

Sweet & easy to sew apron with ruffles
Article may contain Amazon & affiliate links. As an Amazon Associate I earn from qualifying purchases at no additional cost to you.
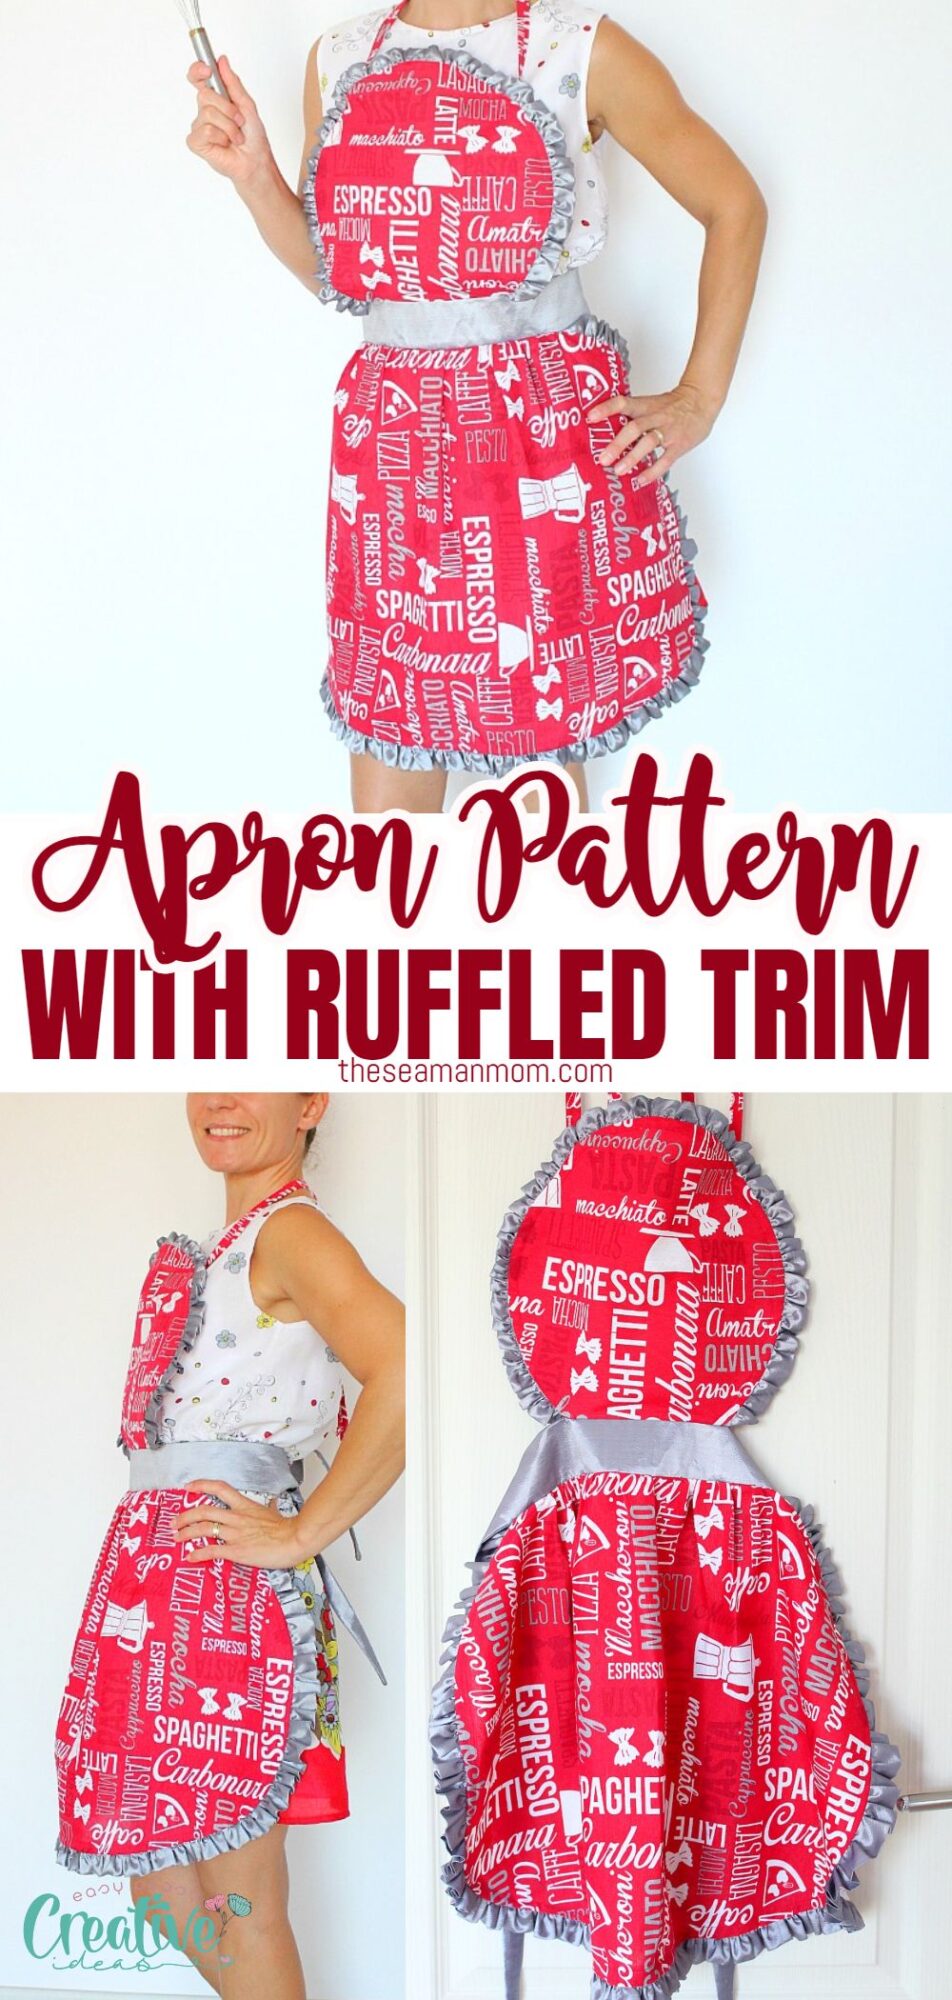
If you’re looking for an apron with a little retro flair that is sweet looking, fun and easy to make, this Apron Pattern is it! This darling ruffled apron sewing pattern is a great project for beginners as well as experienced sewing enthusiasts!
Apron pattern with ruffles
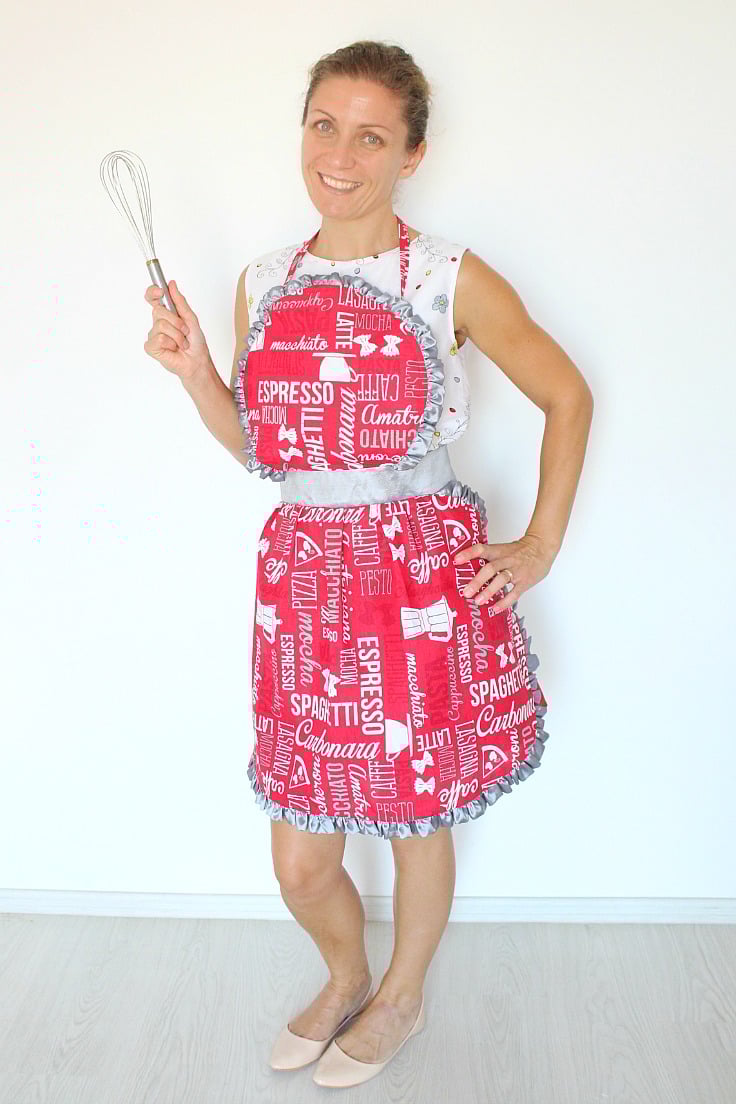
I spend quite a great portion of my time in the kitchen (and I normally don’t look this scary when I hold a whisk; I promise, I’m not trying to beat the heck out of you with my kitchen utensils!). And I realized I never ever owned an apron so I thought it’s time to reward myself for all that hard, delicious work and so I made a vintage looking apron pattern. I’ve always admired those cute, sweet looking aprons in round-ish shapes and with lots and lots of ruffles so I thought this would be a great time to make my dreams come true.
No matter how careful I am, flour, sugar and all those dusty ingredients end up all over the kitchen and my clothes, so I really needed an apron to keep them away and keep myself clean.
Who wears an apron?
Some decades ago, women were mainly housewives who used to stay at home cleaning, cooking and washing, so aprons were really important accessories that protected their dresses from all the mess. As they were using aprons daily, they felt the need to embellish them in order to look and feel pretty while working around the house. This is why they played with the patterns, changing shapes and sizes, adding ruffles and cute trims.

Throughout time, aprons have become an all-purpose item, great for storing treats, holding pans, wiping tears, gathering eggs or fruits and many others. An apron can make you feel more organized and prepared, or it may boost your confidence that you are skilled enough for what you’re making, especially when trying a new recipe. They also don’t use up a lot of fabric and you can combine fabrics and patterns to create the cutest aprons ever! A great way to clean up your stash also.
Similar posts you might like:
- Reversible apron for kids
- Half apron pattern
- Gathered waist supper dress
- 30 minutes skirt tutorial
- DIY batwing top from scarf
Store-bought aprons can be quite pricy, especially those vintage fancy-looking ones, but today I’m going to show you a super-easy way of making one yourself for a much lower cost. The great advantage is that you get to choose your own colors and patterns that match your kitchen décor. This cute vintage apron can also be a great gift for a vintage-style home cook.
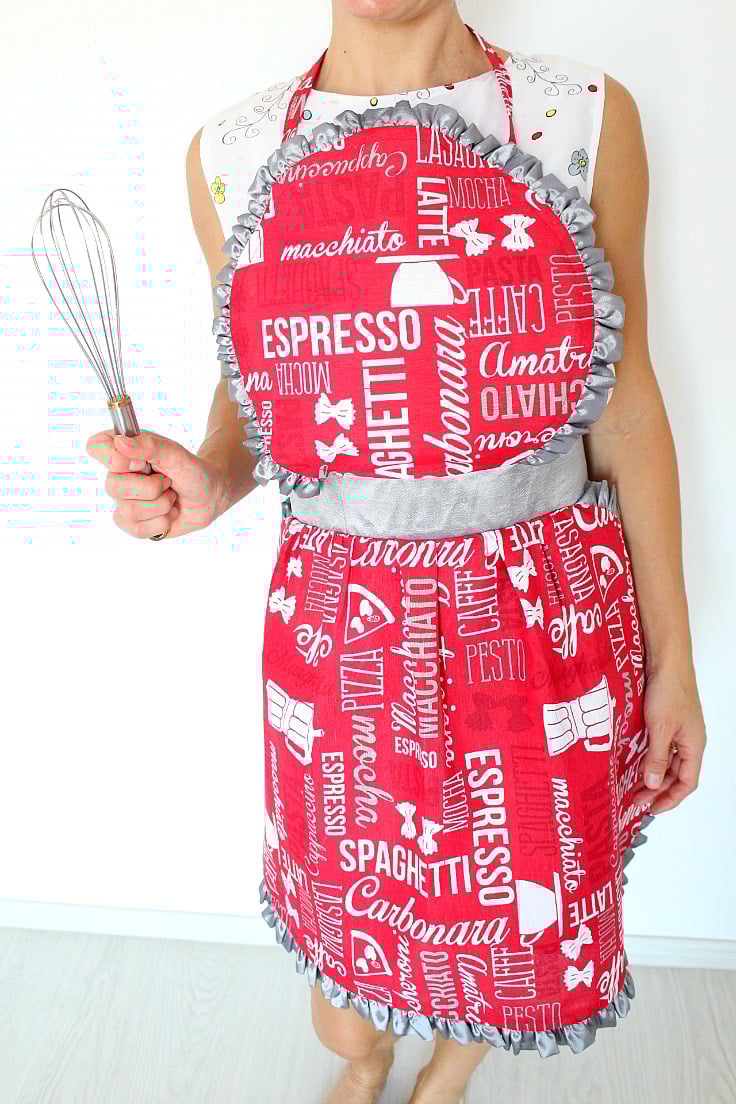
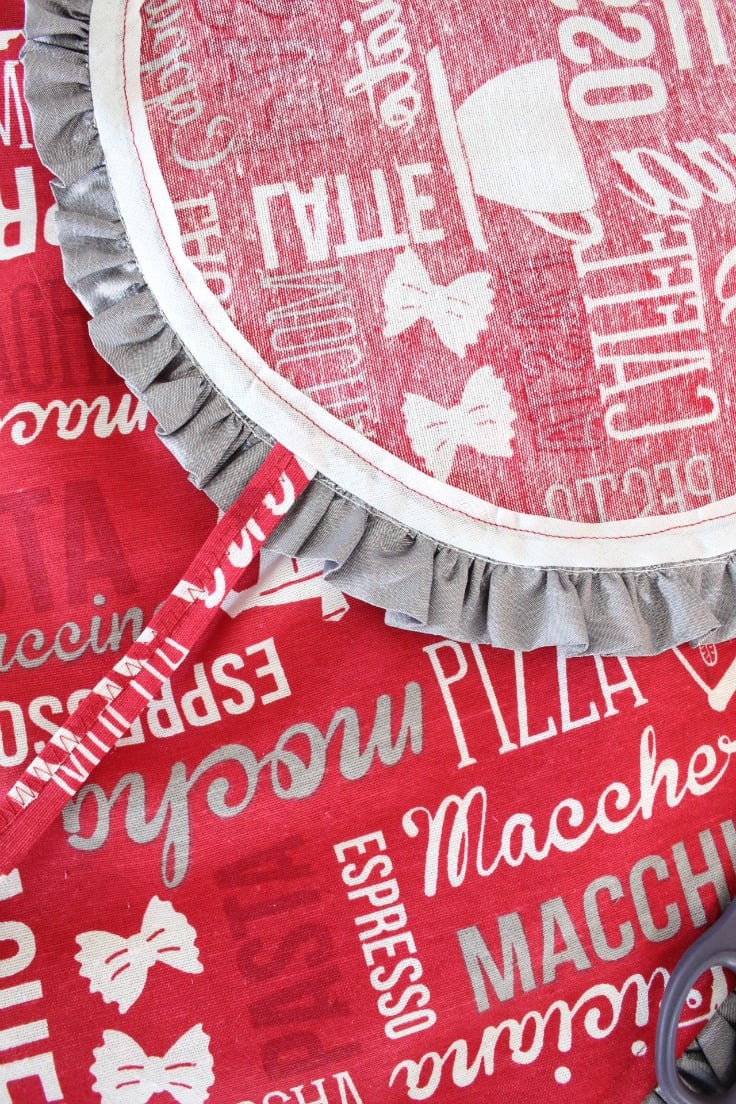
I also wanted this vintage apron pattern to have a little bit of a fancy look so I added a pretty wide waistband and used a crepe satin I made this Bubble Skirt from. It may sound like an odd fabric choice for an apron but I think it looks great and ads a little more vintage flair to this retro apron pattern.
What is the best fabric for an apron?
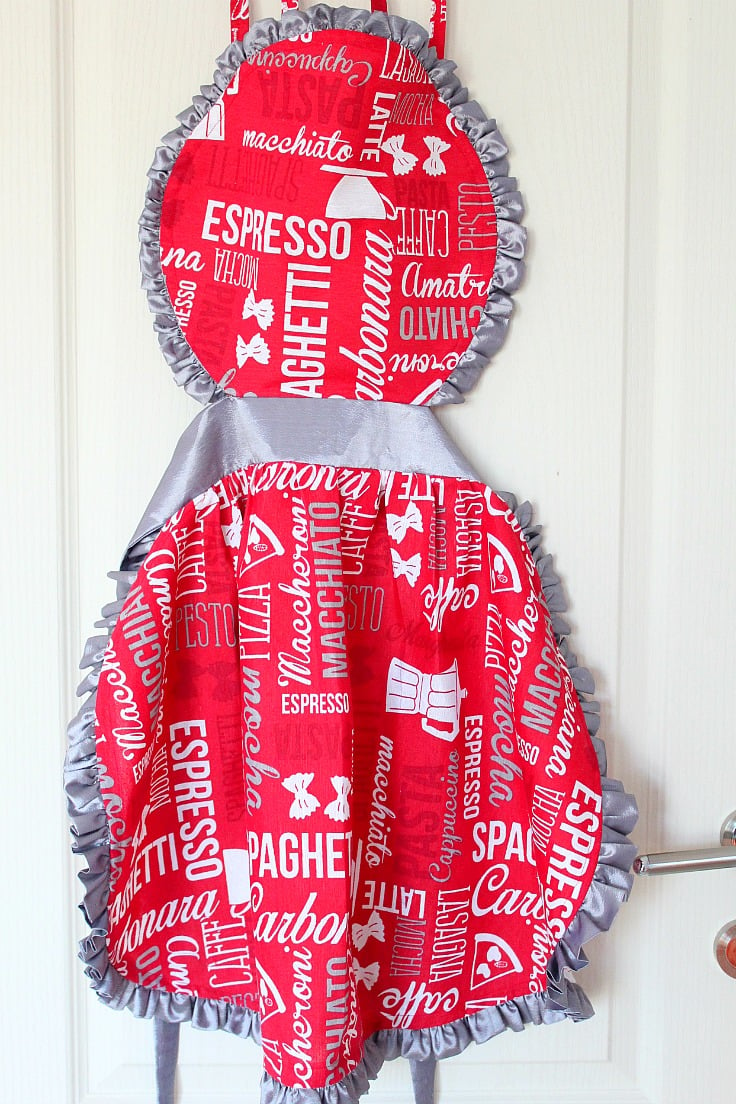
I made this apron from a pretty sturdy fabric from a tablecloth I never actually got to use as it doesn’t fit my kitchen table or the interior design in my kitchen. Not even sure why I bought it, probably the color and the print got my attention. But you can use any fabric, in any pattern and color of choice, I think those ruffles would make anything look extra pretty, no matter the fabric choice.
There are also a lot of other textiles that can be turned into an apron: kitchen towels, shopping bags, bandanas, wipe down tablecloths, placemats, men’s shirts or even small scraps that you can match together to create a patchwork or quilted apron.
In fact, women living through the war times used whatever they could find to make clothing and aprons. There was a time when they would use remaining flour sacks to make what they needed, as fabric was strictly rationalized and factories would work on making fabrics for war use. After noticing that, sack makers then began to make sacks out of prettier fabrics with patterns like polka dots, stripes, flowers, etc, to help women look pretty even during that hard period.
Go the extra mile and make an oven mitt out of the same fabric, or make a child-sized (kitchen helper) matching apron.
Step-by-step instructions to sew a retro apron
Materials:
- main fabric for apron pieces and straps, about 1 yard (cotton fabric or light to medium weight canvas fabrics recommended; heavy weight fabrics such as denim are not suitable for this apron)
- fabric for ruffles and belt (similar here) – 20 feet by 2 1/2″ for ruffles and 5″ by 60″ for belt
- apron pattern available here
- matching thread
- pins
- scissors
- soft interfacing (optional) – 2 1/2″ by 60″
- bias tape (optional) I used 1/4″ bias
- sewing machine
- iron
- ruffling foot (optional)
How do you sew the apron?
Prepare the fabrics
- Start by washing, drying and ironing your fabric.
- Grab your pattern pieces from here if you haven’t done that already.
- Cut your fabric according to the pattern (you’ll have 1 piece for the apron top, 1 for the apron bottom and 2 for belt)
Make the belt
- Cut the interfacing 1/8″ narrower than the belt then fuse to the belt.
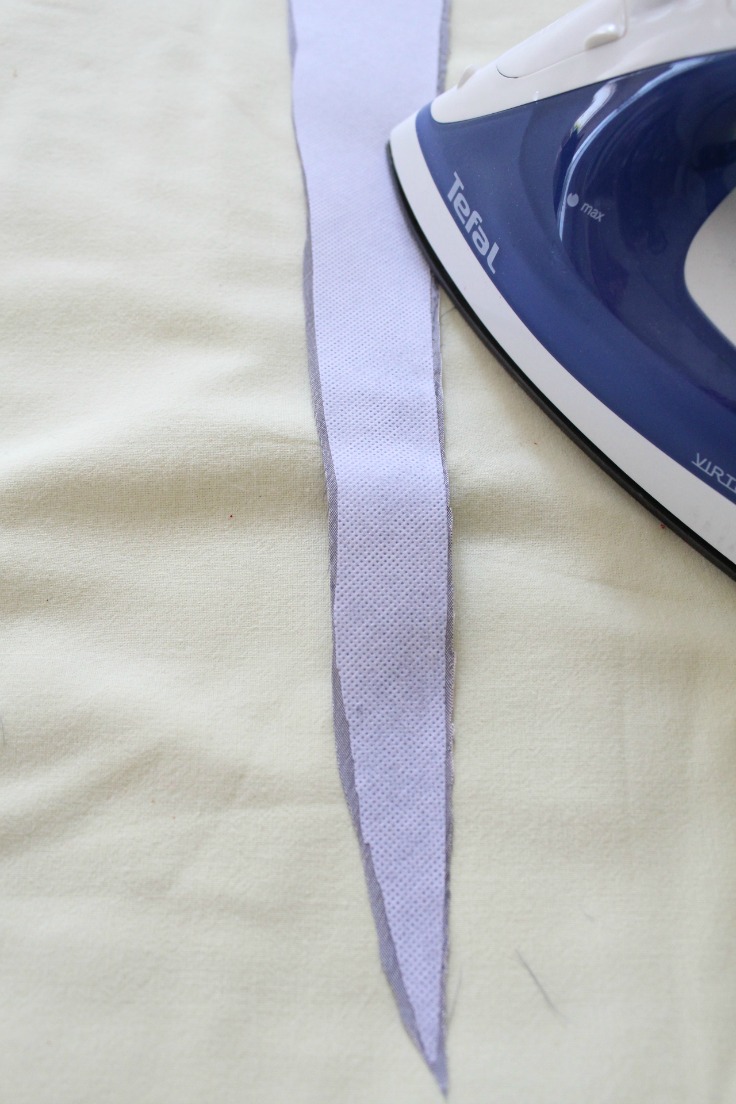
- Sew both strips of fabric for the belt/ties, with the wrong side out, all the way around, except for about 6″, using a 1/4″ seam allowance. Turn the belt right side out through the opening and gently push the corners out with a poking tool that’s not too sharp. I admit this was a bit tricky and required some time for me to get it right. Close the opening with an edge stitch then steam iron the belt.
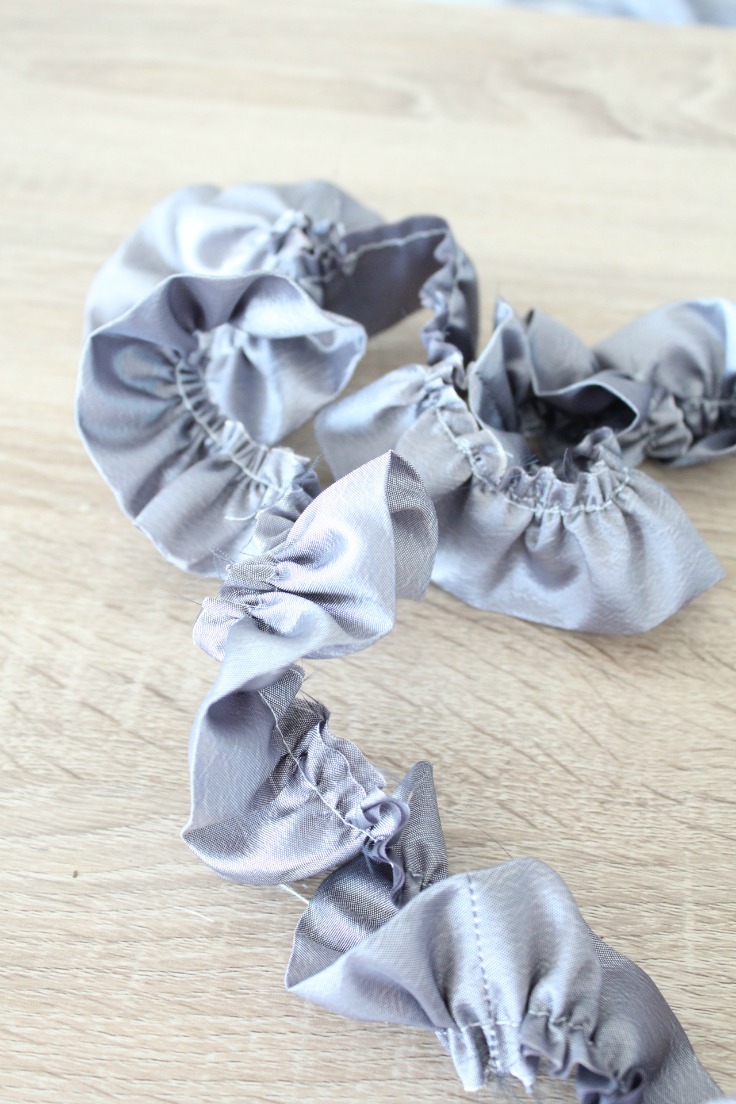
Make the ruffles
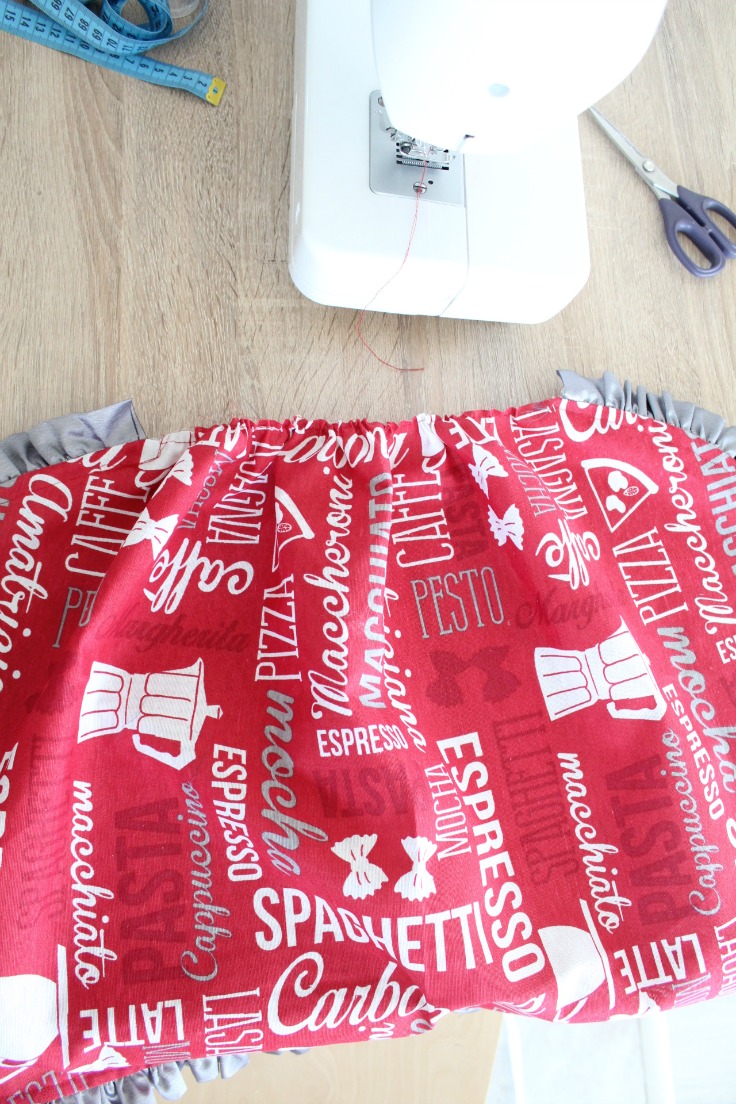
- Take a super long strip of fabric (about 20 feet long and 2 1/2″ wide) and ruffle it using your machine settings to make ruffles. If you use a Singer 1507WC which is an awesome machine for beginners, use a stitch length 4 and a thread tension at 6. Or you can go the easy way and use a ruffling foot, which will get you beautiful, even ruffles in one go.
- The ruffled fabric should be enough to go around the top and the bottom piece of the apron, minus the part where these join the belt.
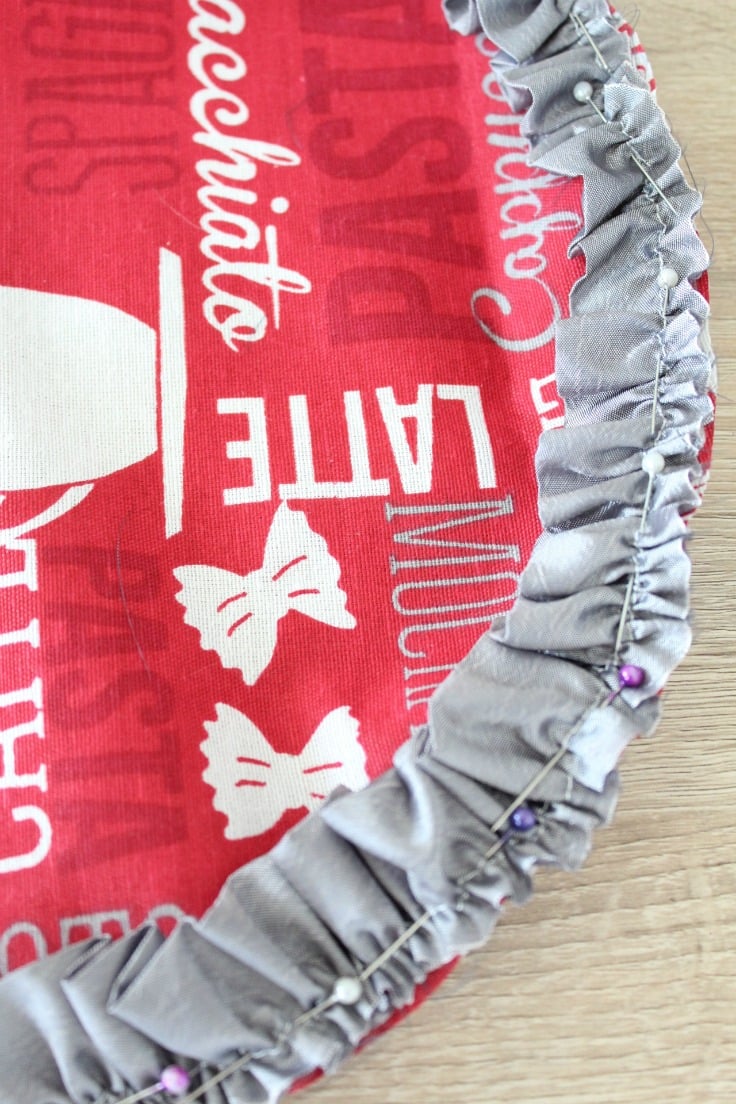
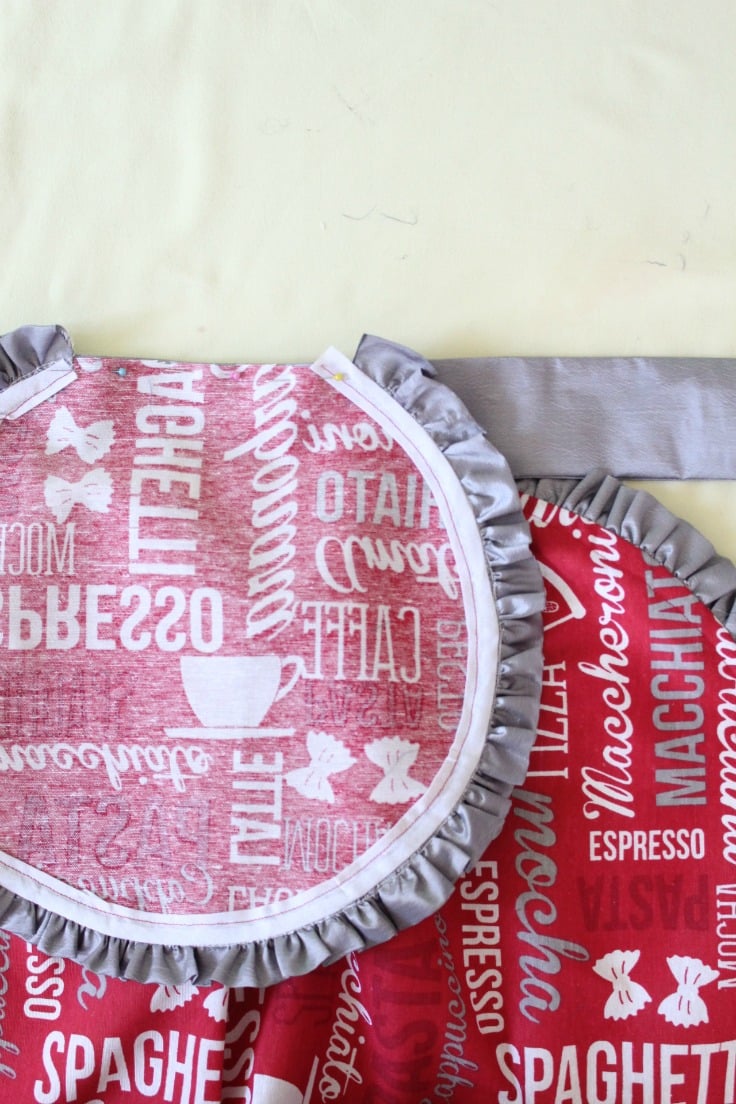
- Take your apron top piece, place it right side out and match with the ruffled fabric as below. Pin and sew. About 1/4″ away from where you stopped sewing, cut the excess ruffled strip and use it for the bottom piece.
Attach the straps
- Make the neck straps as wide and long as you want. I made mine about 1/4″ wide and 10″ long. I folded the fabric in half, then I folded each half, then folded again where I first started to fold, then sewing on the open side of the strap. Then I knotted one end.
- Decide where you want the attach the straps and make marks then attach the adjustable neck straps with a pin.
Finish raw edge with bias
- Open the bias tape and place it on top of the ruffles, with one of the folds matching the stitch where you joined the apron piece and the ruffles.
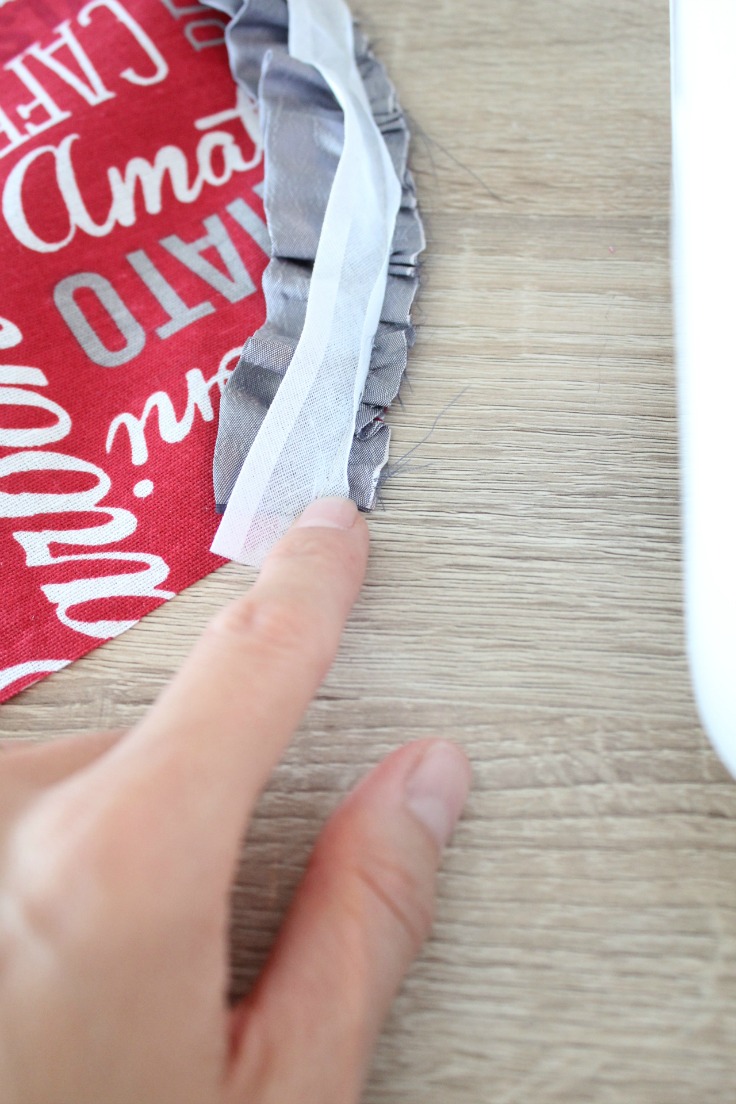
- Pin in place and stitch all the way around that fold mark, making sure to remove the pin who keeps the strap attached.
- Then fold the bias tape over to the back of the apron piece (wrong side), pin and stitch with a 1/8″ seam from the open edge of the bias tape.
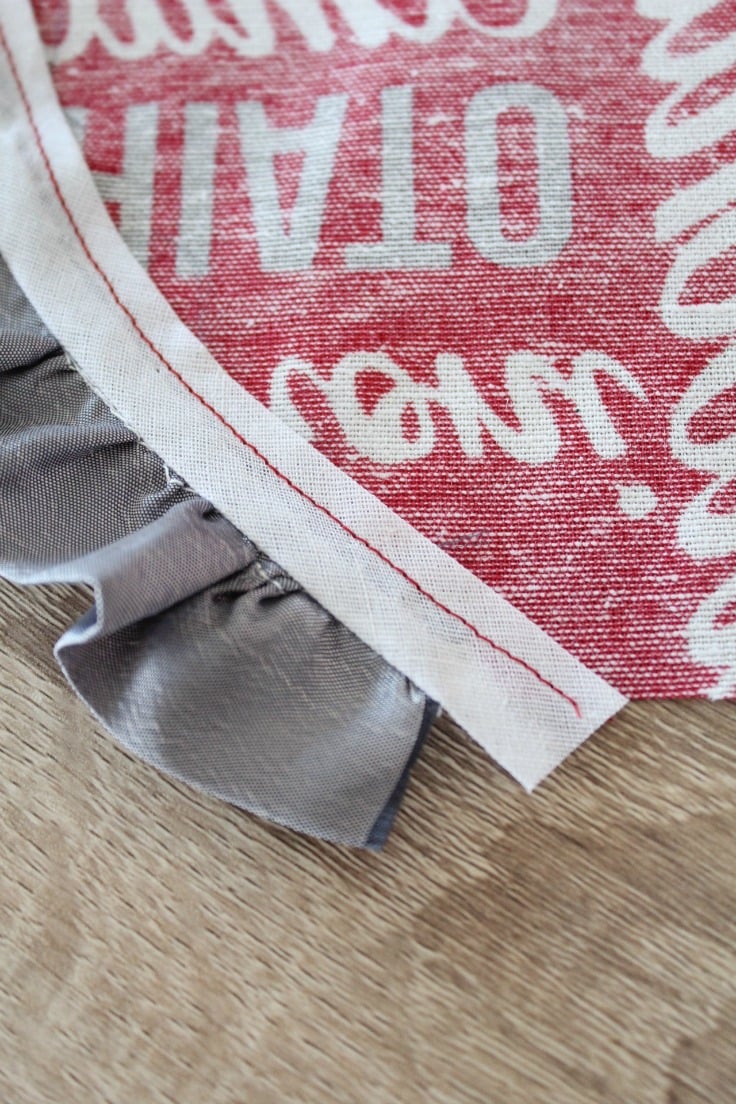
- Do the above steps for the bottom piece of the apron (except for the straps part).
Join all pieces together
- Take the bottom piece and ruffle about 12″ of its top edge.
- Join the bottom piece and the belt, right sides together, pin at the top and stitch; make sure to catch a bit of the ruffle.
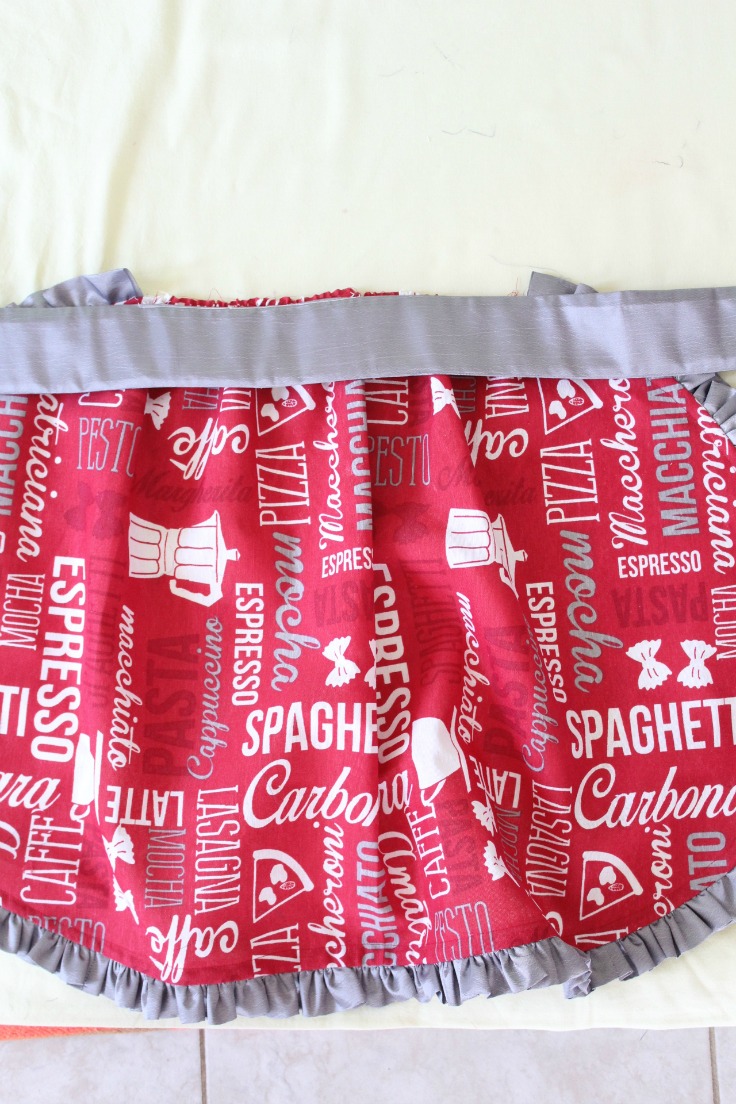
- Fold the belt out, facing you with the right side. Place the top piece of the apron, wrong side out. Pin and stitch, making sure to catch a bit of the ruffle too.
- Finish the belt seams on the inside of the apron with bias tape as above. Or serge or do a zig zag stitch. If you use bias tape, make sure to fold the ends in.
- That’s it! Your pretty DIY apron is ready to wear and enjoy!
This simple apron pattern is pretty large as you can see. Perfect for the messy cooks/bakers (as yours truly) and it covers you on the front and the sides pretty nicely. So you can enjoy being a free spirit in the kitchen! I think this little gem is the perfect addition to a farmhouse kitchen!
Pin to save for later
Print the craft card
Apron pattern with ruffles
Materials
- main fabric for apron pieces and straps about 1 yard
- fabric for ruffles and belt 20 feet by 2 1/2" for ruffles and 5" by 60" for belt
- apron pattern available here
- soft interfacing optional - 2 1/2" by 60"
- bias tape optional - I used 1/4" bias
- matching thread
Tools
- scissors
- Iron
- ruffling foot (optional)
Instructions
- Start by washing, drying and ironing your fabric.
- Cut your fabric according to the pattern (you'll have 1 piece for the apron top, 1 for the apron bottom and 2 for belt)
- Cut the interfacing 1/8" narrower than the belt then fuse to the belt.
- Sew both strips of fabric for the belt, with the wrong side out, all the way around, except for about 6". Turn the belt right side out through the opening and gently push the corners out with a poking tool that's not too sharp. I admit this was a bit tricky and required some time for me to get it right. Close the opening with an edge stitch then steam iron the belt.
- Take a super long strip of fabric (about 20 feet long and 2 1/2" wide) and ruffle it using your machine settings to make ruffles. If you use a Singer 1507WC which is an awesome machine for beginners, use a stitch length 4 and a thread tension at 6. Or you can go the easy way and use a ruffling foot, which will get you beautiful, even ruffles in one go.
- The ruffled fabric should be enough to go around the top and the bottom piece of the apron, minus the part where these join the belt.
- Take your apron top piece, place it right side out and match with the ruffled fabric as below. Pin and sew. About 1/4" away from where you stopped sewing, cut the excess ruffled strip and use it for the bottom piece.
- Make the straps as wide and long as you want. I made mine about 1/4" wide and 10" long. I folded the fabric in half, then I folded each half, then folded again where I first started to fold, then sewing on the open side of the strap. Then I knotted one end.
- Decide where you want the attach the straps and make marks then attach the straps with a pin.
- Open the bias tape and place it on top of the ruffles, with one of the folds matching the stitch where you joined the apron piece and the ruffles.
- Pin in place and stitch all the way around that fold mark, making sure to remove the pin who keeps the strap attached.
- Then fold the bias tape over to the back of the apron piece (wrong side), pin and stitch with a 1/8" seam from the open edge of the bias tape.
- Do the above steps for the bottom piece of the apron (except for the straps part).
- Take the bottom piece and ruffle about 12" of its top edge.
- Join the bottom piece and the belt, right sides together, pin at the top and stitch; make sure to catch a bit of the ruffle.
- Fold the belt out, facing you with the right side. Place the top piece of the apron, wrong side out. Pin and stitch, making sure to catch a bit of the ruffle too.
- Finish the belt seams on the inside of the apron with bias tape as above. Or serge or do a zig zag stitch. If you use bias tape, make sure to fold the ends in.
Most popular sewing projects:
- Tips for sewing a round hem
- Corded bag handles
- Flutter sleeve dress pattern
- How to laminate cotton fabric


ABOUT PETRO
Hi, I’m Petro, author and founder of Easy Peasy Creative Ideas. Sewist, crafter, avid DIY-er, foodie, photographer, homemaker and mommy to one. I’m an expert at coming up with quick, clever sewing tips, recycling crafts and simple, easy recipes! You can find my ideas featured in reputable publications such as Country Living, Good House Keeping, Yahoo News, WikiHow, Shutterfly, Parade, Brit & Co and more. Thanks for stopping by and hope you’ll stay for a while, get to know me better and come back another time. Stick around for real fun projects! Read more…