

DIY Decorative fall lantern
Article may contain Amazon & affiliate links. As an Amazon Associate I earn from qualifying purchases at no additional cost to you.
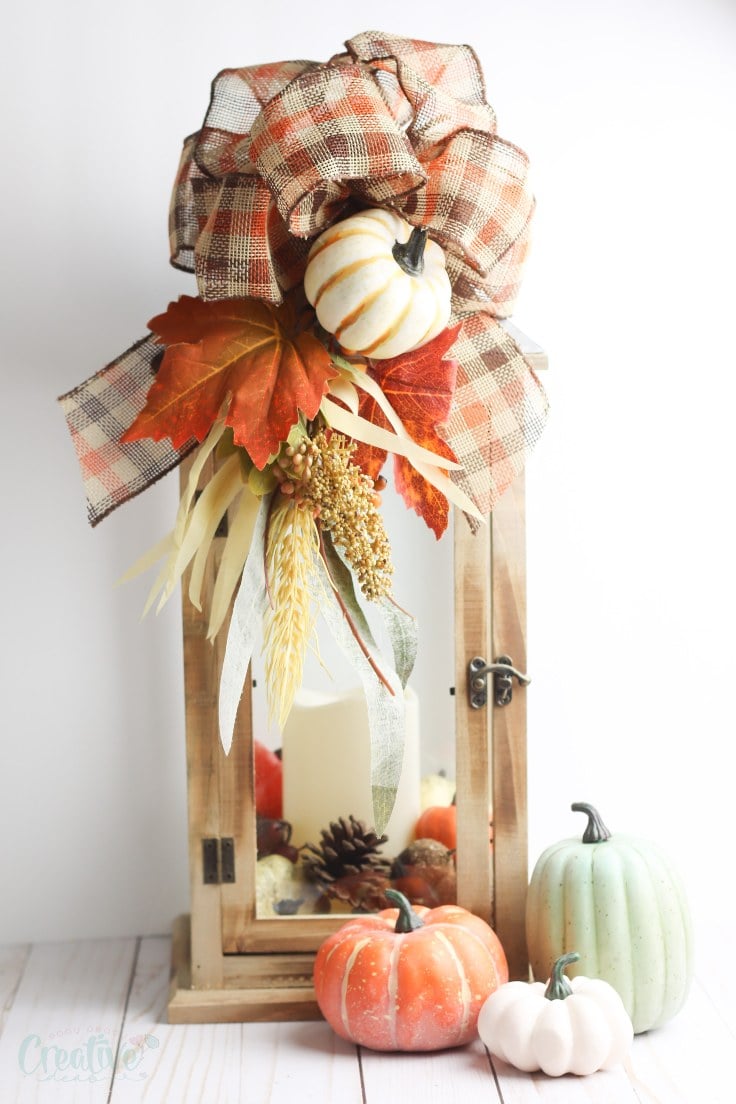
Have you been looking for easy lantern decor ideas? This fall lantern is the perfect fall porch decor! Simply add a few seasonal items inside the lantern and decorate with a cute bow to transform a plain lantern into a beautiful fall lantern decor in minutes!
How to decorate a lantern
Adding a fall lantern to your home’s decor is such a fun way to decorate! In addition to adding a little bit of ambient lighting to a room, a decorative lantern is also a simple way to change up your decor throughout the year because you can easily add seasonal elements to the lantern as the seasons change.
Creating your own fall lantern is so simple! The most difficult part of putting together this fall lantern decor is creating the big bow on top, but I’ll walk you through that process step by step.
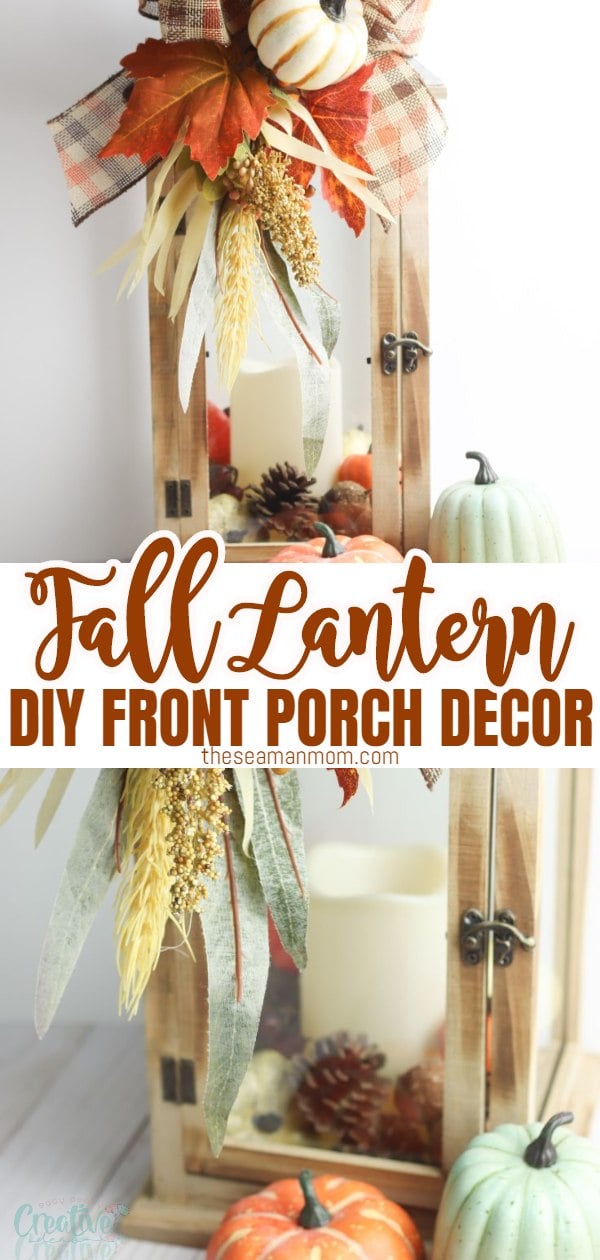
Start by gathering all your supplies. To make this fall lantern, you’ll need a handful of easy to find materials such as lantern, candle, mini pumpkins, acorns, pine cones, ribbon, wire and floral pick. Picking the perfect lantern is the most important step in this craft. Since we’ll be adding fall fillers to the inside, the best lantern for this fall craft is one with large glass panes that allow you to see what’s inside.
After finding the perfect lantern, open the door and place a candle in the center. A battery-operated candle is a great option because you can set it on a timer and it lights itself each evening. And you’ll never have to worry about the lantern being a fire hazard when the candle is lit!
More fall decor ideas you will love:
- Farmhouse fall centerpiece
- Burlap toilet paper pumpkins
- No sew fabric pumpkins
- Jute table runner
- DIY wine cork pumpkins
- Fall leaves garland
- Fall front porch decor with bushel basket
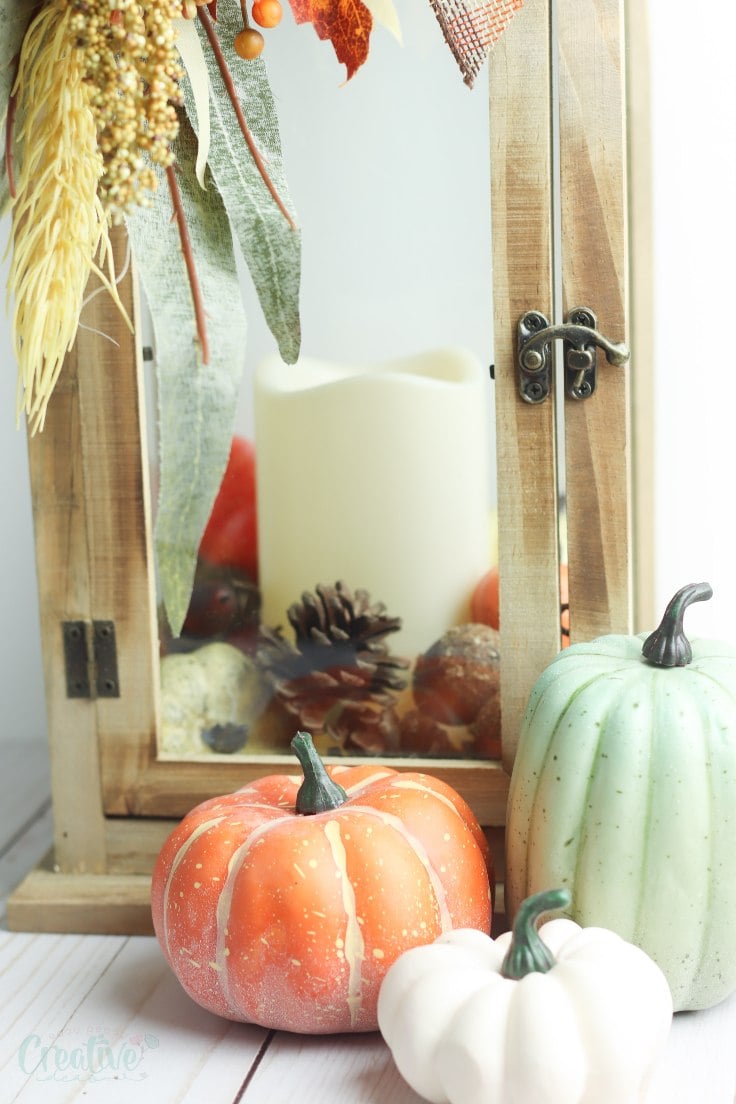
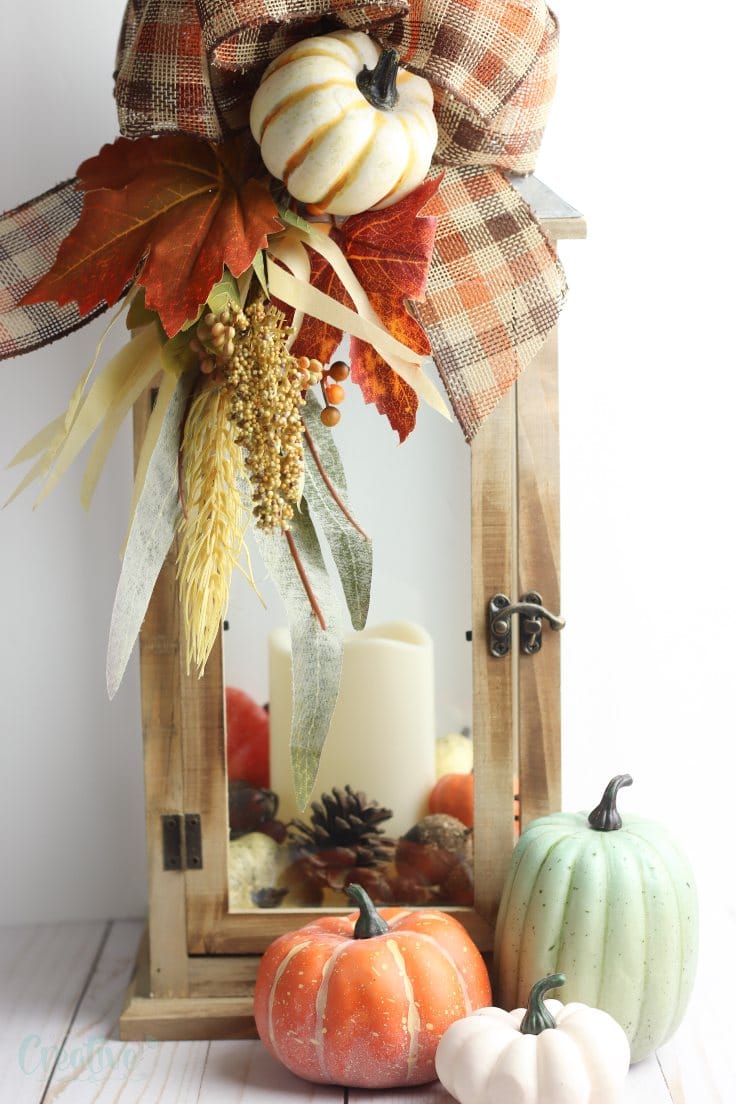
Next, give the inside of your lantern a little bit of fall flair by adding a few fall fillers around the candle. Mini pumpkins, small pine cones, and acorns all make great fillers. Simply arrange the fillers around the bottom of the candle, then secure the lantern door to make sure everything stays in place.

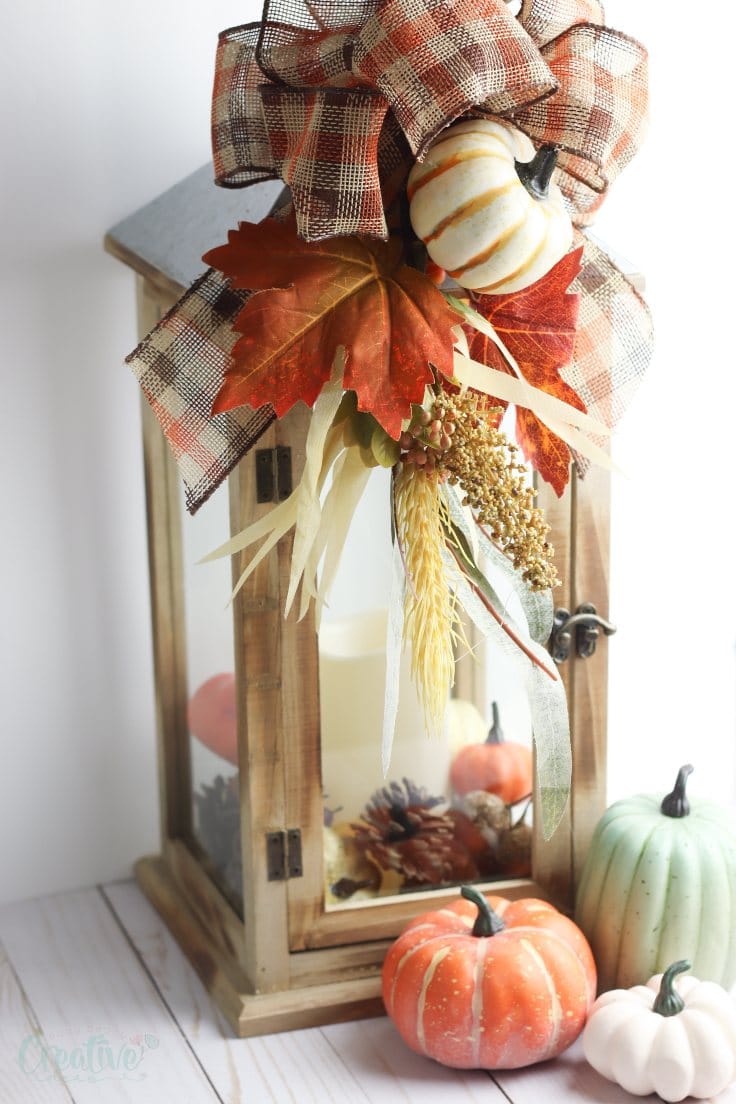
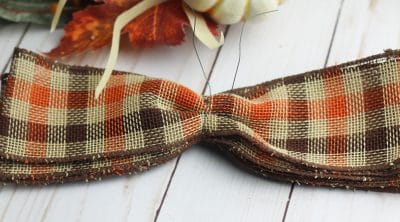
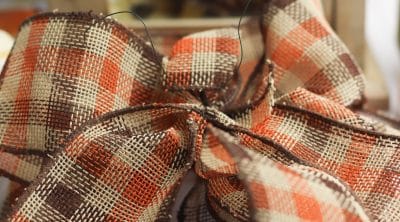
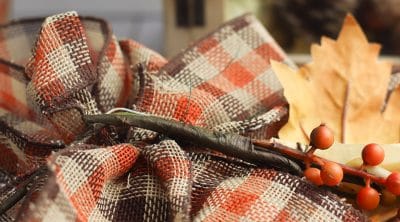
After the inside of the fall lantern is complete, it’s time to decorate the outside. Start by making a big bow to place on top. To make this bow, form eight even loops (four on each side) with your wire-edged ribbon. Secure the center of the ribbon with floral wire. Twist the ends of the floral wire together to tighten the center of the bow and separate each loop to form the bow. Cut another piece of ribbon and fold it in half. Attach the center of the fold to the back of the bow using the floral wire to form trails for the bow. Cut each end of the trail at an angle to finish the bow.
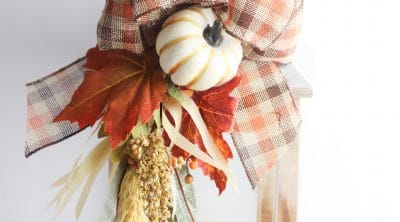
Before attaching the bow to the lantern, add a floral pick to the back of the bow using the floral wire. My floral pick had fall leaves, a pumpkin, and some wheat fronts – perfect for adding a simple fall touch to the top of the lantern. Finish decorating your fall lantern by securing the bow to the lantern by twisting the floral wire on the handle of the lantern. Then, set your decorative lantern out to enjoy all season long. Or you can simply use it as a centerpiece!
Fall lantern step by step DIY
Supplies:
Instructions:
- Add the candle, mini pumpkins, pine cones, and acorns to the inside of the lantern.
- Close and latch the door.
- Create a bow by forming eight even loops (four on each side) with the plaid ribbon. Secure the center of the ribbon with floral wire.
- Twist the ends of the floral wire together to tighten the center of the bow. Separate each loop to form the bow.
- Cut another piece of ribbon and fold it in half. Attach the center of the fold to the back of the bow using the floral wire to form trails for the bow. Cut each end of the trail at an angle.
- Attach the floral pick to the back of the bow using the floral wire.
- Secure the bow to the lantern by twisting the floral wire on the handle of the lantern and you’re done
Print the craft card

Fall lantern front porch decor
Materials
- 1 Lantern
- 1 Candle
- Mini pumpkins
- Acorns
- Pine cones
- Plaid ribbon
- Fall floral pick
Tools
- Floral wire
- scissors
Instructions
- Add the candle, mini pumpkins, pine cones, and acorns to the inside of the lantern. Close and latch the door.

- Create a bow by forming eight even loops (four on each side) with the plaid ribbon. Secure the center of the ribbon with floral wire. Twist the ends of the floral wire together to tighten the center of the bow. Separate each loop to form the bow.
- Cut another piece of ribbon and fold it in half. Attach the center of the fold to the back of the bow using the floral wire to form trails for the bow. Cut each end of the trail at an angle.
- Attach the floral pick to the back of the bow using the floral wire.
- Secure the bow to the lantern by twisting the floral wire on the handle of the lantern.

Pin to save for later
ABOUT PETRO
Hi, I’m Petro, author and founder of Easy Peasy Creative Ideas. Sewist, crafter, avid DIY-er, foodie, photographer, homemaker and mommy to one. I’m an expert at coming up with quick, clever sewing tips, recycling crafts and simple, easy recipes! You can find my ideas featured in reputable publications such as Country Living, Good House Keeping, Yahoo News, WikiHow, Shutterfly, Parade, Brit & Co and more. Thanks for stopping by and hope you’ll stay for a while, get to know me better and come back another time. Stick around for real fun projects! Read more…