

Easter Bunny Cups Tutorial
Article may contain Amazon & affiliate links. As an Amazon Associate I earn from qualifying purchases at no additional cost to you.
Are you looking for a fun and easy way to display Easter treats? I’ve got the perfect solution! These Easter bunny cups are so simple that even kids can help with the process. They’re also super cute, which means they’ll be a hit at your next party or get-together!
Easter Bunny Cups
Ring in the spirit of Easter by making a bunch of adorable Easter bunny cups that all kids will absolutely love! These are not only super cute but easy and quick to make and pretty functional. Use them to offer treats or snacks to kids or for an egg hunt party.
You won’t believe how quick and easy it is to create these adorable little bunny cups. And since they only take about 15 minutes to make, you can whip up an entire batch in no time flat! Not only will your guests love them but they’ll be impressed by how creative you are too.
More Easter crafts you will love:
- Paper tube Easter bunnies
- Sock bunny cups
- Bunny door hanger
- Easter egg holders
- Easter basket craft with printable template
- Foam dice chick craft
- Easter wooden spoons
These Easter bunny cups take a few materials you probably have on hand, especially if you love crafting on a regular basis. And are a great way to spend some quality time with kids; great family activity for Easter and so fun for the kids!
You can use these Easter bunny cups as candy holders or even just as decorations in their rooms. They look so adorable with little treats inside of them, but they also look really nice on their own too. Your kids will love seeing these around the house! And since they’re made out of plastic cups, it won’t be difficult at all to clean up after making them either.
I didn’t have paper cups on hand so I used plastic cups for my project since I’m so thrifty and love making the best of what I own already. But I think using paper cups will give you sturdier cups and work better with the glue gun; my plastic cups melted a bit in the whiskers area so I used 2 at a time.
So what are you waiting for? This Easter, make the kids hopping with excitement with these super easy Easter bunny cups. Great to use for treats, snacks or egg hunting!
Suggested age group
Kids kindergarten and up will enjoy making these cups with a little help from an adult. The steps are easy enough that kids can follow along, but the finished product will look so cute that they’ll be proud to show them off!
What to do with your finished product
Your Easter bunny cups can be used in a variety of ways. You can fill them with treats or snacks, use them as decorations, or even give them away as gifts! They’re so versatile and sure to please all kinds of people.
Tips & tricks
- If you’re using paper cups, it might be a good idea to use a glue gun to help keep the bunny’s whiskers in place.
- Be careful not to burn yourself when using the glue gun.
- Make sure the plastic or paper cups are completely dry before starting this project, or the glue won’t stick.
- You can also use hot glue to stick the googly eyes onto the bunny cups.
- If you’re using plastic cups, it might be a good idea to use two cups at a time so that they’re more sturdy.
- Be sure to let the cups dry completely before filling them with treats or snacks.
- If you’re giving these away as gifts, it might be a good idea to put them in a small Easter basket or other container.
- If you’re using these as decorations, try clustering them together on a table or shelf.
What materials you need?
- pen
- card stock to make the ear stencil
- foam paper for cutting out the bunny ears
- craft scissors
- fabric scissors
- white plastic or paper cups
- hot glue gun
- 1 hot glue stick
- googly eyes
- black wire for whiskers
- pink fleece for nose
- white fleece for teeth
- cotton balls for tails
How to Make Easter Bunny Cups
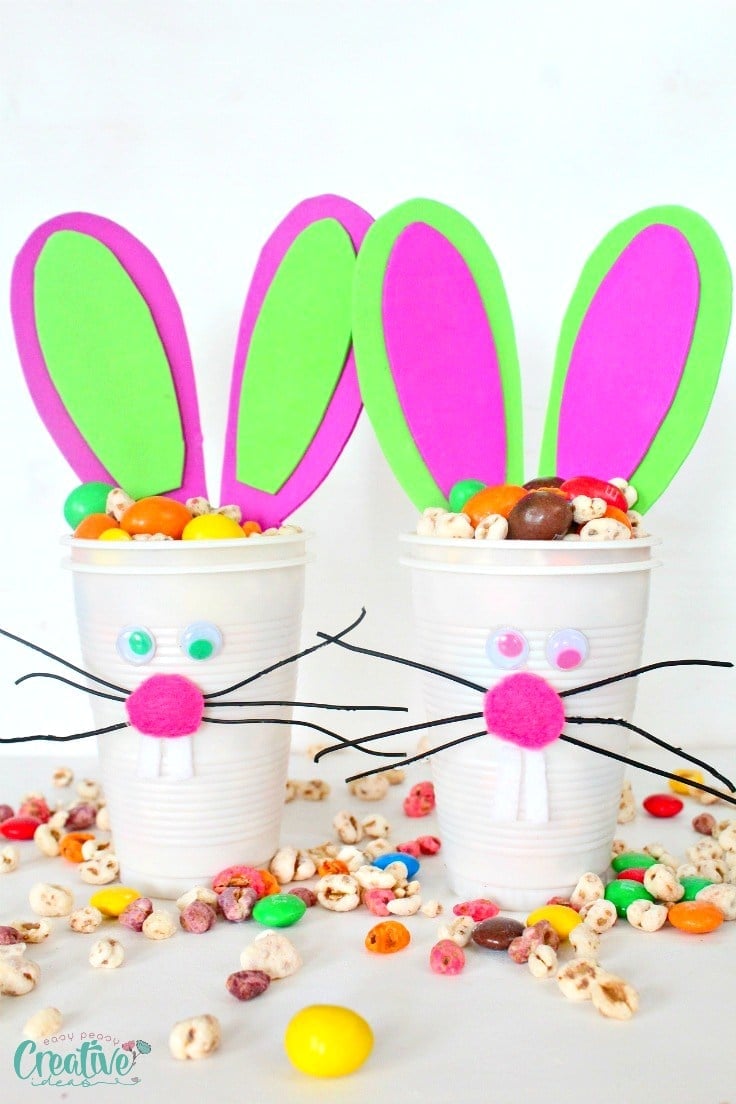
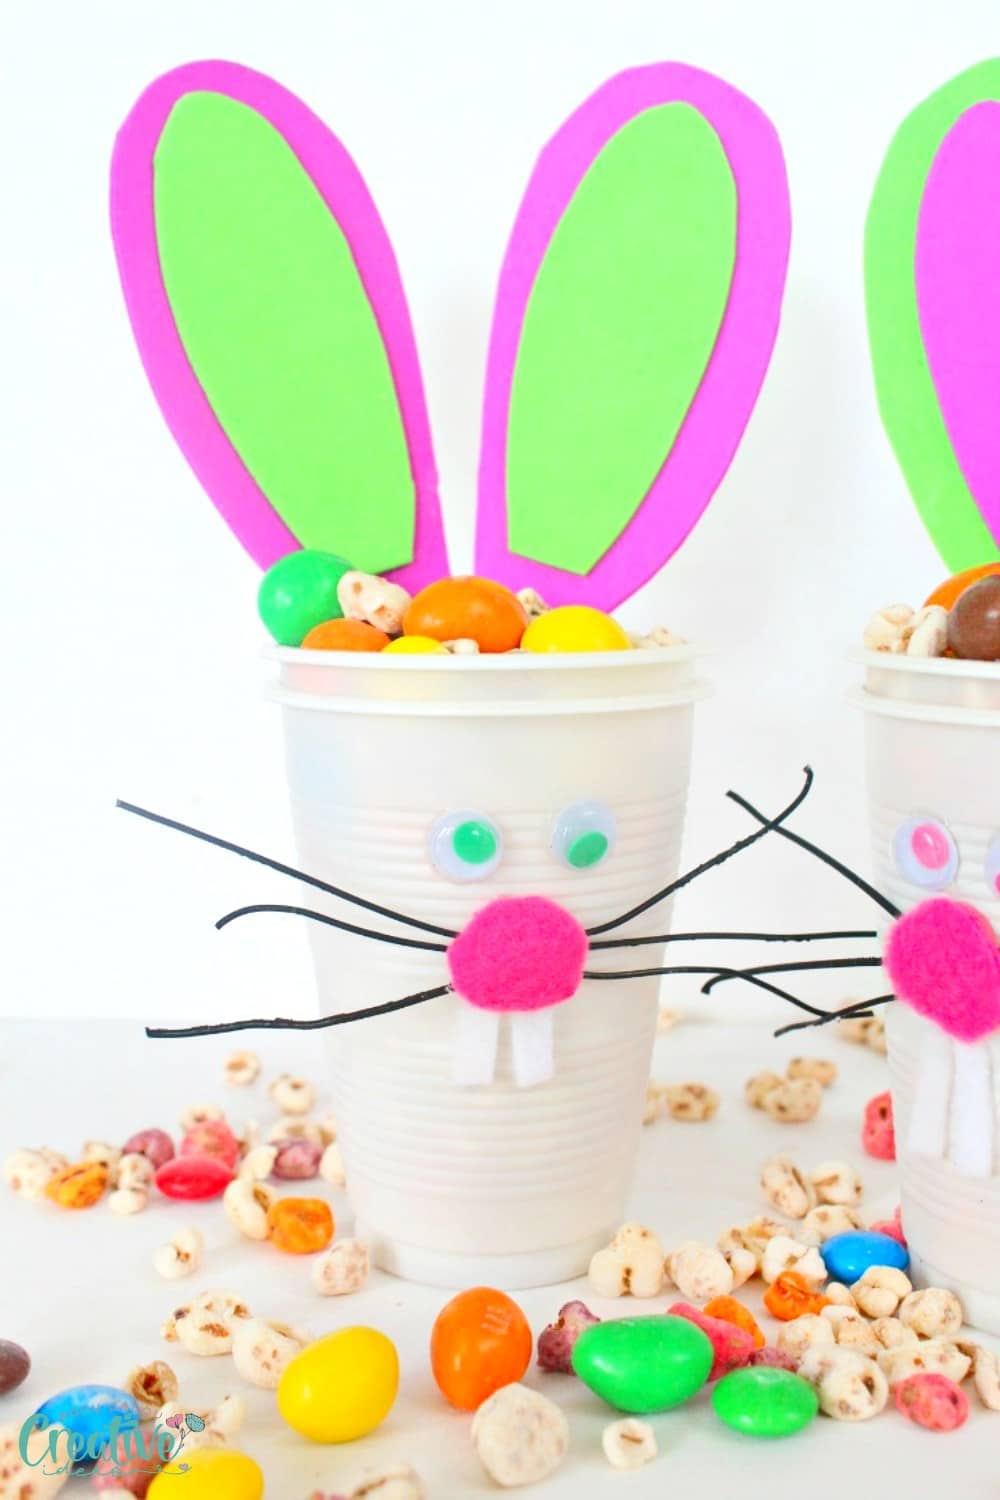
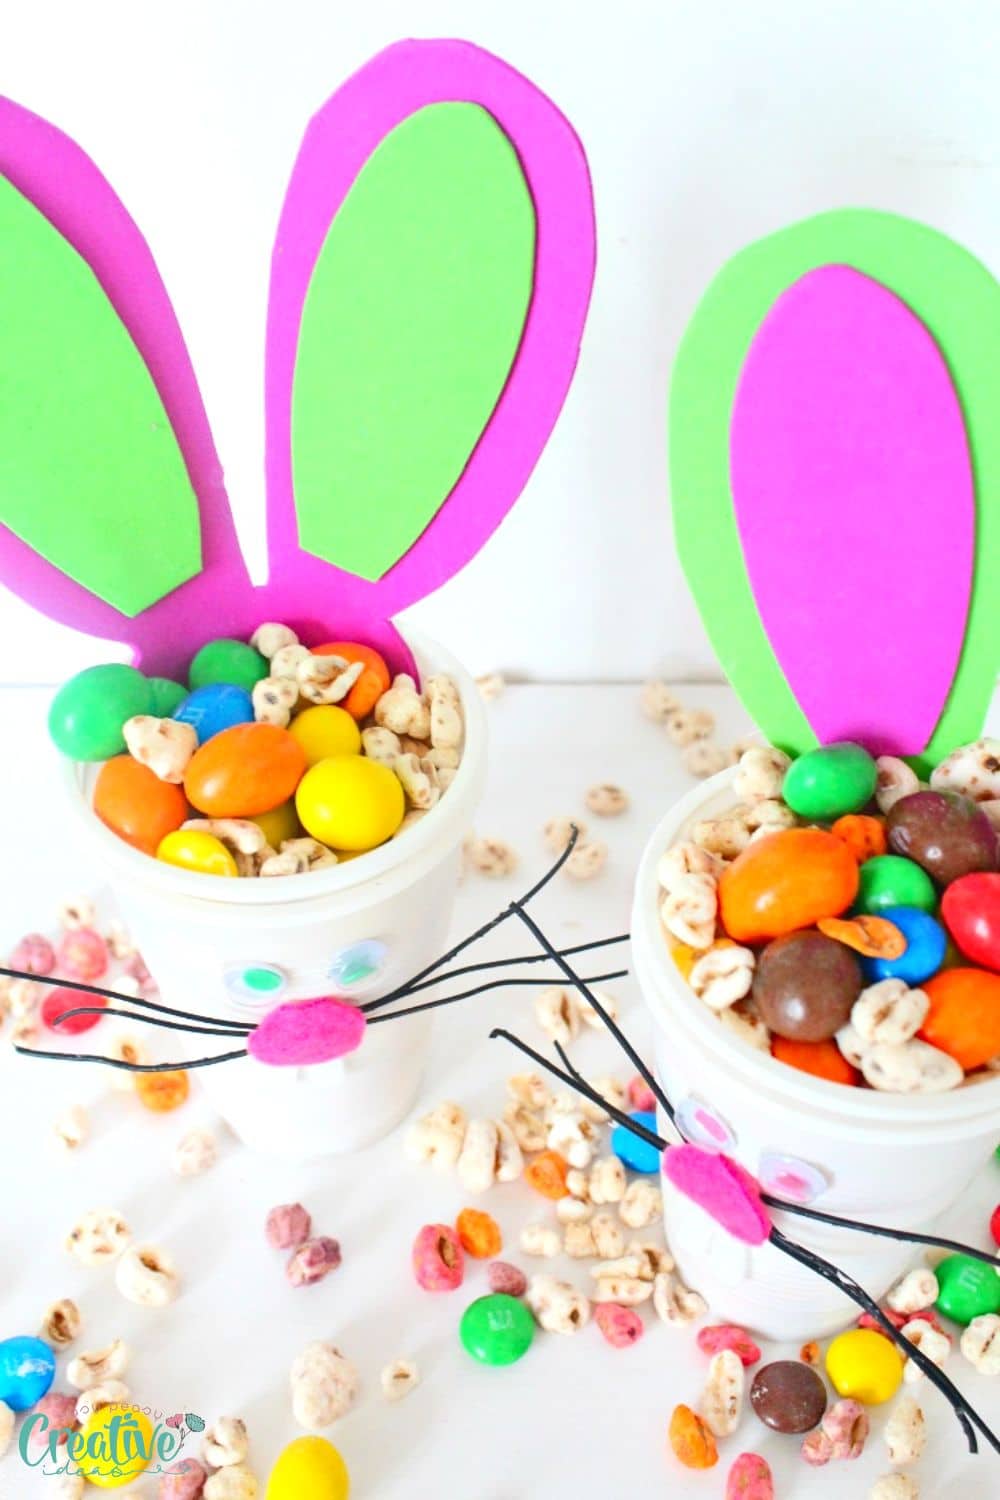
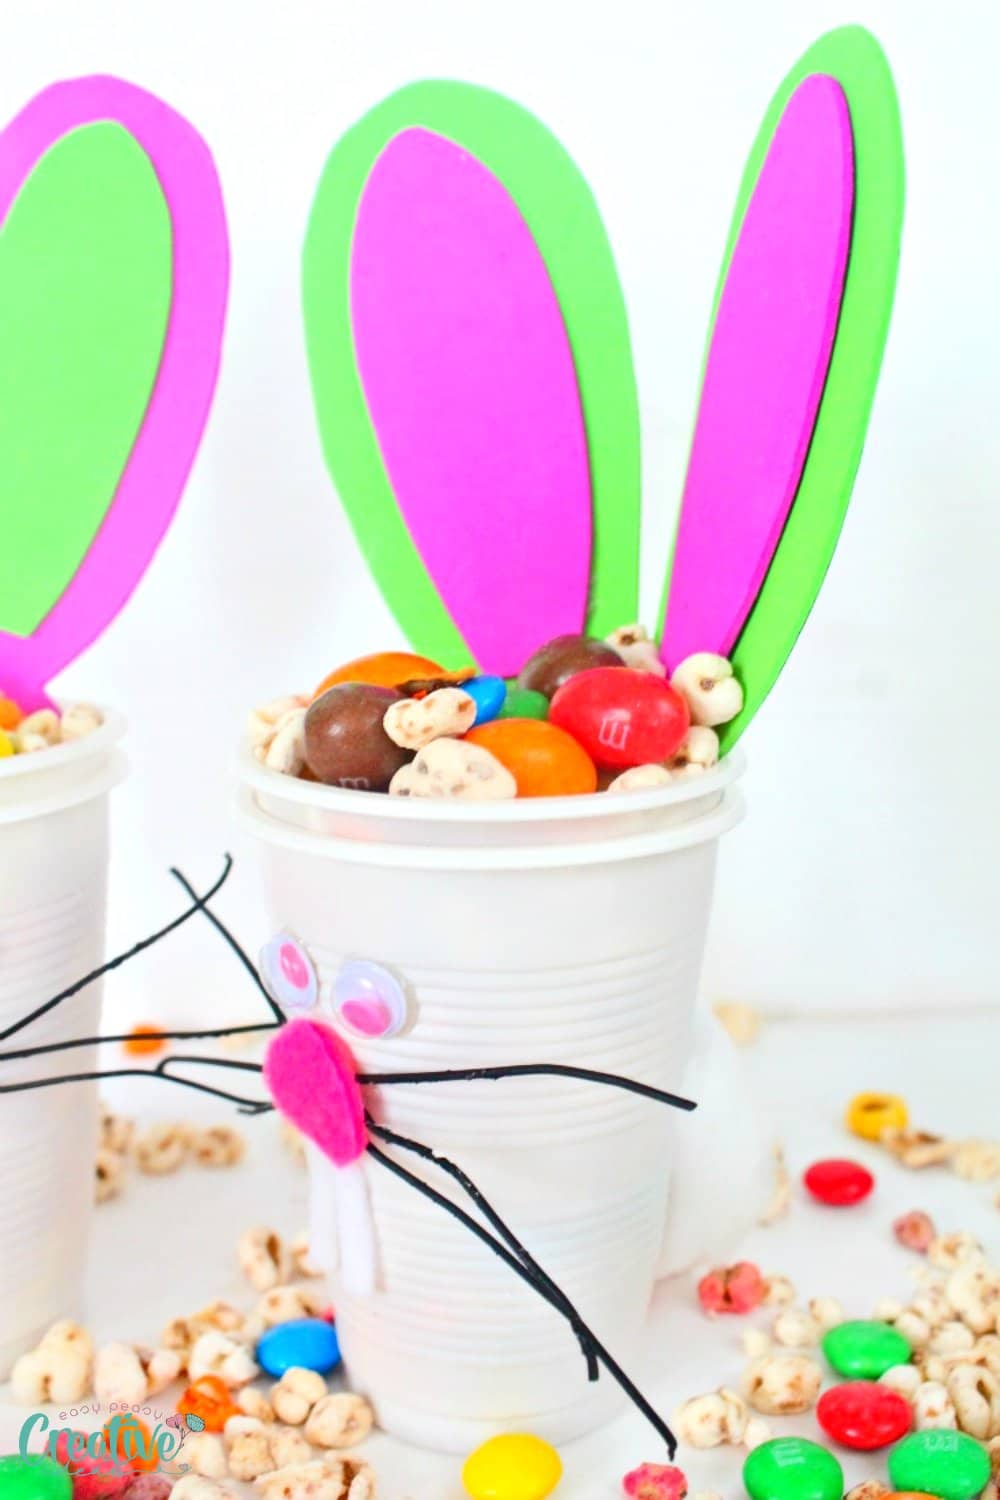
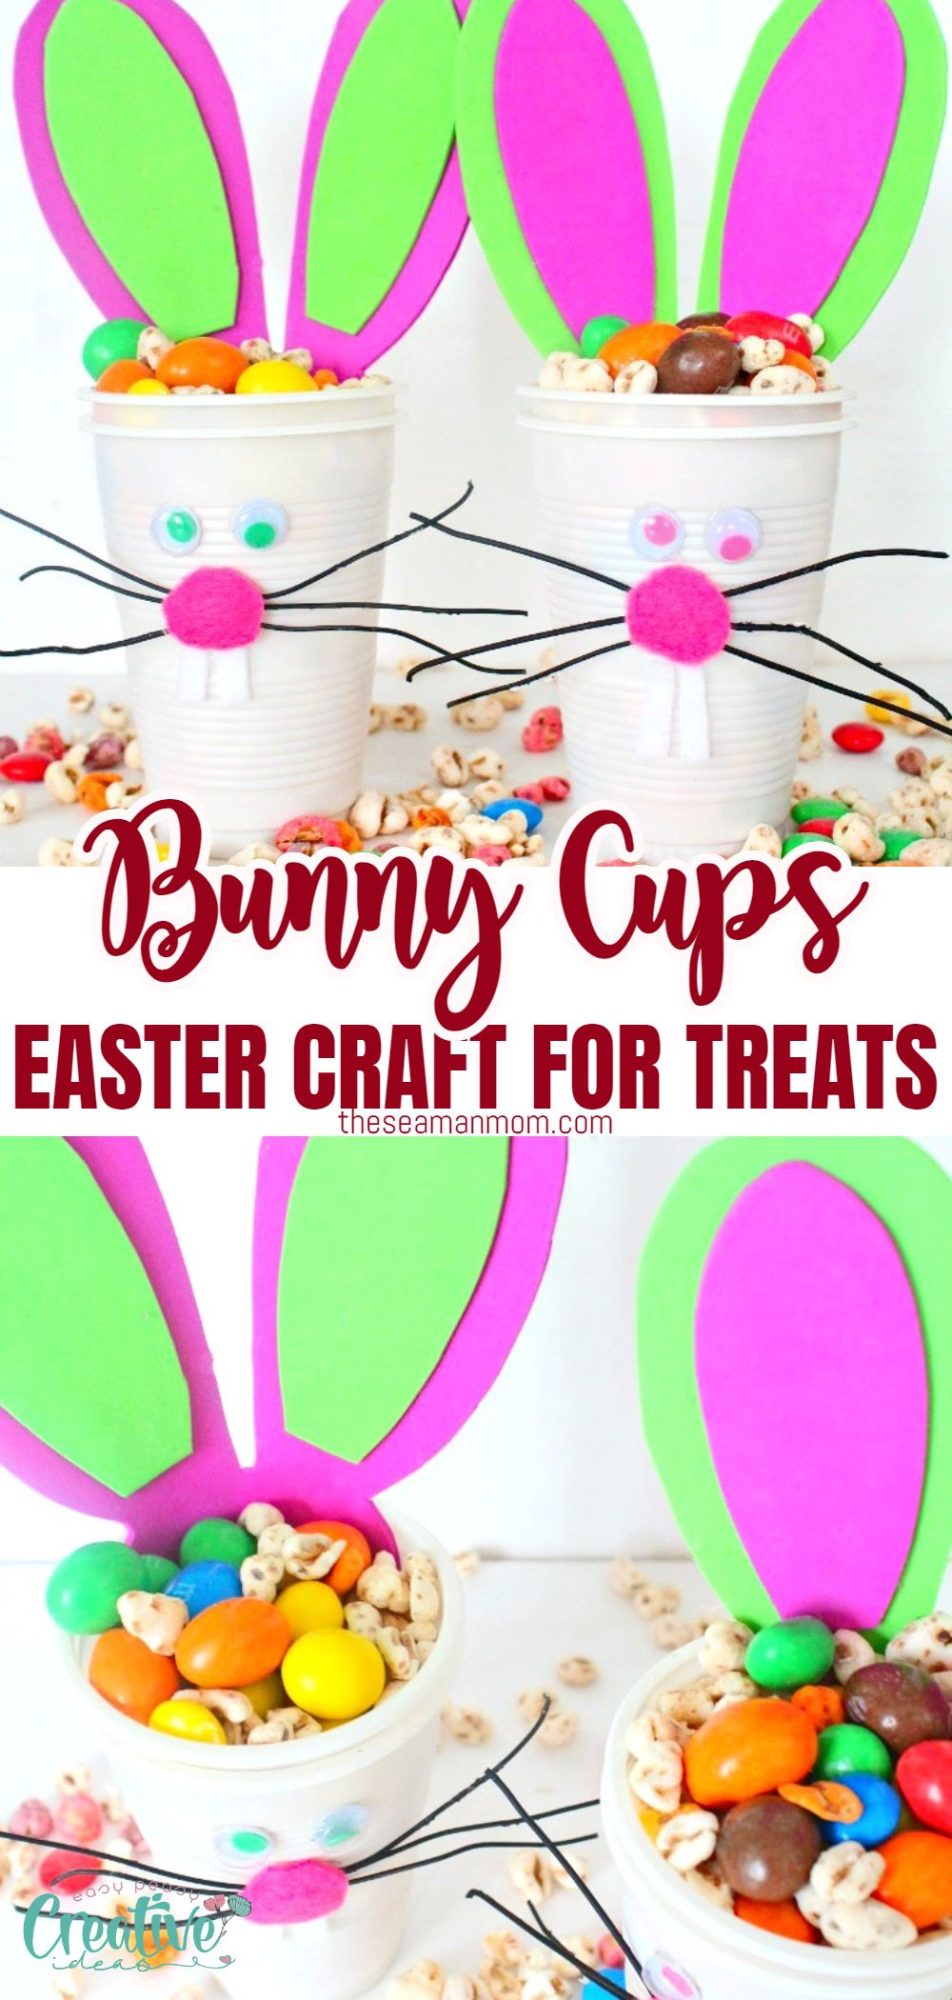
- Use a pen to draw your ears on a piece of card stock. Cut out then make ears out of gummed paper using this stencil. I added a little detail inside the ears with contrast paper; I think it’s the most adorable thing about these cups!
- Glue googly eyes on.
- Cut about 6 whiskers out of black wire, in various shapes and lengths then glue whiskers on. Use your fingers to support the whiskers while the glue dries out.
- Cut out a small circle out of pink fleece for nose, but large enough to cover the dollop of glue you used to attach the whiskers. Add a tiny bit of glue and add the nose on.
- Cut out 2 tiny strips of white fleece and attach as teeth.
- Apply glue to the back of the ears and attach them to the inside of the cups.
- Apply glue to a cotton ball and attach to the back of the cup as a tail.
- Fill cups with treats or snacks. Enjoy!
Ready to get crafty? These Easter bunny cups are so much fun and easy to make with the kids! Be sure to fill them with treats or snacks for a festive Easter treat! Happy Easter crafting!
Pin to save for later
Print the craft card
Easter bunny cups
Materials
- pen
- card stock to make the ear stencil
- foam paper for cutting out the bunny ears
- white plastic or paper cups
- googly eyes
- black wire for whiskers
- pink fleece for nose
- white fleece for teeth
- cotton balls for tails
Tools
- fabric scissors
- 1 hot glue stick
Instructions
- Use a pen to draw your ears on a piece of card stock. Cut out then make ears out of gummed paper using this stencil. I added a little detail inside the ears with contrast paper; I think it's the most adorable thing about these cups!
- Glue googly eyes on.
- Cut about 6 whiskers out of black wire, in various shapes and lengths then glue whiskers on. Use your fingers to support the whiskers while the glue dries out.
- Cut out a small circle out of pink fleece for nose, but large enough to cover the dollop of glue you used to attach the whiskers. Add a tiny bit of glue and add the nose on.
- Cut out 2 tiny strips of white fleece and attach as teeth.
- Apply glue to the back of the ears and attach them to the inside of the cups.
- Apply glue to a cotton ball and attach to the back of the cup as a tail.
- Fill cups with treats or snacks. Enjoy!
ABOUT PETRO
Hi, I’m Petro, author and founder of Easy Peasy Creative Ideas. Sewist, crafter, avid DIY-er, foodie, photographer, homemaker and mommy to one. I’m an expert at coming up with quick, clever sewing tips, recycling crafts and simple, easy recipes! You can find my ideas featured in reputable publications such as Country Living, Good House Keeping, Yahoo News, WikiHow, Shutterfly, Parade, Brit & Co and more. Thanks for stopping by and hope you’ll stay for a while, get to know me better and come back another time. Stick around for real fun projects! Read more…