
Snowman decorations with wire
If you want to bring the winter in your Christmas tree, make interesting Christmas snowman decorations like these simple, easy and inexpensive wire snowman ornaments.
Yield: 1 ornament
Materials
- wire or galvanized wire
- white spray paint
Instructions
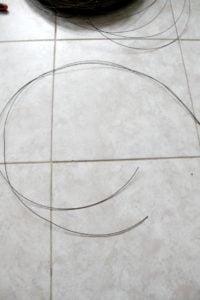
- Star by deciding how big you want your snowman and cut 2 wires of the desired length (I cut mine 40" long, for each wire).
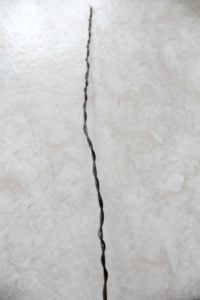
- Twist them around each other, using your fingers or pliers if you are very handy (just like in this project).
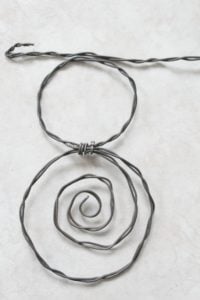
- From one end, start making a small "curl", which will be sitting in the middle of your snowman's body (use this short video tutorial if you don't know how to curl wire). Make the body as big as you like (I made about 4 rolls around the small curl). Once you get to the top of the body, secure the wire in place with a small piece of wire.

- Then switch directions to make a single circle for the "head". Secure the end in place by grabbing another small wire and twisting it at the part where the head and the body meet. Clip the rest of the double wire with your cutting tool.

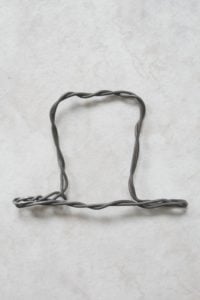
- Time to make the hat. Grab the remaining wire and make a base, starting at one end and making a small loop.
- Continue to the other side of the hat and make another loop of the same length. Bend the wire upwards, then sideways and downwards so you can create the body of the hat.

- Once you reach the first loop, twist the remaining wire around the loop to close the hat. Use pliers to flatten the wire.
- Attach the hat to the head with another small piece of wire and flatten with pliers.

- Lay your snowman on a working surface and spray white paint. Start with the front, leave to completely dry, then do the back. You may need to spray paint twice for each side. Attach a Christmas themed ribbon or twine if you like a rustic look, to the top of the hat and hang in your Christmas tree.