How glue bowl diy
Make a decorative hot glue bowl with little effort or expense - it's the perfect DIY basket for your home!
Yield: 1 bowl
Equipment
Materials
- Hot glue sticks neutral or colored
- Clean bowl
- Spray paint in color of choice skip if using colored glue
- Wax paper
Instructions
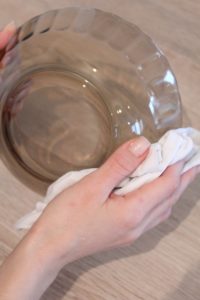
- Start with a very clean bowl so wash and completely dry the bowl that will serve as the base of your hot glue bowl.
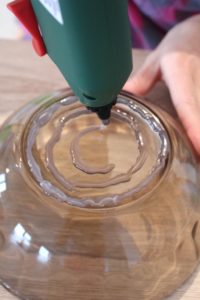
- Make sure you work with very hot glue so make a little test just before starting to build your bowl by squirting a dollop of glue on a piece of wax paper.
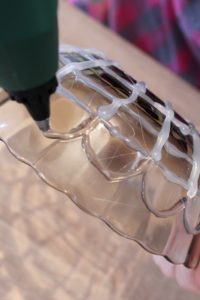
- Turn the bowl upside down. I found it easier to create my bowls using the outside of the bowl not the inside.
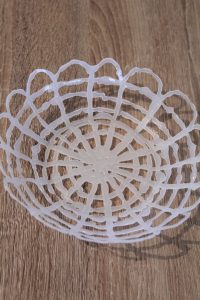
- Start making circles all around your base bowl.
- Then connect those circles with diagonal hot glue lines, starting at the center of the bottom of the bowl.

- Make the design of your choice. I decided to go simple for this project since it was my first so I just made a basic bowl and some scallops around the edge of the bowl. You can add a lot of very thin strings of glue all around your bow if you're going to use it for storing small objects line earring or potpourri flower petals. Or you can add a second row of hot glue to make your bowl more durable.
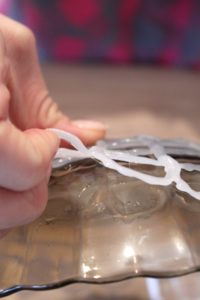
- Allow the glue to completely dry. Test it with your fingers once you see it going white.
- Using your nails, gently peel it off of your base bowl.
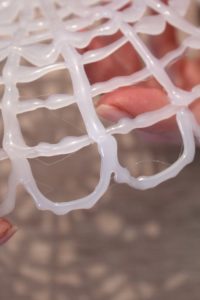
- Remove the tiny glue residues with your fingers or trim off using small, sharp scissors.
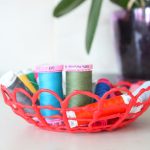
- Spray paint or leave as is. I preferred mine colored. You can skip this step if you used colored glue sticks.