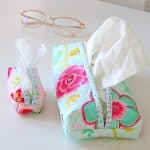
Quilted DIY tissue holder
Take your sewing skills to new levels with a quilted DIY tissue holder! Keep your tissues organized & add charm and creativity to your space!
Yield: 1 holder
Equipment
- sewing machine able to sew through thick quilted layers
- walking foot (optional but very helpful in quilting). If you're using a free motion technique you need a quilting foot and a sewing machine that allows you to push the feed dogs down.
- scissors
- Quilting clips and/or pins.
- Measuring tape, ruler and/or seam gauge
- Adhesive quilting spray (optional but helps to keep the layers together when quilting)
Materials
- Quilting cotton fabric scrap fabric works just fine
- Batting or/and interfacing Use both if you want a sturdier shape.
- Matching or contrast thread depending on the look you want to achieve.
- Bias binding strip
Instructions
- First, measure your tissue box or decide the size of your holder based on the size of the tissues if you plan on adding the tissues straight to the holder, without the box, as I did here.
- Then gather your fabric and cut it into four rectangular pieces. These pieces should be at least 2" larger than the size of your tissue box or your tissues. Keep in mind that quilting the fabrics might also take up some space so add an additional 1/2" to these measurements. Two pieces will serve as the bottom of the tissue holder, while the other two will be the top. If you'd like, you can choose contrasting fabrics to add a touch of personal style to your creation.
- Cut two pieces of batting in the same size as the fabric rectangles. If you want to achieve an extra sturdy tissue holder, cut a piece of fusible interfacing for each fabric rectangle (for lightweight interfacing) or one piece (for medium weight interfacing; I don't advise heavy weight as it gets the holder too bulky and hard to sew)
- Next, it's time to prepare the fabric for sewing. If you're using interfacing, fuse it to the fabrics first. Then place one of the rectangles wrong side up, top with one piece of batting and then top with the second rectangle right side up. Baste the layers with adhesive or pin together then quilt with your favorite quilting method. Alternatively, use hemming tape to help the layers stay put.
- Repeat the steps for the second set of fabrics.
- Trim the quilted panels and square up if needed (necessary when fabric shifting happens)
- Grab one of the quilted panels, find the middle, mark with a fabric pen and cut the panel in half.
- Attach bias binding to each of these new panels, on one of the long edges of each panel. These slim panels are now the top of your tissue holder.
- Place the bottom panel and the top panels right sides together, clip and sew with 1/4" allowance.
- Finish the raw seams with a zig-zag stitch or a serger.
- For an easier version, you can stop at this step. Just clip the corners, turn your DIY tissue holder right side out and use as is, flat. This will allow space for just a few tissues.
- For an advanced version which will be able to hold more tissues, proceed with boxing the holder as follows: mark each corner with a 1/2" square, measured from the seam towards the inside of the tissue holder. Cut out the square. Finish the raw seams in the corner with a zig zag stitch. Then pinch the side seams and sew the corners with 1/4" seam allowance.
- Turn the holder right side out, smooth out the seams and gently push the corners and you're done!