

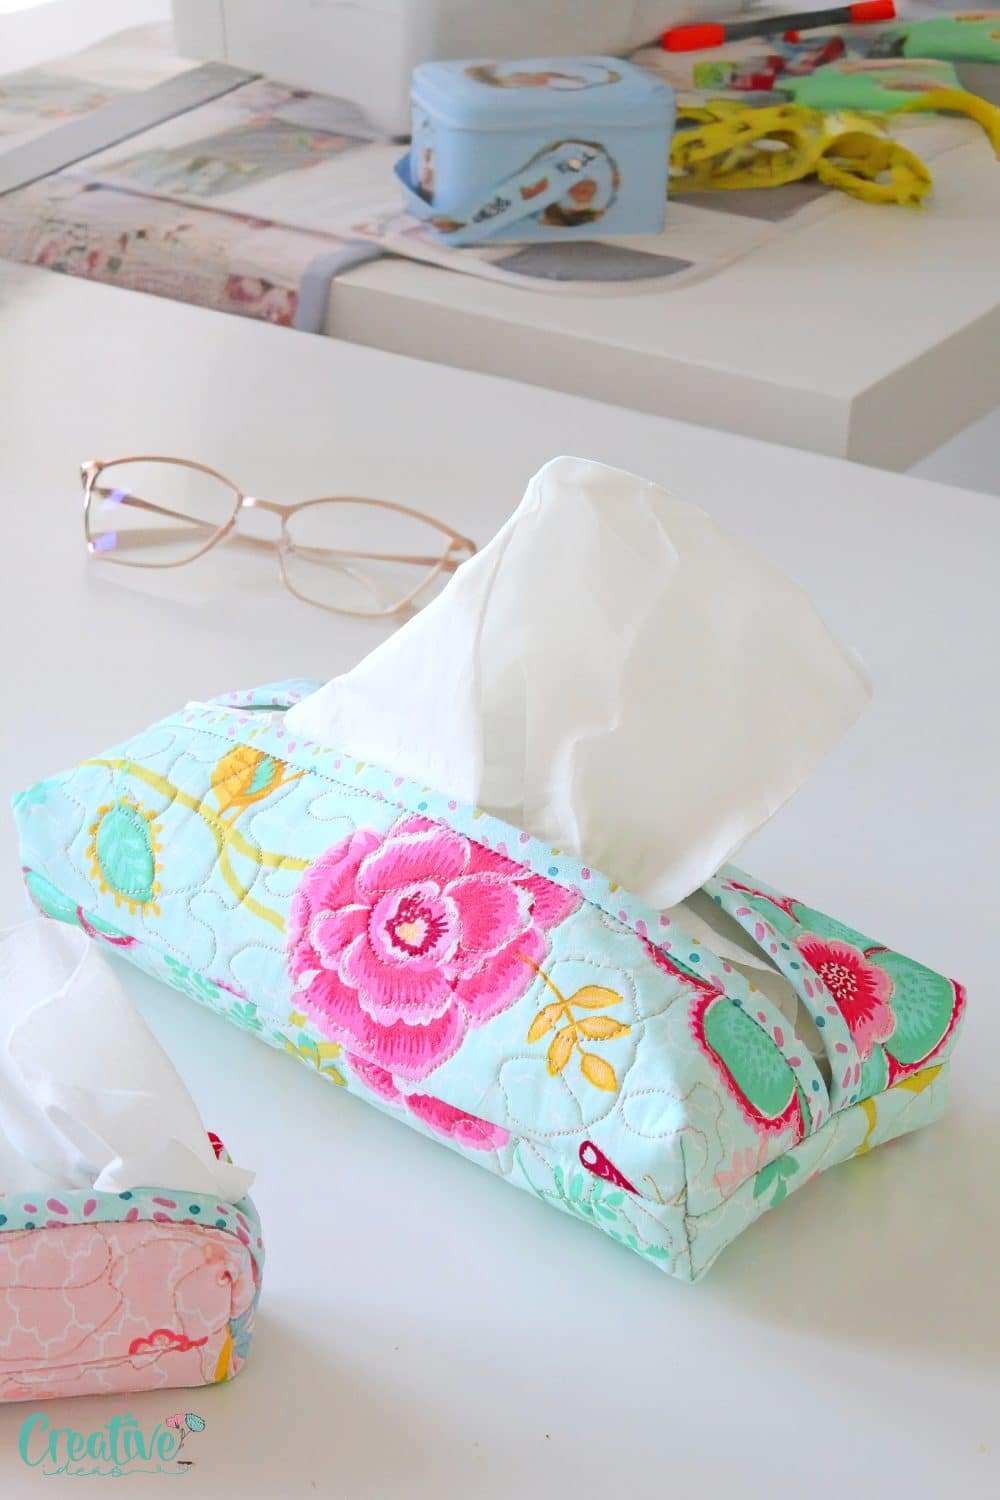
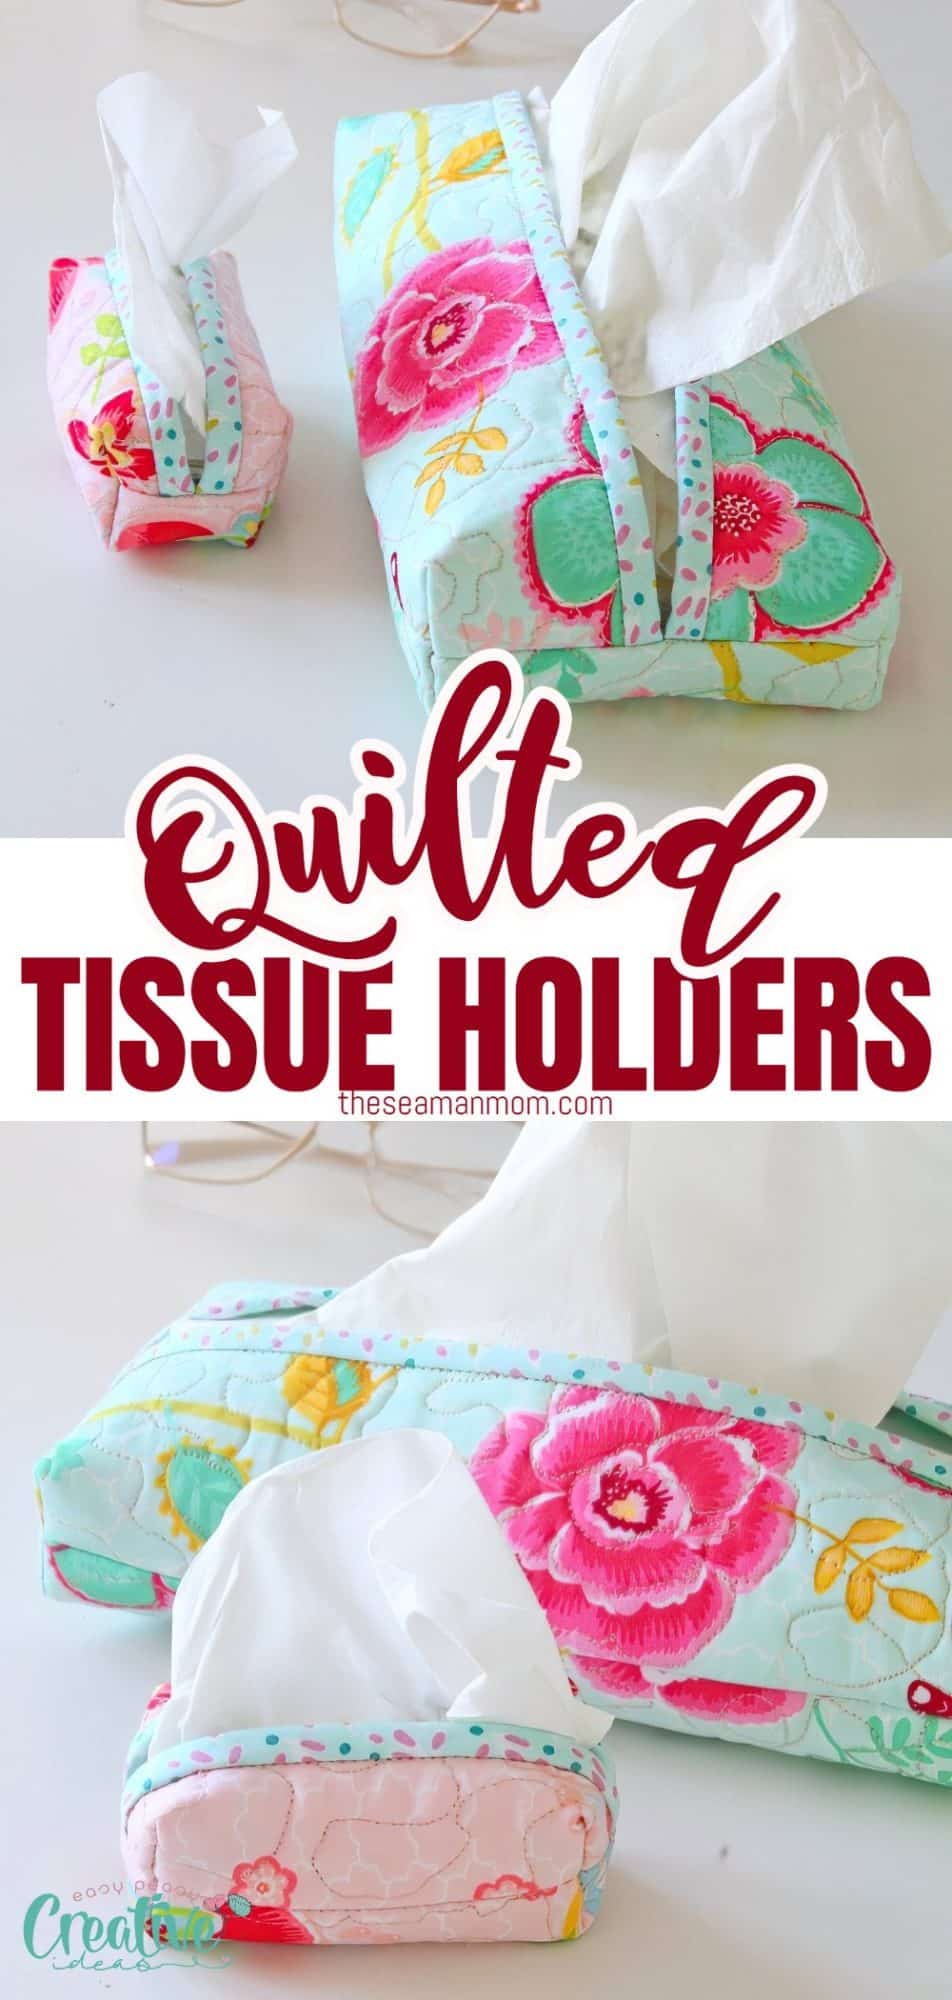
Stylish quilted tissue holder
Take your sewing skills to the next level with a unique and personalized quilted DIY tissue holder. This handy accessory not only keeps your tissues neatly organized but also adds a touch of charm and creativity to your living space.
Quilted DIY tissue holder
Do you always find yourself misplacing tissues or having them clutter up your space? Imagine having a practical and stylish solution to keep your tissues neatly organized and within reach. Well, look no further! In this article, I’ll show you how to sew your own quilted tissue holder that not only serves its purpose but also adds a touch of elegance to your space.
Whether you’re a seasoned sewing enthusiast or just starting out, creating your own quilted tissue holder is a satisfying and rewarding project that allows you to showcase your craftsmanship. So why settle for ordinary tissue storage when you can elevate it with a beautifully crafted, one-of-a-kind creation?
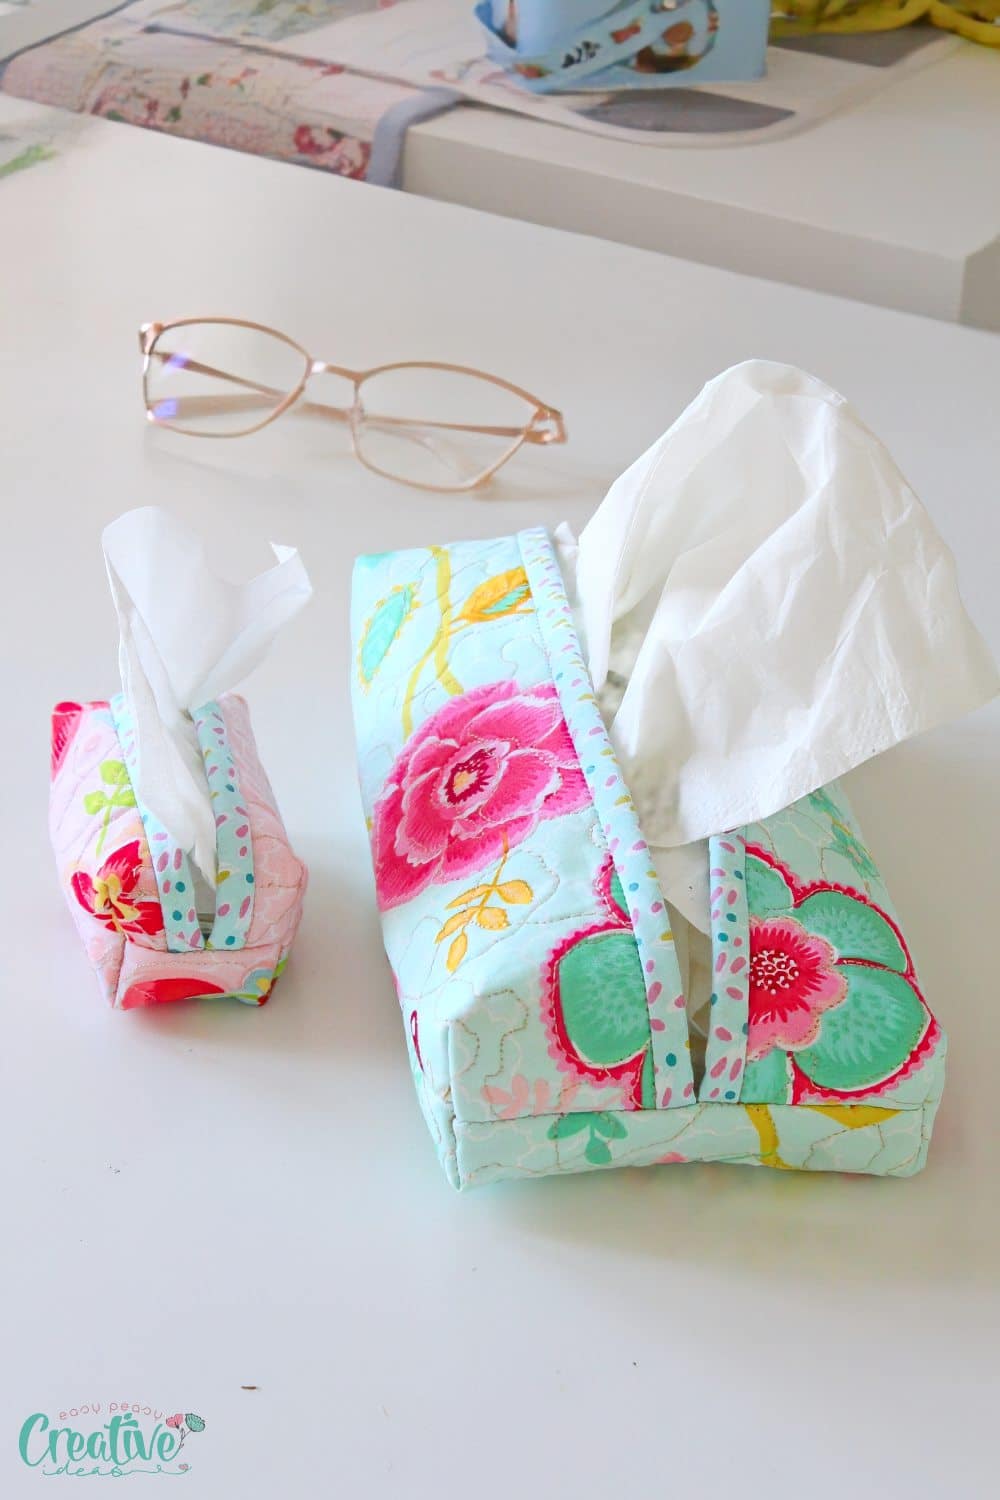
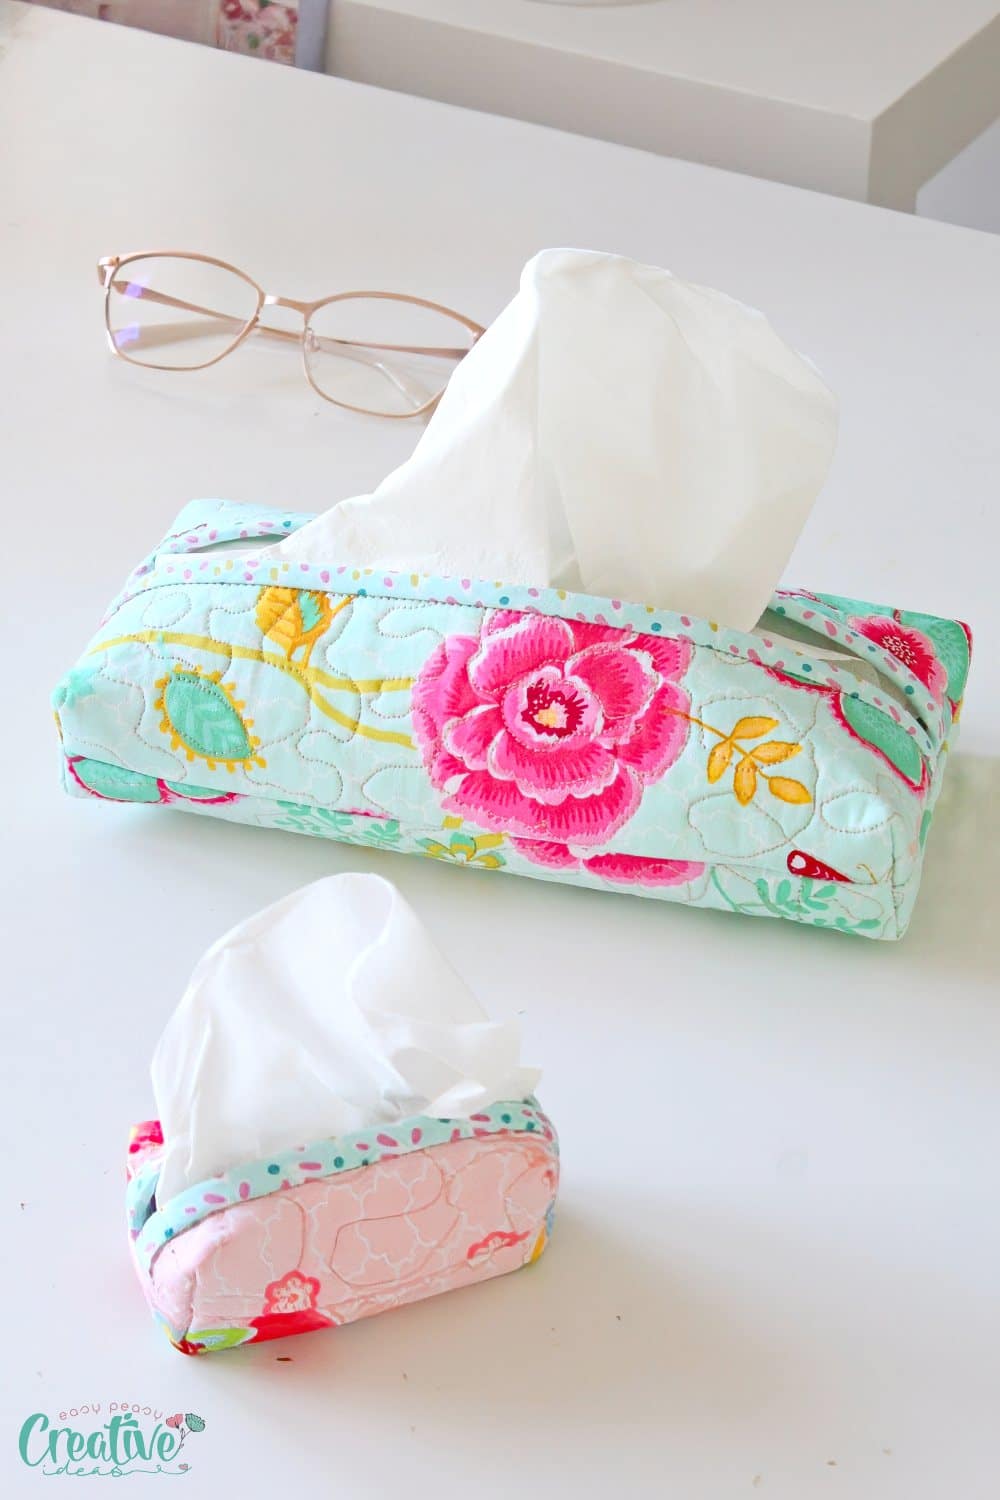
This stylish and functional DIY tissue holder reflects your individuality! Say goodbye to rummaging through drawers and hello to a more organized and stylish solution! I made two tissue holders, one for my car which can hold a ton of tissues and one for my pocket tissues which was a great opportunity to use up some of my never ending stash of fabric scraps.
More easy quilting projects you will love:
- Easy scrappy bookmarks
- Easy sewing supplies organizer
- Toiletry bag with selvage fabrics
- Quilted phone charger holder
- Quilted small coin purse
Why you should make your own tissue holder
One of the great benefits of making your own tissue holder is the control it gives you over the design and functionality. When you create your own quilted tissue holder, you can choose the fabric, colors, and patterns that best match your taste and decor. This means you can customize your tissue holder to seamlessly blend in with your space or make it a standout piece that adds a pop of personality.
Not only does making your own tissue holder allow for customization, but it also ensures that it perfectly fits the size and shape of your tissue box or the tissues. No more struggling to squeeze a box into a generic tissue holder or dealing with a holder that is too loose, your handmade holders will be a perfect fit. With a handmade quilted tissue holder, you can create a snug and secure fit, giving your tissues a proper home that keeps them intact and prevents them from sliding around.
Another benefit of making your own tissue holder is the satisfaction and pride that comes from completing a DIY project. Sewing your own quilted tissue holder allows you to tap into your creativity and showcase your skills. As you see the finished product, you’ll feel a sense of accomplishment knowing that you crafted something practical and beautiful with your own hands.
How long does it take to sew a quilted tissue holder?
The time it takes to sew a quilted tissue holder can vary depending on your sewing skill level and the size and the complexity of the design you choose. While some experienced sewers may be able to complete the project in just an hour or so, beginners might take a bit longer to finish their first DIY tissue holder.
Regardless of your skill level, it’s always a good idea to plan ahead and allocate enough time for the project. This gives you the freedom to work at your own pace and ensures that you can fully immerse yourself in the creative process.
Are there any specific sewing techniques required for this project?
When it comes to creating a stylish quilted tissue holder, there are a few sewing techniques that will help you achieve a polished and professional result.
- One of the key techniques to master is quilting. Quilting involves stitching together multiple layers of fabric to create a padded and quilted effect. It adds dimension and texture to your tissue holder while also providing a cozy and cushioned feel.
- In addition to quilting, you’ll also need to know basic sewing skills such as cutting fabric, pinning, and sewing straight seams. These foundational skills will help you assemble the different parts of your tissue holder, such as the front and back panels, and attach the binding.
- Sewing binding is also another skill you need to be comfortable with. But even if this is your first time, you can still make this project. Just make sure you allocate enough time for it.
- Boxing corners is another technique you need to be familiar with. If this is your first time sewing box corners here’s a helpful tutorial to get you started. The boxed corners for this holder are quite small and while sewing them is not hard, finishing the seams can be a little tricky. If you’re not an expert in sewing a finishing seam through thick fabrics, you can finish the seam first, before sewing the box corners. So cut the corners as explained in the tutorial, finish the raw edges then box the corners as instructed.
Is this project suitable for beginners?
Absolutely! The quilted tissue holder project offers a fantastic opportunity for sewing novices to hone their skills and gain confidence in their abilities. While the finished product may look intricate and advanced, the process itself is manageable and well-suited for beginners.
One of the reasons why this project is ideal for beginners is the simplicity of the pattern. The quilted tissue holder design consists of basic shapes and a straight stitch, providing a solid foundation for beginners to practice and improve their sewing techniques.
The step-by-step instructions break down the process into easy-to-follow stages, ensuring that beginners can understand and execute each step with ease.
Additionally, this project allows beginners to familiarize themselves with essential sewing techniques such as measuring and cutting fabric, pinning, sewing straight lines, and creating simple quilted patterns as well as more advanced techniques such as boxing corners, sewing bias binding or sewing through several layers of fabric.
By working on this project, beginners can gain valuable experience and develop the necessary skills to tackle more advanced sewing projects in the future.
How to add finishing touches
By incorporating final details, you’ll be able to elevate your creation and make it truly one-of-a-kind. Whether you prefer a more minimalistic approach or want to go all out with embellishments, the options for adding those special touches are endless.
One way to add a touch of sophistication to your quilted tissue holder is by selecting the perfect fabric for the exterior. Consider choosing a fabric that complements the overall color scheme or theme of the room where it will be used. You can explore various patterns and textures to match your personal style and add visual interest to the finished piece.
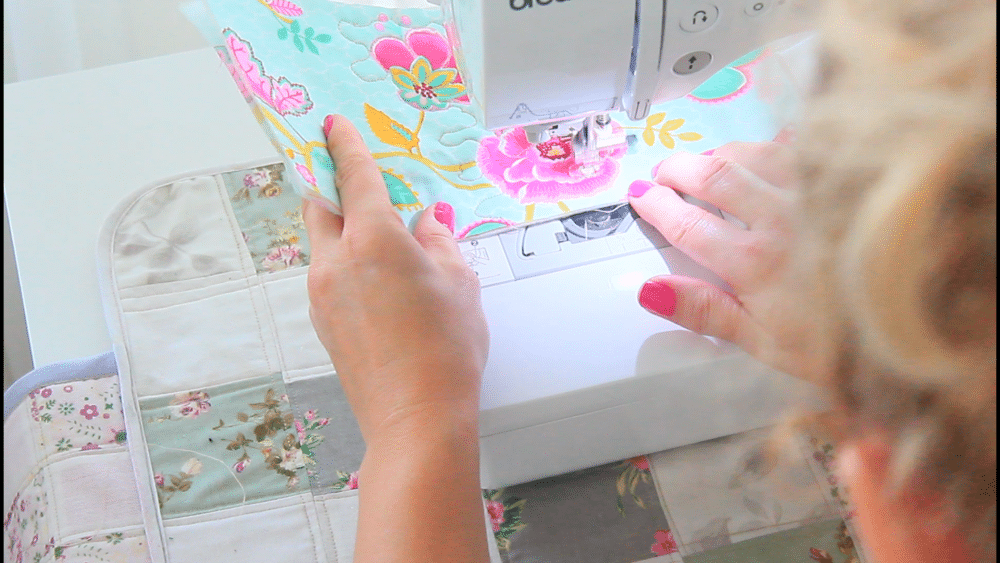
Another fun way to enhance your quilted DIY tissue holder is by incorporating decorative stitching. While the basic quilting stitches create a beautiful texture, you can take it up a notch by experimenting with different stitch patterns. For my projects I used a free motion technique.
Adding a contrasting thread color can also make the stitching stand out and draw attention to the craftsmanship of your creation.
If you’re feeling particularly adventurous, why not explore the world of appliqué? Appliqué involves attaching fabric shapes onto the surface of your quilted tissue holder, creating a three-dimensional effect. You can cut out shapes from different fabrics and secure them in place using either hand stitching or a sewing machine. This technique allows you to personalize your tissue holder with unique designs, such as flowers, animals, or any other motif that inspires you.
Can the quilted tissue holder be easily cleaned and maintained?
I made this fabric tissue holder with ease of use and cleaning in mind. Caring for your quilted tissue holder is a breeze. It can be easily cleaned and maintained with just a few simple steps. Machine wash it on a delicate cycle using mild soap or detergent. Avoid using harsh chemicals or bleach, as they may damage the fabric and affect the overall appearance of your creation.
After washing your quilted tissue holder, it’s essential to allow it to dry thoroughly. Avoid wringing or twisting the fabric, as this can cause it to lose its shape. Instead, gently squeeze out excess water and lay the tissue holder flat on a clean, absorbent towel or hang it up to air dry. Avoid using a dryer, as the heat may cause shrinkage or damage delicate embellishments or the decorative stitching.

Are there any tips for making the tissue holder more durable?
In terms of maintenance, it’s a good idea to periodically check your quilted tissue holder for any loose threads or fraying. If you notice any, simply use a pair of sharp scissors to trim them away, being careful not to cut into the fabric itself. Regularly inspecting and addressing any minor issues will help keep your quilted tissue holder looking its best for years to come.
Furthermore, when choosing the fabric for your tissue holder, consider opting for a durable and sturdy material like quilting cotton or canvas. These fabrics are known for their strength and resilience, ensuring that your tissue holder can withstand daily use without easily tearing or wearing out.
Another tip for enhancing the durability of your quilted tissue holder is to reinforce the seams. While sewing the pieces together, use a tight and secure stitch to ensure that the seams can withstand the stress of holding tissues. Additionally, you may want to consider double stitching the edges to provide extra reinforcement and prevent any potential unraveling.
Can this project also be used to hold other items besides tissues?
Absolutely! Apart from keeping your tissues organized and easily accessible, these stylish quilted tissue holders have the potential to serve double duty as holders for other small items. Their convenient size and sturdy construction make them versatile enough to hold a variety of objects, providing a practical solution for cluttered spaces.
Consider repurposing your tissue holder as a holder for travel-sized toiletries. Whether you’re going on a weekend getaway or need a compact solution for your gym bag, these holders can safely store your favorite travel essentials.
Another creative use for your quilted tissue holder is as a mini first aid kit. Fill it with band-aids, antiseptic wipes, and other small medical supplies. This way, you’ll have a portable and easily accessible solution for minor cuts and scrapes while on the go.
For those who enjoy knitting or crocheting, the quilted tissue holder can be transformed into a compact case for storing your needles, hooks, and other small supplies. With its soft fabric lining and sturdy structure, it will offer a protective and organized home for your crafting tools.
Additionally, these holders can double as handy storage pouches for small electronics such as earbuds, USB drives, or portable chargers. Keep one in your bag or purse to prevent tangles and ensure your gadgets are always within reach.
If you opt for any of these you need to add some sort of closure to your holder though so keep that in mind when building it. Sewing a zipper around the opening is a great idea and it’s easy to do right after you’ve prepared the panels for the top of the holder. Then you can assemble the entire tissue holder as specified in the instructions below.
Troubleshooting common issues
Just like with any handmade item, it’s possible to encounter a few hiccups along the way. Here are some common issues you might face and how to address them:
- One frequent problem is the size of the tissue holder not aligning perfectly with a standard tissue box. If you find that your tissue holder is too snug or too loose for the box, a simple solution is to remove the tissues from the box and use place them in the holder without the box. Remember, a little extra room is better than a tight fit.
- Another issue you may come across is the durability of the tissue holder. While quilted fabric provides a sturdy base, there might be instances where the stitching comes loose or weakens over time. To prevent this, make sure to use a high-quality thread and reinforce the seams with double stitches. Additionally, consider using a fabric glue or fray check on the edges to secure the fabric and prevent fraying.
- If you find that your tissue holder lacks stability and tends to crumple or collapse when empty, the problem might lie in the choice of batting. Opt for a thicker or firmer batting to give your tissue holder more structure. Alternatively, you can add a lightweight interfacing to the fabric before quilting to improve stability.
How do you keep a tissue box in your car?
For such uses, it’s worth considering the incorporation of a Velcro closure or the use of buttons and buttonholes, as these adjustments can easily accommodate different box designs and will keep the tissues secure inside the holder.
Also consider adding Velcro to the bottom of the holder to easily attach it to the items in the car. This will keep the holder in place when the car is on the move.
What do you need to make a fabric tissue holder?
To make a fabric tissue holder, you will need a few basic materials and tools:
- Quilting cotton fabric (scrap fabric works just fine)
- Batting or/and interfacing. Use both if you want a sturdier shape.
- A powerful sewing machine able to sew through thick quilted layers
- Walking foot (optional but very helpful in quilting). If you’re using a free motion technique you need a quilting foot and a sewing machine that allows you to push the feed dogs down.
- Matching or contrast thread, depending on the look you want to achieve.
- Scissors
- Rotary cutter
- Cutting mat
- Quilting clips and/or pins.
- Measuring tape, ruler and/or seam gauge
- Fabric pen
- Basting spray (optional but helps to keep the layers together when quilting)
- Bias binding strip
How to sew a tissue holder?
Measurements and cutting the fabrics
- First, measure your tissue box or decide the size of your holder based on the size of the tissues if you plan on adding the tissues straight to the holder, without the box, as I did here.
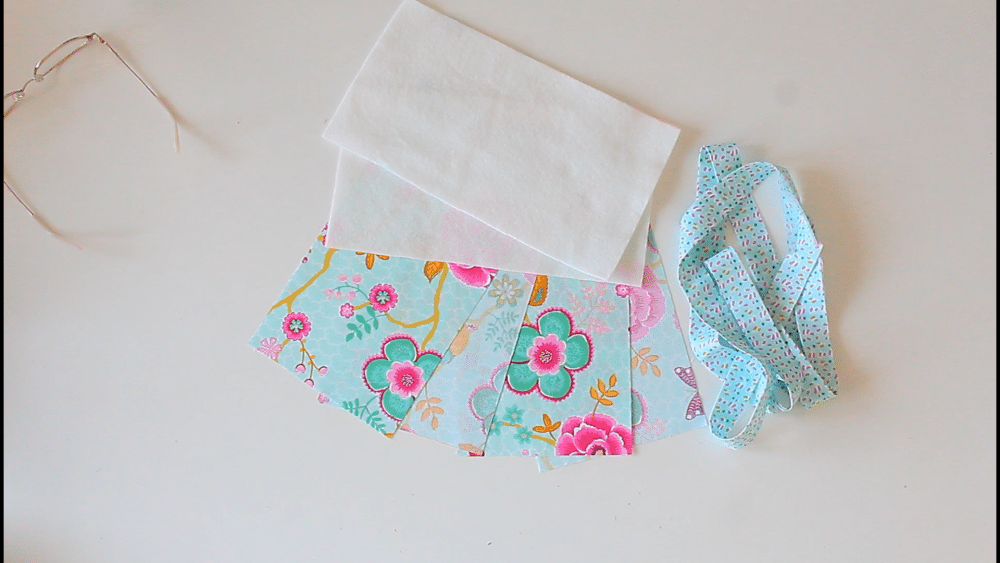
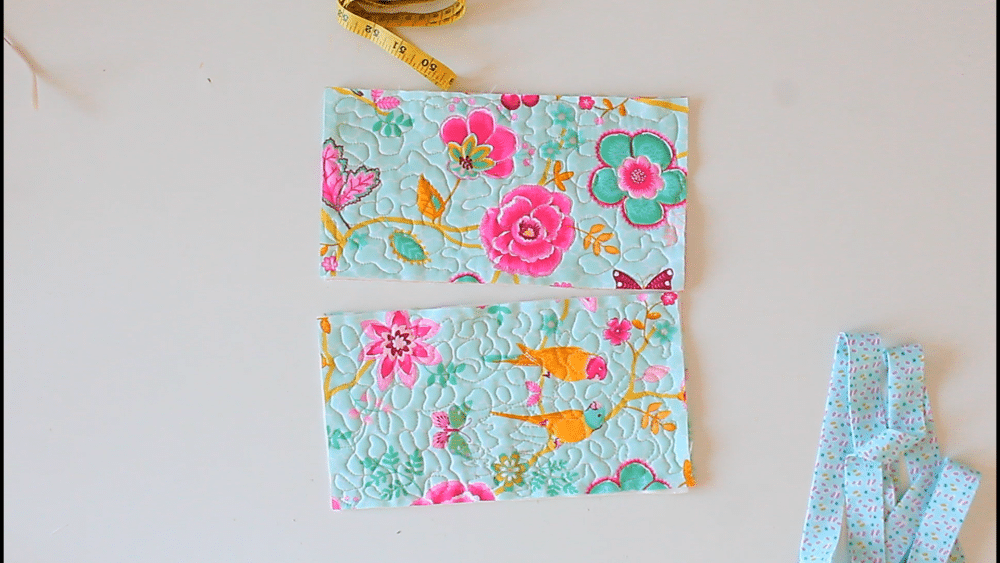
- Then gather your fabric and cut it into four rectangular pieces. These pieces should be at least 2″ larger than the size of your tissue box or your tissues. Keep in mind that quilting the fabrics might also take up some space so add an additional 1/2″ to these measurements. Two pieces will serve as the bottom of the tissue holder, while the other two will be the top. If you’d like, you can choose contrasting fabrics to add a touch of personal style to your creation.
- Cut two pieces of batting in the same size as the fabric rectangles. If you want to achieve an extra sturdy tissue holder, cut a piece of fusible interfacing for each fabric rectangle (for lightweight interfacing) or one piece (for medium weight interfacing; I don’t advise heavy weight as it gets the holder too bulky and hard to sew).
Prepare the quilted panels
- Next, it’s time to prepare the fabric for sewing. If you’re using interfacing, fuse it to the fabrics first. Then place one of the rectangles wrong side up, top with one piece of batting and then top with the second rectangle right side up.
- Baste the layers with adhesive or pin together then quilt with your favorite quilting method. Alternatively, use hemming tape to help the layers stay put.
- Repeat the steps for the second set of fabrics.
- Trim the quilted panels and square up if needed (necessary when fabric shifting happens).
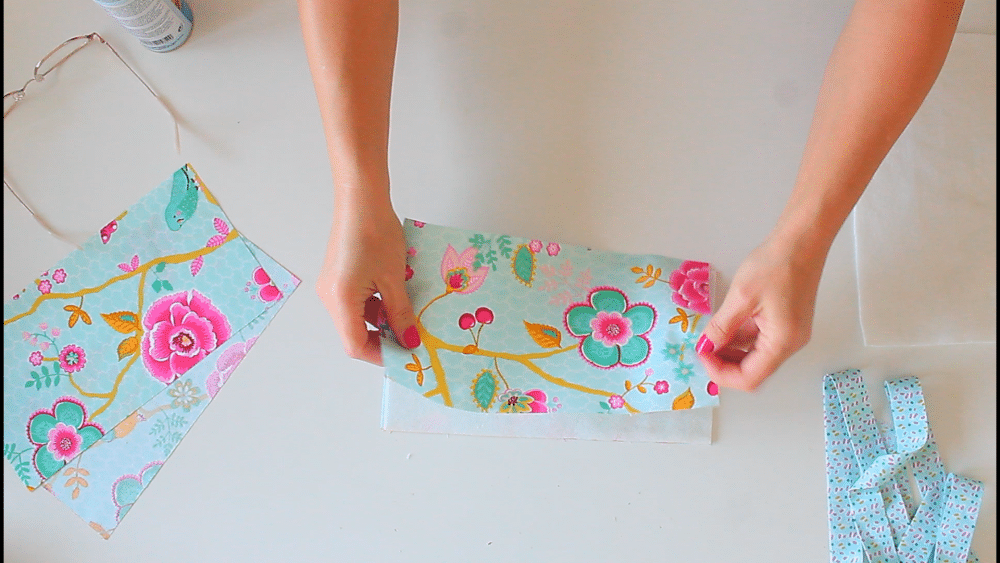
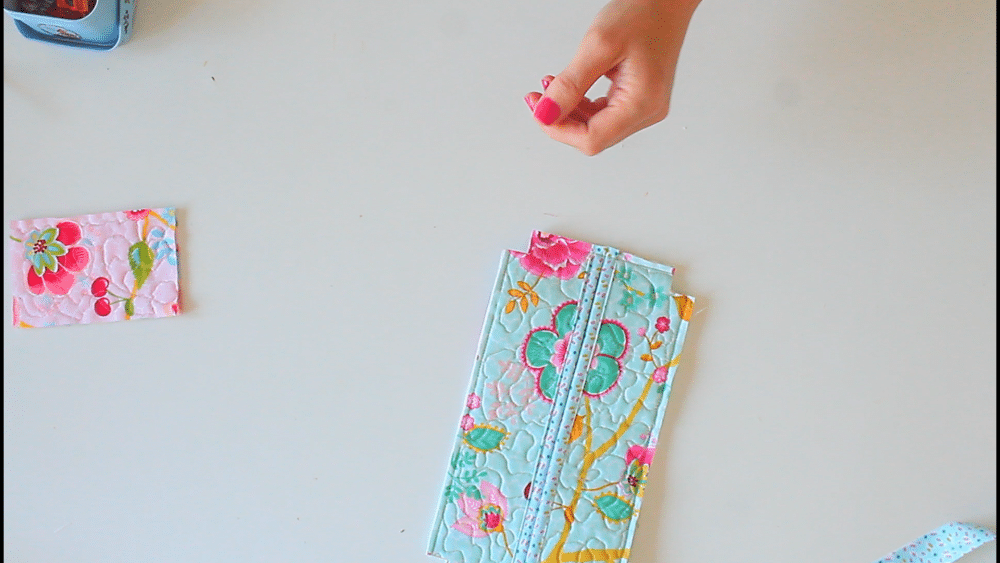
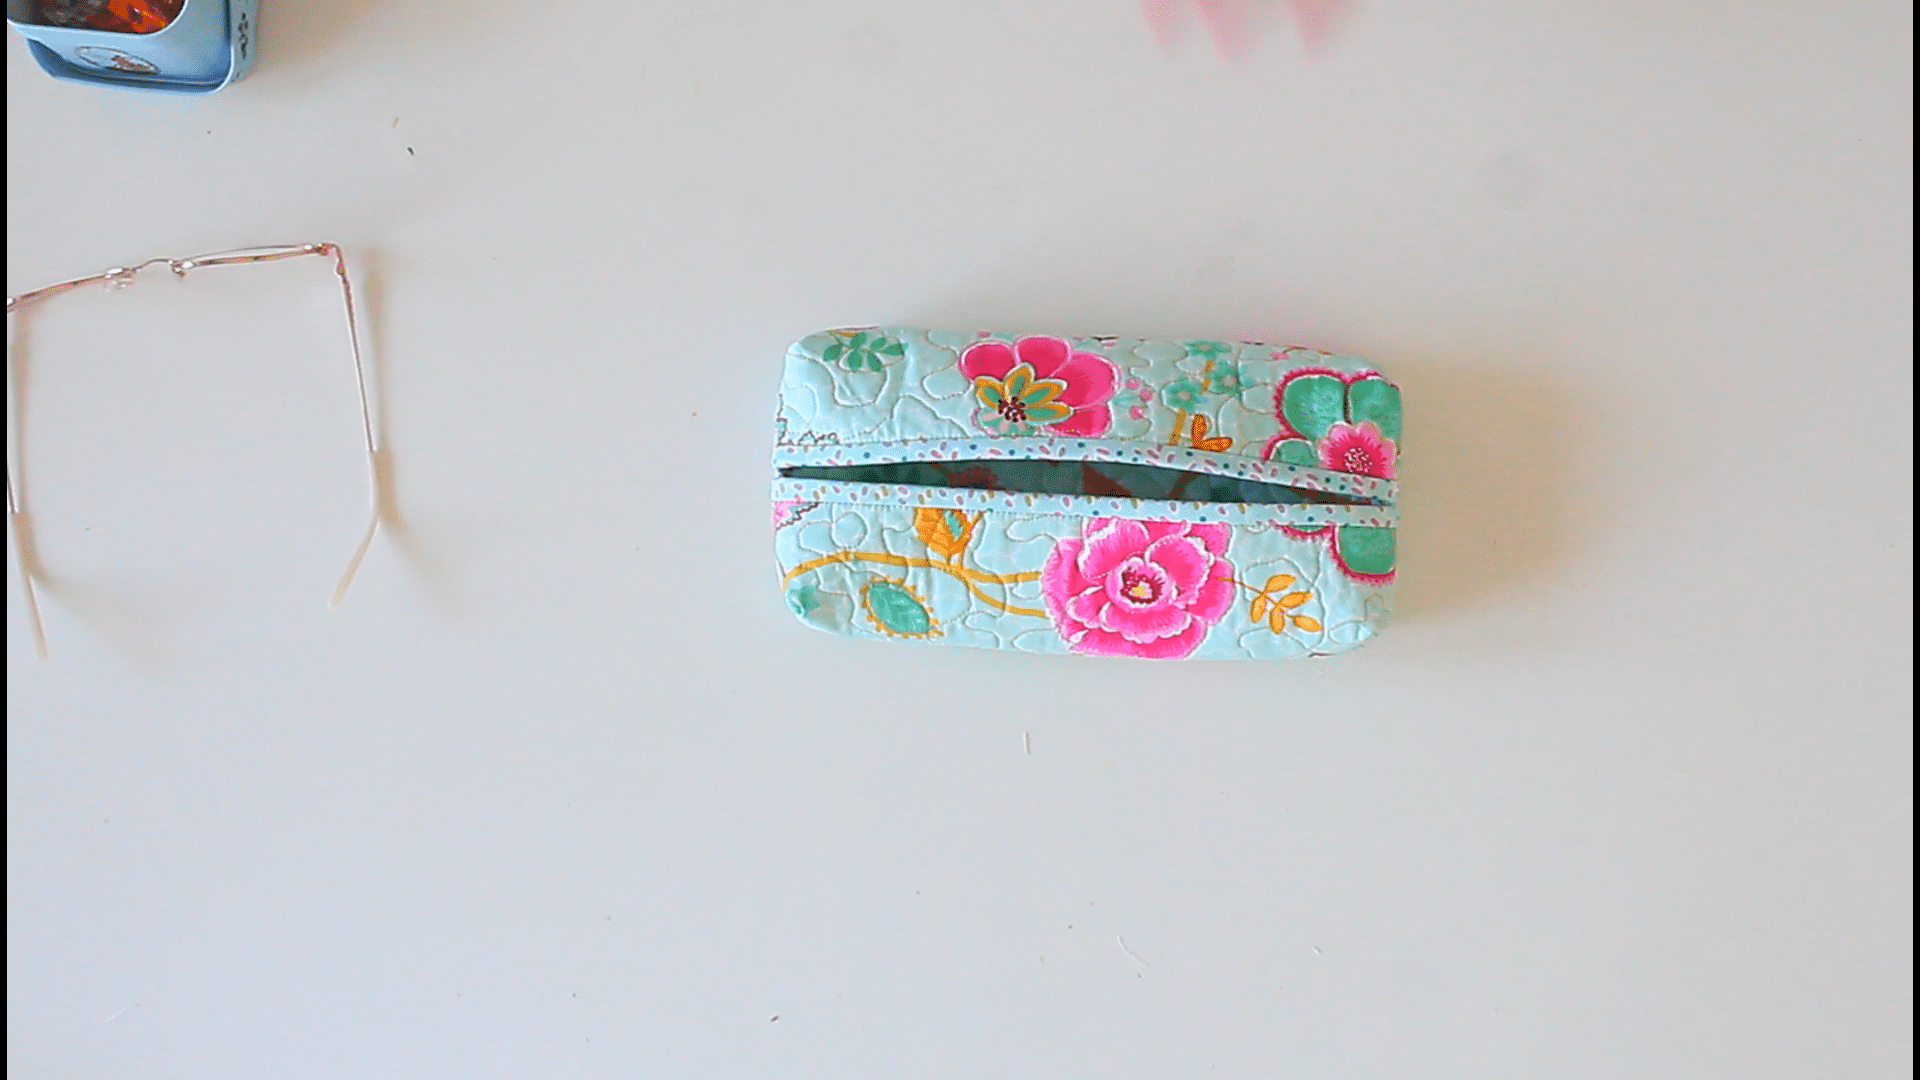
- Grab one of the quilted panels, find the middle, mark with a fabric pen and cut the panel in half.
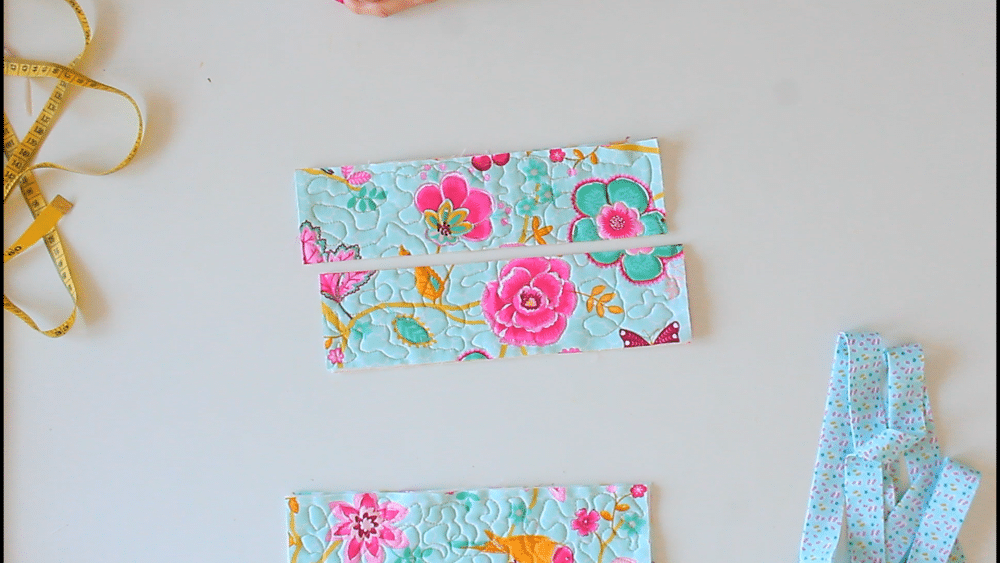
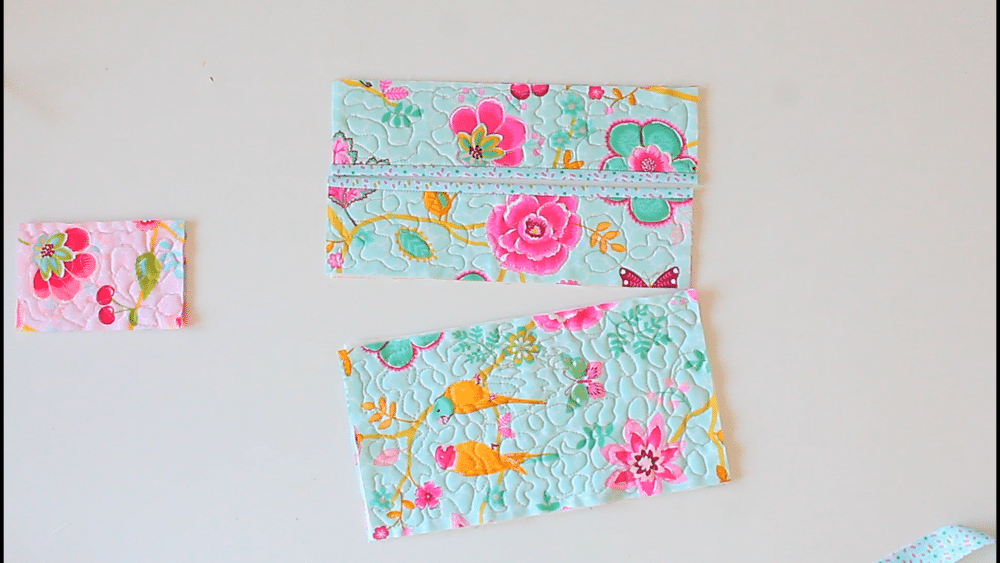
- Attach bias binding to each of these new panels, on one of the long edges of each panel. These slim panels are now the top of your tissue holder.
Make the tissue holder
- Place the bottom panel and the top panels right sides together, clip and sew with 1/4″ allowance on all four sides.
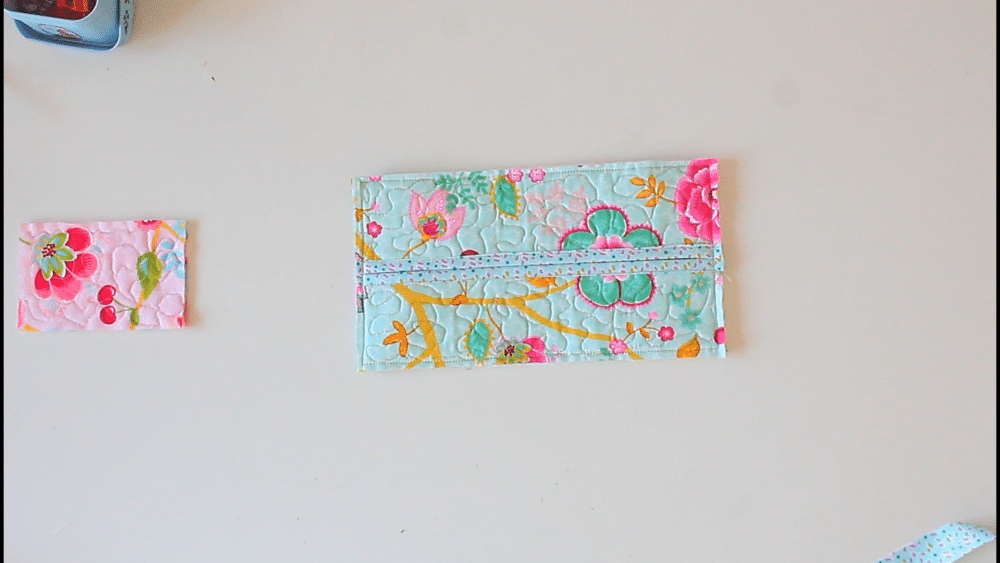
- Finish the raw seams with a zig-zag stitch or a serger. These photos don’t have the seams finished, as I realized after taking the photos that finishing would be much easier to do at this step than later in the process when handling the seams gets harder and trickier.
- For an easier version, you can stop at this step. Just clip the corners, turn your DIY tissue holder right side out and use as is, flat. This will allow space for just a few tissues.
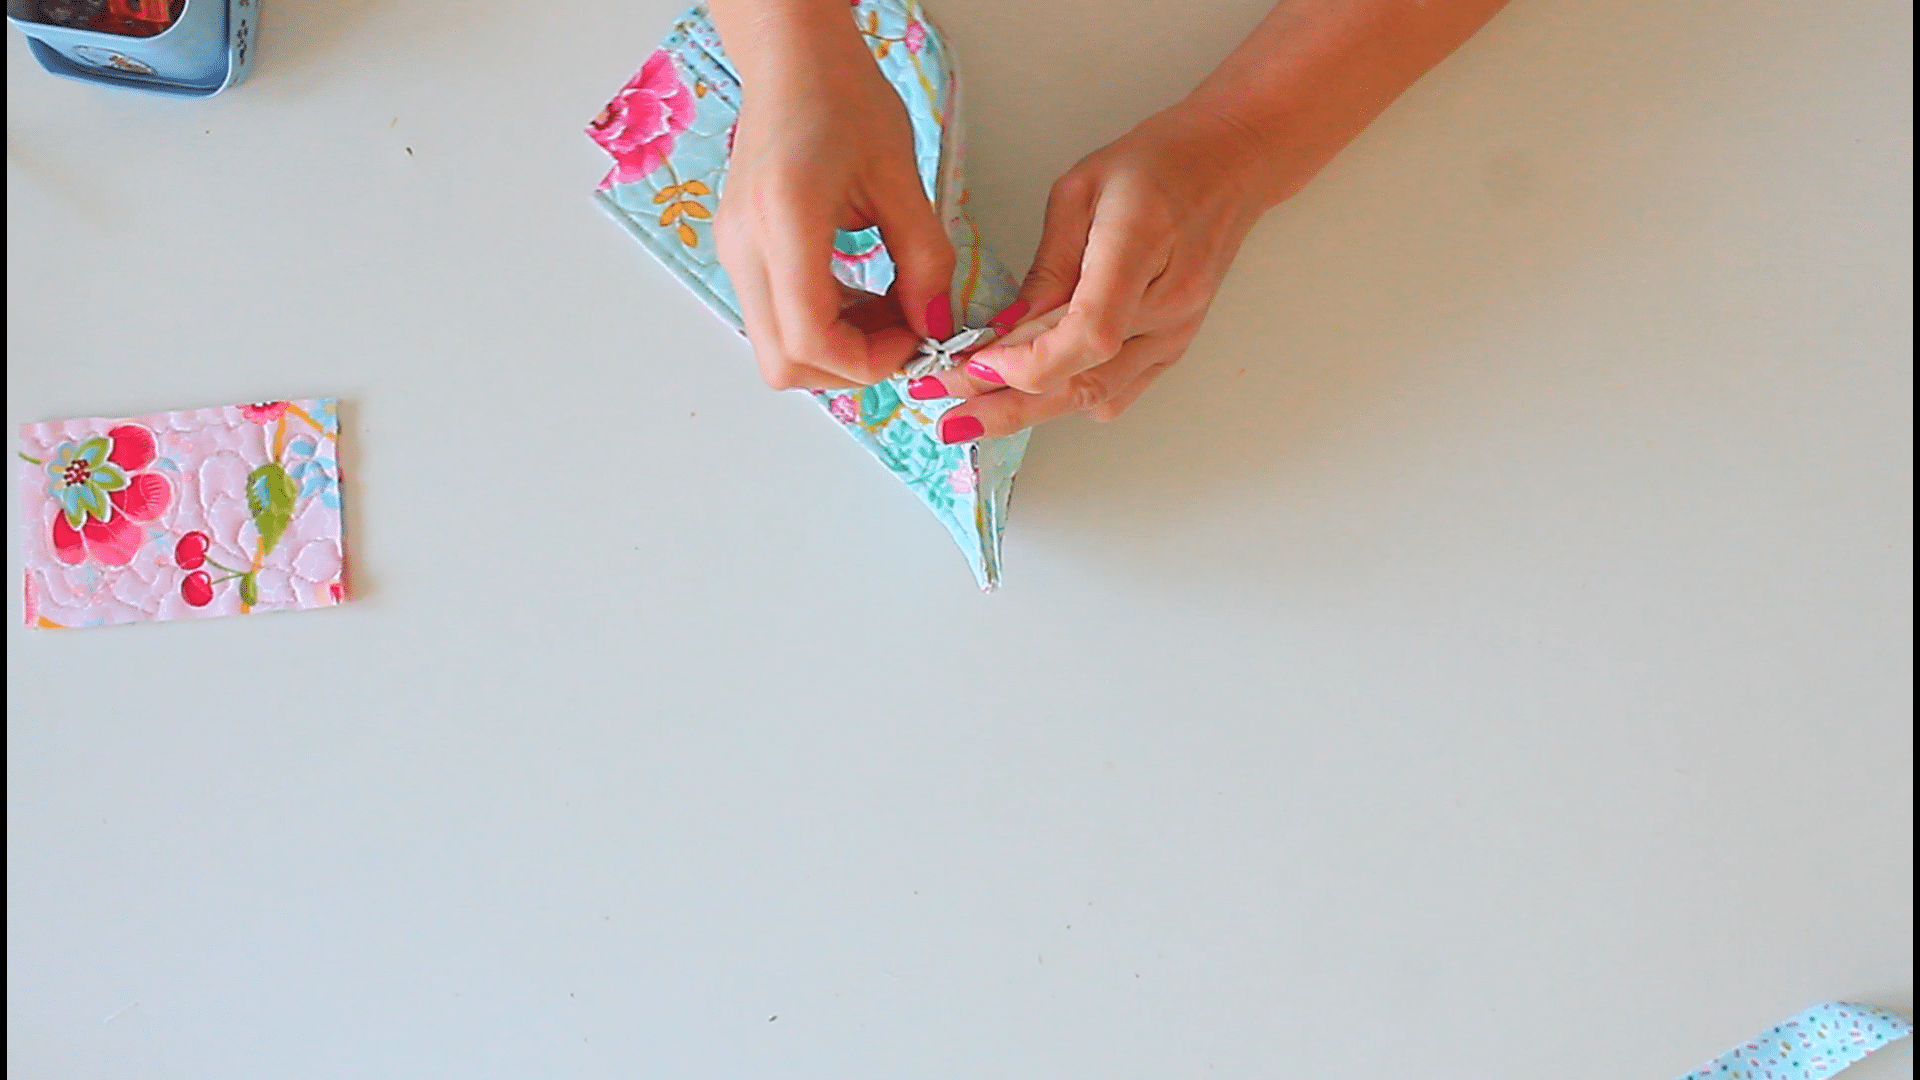
- For an advanced version which will be able to hold more tissues, proceed with boxing the holder as follows: mark each corner with a 1/2″ square, measured from the seam towards the inside of the tissue holder. Cut out the square.
- Finish the raw seams in the corner with a zig zag stitch. Then pinch the side seams and sew the corners with 1/4″ seam allowance.
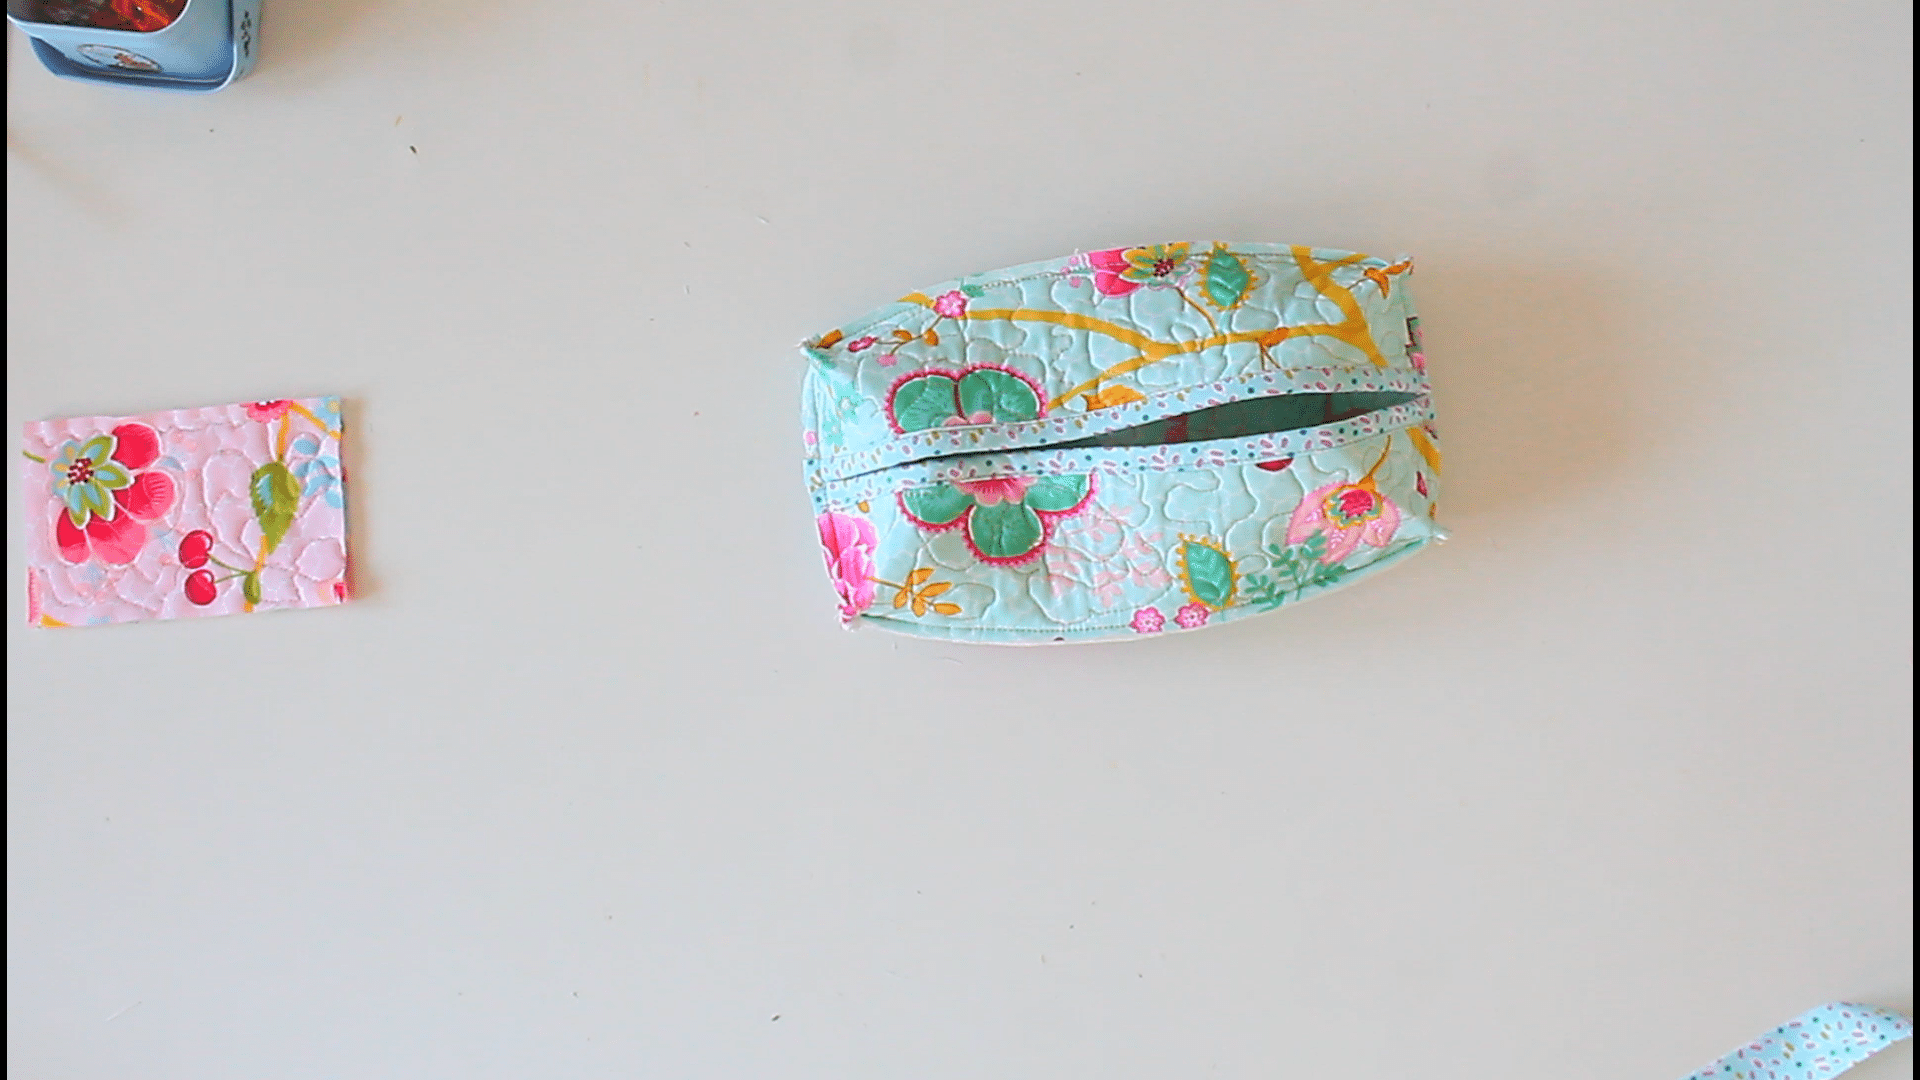
- Turn the holder right side out, smooth out the seams and gently push the corners out.
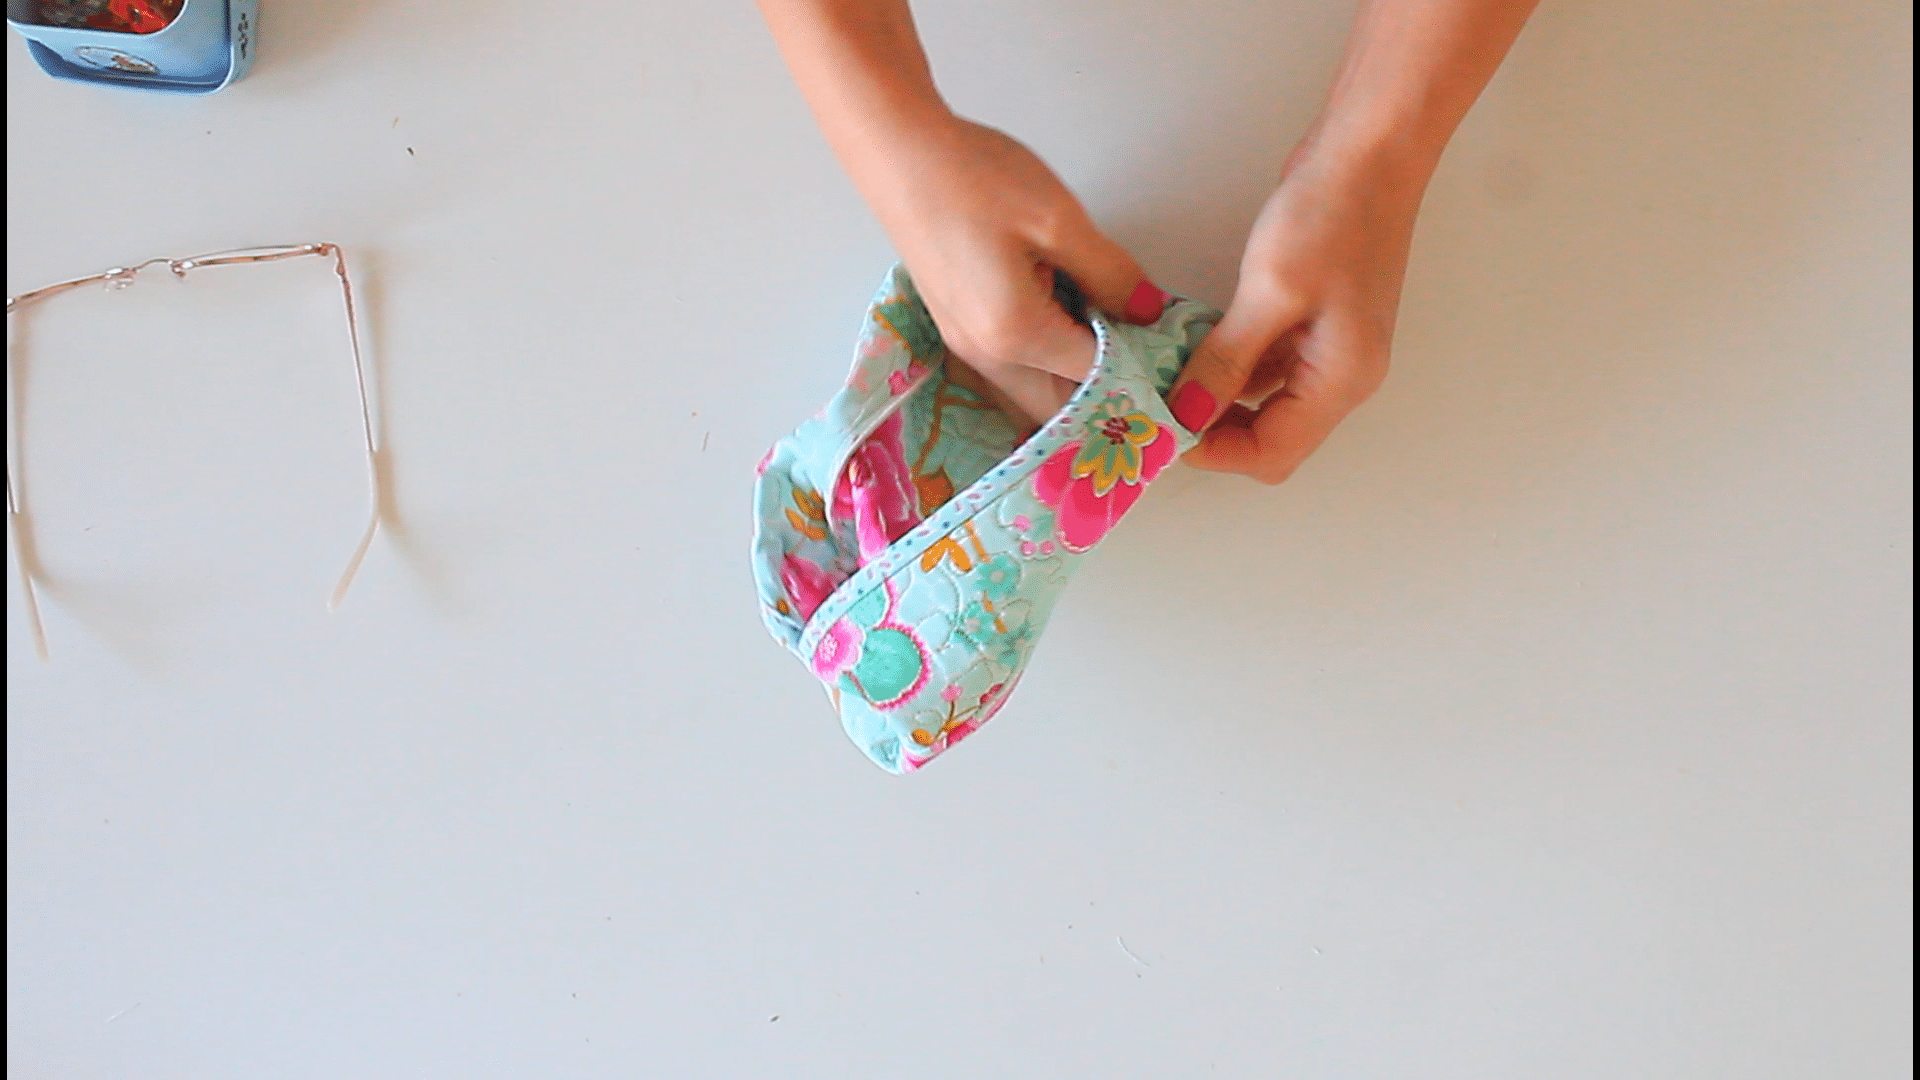
And you’re done! Take a step back and admire your beautiful work! Doesn’t it look so pretty? The satisfaction of creating something that serves both function and beauty is truly rewarding, right. So grab your materials, find your favorite fabric, and let your imagination run wild. Happy sewing!
Pin to save for later
Print the sewing card
Quilted DIY tissue holder
Materials
- Quilting cotton fabric scrap fabric works just fine
- Batting or/and interfacing Use both if you want a sturdier shape.
- Matching or contrast thread depending on the look you want to achieve.
- Bias binding strip
Tools
- sewing machine able to sew through thick quilted layers
- walking foot (optional but very helpful in quilting). If you're using a free motion technique you need a quilting foot and a sewing machine that allows you to push the feed dogs down.
- scissors
- Quilting clips and/or pins.
- Measuring tape, ruler and/or seam gauge
- Adhesive quilting spray (optional but helps to keep the layers together when quilting)
Instructions
- First, measure your tissue box or decide the size of your holder based on the size of the tissues if you plan on adding the tissues straight to the holder, without the box, as I did here.
- Then gather your fabric and cut it into four rectangular pieces. These pieces should be at least 2" larger than the size of your tissue box or your tissues. Keep in mind that quilting the fabrics might also take up some space so add an additional 1/2" to these measurements. Two pieces will serve as the bottom of the tissue holder, while the other two will be the top. If you'd like, you can choose contrasting fabrics to add a touch of personal style to your creation.
- Cut two pieces of batting in the same size as the fabric rectangles. If you want to achieve an extra sturdy tissue holder, cut a piece of fusible interfacing for each fabric rectangle (for lightweight interfacing) or one piece (for medium weight interfacing; I don't advise heavy weight as it gets the holder too bulky and hard to sew)
- Next, it's time to prepare the fabric for sewing. If you're using interfacing, fuse it to the fabrics first. Then place one of the rectangles wrong side up, top with one piece of batting and then top with the second rectangle right side up. Baste the layers with adhesive or pin together then quilt with your favorite quilting method. Alternatively, use hemming tape to help the layers stay put.
- Repeat the steps for the second set of fabrics.
- Trim the quilted panels and square up if needed (necessary when fabric shifting happens)
- Grab one of the quilted panels, find the middle, mark with a fabric pen and cut the panel in half.
- Attach bias binding to each of these new panels, on one of the long edges of each panel. These slim panels are now the top of your tissue holder.
- Place the bottom panel and the top panels right sides together, clip and sew with 1/4" allowance.
- Finish the raw seams with a zig-zag stitch or a serger.
- For an easier version, you can stop at this step. Just clip the corners, turn your DIY tissue holder right side out and use as is, flat. This will allow space for just a few tissues.
- For an advanced version which will be able to hold more tissues, proceed with boxing the holder as follows: mark each corner with a 1/2" square, measured from the seam towards the inside of the tissue holder. Cut out the square. Finish the raw seams in the corner with a zig zag stitch. Then pinch the side seams and sew the corners with 1/4" seam allowance.
- Turn the holder right side out, smooth out the seams and gently push the corners and you're done!
Video
Most popular sewing projects:


Article may contain Amazon & affiliate links. As an Amazon Associate I earn from qualifying purchases at no additional cost to you.
ABOUT PETRO
Hi, I’m Petro, author and founder of Easy Peasy Creative Ideas. Sewist, crafter, avid DIY-er, foodie, photographer, homemaker and mommy to one. I’m an expert at coming up with quick, clever sewing tips, recycling crafts and simple, easy recipes! You can find my ideas featured in reputable publications such as Country Living, Good House Keeping, Yahoo News, WikiHow, Shutterfly, Parade, Brit & Co and more. Thanks for stopping by and hope you’ll stay for a while, get to know me better and come back another time. Stick around for real fun projects! Read more…