How to adjust the presser foot pressure
Master the art of sewing machine presser foot adjustment! Avoid issues, identify incorrect pressure, optimize tension, and enhance your sewing skills today!
Yield: 1 guide
Equipment
- screw driver most machines come equipped with the right tool for that specific type of regulator.
Materials
- scraps of fabric to test the pressure as you change it
Instructions
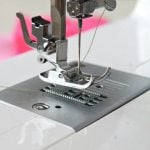
- Locate your presser foot tension regulator
- If your regulator is a dial, spin it towards the plus sign to tighten the pressure. Spin towards the minus to loosen it.
- If you have a pin, pressing down the pin will make it pop up and will create a light pressure, needed for heavy fabric. Press down on the pin again to create heavy pressure if you are sewing light fabric.
- In case you have a knob, it usually comes with an indicator next to it. Pressing up or down the indicator will increase or reduce pressure on your presser foot.
- If your machine has a screw, use the screwdriver to turn the screw and change the presser foot tension. Turning the screw clockwise or towards a plus sign will create heavy pressure. When turning it counterclockwise or towards the minus sign, it will give you light pressure.
- Before starting working on a new sewing project, test the pressure foot tension. Sew on a scrap of fabric that is the same thickness as your project. Adjust pressure according to your results.
- You have the right settings when: the fabric doesn't pucker, the thread is not tangled, your stitches are of the same length, and the fabric slides through the feeding dogs smoothly.