How to gather fabric
Learn how to gather fabric easily and create perfect, even ruffles with these simple tips and techniques. Make ruffling fun and effortless!
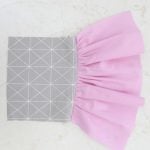
Yield: 1 ruffle
Equipment
- scissors
- pressing iron
Materials
- Fabric Strips
- Matching Thread
Instructions
- Set your machine to the longest stitch length and a regular thread tension.
- Switch the presser foot tension to a loose setting.
- Before starting to sew, leave the threads about 5" long.
- Sew along the edge where you want to create the ruffles, 1/8" away from the edge. Leave these threads about 5" long too.
- Repeat one or two more times creating two additional lines, 1/8" away from each other. For lightweight fabrics, two lines of stitches should work fine while for thicker fabrics three rows might be needed to ensure the threads won't break while gathering.
- Using a pin separate the threads of the front stitches from the threads of the back stitches (in my case the back threads from the red threads)
- With one hand grab all threads in the back (red in my case) and with the other hand start pulling the fabric down, gathering the fabric towards the other end of the stitches. The threads won't break and the gathers will form and spread evenly.
- You can do this process at one end or both ends of the fabric strip.
- The ruffled fabric needs to match the length of the second fabric strip you're sewing the ruffles onto.
- When happy with your ruffles, tie the threads in a double knot (the red threads tied with the blacks), on both ends.
- Trim the threads too
- Set your iron on steam and press the ruffles very well. This is a very important step as it will be a great help when sewing the ruffles.
- Place the main fabric strip (the one without ruffles) right side up. Place ruffled strip over, wrong side up.
- Pin the two strips together using lots of pins.
- Sew a straight stitch, 1/8" below the last row in your ruffled strip. Sewing right on top of the last row would be perfect if you can; this way your ruffles will be perfectly even if you've spread them correctly the previous steps!
- Flip the ruffled strip up and press!