How to sew binding on quilt corners
Master the art of sewing binding on quilt corners with this ultimate guide! Say goodbye to frustration and conquer quilt corners like a pro.
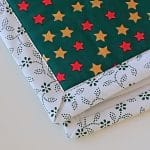
Yield: 1 quilt
Equipment
- Iron
- Ironing Board
- Seam Ripper
- A walking foot
Materials
- Quilt
- Binding Strips
- Matching thread
Instructions
- To start, lay the binding strip flat along the edge of your quilt, aligning the raw edges.
- Begin sewing about 3 inches from the strip's end, using a ¼ inch seam allowance. If your binding strip is wide you can use a larger seam allowance. For my quilt I used a 3/8" seam allowance.
- Sew the binding until you get close to the corner. Stop about 2 inches away and mark a diagonal line in the corner, in the size of your chosen seam allowance, at a 45-degree angle.
- Continue sewing the binding until you reach that marking, pivot the needle then sew the marked line.
- Next, fold the binding strip up in a 45-degree angle, using the corner stitch as a guide.
- Finger press then fold the binding down, aligning the folded edge of the binding with the edge of the next side of the quilt. Be sure to align the raw edges of the binding and the quilt for a tight fit.
- With the binding strip securely in place, continue sewing along the edge towards the next corner. As you approach the corner, stop sewing with the needle down in the fabric. Repeat the steps above to sew the second corner.
- Keep doing these steps until you finish sewing all four corners.
- When you are about 3 inches away from your starting point, it's time to join the ends of the binding.
- Next fold the binding to the other side of the quilt. Use clips to keep the binding folded in place.
- Flip the quilt to the other side.
- Arrange the corners so the fabric forms 45-degree angles and that the edges of the binding match perfectly in every corner. You can use an iron to press the binding and form crisp corners.
- Edge stitch the binding to finish your quilt. You can also use a hand-stitch or a stitch in the ditch on the back side of the quilt, if you attached your binding starting on the front first.