DIY seam guide
Improve your sewing skills with a simple DIY seam guide! Perfect your topstitching and seam allowances for clean, precise seams every time!
Yield: 1 guide
Equipment
- Post-it pad
- seam gauge or ruler
- erasable marker
Materials
- fabric to sew
- thread
Instructions
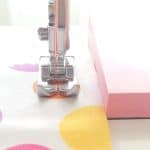
- Using your seam gauge, measure the seam allowance you need to sew, starting from the needle to the right.
- Mark the spot for ease of reference (this is optional).
- Remove the last page from the post it pad.
- Place the post it with the glue side right next to the mark you made on your sewing machine plate and press firmly.
- Place the fabric under the foot and push it to the right until the edge meets the pot it.
- Start sewing. At this point you only need to make sure the fabric doesn't slip to the left as the right side is secured by the post it.