How to sew a camisole pattern
Learn how to sew an easy and quick camisole pattern with a flounce hem that's irresistibly cute, in about half an hour. Ideal for spring or summer!
Yield: 1 camisole
Equipment
- camisole and flounce pattern
- scissors
- safety pin
- Yardstick
- serger
- pressing iron
Materials
- lightweight fabric
- elastic
- matching thread
Instructions
Making the pattern
- If you are a size 10 you can use my pattern for the cami and the flounce. If you are a different size or simply don't want to go the easy way, here's how to make your own pattern in just a few easy steps.
- Decide how long you want the camisole (flounce excluded) and measure from just above the chest to the bottom of the cami. Add 4" at the top and 1" allowance at the bottom. This will the the length of your camisole pattern.
- Measure around your body, where you decided to make the bottom of your camisole (flounce excluded), divide in half and add 1" allowance. This will be the width of the bottom of your camisole. Allow for some room when measuring, you don't want your camisole too tight.
- Measure around your body above the chest, divide in half and add 6". This will be the width of the top of your camisole. Also allow for a little room when measuring, don't get too tight with the measuring tape.
- Draw the pattern using these measurements and you need to get a trapezoid with a top that is wider than the bottom. If you want a lot of gathering at the top of your camisole you need to increase the size of the trapezoid at the top.
- Decide how wide you want the flounce and do the flounce pattern following this tutorial.
Preparing the fabrics
- Cut the fabrics using the patterns you just made above.
- You need two pieces for the camisole (front and back) and two pieces for the flounce.
- Measure from your chest up to the back to decide on the length of your straps and cut four fabric strips that match these measurements and are at least 2" wide.
Making the camisole pieces
- Get one piece of flounce and hem using this tutorial or use a roller foot to make a rolled hem as indicated in this tutorial. The idea is to make a tiny hem as this type of hems work best on lightweight fabrics and darling garments like this.
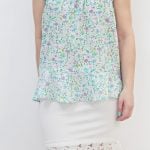
- Place one camisole piece on the table, right side up and top with the hemmed flounce, wrong side up. The raw edge of the flounce should align with the raw bottom of the camisole piece. In this image my flounce is larger than the camisole as I wanted to have plenty of room to work without risking to run into a shorter flounce when putting the pieces together. I trimmed the flounce after attaching it to the blouse.
- Pin these two, sew with 1/2" allowance and serge or finish the seam with a zig zag stitch.
- Fold the flounce down pushing the seam up and press well.
- Repeat for the back piece of the camisole and the second flounce.
Attaching the camisole pieces together
- Place the two cami pieces right sides together, pin the sides and sew with 1/2" allowance.
- Make sure the seams in the flounces match.
- Serge or zig zag to finish the seam.
- Serge the top of your camisole or use a zig zag stitch to finish the raw edge and prevent from fraying when wearing the camisole or with washing.
- With you camisole wrong side out, fold the top down, 6" and press well.
- Sew around the top, 5 1/2" away from the edge.
- Leave a gap of about 2"
- Place the elastic along this stitch line, move about 1/8" away from the stitch line, towards the folded edge of the camisole and mark a line along the elastic, using a fabric pen.
- Sew down along this marked line.
- Using a safety pin insert the elastic through the gap.
- When the elastic comes out through the gap, join the ends using this tutorial to reduce bulkiness.
- To close the gap, pull the elastic and continue stitching along the line you did above.
- Some people may find that the distance between their underarms and the chest line is too small to accommodate the ruffles in the camisole. This is my case and I decided to fold the ruffled top of the cami inside, in the underarms area and stitch it to itself.
Making the spaghetti straps
- Since this camisole looks so delicate and is made in sheer fabric, I thought spaghetti straps would be the best option. Use this tutorial to make yours.
- If you think your camisole works just as great with regular straps, use this tutorial to make your straps and turn them out in a snap, without the need for a tube turner.
- To attach the straps to your camisole, either hand stitch the straps or use your sewing machine. I added mine at the top seam of the elastic.