Welt zipper pocket sewing tutorial
Add a stylish and functional welt zipper pocket to your handbags and accessories with this easy tutorial. Perfect for personalizing your handmade bags!
Yield: 1 welt zipper pocket
Equipment
- zipper
- measuring tape
- scissors
- pressing iron
- double sided tape
- zipper foot
- Seam Ripper
Materials
- template optional
- the piece of the bag fabric where you want your pocket to be placed. That could be the outside of your bag on the main fabric, typically the back or the lining, front or back piece of the lining, either one works.
- piece of fabric for the pocket.
- matching thread
Instructions
- Cut a rectangle of fabric for the pocket, that is 2'' wider than your planned pocket and twice as tall as your pocket depth, plus 2''.
- If you're adding the pocket to an already sewn bag, pull the lining fabric out and using the seam ripper, unpick the bottom of the lining.
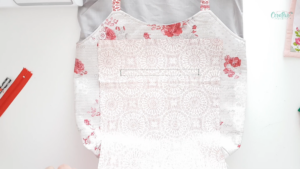
- Place the pocket fabric on the bag, right sides facing together. Center the pocket fabric and pin the pocket to the bag.

- Draw an outline for the welt area. At the top of the pocket fabric, on the wrong side, draw a horizontal line 1'' below the top edge. Draw another line 1/2'' below it. Connect the two lines with vertical lines on the sides, 1'' from each edge of the fabric.
- Sew all the way around the drawn rectangle, backstitching at the starting point and pivoting at corners.
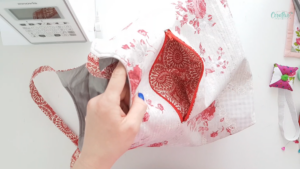
- Using small sharp scissors, cut a line down the middle of the rectangle, ending about 1/4'' from either edge. Clip to the corners into a Y without cutting through the stitches.
- Push the pocket piece inside the bag.
- Press the opening with the iron on steam.
- Apply double side tape, washable glue for fabric or wonder tape if you have any available, to both zipper tapes, on the right side of the zipper.

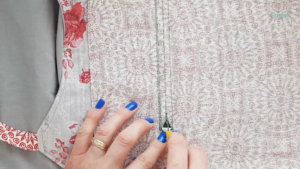
- Center the zipper under the opening and press with your fingers to stick the tape to the fabric. Make sure the slider is visible in the opening.

- Top stitch around the zipper, about 1/8", using a zipper foot.

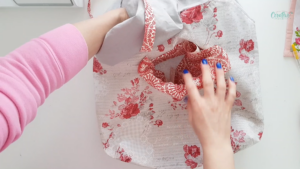
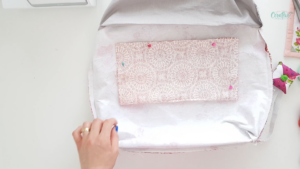
- Turn the bag wrong side out through the lining opening and fold up the pocket piece.

- Pin around the top and sides and sew with 1/2" allowance all around the pocket.
- Turn the bag right side out, press and stitch the lining closed with a tops stitch or a ladder stitch.