

How to sew a welt zipper pocket to any bag
If you love sewing bags with lots of pockets, you can now customize and personalize them even more with a practical and elegant welt zipper pocket. Here, you’ll find everything you need to know to create a beautiful welt pocket for your handbag or other accessory!
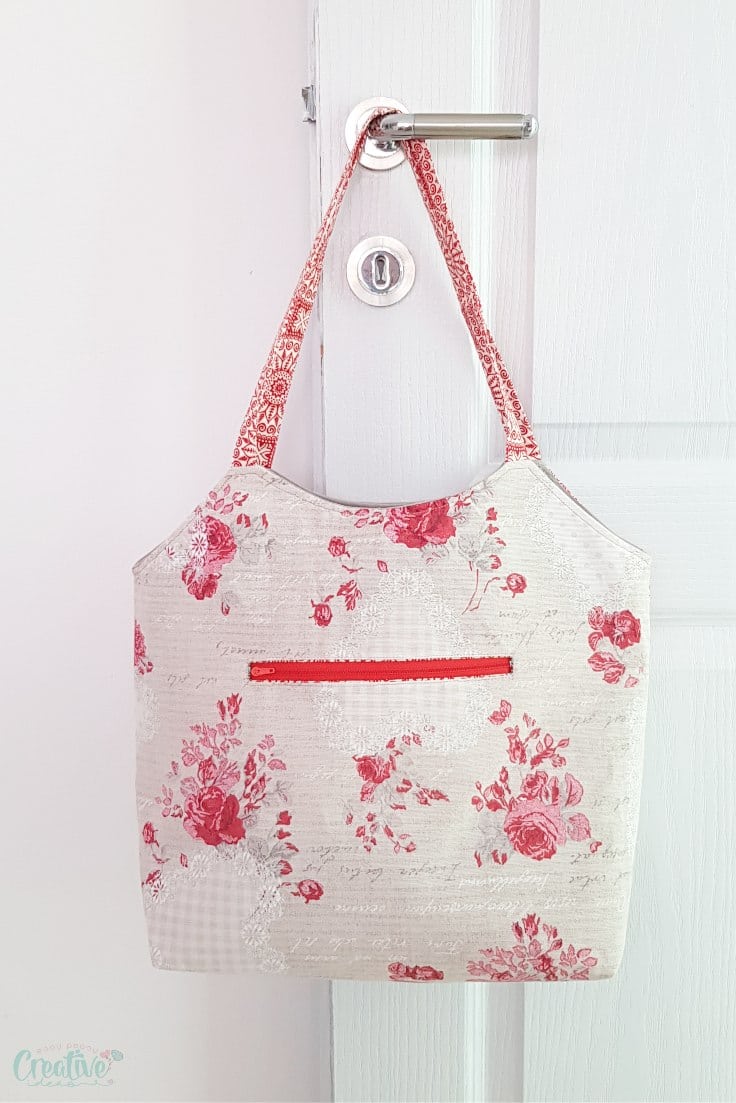
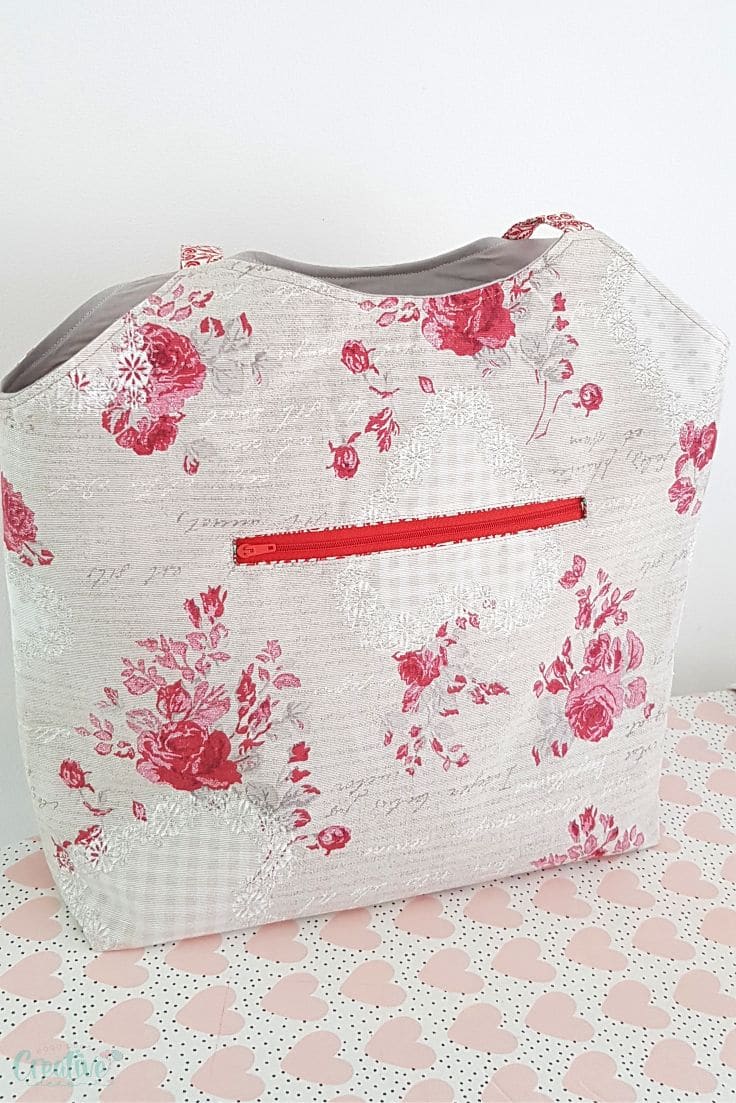
A while a go I made this beautiful deep front tote bag but at that time I decided I don’t need to add a welt zipper pocket. But after wearing it for a while I realized something is missing. While the large front pocket is more than enough most of the time, there are certain occasions when I need some of the items I carry with me on a regular basis (like keys, cash and credit cards) to be stored in a more secure place. And in an elegant bag like this, what better place than a zipper pocket nicely hidden in the back of the tote bag?
In this easy tutorial I’ll show you how to sew a basic welt zipper pocket. These are great for adding pockets to purses, bags, curtains, pillows, backpacks, pouches and more. I love adding detail to my bags and this simple welt pocket is a great touch. It’s a good project for a beginner and the end result is a very sturdy pocket that will last a lifetime.
How to sew a welt zipper pocket
Materials you’ll need
- template (optional)
- the piece of the bag fabric where you want your pocket to be placed. That could be the outside of your bag (on the main fabric), typically the back or the lining, front or back piece of the lining, either one works.
- piece of fabric for the pocket.
- zipper (you can get one with a cute zipper pull like these ones, for added style)
- measuring tape or seam gauge
- fabric marker
- matching thread
- scissors
- sewing machine
- pressing iron
- double sided tape
- zipper foot
- seam ripper – optional
Step-by-step instructions
Detailed photo and video are available below, in the sewing card.
Prepare the fabric pieces
1. Cut a rectangle of fabric for the pocket, that is 2” wider than your planned pocket and twice as tall as your pocket depth, plus 2”.
2. If you’re adding the pocket to an already sewn bag, pull the lining fabric out and using the seam ripper, unpick the bottom of the lining.
Draw the welt area
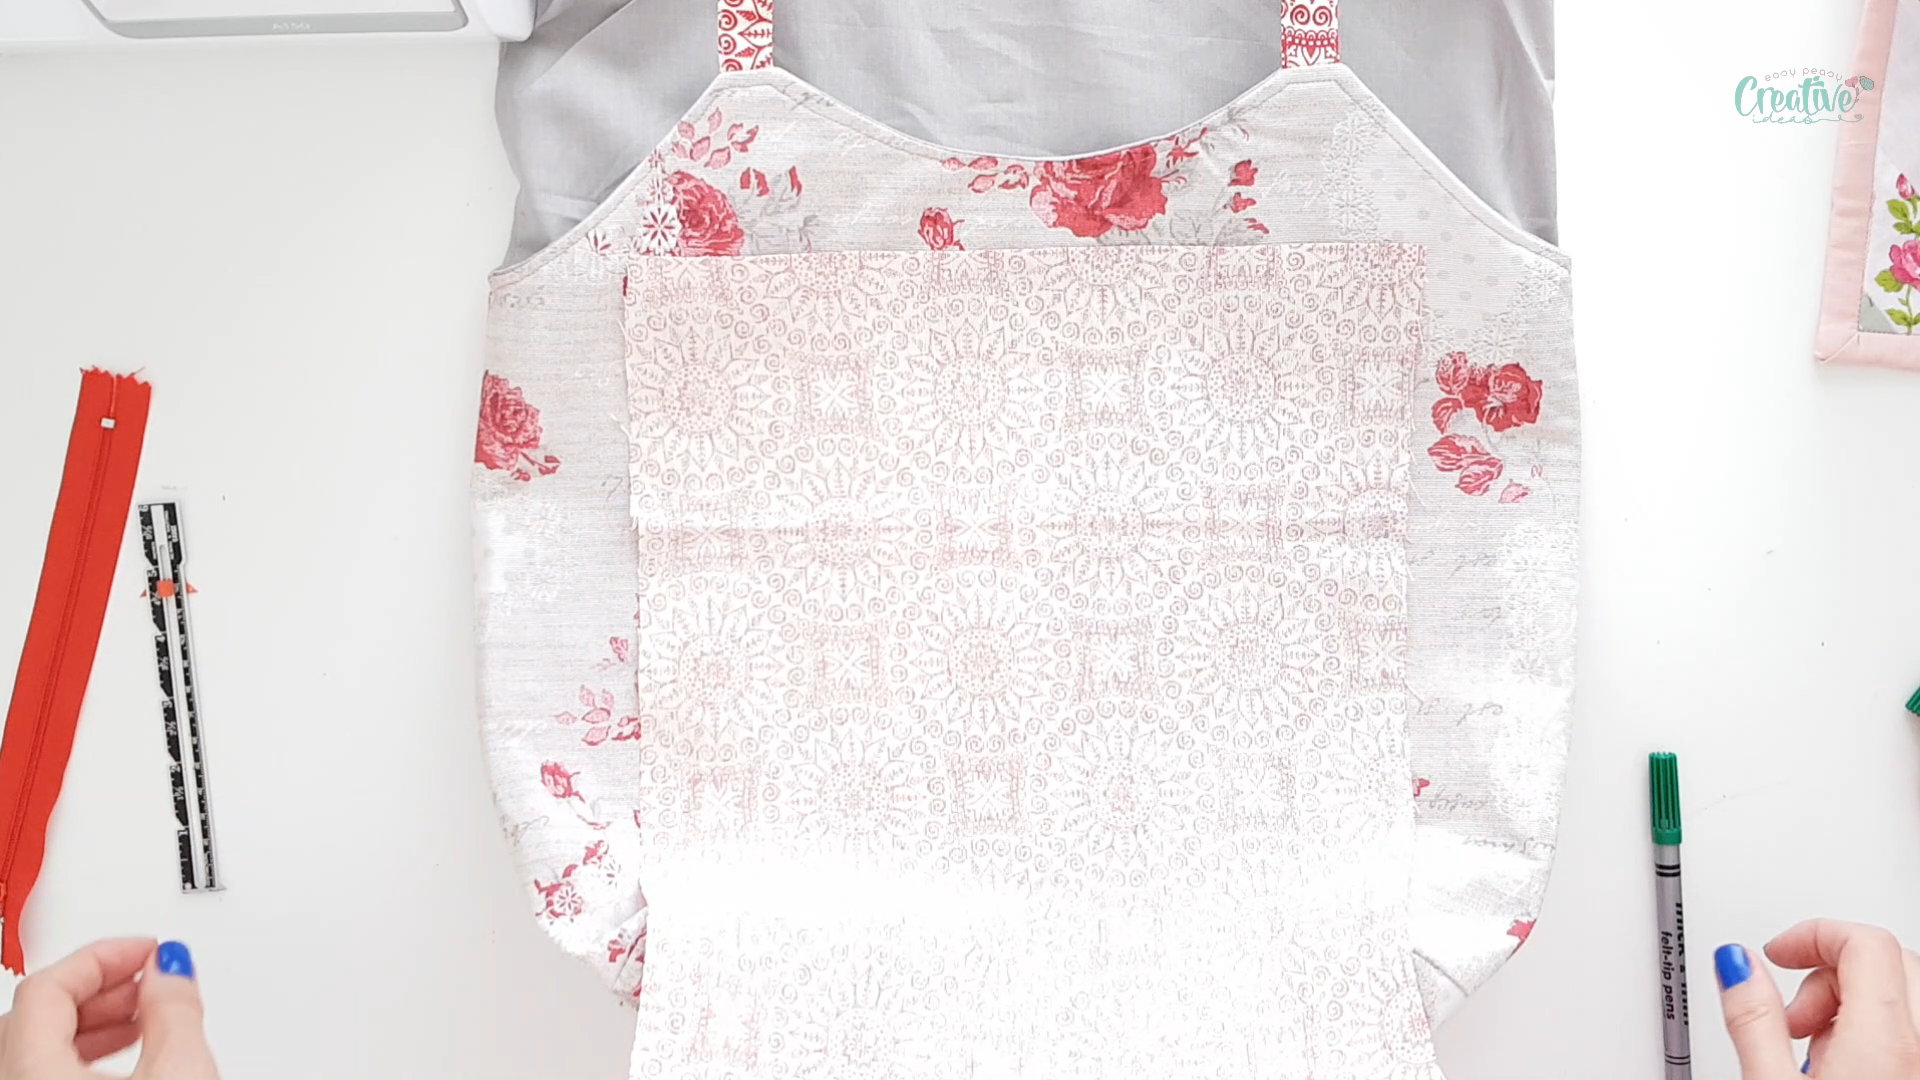
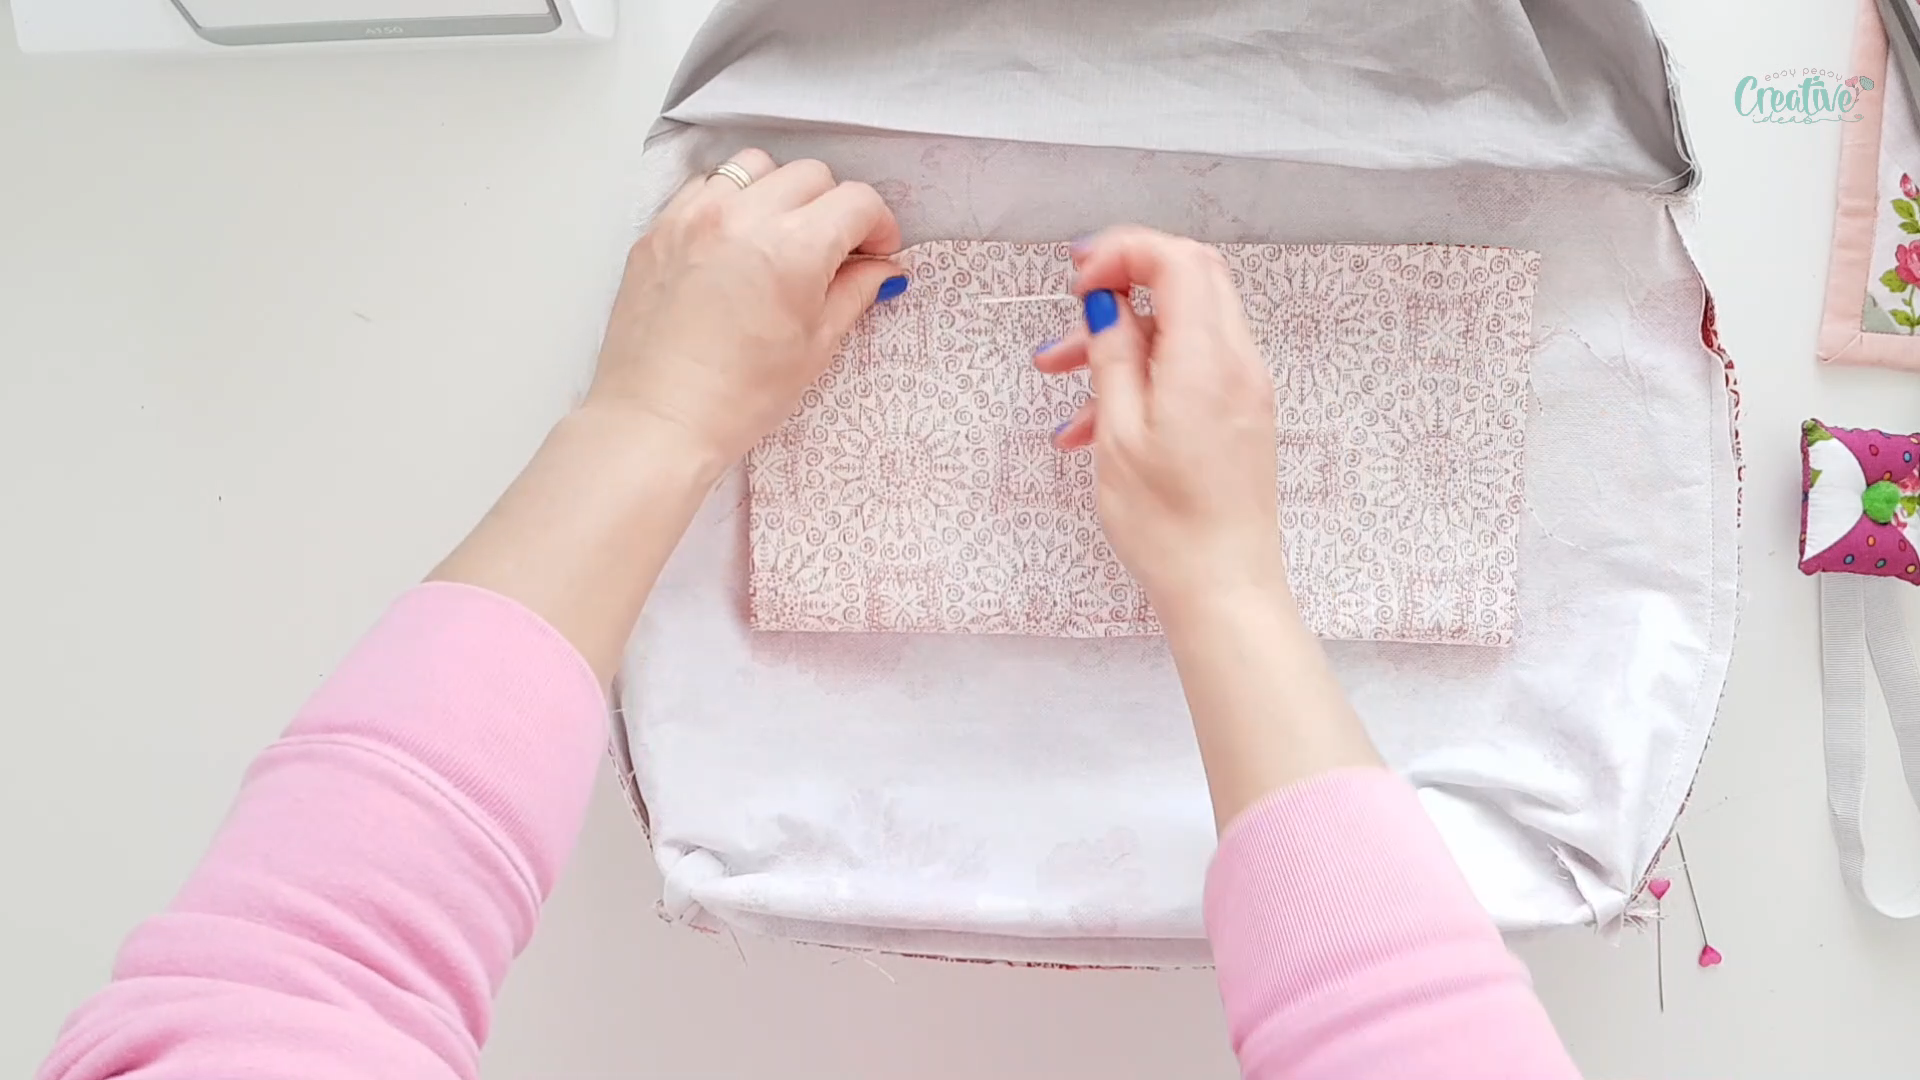
3. Place the pocket fabric on the bag, right sides facing together. Center the pocket fabric and pin the pocket to the bag.
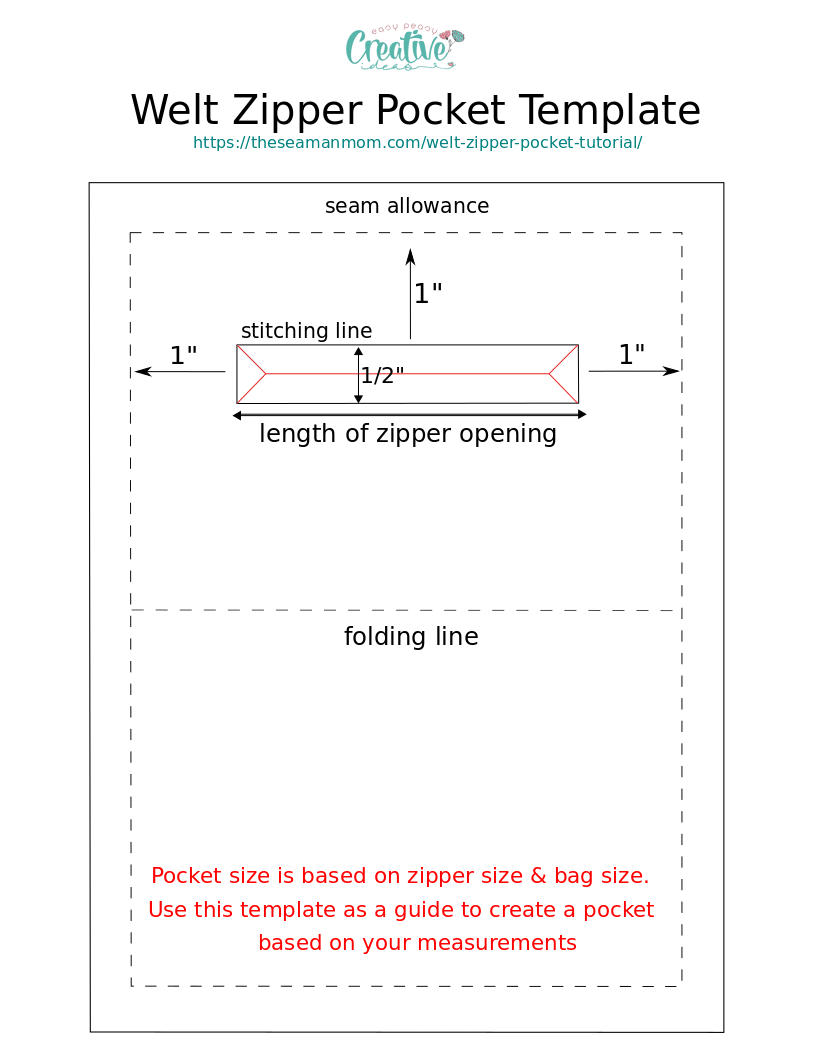
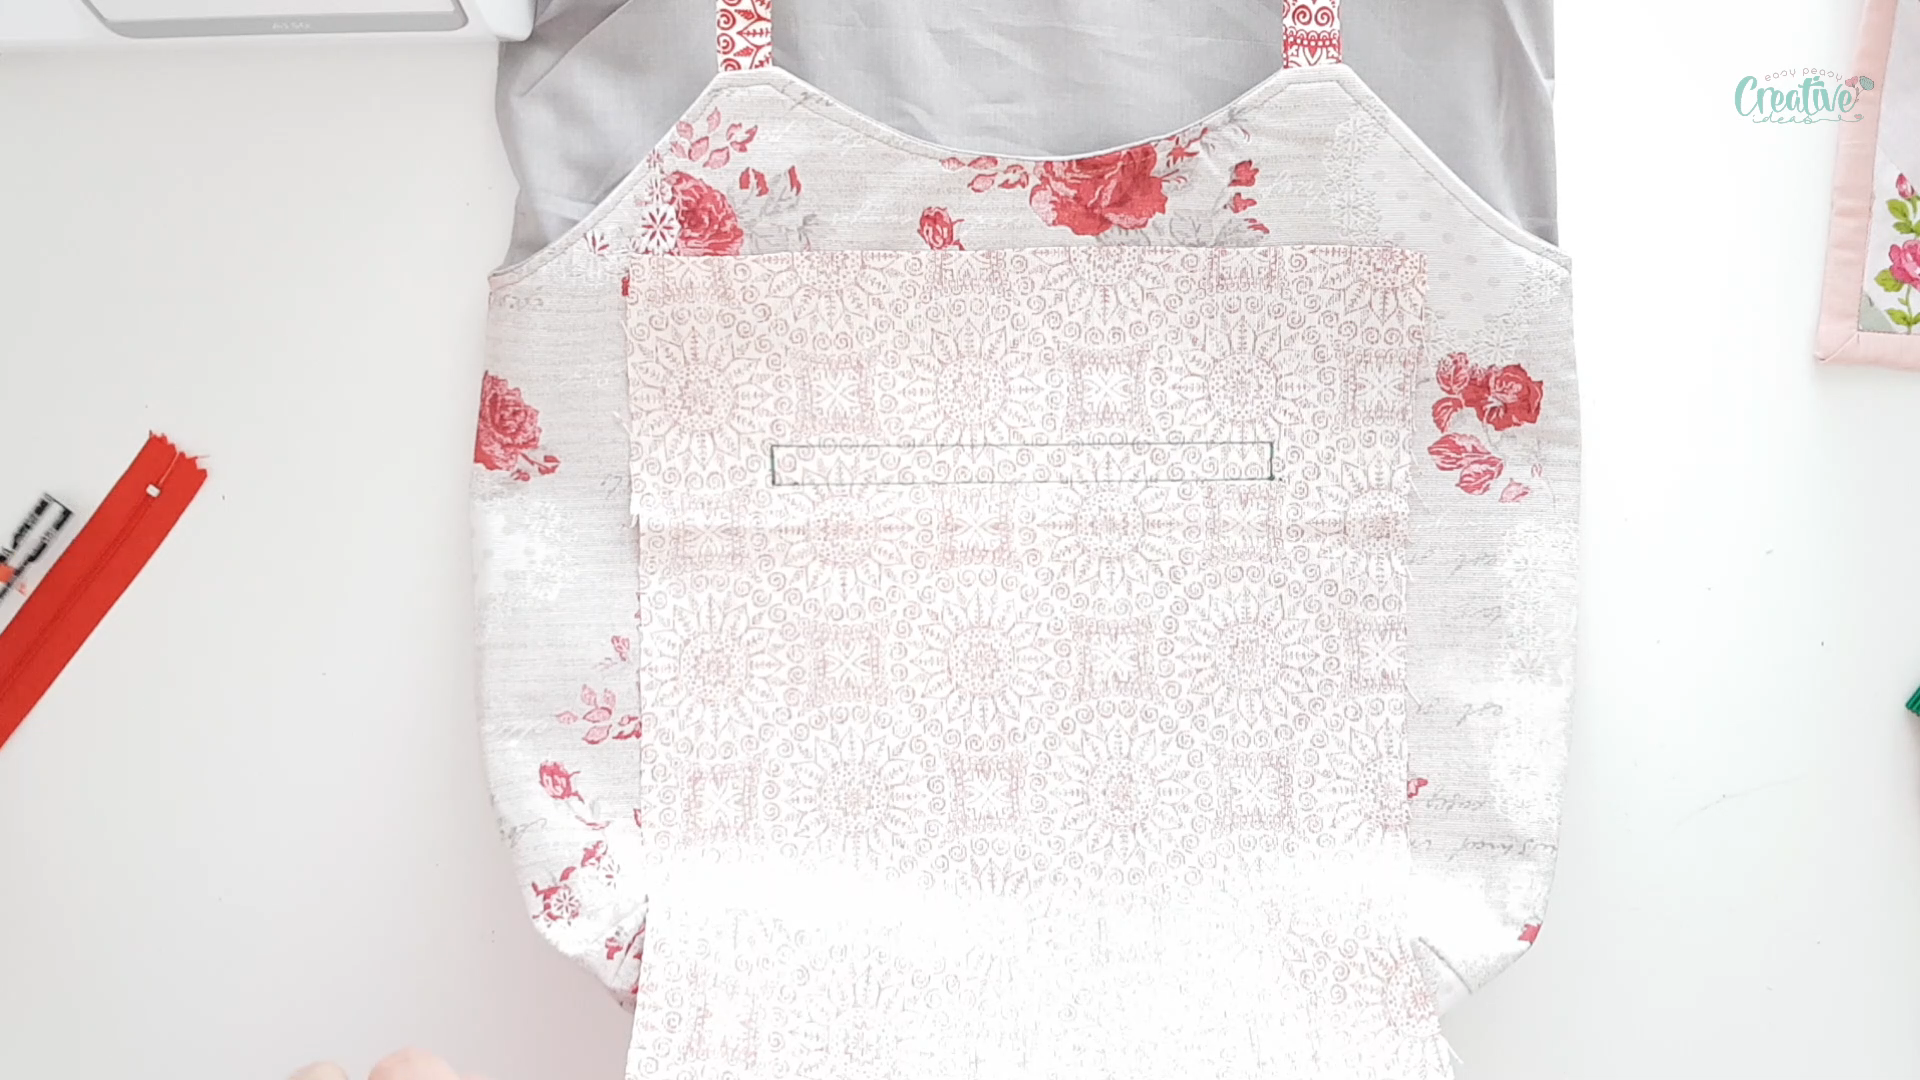
4. Draw an outline for the welt area. At the top of the pocket fabric, on the wrong side, draw a horizontal line 1” below the top edge. Draw another line 1/2” below it. Connect the two lines with vertical lines on the sides, 1” from each edge of the fabric. Here’s a template to help you get a better idea on how the pocket and rectangle should look like. You ca get the template for the pattern piece from here. Please bare in mind the size of the pocket and the rectangle depend on the size of your zipper and these measurements are made to help you understand the steps that go into constructing a welt zipper pocket.
Sew the welt area
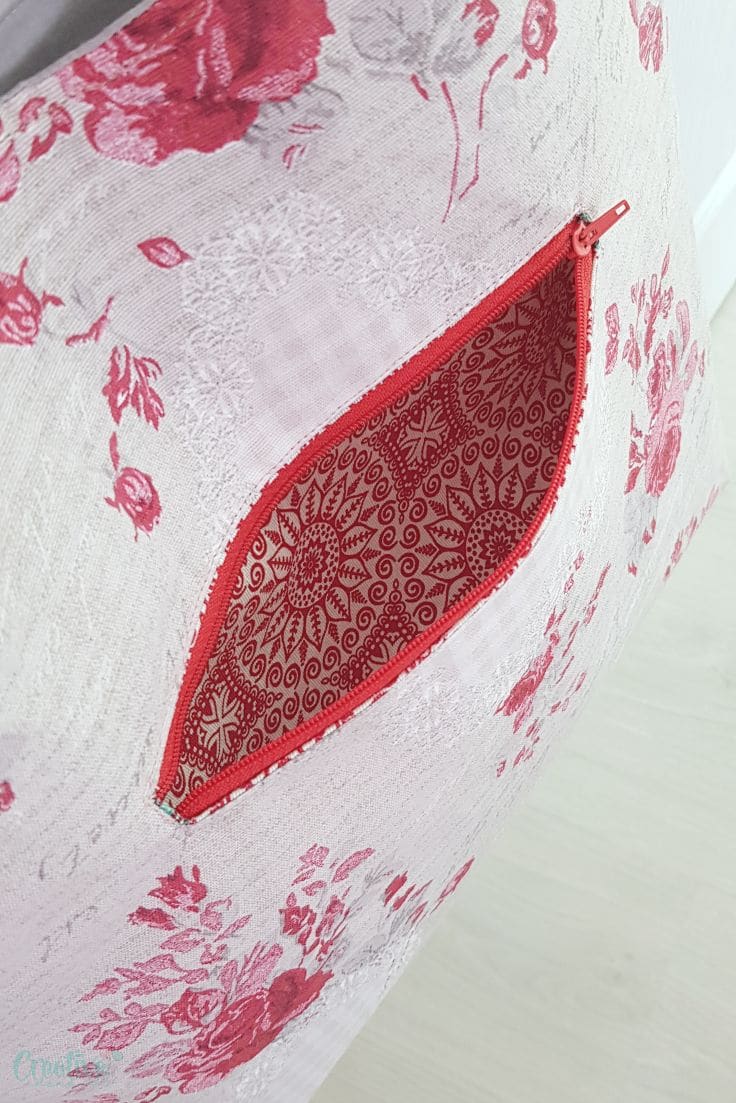
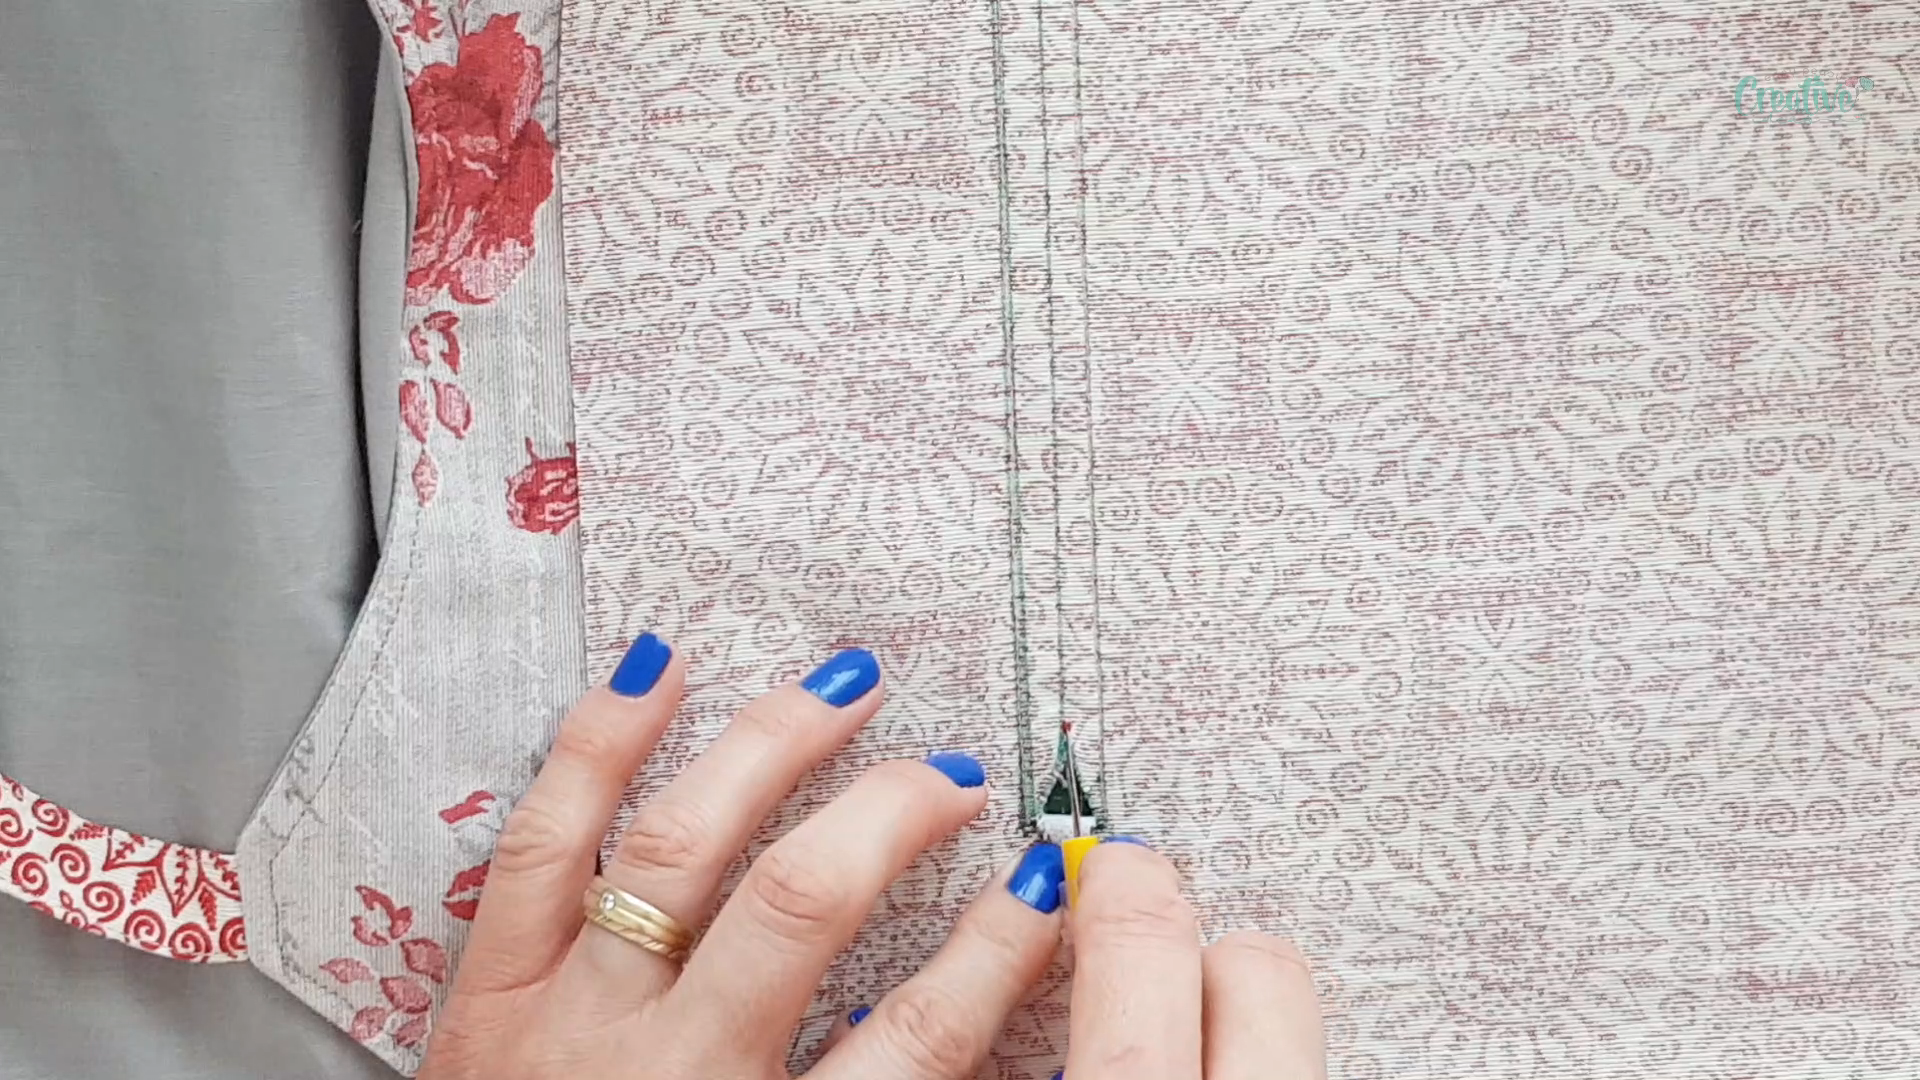
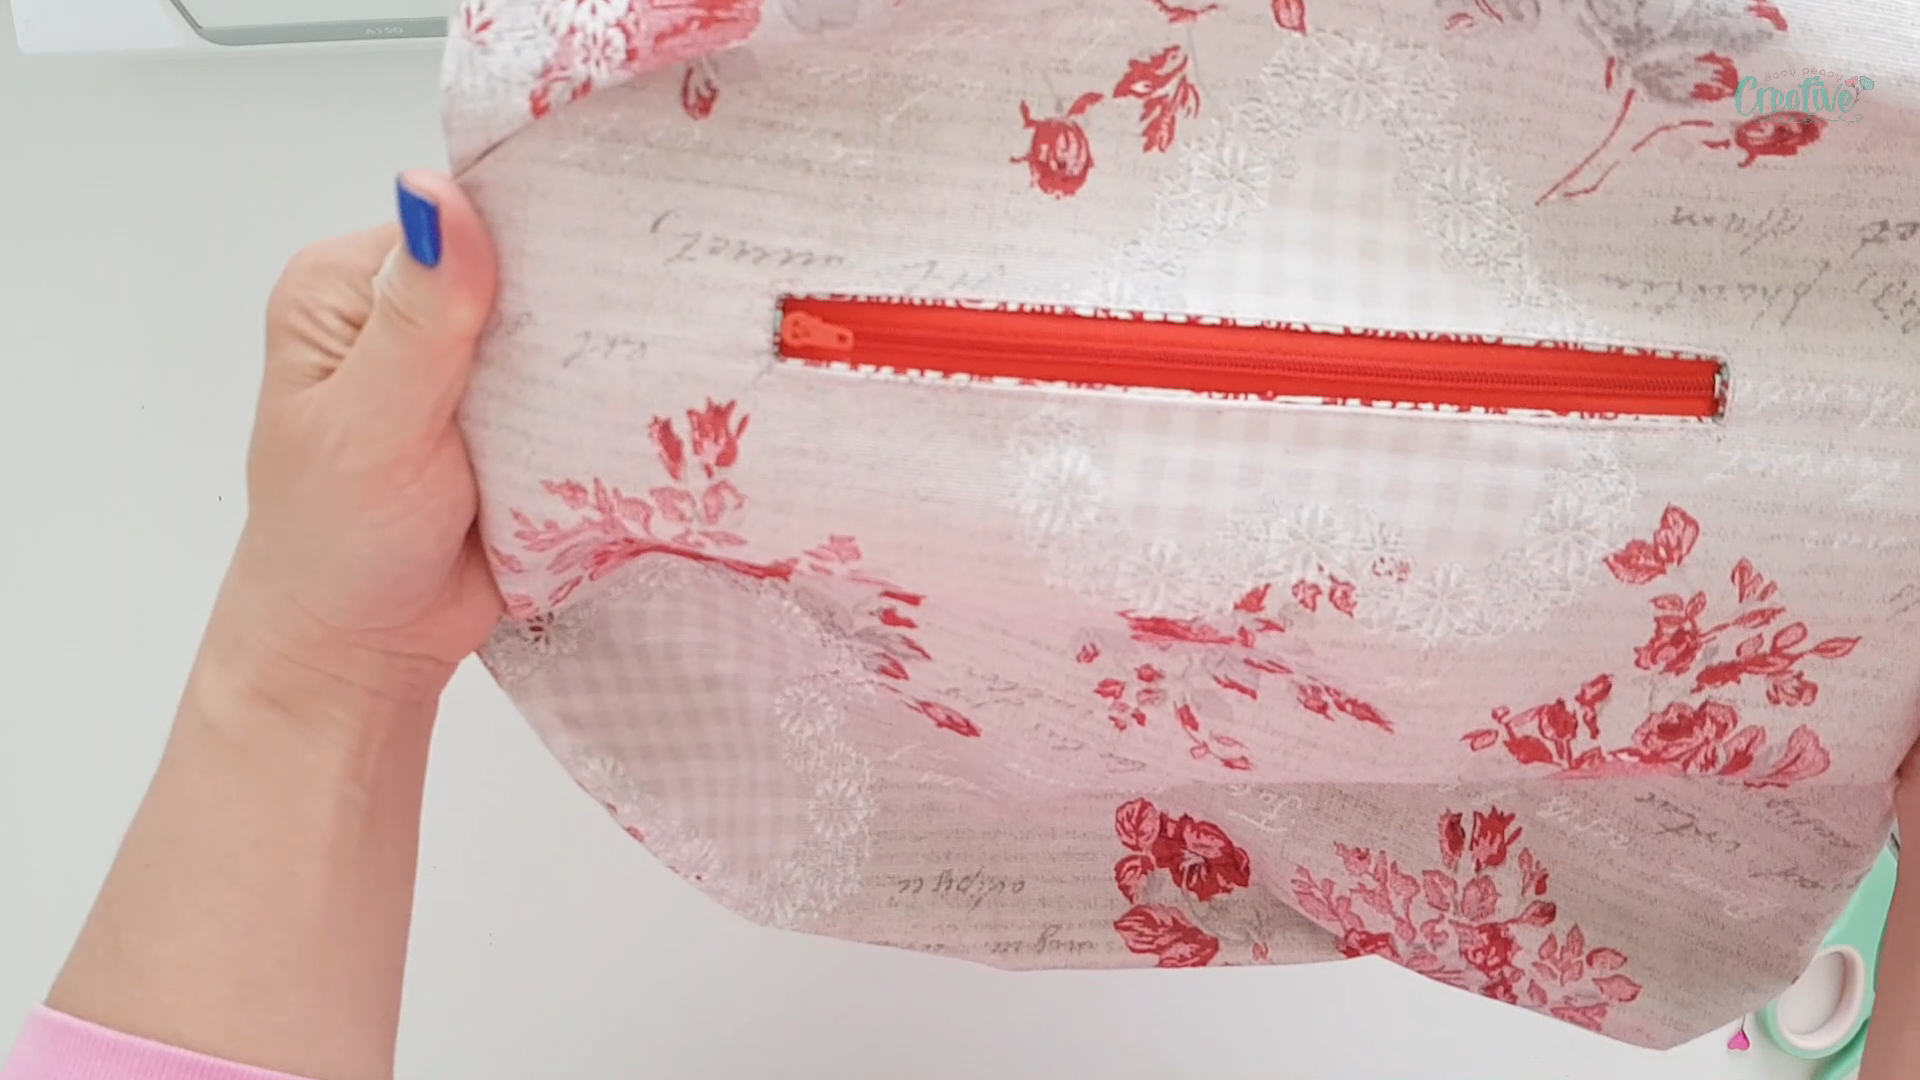
5. Sew all the way around the drawn rectangle, backstitching at the starting point and pivoting at corners.
6. Using small sharp scissors, cut a line down the middle of the rectangle, ending about 1/4” from either edge. Clip to the corners into a Y without cutting through the stitches.
7. Push the pocket piece inside the bag.
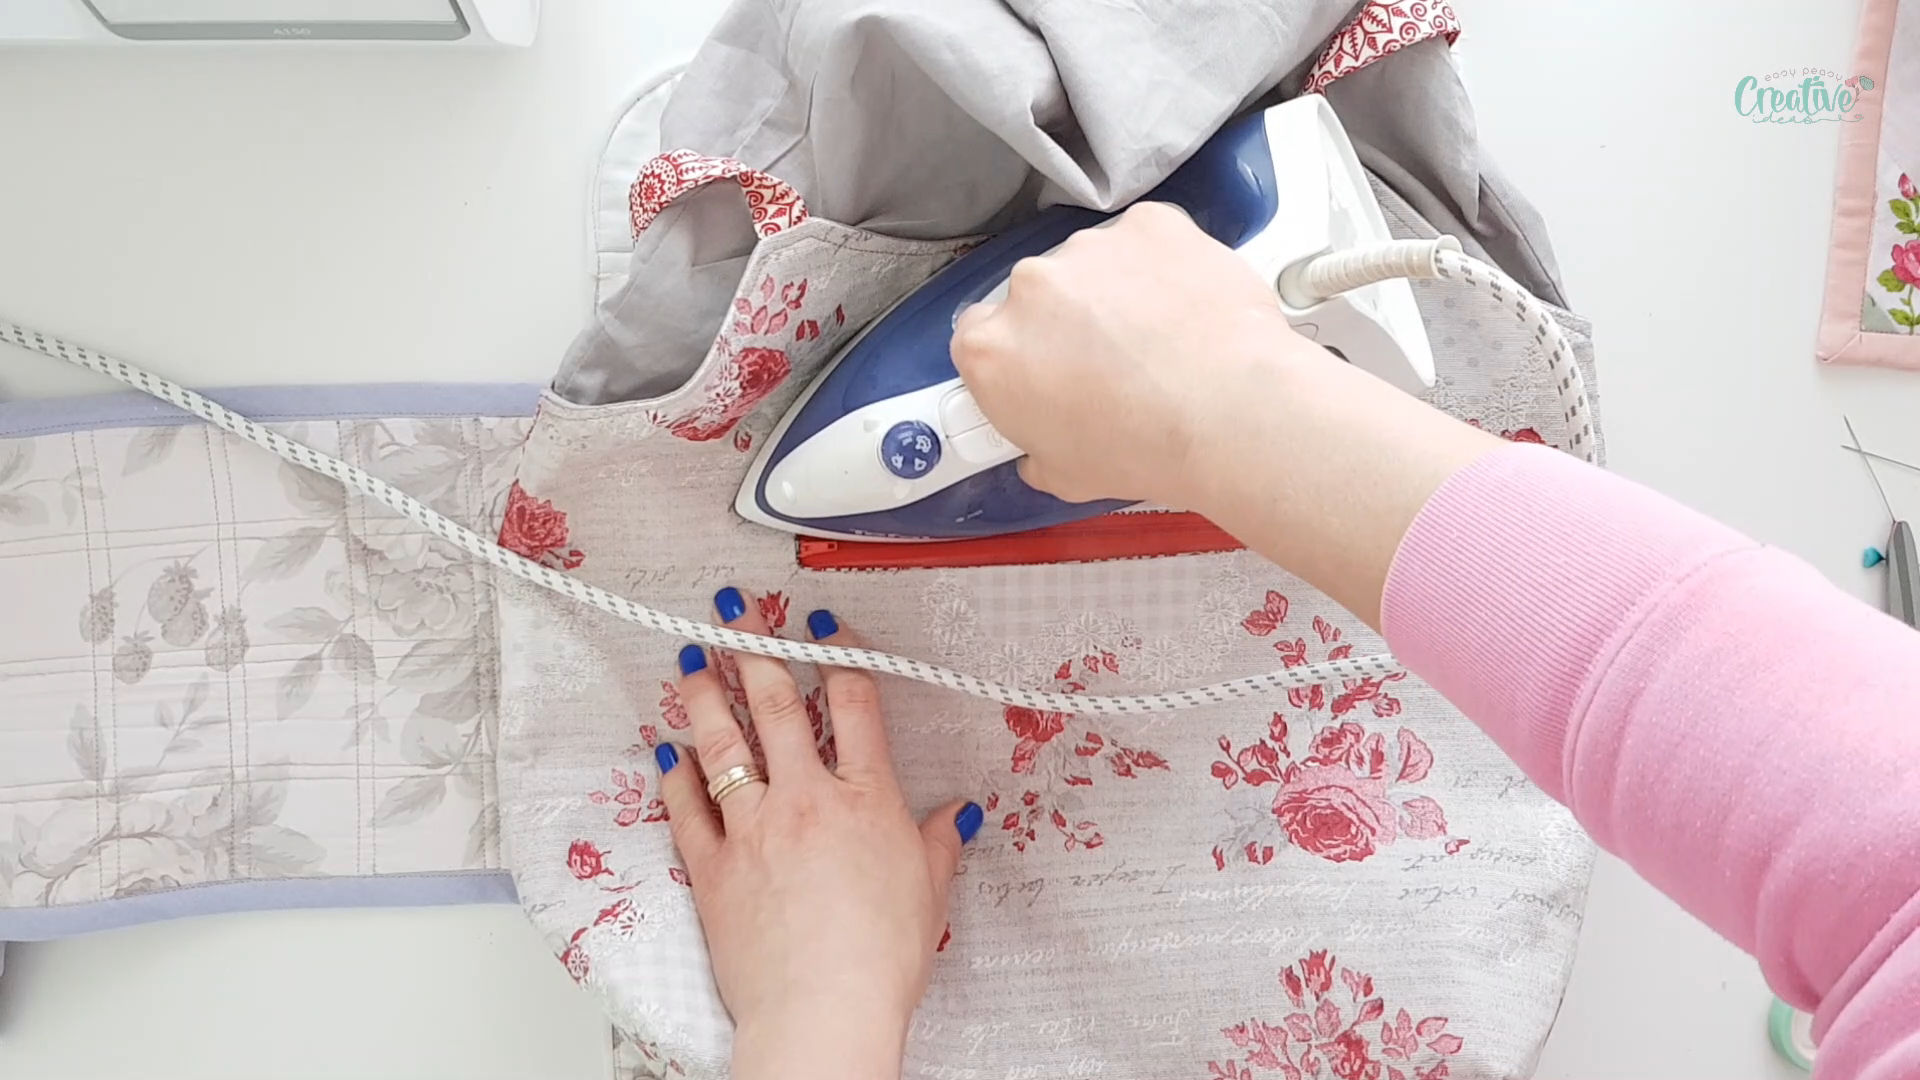
8. Press the opening with the iron on steam.
Add the zipper
9. Apply double side tape, washable glue for fabric or wonder tape if you have any available, to both zipper tapes, on the right side of the zipper.
10. Center the zipper under the opening and press with your fingers to stick the tape to the fabric. Make sure the slider is visible in the opening.
11. Top stitch around the zipper, about 1/8″, using a zipper foot.
Finishing touches
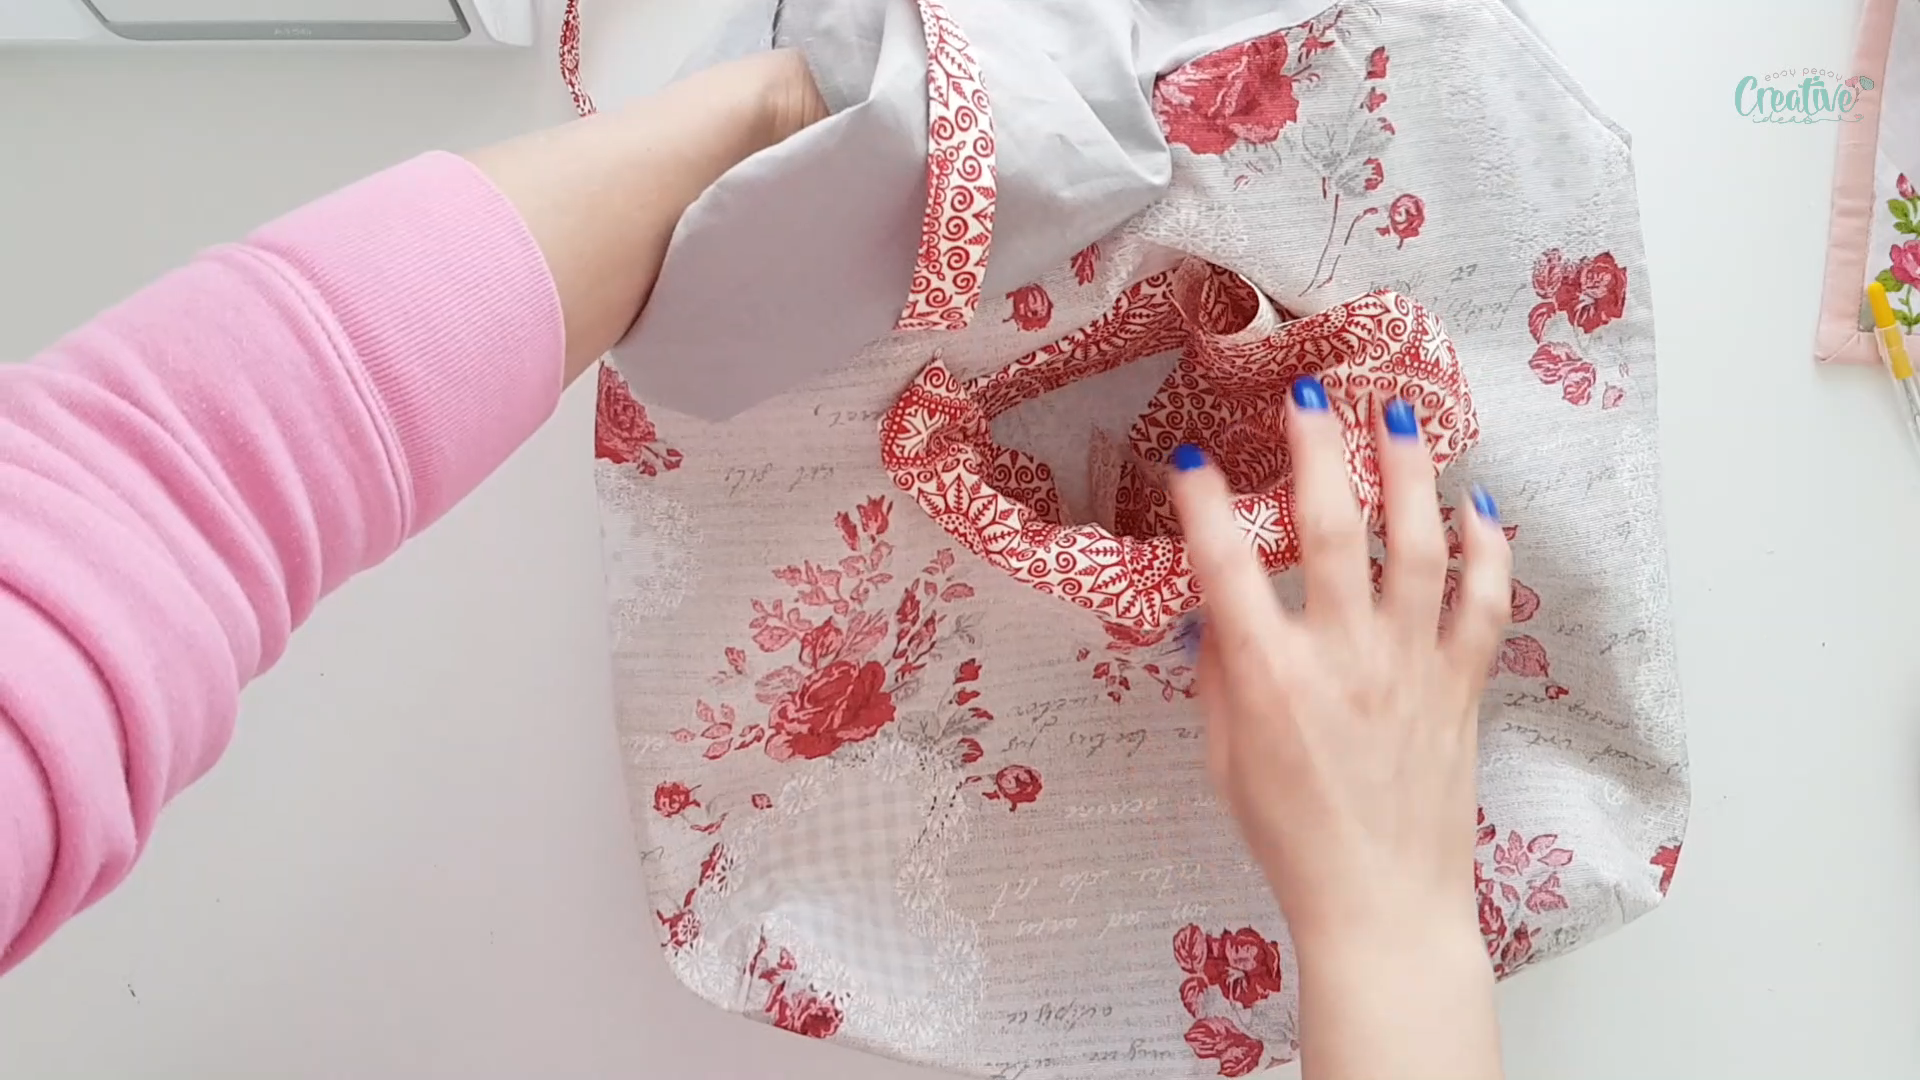
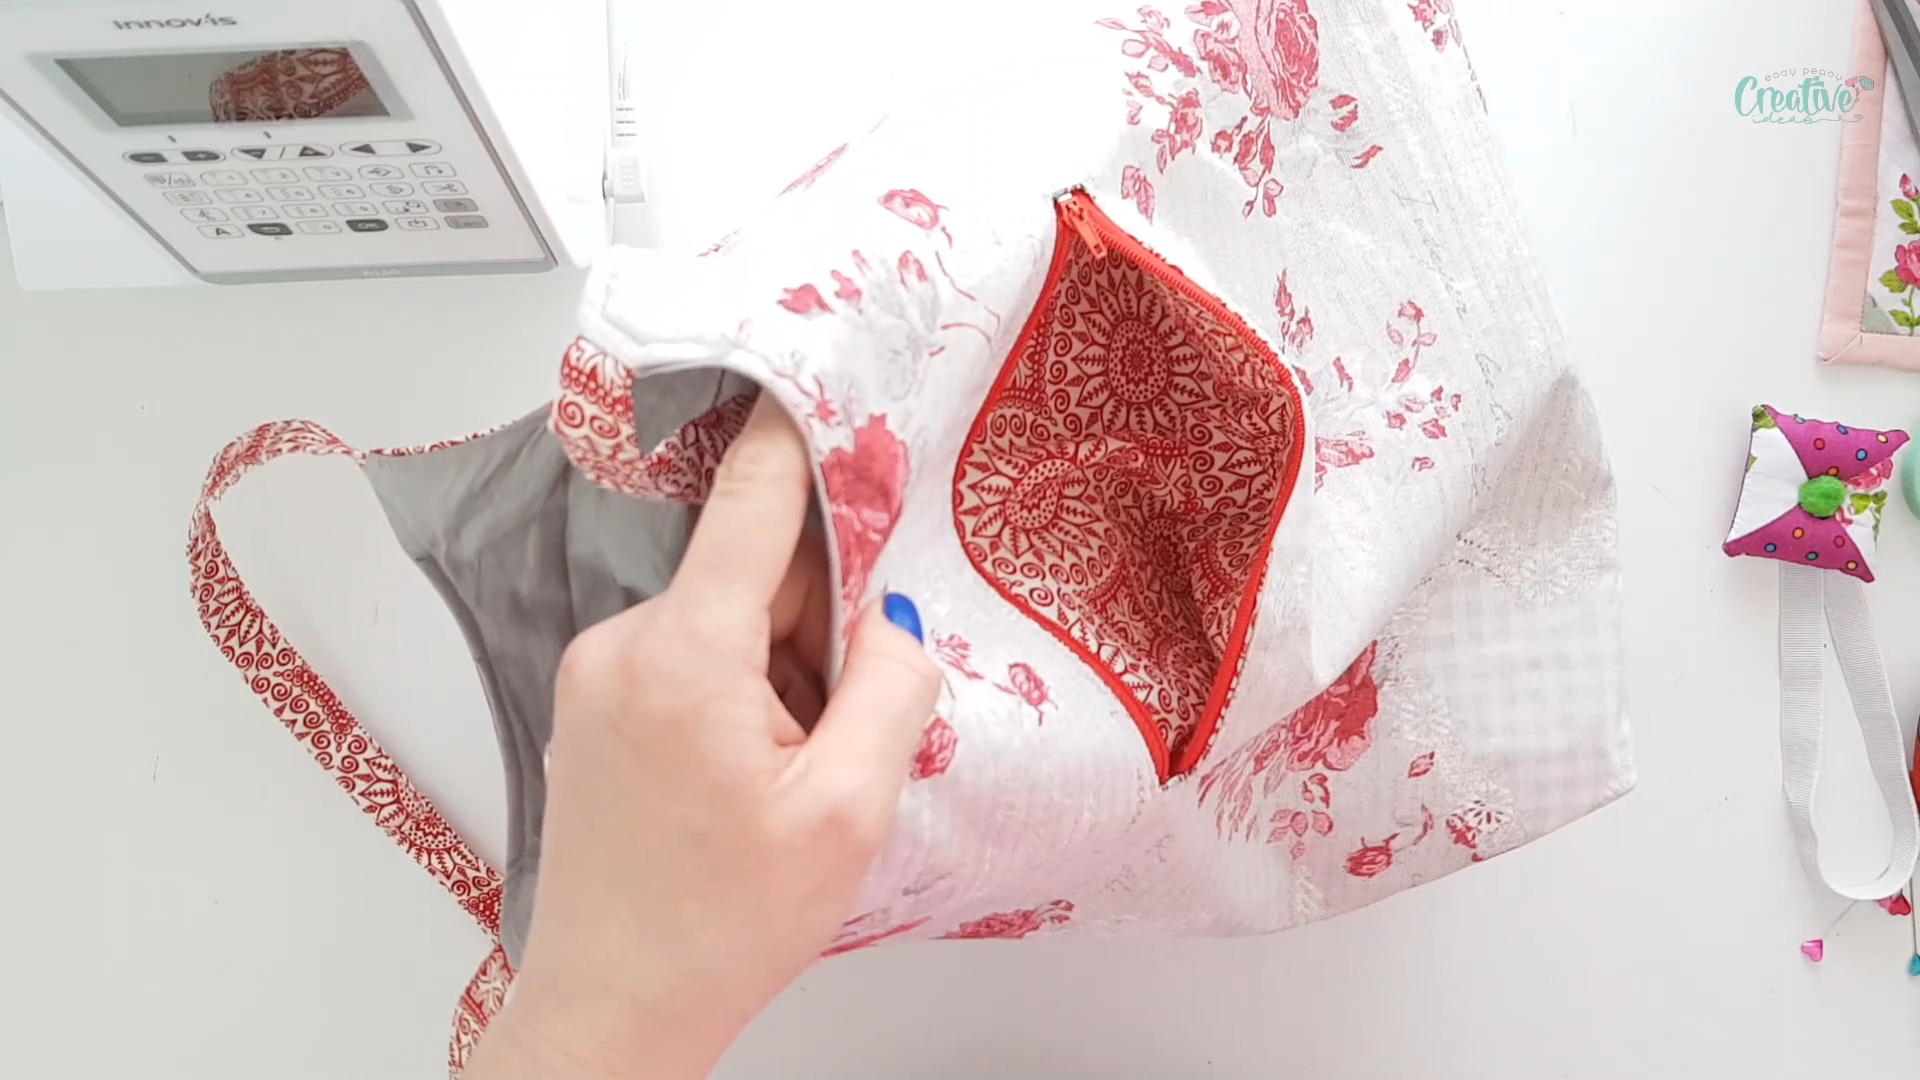
12. Turn the bag wrong side out through the lining opening and fold up the pocket piece.
13. Pin around the top and sides and sew with 1/2″ allowance all around the pocket.
14. Turn the bag right side out, press and stitch the lining closed with a tops stitch or a ladder stitch.
And that’s it! Your pretty welt zipper pocket is done!
Tips to keep in mind when sewing a welt zipper pocket:
- Center the welt pocket so that there’s enough space left on all four sides of your pocket, at least 1”. For example, if your bag is 15″ wide and 17″ tall, your welt zipper should be no more than 14” wide and 16″ long.
- Before drawing the hole on your pocket, measure the zipper and draw the rectangle for the hole according to these measurements, leaving some room for allowance. For example, if your zipper is 10″ long and 2″ wide, your pocket hole should be no larger than 9″ by 1″.
- The fabric used for the pocket will have to be double the finished size, plus 2″ allowance for height and 1″ allowance for width. For example if you plan on adding a pocket of 6″ width x 6 height” then the fabric for the pocket will be 7″ in width x 14″ height.
- The fabric for the pocket has to be at least 2″ wider than the zipper. For example if you’re using a 9″ long zipper, the pocket fabric will have to be at least 11″ wide.
- The zipper will be centered on the pocket fabric at least 1″ away from the top edge of the pocket fabric (and 1″ away from both sides as mentioned above).
Frequently asked questions
What’s a welt in sewing?
A welt is a double strip (flap) which is sewn around the edge, insert or seam of a garment for ornament. It is also known as a reinforced border along the edge of a piece of fabric.
What is a welt pocket?
Welt pocket is a bound, flat, hidden pocket that is finished with a welt. It is most commonly used in garment pieces like vests, jackets, pants, coats but is also used in adding elegant details to bags like welt zipper pockets. A welt zipper pocket in bags can still feature the ornamental flap but most often it doesn’t.
Where can you add a welt zipper pocket?
A beautiful zipper pocket like this can be added to any bag you make! Adding a welt pocket to a bag is a great way to expand the capacity of the bag and add stability and extra style to any bag. This sewing tutorial is so easy even beginners can do it. I even made a video to complement the written tutorial in case you are a more visual person and learn easier from videos.
Welt zippers pockets can be sewn on the inside or outside of a tote bag, or wherever you want (like on a jacket or a pair of trousers) but this welt pocket tutorial focuses on adding a welt pocket to an already sewn pocket bag.
I decided to add a little more to the stunning design of this bag with an outside welt zipper pocket and I’ve chosen a zipper in a contrast color. Also I didn’t want anything overwhelming, I simply needed a small pocket for my keys and wallet. I could’ve added the welt zipper pocket to the lining of the bag but I thought it would be a shame to hide such a pretty detail so I added it to the back of the bag.
More sewing tips you will love:
- How to adjust the presser foot pressure
- DIY seam guide quick sewing tip
- Easiest way for removing serger stitches
- Genius bobbin storage ideas
- Tips for clipping and notching seam allowances
- How to make rolled bag handles
Adding a welt zipper pocket to your handbags and accessories is both stylish and functional. It not only adds a personalized touch to your handmade items, but also provides a secure place for important belongings. So give it a try and let me know how your pocket turns out! Happy sewing!

Welt zipper pocket sewing tutorial
Materials
- template optional
- the piece of the bag fabric where you want your pocket to be placed. That could be the outside of your bag on the main fabric, typically the back or the lining, front or back piece of the lining, either one works.
- piece of fabric for the pocket.
- matching thread
Tools
- zipper
- measuring tape
- scissors
- pressing iron
- double sided tape
- zipper foot
- Seam Ripper
Instructions
- Cut a rectangle of fabric for the pocket, that is 2'' wider than your planned pocket and twice as tall as your pocket depth, plus 2''.
- If you're adding the pocket to an already sewn bag, pull the lining fabric out and using the seam ripper, unpick the bottom of the lining.
- Place the pocket fabric on the bag, right sides facing together. Center the pocket fabric and pin the pocket to the bag.

- Draw an outline for the welt area. At the top of the pocket fabric, on the wrong side, draw a horizontal line 1'' below the top edge. Draw another line 1/2'' below it. Connect the two lines with vertical lines on the sides, 1'' from each edge of the fabric.
- Sew all the way around the drawn rectangle, backstitching at the starting point and pivoting at corners.
- Using small sharp scissors, cut a line down the middle of the rectangle, ending about 1/4'' from either edge. Clip to the corners into a Y without cutting through the stitches.
- Push the pocket piece inside the bag.
- Press the opening with the iron on steam.
- Apply double side tape, washable glue for fabric or wonder tape if you have any available, to both zipper tapes, on the right side of the zipper.
- Center the zipper under the opening and press with your fingers to stick the tape to the fabric. Make sure the slider is visible in the opening.
- Top stitch around the zipper, about 1/8", using a zipper foot.
- Turn the bag wrong side out through the lining opening and fold up the pocket piece.
- Pin around the top and sides and sew with 1/2" allowance all around the pocket.
- Turn the bag right side out, press and stitch the lining closed with a tops stitch or a ladder stitch.


Video
Most popular sewing projects:


Article may contain Amazon & affiliate links. As an Amazon Associate I earn from qualifying purchases at no additional cost to you.

Love your creativity with all the items you sew. I really enjoy your website for sewing.
Thank you for sharing your knowledge! You are amazing.