

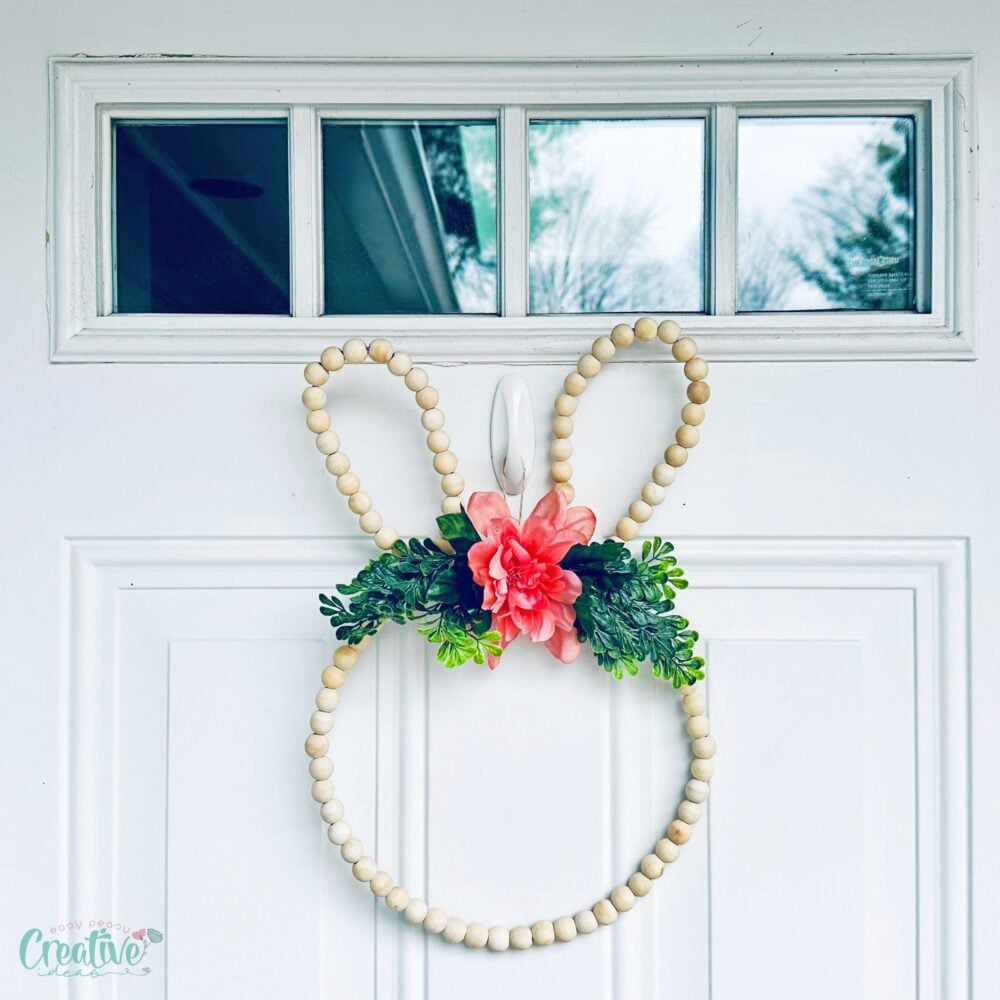
DIY beaded bunny wreath
Craft a charming beaded bunny wreath to celebrate Easter! Our easy step-by-step guide, complete with helpful tips and creative variations, will help you design the perfect Easter bunny wreath to brighten your home.
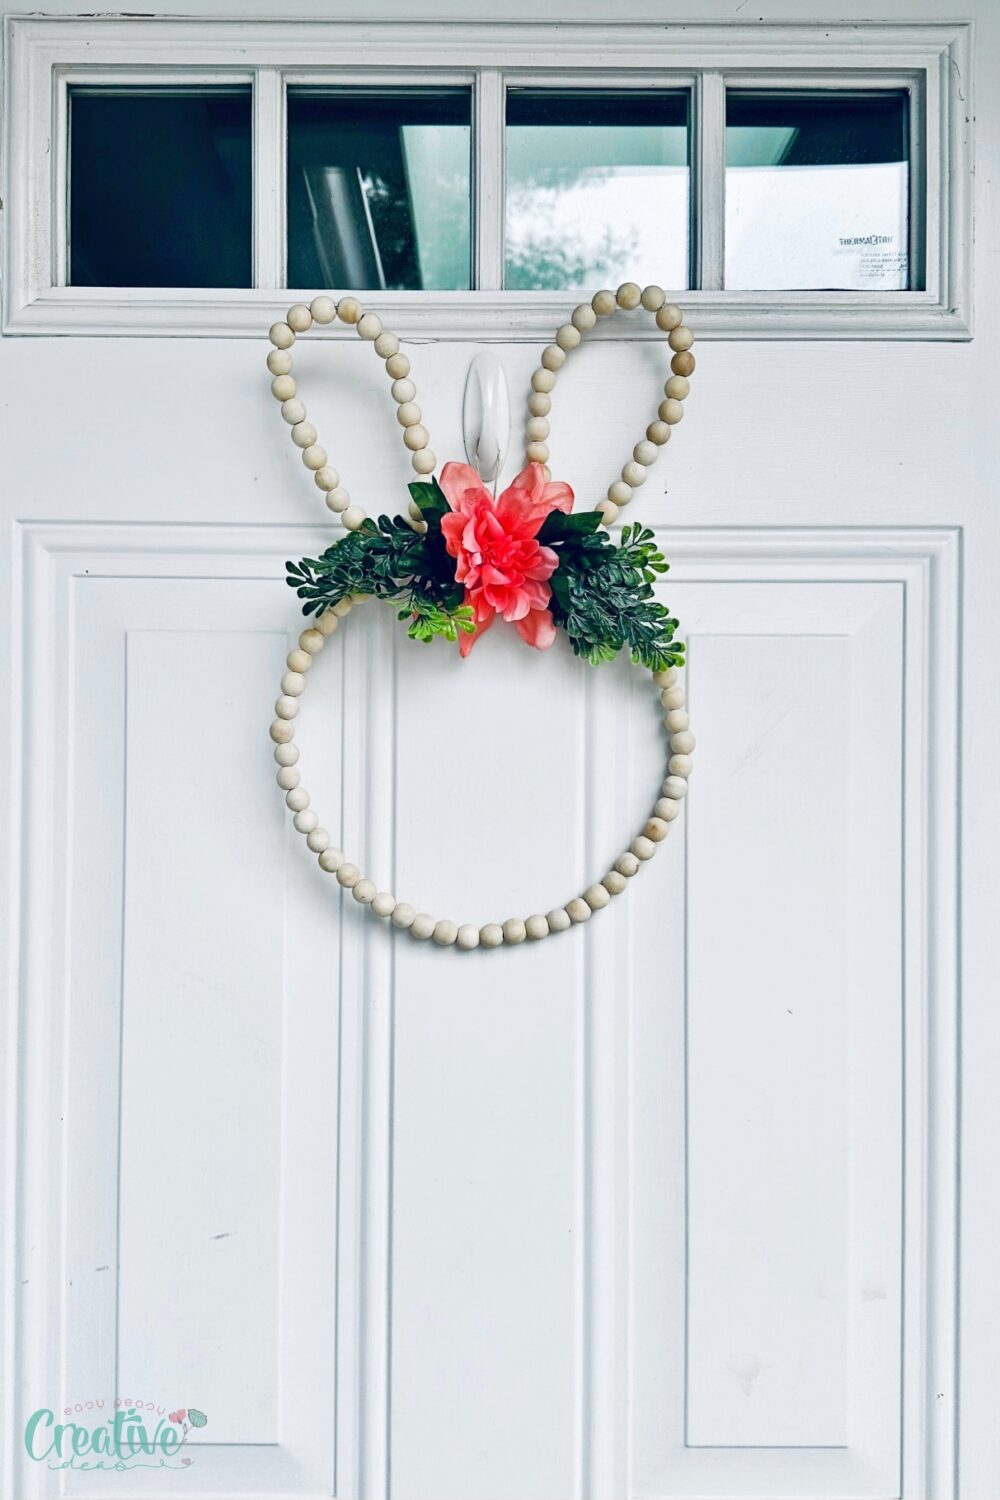
If you’re looking to add a unique and personal touch to your Easter décor, a beaded bunny wreath is just the thing! Combining creativity, charm, and simplicity, this adorable craft is perfect for welcoming the season of renewal.
This DIY bunny wreath is not just a craft, it’s a statement piece! Its minimalist yet striking design is perfect for Easter and spring. The best part? You can customize it to suit your taste and style. It’s lightweight, easy to hang, and adds a whimsical touch to any space.
How to make beaded bunny wreath
Materials and Tools You’ll Need:
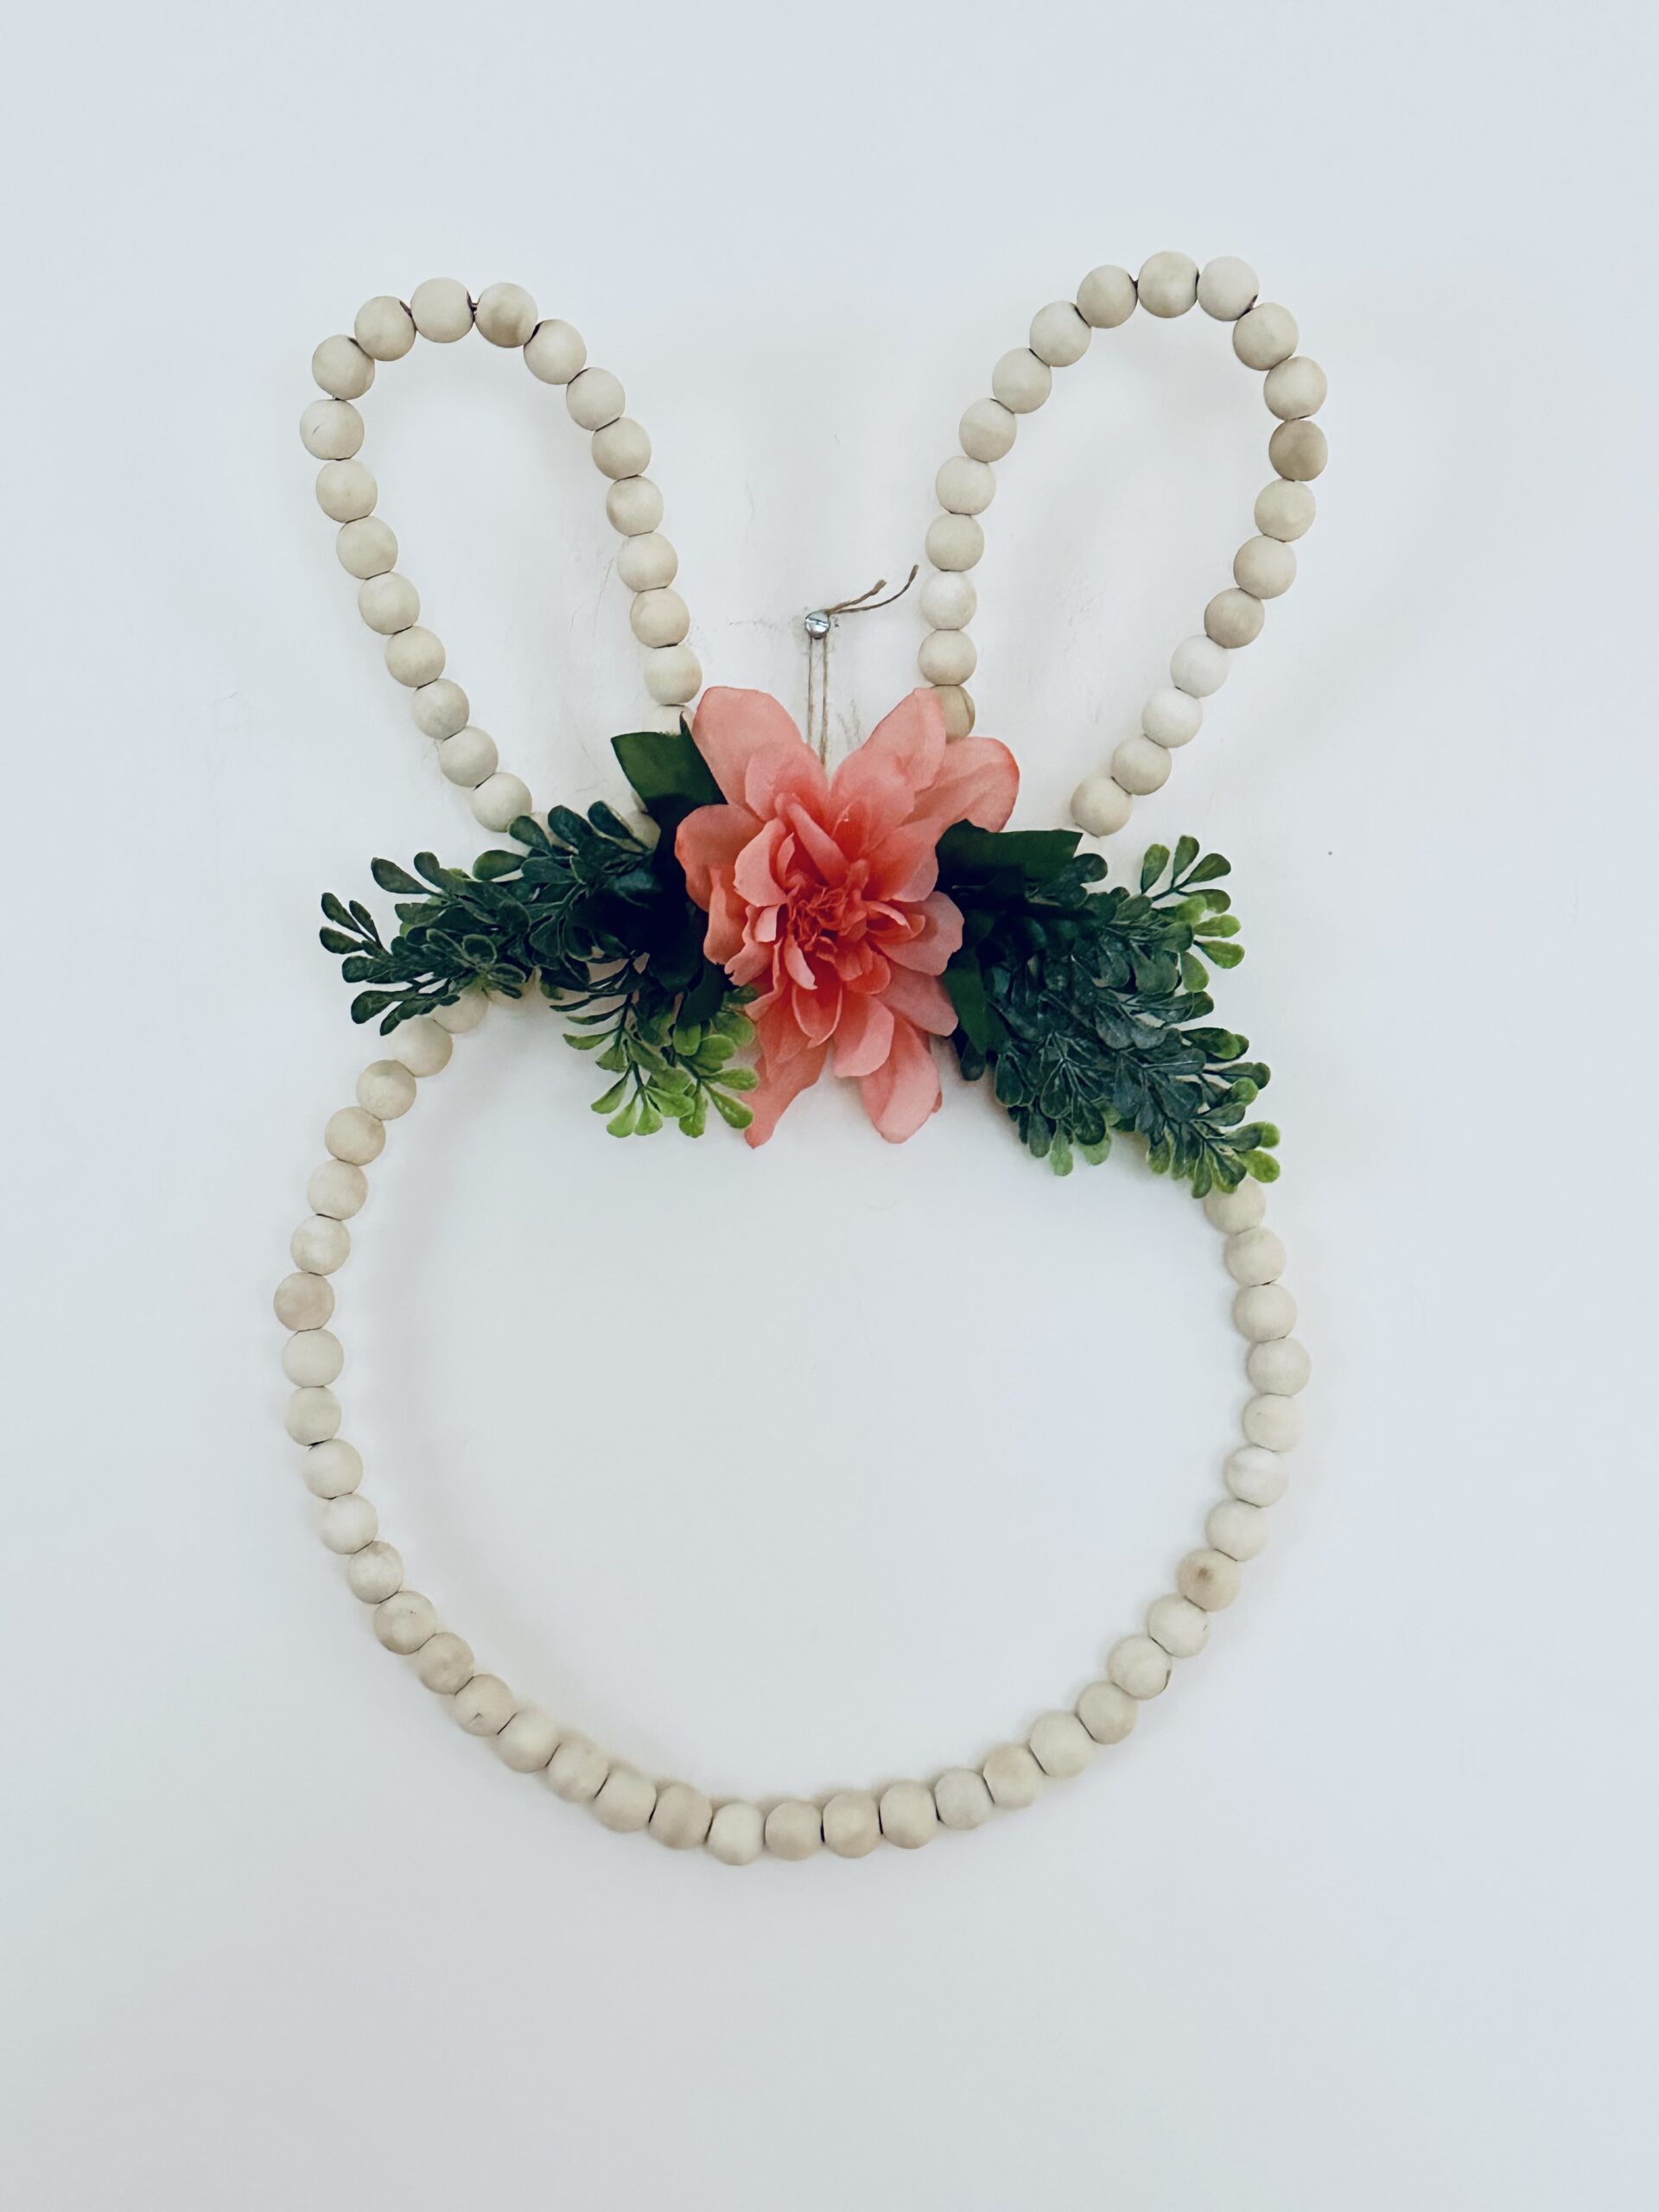
- 2 Beaded Wreaths: These form the base of your bunny wreath, one for the body and one for the head.
- Floral Wire: Flexible and sturdy, this will help shape the bunny’s ears.
- Coral Dahlia Flowers: A vibrant flower choice to add a pop of color.
- Eucalyptus or Boxwood Florals: These greens provide texture and a natural finish.
Equipment:
- Wire Cutters: Essential for shaping and trimming the floral wire.
- Hot Glue Gun: The magic tool that holds everything together securely.
Instructions:
Preparation:
- Clear a flat workspace and gather all your supplies.
- Plug in your hot glue gun and let it heat up while you prep the materials.
Crafting:
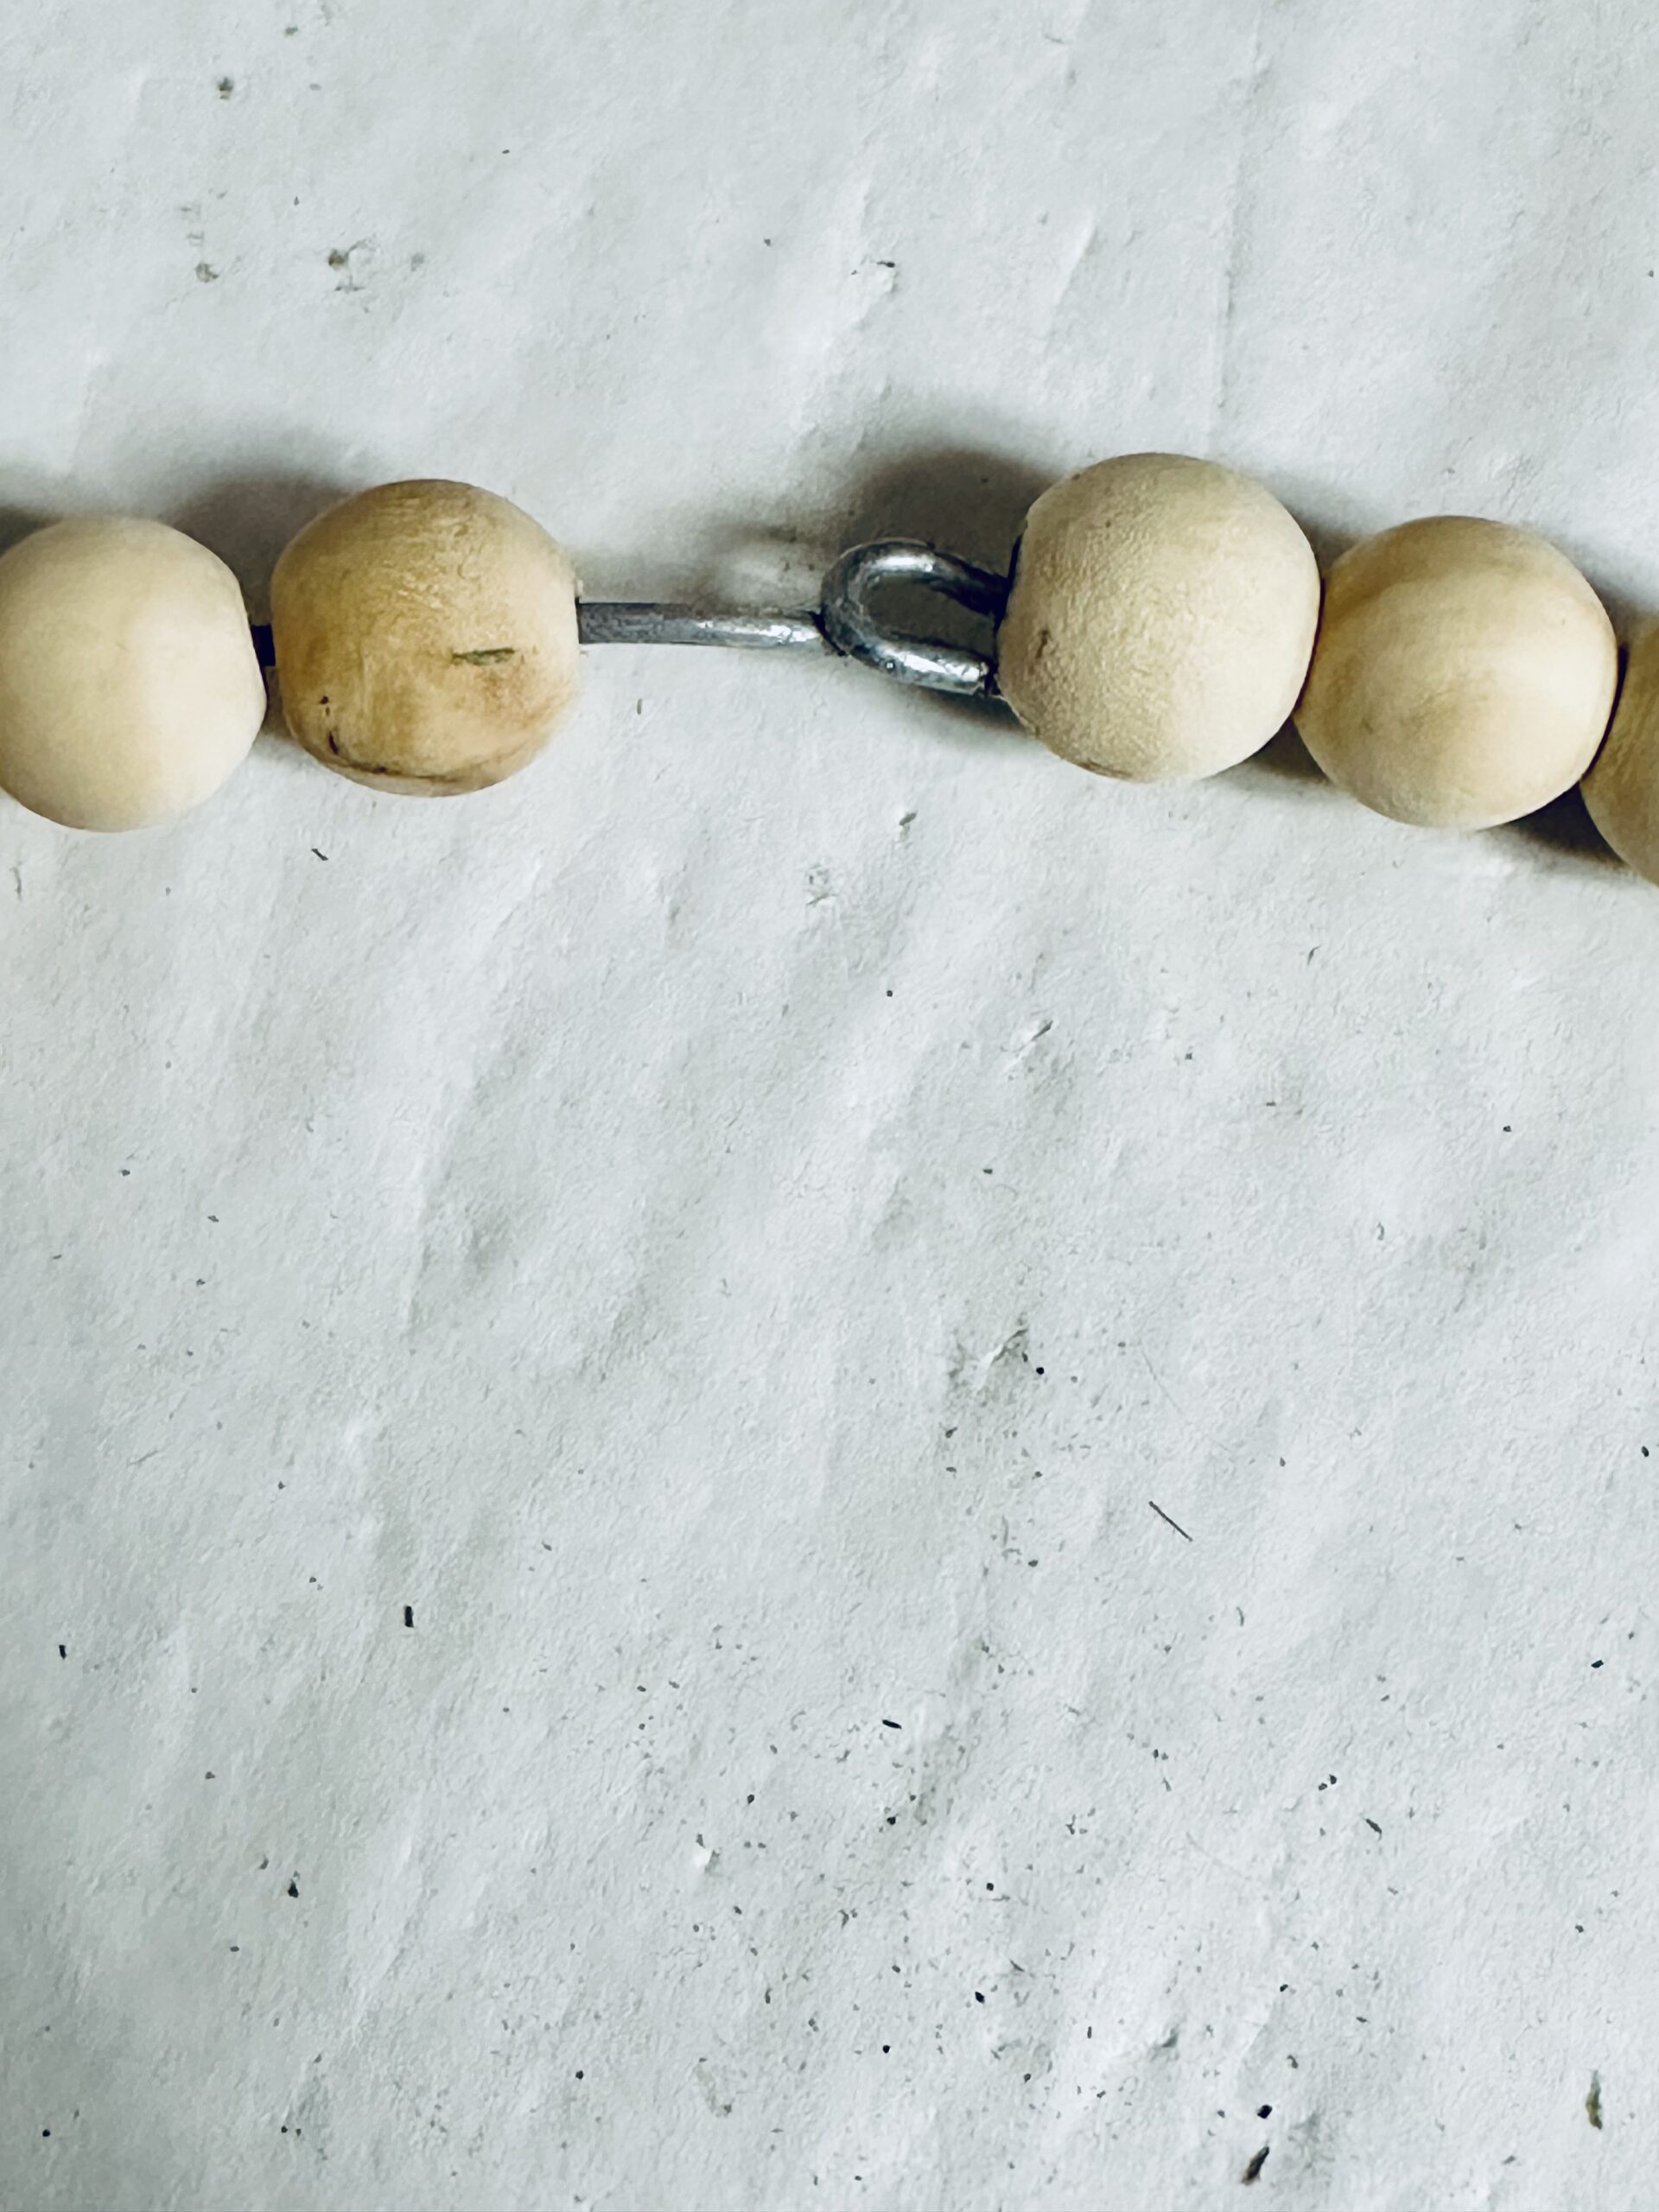
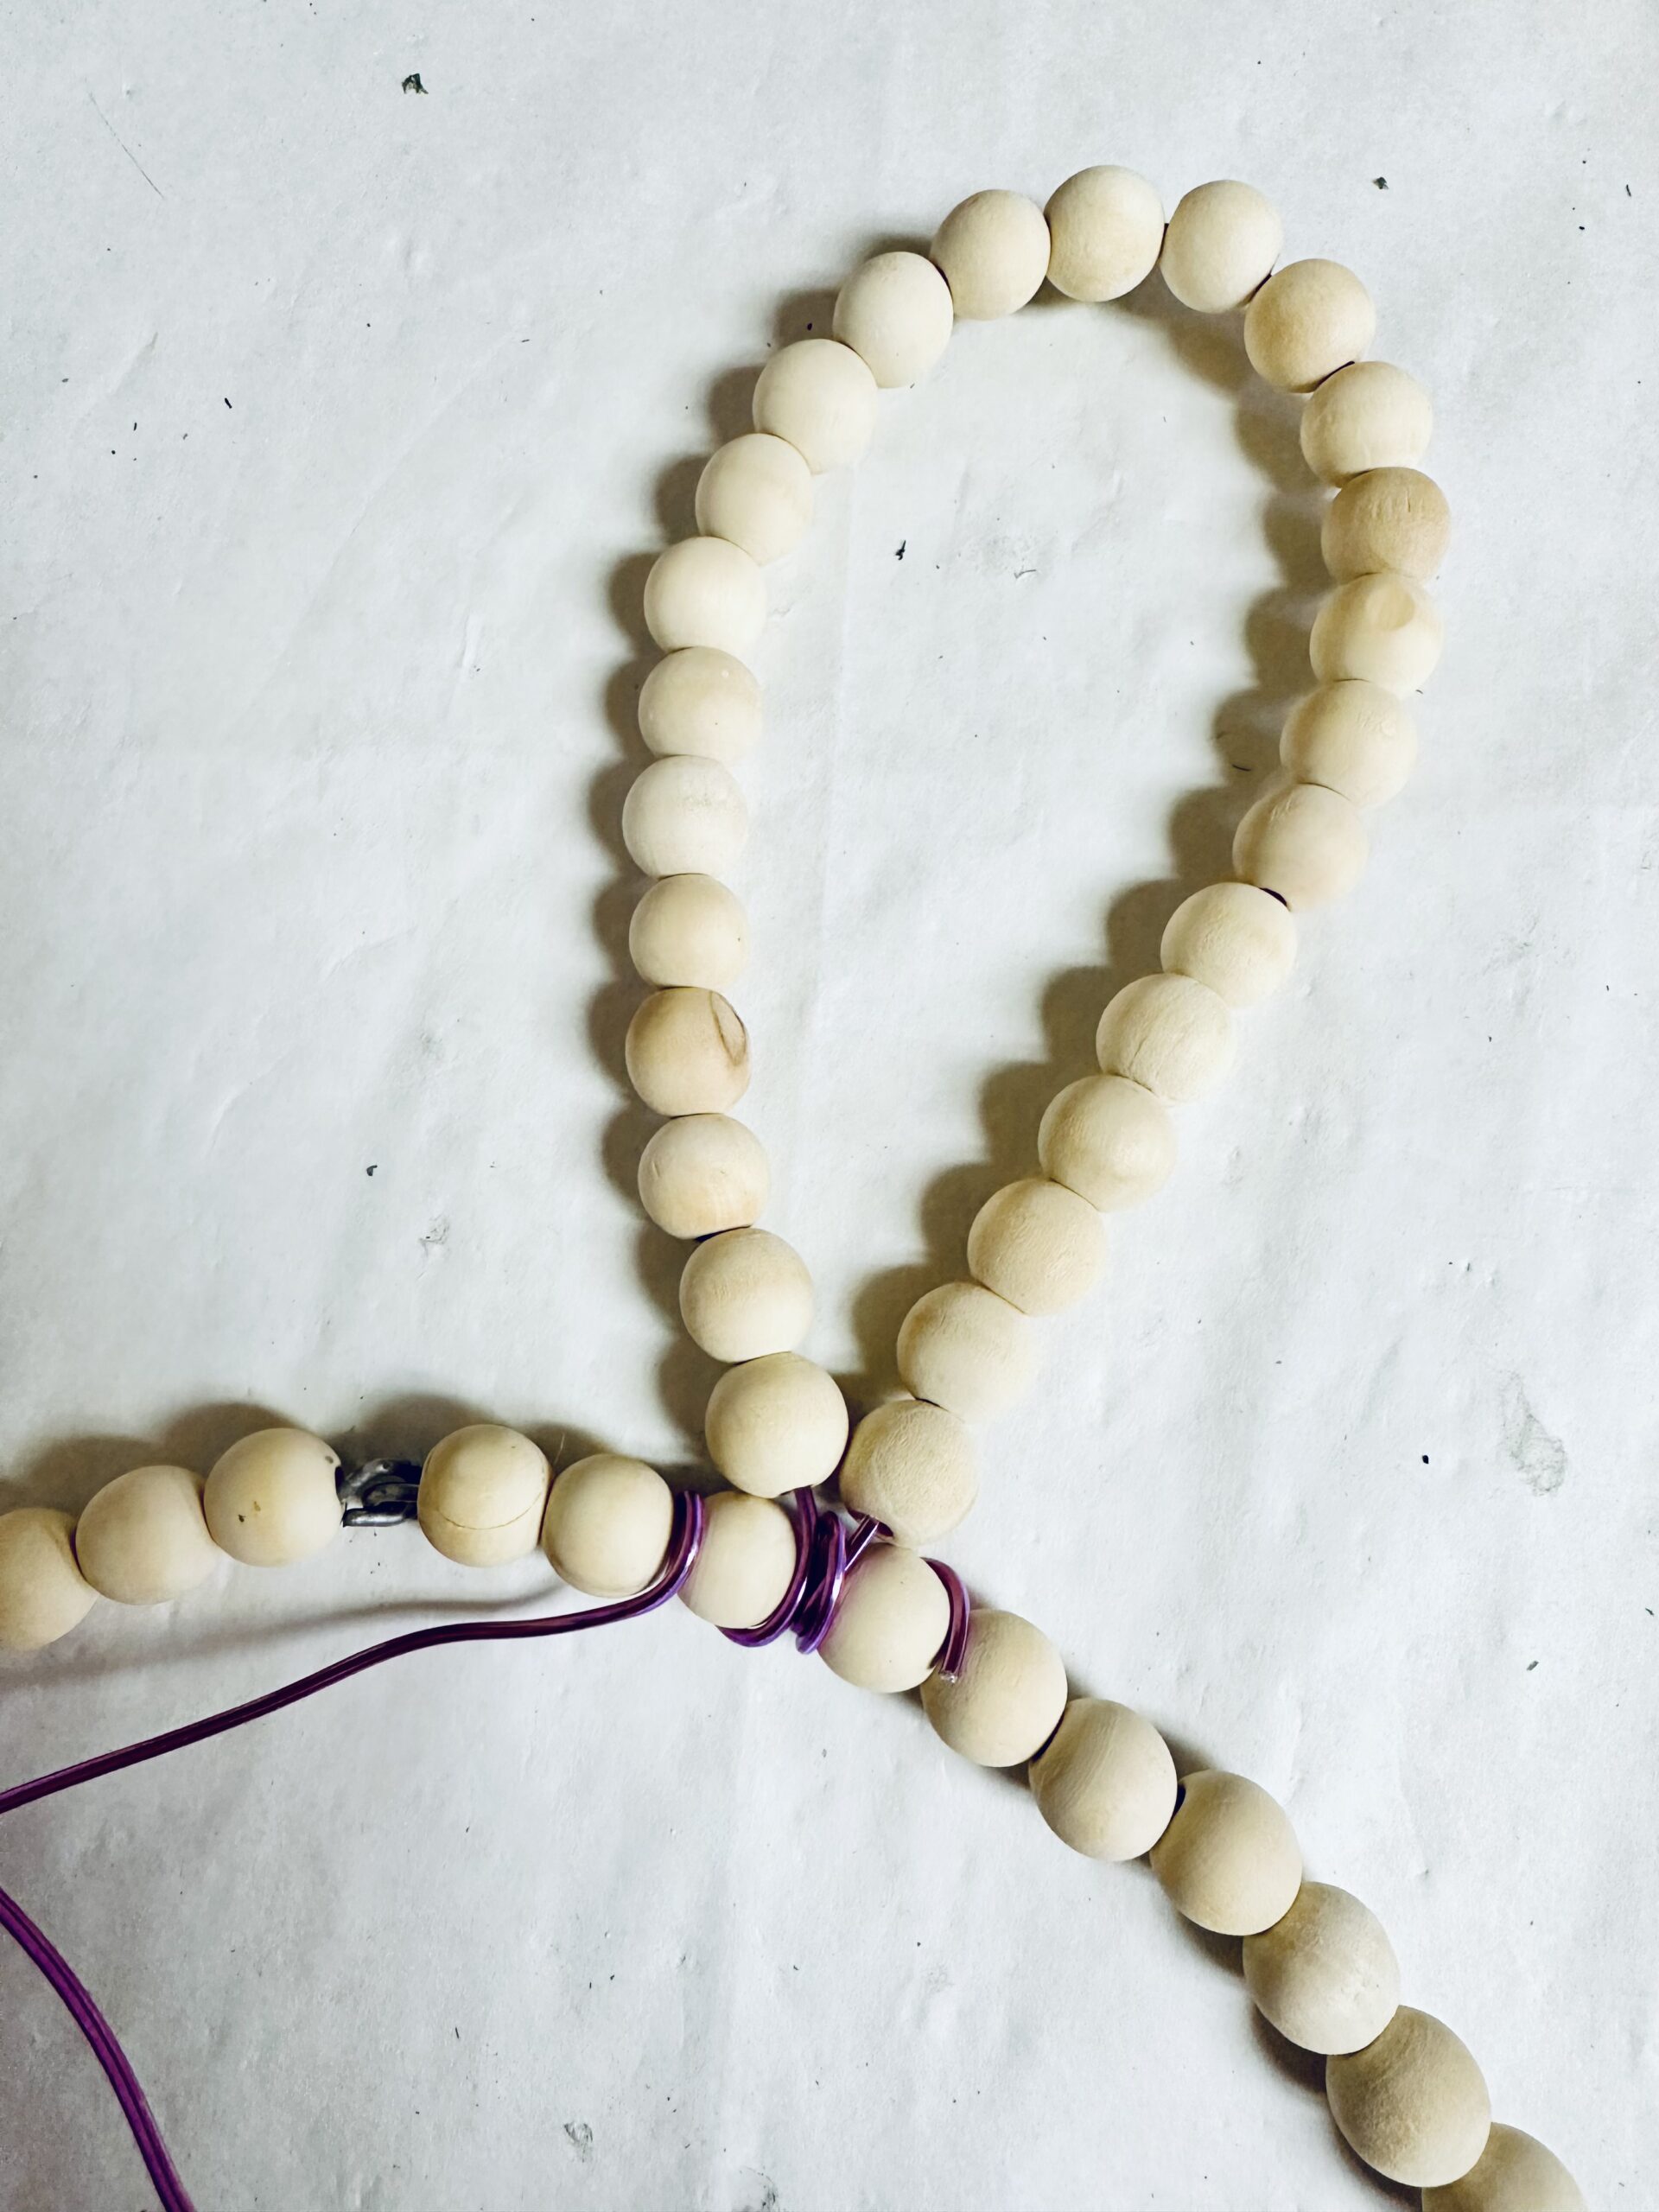
- Start by bending back the wire that closes one of the beaded wreaths. This will allow you to slide the beads off easily.
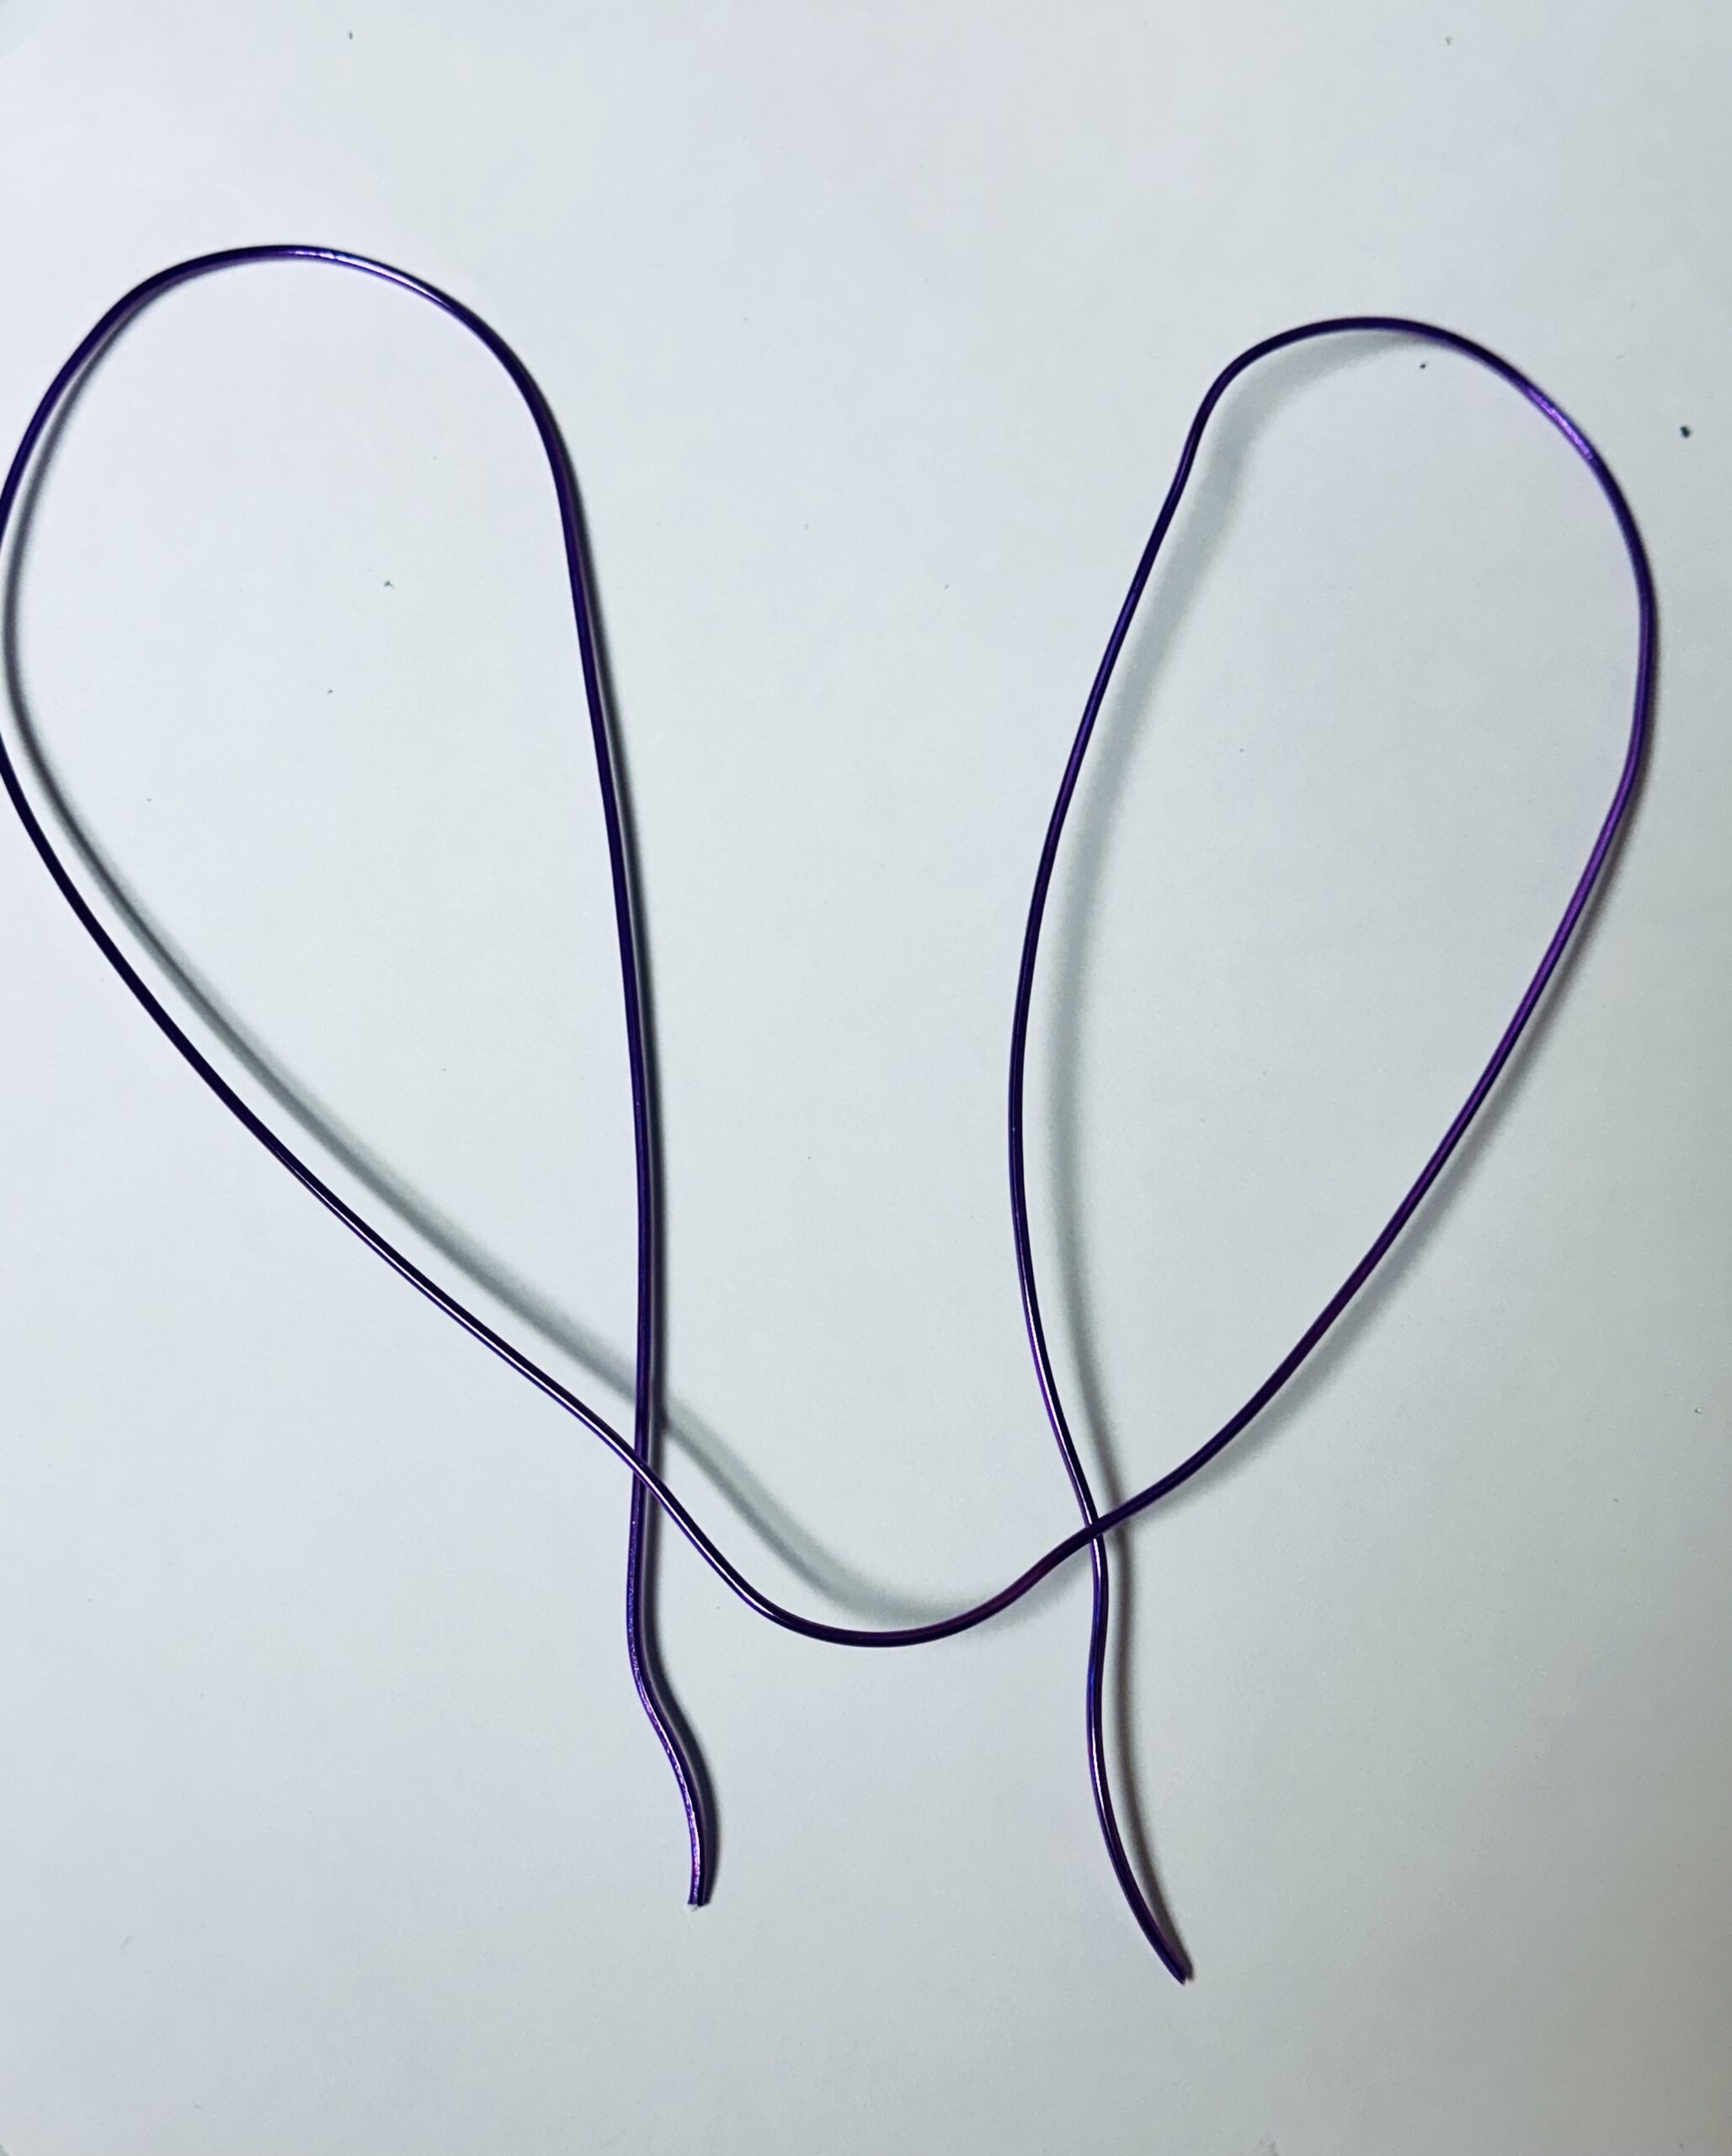
- Bend your floral wire into two bunny ear shapes, making them as large or small as you like. Use the entire piece of floral wire for sturdier ears.
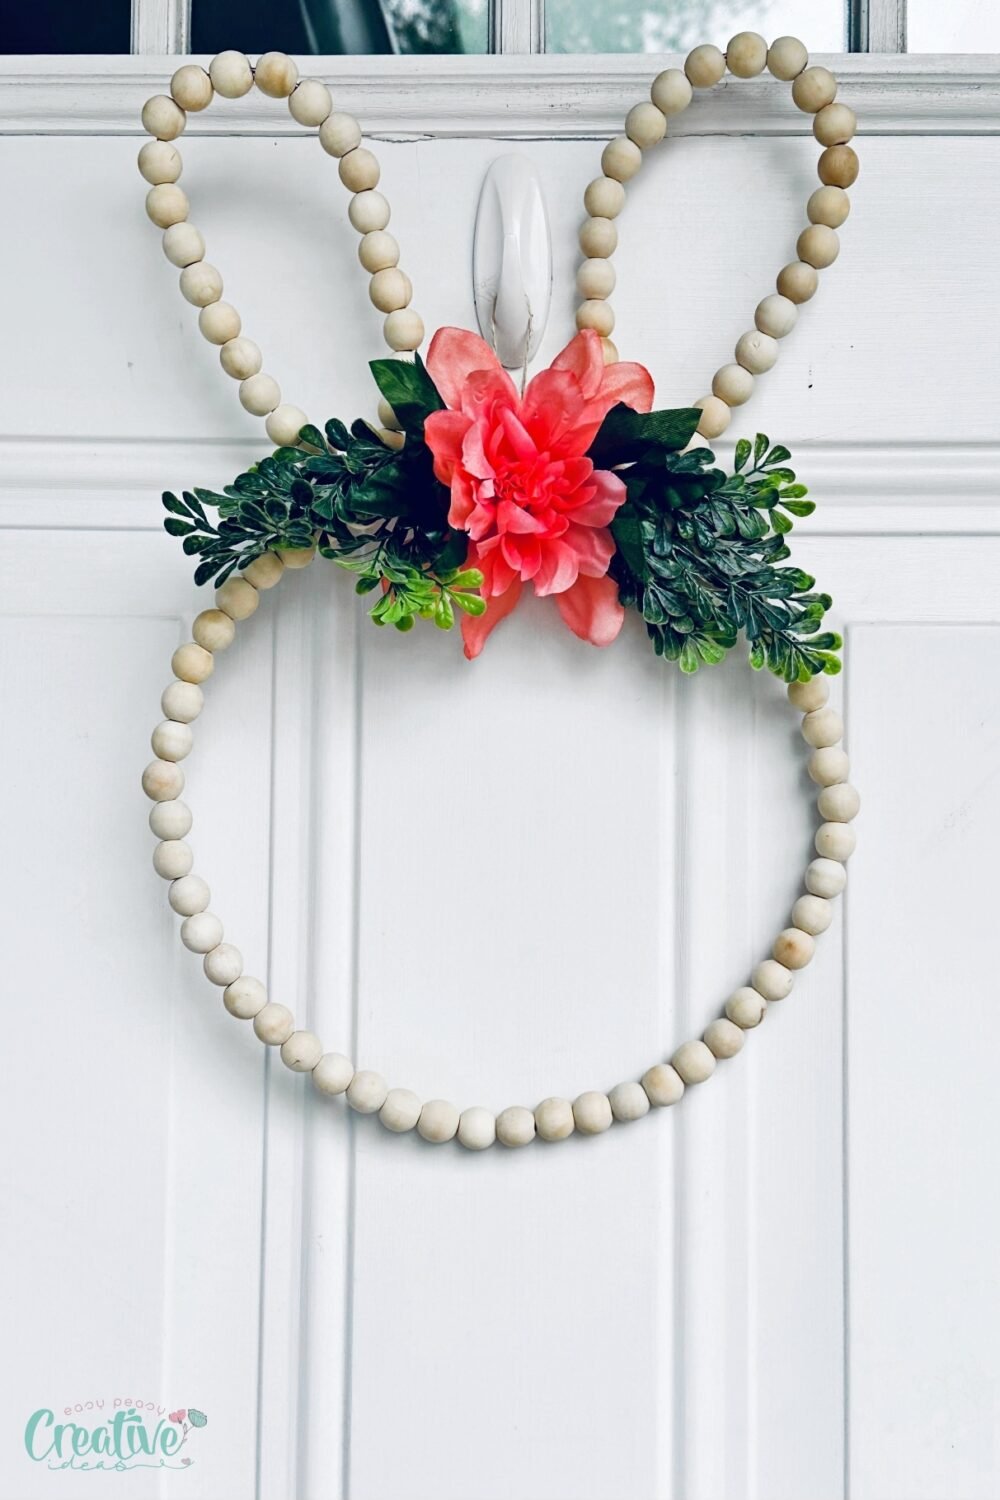
- Wrap one end of the floral wire securely around the second beaded wreath (the “head”) to attach the ear. String beads onto the wire until it forms a full ear shape. Repeat for the second ear. Use the remaining wire to secure the ears to the wreath frame. For extra security, add a dab of hot glue at the base.
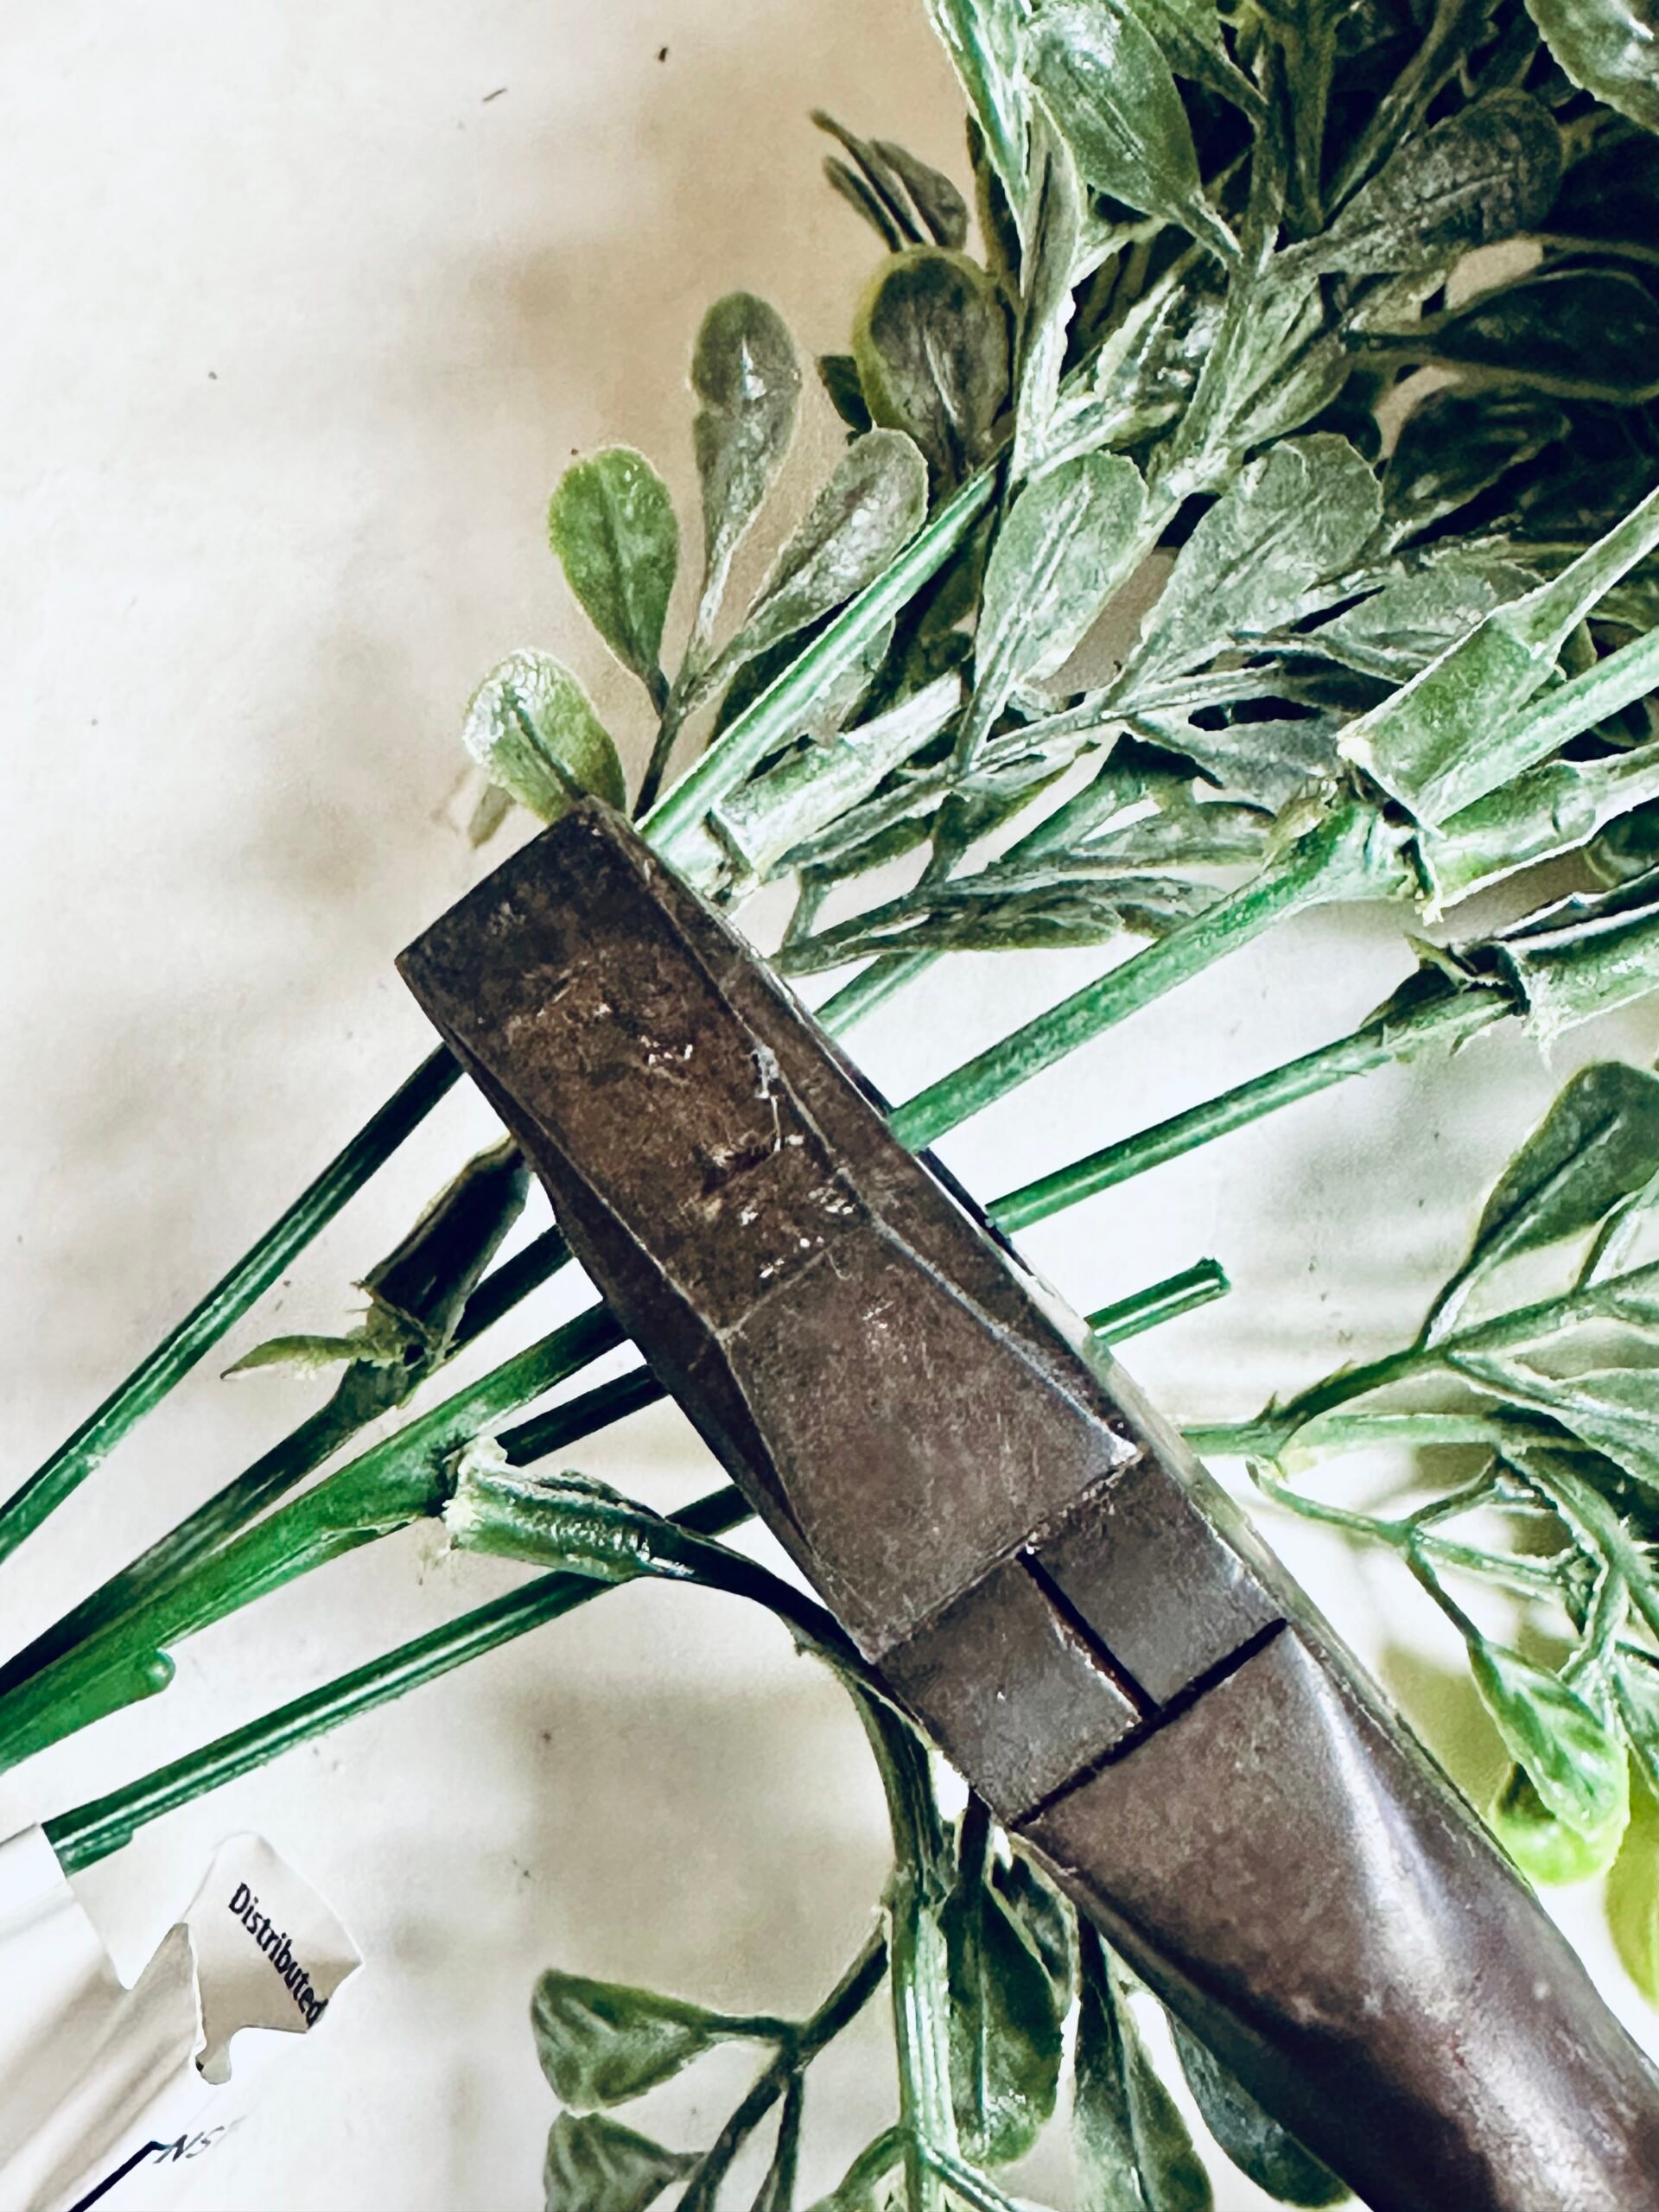
- Trim a few sprigs of boxwood and a Dahlia flower using wire cutters. Optionally, use Dahlia leaves for added greenery.
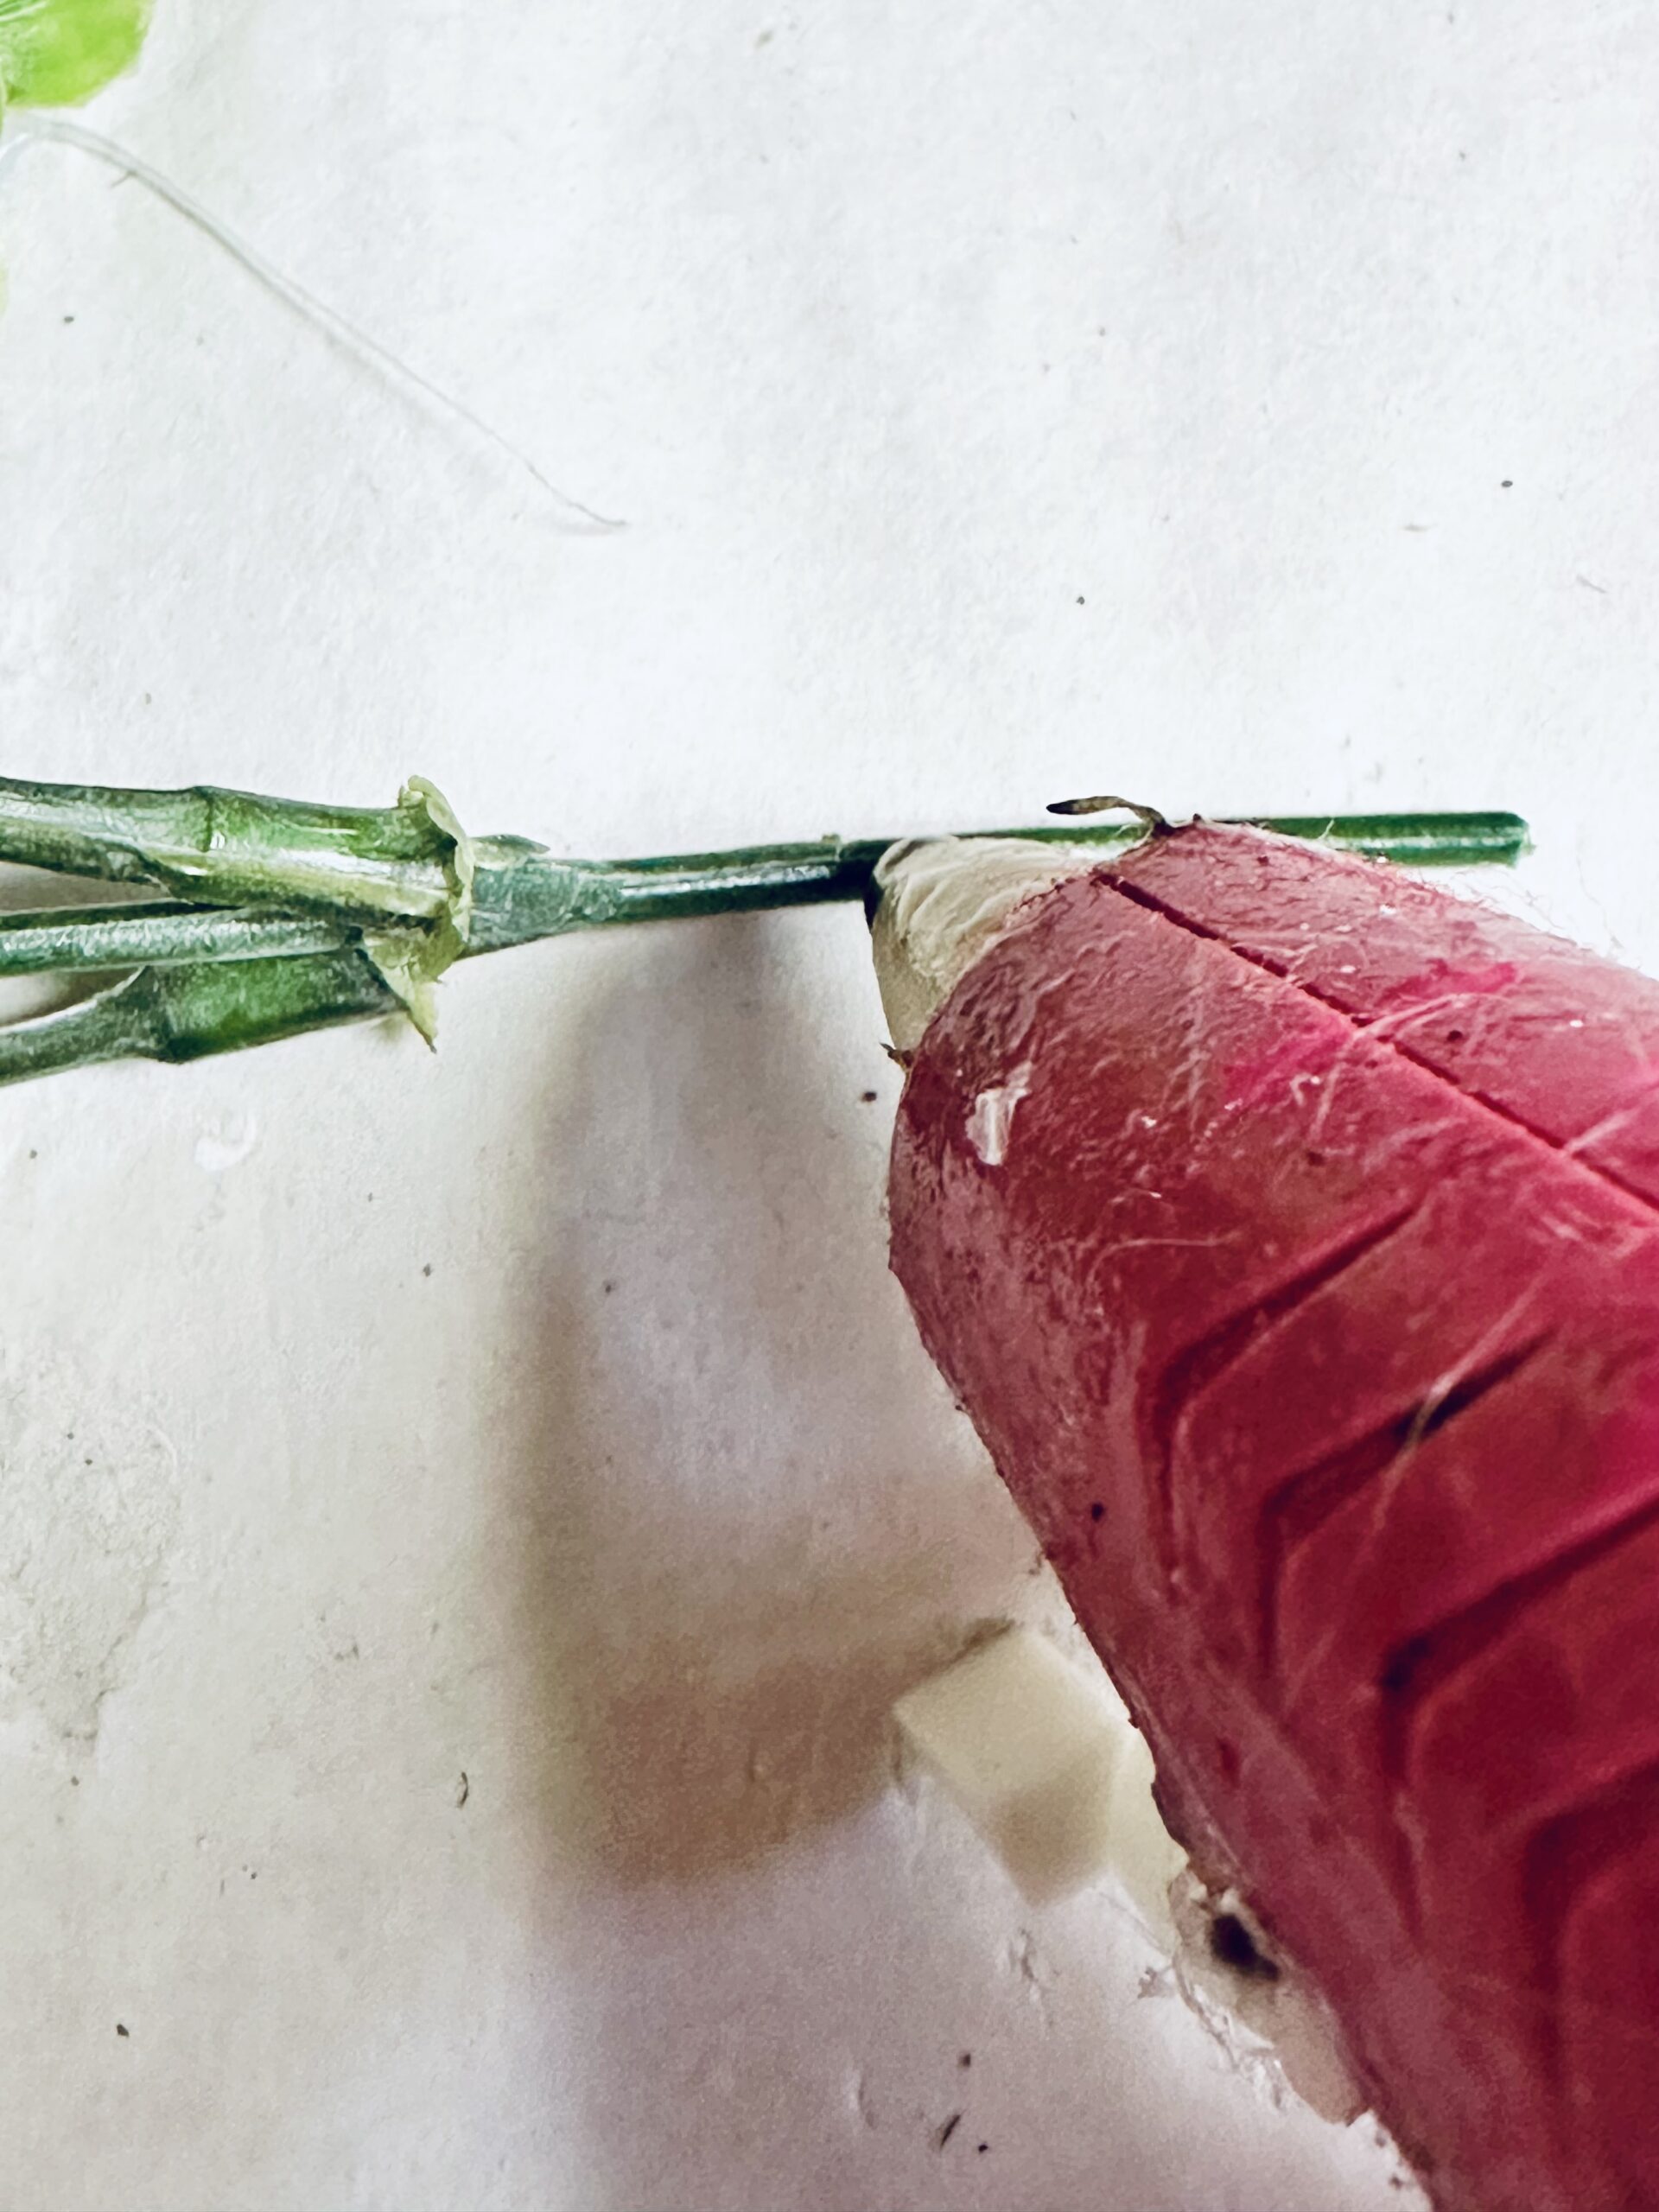
- Hot glue the florals onto the wreath form, arranging them to your liking. Add a piece of string at the top for easy hanging.
Tips:
- Secure the Ears: If you’re worried about the ears wiggling, wrap the ends with wire and reinforce with hot glue for extra strength.
- Play with Colors: Swap out coral Dahlias for pastel flowers or even faux lavender to match your décor.
- Use Faux Greenery Wisely: Opt for high-quality faux greenery to ensure your wreath looks fresh year after year.
Craft Variations:
- Pastel Bunny Wreath: Use pastel-colored beads for a softer, spring-inspired look.
- Rustic Charm Wreath: Swap beads for burlap ribbon and add wooden bunny accents.
- Floral Explosion Wreath: Cover the entire wreath with mixed seasonal florals for a vibrant appearance.
- Minimalist Bunny Wreath: Stick to neutral tones with simple greenery and white beads for a modern touch.
Frequently Asked Questions:
Can I use a different type of wreath base?
Yes! You can use grapevine or foam wreath bases if you don’t have beaded wreaths.
How do I secure beads if I don’t have floral wire?
Use fishing line or a thin ribbon instead for a secure and seamless look.
Can I make this wreath kid-friendly?
Absolutely! Skip the hot glue gun and use craft-safe adhesives or enlist adult supervision.
How do I store the wreath after Easter?
Wrap it in tissue paper and store it in a cool, dry place to keep it looking great.
More Easter Crafts You’ll Enjoy:
- Printable Easter baskets
- DIY Easter treat baskets with paper cups
- Glam dinosaur eggs
- DIY Egg wreath
- Farmhouse bunny crate
Ready to make your own beaded bunny wreath? Grab your supplies and get crafting, then let me know your thoughts in the comments section below!
And for more fun DIYs, sign up for my newsletter today!
Happy Easter crafting!

Beaded bunny wreath
Materials
- 2 Beaded Wreaths
- Floral Wire
- Coral Dahlia Flowers
- Eucalyptus or Boxwood Florals
Tools
- Wire Cutters
Instructions
- Clear a flat workspace and gather all your supplies. Plug in your hot glue gun and let it heat up while you prep the materials.
- Start by bending back the wire that closes one of the beaded wreaths. This will allow you to slide the beads off easily.

- Bend your floral wire into two bunny ear shapes, making them as large or small as you like. Use the entire piece of floral wire for sturdier ears.

- Wrap one end of the floral wire securely around the second beaded wreath (the "head") to attach the ear. String beads onto the wire until it forms a full ear shape. Repeat for the second ear. Use the remaining wire to secure the ears to the wreath frame. For extra security, add a dab of hot glue at the base.
- Trim a few sprigs of boxwood and a Dahlia flower using wire cutters. Optionally, use Dahlia leaves for added greenery.
- Hot glue the florals onto the wreath form, arranging them to your liking.
- Add a piece of string at the top for easy hanging.
Article may contain Amazon & affiliate links. As an Amazon Associate I earn from qualifying purchases at no additional cost to you.
ABOUT PETRO
Hi, I’m Petro, author and founder of Easy Peasy Creative Ideas. Sewist, crafter, avid DIY-er, foodie, photographer, homemaker and mommy to one. I’m an expert at coming up with quick, clever sewing tips, recycling crafts and simple, easy recipes! You can find my ideas featured in reputable publications such as Country Living, Good House Keeping, Yahoo News, WikiHow, Shutterfly, Parade, Brit & Co and more. Thanks for stopping by and hope you’ll stay for a while, get to know me better and come back another time. Stick around for real fun projects! Read more…