

Festive DIY Easter egg wreath
Perfect for sprucing up your front door or adding a festive touch to any room, this DIY Easter egg wreath is not just a craft, it’s a cheerful celebration of spring and creativity. Whether you’re a seasoned crafter or trying this Easter egg wreath for the first time, I’m here to guide you every step of the way. Get ready to inspire your neighbors and guests with your vibrant and unique Easter door wreath.

If you’re looking to add a splash of color and a dash of creativity to your home this spring, you’re in the right place to learn how to make a stunning DIY Easter egg wreath that will surely turn heads and warm hearts.
This Easter wreath DIY is not only a fun and engaging way to celebrate the season, but it’s also a fantastic opportunity to express your creativity and perhaps even start a delightful crafting tradition. Don’t worry if you’re new to the crafting world; I’ll be with you every step of the way, offering tips, tricks, and encouragement. Together, we’ll transform basic materials into a beautiful Easter wreath craft that you’ll be proud to display on your door or in your home.
One of the main reasons I love this DIY Easter egg wreath is because it’s incredibly versatile. You can customize it to fit your personal style and color scheme, making it a unique piece that truly reflects who you are. Plus, you can use materials that you already have at home or easily find at your local crafts store, making this project budget-friendly.
How to make a DIY Easter egg wreath
Materials
Our adventure into the world of DIY Easter egg begins with gathering our materials, which you’ll likely find are already waiting for you in your craft supplies or are easily accessible from your local craft store:
- Grapevine Wreath (I typically get these from Joann’s when they go on sale or use a coupon)
- 3 packages of moss from Dollar Tree
- 3 packages of Easter eggs from Dollar Tree
- Easter Egg sign (Dollar Tree)
- Pink Burlap Ribbon (also Dollar Tree)
Equipment
- Scissors
- Hot Glue gun and a lot of glue sticks (if using the mini ones)
- Zip tie
Preparation
- Begin by laying out all of your materials and making sure you have everything you need.
- Plug in your hot glue gun so it can heat up while you start assembling the wreath.
- Set aside a clean work area with plenty of space to spread out your materials and create without any distractions.
Instructions
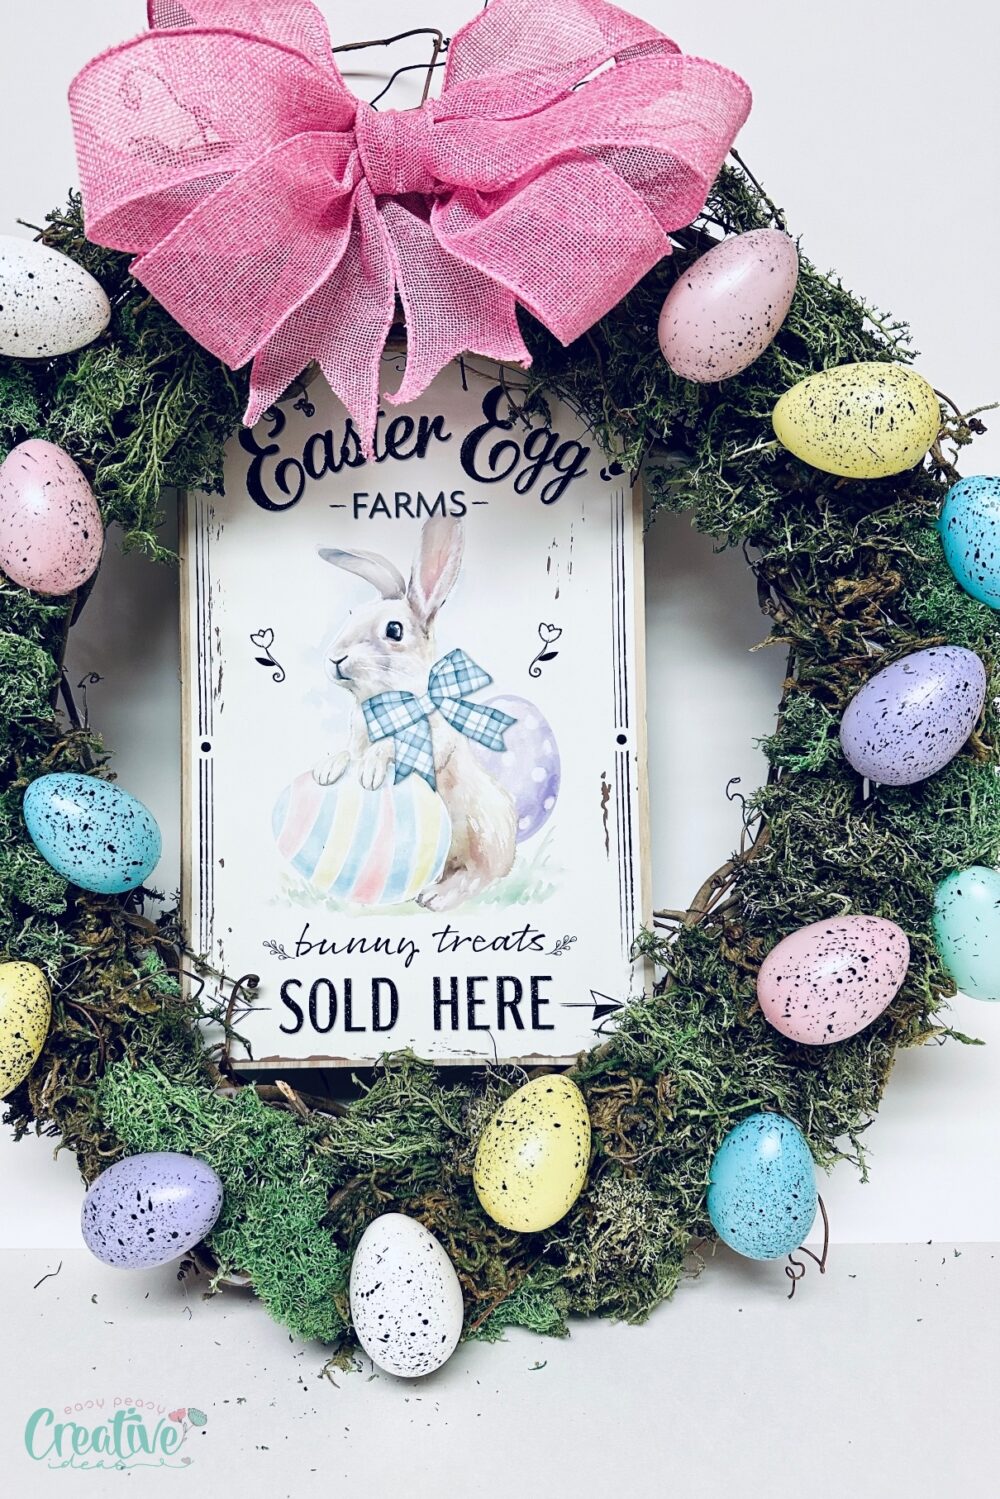
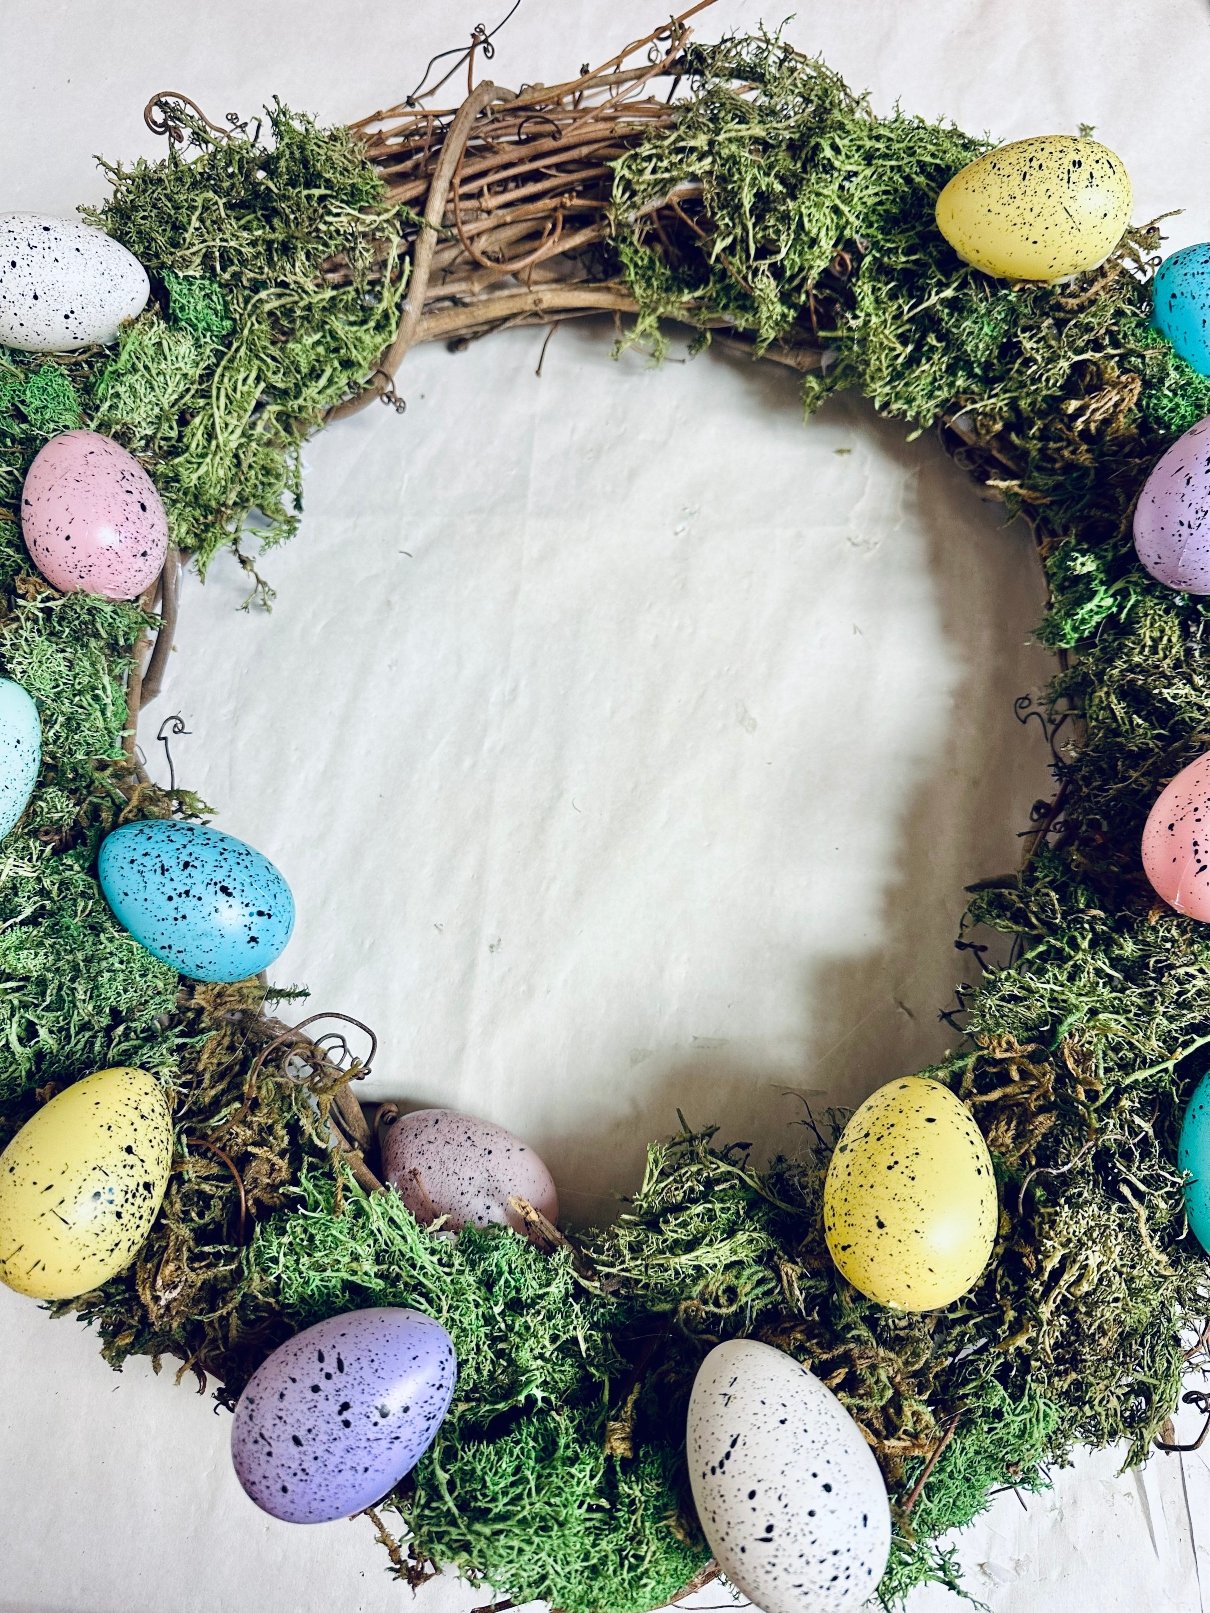
Cover the wreath
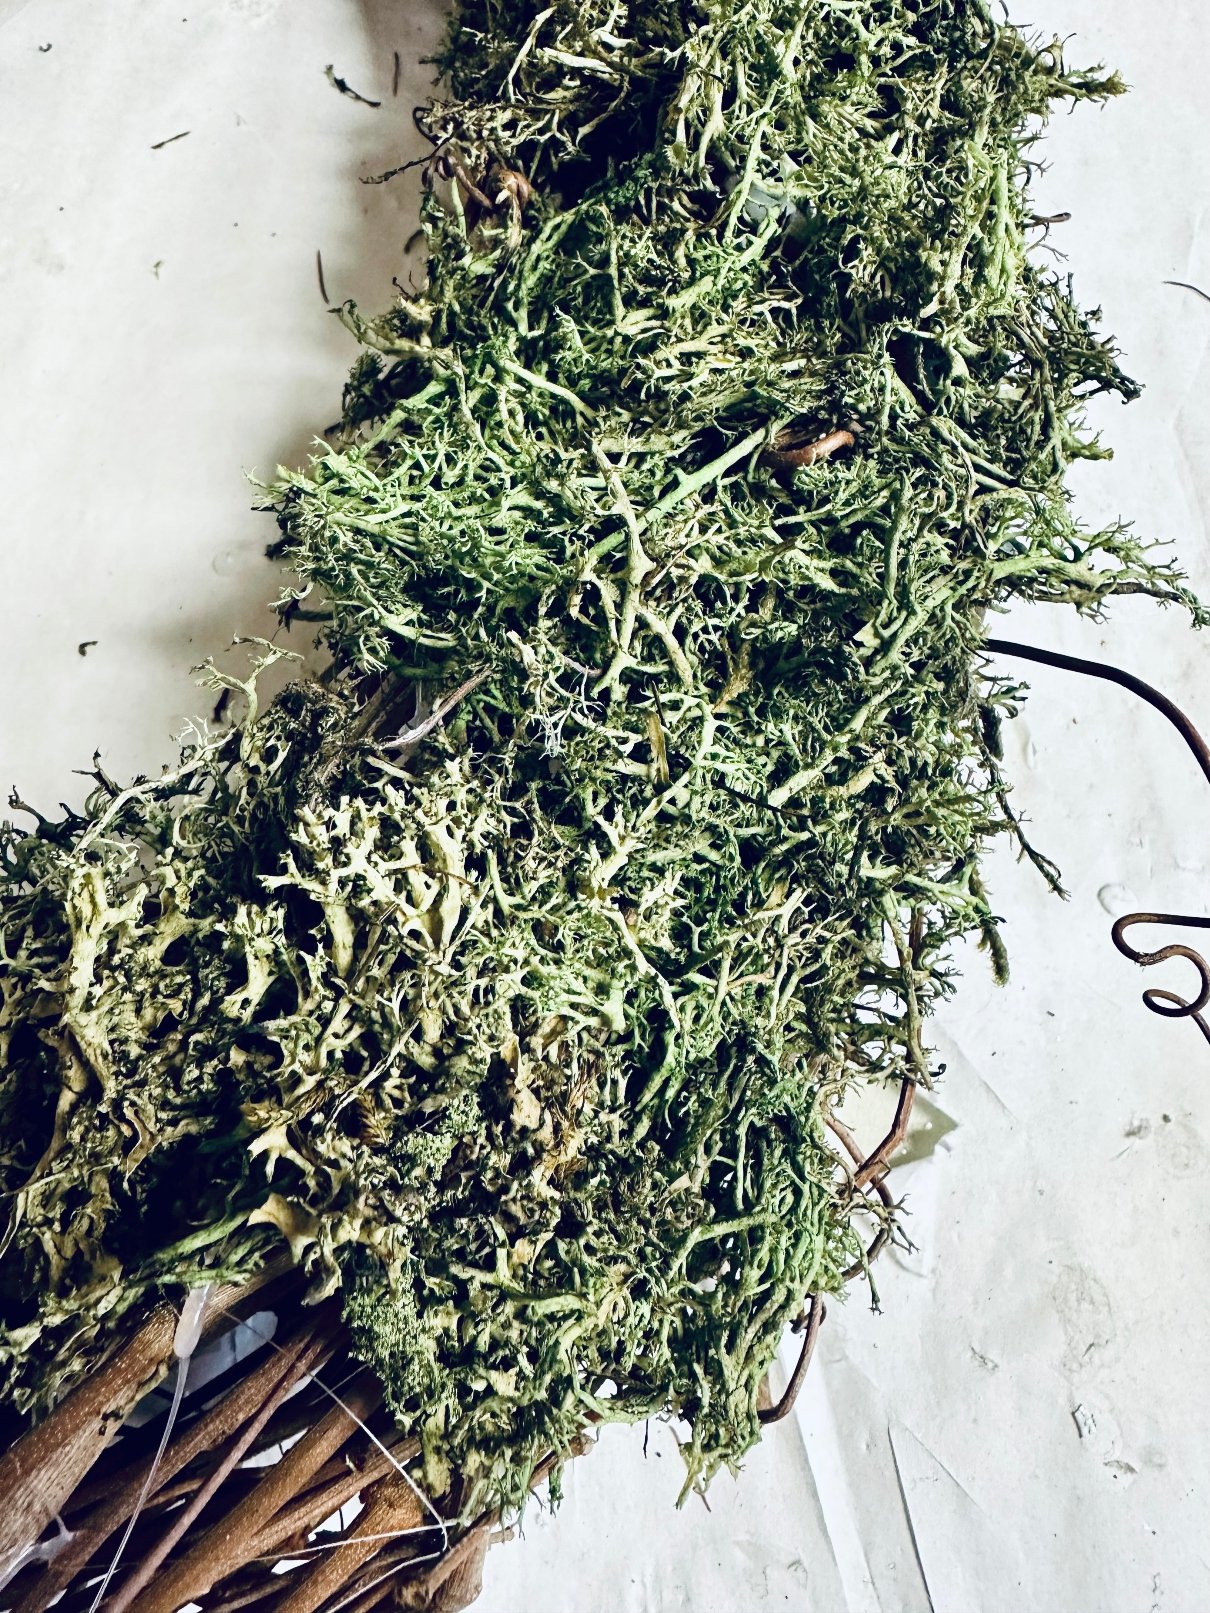
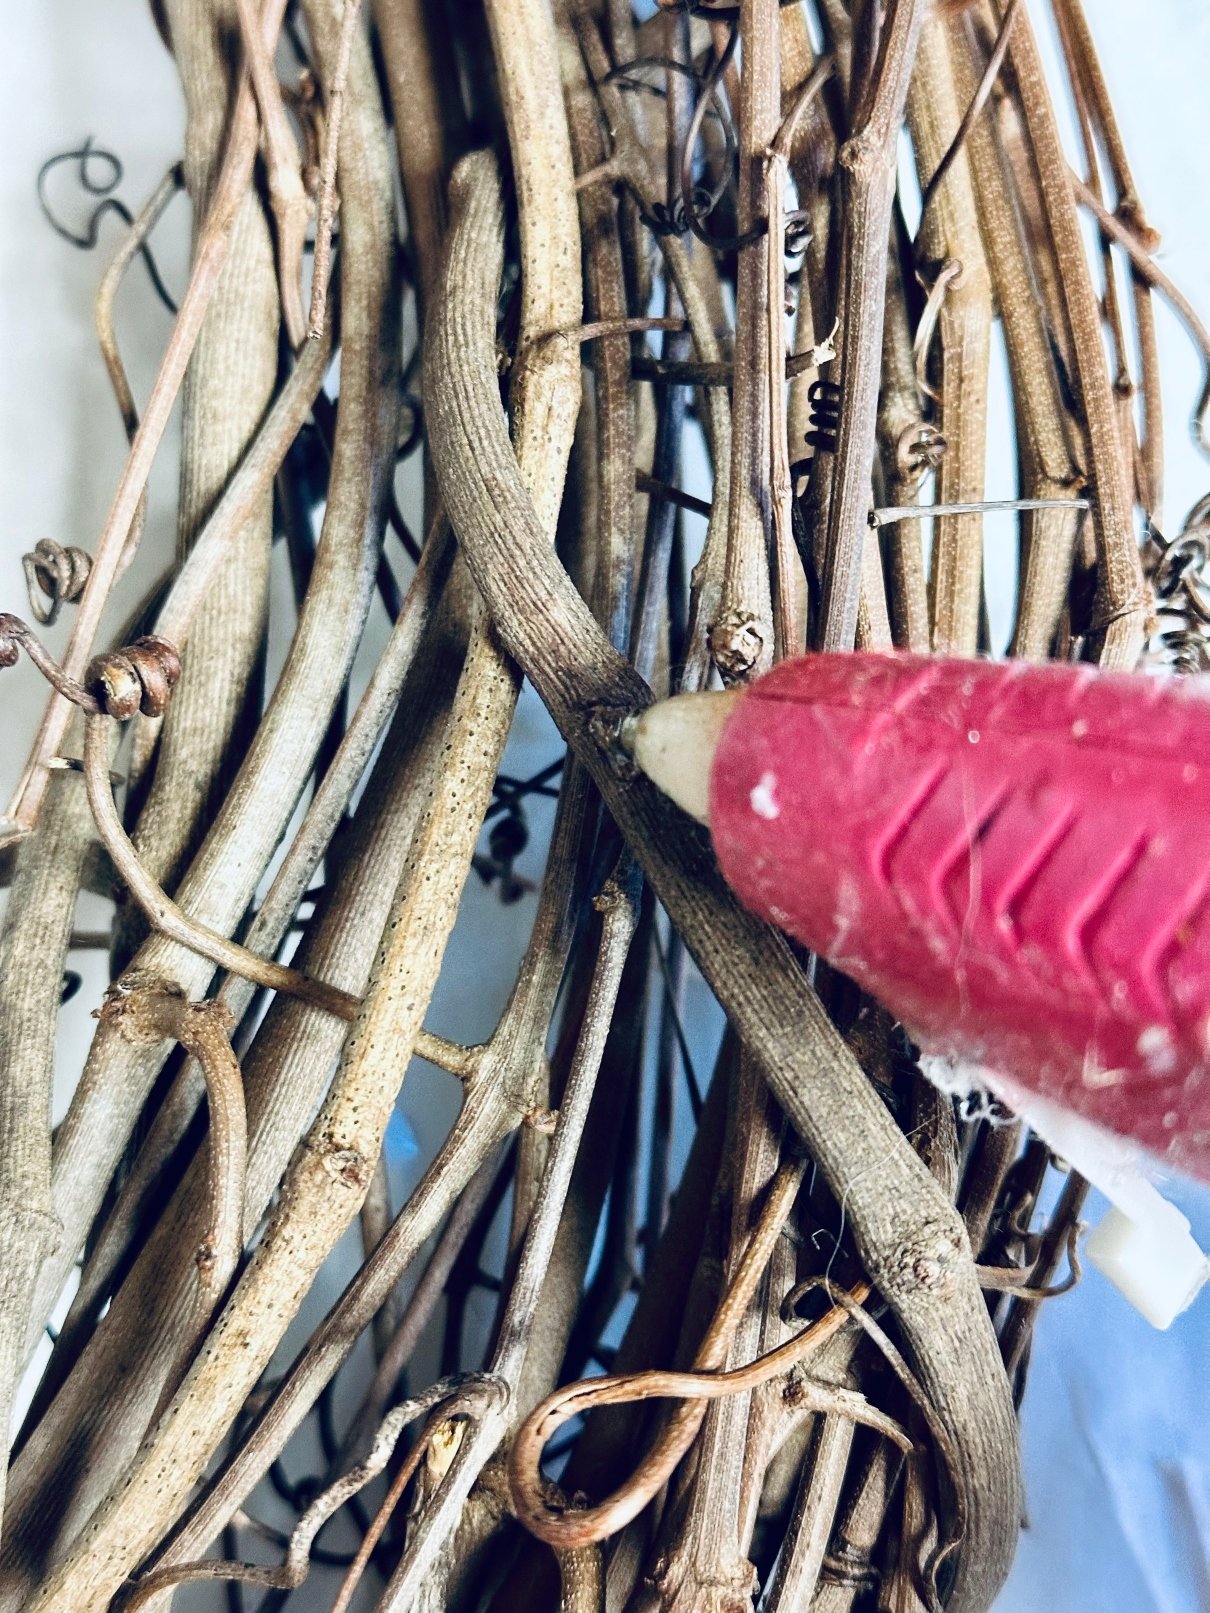
- Start by taking your grapevine wreath and wrapping the moss around it. I left a spot open on the top as I was adding a bow. To add the moss you need to do this in sections. Add hot glue to the grapevines and then place the moss on top, making sure that it adheres. Some will fall off when you lift it up but you can either hot glue it back in place or stuff it in between the grapevines. Have patience with this. If you notice that your hot glue is stringy like mine was, just make sure to take your time and remove the strings so it doesn’t get tangled with the moss.
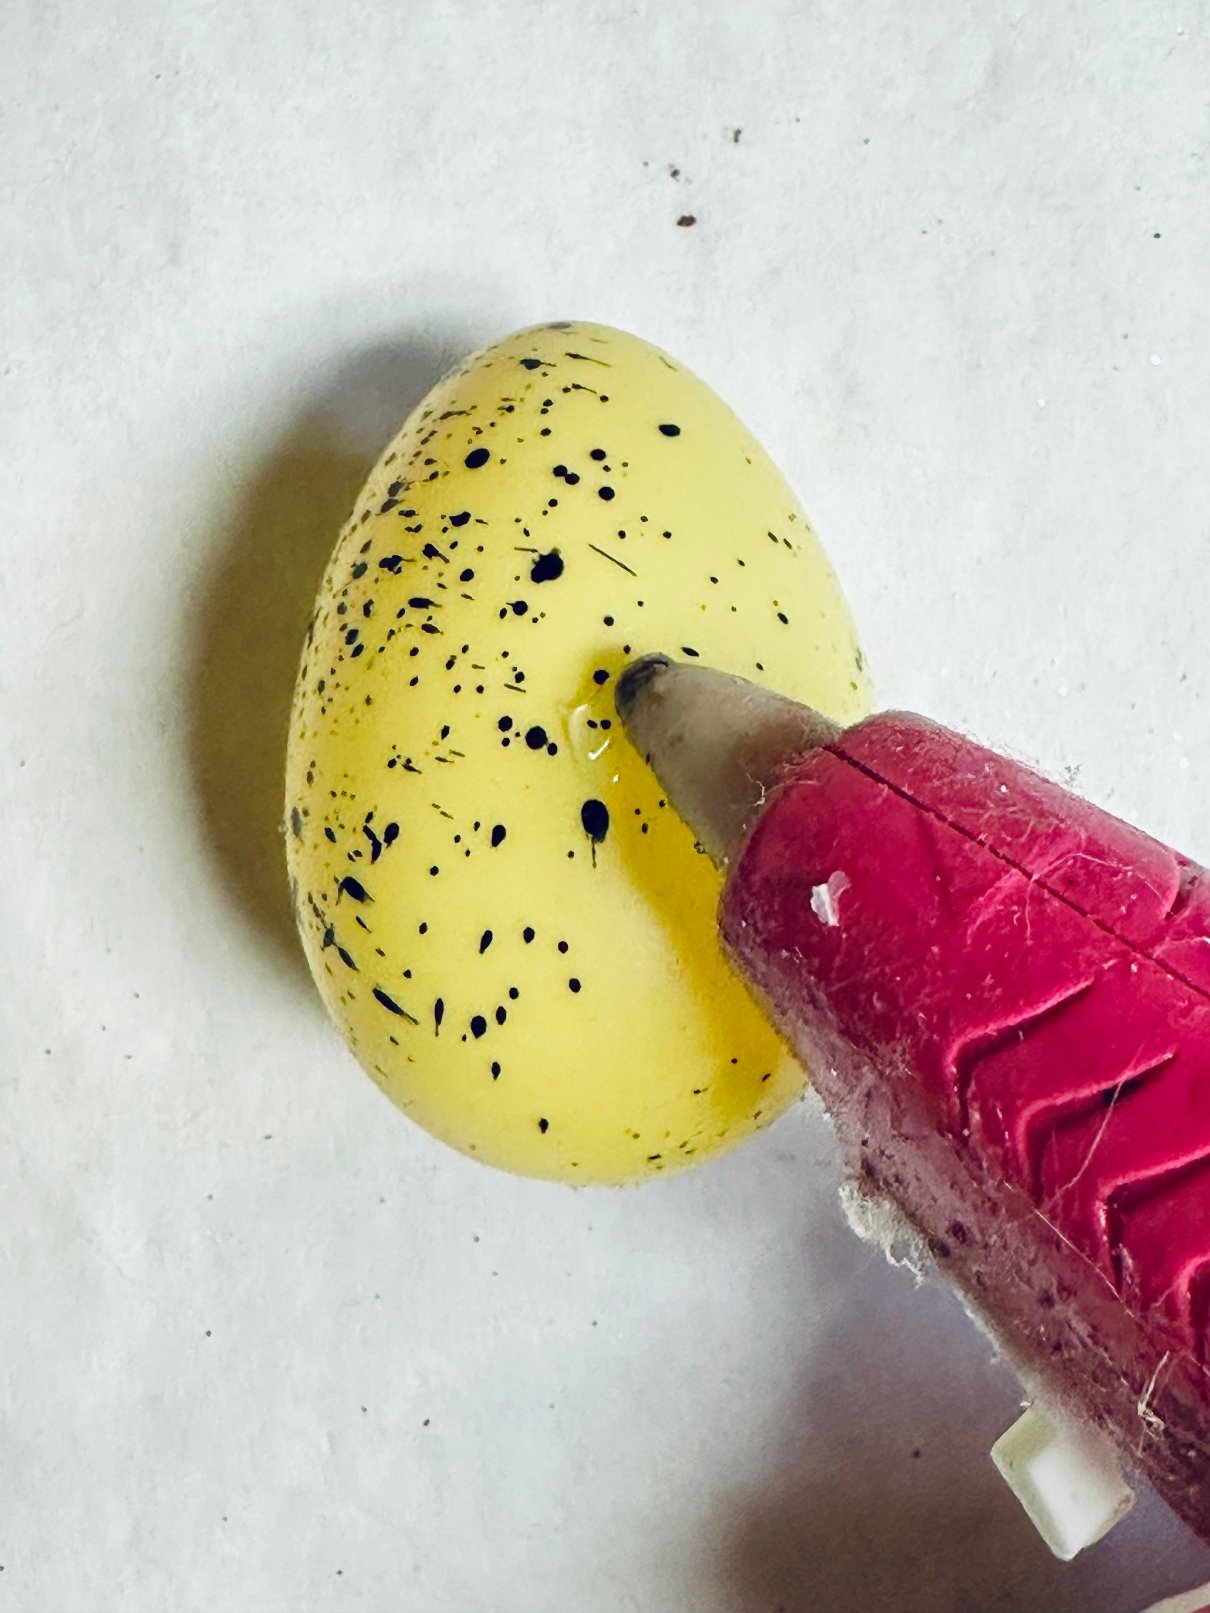
- Once the wreath is pretty much covered, start adding your eggs with hot glue. I just randomly added them around the wreath. I tried not to get the same color next to each other.
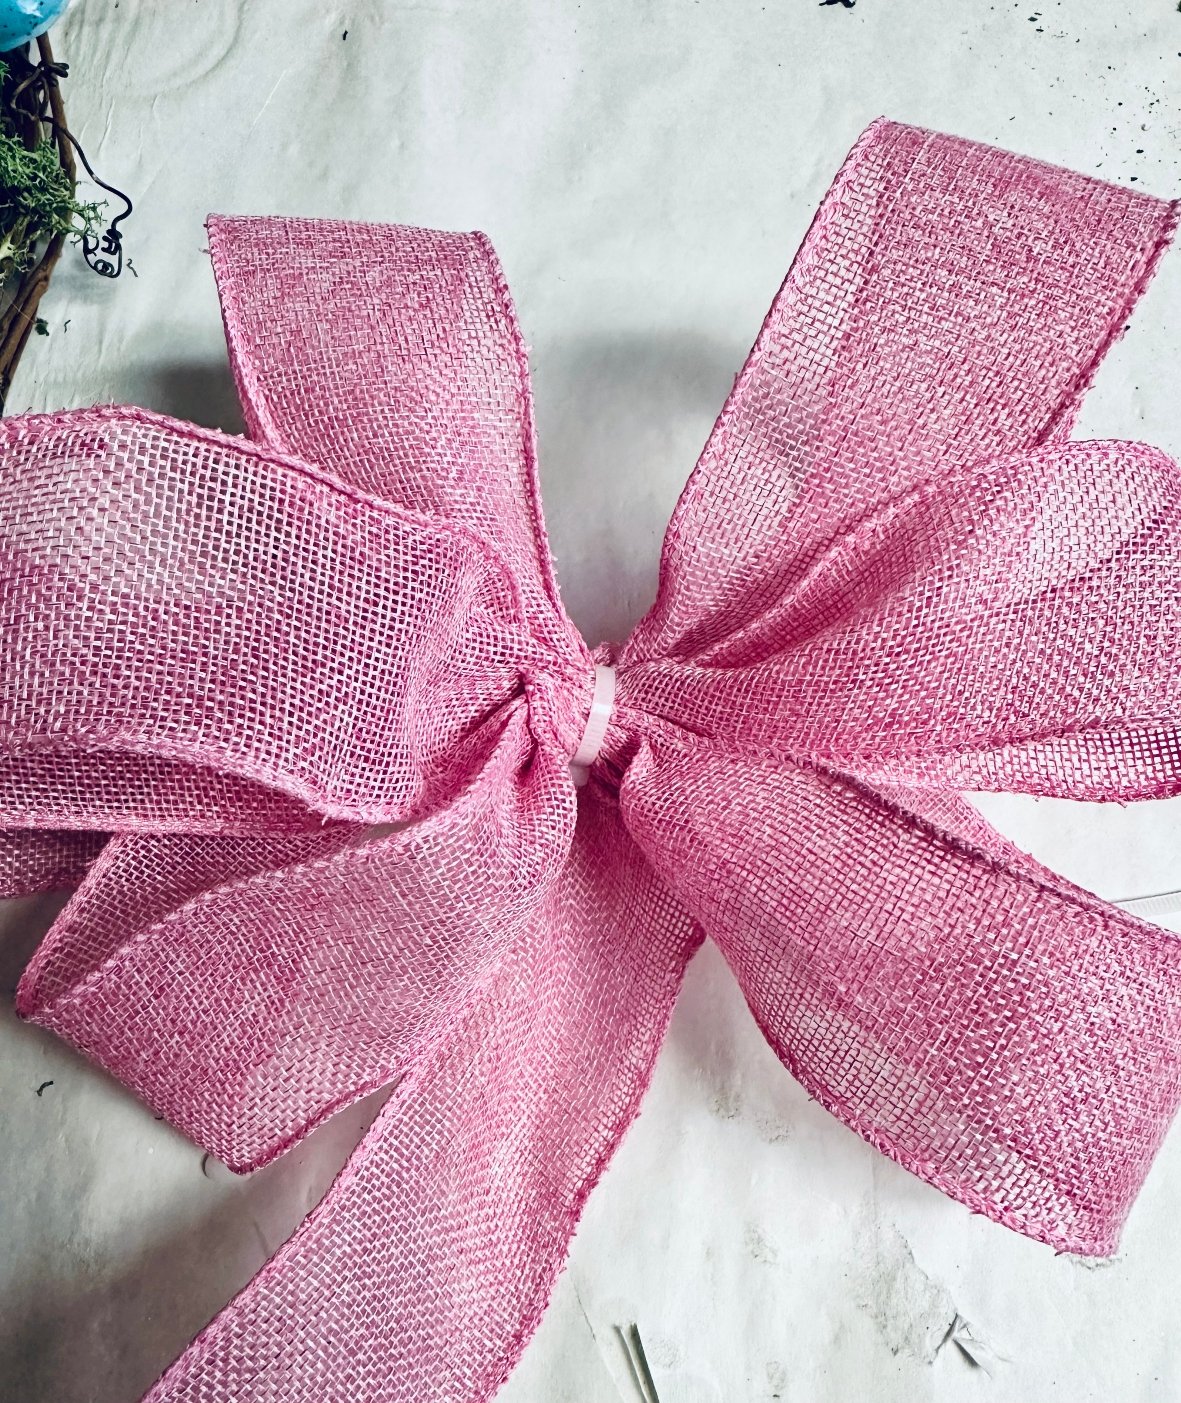
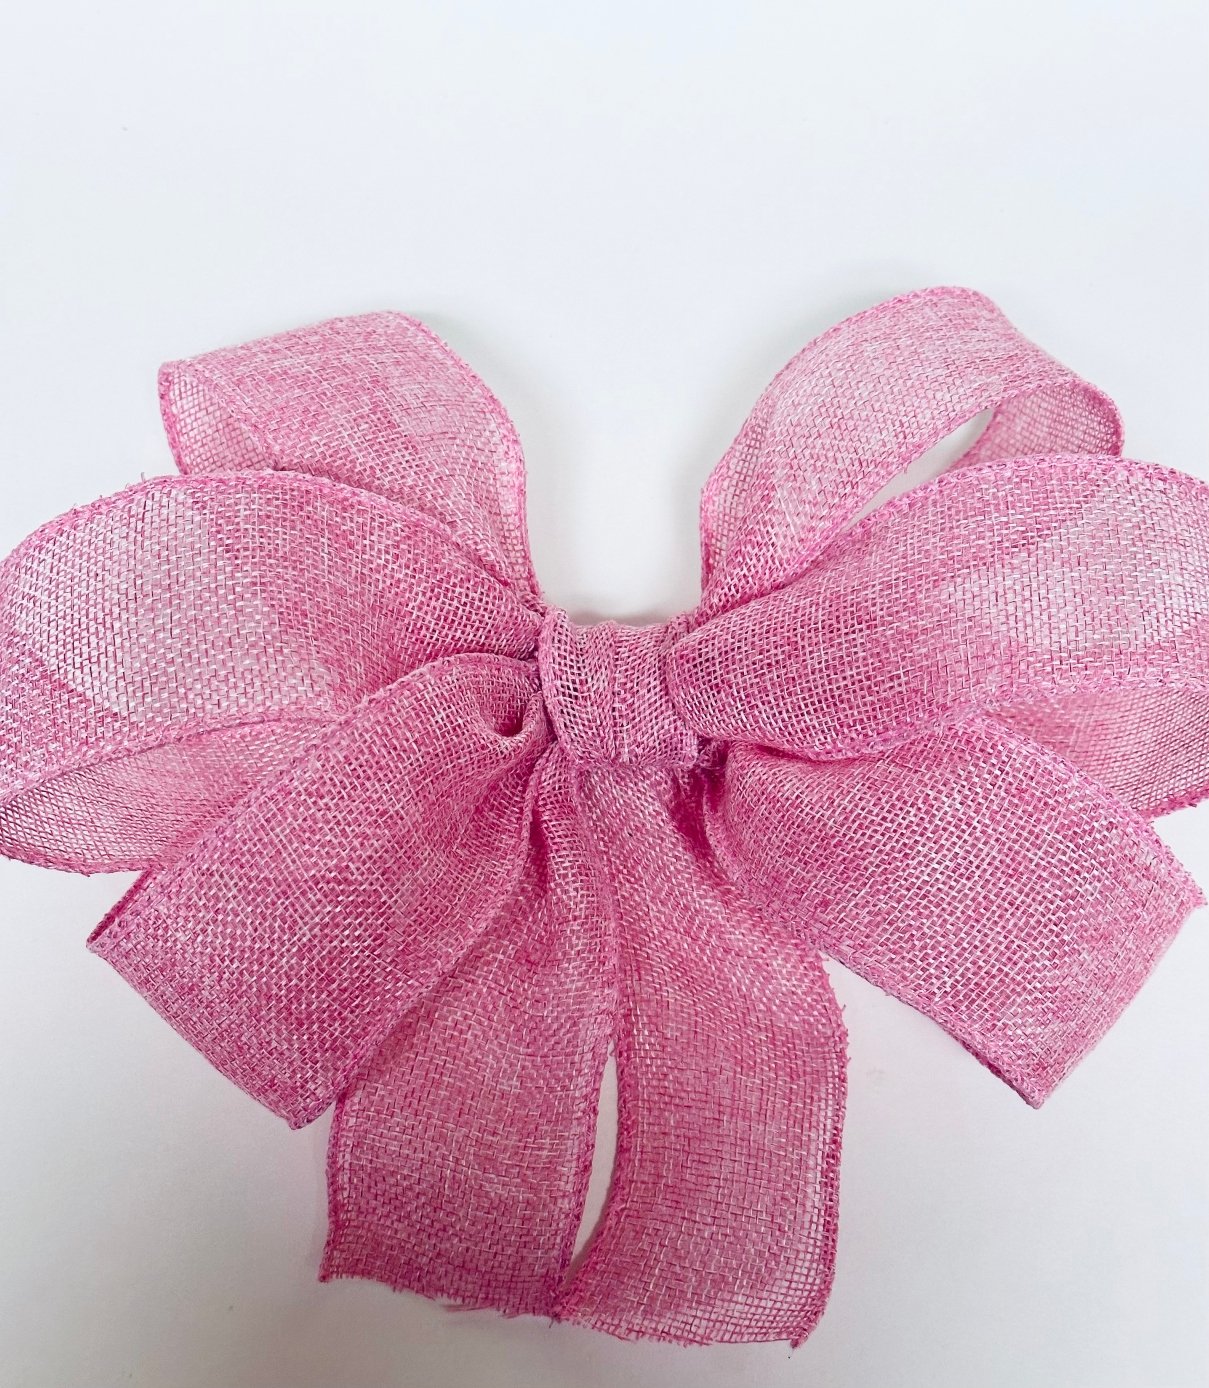
Make the ribbon
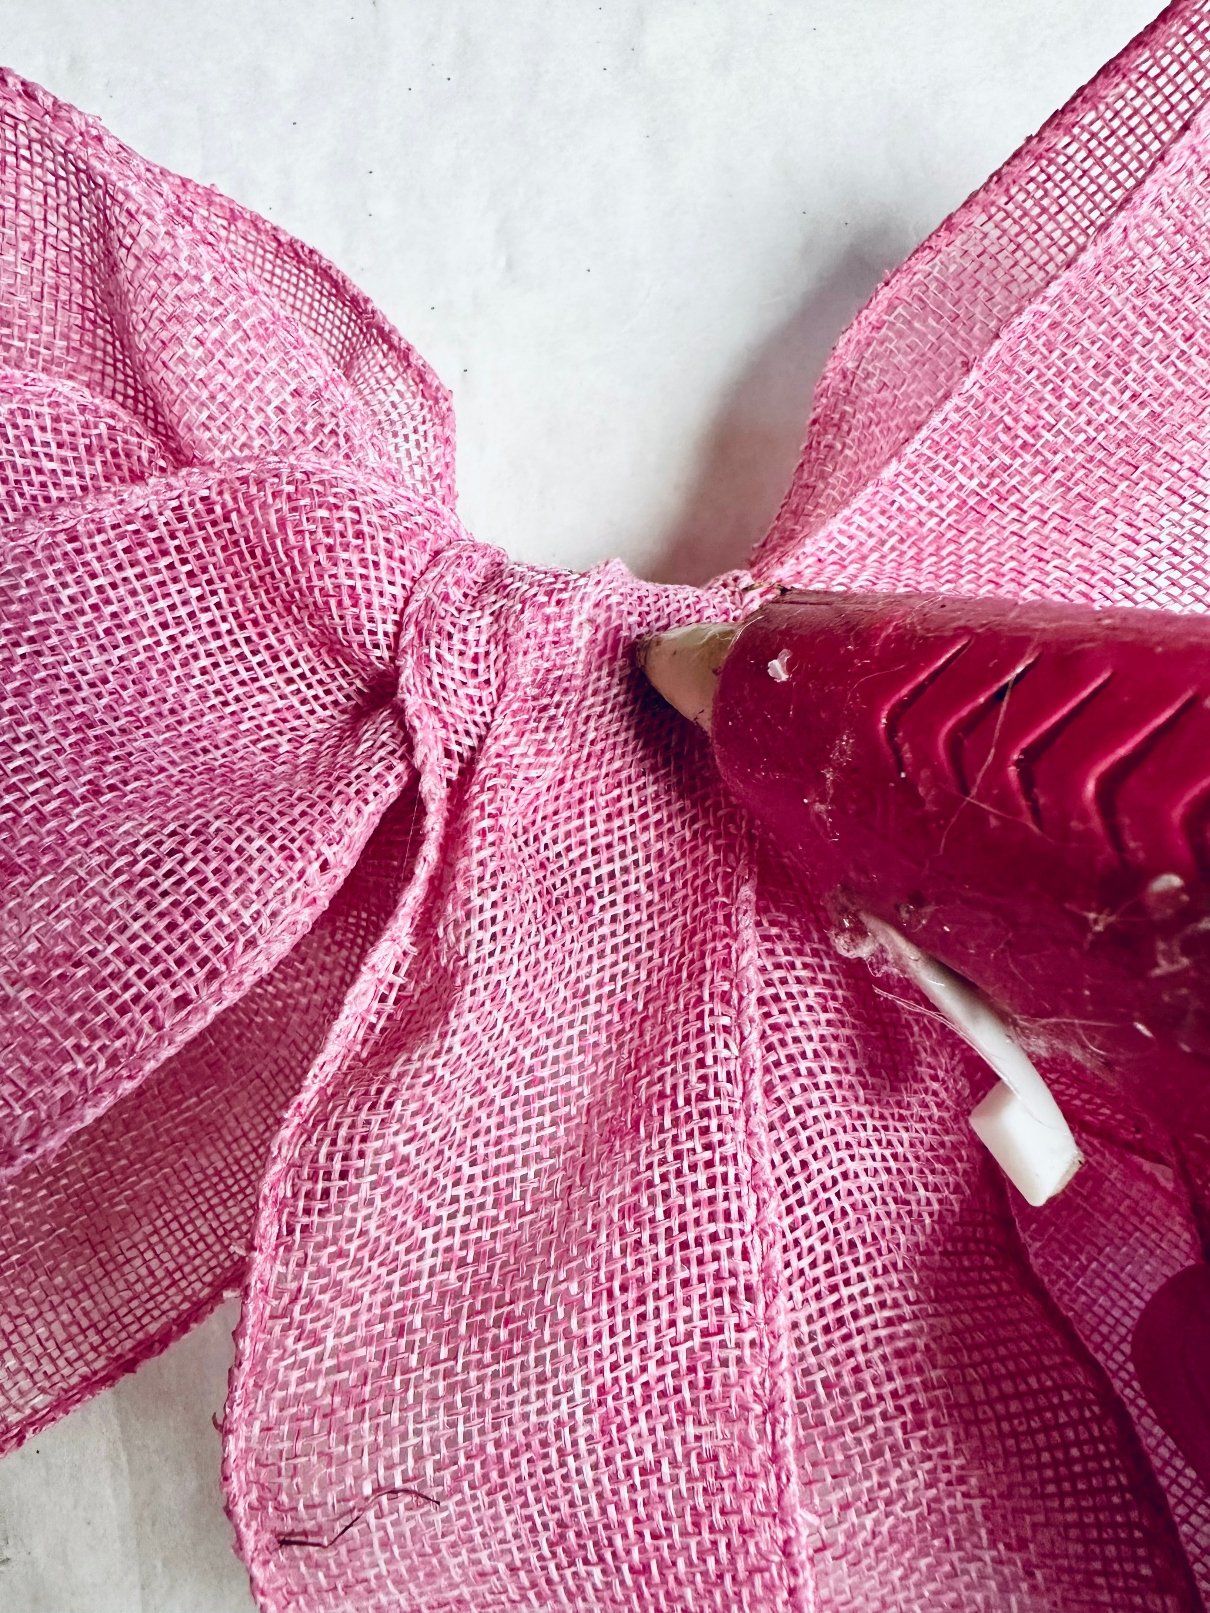
- Next I made a bow using the burlap ribbon. Make sure your ribbon is wired, it is much easier to work with. I made a few loops and secured them together with a zip tie.
- I then cut another piece of the burlap ribbon to make the tails and to use to wrap over the zip tie to cover it.
- Add a dab of hot glue on the center of the bow to secure the burlap ribbon. Cut the tails to your desired length.
Add the final pieces
- To add the Easter egg sign, remove the piece of jute on the top (don’t throw it away, you will reuse this. I pushed the bottom section of the sign into some of the grapevines and it held it, I added some hot glue to secure it.
- Take the jute piece and pull it through one of the holes on the sign and then through a piece of the grapevine and then back through the other hole. Add hot glue to where the sign meets the wreath to secure it in place.
Experiment with different bow styles, colors, and materials to make your wreath truly unique. You can also add additional embellishments like flowers or even a bunny figurine if you want to take it to the next level. And don’t be afraid to play around with placement of the eggs and sign until you find what looks best to you.
Variations
You can personalize your DIY Easter egg wreath even further by trying out different variations, such as:
- Adding other decorative elements like flowers, or figurines to make it stand out even more.
- Experimenting with different color palettes to match your personal style and décor.
- Incorporating natural elements like twigs, leaves, or feathers to give your wreath a rustic touch.
- Making miniature versions of the wreath to use as table centerpieces for Easter dinner or as gifts for friends and family.
- Instead of using moss, you can use faux grass or even shredded paper to give your wreath a different texture.
- Use pastel-colored feathers instead of eggs for a more whimsical and playful look if you want to make this a Spring wreath instead.
- Add some twinkle lights to the wreath for an extra festive touch.
- Replace the burlap ribbon with a satin or patterned ribbon for a more elegant and sophisticated wreath.
No matter which variation you choose, the end result will be a beautiful symbol of spring and creativity that you can proudly display in your home.
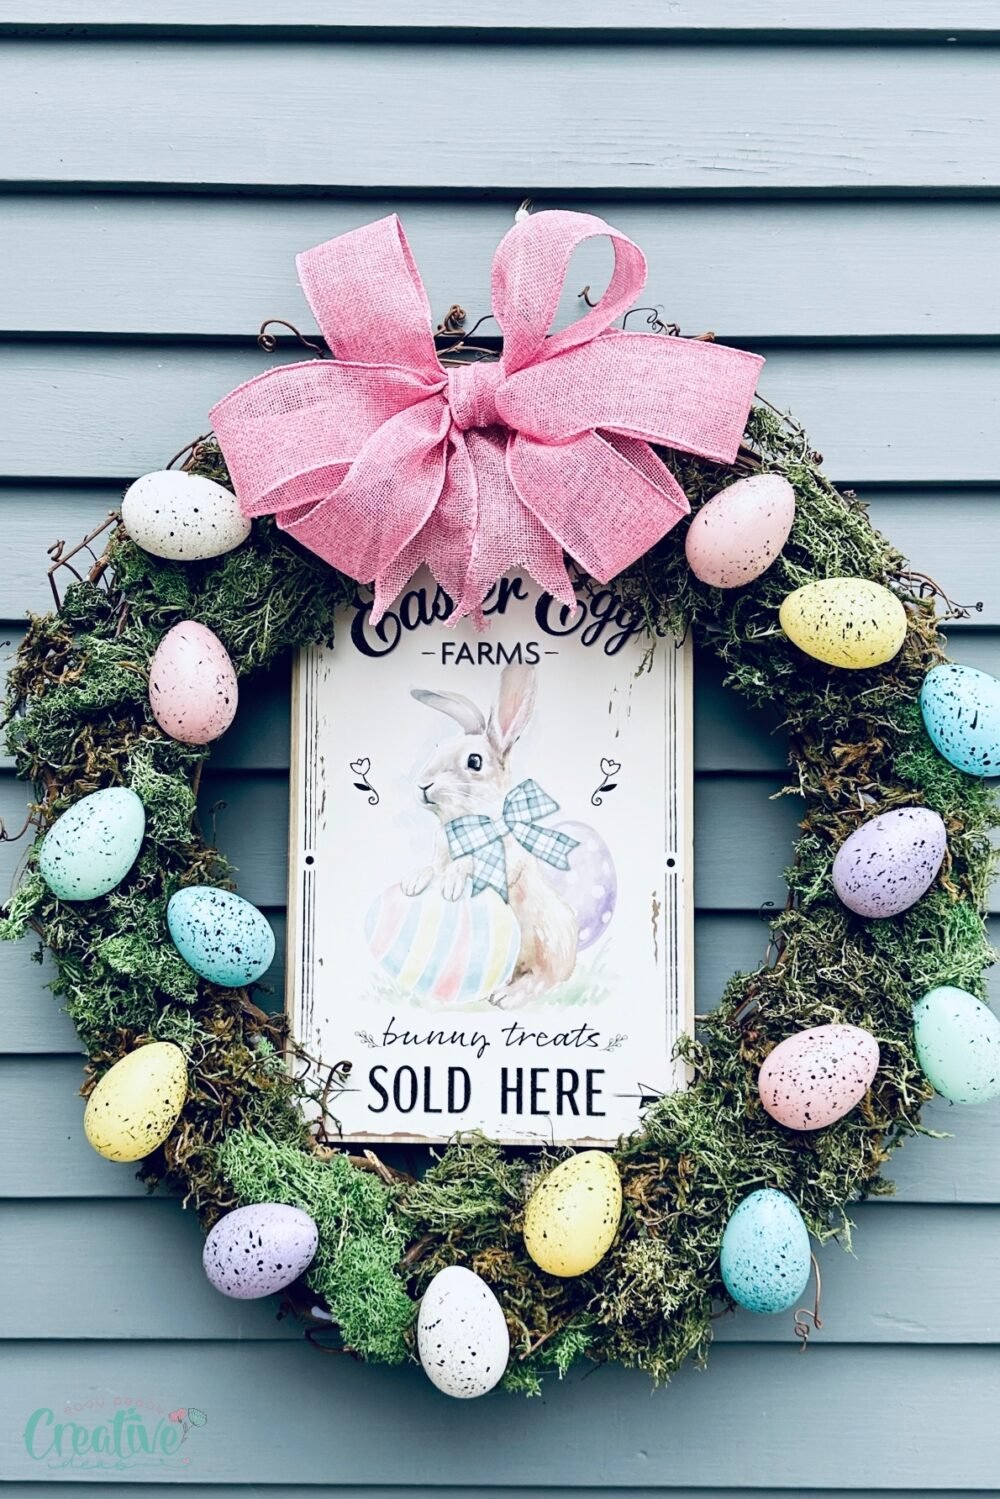
How to display your Easter egg wreath
There are many different ways to display your DIY Easter egg wreath, depending on where you want to showcase it and what materials you have available. Here are a few ideas to get you started:
- Hang it on your front door using a wreath hanger.
- Display it on an interior door or wall using removable hooks.
- Prop it up against a mantle or shelf for a more casual look.
- Use it as a centerpiece for your Easter table by placing it on a cake stand or tray.
- Hang it outside on your porch using command hooks and add some fresh flowers or greenery around the base of the wreath to create a stunning visual display.
Frequently Asked Questions
What kind of eggs work best for this wreath?
Styrofoam or plastic eggs work best, as they are lightweight and easy to glue onto the wreath. I would not recommend using real eggs, even boiled eggs as they can easily break and spoil.
Can I use different types of moss for this wreath?
You can use any type of green or natural-colored moss that you prefer. You can even mix and match different textures for a more dynamic look.
How long does it take to make this wreath?
The time may vary depending on your crafting experience and how detailed you want to make your wreath. But on average it takes about 1 hour to complete. However, don’t be afraid to take breaks or work at your own pace. Crafting is meant to be fun and relaxing!
Is this project suitable for children?
Yes, with adult supervision. This is a great project for kids to get involved in and let their creativity shine. Just make sure to use caution when working with hot glue guns. Have them assist in the decorating rather than using it themselves.
Can I use this wreath for other holidays or occasions?
Sure! You can customize this wreath to fit any holiday or season by swapping out the eggs and sign. For example, you can use flowers and a “Welcome” sign for a spring/summer wreath. Or add ornaments and a “Merry Christmas” sign for a festive winter wreath.
More Easter crafts you will enjoy:
- Decorated Easter wooden spoons
- Easter bunny butts with clay pots
- DIY chick craft with foam dice
- Printable mini Easter baskets
- Dinosaur glam eggs
- Easter lily wreath
Storing your DIY Easter egg wreath when not in use
- To preserve your wreath, store it in a dry and cool place, away from direct sunlight.
- You can also wrap it in tissue paper or plastic to protect it from dust and potential damage.
- When ready to use again, gently fluff and reshape any areas that may have been flattened during storage.
Get creative this Easter and make your own DIY Easter egg wreath! And don’t forget to subscribe to my newsletter for more fun and easy craft ideas!

DIY Easter egg wreath
Materials
Tools
- scissors
- Zip tie
Instructions
- Start by adding moss to almost the entire grapevine wreath. I left a spot open on the top as I was adding a bow.

- To add the moss you need to do this in sections. Add hot glue to the grapevines and the place the moss on top, making sure that it adheres. Some will fall off when you lift it up but you can either hot glue it back in place or stuff it in between the grapevines. Have patience with this. If you notice that your hot glue is stringy like mine was, just make sure to take your time and remove the strings so it doesn’t get tangled with the moss.
- Once the wreath is pretty much covered, start adding your eggs with hot glue, I just randomly added them around the wreath.
- I tried not to get the same color next to each other.
- Next I made a bow using the burlap ribbon, make sure your ribbon is wired, it is much easier to work with. I made a few loops and secured them together with a zip tie.

- I then cut another piece of the burlap ribbon to make the tails and to use to wrap over the zip tie to cover it.

- Add a dab of hot glue on the center of the bow to secure the burlap ribbon. Cut the tails to your desired length.
- To add the easter egg sign, remove the piece of jute on the top (don’t throw it away you will reuse this. I pushed the bottom section of the sign into some of the grapevines and it held it, I added some hot glue to secure it.
- Take the jute piece and pull it through one of the holes on the sign and then through a piece of the grapevine and then back through the other hole. Add hot glue to where the sign meets the wreath to secure it in place.

Article may contain Amazon & affiliate links. As an Amazon Associate I earn from qualifying purchases at no additional cost to you.
ABOUT PETRO
Hi, I’m Petro, author and founder of Easy Peasy Creative Ideas. Sewist, crafter, avid DIY-er, foodie, photographer, homemaker and mommy to one. I’m an expert at coming up with quick, clever sewing tips, recycling crafts and simple, easy recipes! You can find my ideas featured in reputable publications such as Country Living, Good House Keeping, Yahoo News, WikiHow, Shutterfly, Parade, Brit & Co and more. Thanks for stopping by and hope you’ll stay for a while, get to know me better and come back another time. Stick around for real fun projects! Read more…