

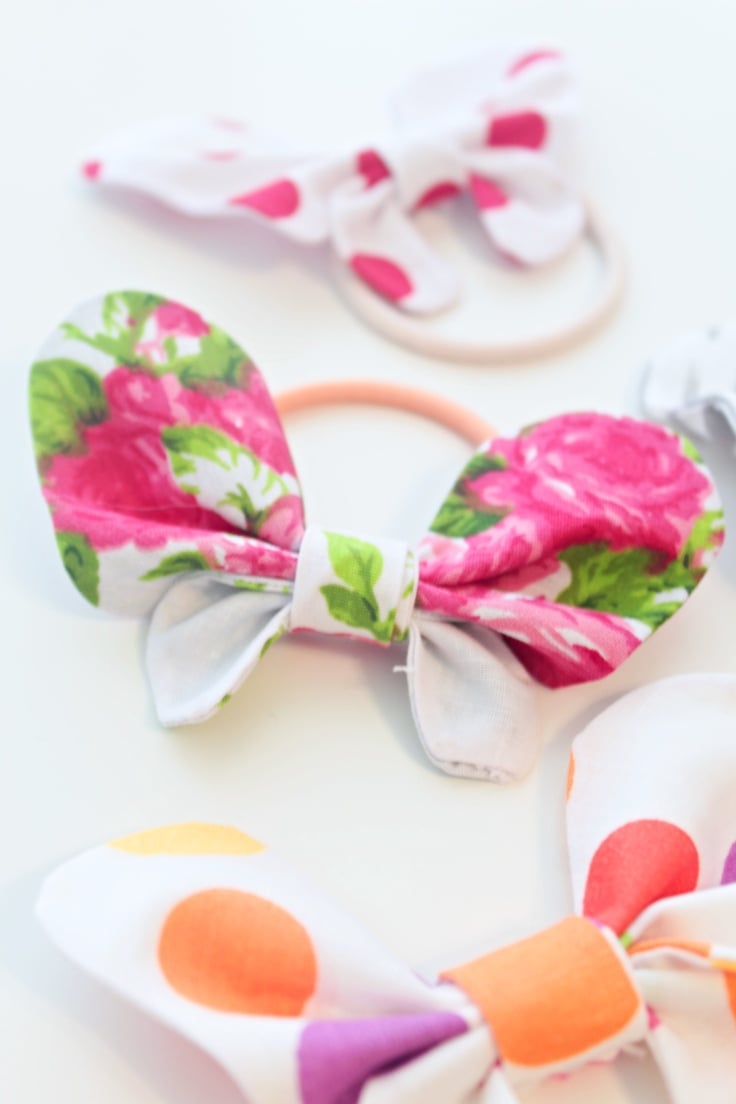
How to sew butterfly hair bows
Want to make a beautiful butterfly hair bow for the little girl in your life? These charming bows are easy to create using fabric scraps you already have at home, making them an affordable and fun sewing project. Perfect for girls of all ages, these bows can be customized with different colors and patterns to match any outfit or occasion. Whether you’re sewing for a special gift or a cute accessory, this project is sure to bring smiles!
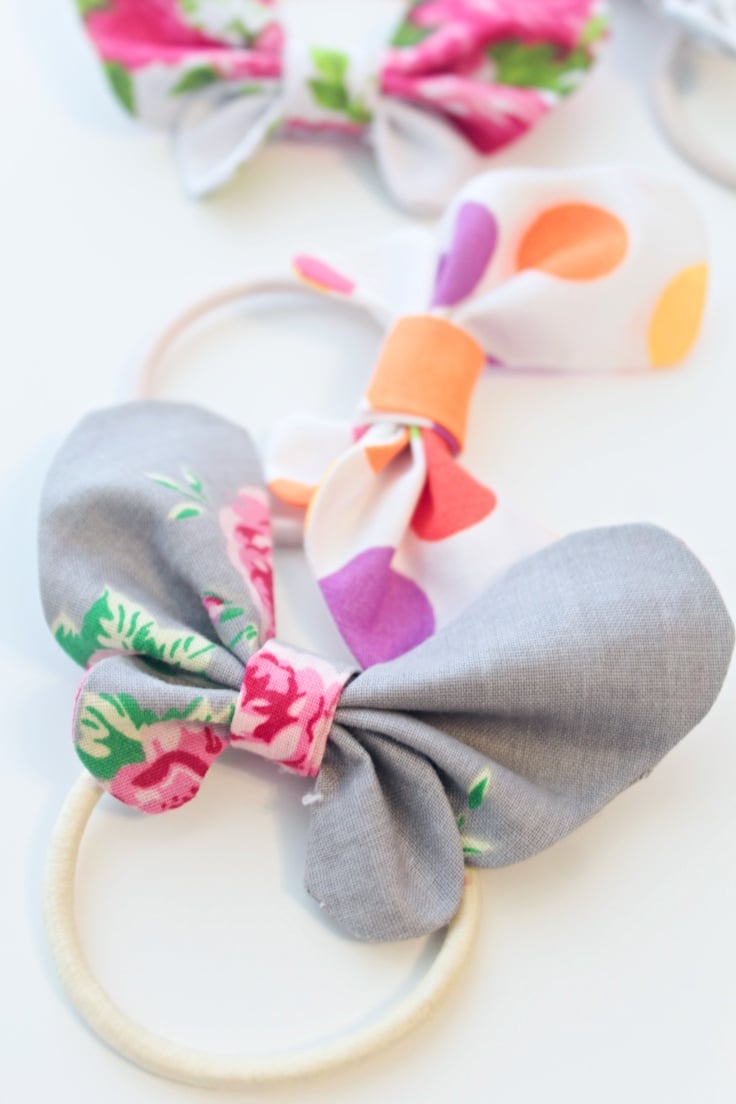
My daughter, Ellie absolutely loves wearing cute hair accessories and has been asking for a butterfly hair bow for quite some time. It was the perfect opportunity to pause my busy routine and create some adorable DIY fabric hair bows!
I love seeing her wear cute accessories, so I made this butterfly hair bow to brighten my mood. Lately, I’ve been feeling stressed for no reason, and getting creative always helps. There’s something so satisfying about turning my fabric scraps into something practical and adorable, like these DIY hair bows!
This is a great chance to tidy up and use those fabric scraps! Make cute hair bows to match your daughter’s or granddaughter’s outfits for a playful, everyday accessory. Even better, use leftover fabric from outfits you’ve made for perfectly matching, coordinated bows.
How to sew a butterfly hair bow
Materials you’ll need
- Butterfly Hair Bow Template – to help you achieve the perfect butterfly shape for your bows I made a great one here. This template provides a clean starting point for cutting your fabric into the perfect shape.
- Exacto Knife- Precision is key when crafting intricate designs, and an exacto knife is perfect for cutting out small details in your template or fabric.
- Self-Healing Cutting Mat – Protect your workspace and achieve cleaner cuts with a self-healing cutting mat. It’s a must-have for working with sharp tools like an exacto knife.
- Fabric Scraps – Use colorful or patterned fabric scraps to bring your butterfly bows to life. This is a great way to repurpose leftover fabric from other projects.
- Light Interfacing – To give your bows structure and make them sturdy, use light interfacing. It helps the fabric hold its shape beautifully.
- Fabric Pen – A fabric pen is essential for tracing your template onto the fabric with precision. It ensures your outlines are clear but can be easily washed out later. Here’s one to consider: fabric pen.
- Scissors and Pinking Shears – Sharp scissors are a basic necessity for cutting fabric accurately. Pinking shears, which cut in a zigzag pattern, are also helpful to prevent fraying and add a decorative edge.
- Pins and Thread – Keep your fabric in place as you work by using pins. Matching thread is also essential for stitching your bow together, whether by hand or machine.
- Sewing Machine (Optional)- While you can hand-stitch your bows, a sewing machine can save time and give your work a polished finish. If you enjoy sewing frequently, it’s worth investing in one.
- Additional Tools: Bamboo Skewer, Pressing Iron, and Glue Gun
- A bamboo skewer helps turn out small corners or press out tight edges in your bows.
- A pressing iron is perfect for smoothing out fabric and ensuring your bows look finished.
- A low-temperature glue gun and glue sticks are excellent for attaching embellishments or securing the bow to clips.
Instructions to make the butterfly hair bows:
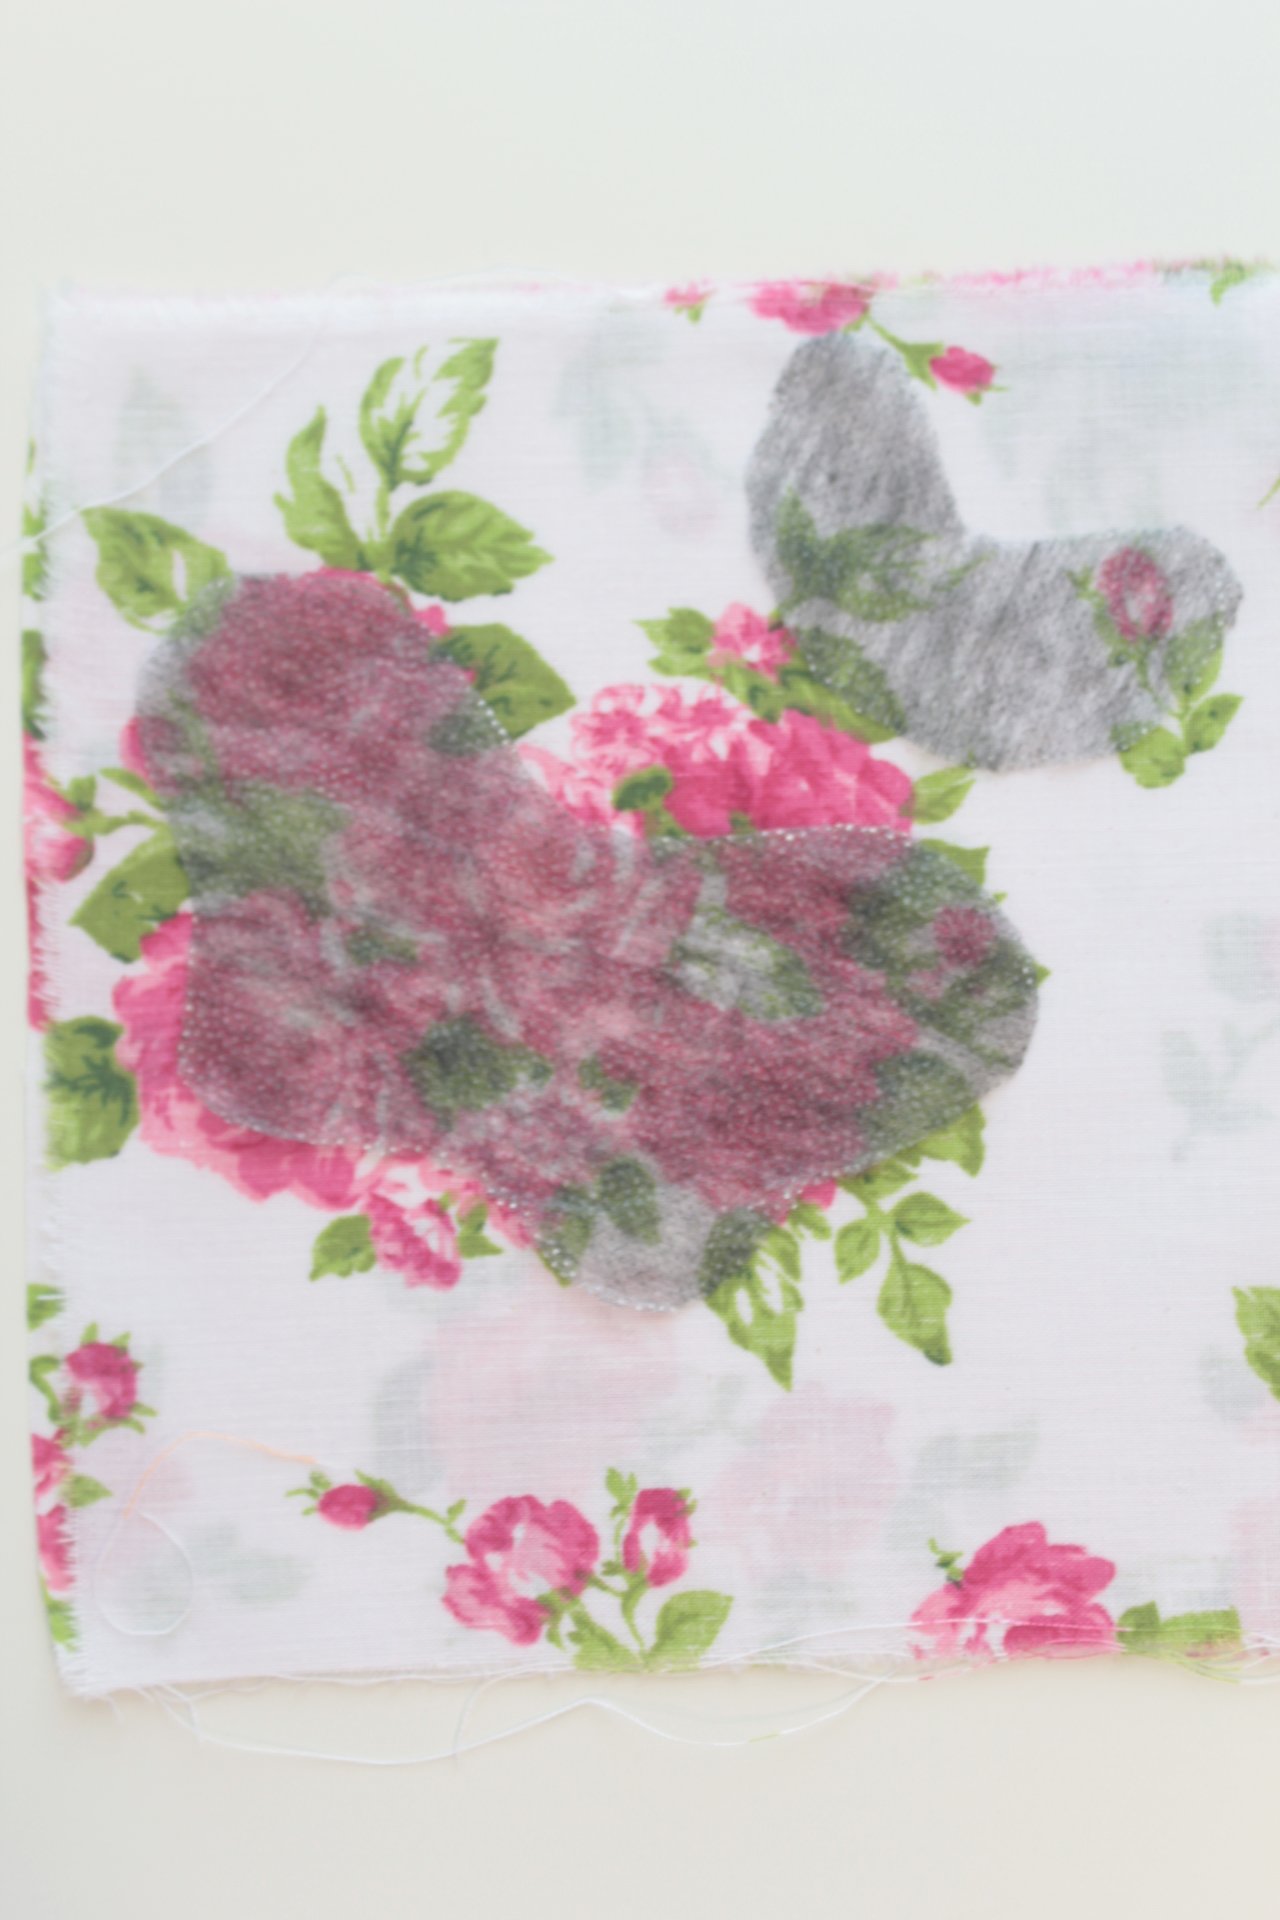
Cutting the butterflies
- Print your template and place it on a self healing cutting mat.
- Use the exacto knife to cut out the templates. Being so small, it’s pretty hard to cut using craft scissors so an exacto knife is a better fit for this project.
- Place the patterns on a piece of interfacing and trace around the patterns using a fabric pen or chalk pen. Cut interfacing for each of the bows you’re planning to make.
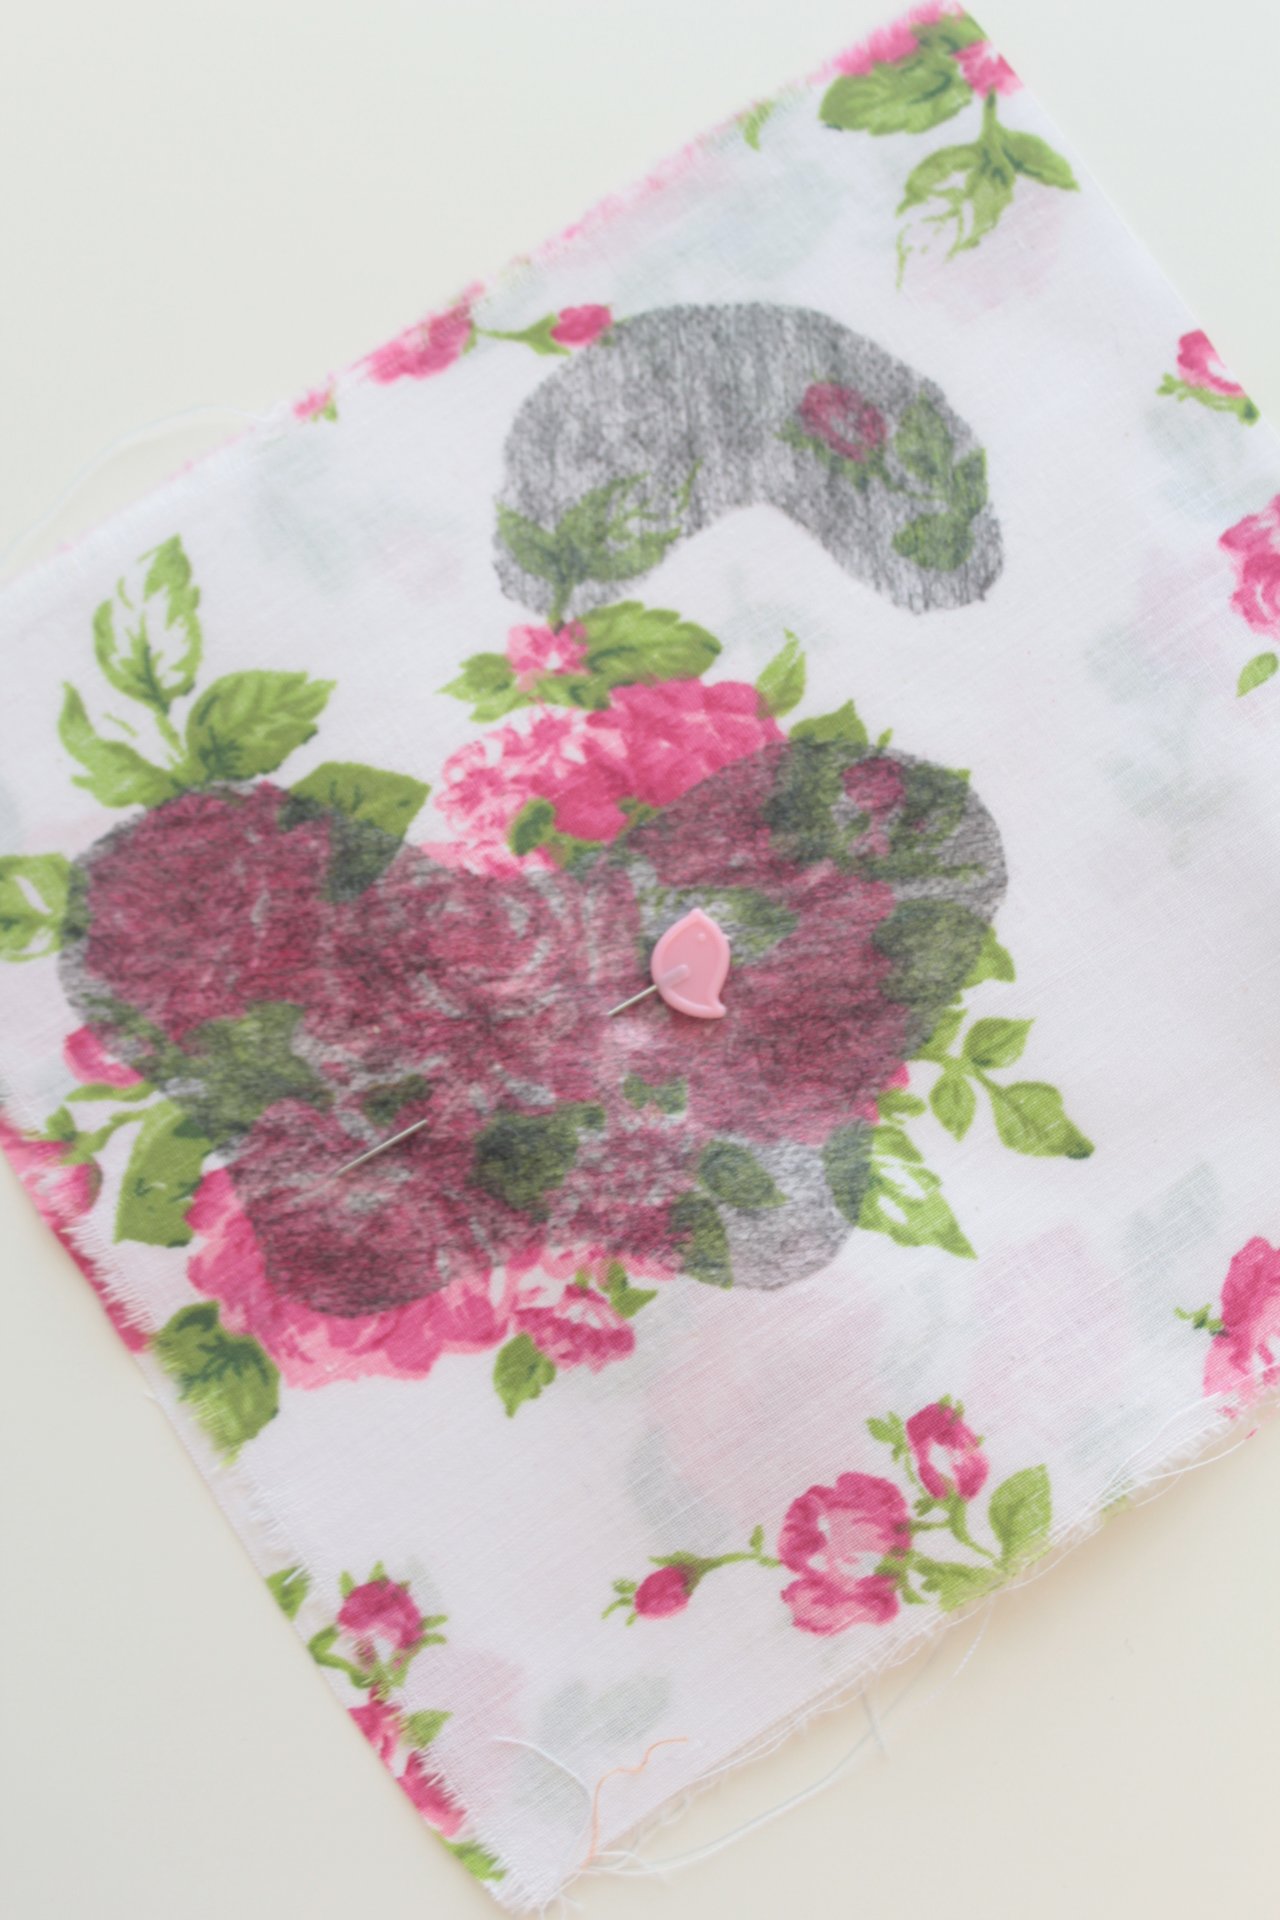
- Take the scrap fabrics and place them in pairs, right sides together.
- Place the interfacing on the scrap fabric, sticky side down
- and press until the interfacing adheres well to the fabric. Pin fabrics together.
Sewing the butterflies
- Sew slow, just outside the interfacing, using a small stitch and a small length. This will help you go slow over tiny curves so you don’t mess things up as I did lol
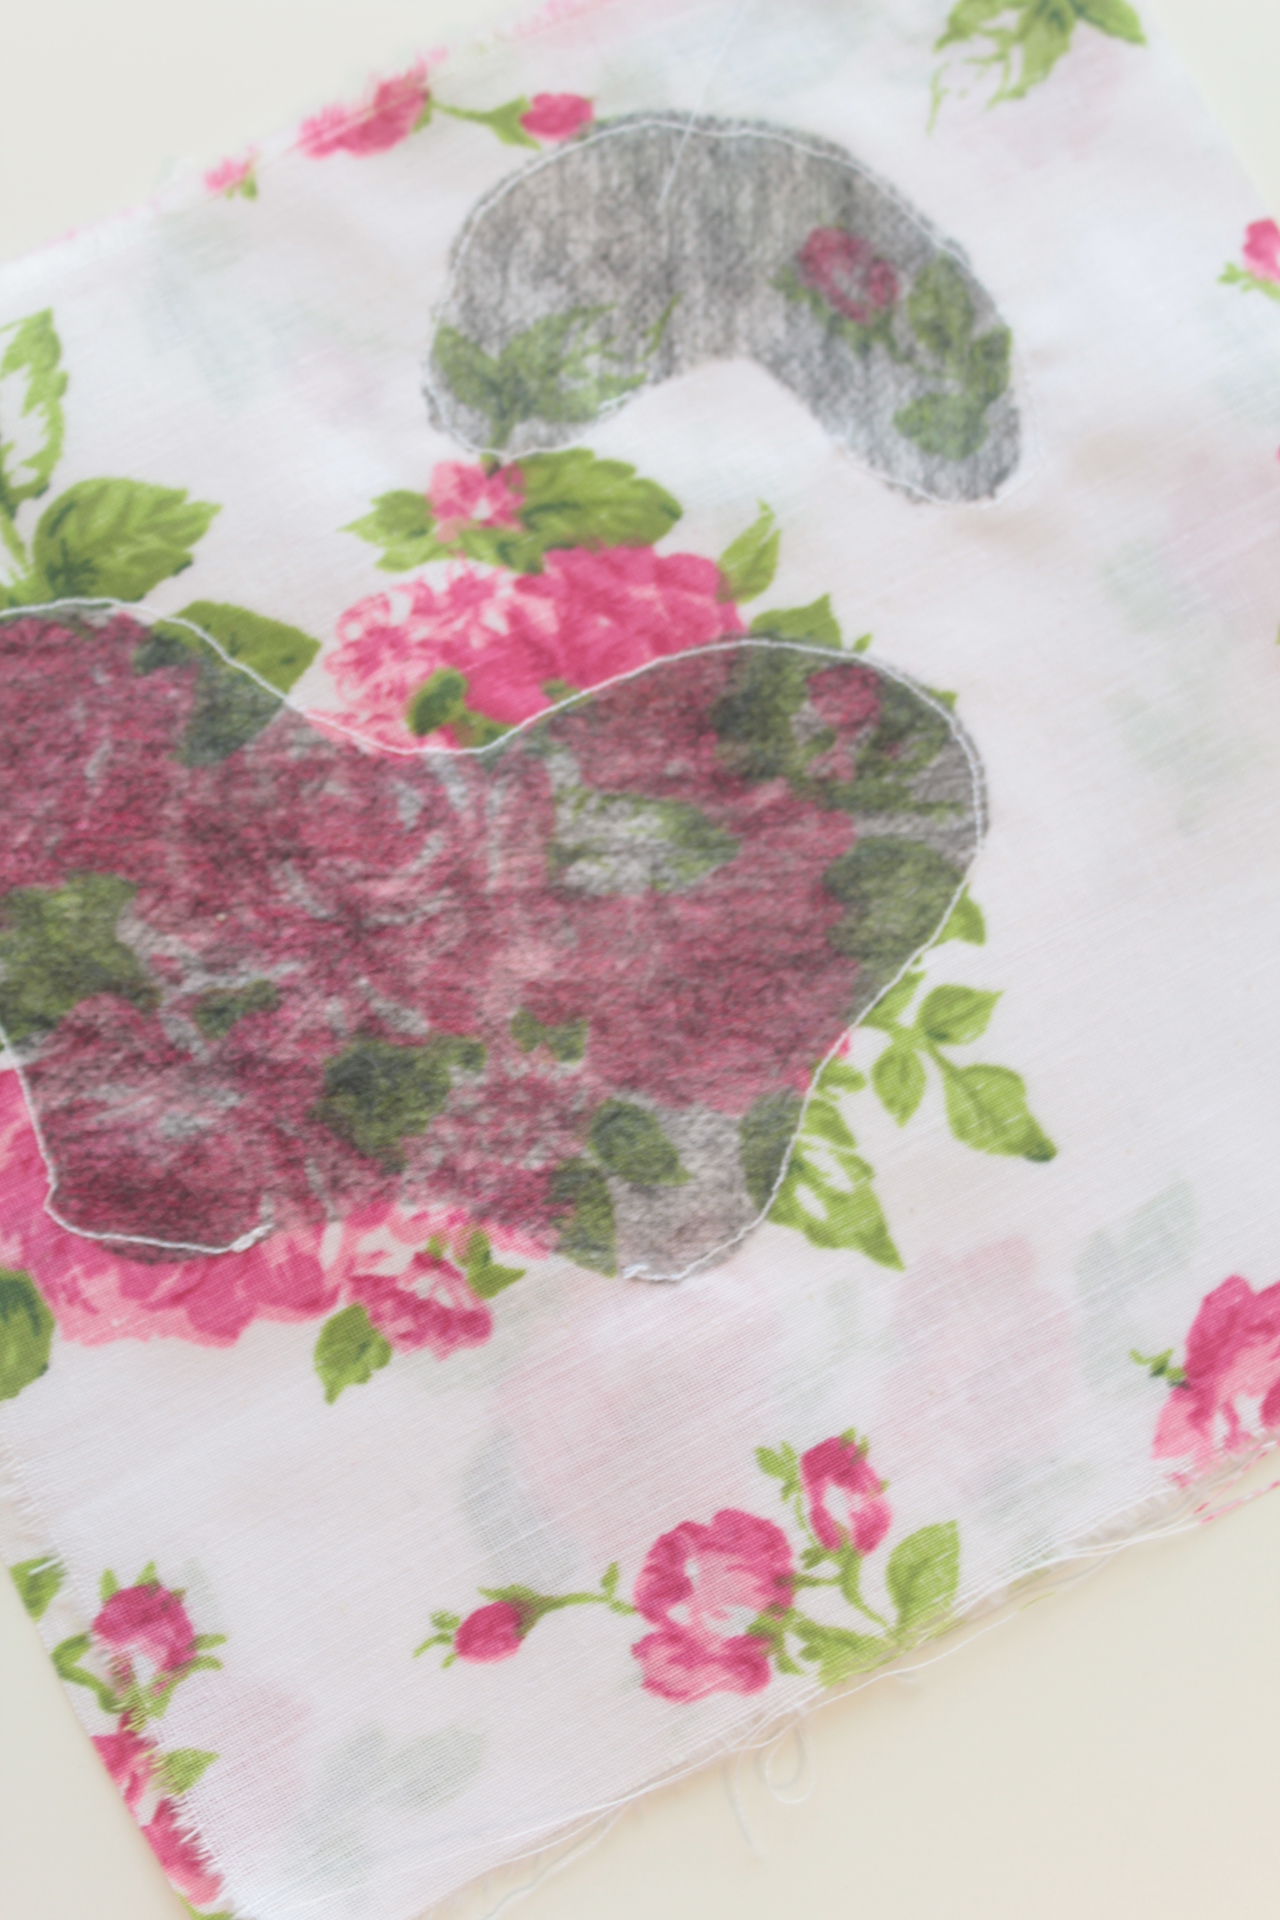
- Leave a gap in the bottom of each butterfly piece.
- Cut around the butterfly with 1/8″ allowance, leaving a bit more fabric around the gap.
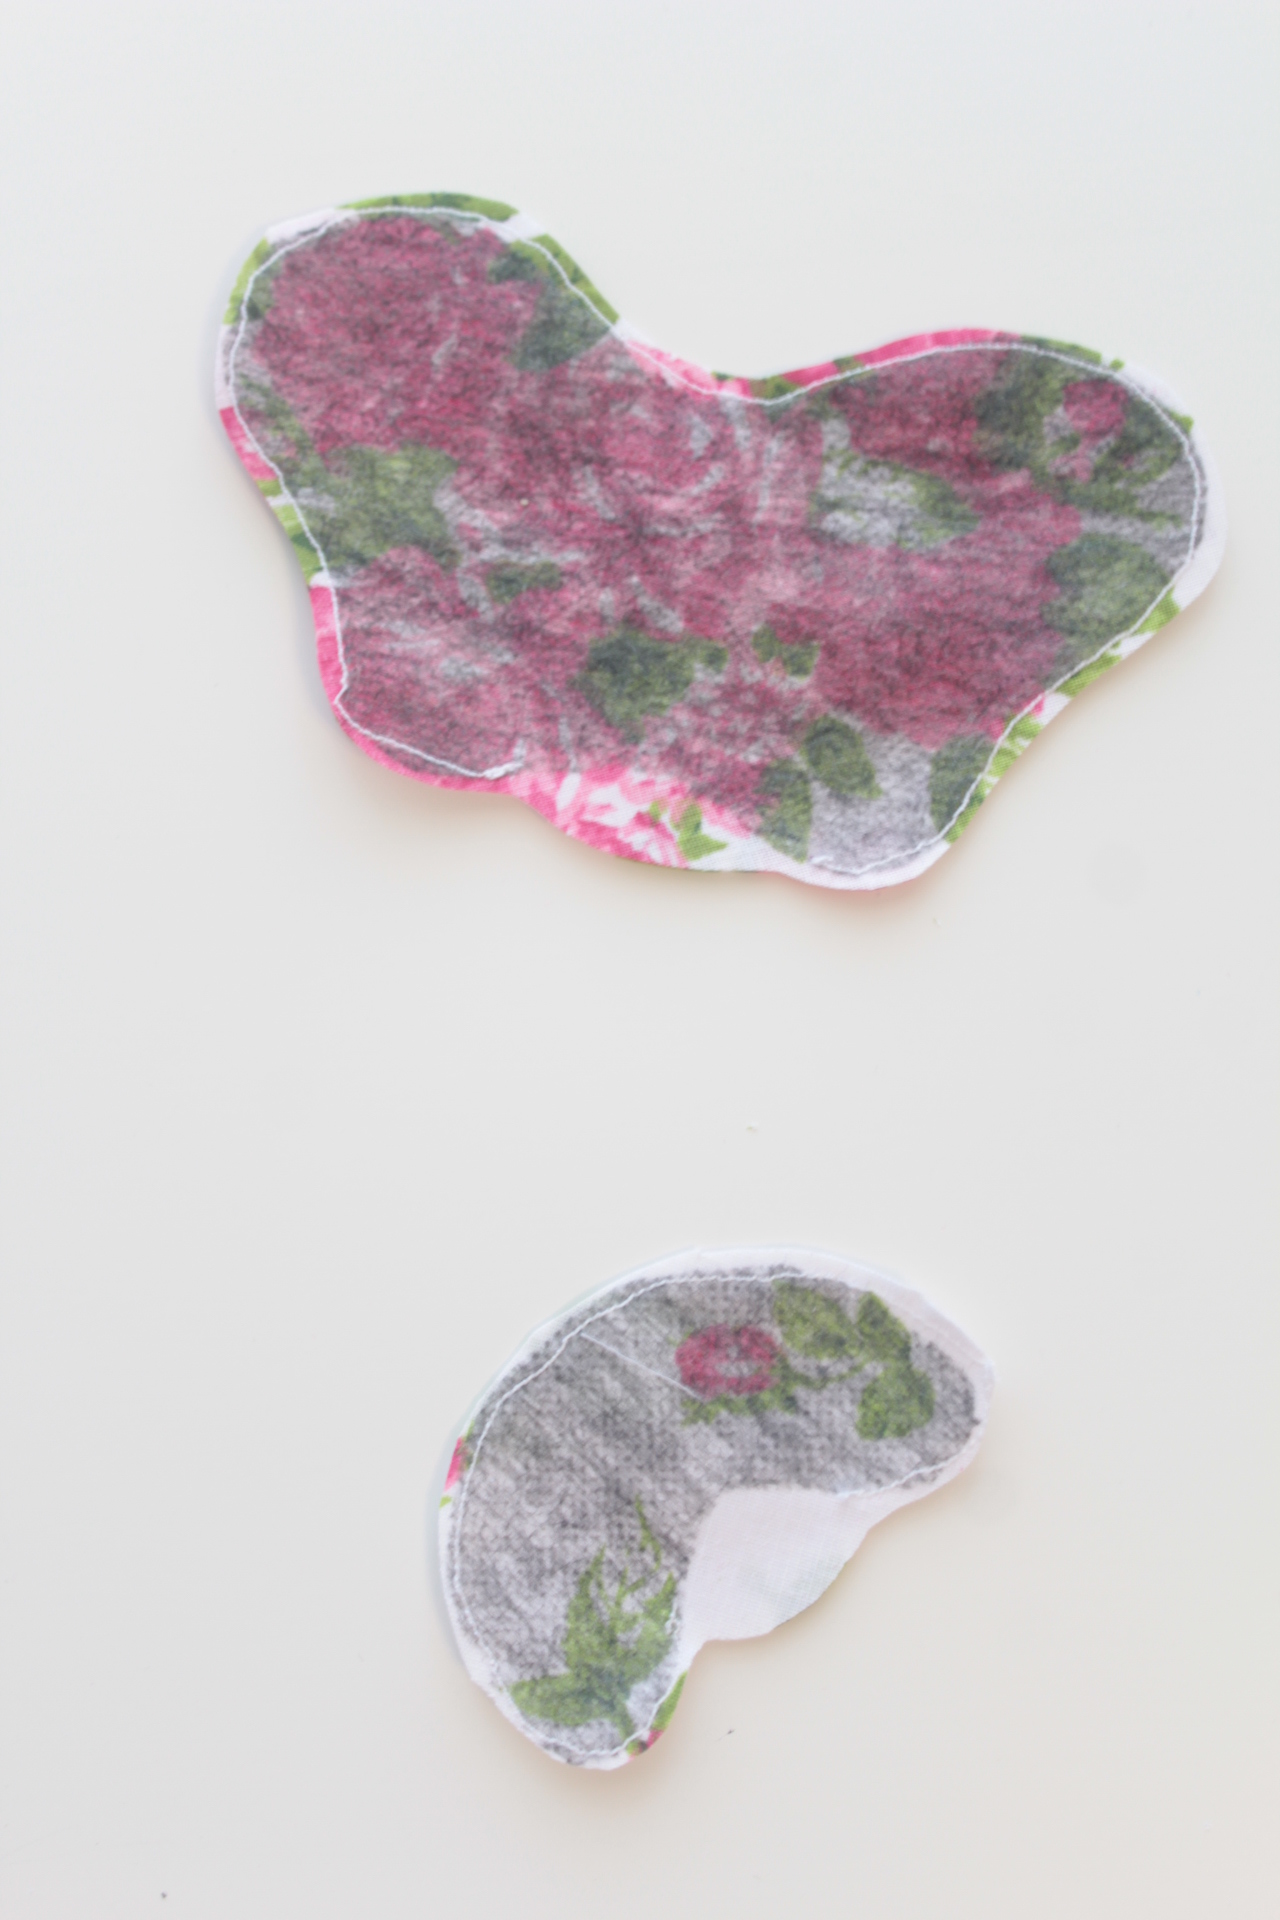
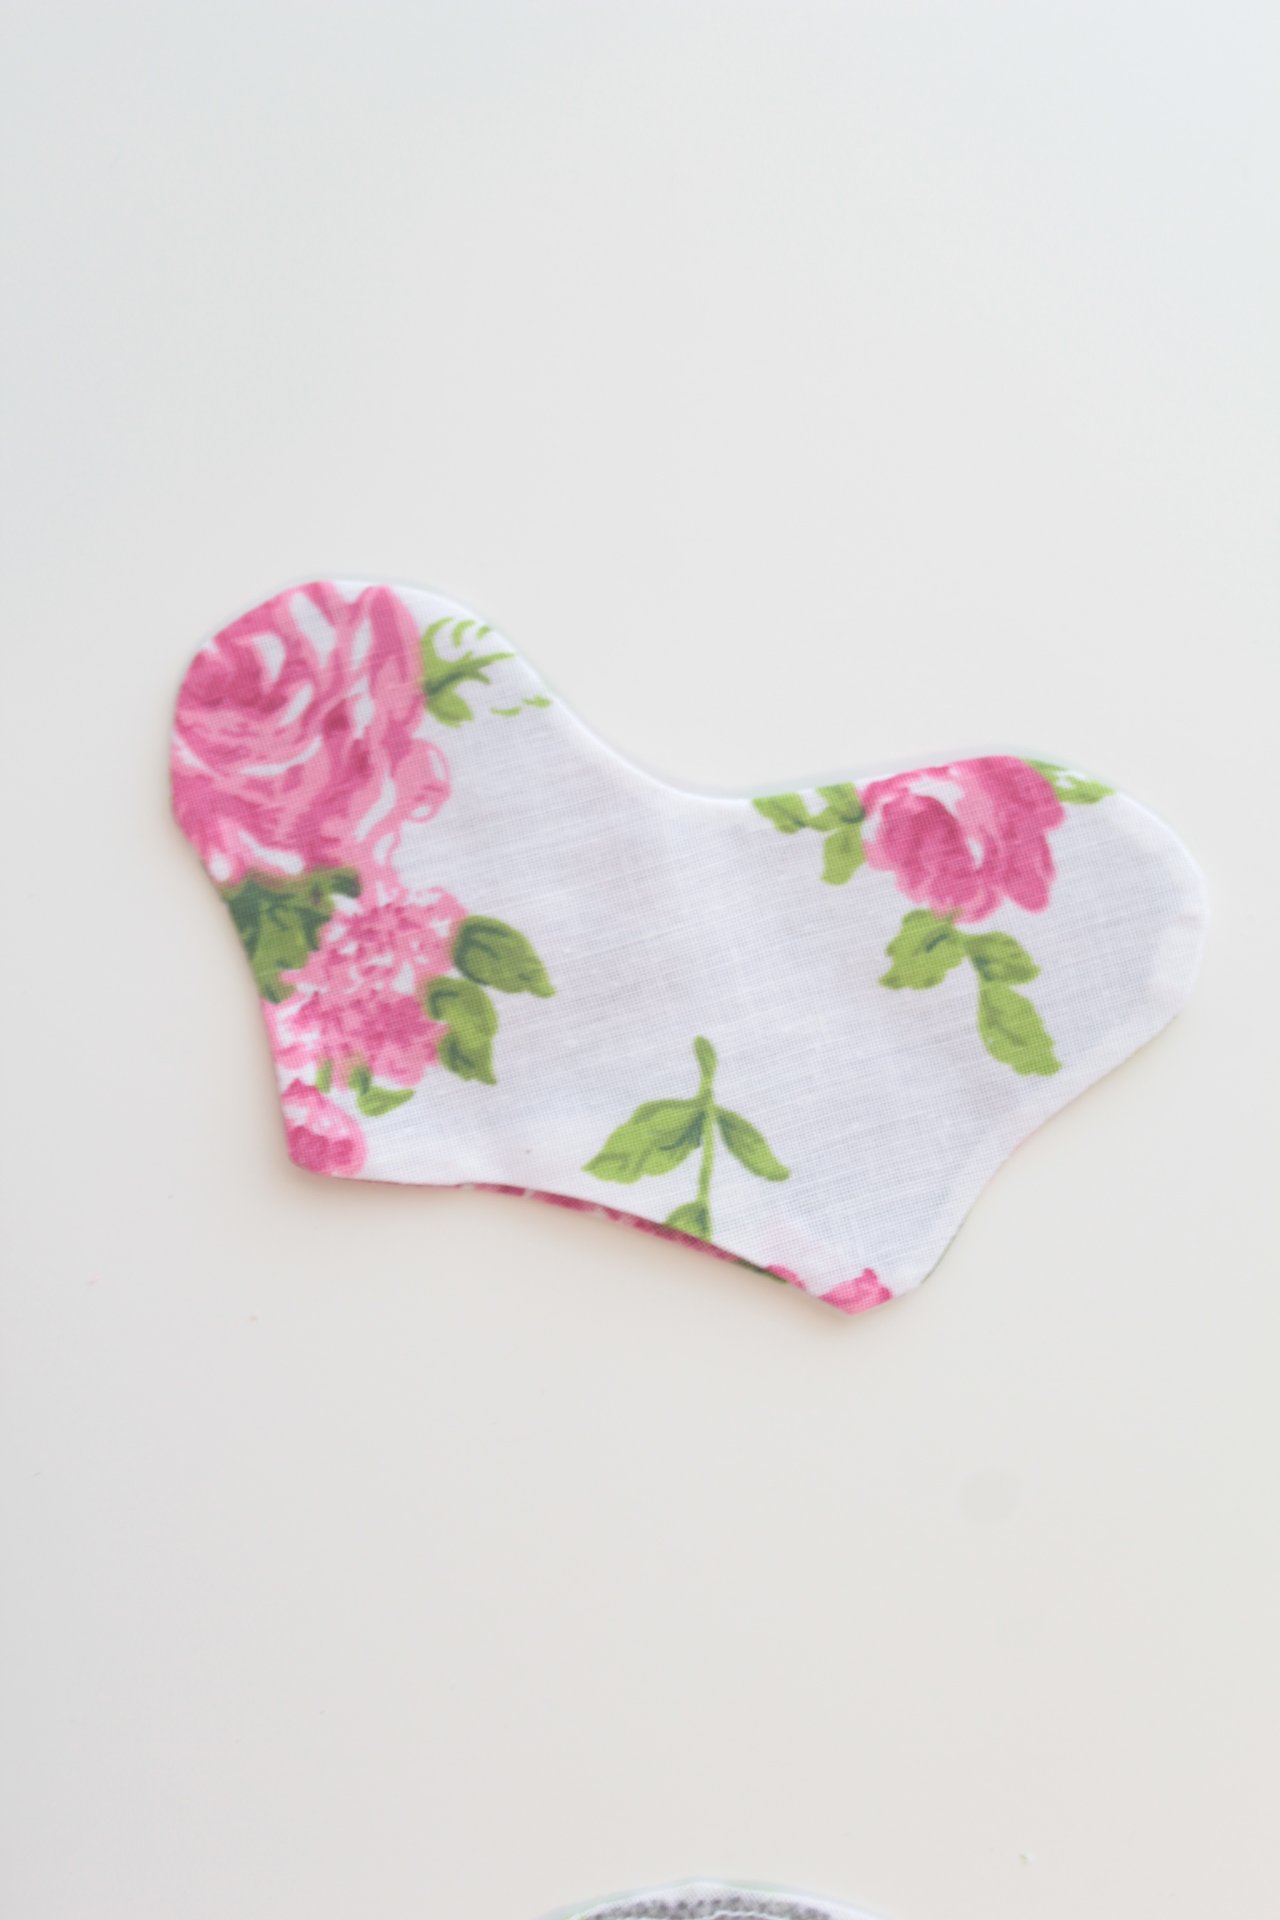
- Turn butterfly pieces right side out through the tiny gap. You might find a bamboo skewer is a pretty good help here. Just remember to use the blunt end or else you’ll pierce through the seam.
- Push the gap in then press well.
Finishing the bows
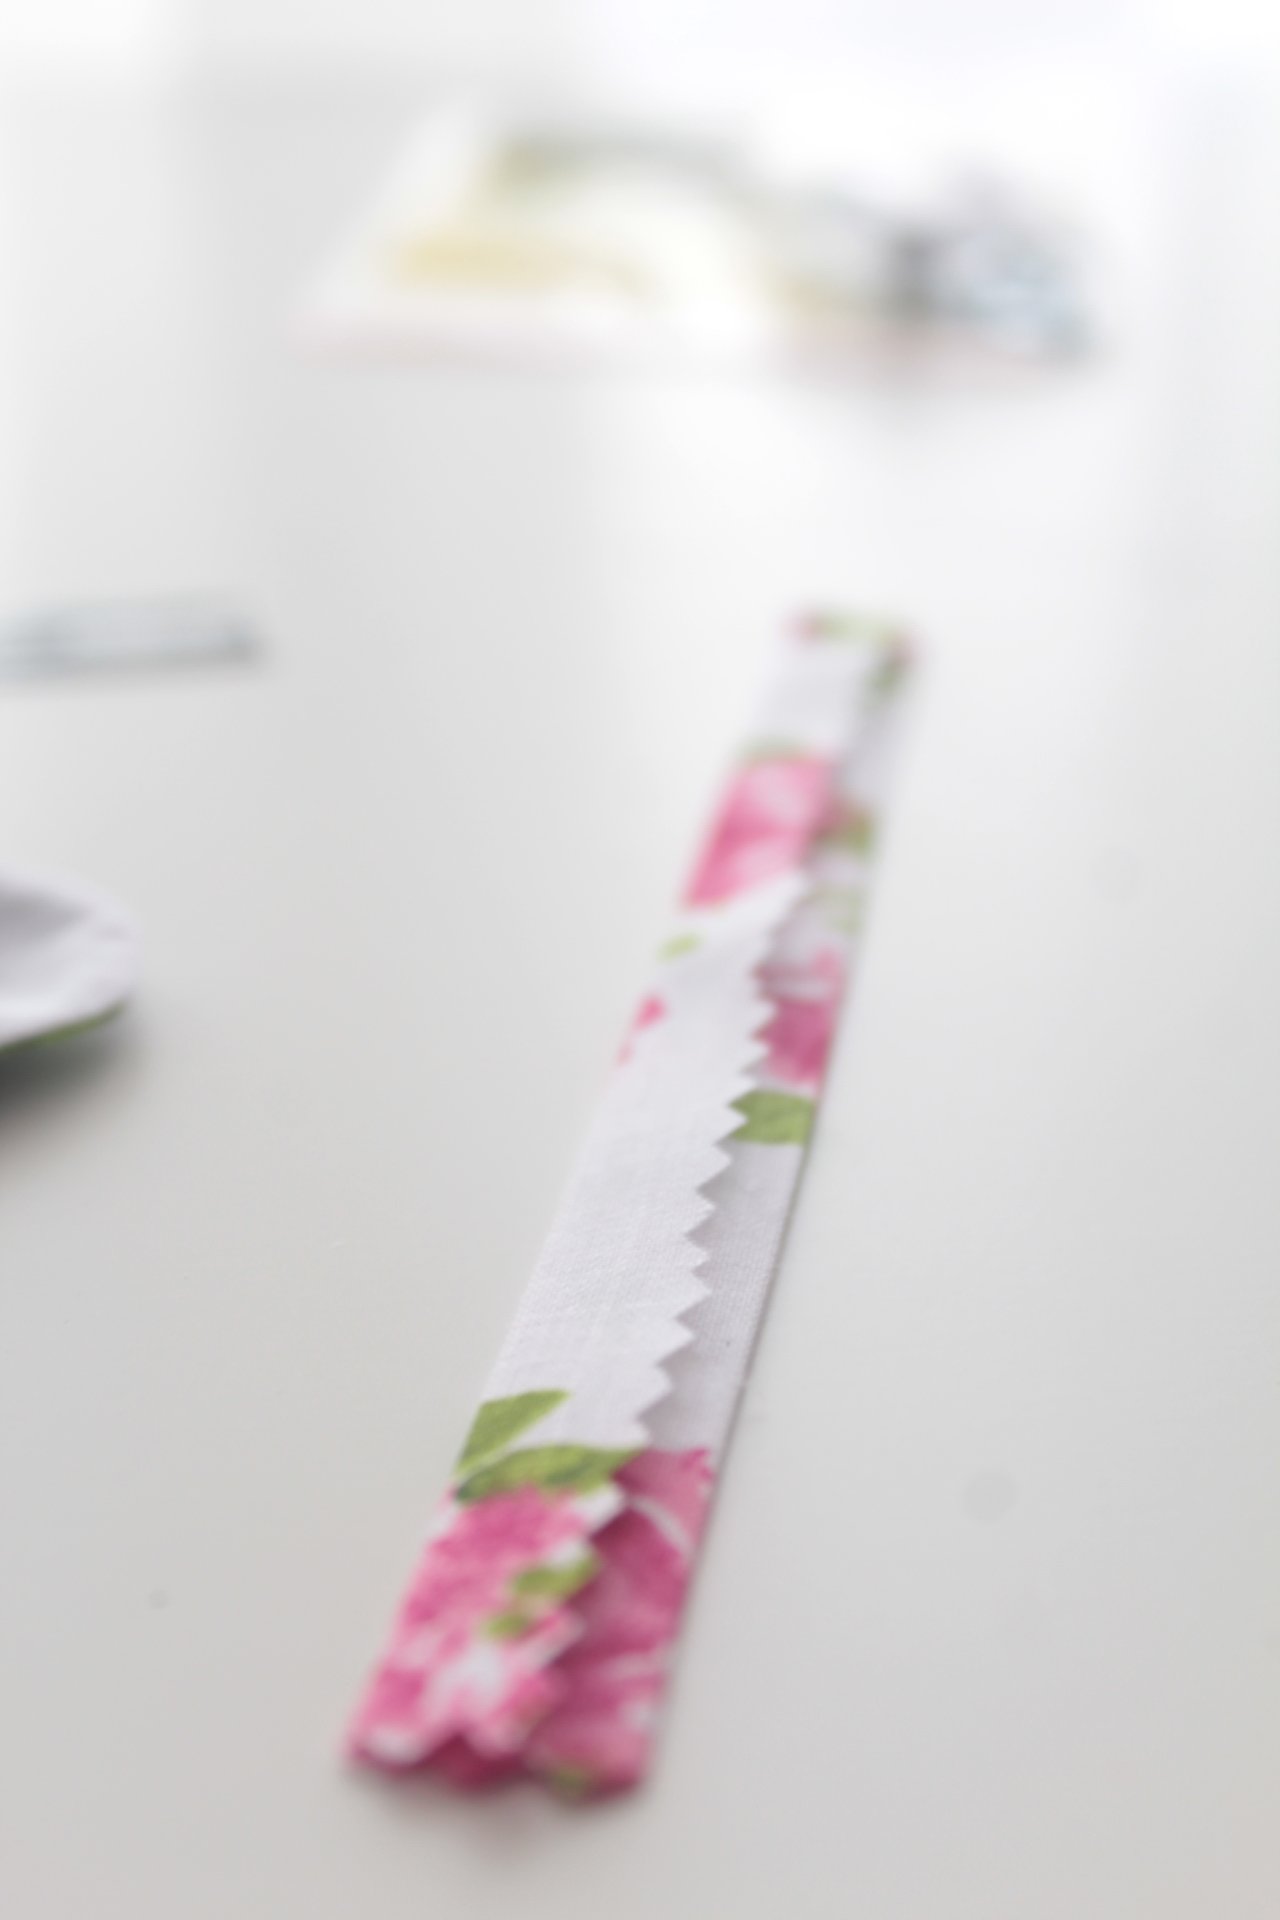
- Cut a small strip of fabric of about 1 1/2″ x 5″ using your pinking shears. this will prevent the strip from fraying.
- Fold the sides in, lengthwise, and press well with your iron on steam.
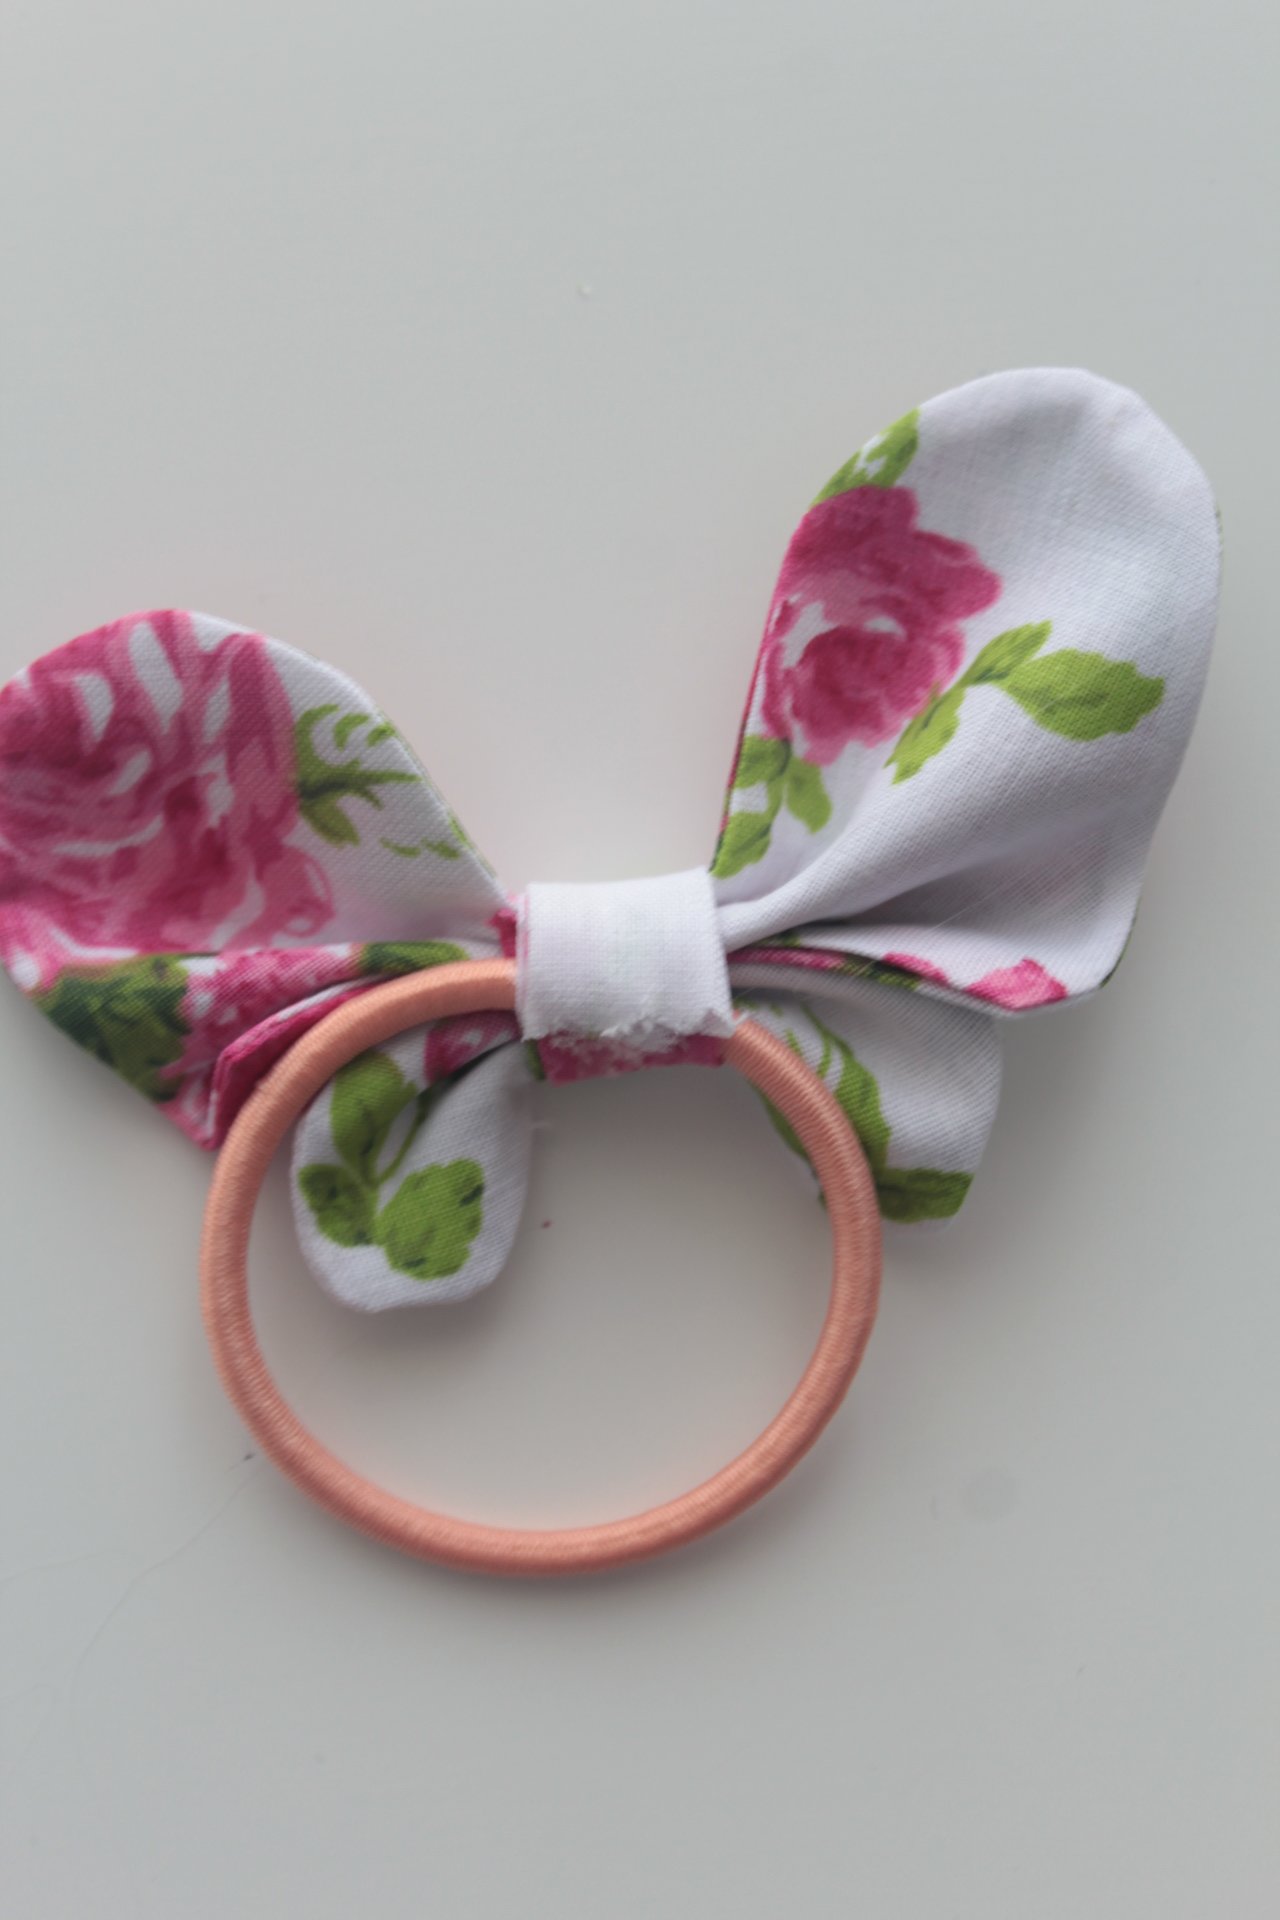
- Pinch both butterfly pieces and join them in the middle then wrap some thread around to keep them together until you move to the next step.
- Place a dot of hot glue on the wrapped thread and press one end of the pinked strip until secured.
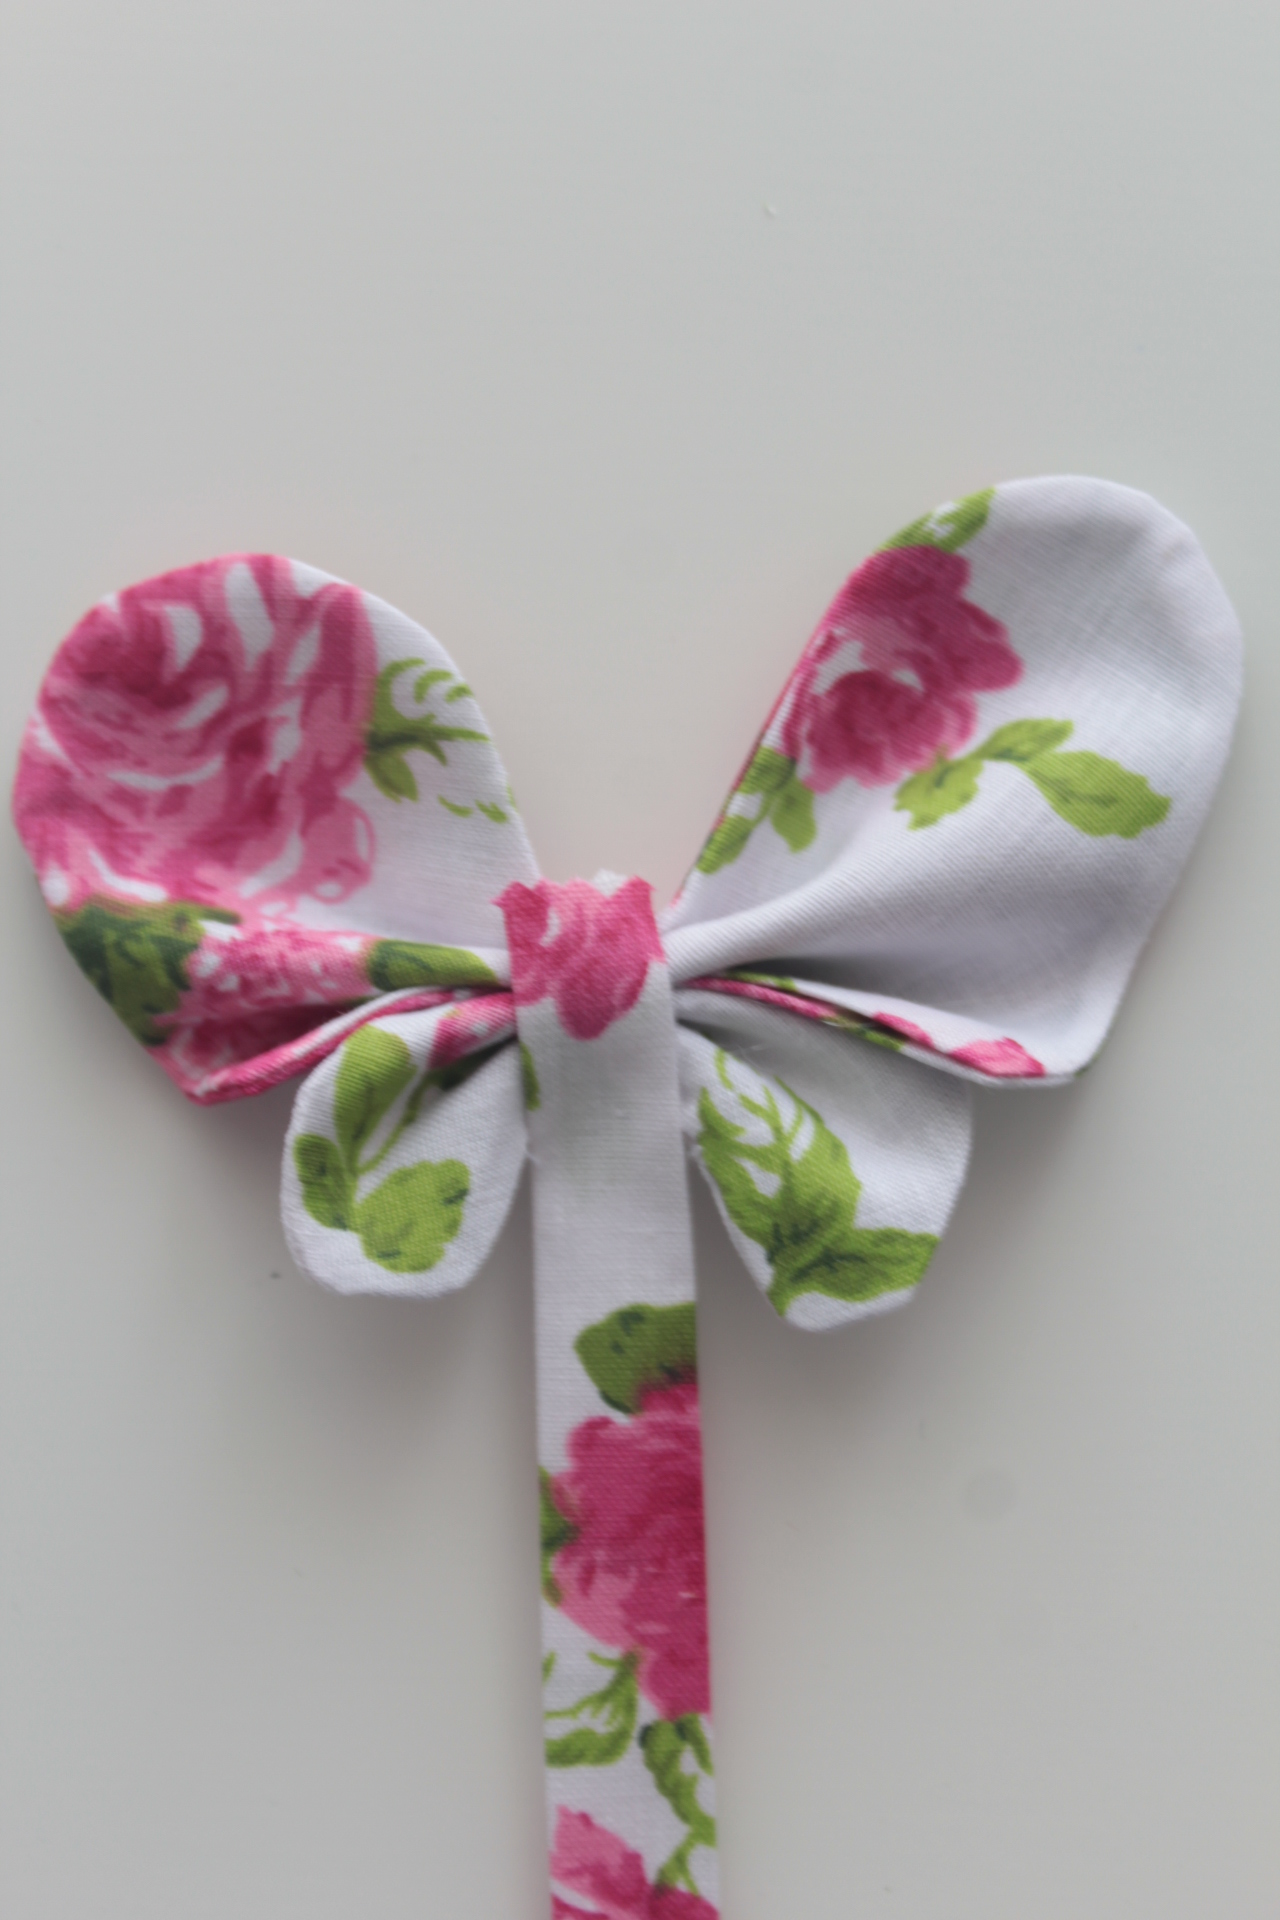
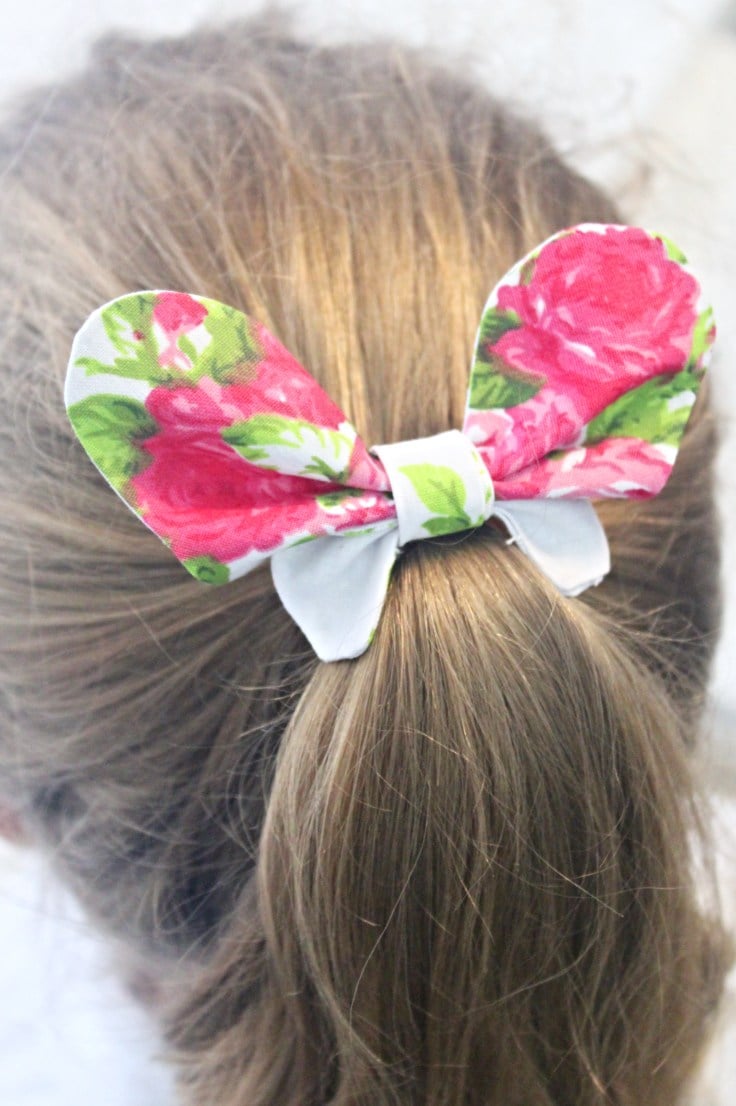
- If you’re using these butterfly bows as hair ties or hair clips now is the time to add those in the middle of the butterfly.
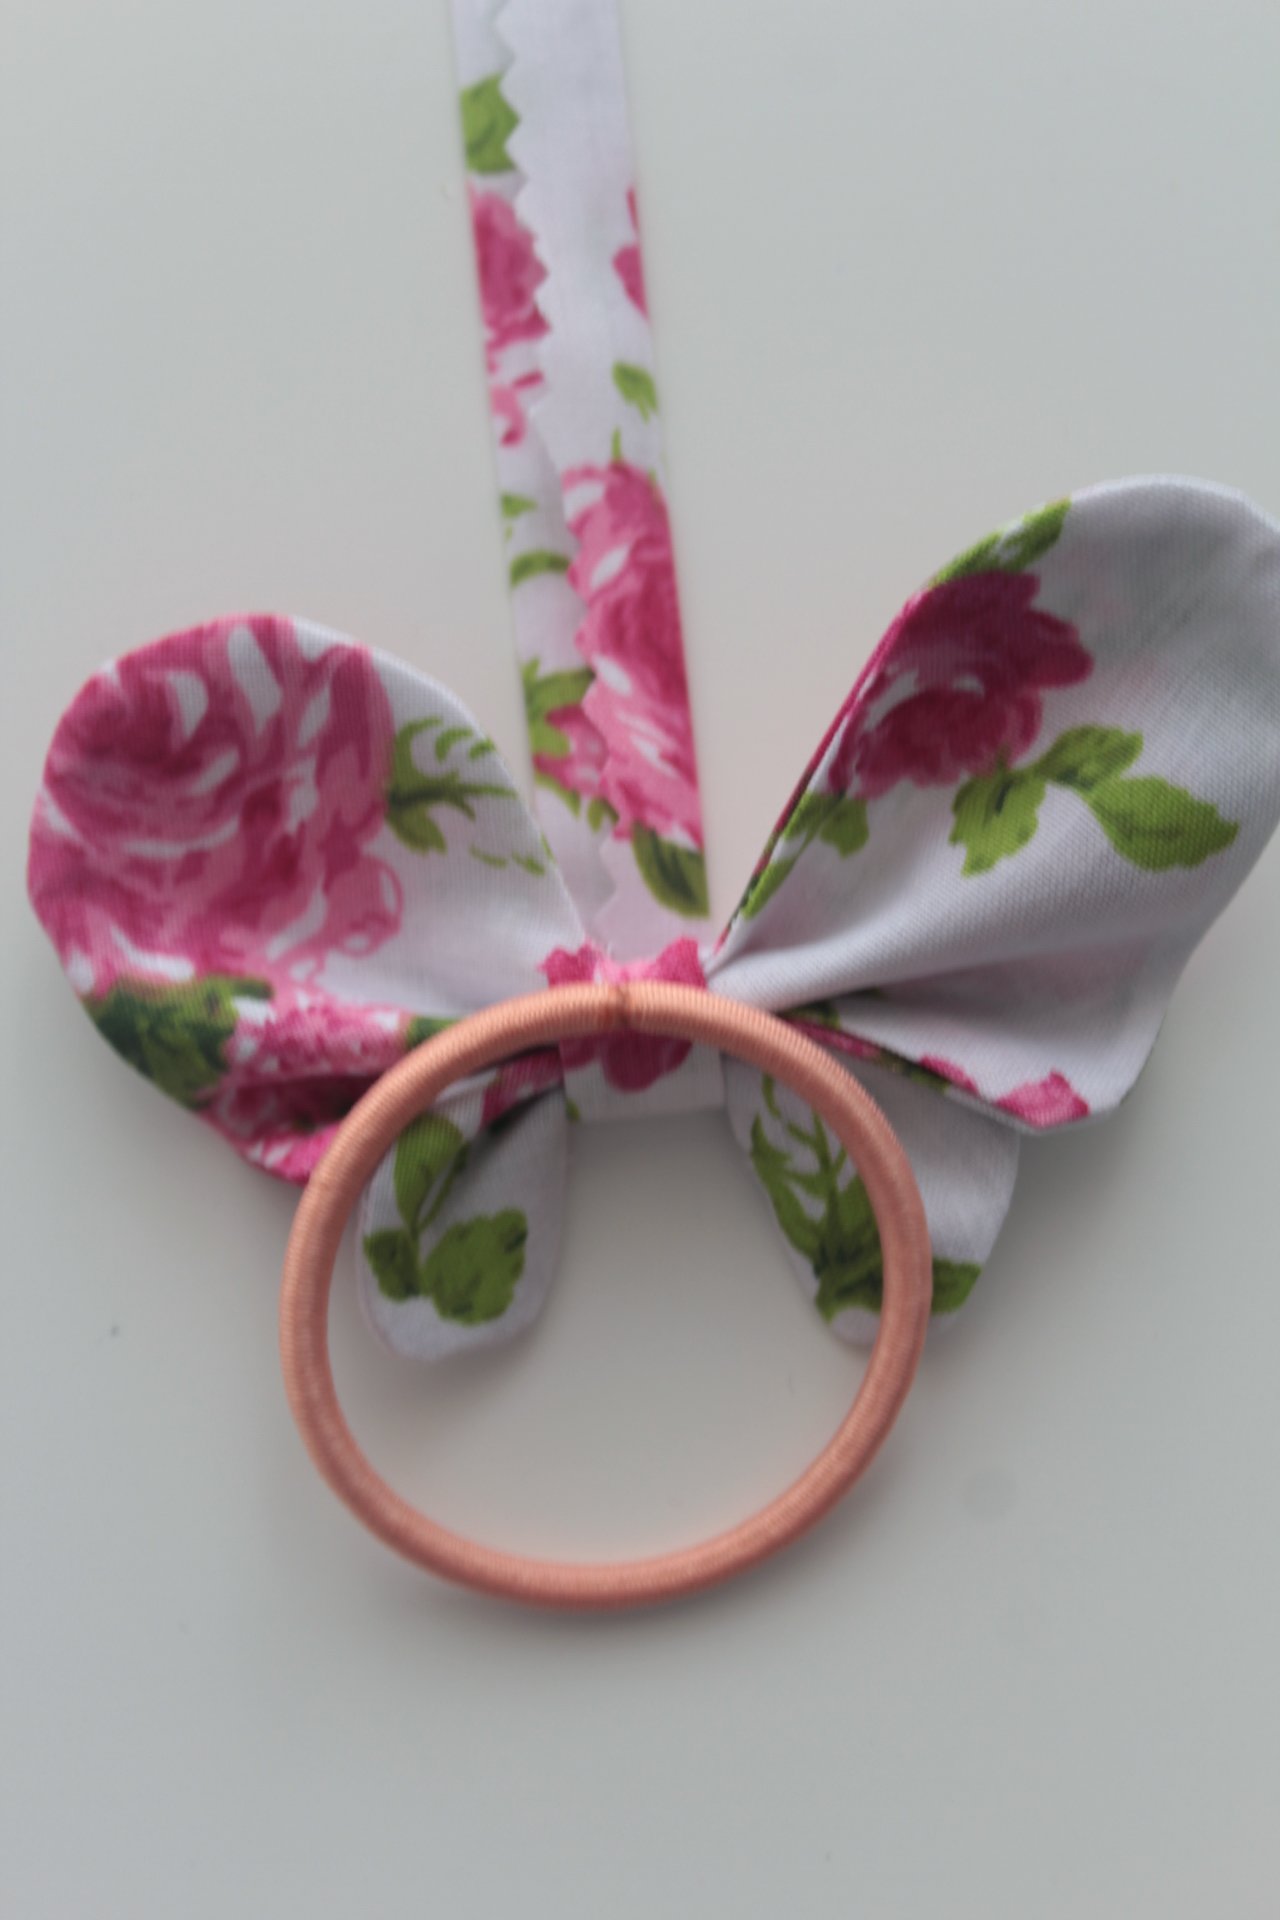
- Wrap the pinked strip tightly around the butterfly until you reach the end of the strip.
- Secure the end with another drop of hot glue and you’re done!
Tips
- If you don’t have pinking shears, you can use regular scissors, but the edges might fray over time.
- Choose fabrics with contrasting patterns or colors to make your butterfly bows stand out and look more vibrant.
- Be cautious when using hot glue, as it can be very hot and cause burns. Work on a heat-resistant surface for added safety.
- Experiment with different sizes of fabric to create bows of various dimensions, perfect for different uses like accessories or decorations.
More hair accessories you will enjoy
- DIY bunny hair clip
- Knot headband sewing tutorial
- Lace headband tutorial
- Flower hair ties
- Singed flower hair pins
Sewing project variations
There are many variations and options for your butterfly bow sewing project. Here are some ideas to get you started:
- Add a center embellishment, like a button or bead, to add an extra touch of detail.
- Use different types of fabric, such as satin, chiffon, or lace, to create unique textures and looks.
- Sew multiple smaller butterfly bows onto a larger base for a layered effect.
- Create a mini version by using thinner strips of fabric and making smaller folds.
- Experiment with patterned fabrics, like polka dots, florals, or stripes, to make the bow stand out.
- Add a hair clip or barrette to the back to turn your creation into a stylish hair clip.
- Use the butterfly bow as a decorative element on bags, hats, or clothing to personalize your items.
- Scale up the size of your bow to make a bold statement piece, perfect for gift wrapping or home décor.
Frequently asked questions
Here are some common questions that may arise when making a butterfly bow:
Can I use any type of fabric for the butterfly bow?
Yes, you can use any type of fabric as long as it’s not too thick or stiff. Lighter weight fabrics like cotton, satin, or chiffon work well for this project.
Do I have to use a sewing machine to make the butterfly bow?
No, you can hand sew the pieces together if you don’t have access to a sewing machine. However, using a sewing machine will make the process faster and more precise.
How to clean your butterfly hair bow
Washing
Hand washing is the best method for cleaning your butterfly hair bow. Fill a sink or basin with lukewarm water and add a small amount of mild detergent. Gently agitate the bow in the water, making sure not to scrub or wring it out too harshly. You can use a small brush, like a toothbrush, to gently remove any stains or dirt. Rinse the bow thoroughly with clean water and gently squeeze out any excess water.
Drying your butterfly hair bow
To dry your butterfly hair bow, lay it flat on a towel and reshape it if necessary. Do not hang it to dry as this may cause the shape of the bow to become distorted. Allow the bow to air dry completely before wearing or storing it.
Creating your own butterfly hair bow can be a fun and creative project. With the right materials and techniques, you can make a beautiful accessory that is unique to you. So go ahead and add some color and playfulness to your hairstyle with a handmade butterfly hair bow! Happy sewing!
Most popular sewing articles:
- How to hem a curve
- Corded bag handles
- Little girls flutter sleeve dress
- Making your own laminated cotton fabric
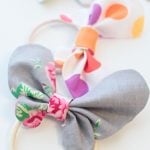
How to sew a butterfly hair bow
Materials
- fabric scraps
- matching thread
- light interfacing
Tools
- butterfly hair bow template
- exacto knife
- scissors
- sewing machine (optional, you can hand stitch these too)
- bamboo skewer
- pressing iron
- low temperature hot glue gun
- hot glue sticks
Instructions
- Print your template and place it on a self healing cutting mat.
- Use the exacto knife to cut out the templates. Being so small, it's pretty hard to cut using craft scissors so an exacto knife is a better fit for this project.
- Place the patterns on a piece of interfacing and trace around the patterns using a fabric pen or chalk pen. Cut interfacing for each of the bows you're planning to make.
- Take the scrap fabrics and place them in pairs, right sides together.
- Place the interfacing on the scrap fabric, sticky side down and press until the interfacing adheres well to the fabric. Pin fabrics together.
- Sew slow, just outside the interfacing, using a small stitch and a small length. This will help you go slow over tiny curves so you don't mess things up as I did lol
- Leave a gap in the bottom of each butterfly piece.
- Cut around the butterfly with 1/8" allowance, leaving a bit more fabric around the gap.
- Turn butterfly pieces right side out through the tiny gap. You might find a bamboo skewer is a pretty good help here. Just remember to use the blunt end or else you'll pierce through the seam.
- Push the gap in then press well.
- Cut a small strip of fabric of about 1 1/2" x 5" using your pinking shears. this will prevent the strip from fraying.
- Fold the sides in, lengthwise, and press well with your iron on steam.
- Pinch both butterfly pieces and join them in the middle then wrap some thread around to keep them together until you move to the next step.
- Place a dot of hot glue on the wrapped thread and press one end of the pinked strip until secured.
- If you're using these butterfly bows as hair ties or hair clips now is the time to add those in the middle of the butterfly.
- Wrap the pinked strip tightly around the butterfly until you reach the end of the strip.
- Secure the end with another drop of hot glue and you're done! Your butterfly bow is now complete.
Video
Article may contain Amazon & affiliate links. As an Amazon Associate I earn from qualifying purchases at no additional cost to you.

Thank you for all you do. You are a wonderful kind person, showing all these wonderful inspiring crafts for free. Have a lovely day.
Aww, thanks so much, Ruth! You made my day :)
Adorable!
do i really have to rejoin the website for the template ??
Hi Brenda. I see your email as active in my list of email subscribers so you don’t have to rejoin as you’re still a member. You just have to access the files via the link I’ve sent through my newsletters, using the most updated password I also provided with each of my newsletters.
Your tutorials are great and easy to follow. Thanks for sharing
Hi, this tutorial was indeed simple and well explained.
thank you
Hi there! So glad you liked it and found it easy to follow! Thanks for letting me know!
Hello! I wanted to make the butterfly hair bows for my granddaughters but the template does not download. I signed up as directed for the pattern but it does not open the template. Any suggestions? Thanks!
Hi Jeanette. I’ve sent you an email with the template, hopefully it works this way.
Hi , I also love this tutorial and signed up for craft newsletter because it looks like you have a lot of wonderful ideas I’m excited about but , I also couldn’t find the template either.
Hi Tammy! Thanks so much for your lovely comment! The template is available to purchase here https://payhip.com/b/LtOk or free for my newsletter subscribers here https://landing.mailerlite.com/webforms/landing/f9q7r2 When you sign up for newsletter you get access to my entire resource library too.
I love the butterfly hair bow , but can’t find the tbutterfly bow template. Do you offer that ? I do not draw good at all. Would love to have it if you don’t mind.
Thank you
Donna
Hi Donna. I’m so happy you like my tutorial :) It’s specified in the article that you can purchase the template here https://payhip.com/b/LtOk