

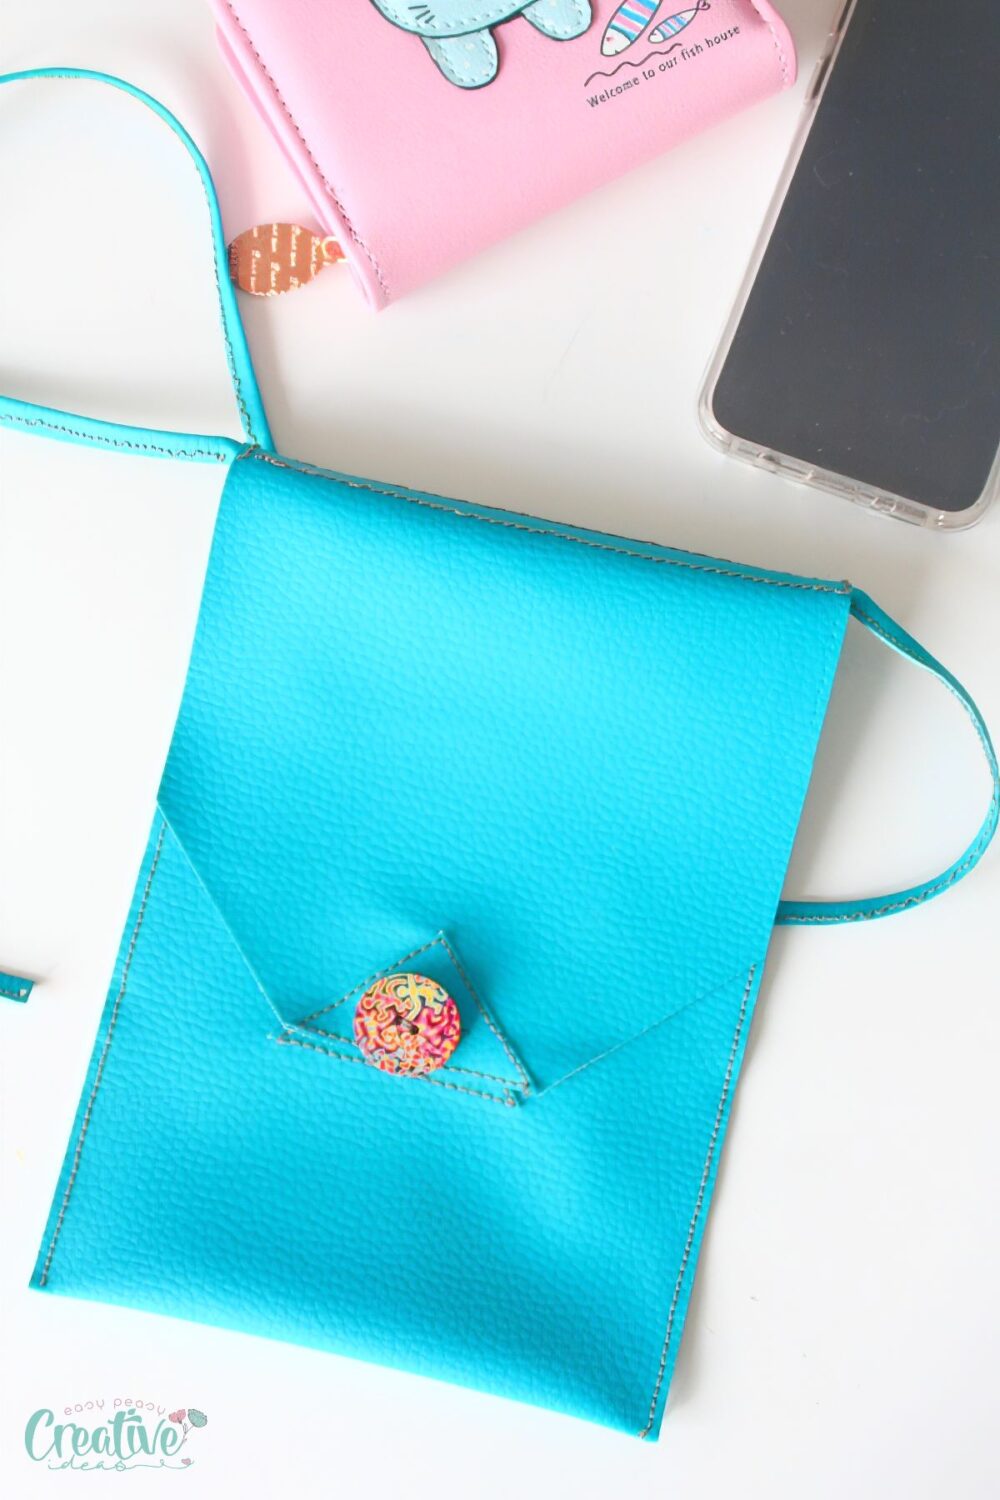
Simple crossbody bag with faux leather
Create your own stylish and functional accessory with this simple crossbody bag sewing tutorial. Perfect for beginners, this minimalist crossbody bag made from faux leather is ideal for carrying your essentials with ease and flair.
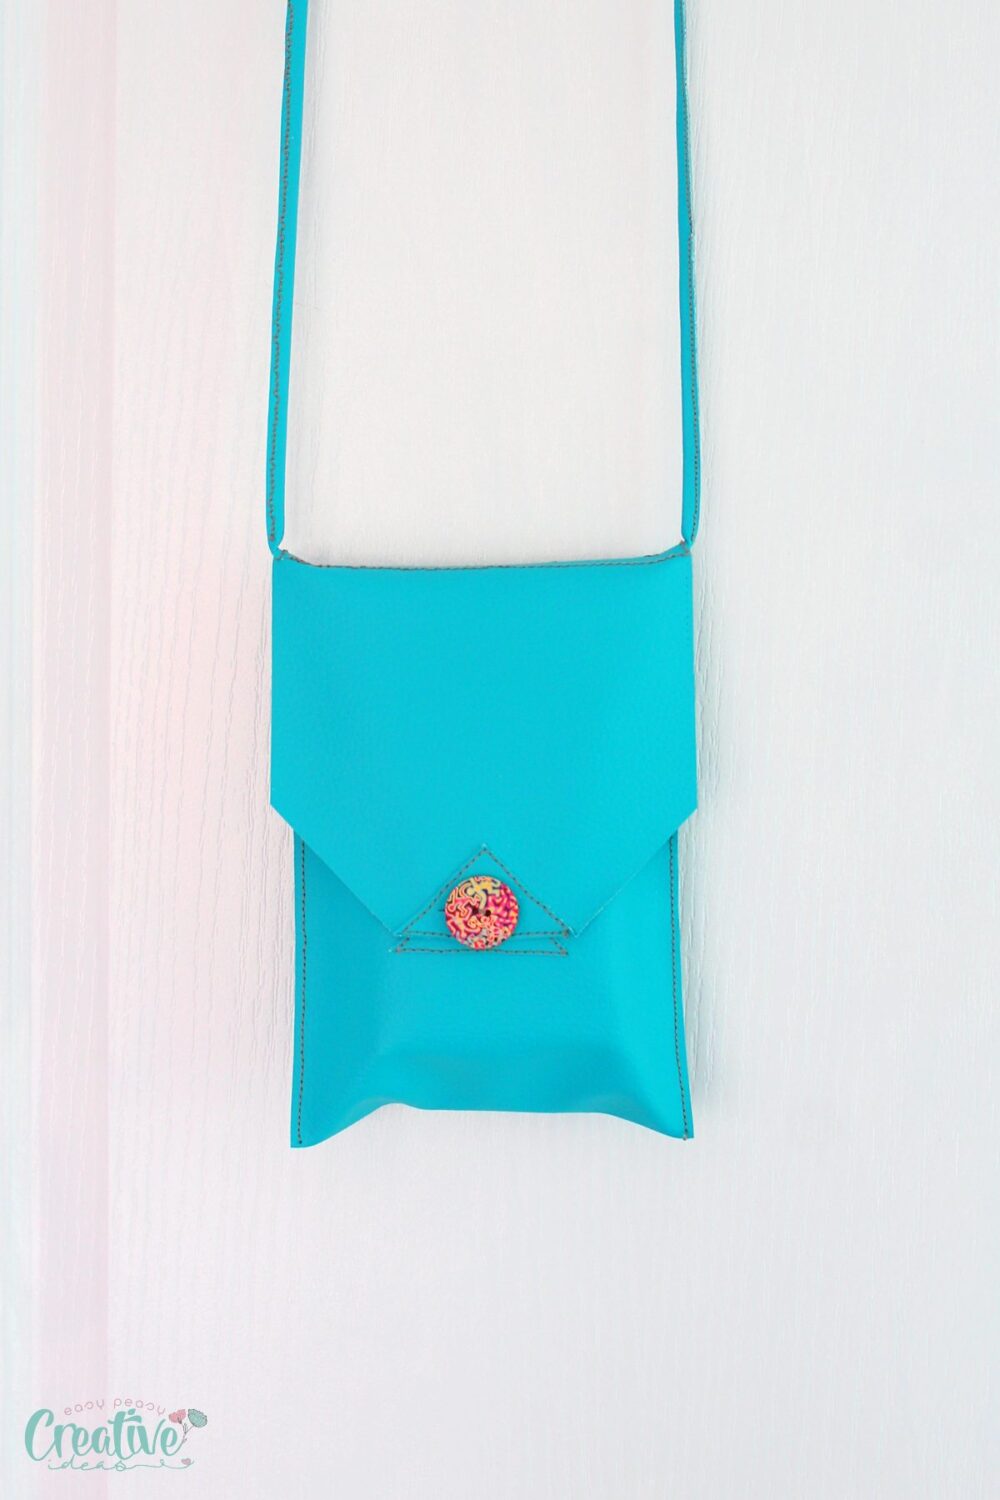
If you’ve been looking for an easy yet chic sewing project, this simple crossbody bag tutorial is just what you need. Designed with a minimalist aesthetic in mind, this faux leather crossbody bag is both trendy and functional, perfect for quick errands. Not only will you hone your sewing skills, but you will also end up with a fashionable accessory crafted by your own hands.
This simple crossbody bag is a versatile accessory that’s both stylish and practical. Its minimalist design makes it easy to pair with any outfit while the durable faux leather ensures that it can withstand regular use. Whether you’re heading out for a casual day or need a sleek purse for an evening out, this crossbody bag has you covered.
How to sew a simple crossbody bag with faux leather

Materials you’ll need
- Faux Leather: The main fabric for this project is faux leather, which is durable, easy to clean, and provides a nice look without the ethical concerns associated with real leather.
- Matching Jeans Thread: Strong and reliable, matching jeans thread ensures that the stitches on your bag are sturdy and seamless, blending effortlessly with the faux leather.
- Button: A simple yet sturdy button is essential for the bag’s closure, providing both security and a classic look.
Substitutes
If you don’t have faux leather, you can substitute with canvas or heavy-duty fabric. Instead of jeans thread, you may use an all-purpose thread suitable for heavy fabrics. In place of a traditional button, a magnetic snap closure can also be used.
Equipment
- Scissors: Essential for cutting fabrics and threads to the required measurements.
- Fabric Pen: Useful for marking measurements and sewing lines on faux leather.
- Ruler & Measuring Tape: Important for ensuring precise cuts and measurements.
- Double-sided Tape: Holds fabric layers together temporarily without pinning, a helpful tool when working with faux leather.
- Hand Needle: For sewing the button.
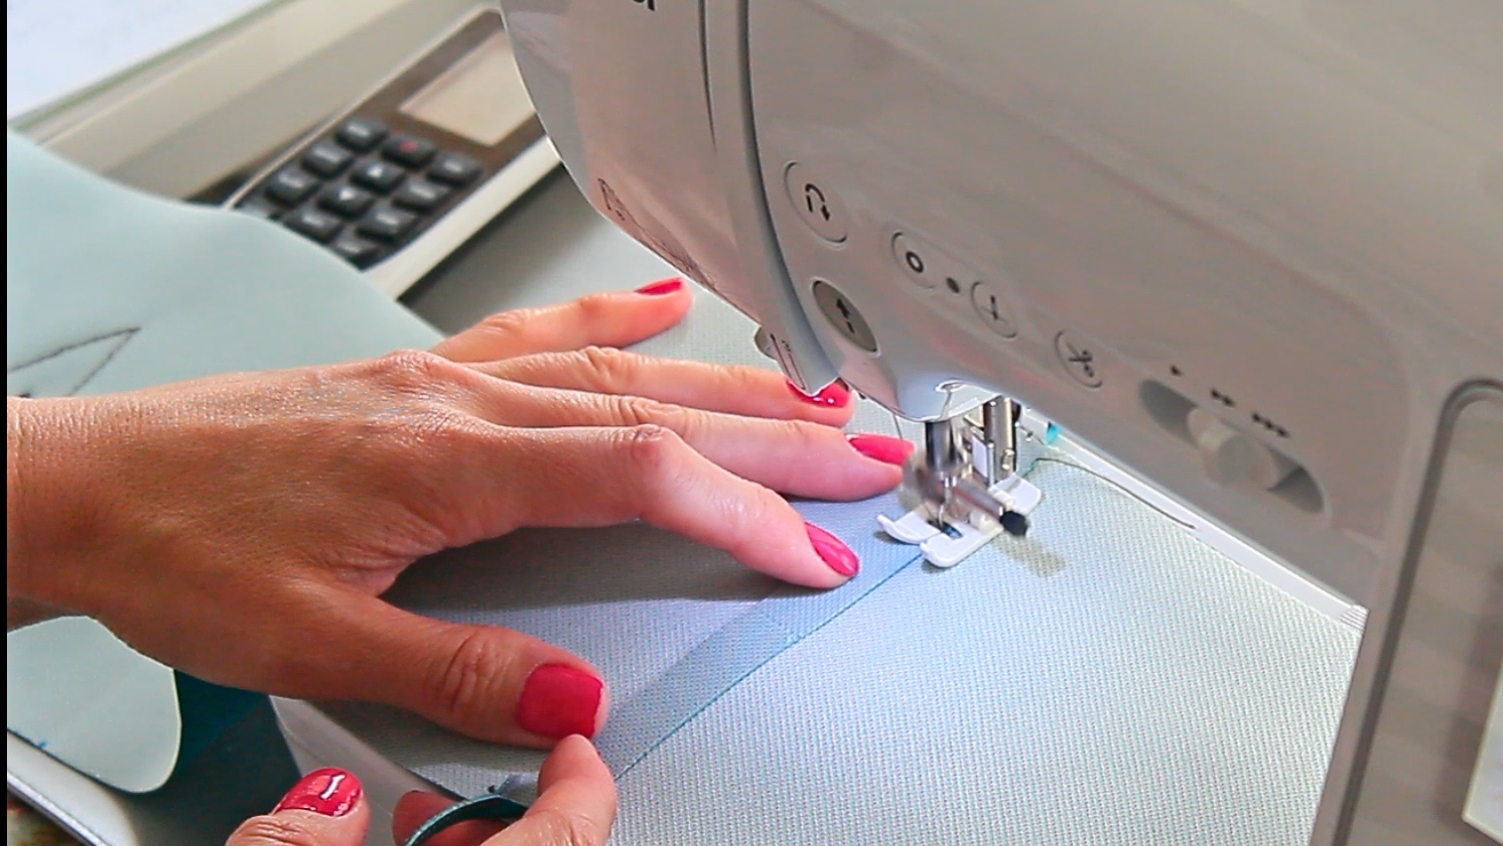
- Teflon Foot: Prevents faux leather from sticking to the sewing machine’s foot, ensuring smooth sewing.
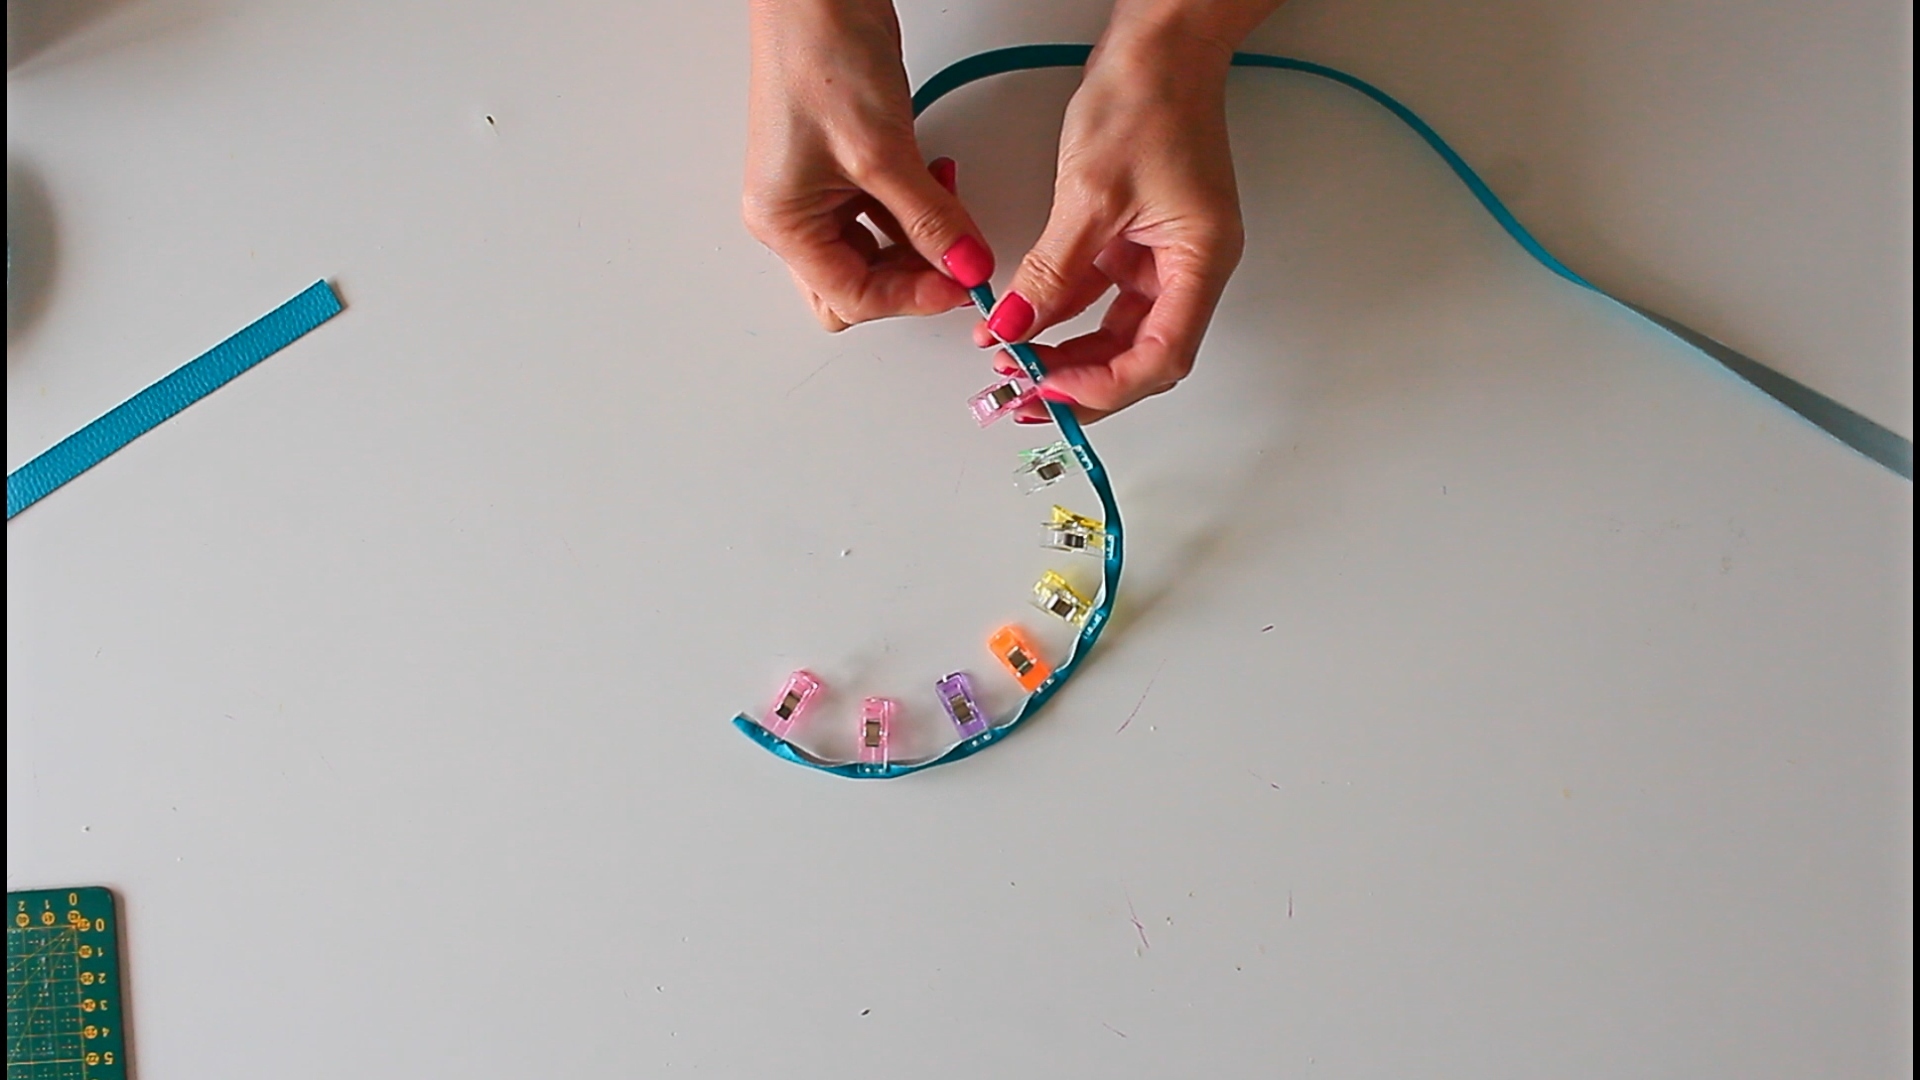
- Quilting Clips: Ideal for holding pieces of faux leather pieces together without perforating the fabric as pins would.
Instructions to sew the bag
Preparations
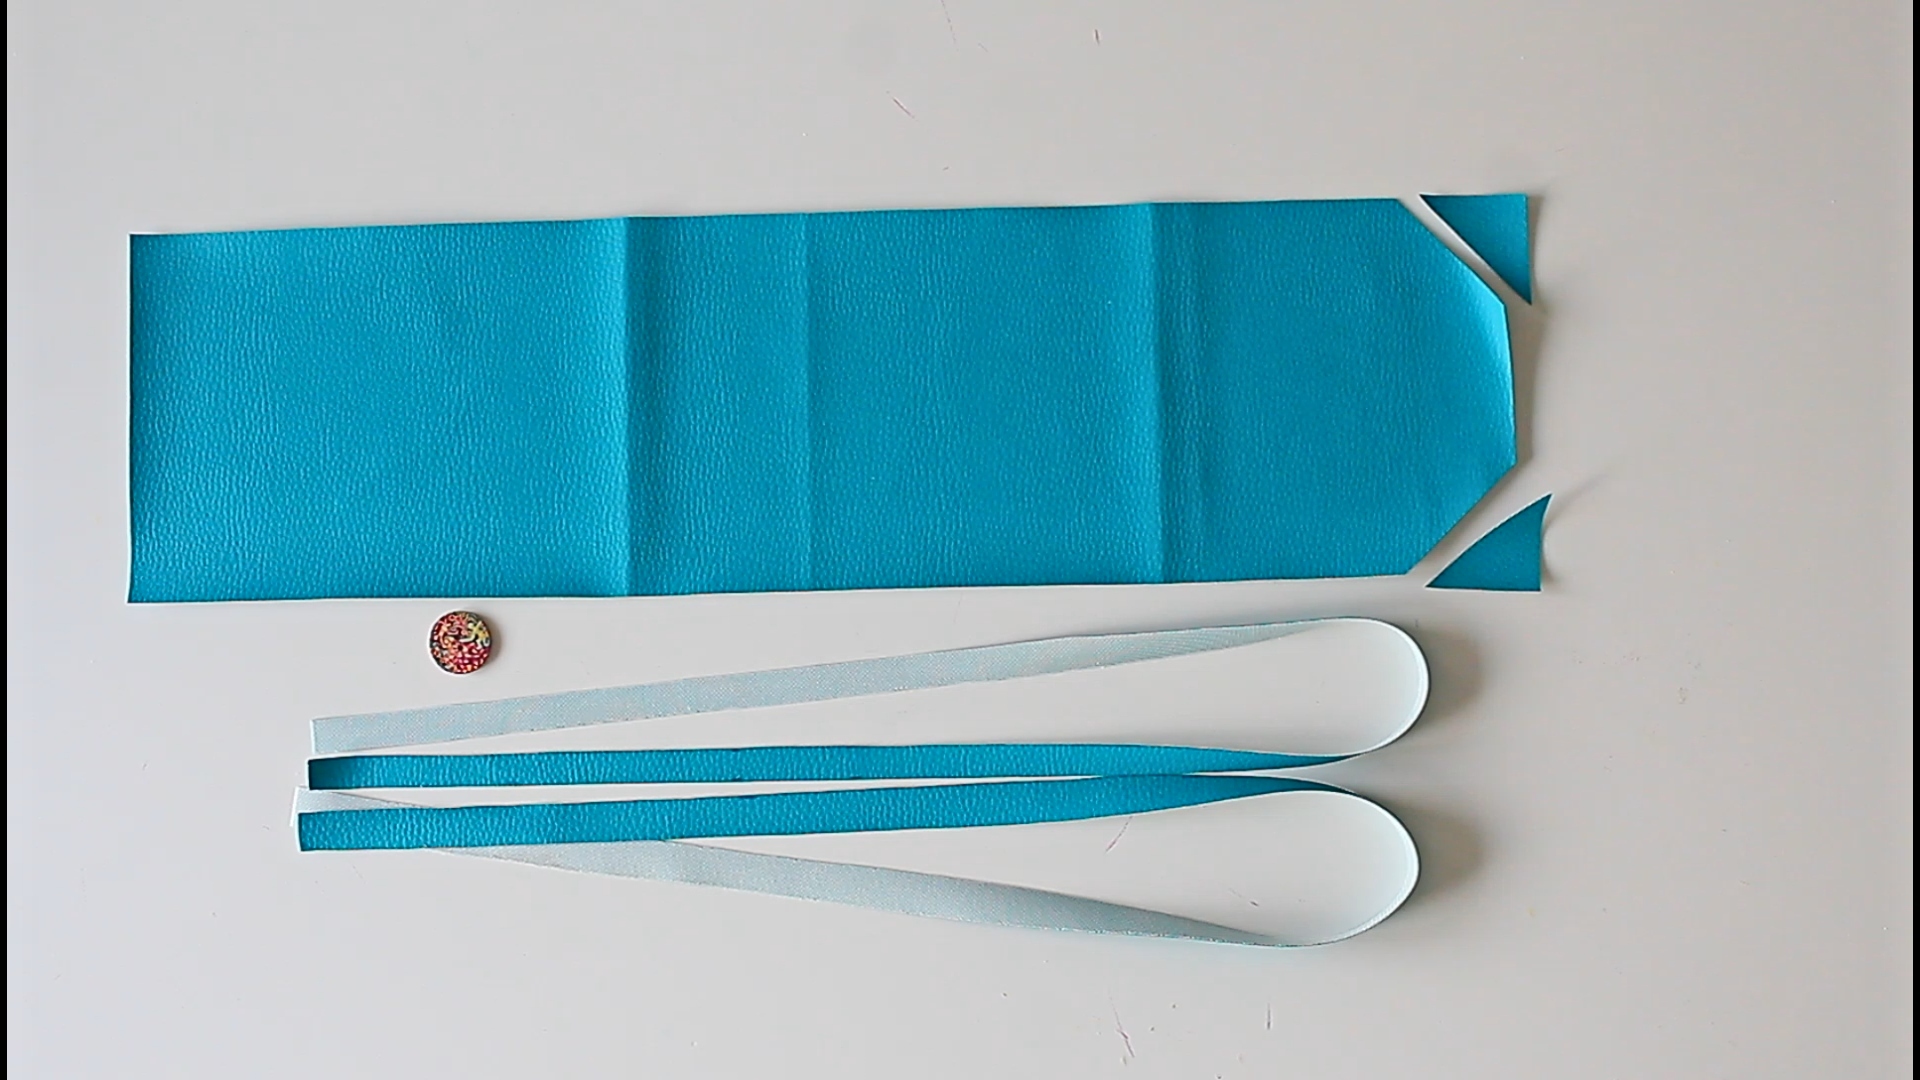
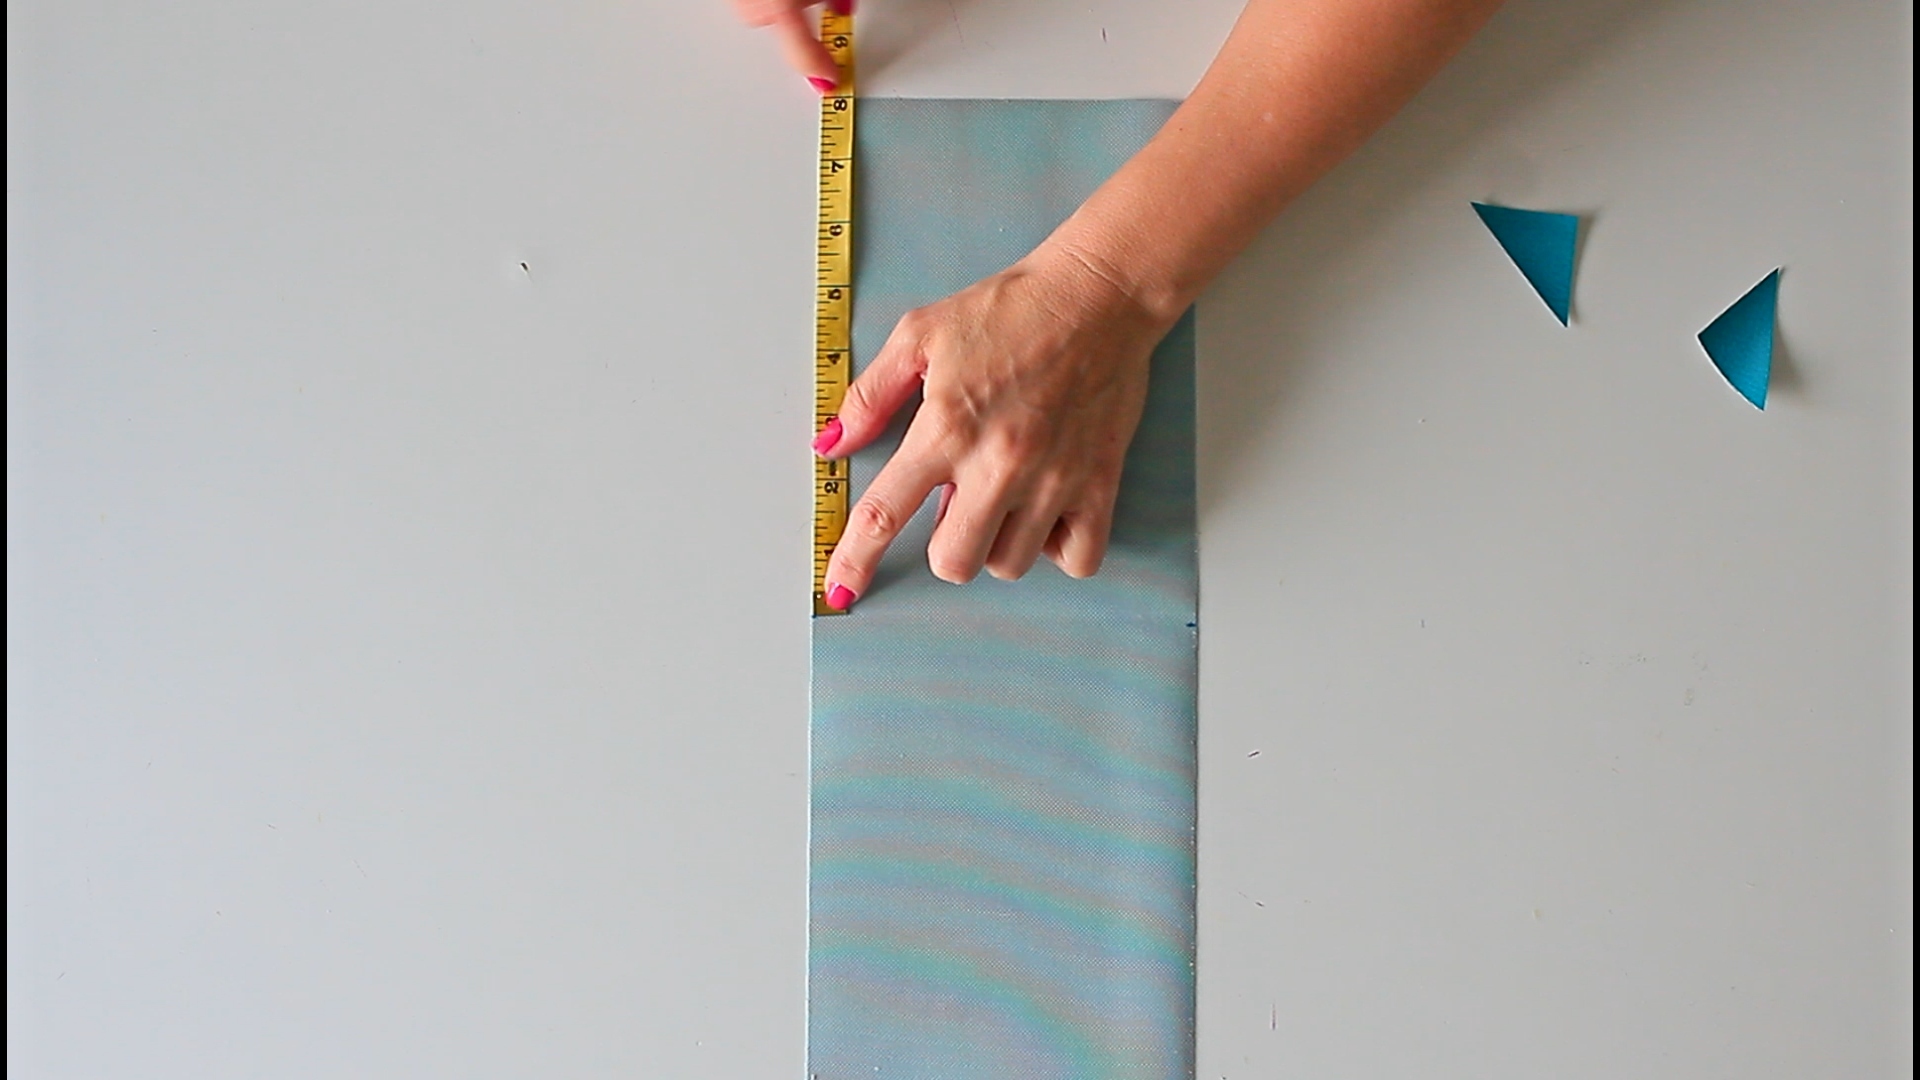
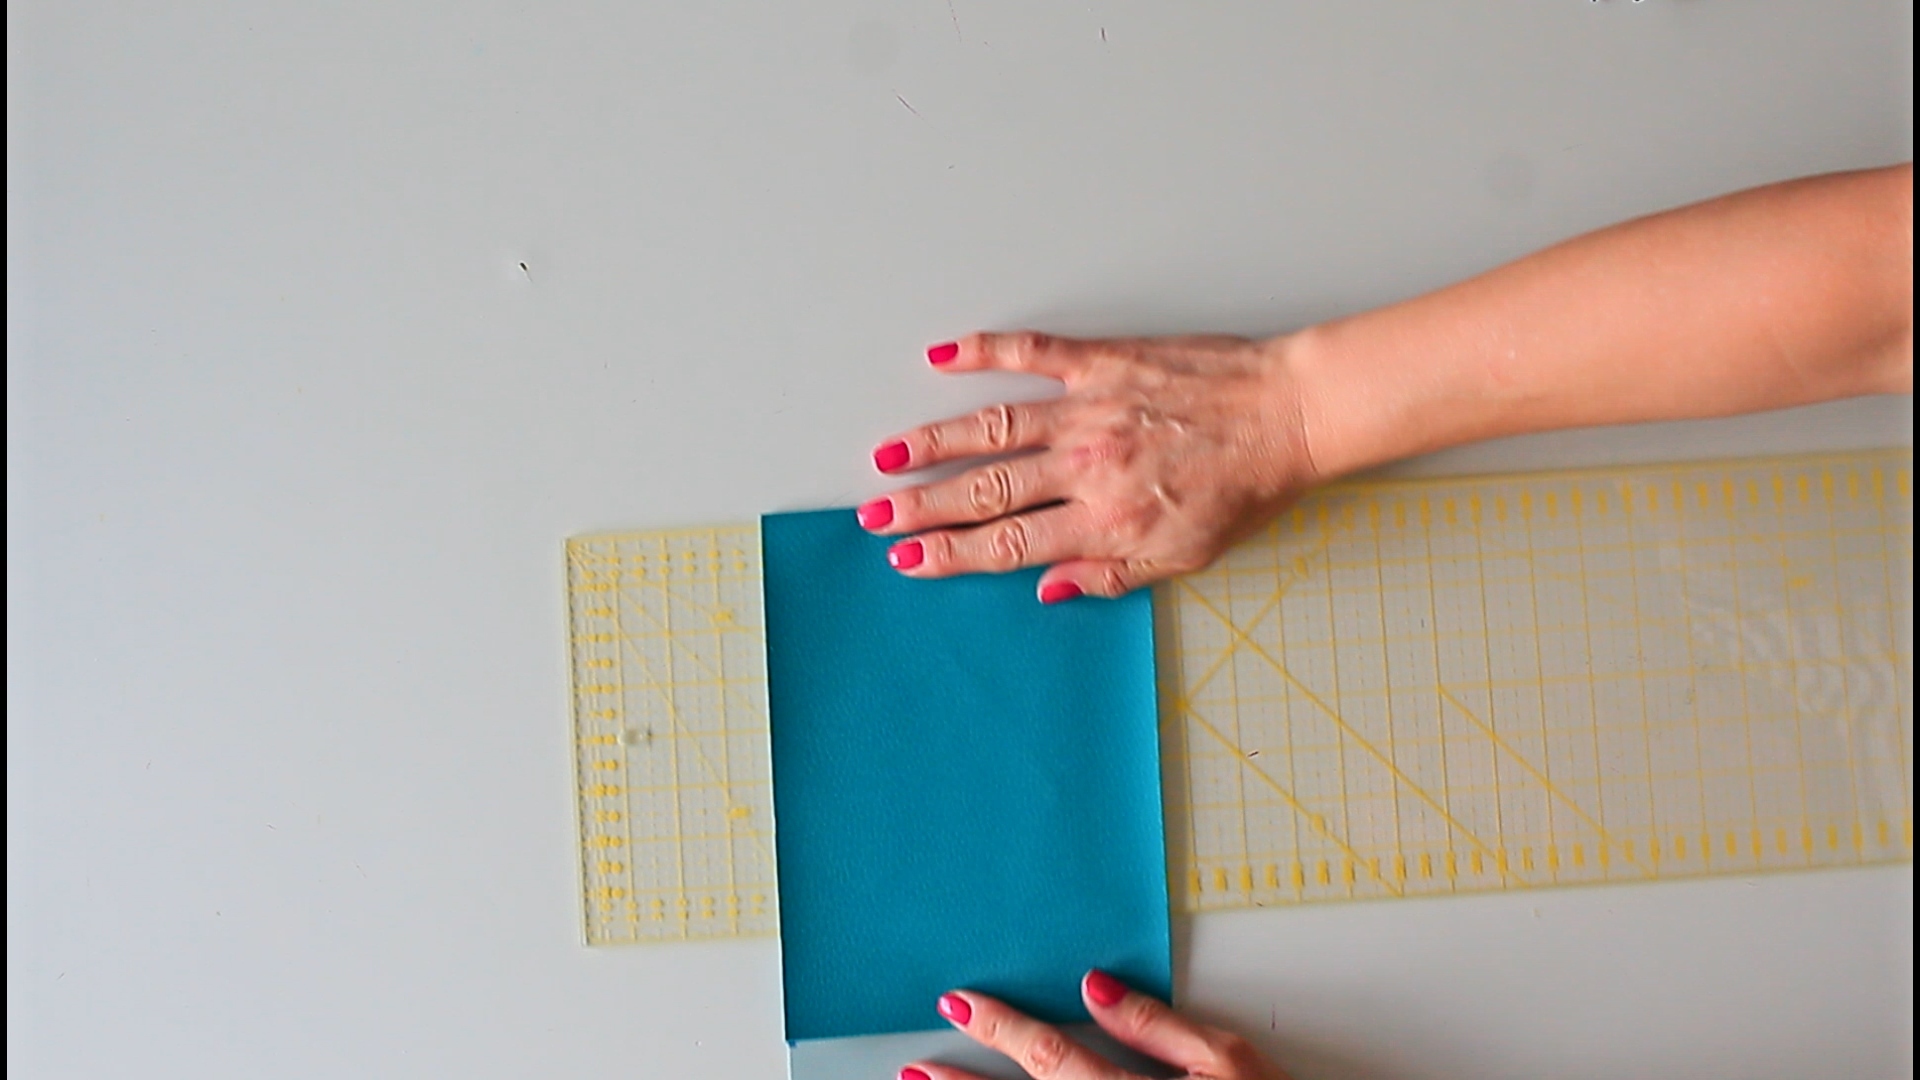
- Cut a piece of faux leather measuring 6″ by 22″, and two straps measuring 1/2″ by 30″ each.
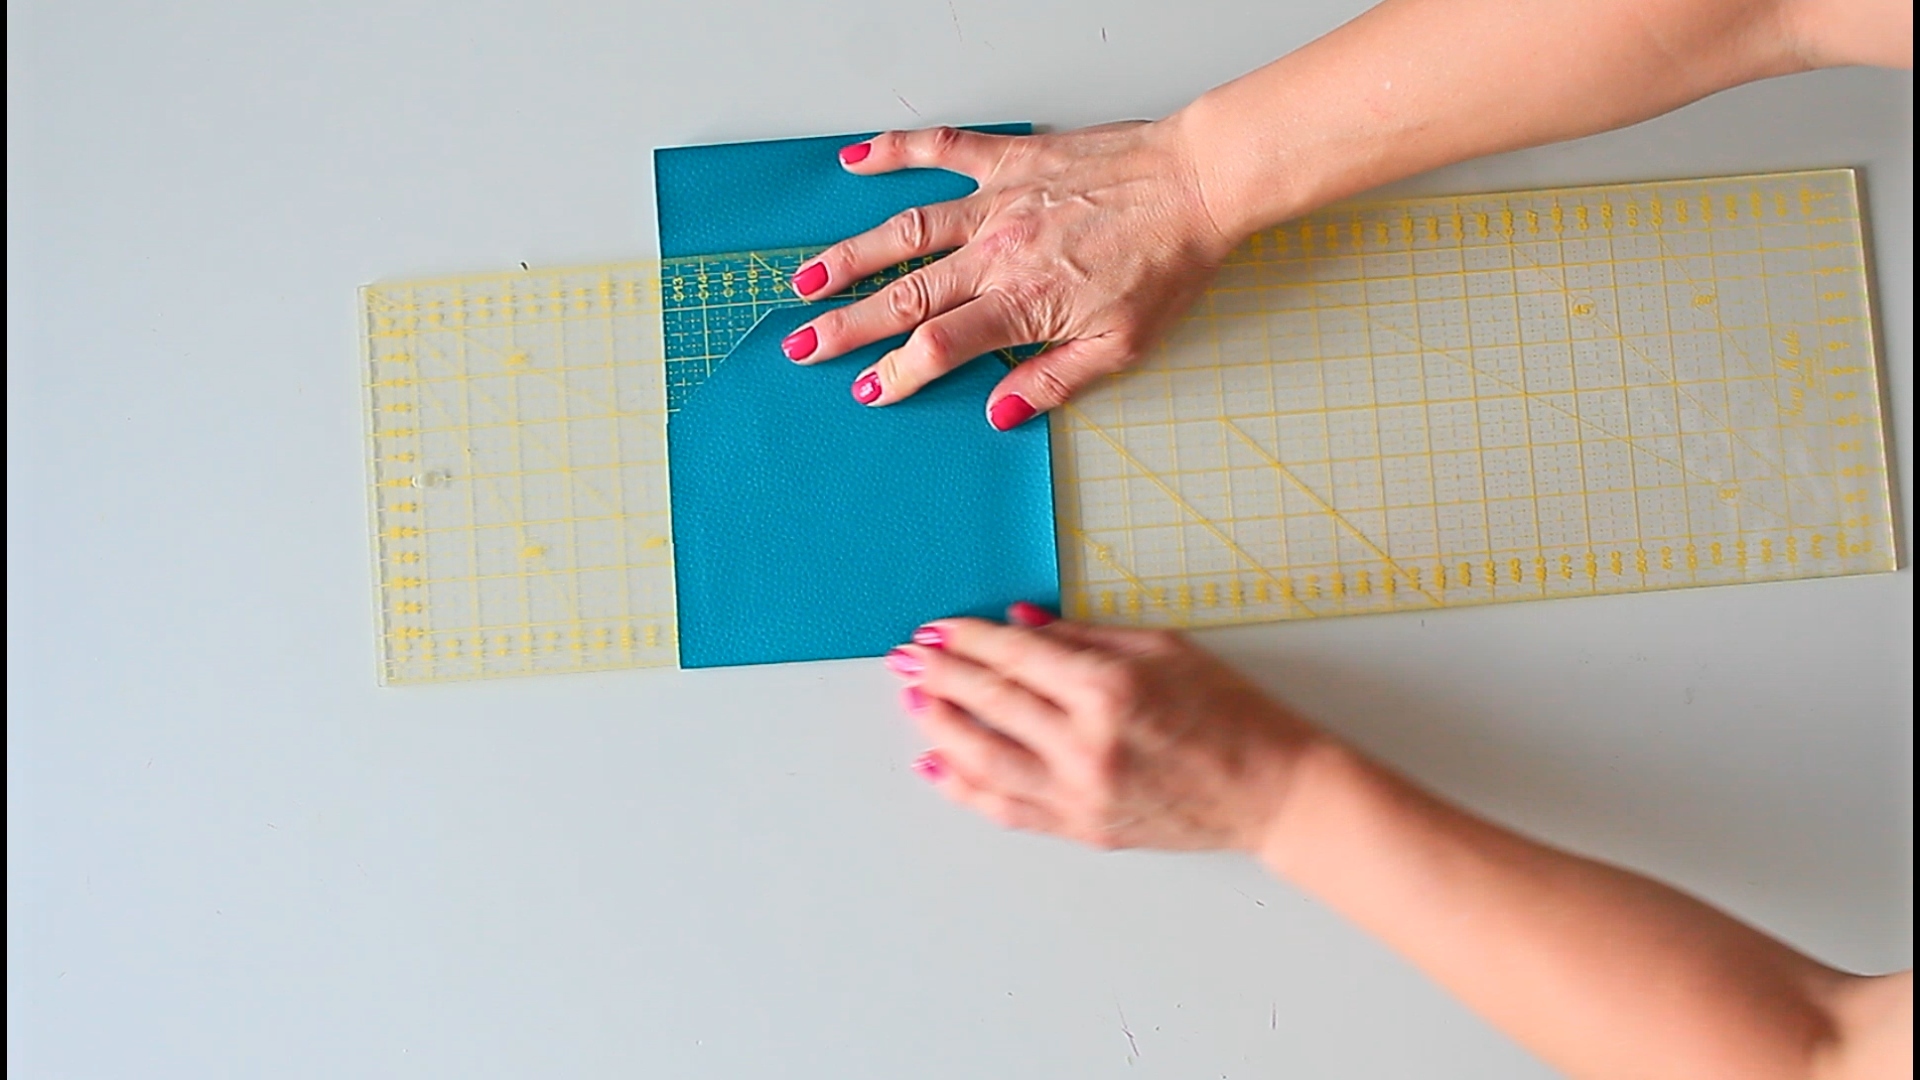
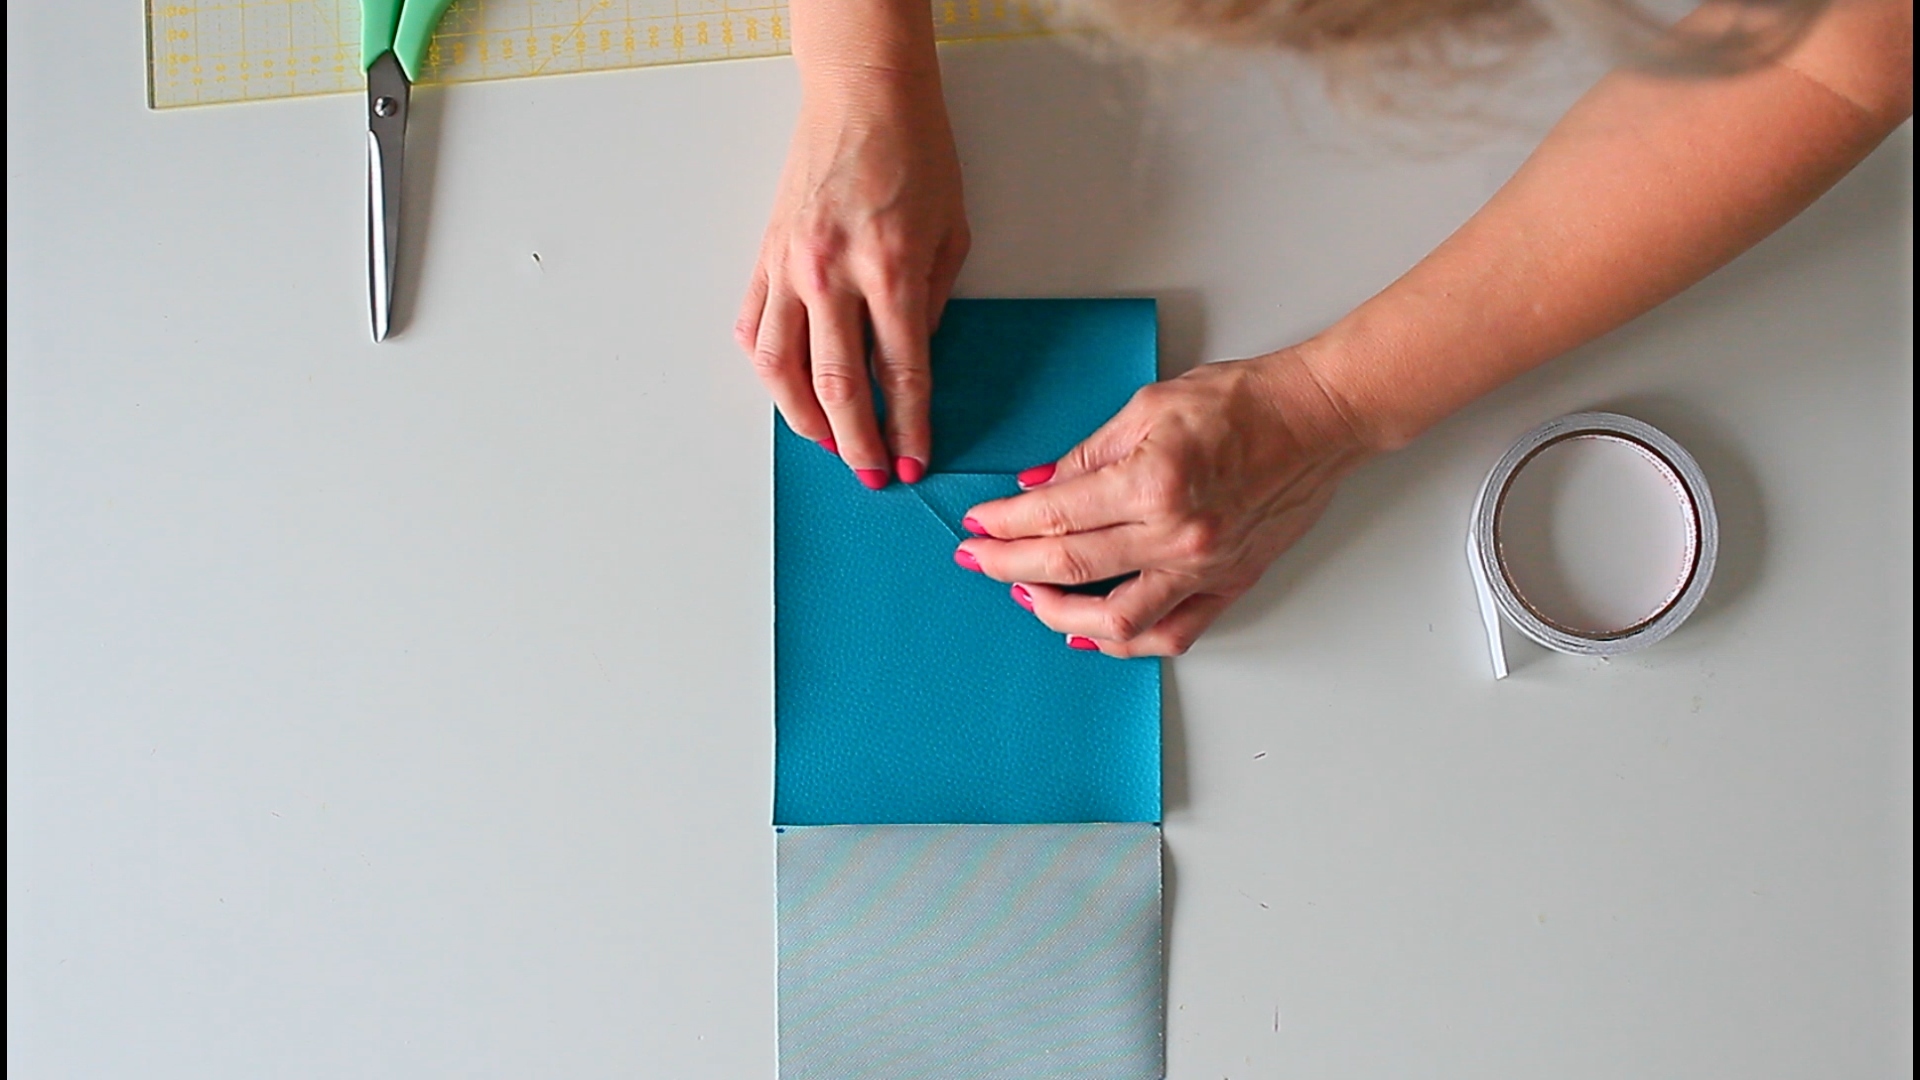
- Measure 1″ in each corner of one end of the main piece, join the marks, and cut out the corners to create the flap of the bag.
- Measure 8″ from the bottom of the faux leather, then fold and press to make a crease for the bag’s bottom.
- Fold the top down and press to create the flap crease.
Sewing
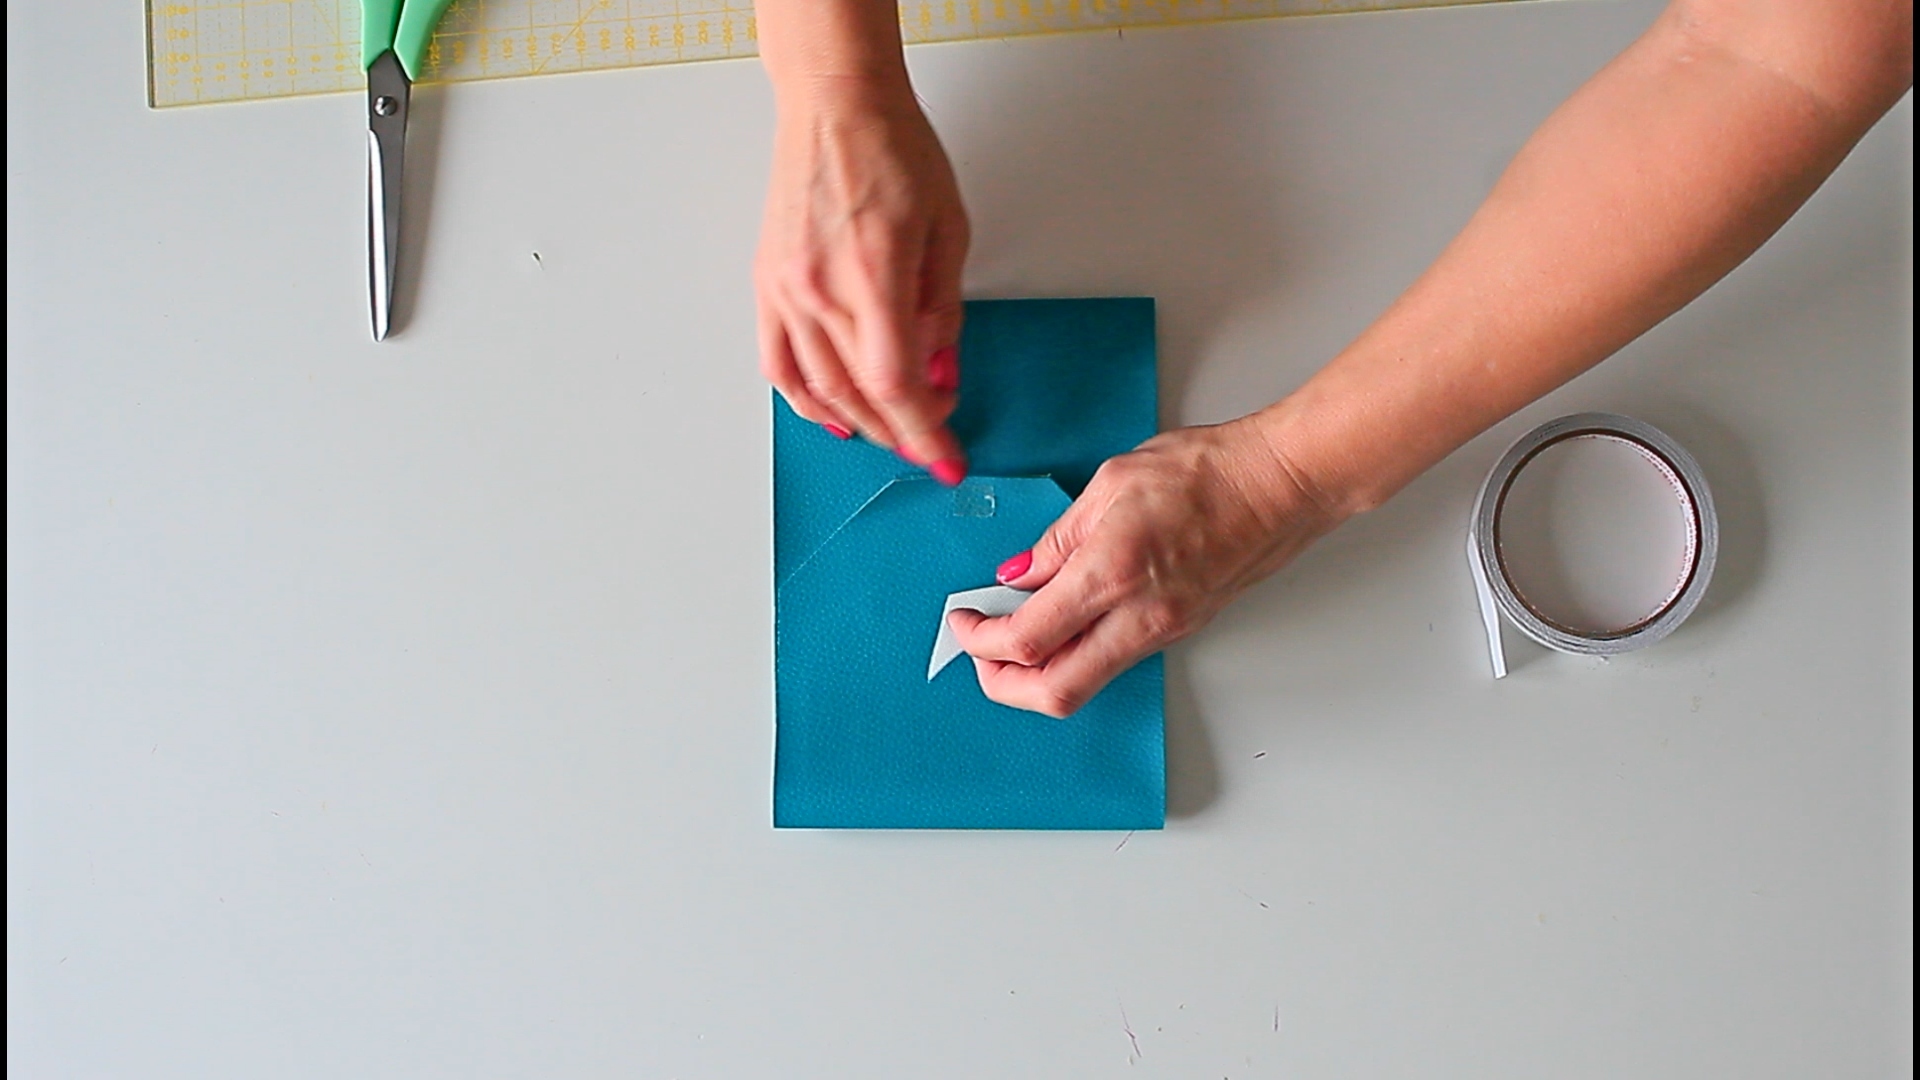
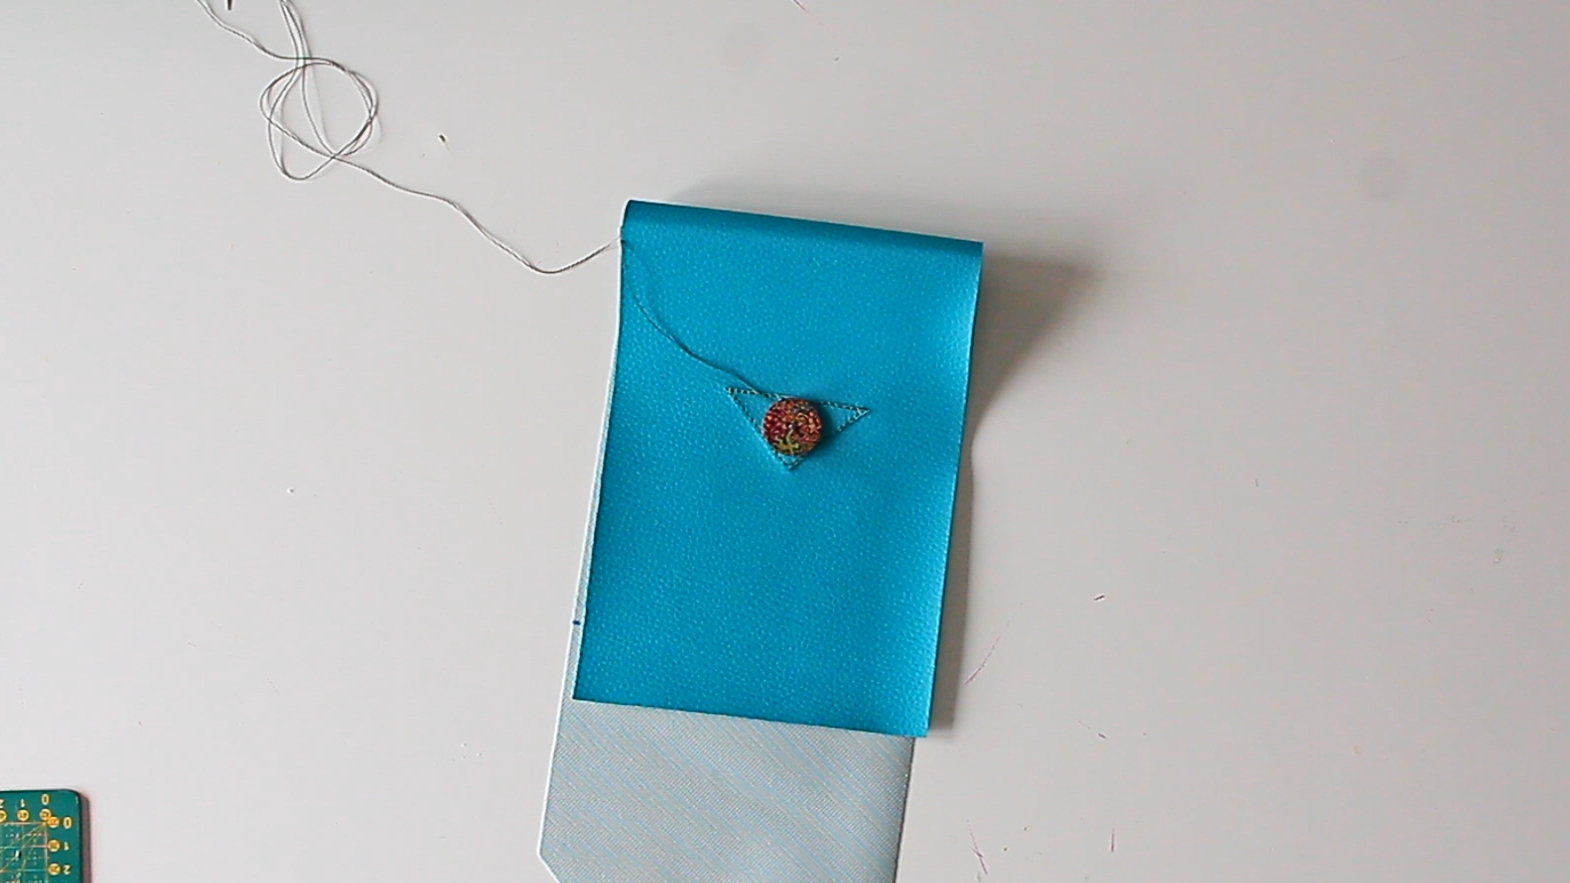
- Attach one of the cut-out triangles to the bottom of the flap with double-sided tape to reinforce it. Sew, edge stitching and pivoting at the corners.
- Attach the second triangle to the bag, right below the flap, and sew it in place.
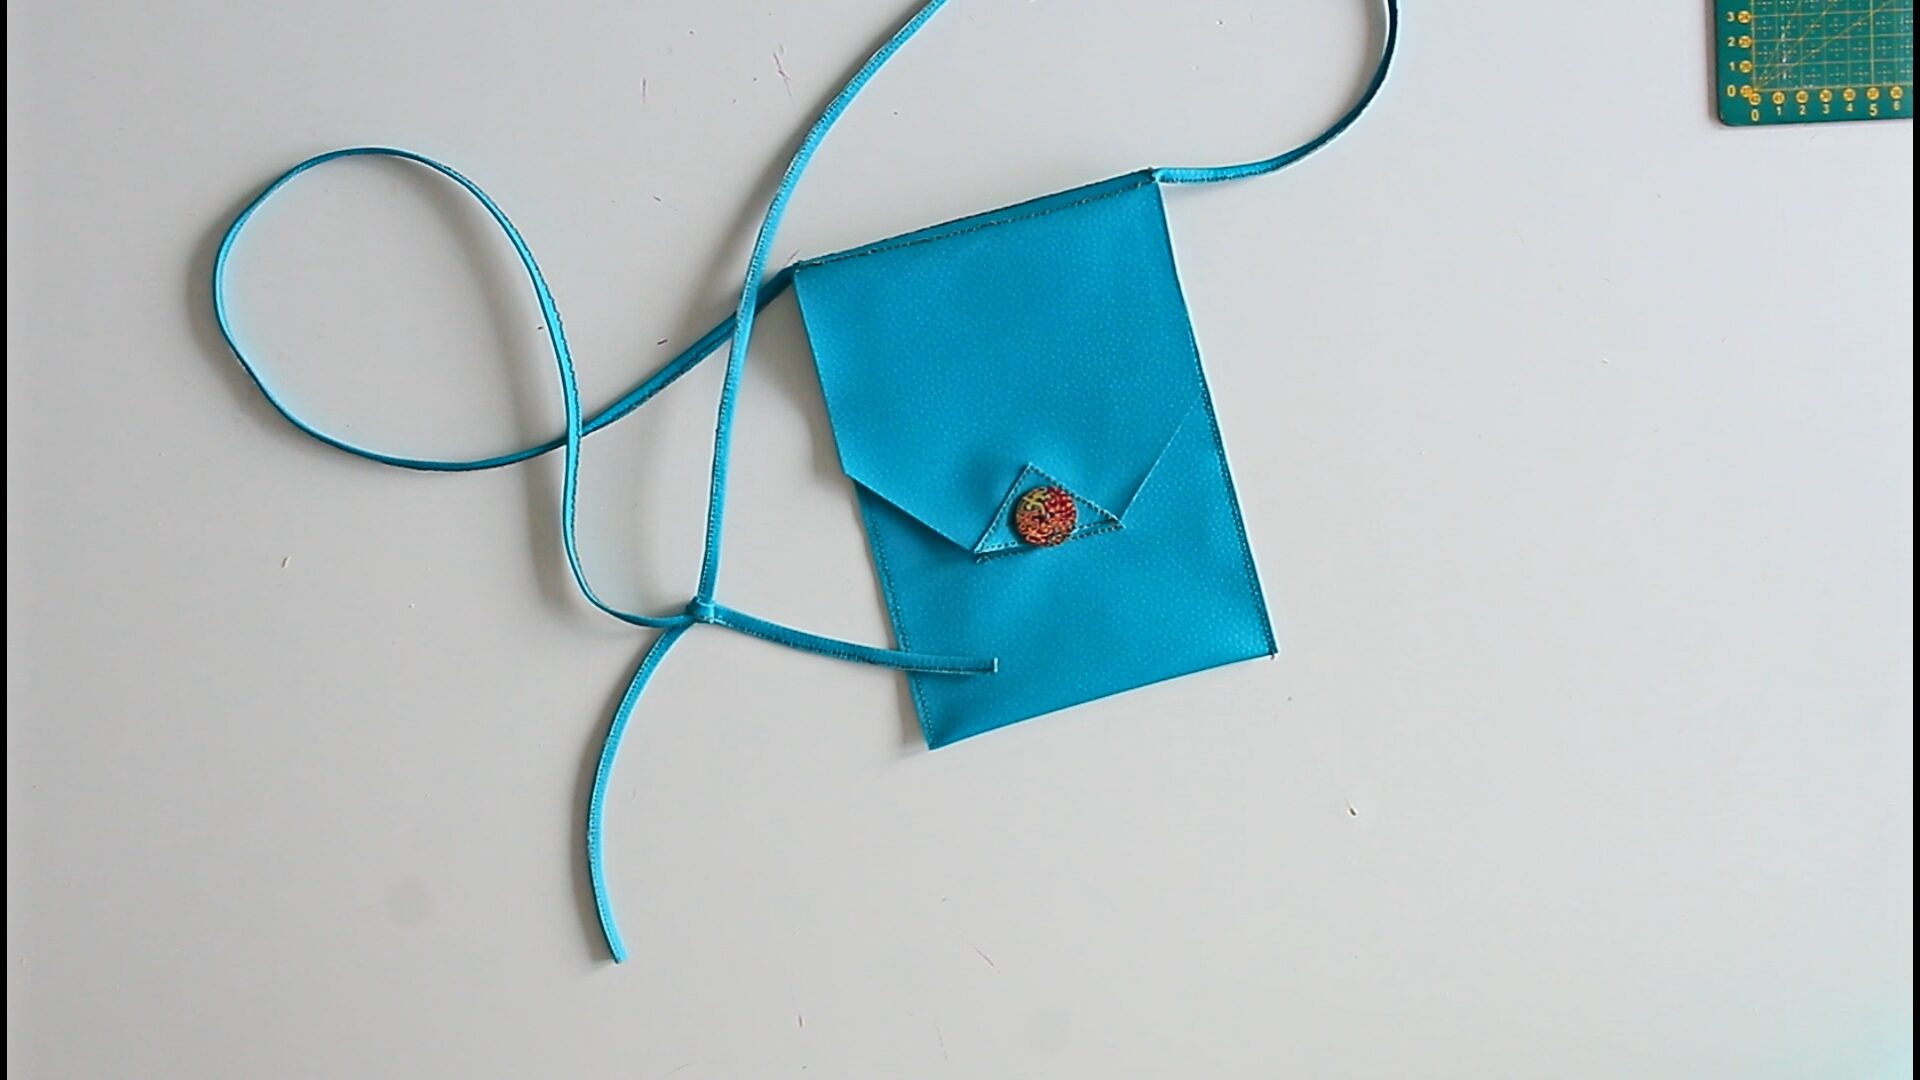
- Cut a slit into the reinforced flap, large enough to fit your button.
- Hand-sew the button to the bag, positioning it in the middle of the triangle. Leave a little room when sewing so you can close the bag easily when in use.
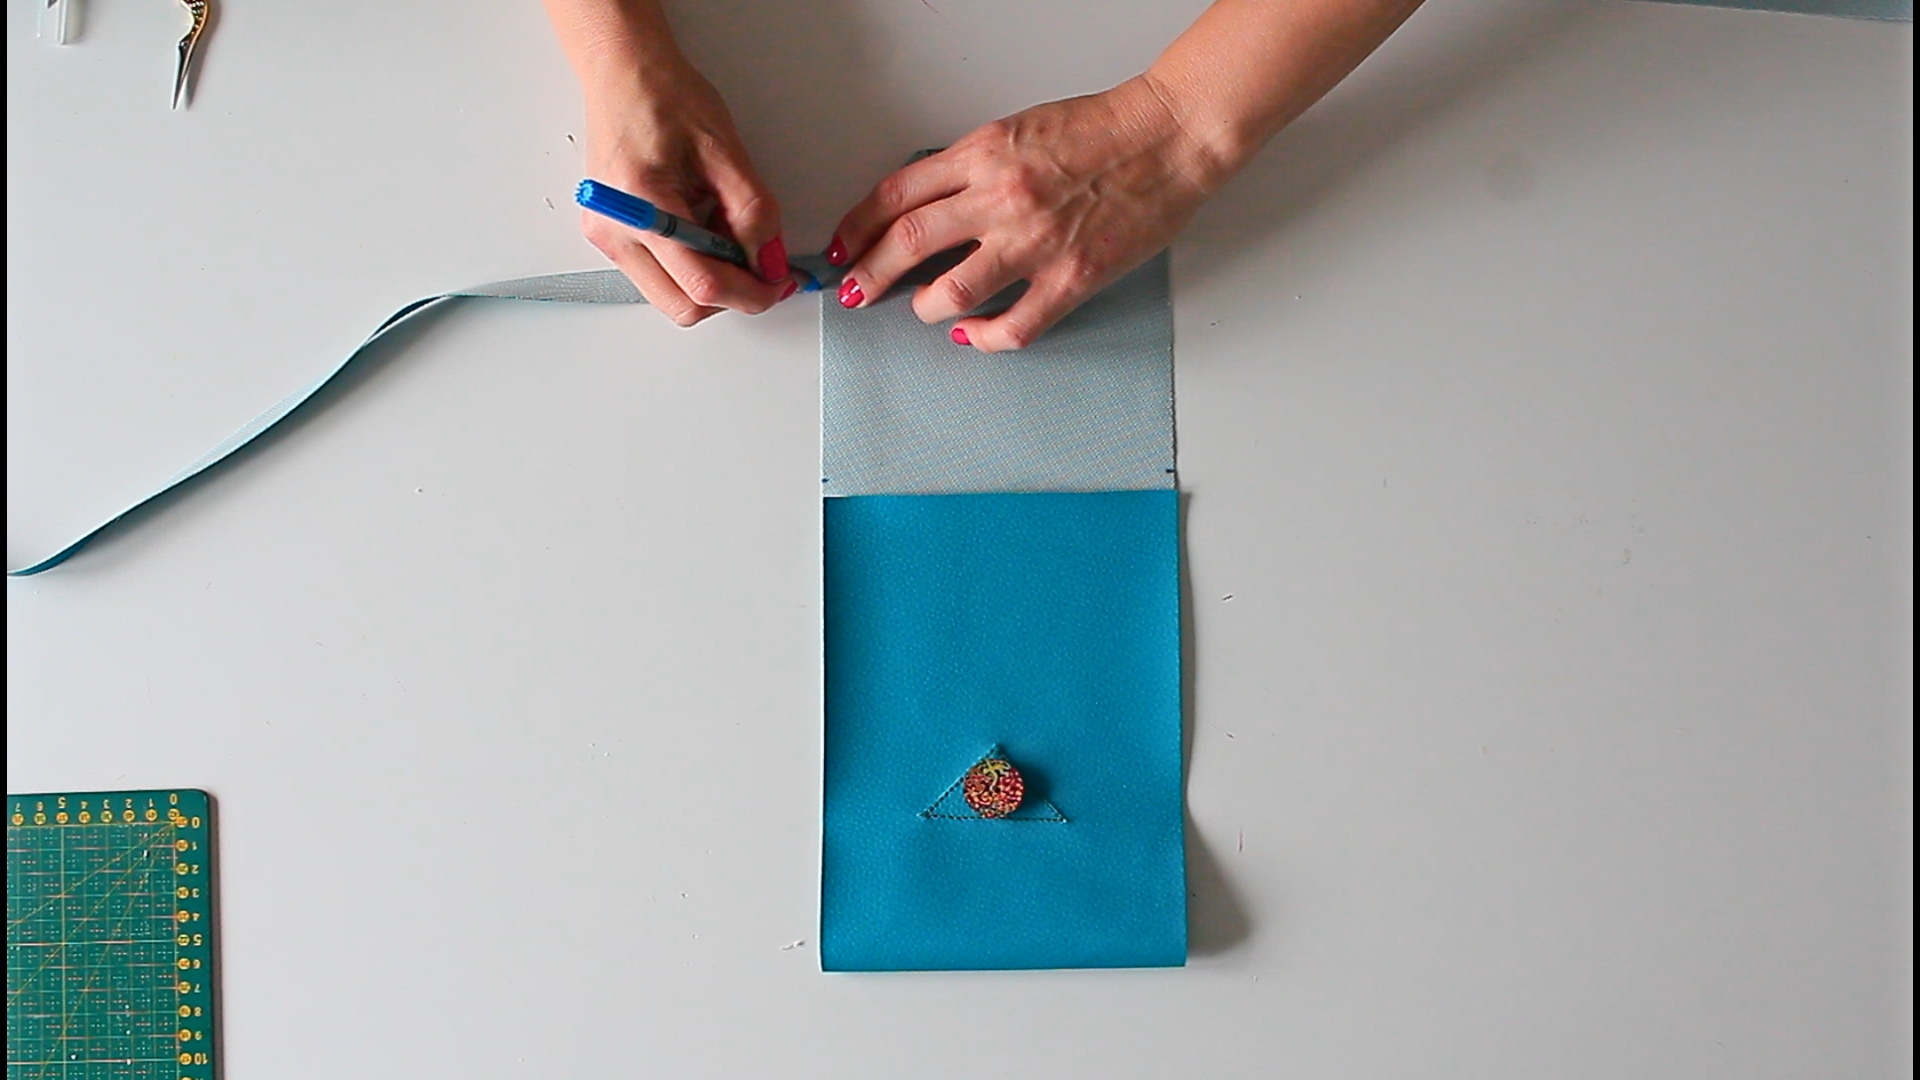
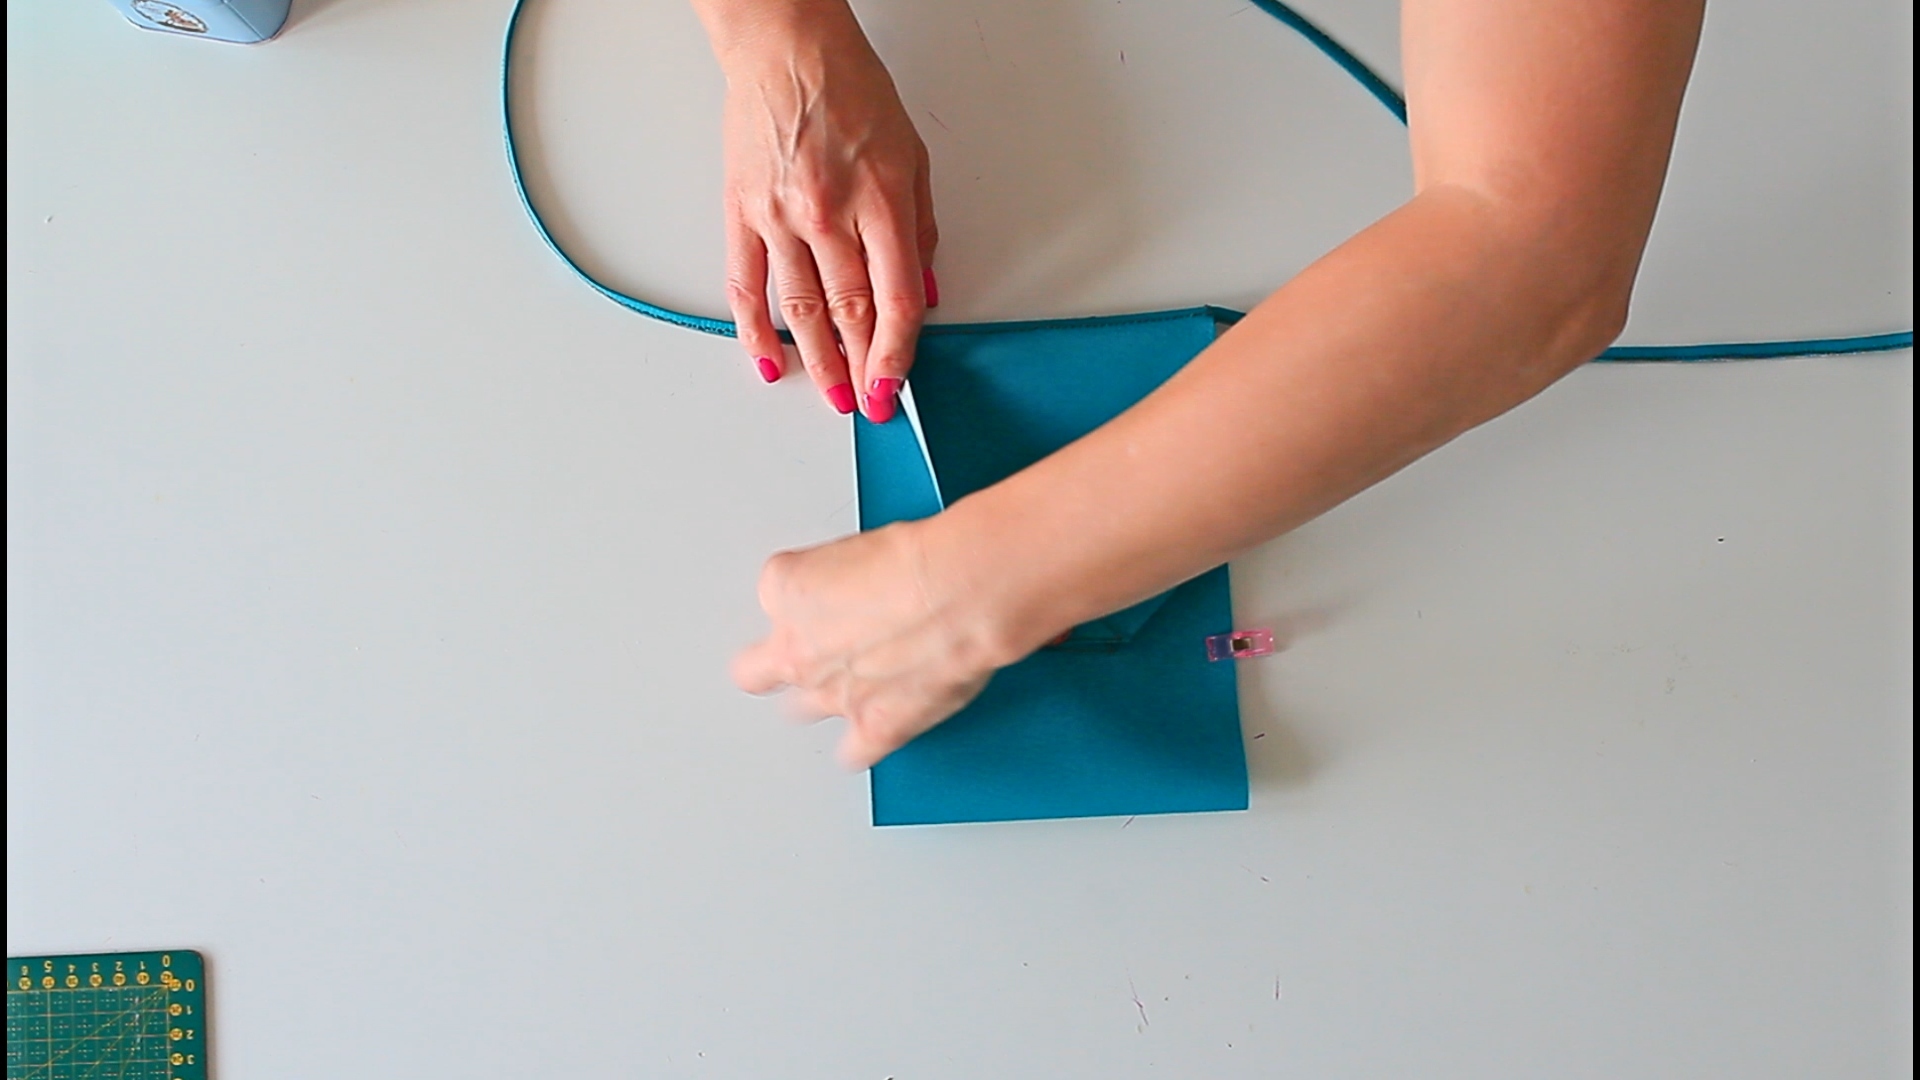
- Place one end of each strap right over the flap crease until they join in the middle, then mark where the straps exit the flap.
- Fold the straps in half starting at this mark, clip with quilting clips, and edge stitch, leaving the marked area unstitched.
- Attach the straps to the bag by placing the unfolded area onto the flap crease and fusing it to the bag using double-sided tape. Then sew on all four sides.
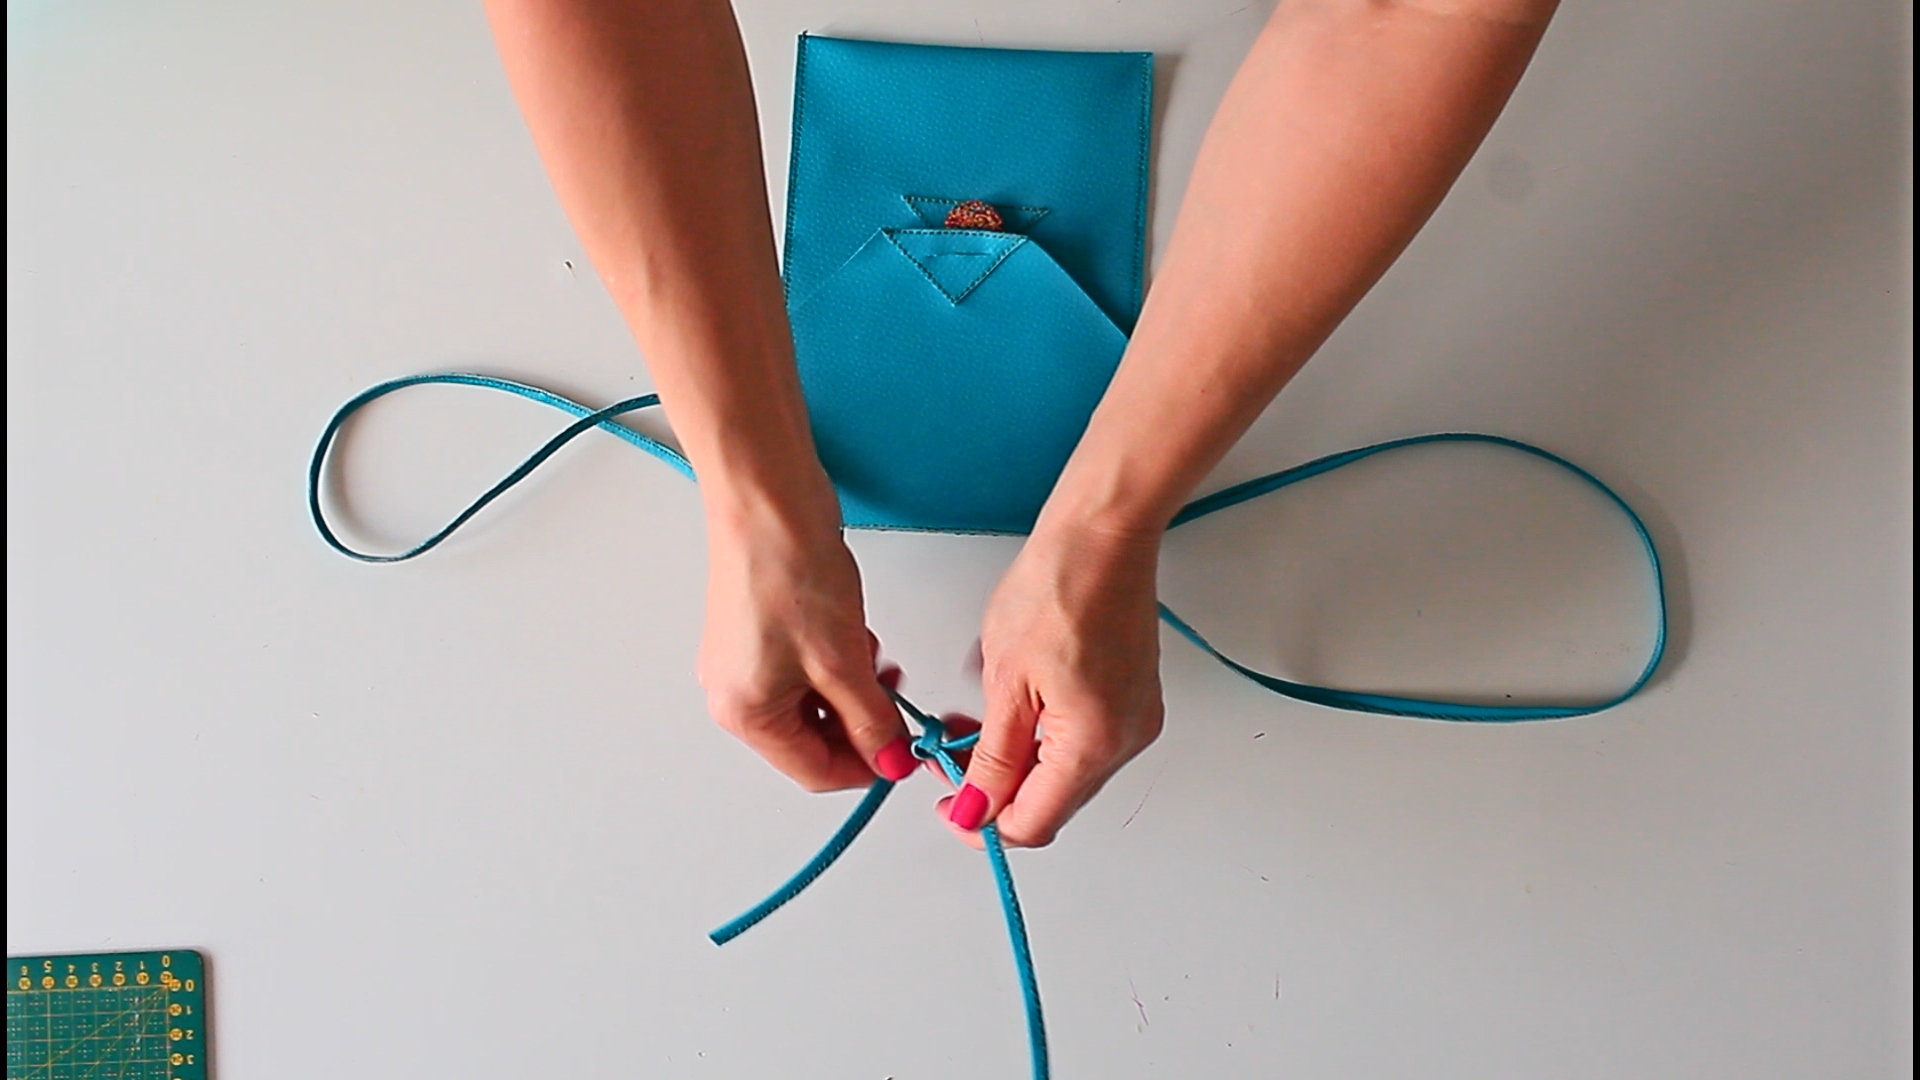
- Fold the bag following the created creases, then close the button.
- Lift the flap and clip the sides of the bag, open the flap, and sew the sides with a 1/8″ allowance.
- Celebrate your completion by tying the straps, and there you have it—a chic and functional minimalist crossbody bag!
Tips
- Use a Teflon Foot: When sewing with faux leather, a Teflon foot will glide smoothly over the fabric, preventing it from sticking and ensuring even stitches.
- Double-sided Tape: This is a game-changer for holding pieces together without the need for pins, which can leave marks on faux leather.
- Jeans thread and needle: choose the correct thread size and needle size. I think I used a thread slightly larger than the faux leather I had, it was giving me ugly, uneven stitches in the back.
- If the faux leather thickness permits, consider “lining” the bag with another layer of faux leather so the bag looks nice inside and outside. Or line it with fabric.
- After experimenting with adding the button closure I am now confident a snap would look better and be more practical. So if you’re familiar with adding snaps to fabric/leather, I recommend using those instead of a button.
Sewing Project Variations
- Attach the straps with a carabiner or decorative rings instead of sewing them directly onto the flap as I did.
- Add an inside pocket for additional storage. Or add a zipper pocket in the back of the bag.
- Consider embellishing the flap with decorative stitches or adding a small tassel for a personal touch. These variations allow you to customize the crossbody bag, making it uniquely yours.
Frequently Asked Questions
Can I use any type of fabric for this bag?
This works best with faux leather or leather as they don’t fray. If you choose different fabrics you’ll have to modify the project and sew it as you would sew any other fabric that frays and finish the seams.
What if I don’t have a Teflon foot?
You can use a regular sewing foot, but consider placing tissue paper between the foot and faux leather to prevent sticking.
More projects you’ll enjoy
- Deep front pocket tote bag
- Burlap tote bag with wide handles
- Small crossbody bag with zipper
- Multi pocket tote bag
- Round top canvas tote bag
Size
This minimalist crossbody bag fits one phone and a small wallet, making it ideal for carrying just the essentials. This is great for short trips where you don’t need to carry lots of things with you, just the bare minimum.
Thank you for following along with this tutorial on how to create a minimalist crossbody bag. I hope you’ll enjoy making and using your new chic accessory! Happy Sewing!
Simple crossbody bag sewing tutorial
Materials
- Faux Leather
- Matching Jeans Thread
- Button
Tools
- scissors
- Ruler & Measuring Tape
- double sided tape
- hand needle
- Teflon Foot
- Canvas needle
- quilting clips
Instructions
- Cut a piece of faux leather measuring 6" by 22", and two straps measuring 1/2" by 30" each. Measure 1" in each corner of one end of the main piece, join the marks, and cut out the corners to create the flap of the bag.

- Measure 8" from the bottom of the faux leather
- Fold up and press to make a crease for the bag's bottom.
- Fold the top down and press to create the flap crease.
- Attach one of the cut-out triangles to the bottom of the flap with double-sided tape to reinforce it.
- Sew, edge stitching and pivoting at the corners.
- Attach the second triangle to the bag, right below the flap, and sew it in place.
- Cut a slit into the reinforced flap, large enough to fit your button.
- Hand-sew the button to the bag, positioning it in the middle of the triangle. Leave a little room when sewing so you can close the bag easily when in use.

- Place one end of each strap right over the flap crease until they join in the middle, then mark where the straps exit the flap.
- Fold the straps in half starting at this mark, clip with quilting clips, and edge stitch, leaving the marked area unstitched.
- Attach the straps to the bag by placing the unfolded area onto the flap crease and fusing it to the bag using double-sided tape. Then sew on all four sides.

- Fold the bag following the created creases, then close the button. Lift the flap and clip the sides of the bag, open the flap, and sew the sides with a 1/8" allowance.
- Tie the straps.
- And there you have it—a chic and functional minimalist crossbody bag!


Video
Article may contain Amazon & affiliate links. As an Amazon Associate I earn from qualifying purchases at no additional cost to you.
ABOUT PETRO
Hi, I’m Petro, author and founder of Easy Peasy Creative Ideas. Sewist, crafter, avid DIY-er, foodie, photographer, homemaker and mommy to one. I’m an expert at coming up with quick, clever sewing tips, recycling crafts and simple, easy recipes! You can find my ideas featured in reputable publications such as Country Living, Good House Keeping, Yahoo News, WikiHow, Shutterfly, Parade, Brit & Co and more. Thanks for stopping by and hope you’ll stay for a while, get to know me better and come back another time. Stick around for real fun projects! Read more…