

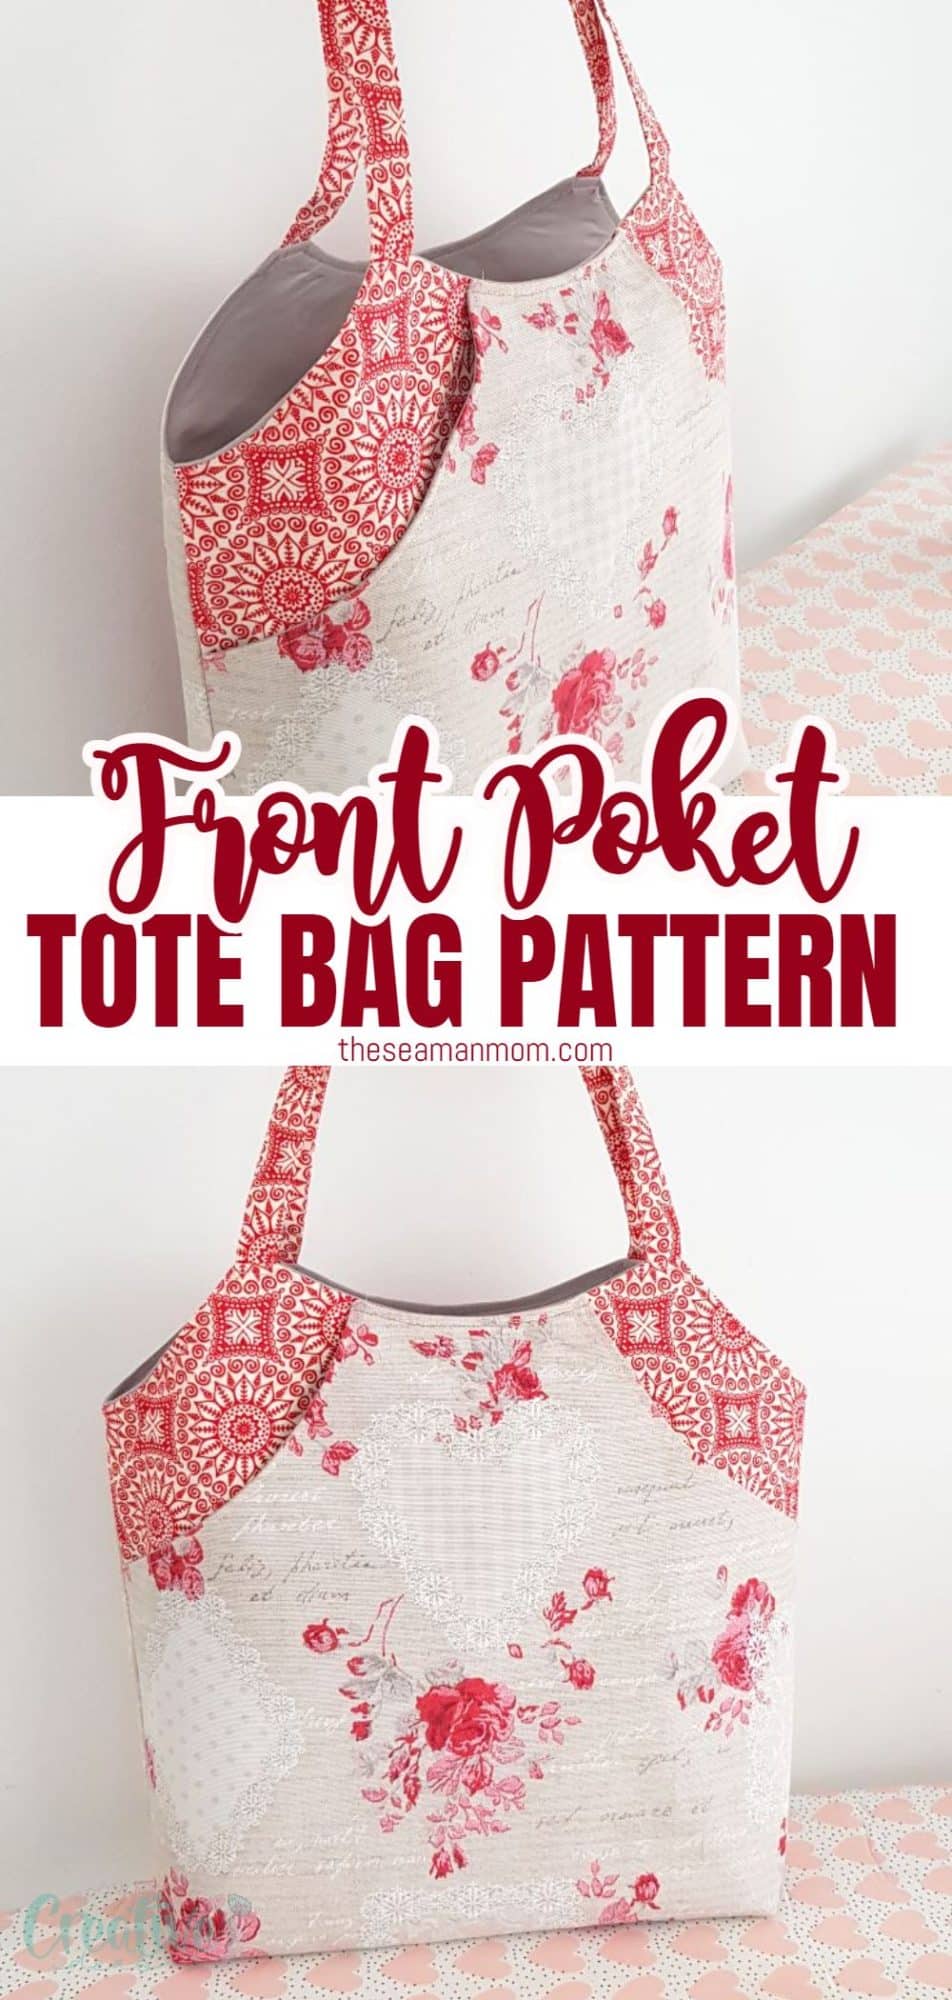
Deep front pocket tote bag pattern
This simple but stunning pocket tote bag pattern featuring a deep front pocket is the perfect roomy pocket tote bag to sew to carry just about anything you need! Create a one-of-a-kind large tote bag pattern by choosing colorful and coordinating fabrics for the bag, the pocket and the straps, for a chic yet low key custom look.
Pocket tote bag pattern
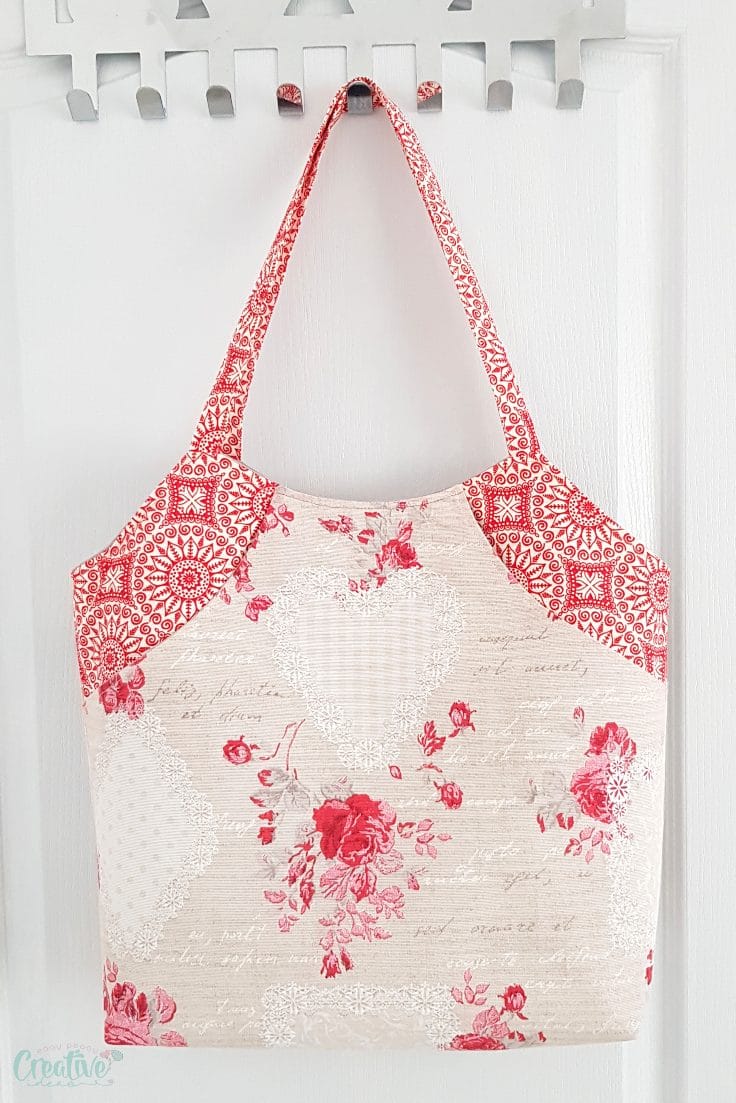
Everyone needs a great tote bag, don’t they? I absolutely love how this pocket tote bag pattern turned out! So cute but also stylish and roomy enough to hold a lot of stuff!
I have a soft spot for tote bags (but who doesn’t, right?) and every once in a while I tend to kind of binge on sewing totes! They’re fun and easy to make and in the right fabrics, with the right details they always make a statement! And the detail that makes this pocket bag pattern standing out is the simple but interesting deep front pocket!
More paid & free tote bag patterns you will love:
- Cross body bag pattern
- Quilted handbag sewing pattern
- 6 Pockets tote bag
- Drawstring makeup bag pattern
- DIY rope bag
- Round top tote with corded handles
- Color block tote bag
- One handle shopping bag pattern
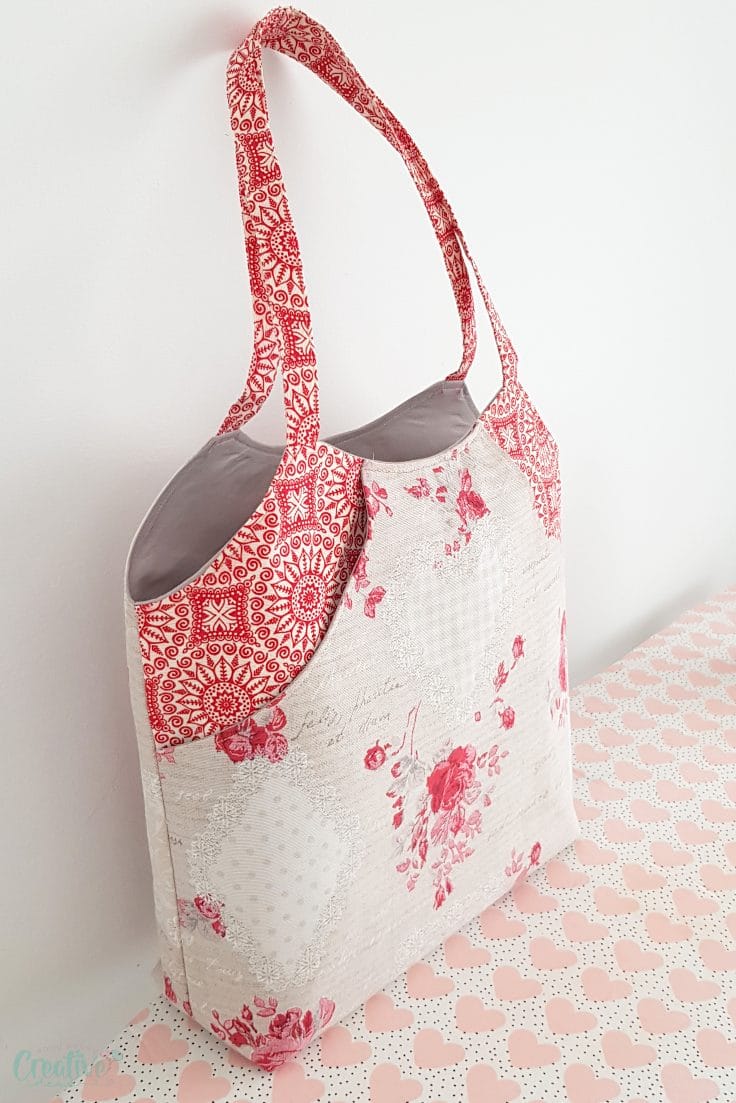
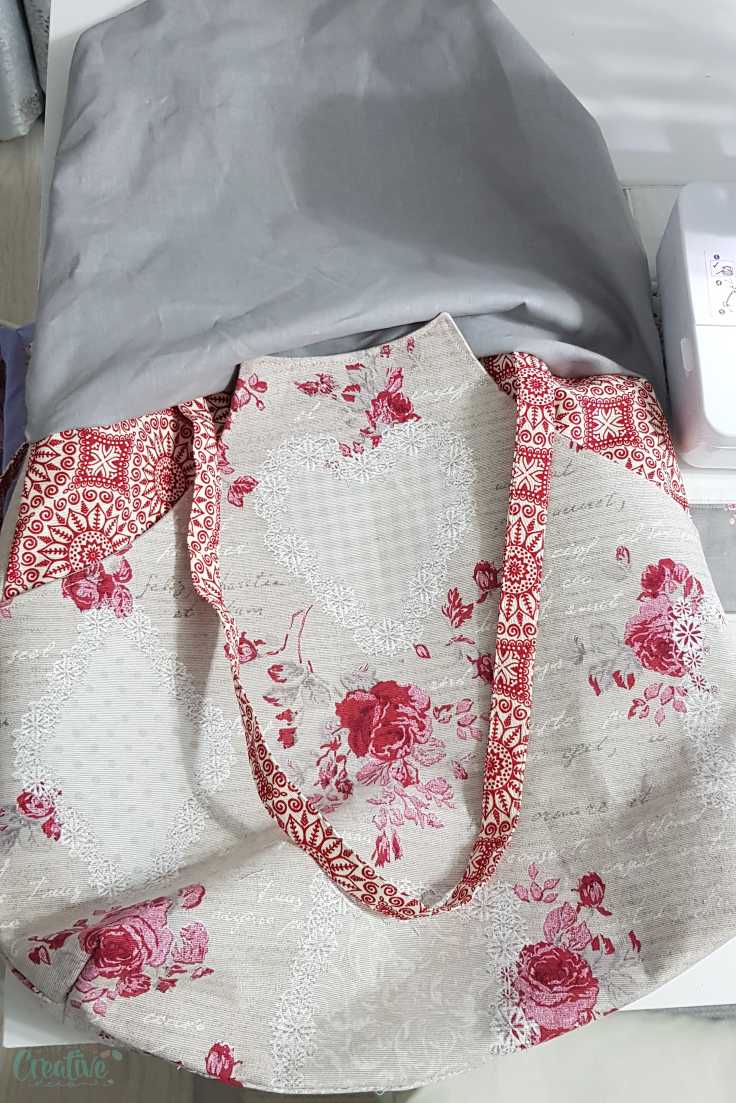
I used the same fabric for the pocket and the back side of the tote and a complementing fabric for the front side of the bag and the straps which contrast with the rest of the bag but in a good way! I used medium weight canvas fabric for my pocket tote bag to give it more body and shape.
Sewing this tote bag was simply a breeze! To be honest, it took more time to cut and prepare the fabrics than the actual sewing process! The key to get great results with this bag is cutting the fabrics perfectly and interfacing so it might be a good idea to take your time on these steps.
If you want to add an extra touch to your bag or simply need another pocket, this tutorial teaches you how to add a welt zipper pocket to any bag.
Get the deep front pocket tote bag pattern HERE!
Tote with pocket

Features of the deep front pocket tote pattern:
- This is a medium large bag with approximate measurements of 18″ by 18″, with straps measuring about 1 1/2″ by 22″
- Large deep front pocket
- Fully lined bag
- Flat base
- Nice, comfortable handles
- Great pattern to showcase a really nice fabric print combination
- Contrast pocket and front bag for a little extra design flair
- Additional pockets are easy to add, on the inside or outside, such as a welt zipper pocket.
- Full step by step instructions on using pattern, cutting fabrics and sewing the bag
Materials:
- deep pocket tote bag pattern
- approx. 1/2 yard of canvas fabric or denim fabric for the deep pocket & the back side of the bag
- approx. 1/4 yard of fabric for the front side of the bag.
- about 2/3 yard of cotton fabric for the lining (bag and pocket).
- about 1 yard of medium weight interfacing or fusible fleece.
- a strip of fabric of 7″ by 23″ for the straps.
- scissors
- measuring tape or yardstick
- pins
- quilting clips
- matching thread
- sewing machine
- pressing iron
Directions
How to use the pattern
- The first step of the making process is to print all four bag pieces and decide on the fabric choice. You can mix and match the fabrics, use patterned fabrics or a solid color for the bag and patterned for the pocket etc There are many possibilities to construct this beautiful bag.
- Match the papers at the green square marks so the squares form a larger square. Keep the papers together with scotch tape.
- Cut out along the green pattern first. This will be used to trace and cut the fabrics for the bag
- Cut the fabrics as indicated below then trim the pattern along the red marks to get the pocket pattern.
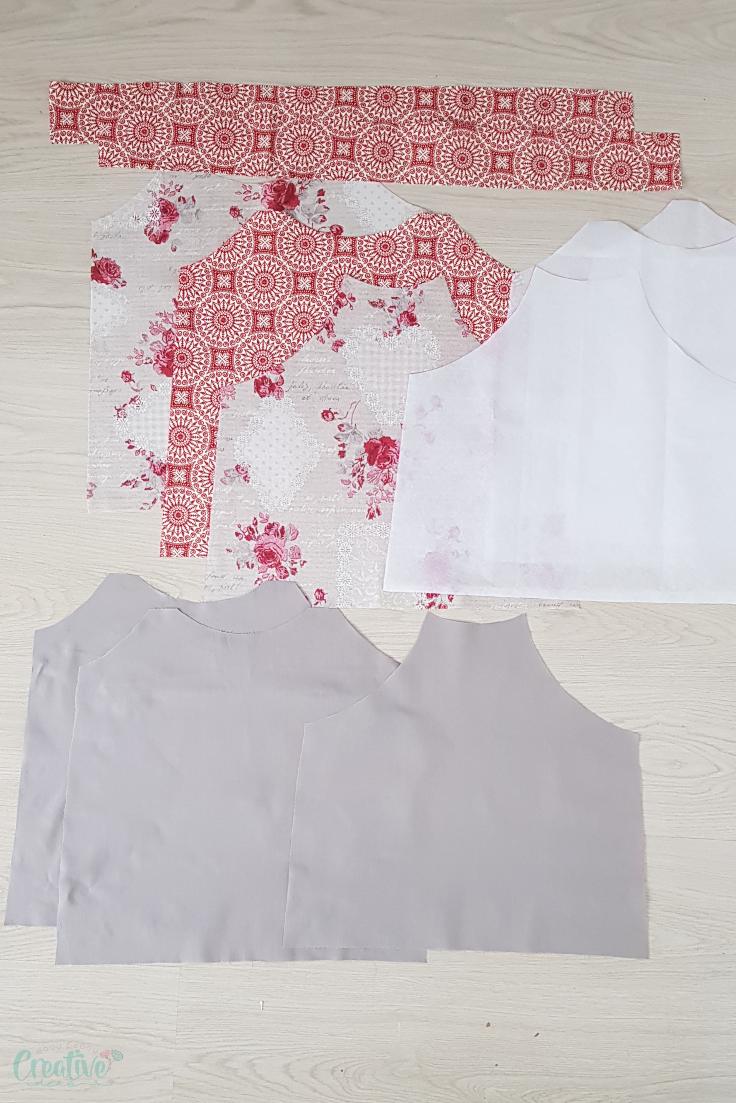
Cut the fabrics
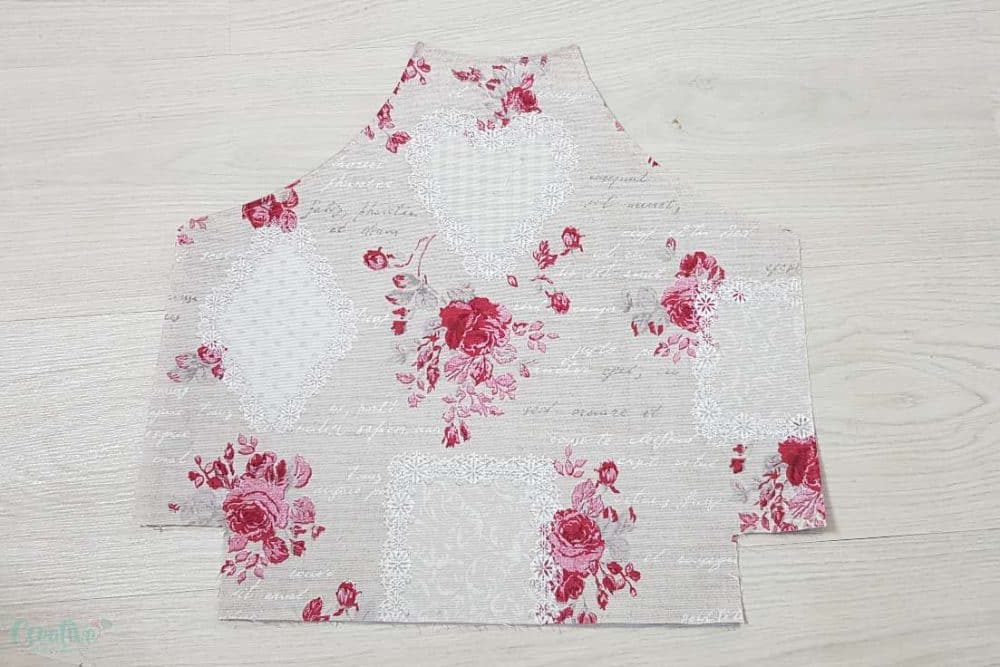
- Fold the fabric for the back bag and pocket and place the bag pattern on the fold. Hold the pattern in place with pattern weights and cut one piece of fabric, for the back side of the bag.
- Fold the fabric for the front side and place the bag pattern on the fold. Hold the pattern with pattern weights and cut one piece of fabric, for the front side of the bag.
- Use these bag pieces to draw on interfacing and cut out two pieces from the interfacing.
- Place either one of the back or front bag piece on the lining fabric, draw and cut out two pieces of lining.
- Trim the pattern as indicated above.
- Fold the rest of the bag and pocket fabric and place the pocket pattern on the fold. Hold in place with pattern weights and cut one piece of fabric, for the deep front pocket.
- Place the pocket fabric over the interfacing, draw and cut one piece of interfacing.
- Place the pocket fabric over the lining fabric, draw and cut one piece of lining for the pocket.
- Take the strap fabric and cut in half, lengthwise.
When you’re done cutting the fabrics you should have this list:
- 1 main fabric piece for the front bag
- 1 main fabric piece for the back
- 1 main fabric for the pocket
- 1 piece of lining for the front
- 1 piece of lining for the front bag
- 1 piece of lining for the back bag
- 2 pieces of interfacing for the main bag
- 1 piece of interfacing for the pocket
- 2 fabric strips for the straps
Prepare the bag pieces
- Interface the front bag, the back bag and the pocket.
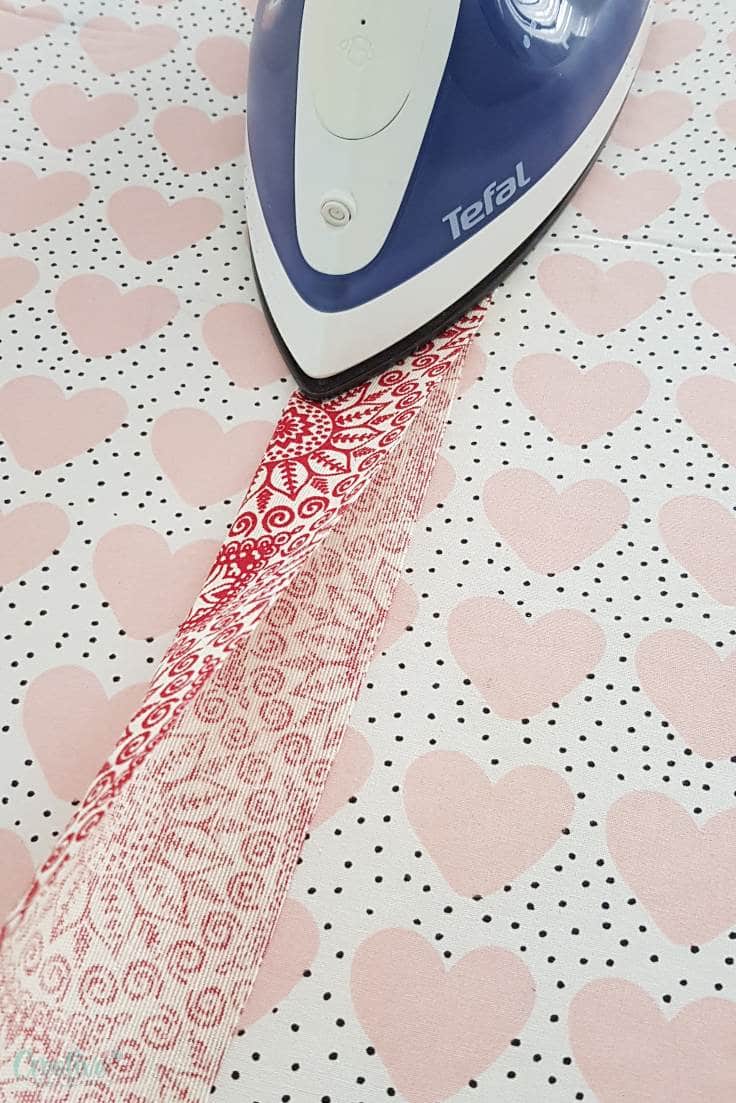
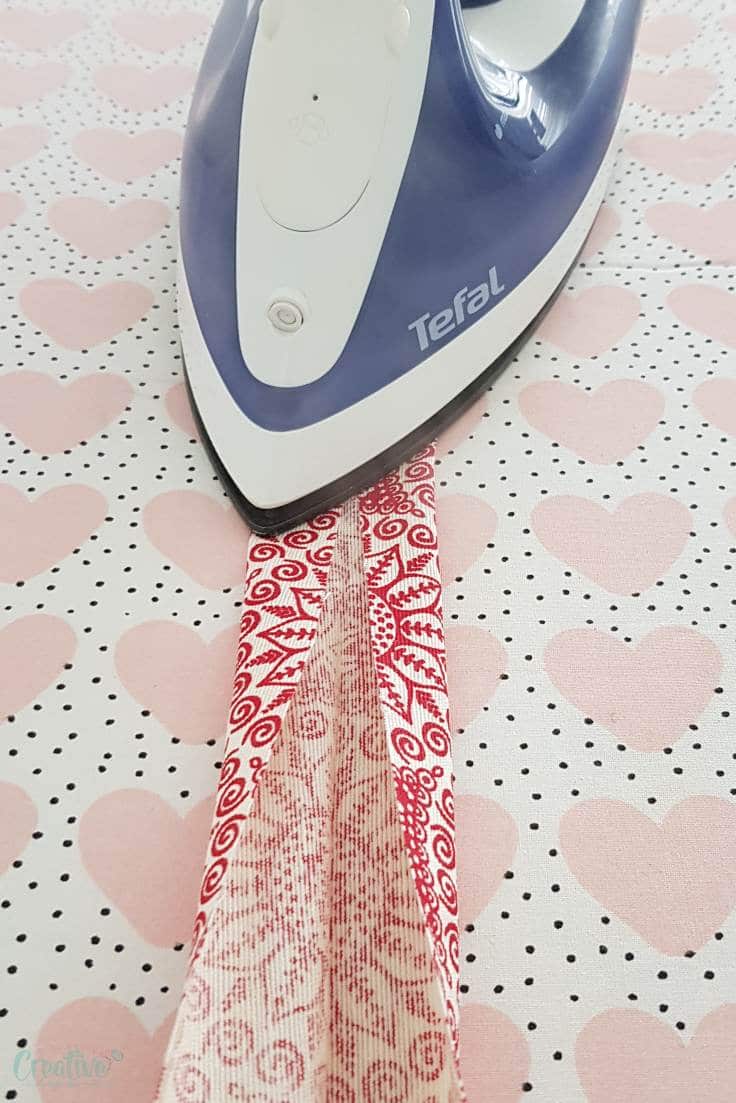
- Fold one of the straps in half and press with the iron on steam.
- Open the strap and fold each halves in then press well.
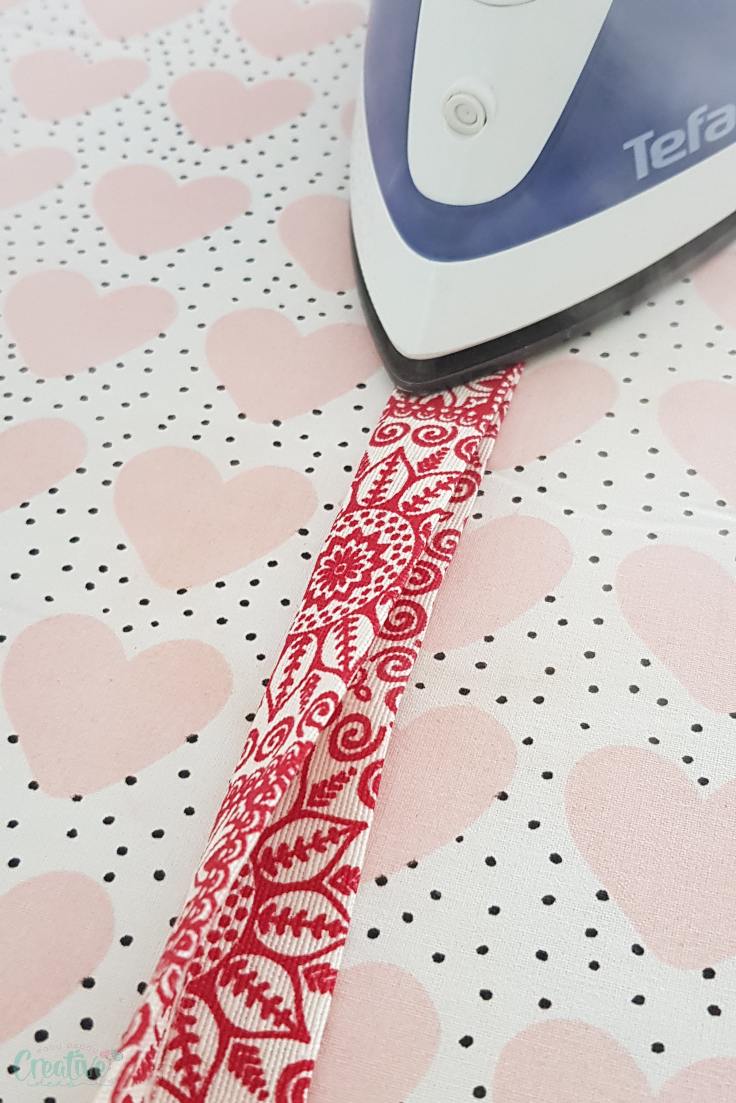
- Fold the strap again to the original fold and press well.
- Top stitch both edges of the strap using matching thread.
- Repeat for the second strap.
Make the pocket
- Place the pocket right side up and top with the pocket lining wrong side up.
- Pin the top.
- Sew with 1/4″ seam allowances.
- Clip the points and cut out notches in the curves.
- Turn the fabrics right side out and smooth out the top seam then press well.
- Top stitch the top with 1/8″ allowance.
Sew the bag pieces
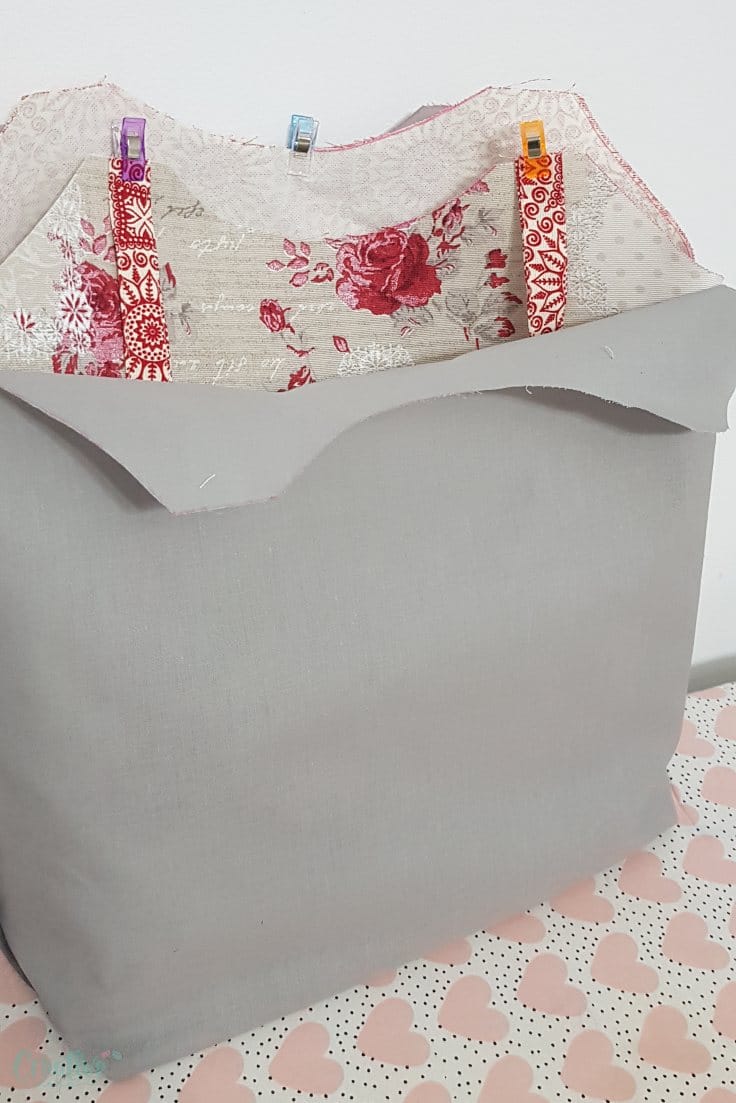
- Cut a 2 1/2″ square in both bottom corners of each bag piece, lining included.
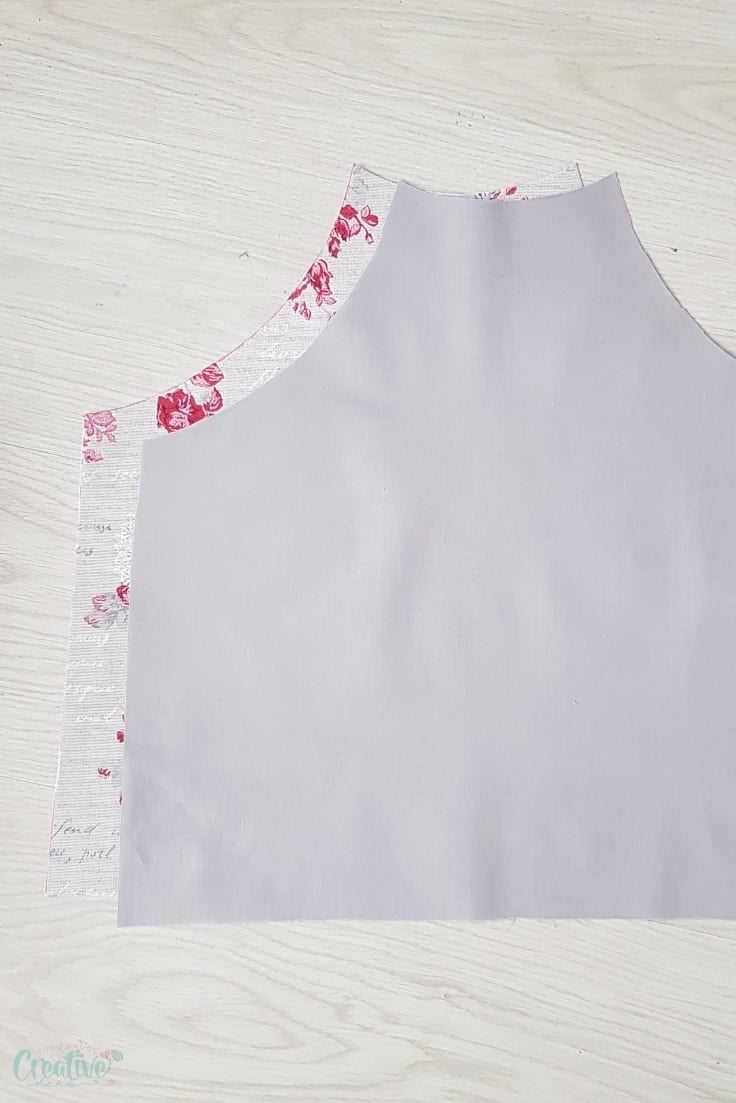
- Place the front bag fabric right side up and top with the lined pocket also right side up.
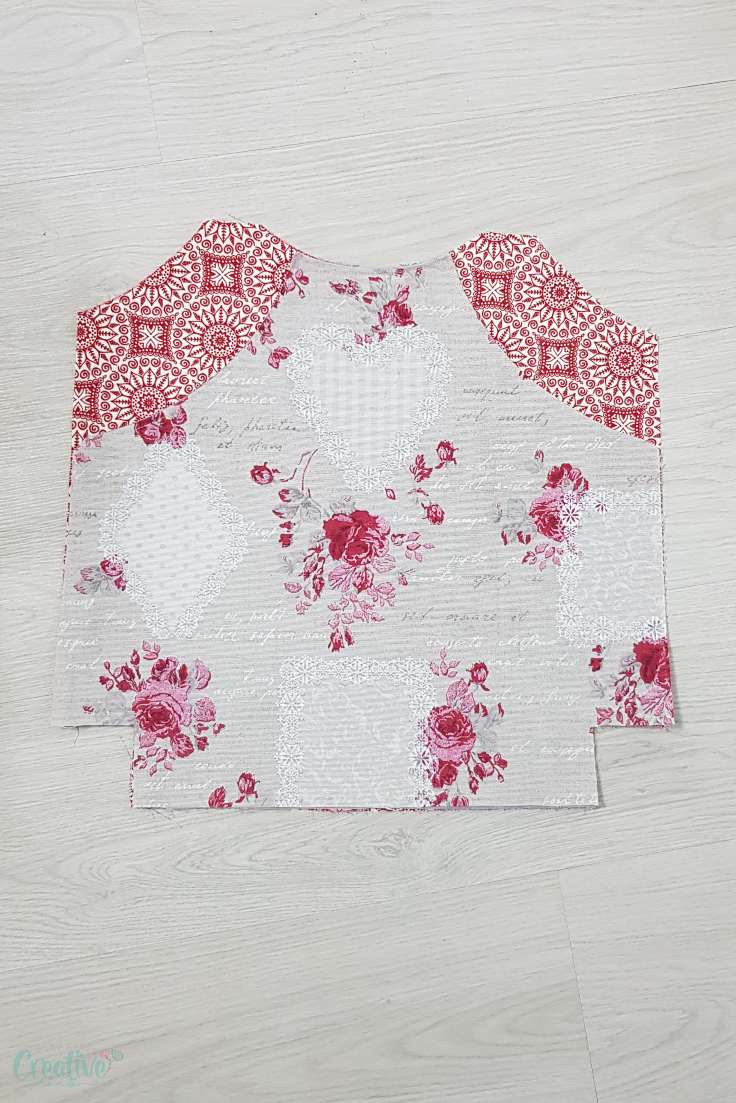
- Pin or clip the pocket to the front bag to temporarily keep them together.
- Top with the back panel wrong side up.
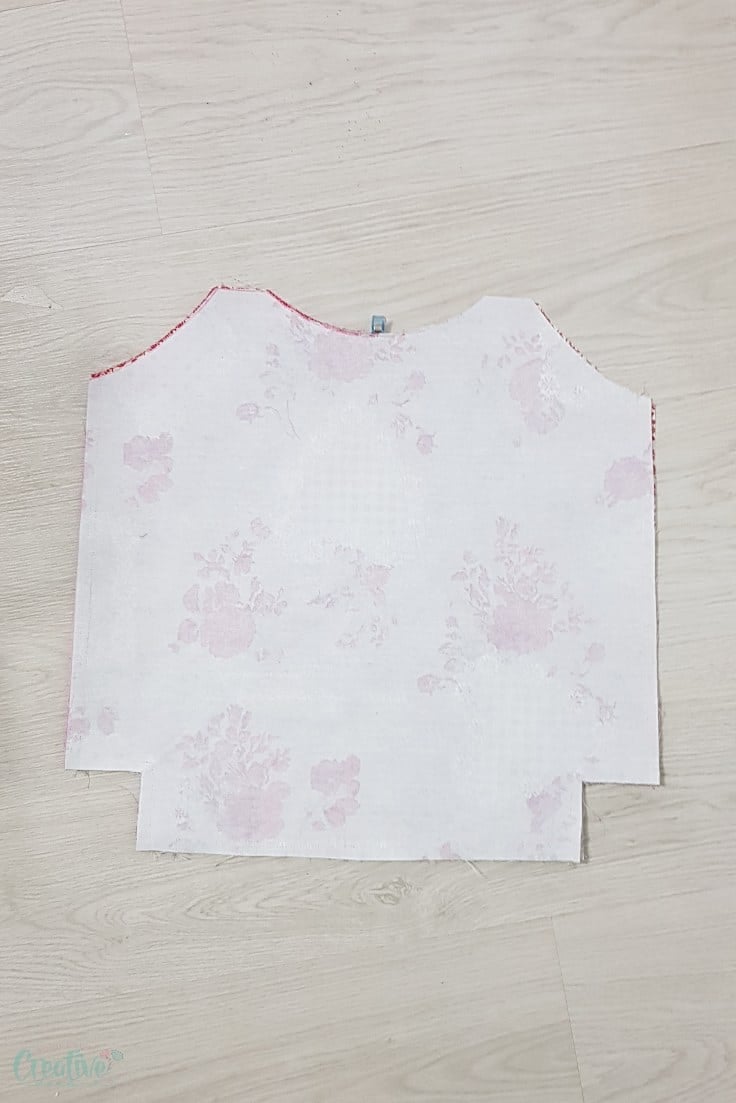
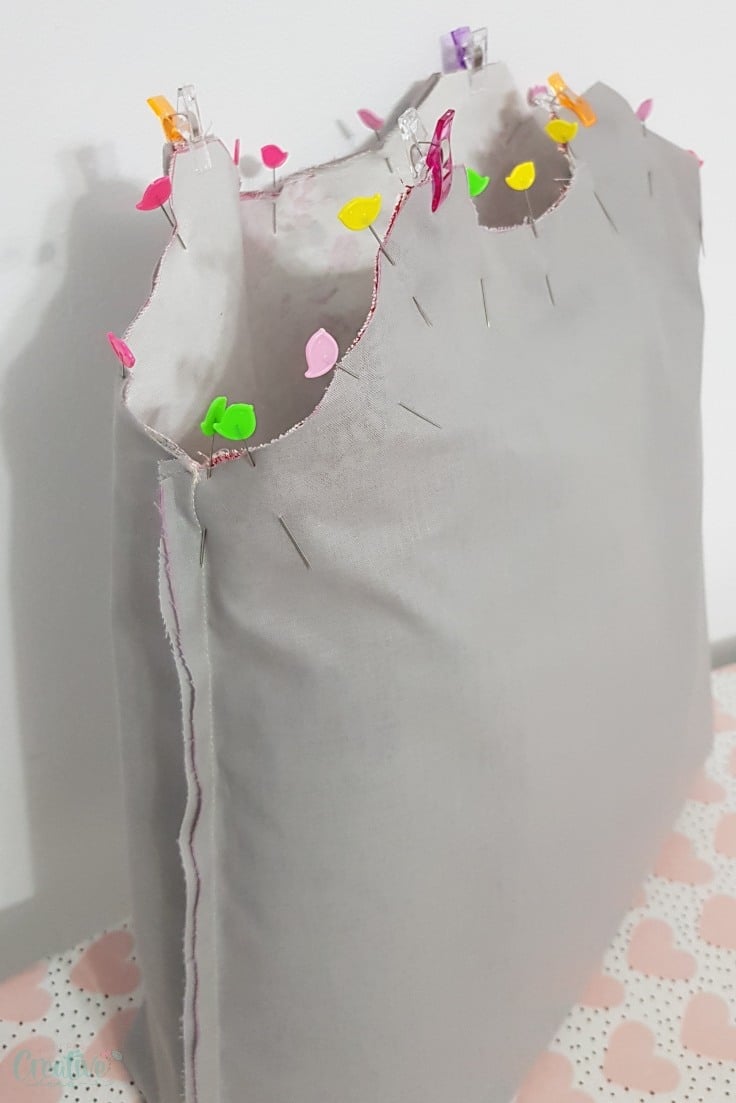
- Clip the sides and the bottom and sew only the sides and the bottom with 1/2″ allowance, skipping the square cut outs in the bottom.
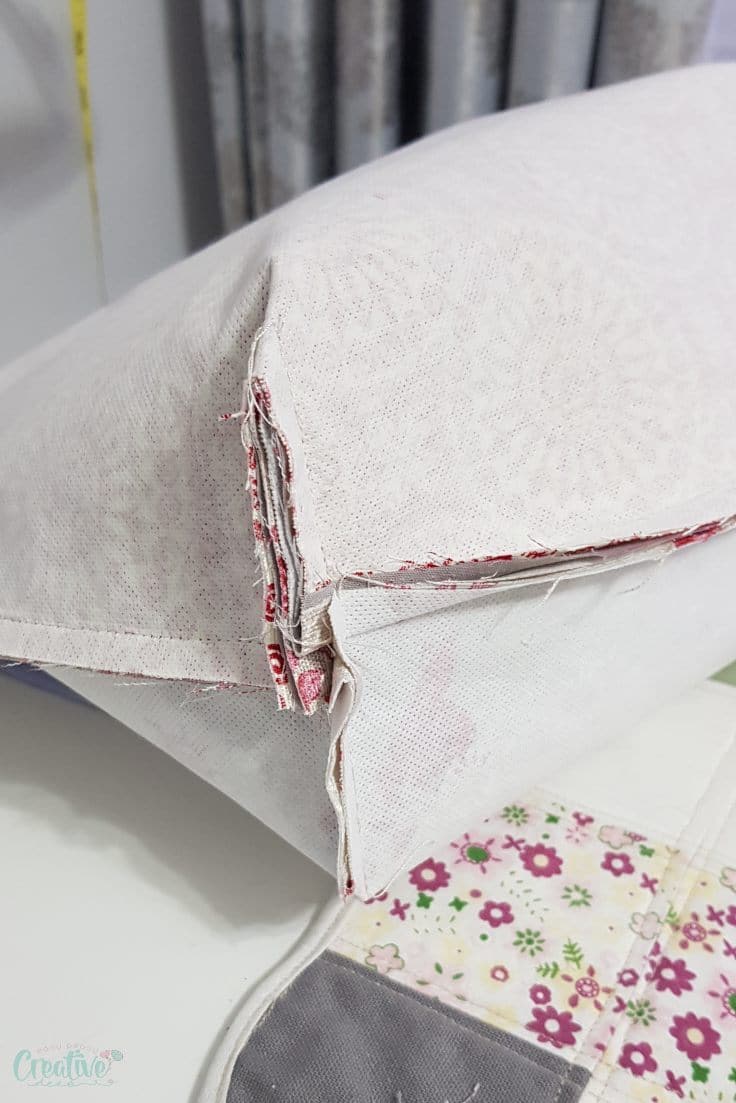
- To make the flat bottom, box the corners by pinching the squares and aligning the side seam and the bottom seam then sew the squares closed with 1/2″ allowance.
- When pinching and aligning seams, make sure the pocket and front fabric are together on one side and the back fabric on the opposite side.
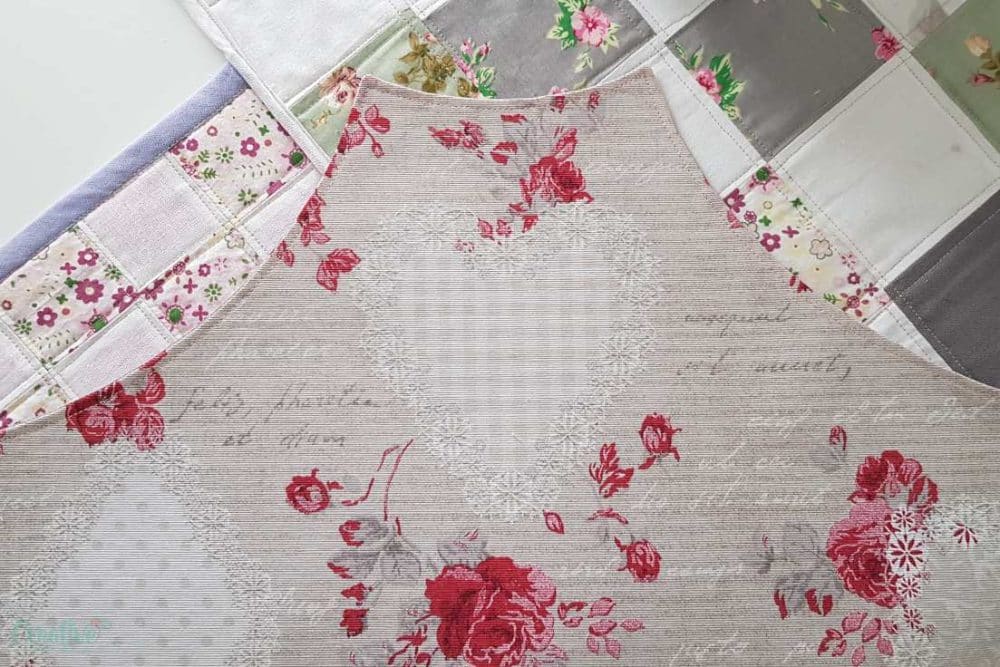
- Turn the fabrics right side out, push the corners of the bag out and smooth out the seams with your fingers.
- Give the seams a good press with the iron on steam.
- Place the bag lining pieces right sides together, pin the sides and the bottom and sew with 1/2″ allowance, leaving a gap in the bottom to turn the bag right side out later on.
- Box the corners of the lining as above.
Attach all bag pieces together
- Keep the lining wrong side out and slide the bag inside, with the bag on the right side.
- Push the lining down a bit and insert one of the handles in the front and one in the back. Raw ends should align with the top of the bag and the fold hanging inside the bag, in between the bag and the lining.
- Return the lining to its original position, match the side seams and clip or pin the bag and the lining around the top.
- Remove the clip that keeps together the pocket and the front bag and push the pocket down a bit to get it out of the way while you’re doing the next step.
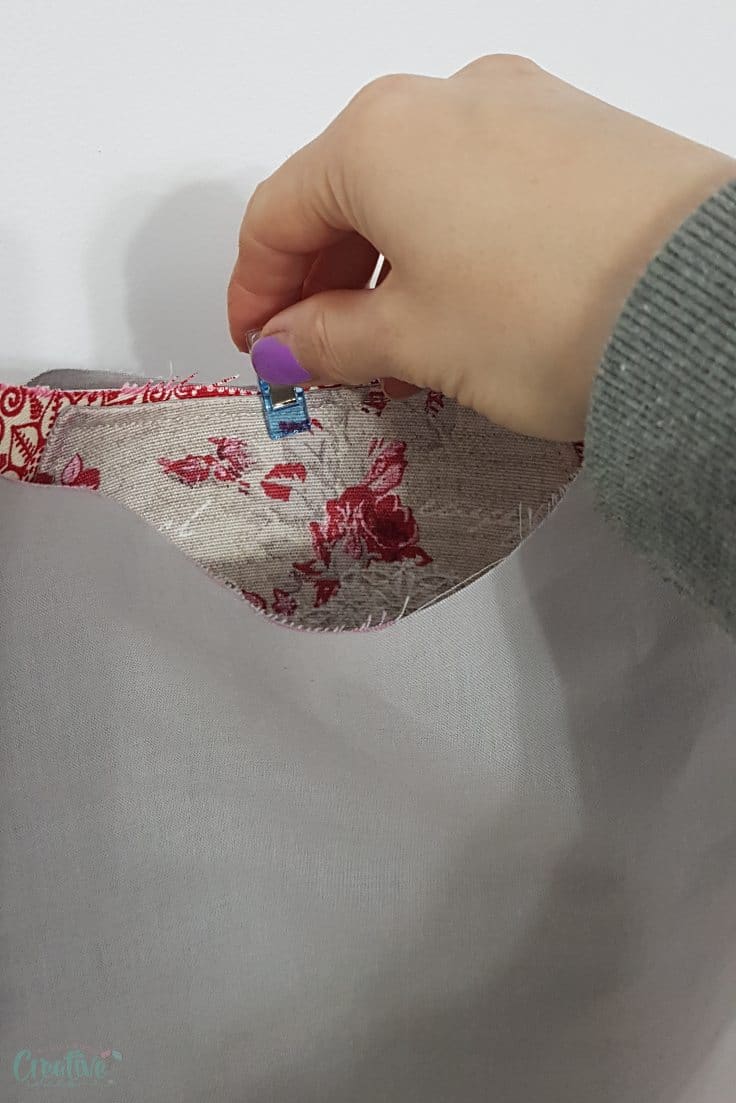
- Sew the top with 1/2″ allowance.
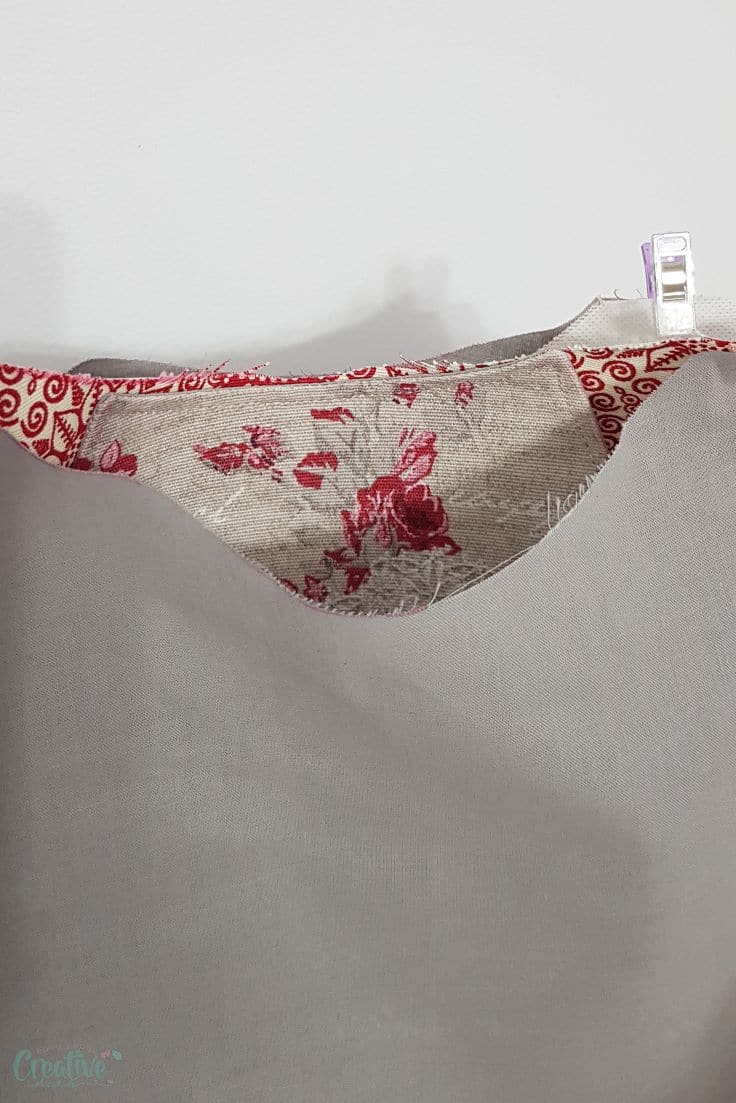
- Clip the points and cut notches in the curves.
- Turn the fabrics right side out through the gap in the lining.
- Edge stitch the gap closed or use a ladder stitch. Push the lining inside the bag and smooth out the top seam.
- Pull out the handles a little to make sure all corners are out and the seams are smooth in that area too.
- Return the pocket to the original position and clip the bag all around the top.
- Top stitch the entire top with 1/8″ allowance, catching the front pocket too (just follow the seam you’ve sewn before in the top of the pocket).
- Give it a last press, also pressing the lining and you’re done! Enjoy your new bag!
So if you’re looking for a roomy tote bag pattern with pockets, this lovely pocket tote bag pattern is the perfect accessory to add to your arsenal!
Pin to save for later
Most popular sewing projects:
- Tips for sewing a round hem
- Corded bag handles
- Flutter sleeve dress pattern
- How to laminate cotton fabric


Article may contain Amazon & affiliate links. As an Amazon Associate I earn from qualifying purchases at no additional cost to you.

Hi. I ordered and printed out the pattern a few weeks back. I put the pieces together and now to sew it, but I only have the piece with the #3 attached. I don’t have the other 2 pieces. Is there any way for me to get the other 2 pieces?
Hi Barbara. This is a complete pattern, it comes with all pattern pieces plus materials & instructions in one file. Please check the settings on your printer for missing pages.
I made this bag last weekend and sent it to my best friend. She LOVED it!!! I got 2 really great fabrics for it, and it turned out great. Even though I am a very experienced sewer, I did have a couple of hiccups, but I worked them out and can’t wait to make one for myself. It is a great bag!! Thank you!
Thanks so much for your kind comment, Jody! It made my day ❤ I’m so happy you enjoyed making this bag!
Is the pattern downloadable? I see ads for templates, but nothing specifically for this pattern.
Hi, Sue. The pattern is available here https://brandcycle.go2cloud.org/aff_c?offer_id=847&aff_id=4794&url=https%3A%2F%2Fwww.awin1.com%2Fcread.php%3Fawinmid%3D6220%26awinaffid%3D303693%26clickref%3DA{affiliate_id}O{offer_id}TID{transaction_id}%26p%3Dhttps%253A%252F%252Fwww.etsy.com%252Flisting%252F776546584%252Fdeep-front-pocket-tote-bag-pattern%253Fref%253Dshop_home_active_6
I really struggled with this and I wish there were a video. Does “Interface the front bag, the back bag and the pocket” mean to apply the interfacing to those sections?
Yes, Belinda. Apply interfacing to the fabric pieces for the front of the bag, back of the bag and the pocket.
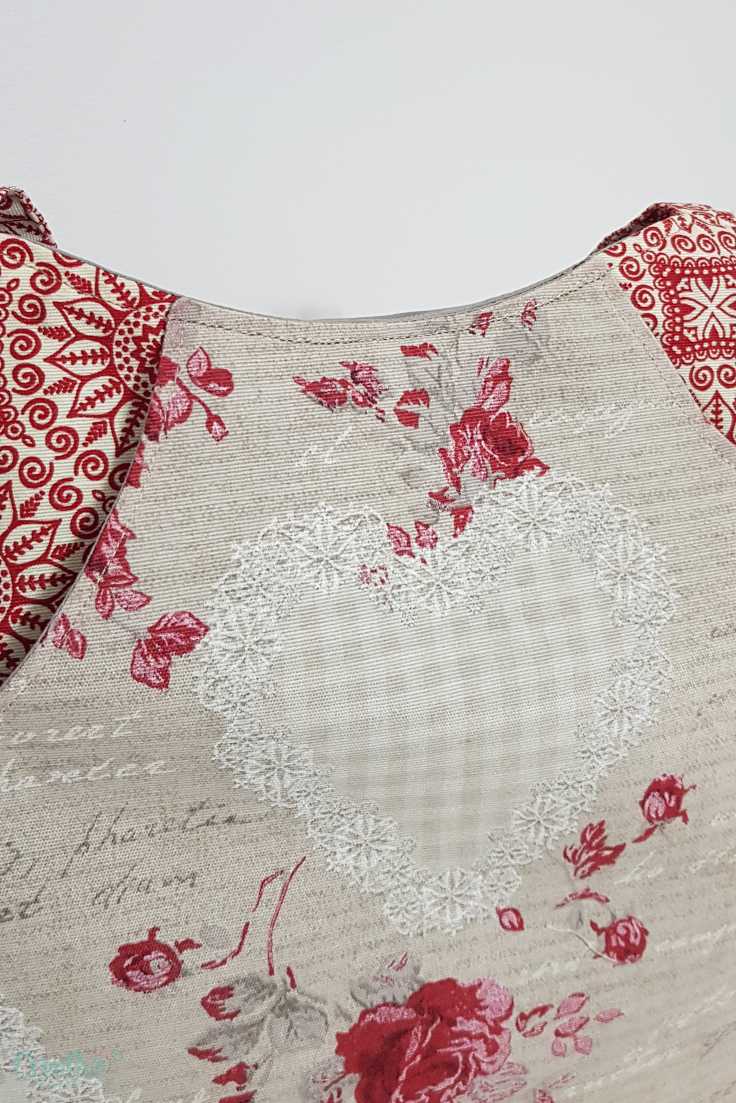
Is the pocket supposed to be on the outside of the bag?
Hi, Mary! Yes, the pocket is outside.
Nov 2021 – are you still available to answer questions? Approx 1/4 yard of fabric for the front side of the bag is not enough to cut out the front side piece unless I make a seam cross wise. It takes 1/2 yard of fabric to cut the front the same size as the bag. Or am I reading something wrong? PLEASE ANSWER ME – I wanted to make some for Christmas 2021!!!
Hi, Barbara! I’m sorry for your troubles! I think I see where the confusion might be. Fabric stores sell fabric in yards with various widths (such as 54″, 60″, 72″ and more) while the length is always 1 yard =36″. My fabric was 72″ x 36″ with the print distributed evenly across the width and the length so I could cut the bag pieces as indicated in the pattern using the width of the fabric. With plain fabric, it should be even easier to cut the bag pieces since you don’t have to take the fabric pattern into account.
So the front side of the bag should be the same pattern piece as the back – so for 36″or 45″ inch fabric I will need 1/2 yard to cut the front piece on a length wise fold. Probably enough to use on another bag. HMMM I may just make this one with a seam down the middle of the front. I don’t want to go back in Turkey week traffic. THANK YOU I will send a picture.
It’s not very often I get excited about a bag but this is gorgeous.
Thanks, Angela! I’m pretty smitten too :) Let me know if you decide to make it, would love to see photos!
Beautuful. Love the tailored look.
This tote is gorgeous! Every year I make almost all of my Christmas gifts and this tote is this year’s gift to family and friends. I downloaded the pattern and I can’t wait to make this! Do you have youtube videos for your projects?
Thanks so much, you made my day! I have a video for many of my projects but not all. If a project has a video it will always play in the article, at the top or in content.
Where is the deep pocket tote bag pattern?
Hi, Sue. The link is right above the materials listing.
Sorry not ment for you!
Can’t you atleast put the adds to one side!! Thanks and appreciated!
I cannot, Teresa! These ads support this site and enable me to offer you my content free of charge. I work hard for this content and sharing it here involves lots of expenses on my side. Without these ads you will have to pay for my content and all those expenses.
Hi! I love some of your patterns and have purchased this one for the Deep Pocket Tote Bag. I have to say that you should really make it known on these pages here which of your patterns comes with the subscription process and which must be purchased. I don’t mind paying at all, you deserve it for your hard work! But no one likes feeling bamboozled or taken in, it would turn people away instead of drawing them in! Just a thought for you to ponder.
Hi Jessa. Thanks for your feedback! All of my patterns are marked when they come with paid or free subscription, at least 2 times in the body of the article.
Hi there,
Just downloaded your pattern but was wondering if this pattern includes seam allowances?
Hi Michelle. Thanks for your purchase! Yes, the pattern includes seam allowance.
I went through all the steps to buy it…….it says it’s in my cart, but can’t figure out how to print it out. Help!
Hi, Sarah. Thanks for contacting me! I have no records of a transaction under this email address and I’m unable to see your cart as I sell my pattern on a third party platform. If you can still see it in your cart with no option to purchase I would contact the platform (not sure you saw my pattern on Payhip or Etsy) as it sounds like a technical issue with the third party platform. Thanks!
Really nice!
Thanks, Karen!
I am wondering what the finished size of this tote is. I purchased your pattern and the instructions say to match the papers at the green squares to form a larger square. I guess I’m not understanding how the squares become larger. Do I place them on top of one another or next to each other?
You place them next to each other, Sue.
Okay thank you!
Hi there I was just wondering where you bought this fabric I love this and would love the same design fabric. THanks so much Teresa
I’m sorry, Teresa! These are from my local store.
Hi,
I just tried to purchase your pattern -several times!! I didn’t want to use pay pal but rather my credit card but it kept asking for my pay pal account so I tried to go through pay pal but no luck.Now I don’t know if I have been charged or not as I gave up. Can you please check for me and help me try again. I would rather not go through pay pal but there doesn’t seem to be any other option
Thank you
Sue a Smith
suesmith52@hotmail.com
Hi Sue. I’m sorry, PayPal seems to be the only option at this stage. However no charge is registered under this email or name.
I’m receiving your e-mail but don’t know ow to download the free pattern for the button headband. Please advise
Hi Lois. The pattern is in the sewing library, link & password in the email. Open the pattern and look for a download button in the top right hand corner.
I tried to purchase the Deep Pocket tote. It shows that it is in the cart for purchase but will not proceed to the next step. Can you help?
Hi Bonnie. Thanks for your interest in my pattern! Unfortunately, I have no ability to see your cart as I am not the owner of the platform where I sell this pattern. I can only see that no purchase under this email has been processed so you weren’t charged. I would suggest try purchasing again after deleting the product from your cart first so you won’t be charged twice.