

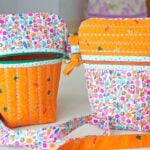
Small crossbody bag pattern
Are you in search of the perfect small crossbody bag pattern that combines practicality with fashion? Especially designed for on-the-go individuals, this must-have accessory is ideal for travelers and adventure-seekers who prioritize keeping their hands free while carrying just the essentials – like your phone and wallet.
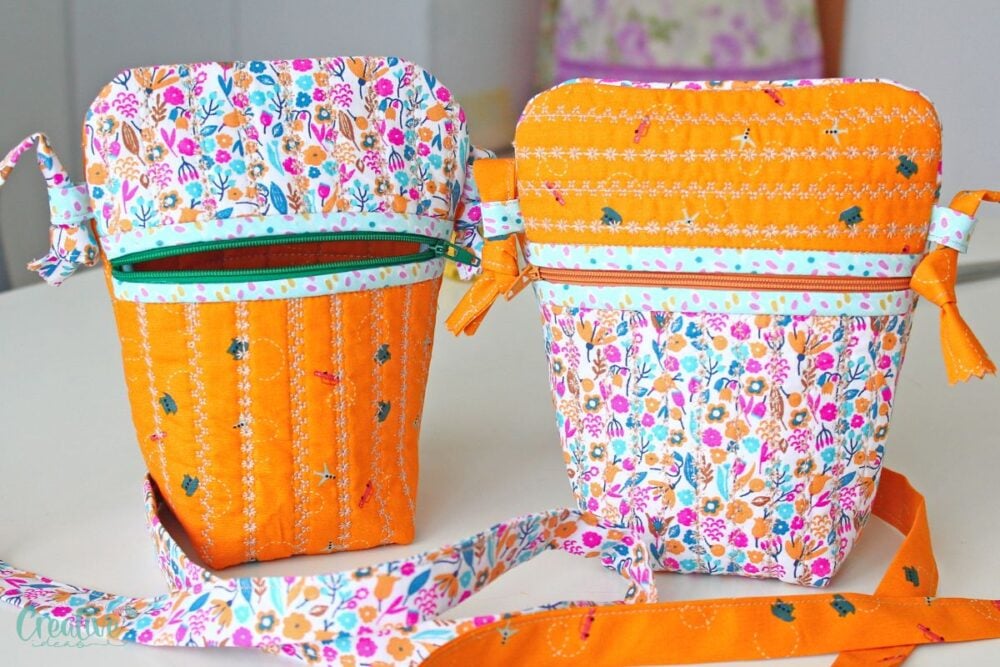
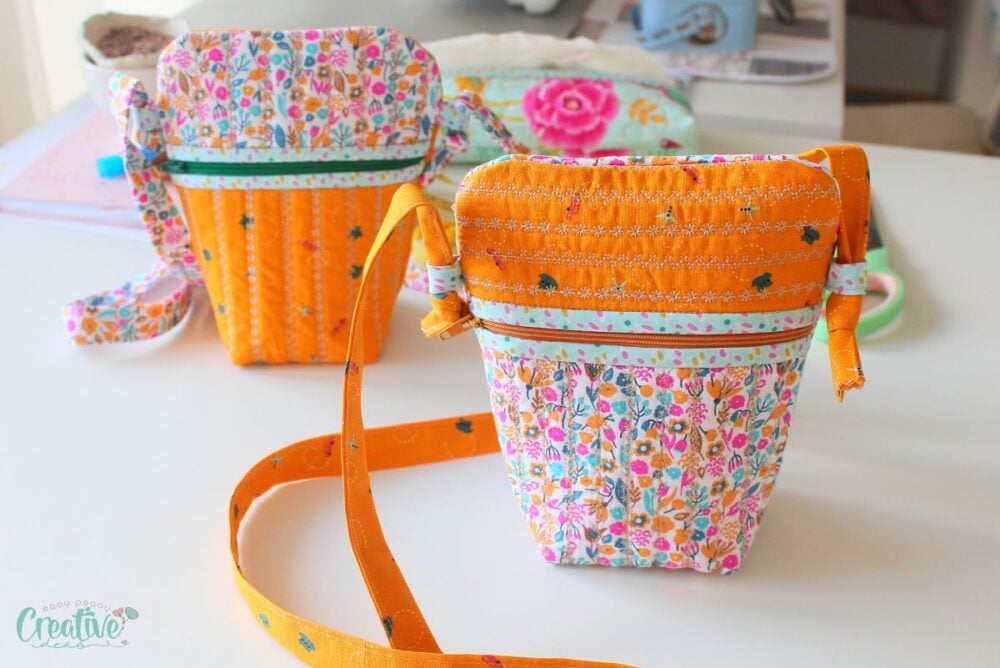
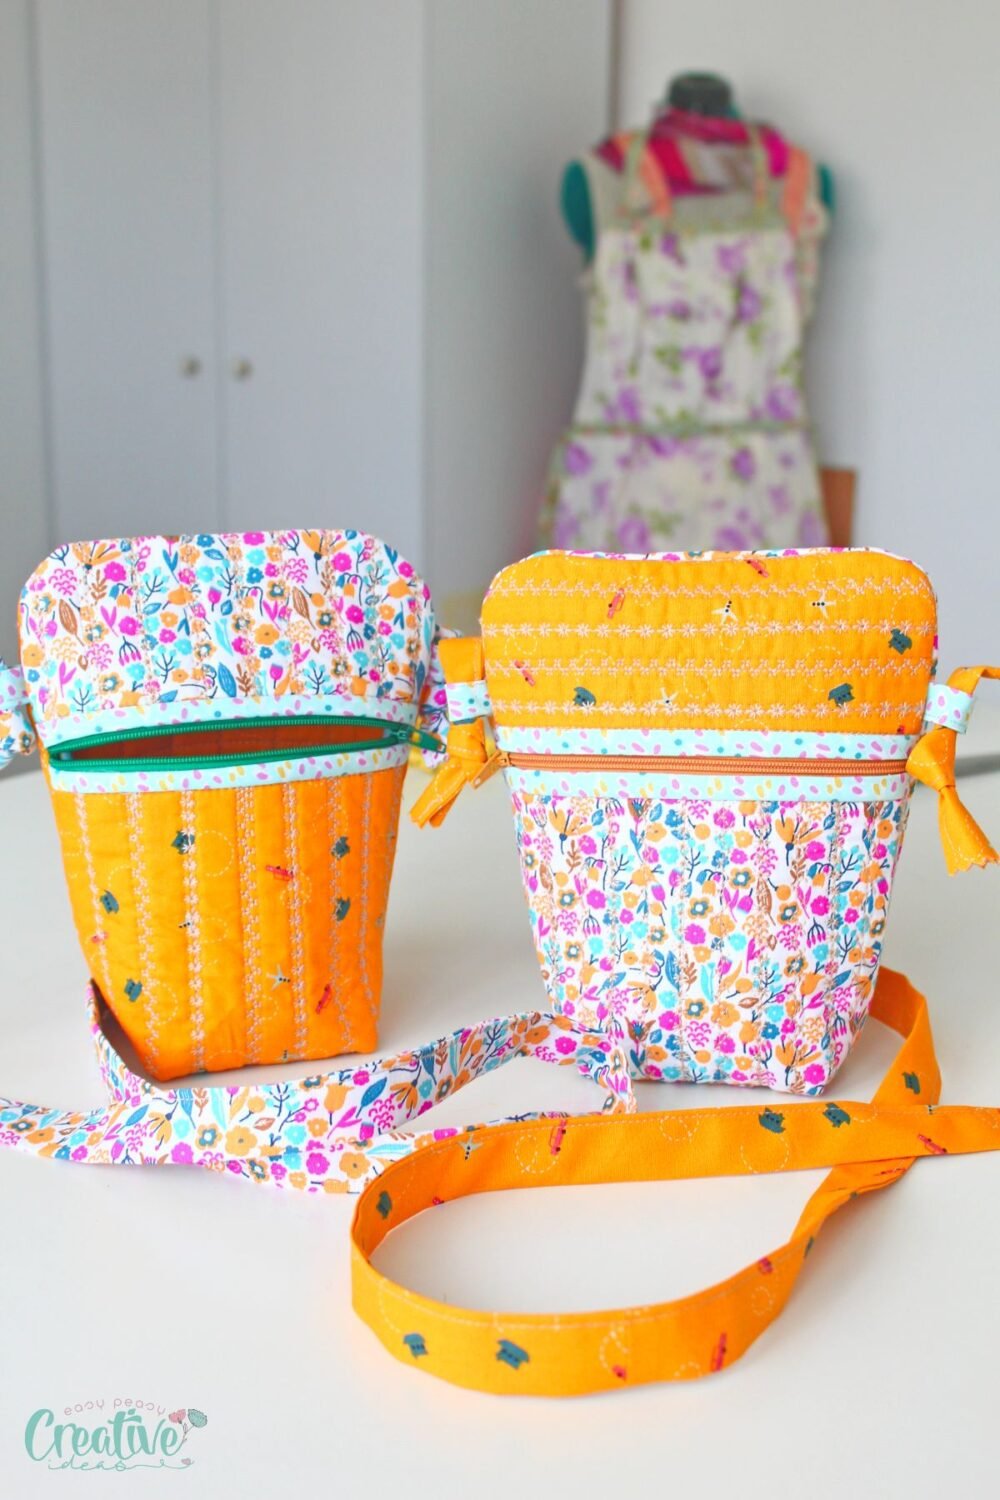
If you’re a fan of small, practical bags that allow you to keep your hands free while on the go, then you’ll love this small crossbody bag pattern. As someone who loves to travel and explore new places, I needed a reliable bag that could carry just the essentials – my phone and wallet. That’s why I created this easy-to-sew pattern that has become my go-to bag for all my short trips.
This small crossbody bag pattern is perfect for anyone who wants a compact, yet functional bag. It’s lightweight and doesn’t add any extra weight to your load, making it perfect for sightseeing or casual outings. The adjustable strap allows you to wear it comfortably on your shoulder or across your body, making it versatile and easy to carry around. Not only is this small bag practical, but it’s also stylish.
How to sew a small crossbody bag
Materials you’ll need
- Cotton fabric: Choose a sturdy, yet lightweight cotton fabric for the body of your bag. This will give it enough structure to hold its shape, while still being comfortable to wear.
- Cotton batting: To add padding, softness and stability to your bag.
- Matching thread: Make sure to choose a thread that matches your fabric color for a seamless finish.
- Bias binding: This will be used for the loop and the raw edges of the bag. You can either buy pre-made bias binding or make your own, the old fashion way or by using a bias tape maker.
- Zipper: I used a zipper of 9″ long and 1″ wide. Use a zipper that is about 2 inches longer than the width of your bag for easy access to your belongings.
Substitutes
Don’t have all the materials listed? Don’t worry, you can always get creative and use substitutes instead. Instead of cotton fabric and batting, try using a sturdy denim or canvas for a more durable bag (here are some useful tips for sewing with canvas). Instead of bias binding, you can use ribbon or even fold over elastic to finish the edges. And if you don’t have a zipper, consider adding a button closure or snap fastener.
Equipment You’ll Need
- Cutting mat: This will make it easier to cut your fabric and ensure precise measurements.
- Rotary cutter: A rotary cutter is great for cutting through multiple layers of fabric quickly and accurately.
- Scissors: You’ll also need a pair of fabric scissors for cutting any smaller details or trimming excess threads.
- Pinking shears: To pink the ends of the bag strap.
- Wonder clips: These handy clips are perfect for holding your fabric pieces in place while sewing, without leaving any marks.
- Sewing machine: a strong, heavy duty sewing machine, capable of sewing through thick layers is required for this project.
- Embroidery scissors: These small scissors are great for trimming threads and getting into tight corners.
- Measuring tape: Make sure to use a measuring tape for accurate measurements of your fabric and strap length.
- Hemming tape or quilting spray to attach the fabrics to the batting – these are optional but very helpful in keeping the fabrics and batting together.
Instructions to sew the small cross body bag
See the sewing card below for detailed photography and video.
Preparations
Before you start sewing, make sure you have all your materials and equipment ready. Iron your fabric to remove any wrinkles and make it easier to work with.
Cut out the pattern pieces according to the size you want. I made my small crossbody bag based on my needs (phone and wallet) and these were my measurements. Feel free to use them if they match your phone and wallet size.
- 2 panels of fabric of 7″ by 3″ plus corresponding batting – for the top front
- 2 panels of fabric of 7″ by 6″ plus corresponding batting – for the bottom front
- 2 panels of 7″ by 9 1/2″ for the back of the bag plus corresponding batting
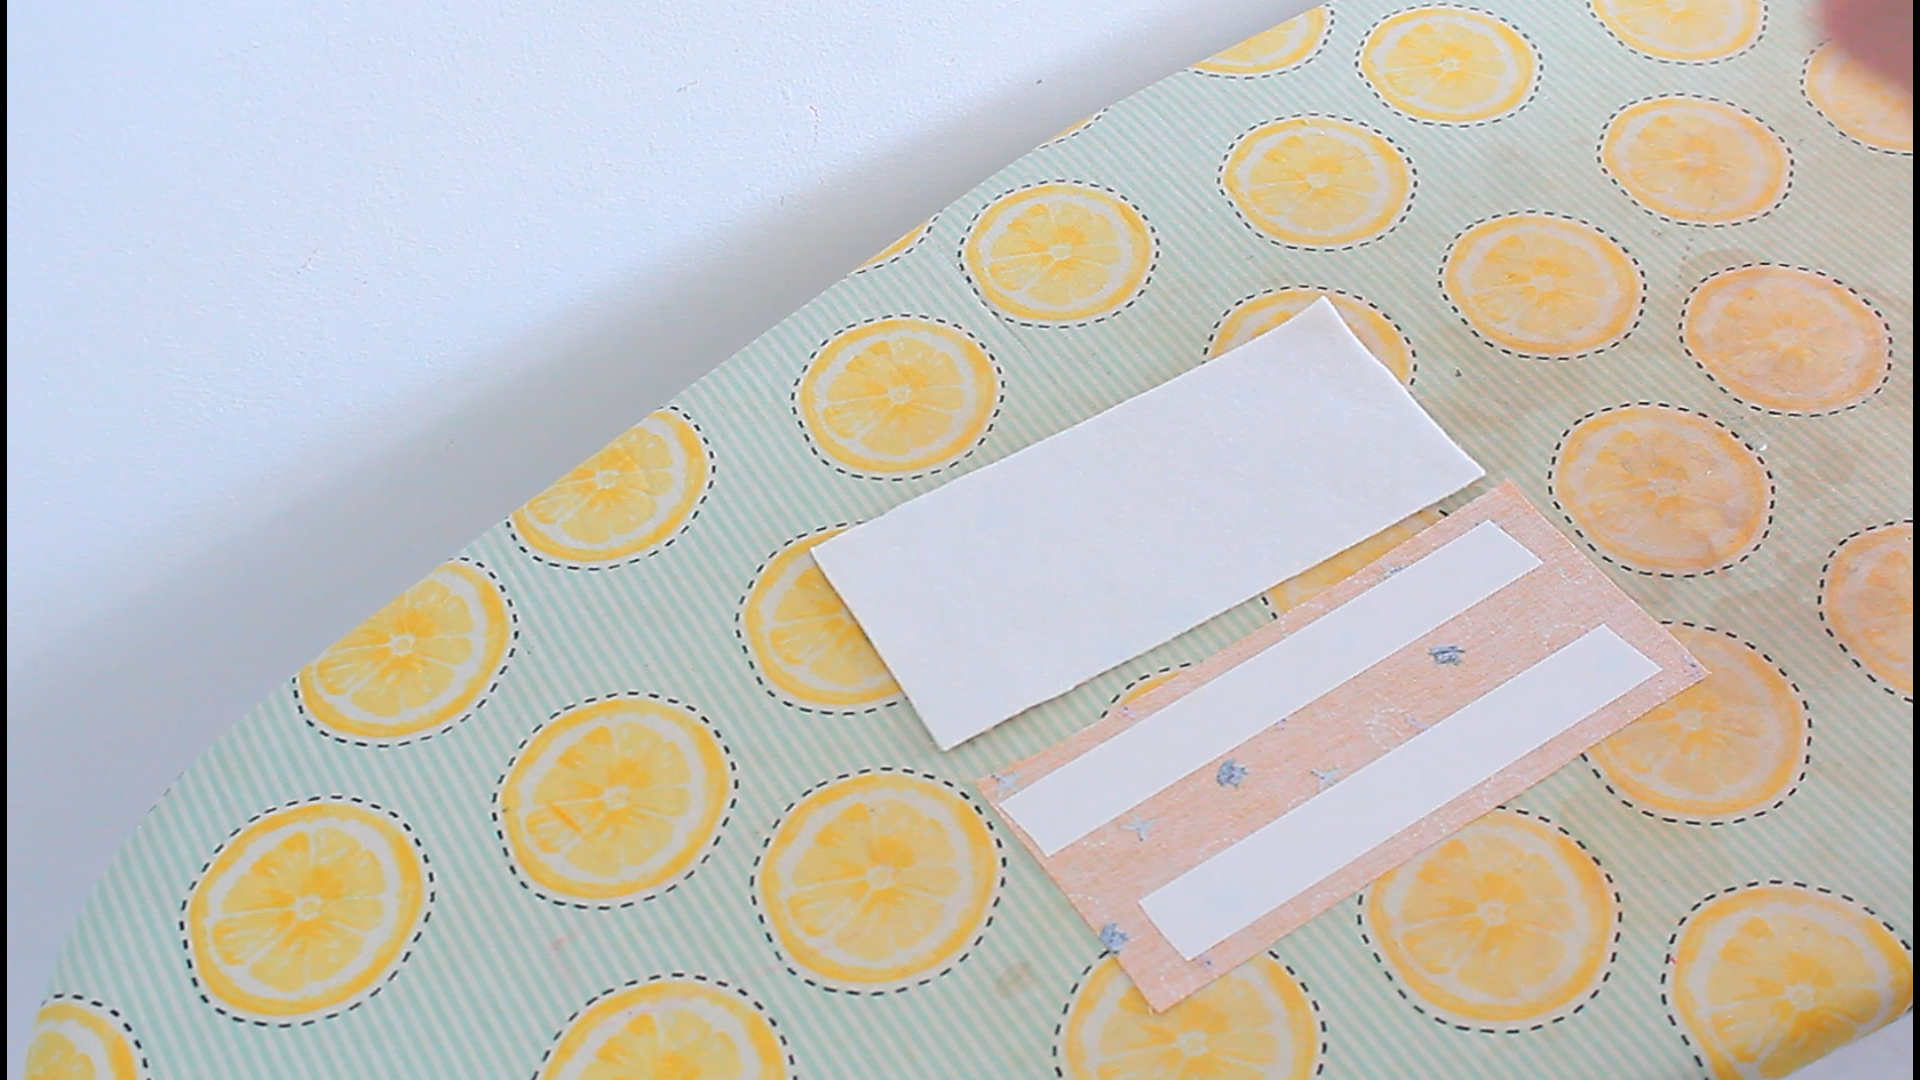
- 2 small strips of 2″ by 4″ for the loops (if your fabric is not sturdy enough you might need to interface these strips with medium weight interfacing)
- 1 long strip of 3″ by 50″ for the bag strap (interface this too if needed)
- 1″ wide bias binding
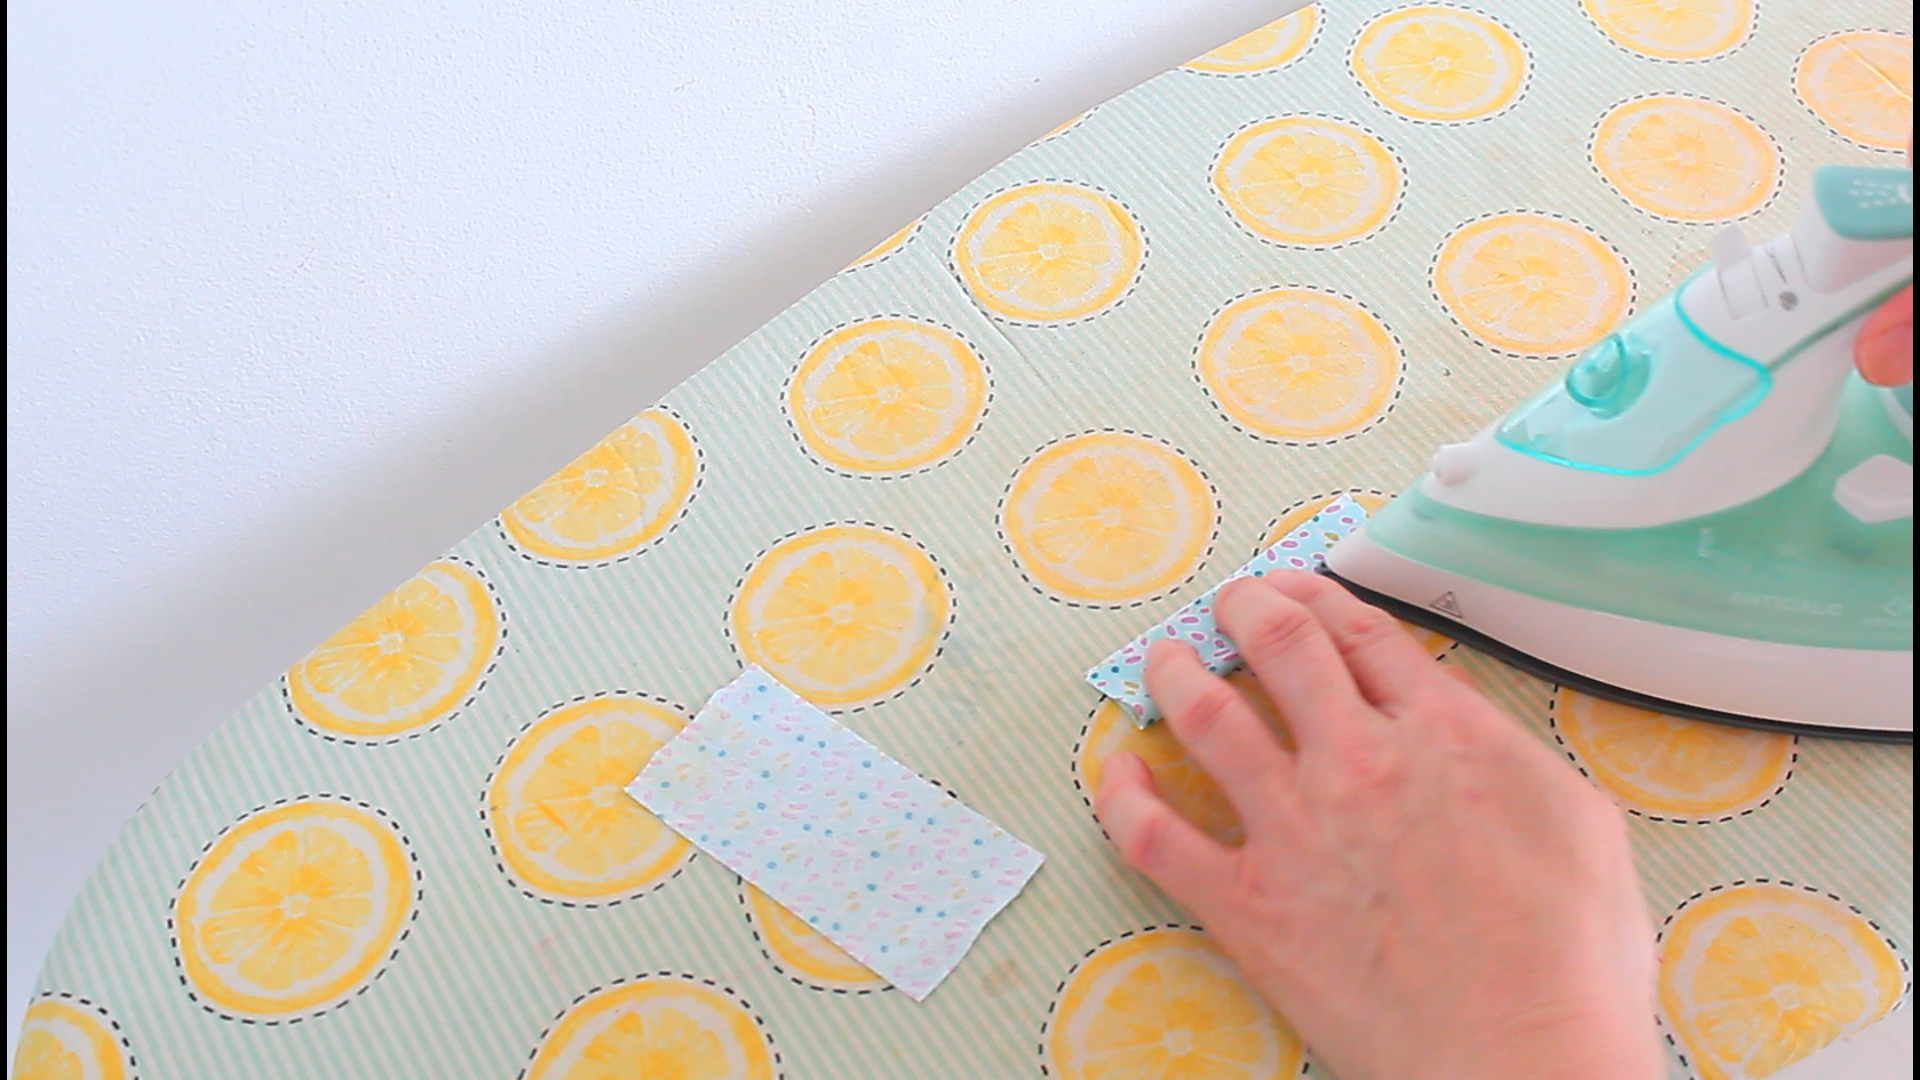
Next you need to prepare the loops and the bag strap with the same method:
- Fold the strips in half.
- Then fold each half in and press.
- Fold again in half and press.
Sewing the small crossbody bag pattern
- Begin by attaching the fabrics to the batting for each individual panel. You can use hemming tape or quilting spray.
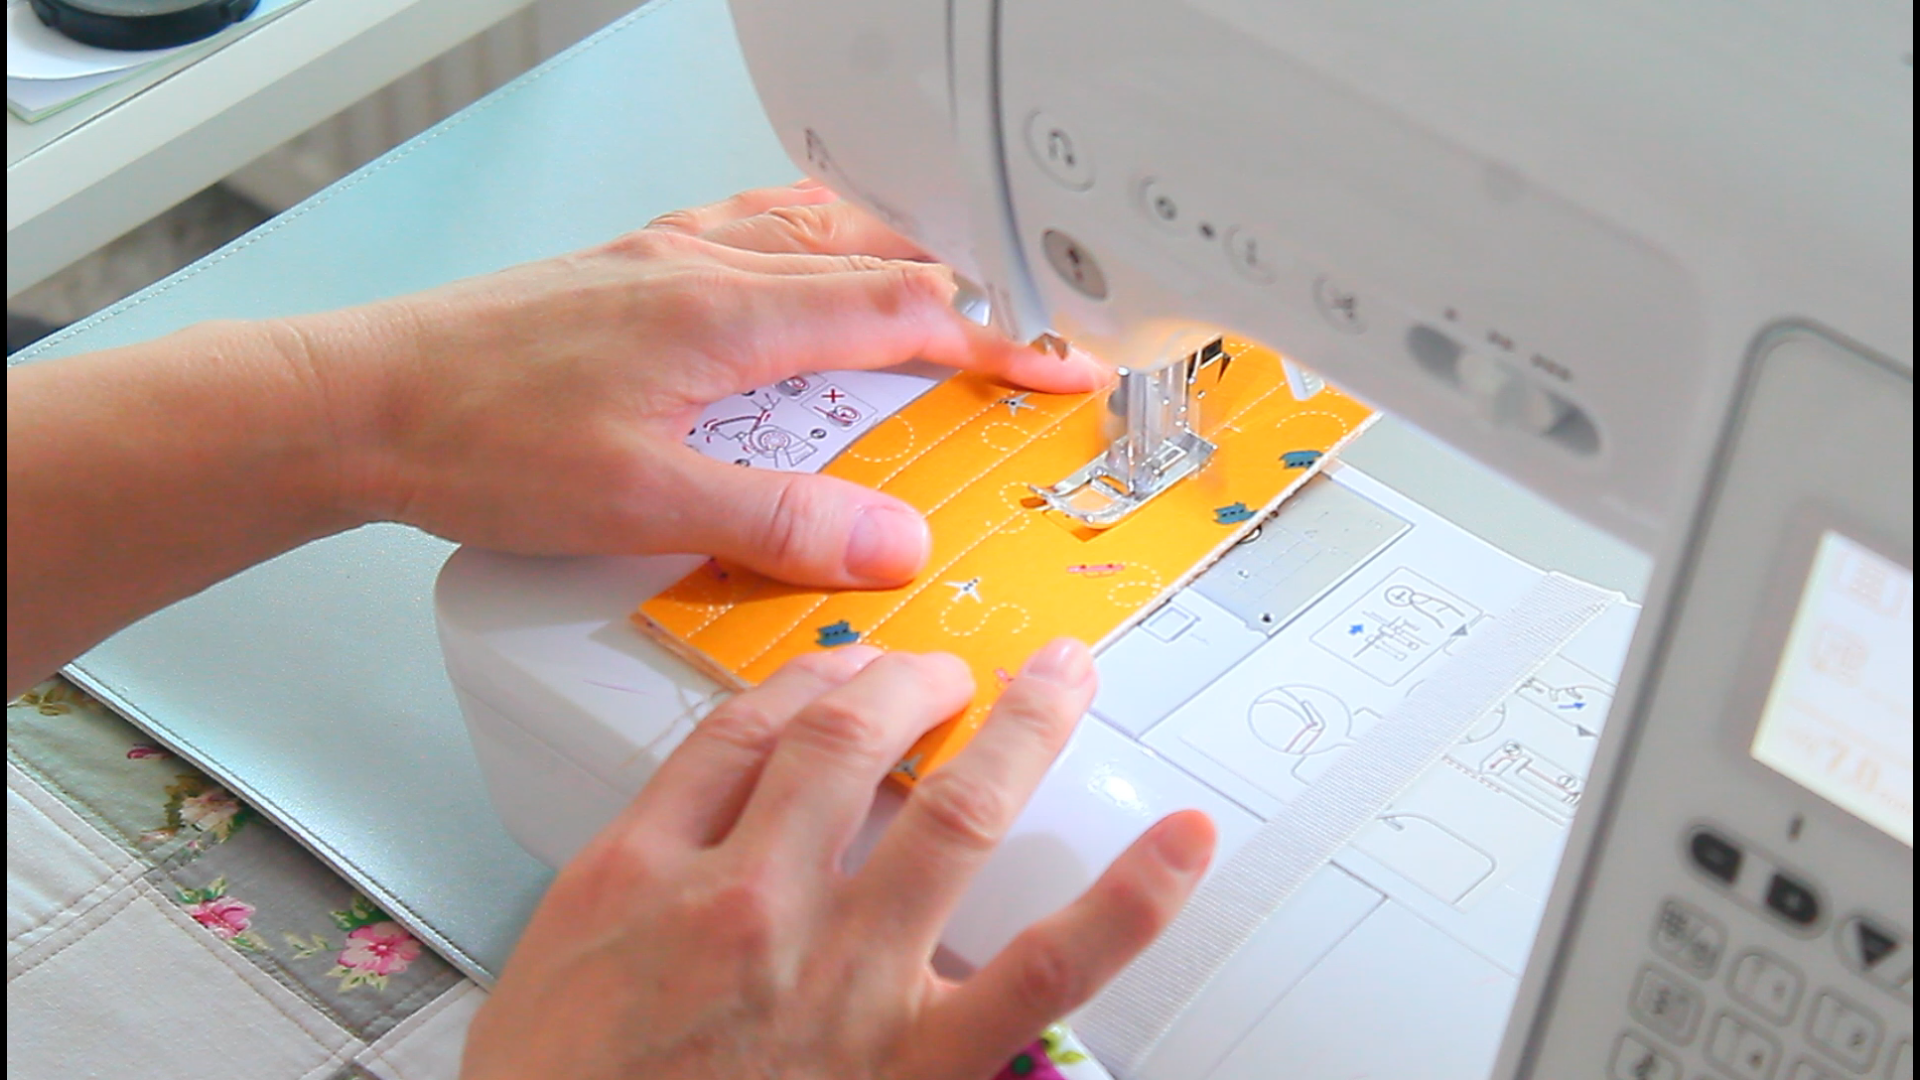
- Then quilt each panel with your favorite method. I ran straight stitches then added decorative stitching along those lines.
- While you are at the sewing machine, finish the bag strap and the loops by running an edge stitch along the open edge of each.
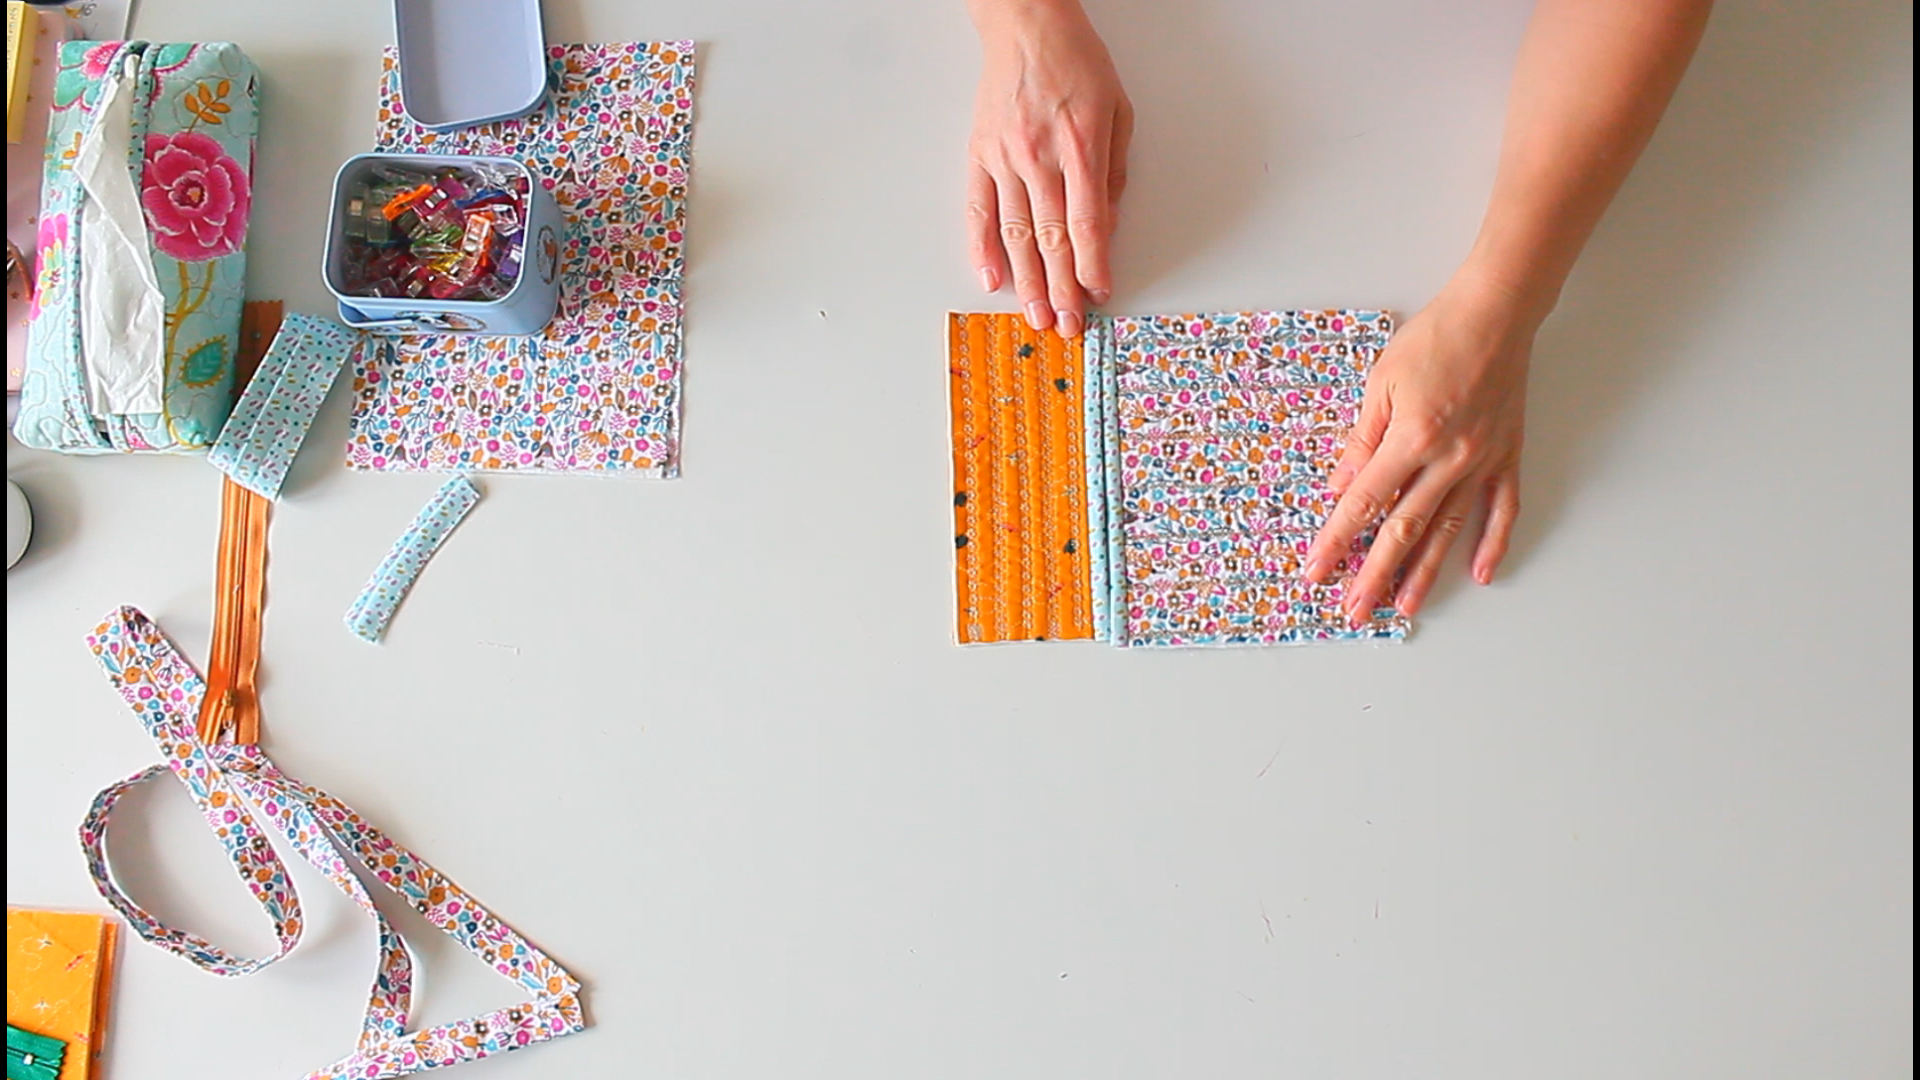
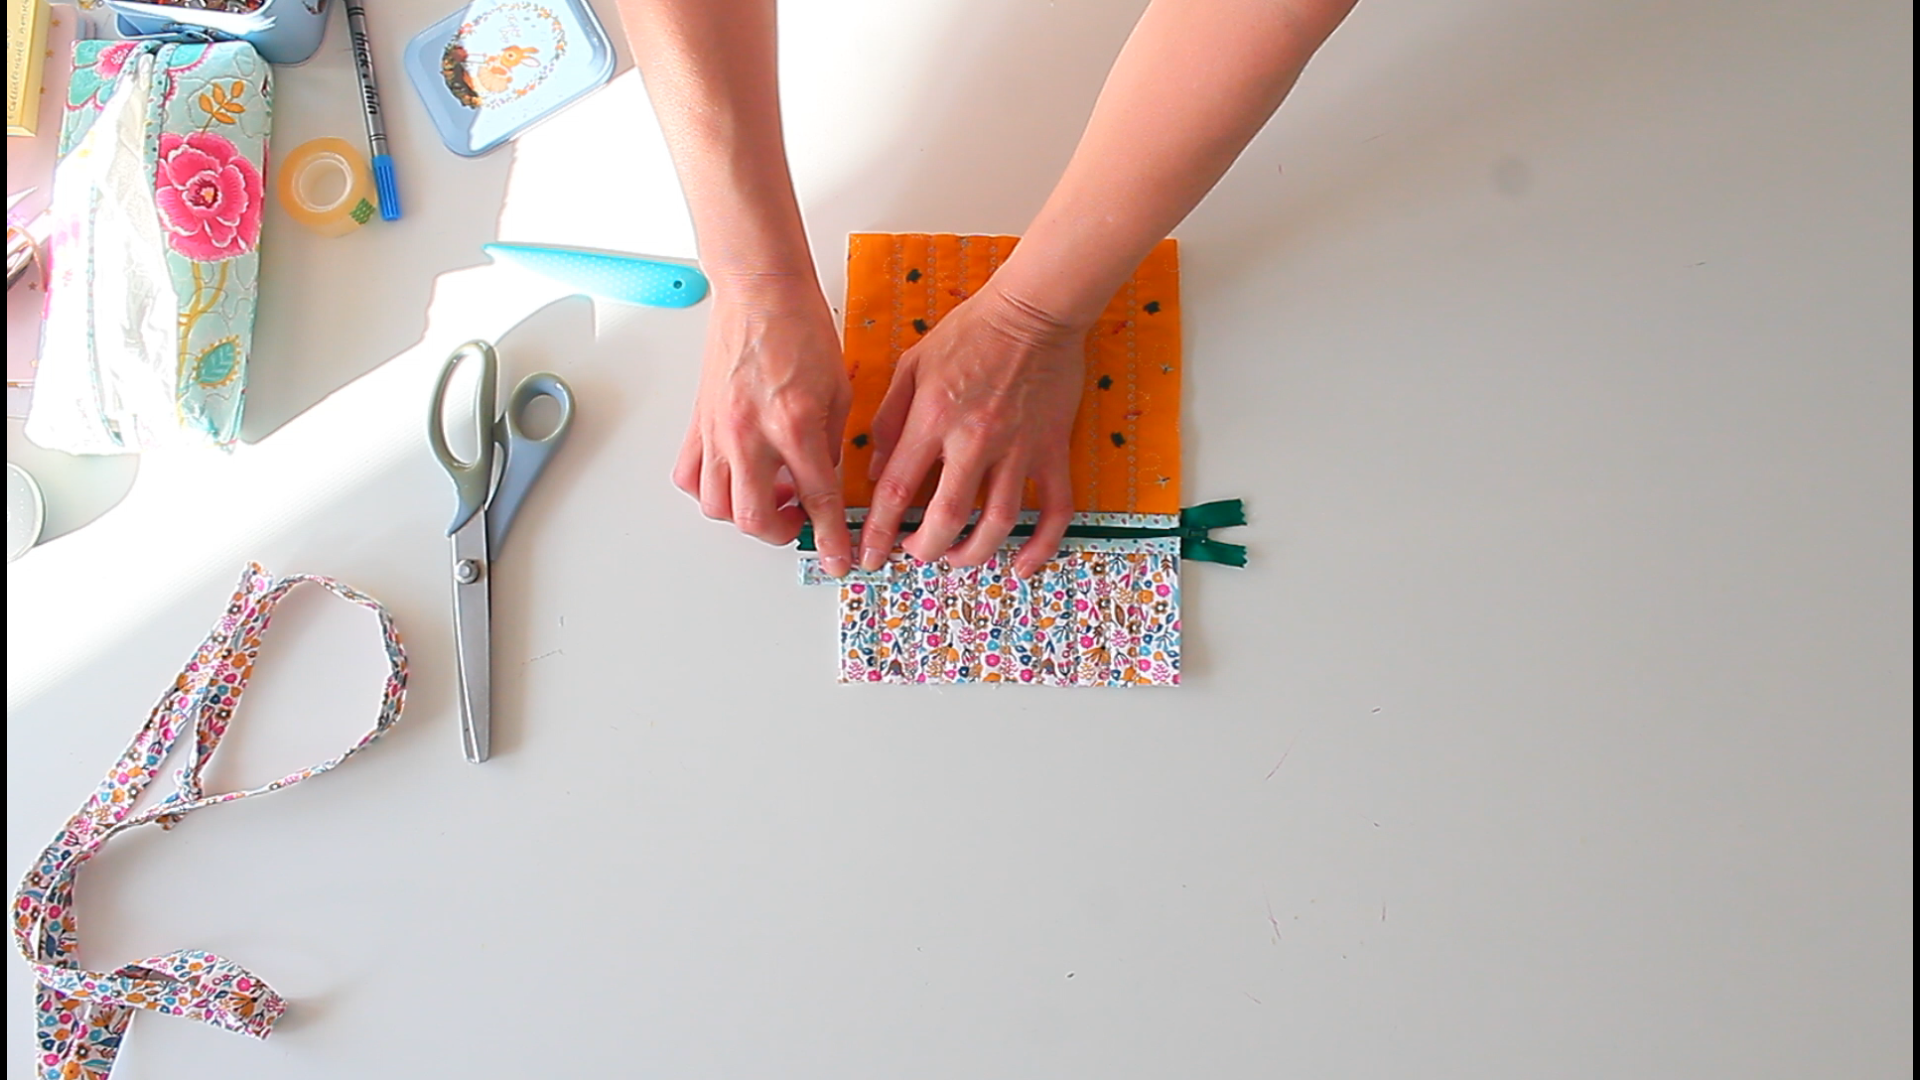
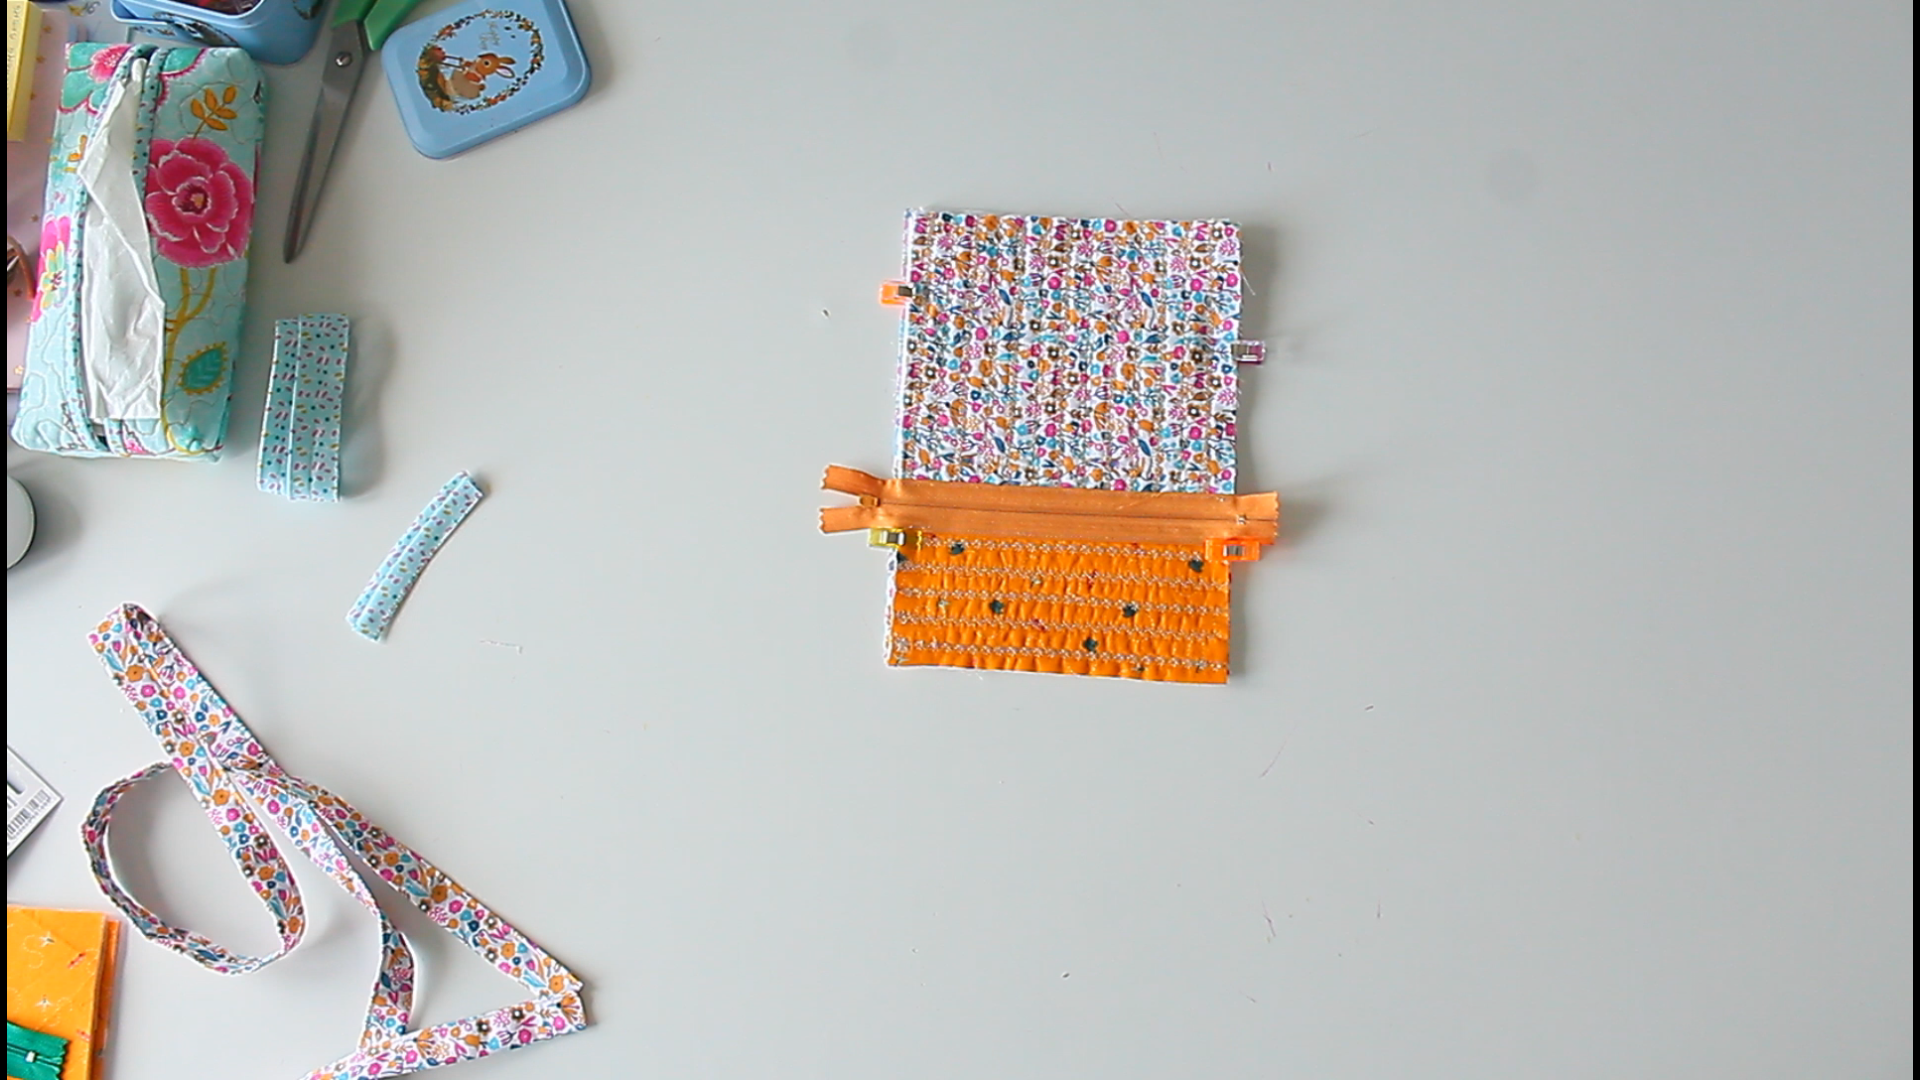
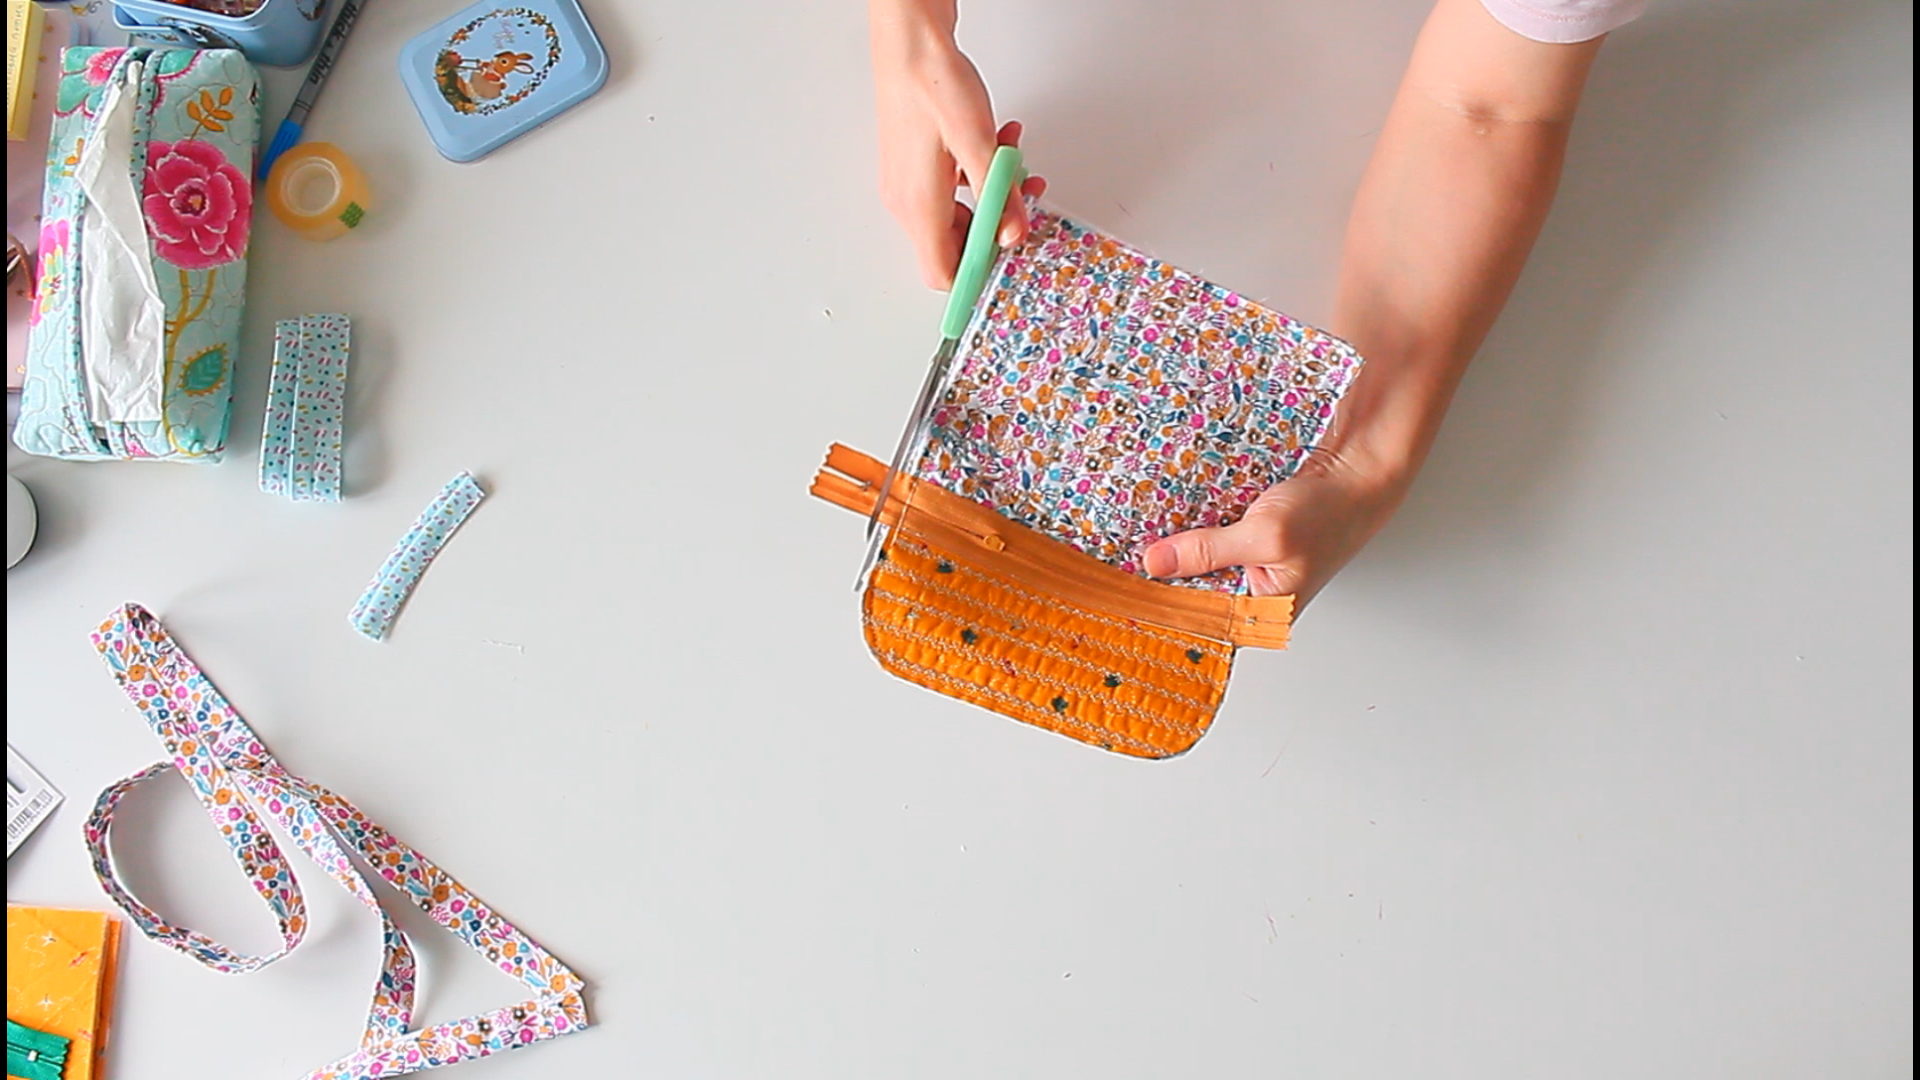
- Next take the top front panel and the bottom front panel and cover the joining edges in bias binding.
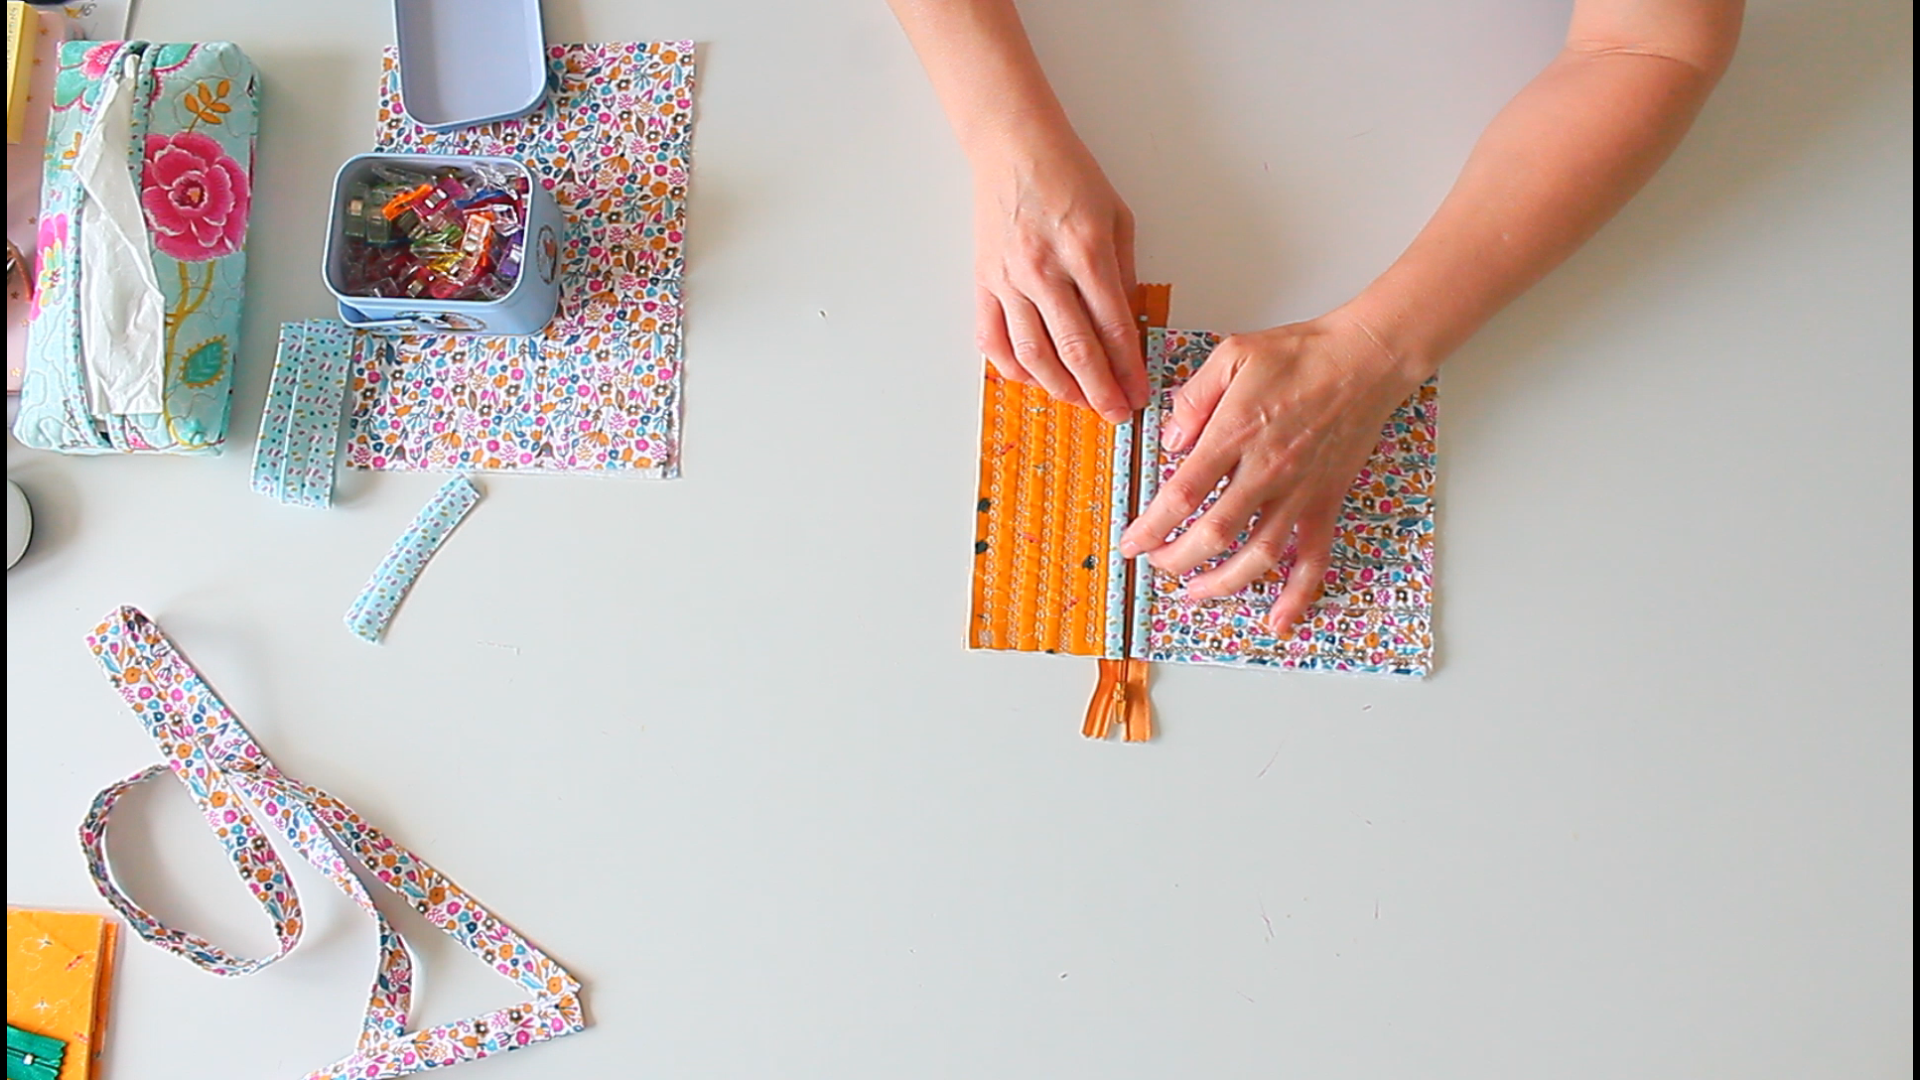
- Attach both panels to the zipper. Make sure the zipper teeth are facing outwards. I like to add hemming tape to the zipper tapes then fuse the panels to the zipper. This helps me attach the panels in a straight even line.
- Then sew the panels to the zipper with stitch in the ditch sewn right inside the bias binding seam. Now the front of the bag is formed.
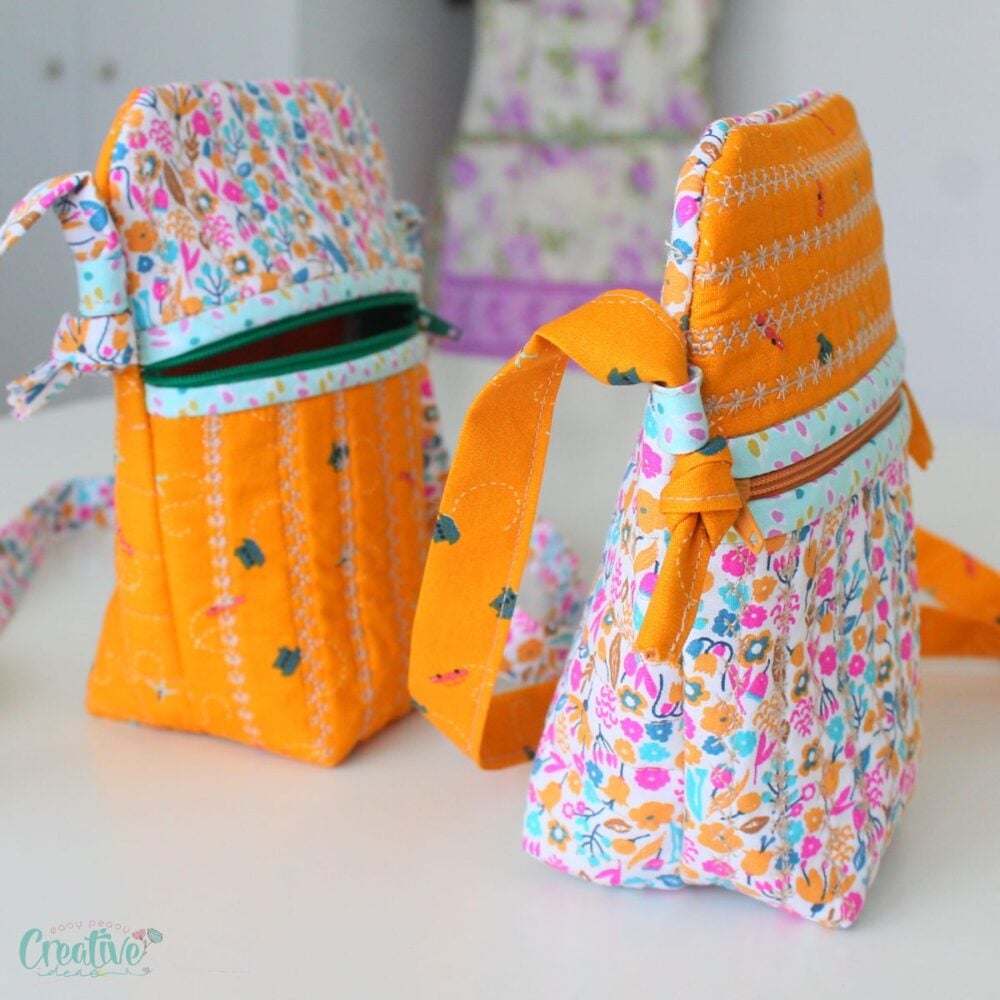
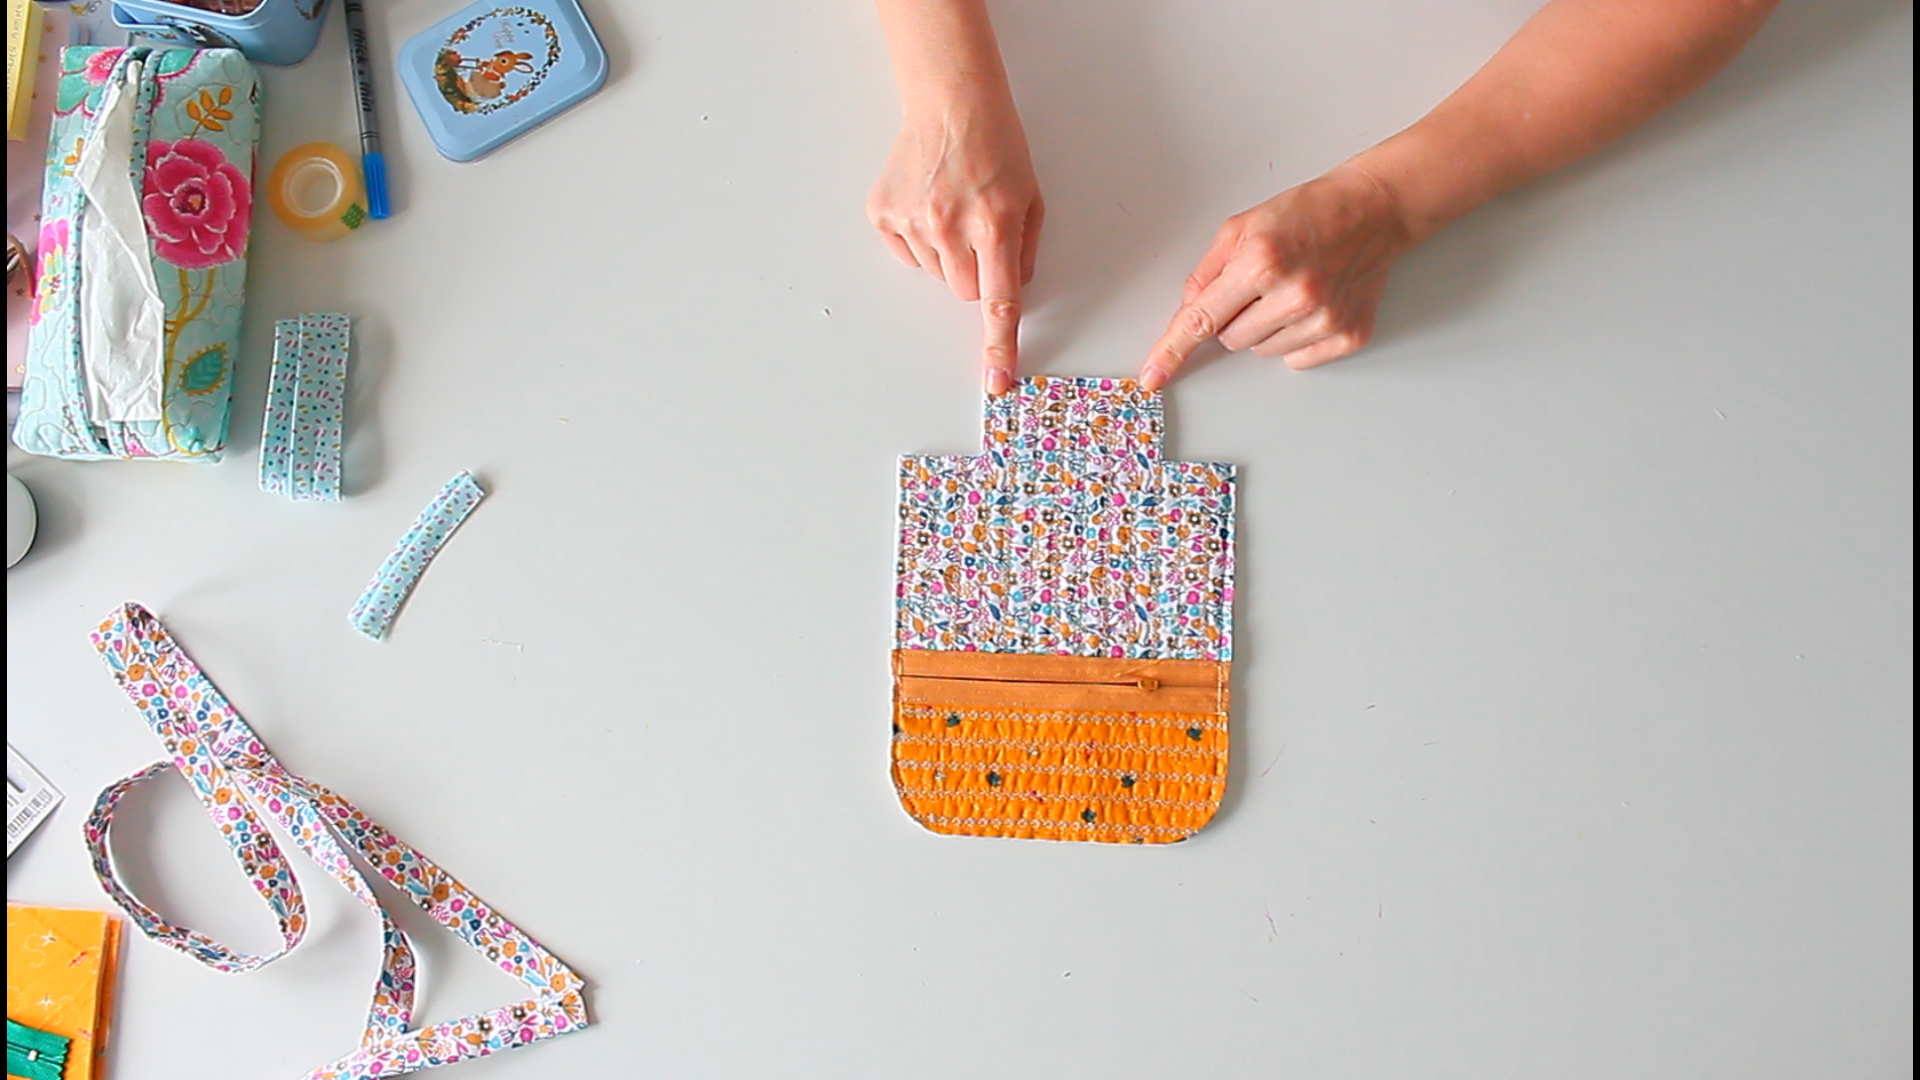
- Sew the loops to the sides of the front panel or back panel (either way works), onto the right side of the panel. Make sure the fold of the loops points towards the inside of the bag. I left about 1″ of the loop hanging outside so 1″ was inside.
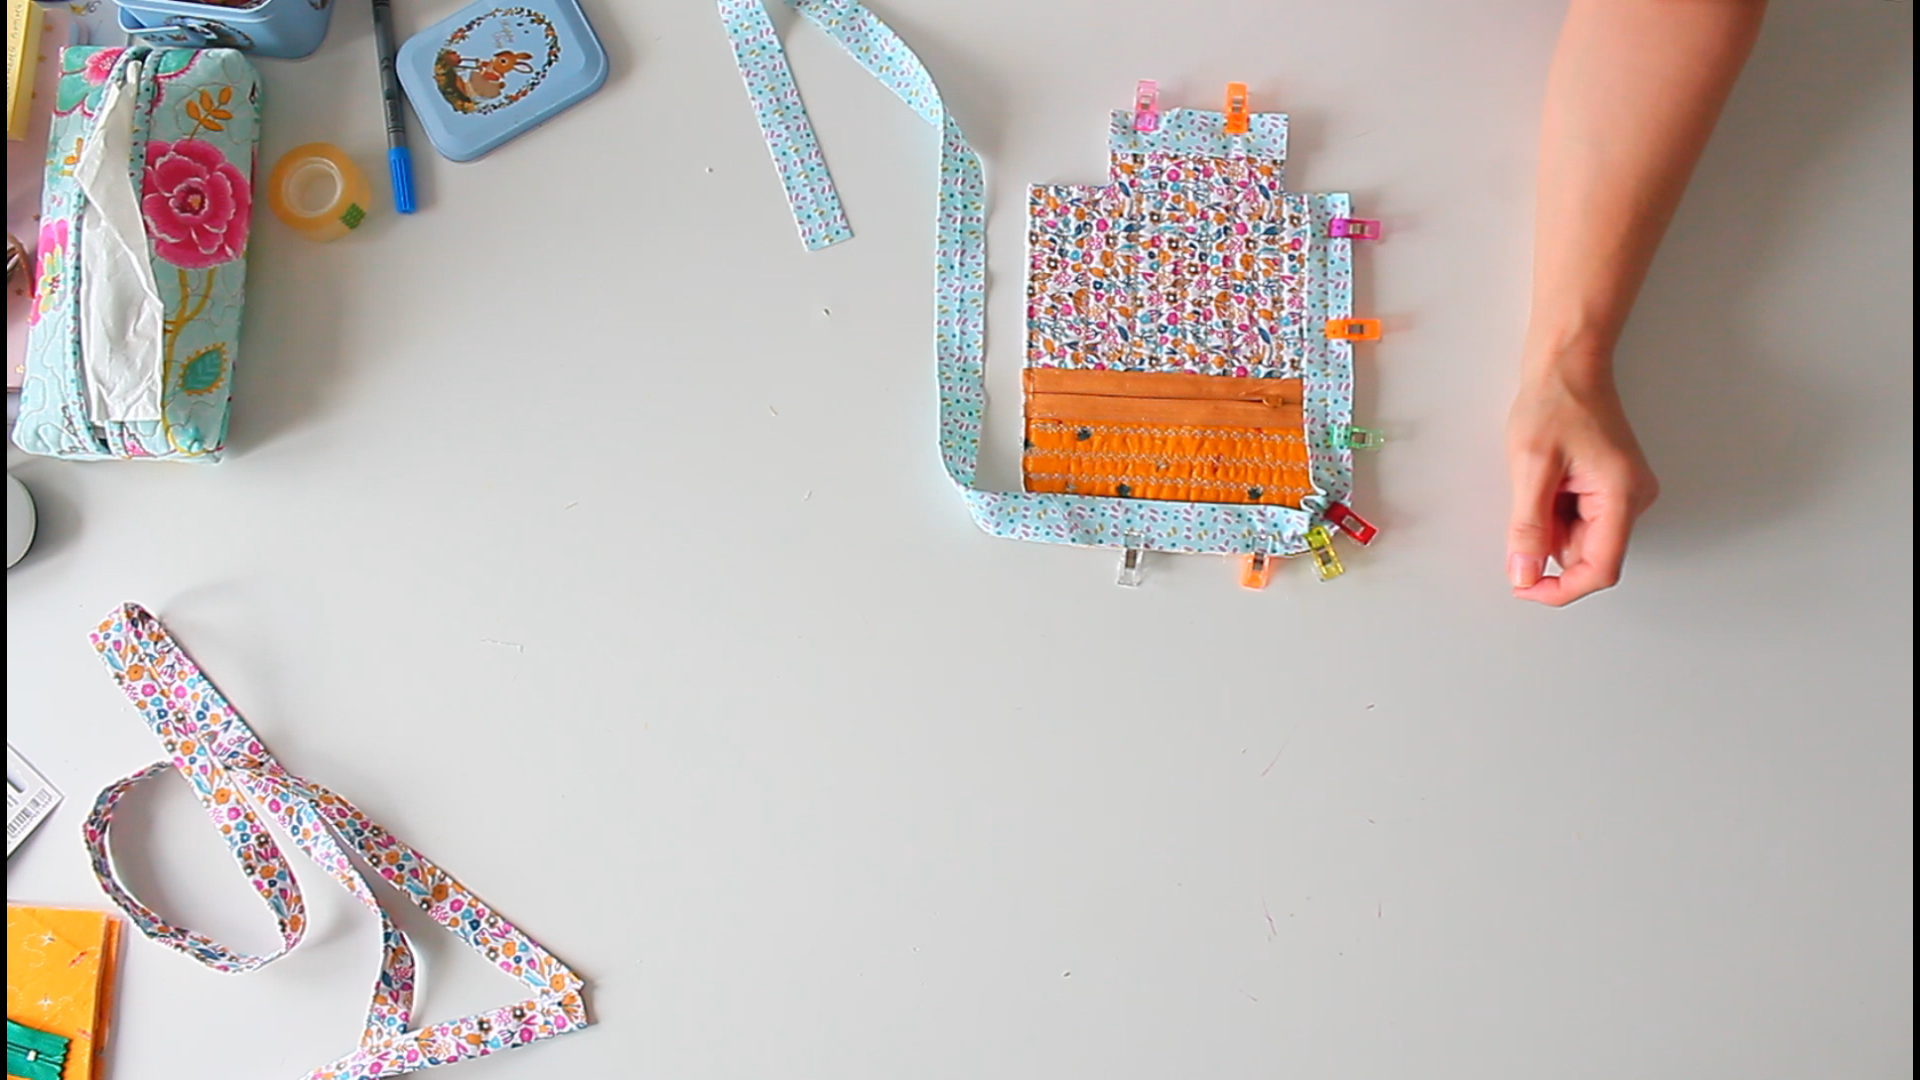
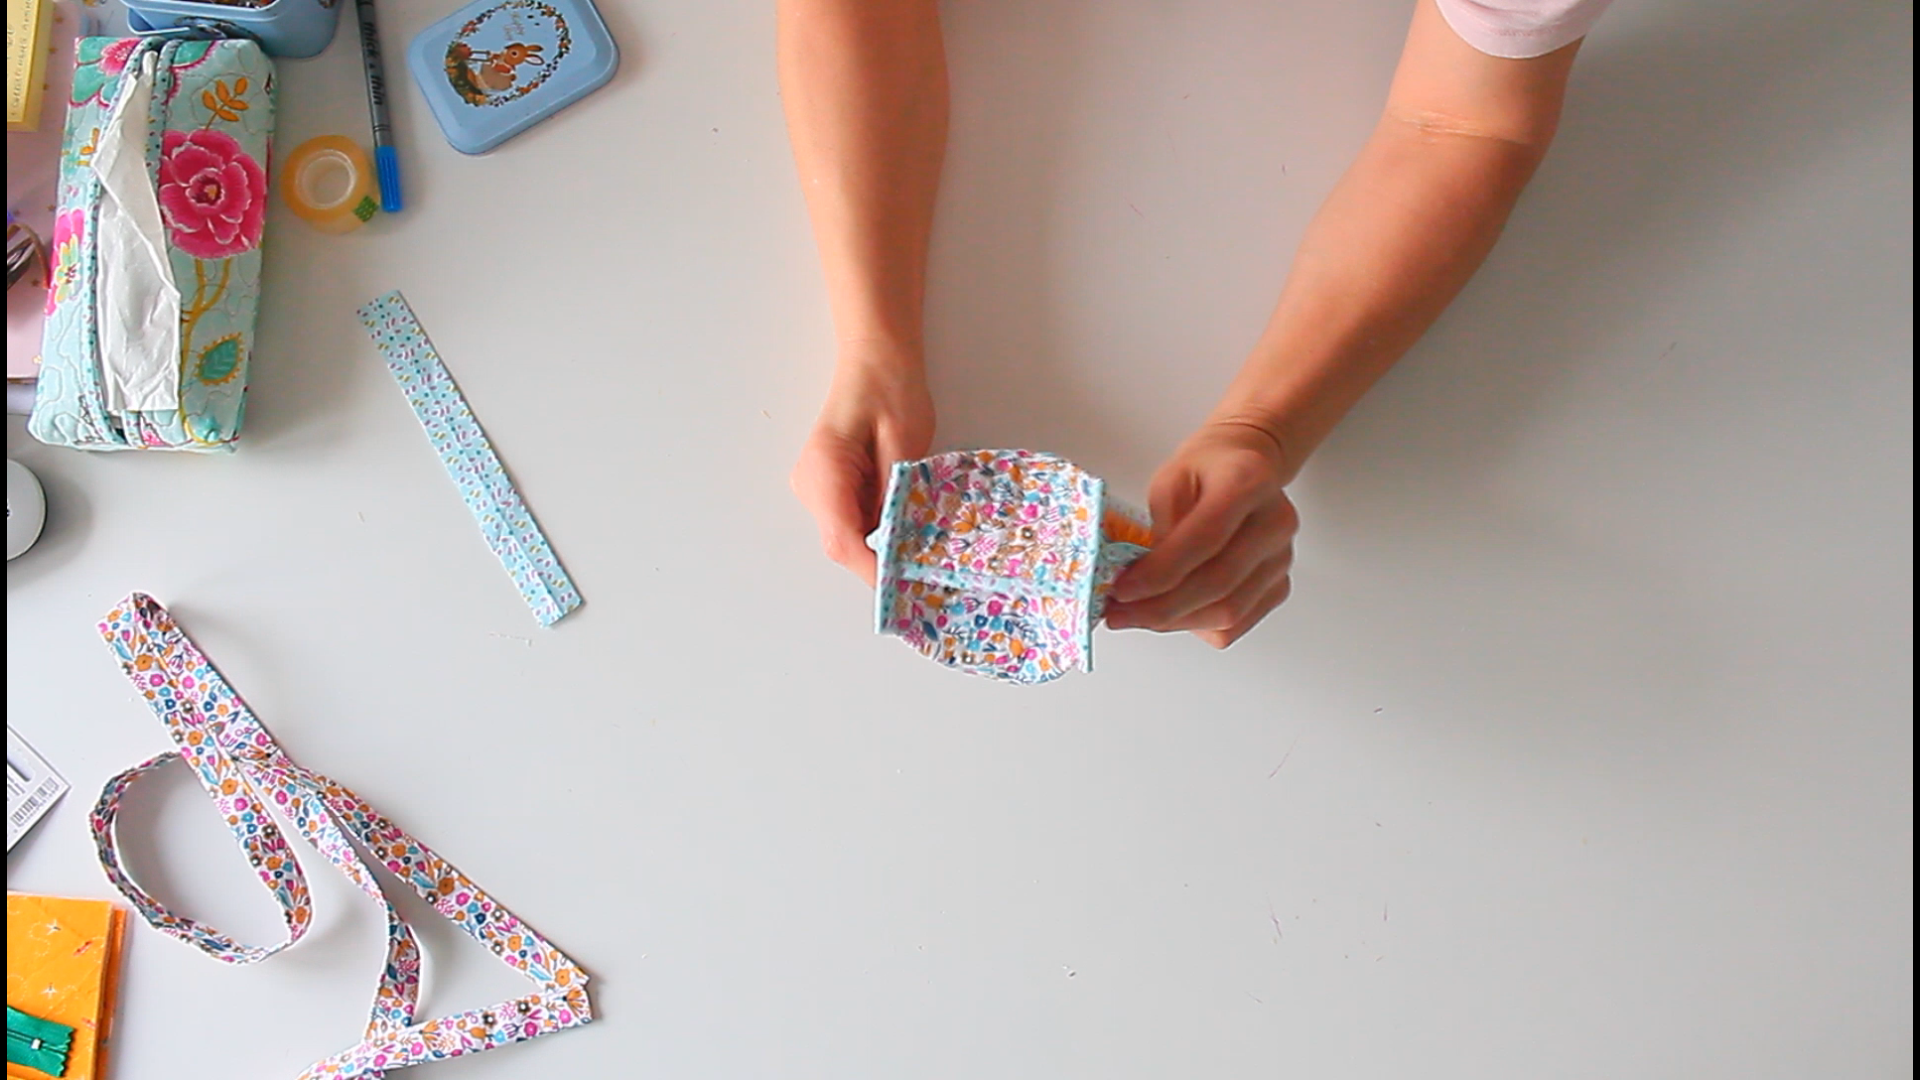
- Place the back panel on the table right side up then top with the front panel wrong side up, and clip.
- Grab a small round object and round the top corners of the bag. This is optional but I find the bag looking much better with rounded corners.
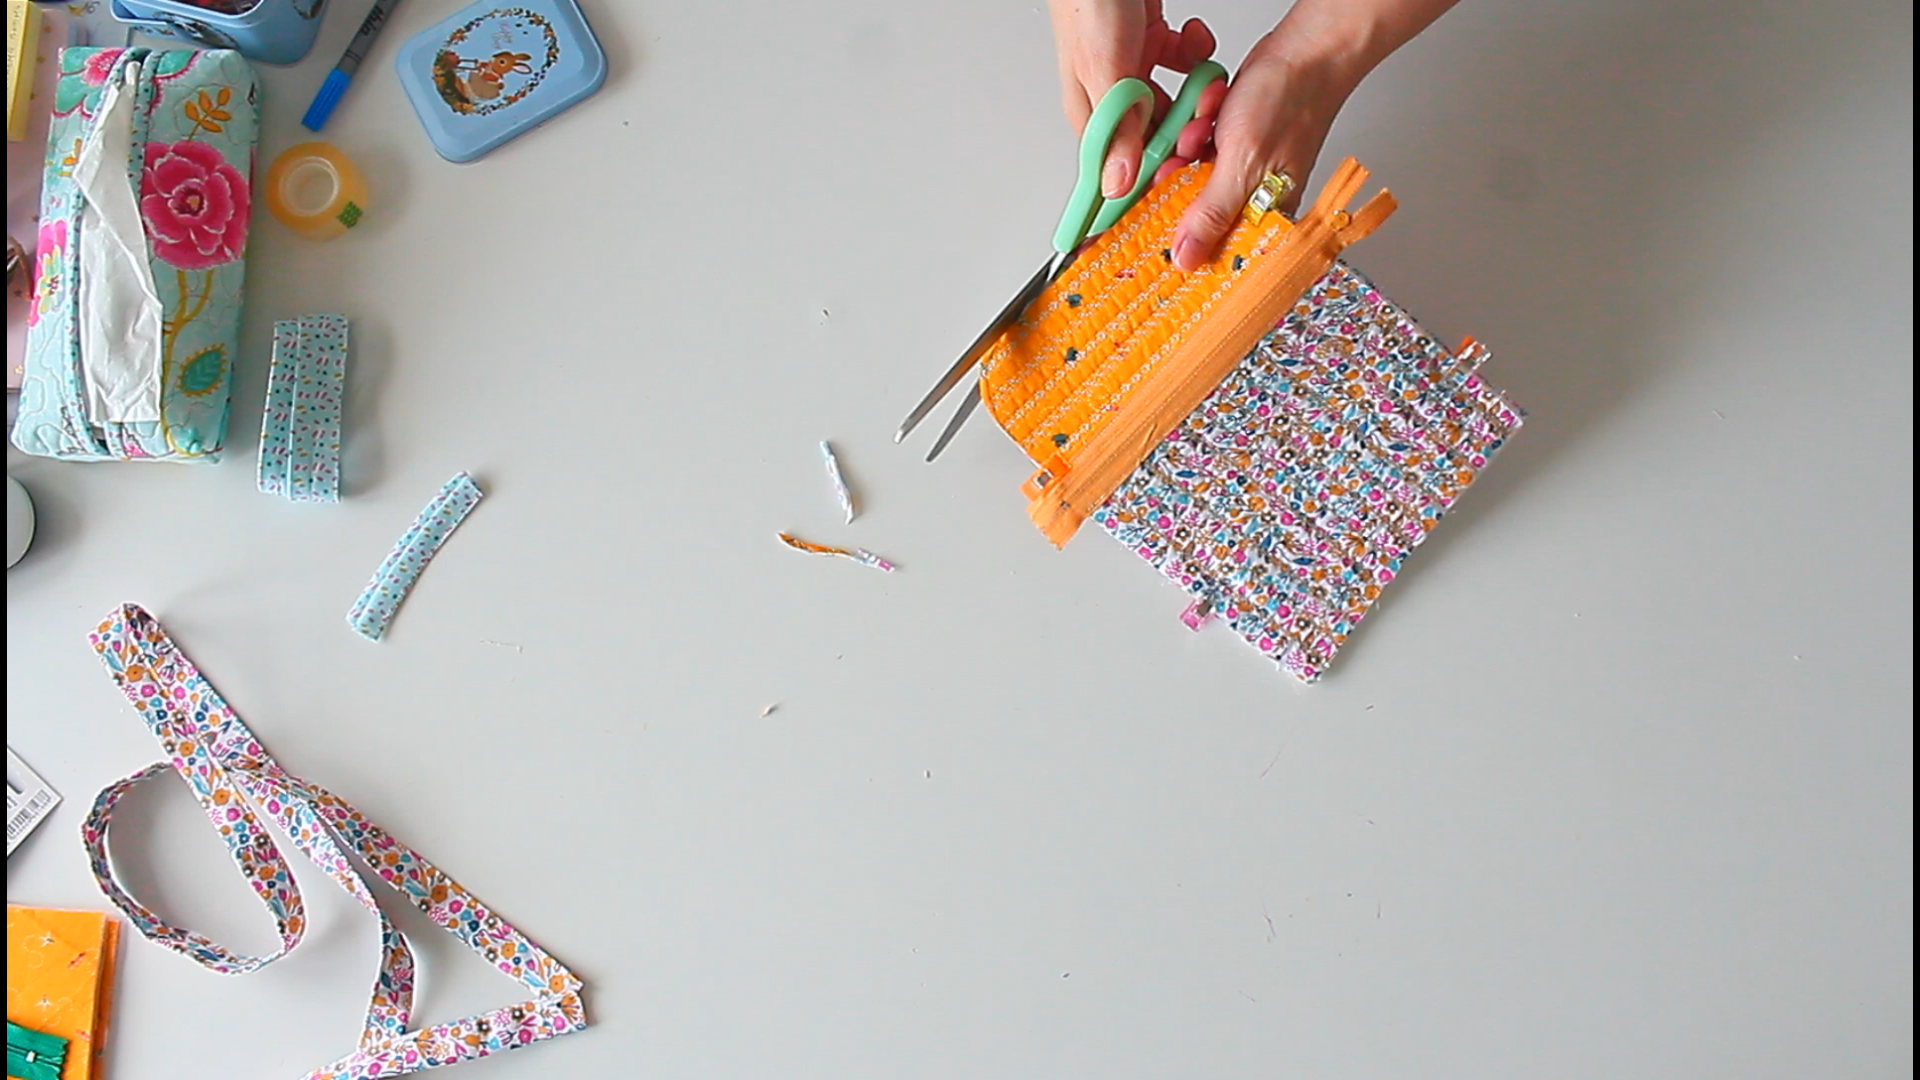
- Push the zipper pull a little to open it then sew all around the bag with 1/4″ allowance.
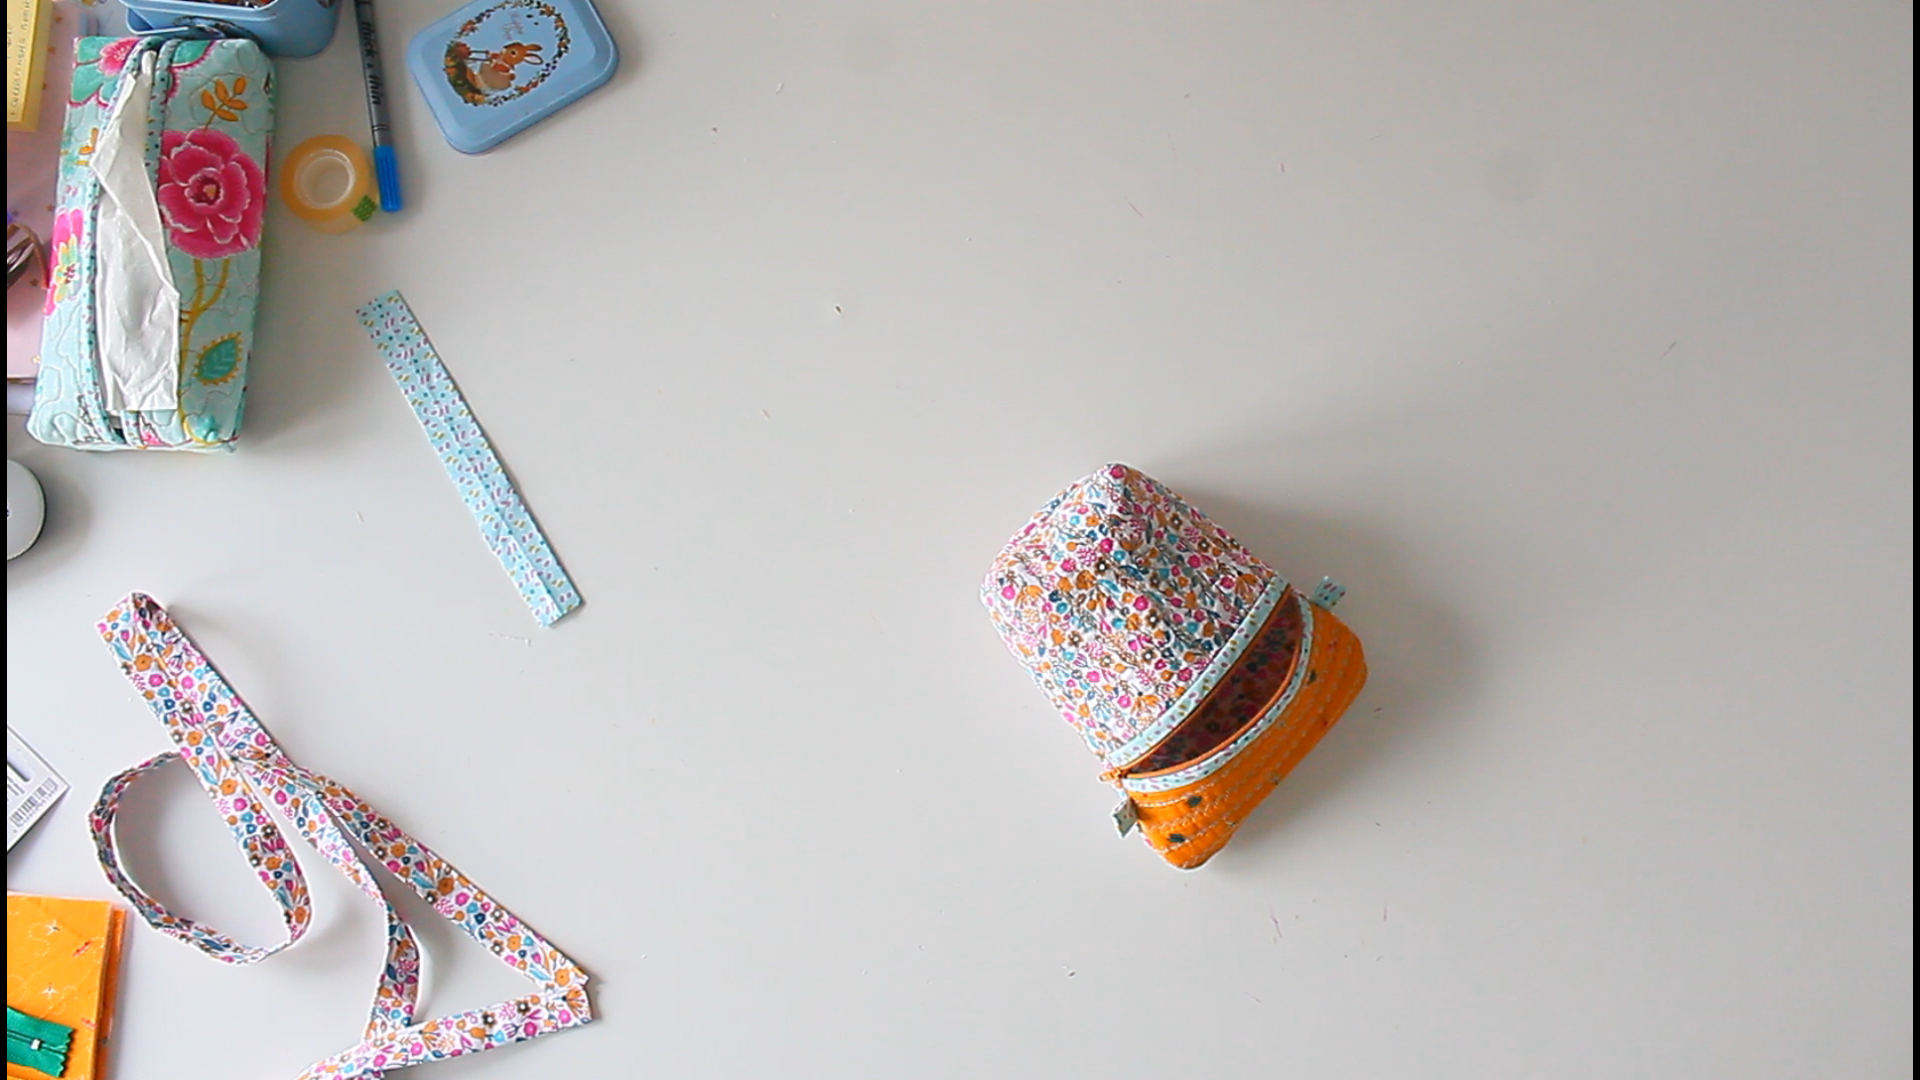
- Trim the zipper and if needed the seams too so they are even.
- Mark a 1 and 1/2″ square in the bottom corners of the bag and cut out.
- Cover the bag in bias binding, except for the cut out corners.
- Pinch the bag at the bottom corners so the side seam matches the bottom seam and sew with 1/4″ allowance.
- Cover the boxed corners in bias binding.
- Turn the bag right side out through the zipper opening and smooth out the seams and the corners.
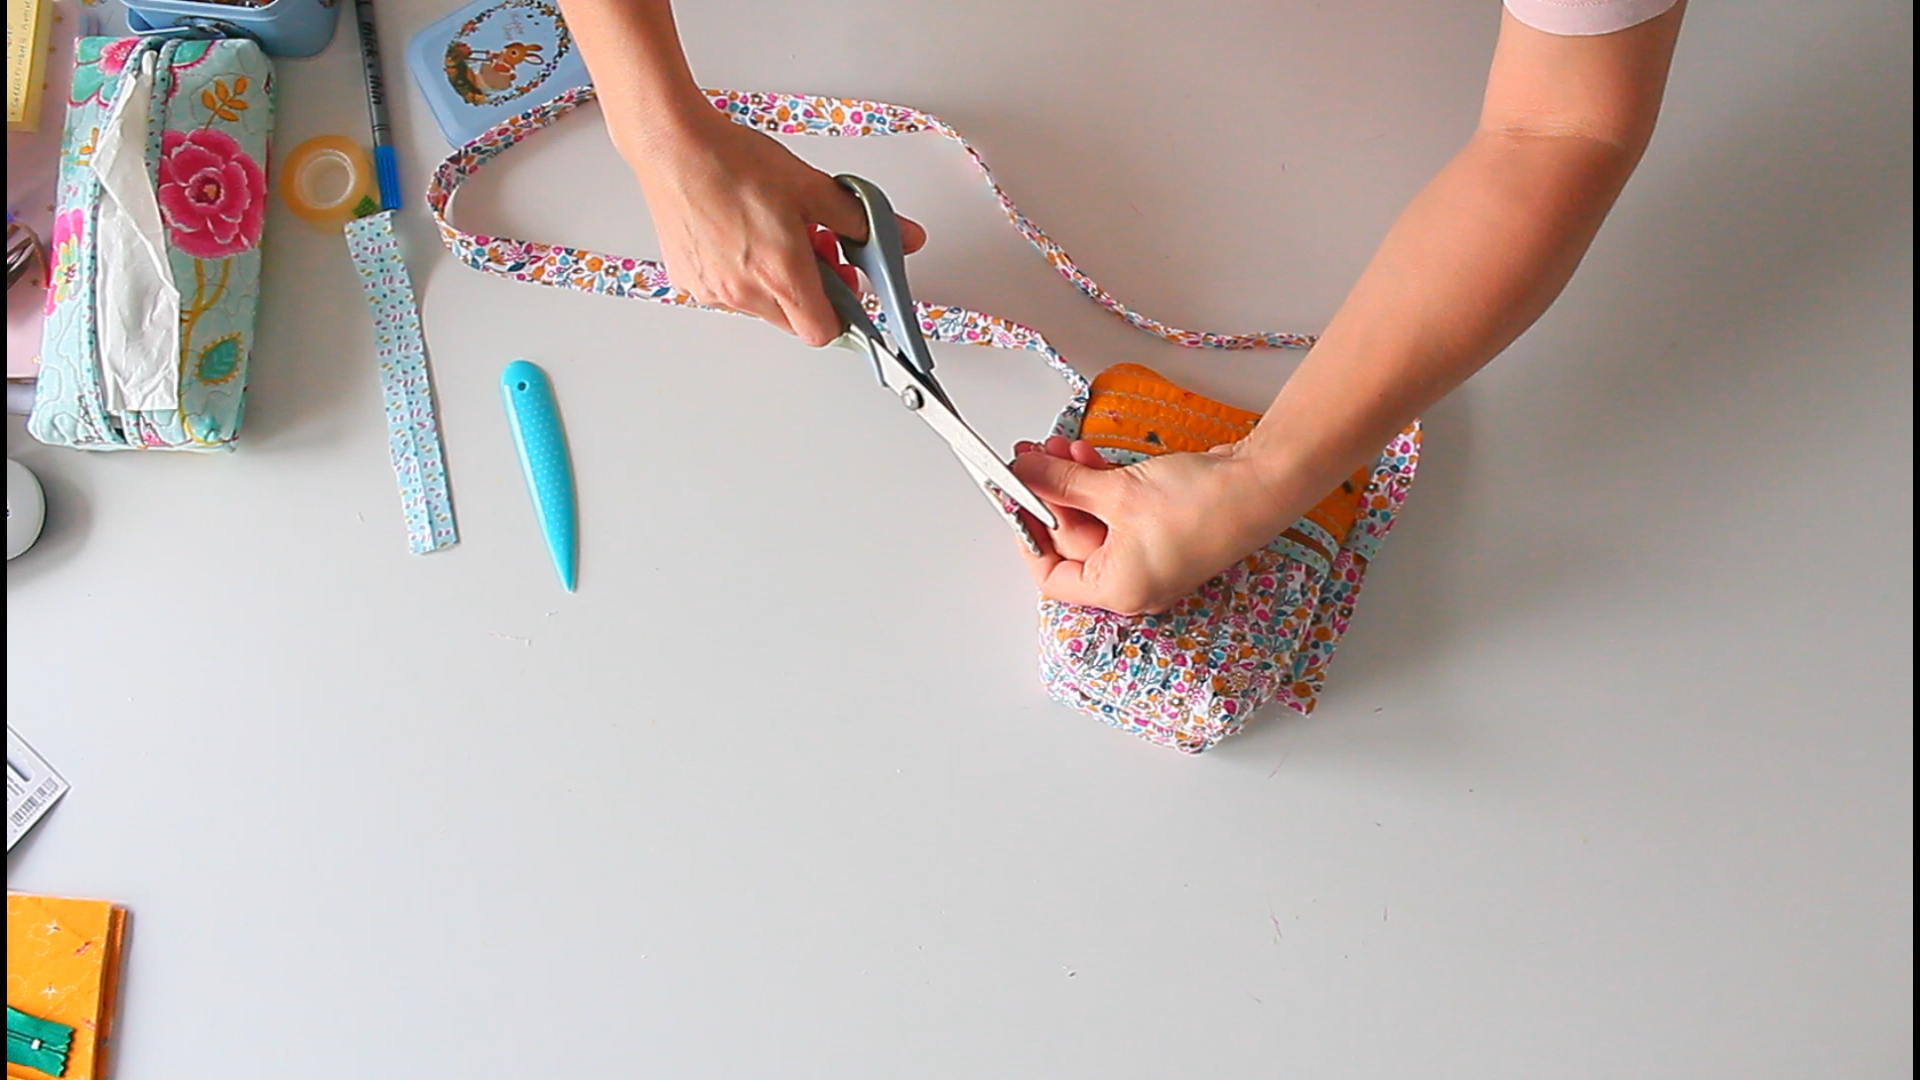
- Insert the strap through the loops, cut the ends with pinking shears and tie knots to secure the strap in place.
And there you have it! Your very own small crossbody bag, perfect for carrying your essentials while on-the-go.
Tips
- Use a walking foot if you have one: A walking foot can help to prevent shifting and puckering of the fabric layers, especially when sewing through thicker materials.
- Make sure the needle matches the thickness of your project. I had to use the 100 size for this project to manage sewing through the thick layers with ease.
- You don’t need to use a zipper foot for precision in this project, there’s plenty of room for the regular foot of your sewing machine.
- If you find sewing the binding too difficult, you can skip this step and instead finish the raw seams with a zig zag stitch or use a serger.
- If your phone is quite tall, you might need to make the top front panel narrower and widen the bottom front panel. This will accommodate the size of your phone better.
Sewing project variations
You can customize this small crossbody bag pattern by using different fabrics and adding your own personal touches. Here are a few ideas to inspire you:
- Add embroidery or appliqué to the front panel for a unique design.
- Use different fabric combinations such as denim and floral prints for a more eclectic look.
- Add pockets to the inside or outside of the bag for extra functionality.
How to make this project even more easy
- You can skip the boxing part of the corners if all you need to carry in this small crossbody bag are flat items such as your phone and a small wallet.
- Swap out the zipper for a button closure or snap fastener if preferred or not experienced with sewing zippers.
- Skip adding batting if your sewing machine doesn’t handle sewing through such thick layers. Use some double sided medium weight interfacing instead.
Frequently asked questions
- Can I adjust the size of the bag to fit my needs?
Yes, feel free to adjust the measurements of the pattern pieces according to your preferences and needs. Just make sure to adjust the size of all pieces accordingly for consistency.
- Can I use different types of fabric for this project?
Absolutely! You can use any type of fabric you prefer such as linen, denim, canvas, or even leather or faux leather. Just make sure to adjust your sewing machine needle to match the thickness of the fabric. And if using leather get a teflon foot
- How long does it take to complete this project?
The time needed to complete this project will depend on your sewing skills and experience, but it can typically be completed in about an hour or two.
- Can I make this bag without any batting or interfacing?
I wouldn’t recommend it as the batting or interfacing provides structure and stability to the bag. You can try using a double layer of fabric instead, but keep in mind that the final result may not be sturdy enough.
More bag projects you’ll enjoy
- Small quilted handbag
- Drawstring makeup bag
- Evening purse from a placemat
- Toiletry bag from selvage
- Faux leather crossbody bag
Sewing your own small crossbody bag is not only a fun and creative project, but also a practical and stylish addition to your accessories collection. So go ahead and give it a try, and let me know how it turned out for you! Happy sewing!
Small crossbody bag pattern
Materials
- cotton fabric for the bag the loops and the strap
- cotton batting
- bias binding
- matching thread
- zipper 9" long and 1" wide
Tools
- scissors
- embroidery scissors
- measuring tape
- hemming tape
Instructions
Bag measurements
- 2 panels of fabric of 7" by 3" plus corresponding batting - for the top front
- 2 panels of fabric of 7" by 6" plus corresponding batting - for the bottom front
- 2 panels of 7" by 9 1/2" for the back of the bag plus corresponding batting
- 2 small strips of 2" by 4" for the loops (if your fabric is not sturdy enough you might need to interface these strips with medium weight interfacing)
- 1 long strip of 3" by 50" for the bag strap (interface this too if needed)
- 1" wide bias binding
Prepare the loops and strap
- Fold each strip in half.

- Then fold each half in and press.
- Fold again in half and press.

Making the bag panels
- Begin by attaching the fabrics to the batting for each individual panel. You can use hemming tape or quilting spray.
- Then quilt each panel with your favorite method. I run straight stitches then added decorative stitching along those lines.
- While you are at the sewing machine, finish the bag strap and the loops by running an edge stitch along the open edge of each.
- Next take the top front panel and the bottom front panel and cover the joining edges in bias binding.

Sew the zipper
- Attach both panels to the zipper. I like to add hemming tape to the zipper then fuse the panels to the zipper. This helps me attach the panels in a straight even line.
- Then sew the panels to the zipper with stitch in the ditch sewn right inside the bias binding seam. Now the front of the bag is formed.
Sew the bag pieces
- Sew the loops to the sides of the front panel or back panel (either way works). Make sure the fold points towards the inside of the bag. I left about 1" of the loop hanging outside so 1" was inside.
- Place the back panel on the table then top with the front panel and clip.
- Grab a small round object and round the top corners of the bag. This is optional but I find the bag looking much better with rounded corners.
- Push the zipper pull a little to open it then sew all around the bag with 1/4" allowance.
- Trim the zipper, the loops and if needed the seams too so they are even.
- Mark a 1 and 1/2" square in the bottom corners of the bag and cut out.
- Cover the bag in bias binding, except for the cut out corners.
Box the corners
- Pinch the bag at the bottom corners so the side seam matches the bottom seam and sew with 1/4" allowance.
- Cover the boxed corners in bias binding.
- Turn the bag right side out through the zipper opening and smooth out the seams and the corners.
- Insert the strap through the loops, cut the ends with pinking shears and tie knots to secure the strap in place.
Video
Article may contain Amazon & affiliate links. As an Amazon Associate I earn from qualifying purchases at no additional cost to you.
ABOUT PETRO
Hi, I’m Petro, author and founder of Easy Peasy Creative Ideas. Sewist, crafter, avid DIY-er, foodie, photographer, homemaker and mommy to one. I’m an expert at coming up with quick, clever sewing tips, recycling crafts and simple, easy recipes! You can find my ideas featured in reputable publications such as Country Living, Good House Keeping, Yahoo News, WikiHow, Shutterfly, Parade, Brit & Co and more. Thanks for stopping by and hope you’ll stay for a while, get to know me better and come back another time. Stick around for real fun projects! Read more…