

Burlap Tote Bag with Wide Handles
Make a gorgeous and practical burlap tote bag with this easy and quick tutorial! This pretty color block tote bag makes a great project for beginner sewists and is perfect as an every day bag or a shopping tote!
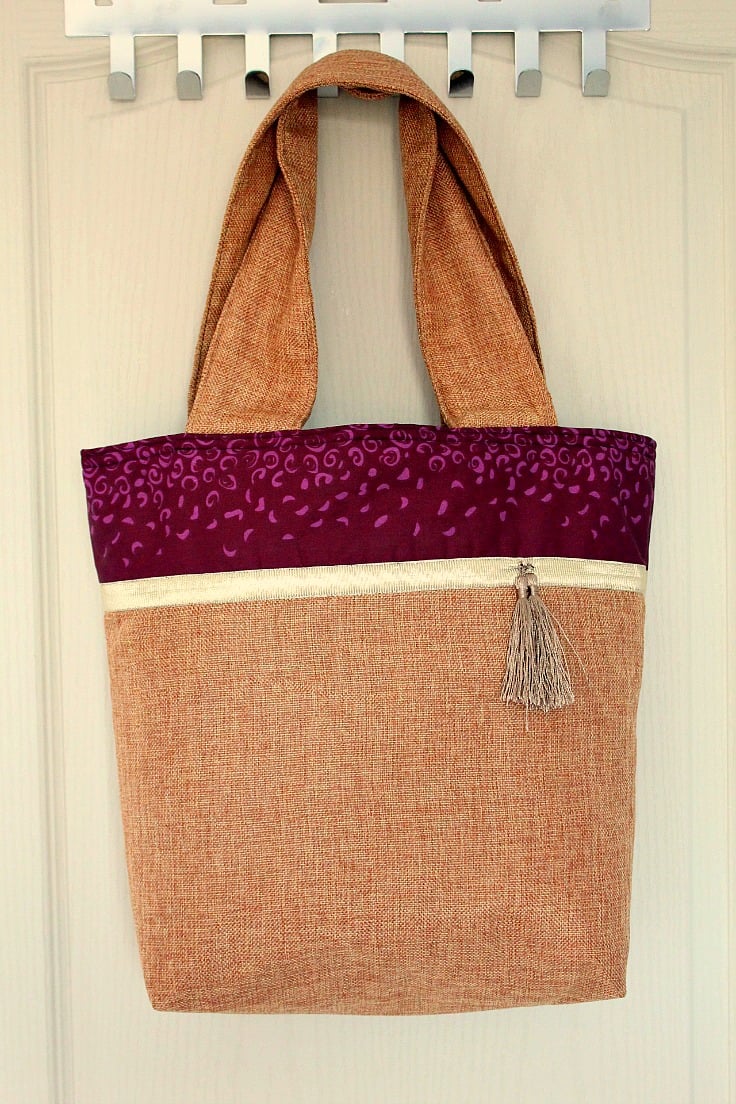
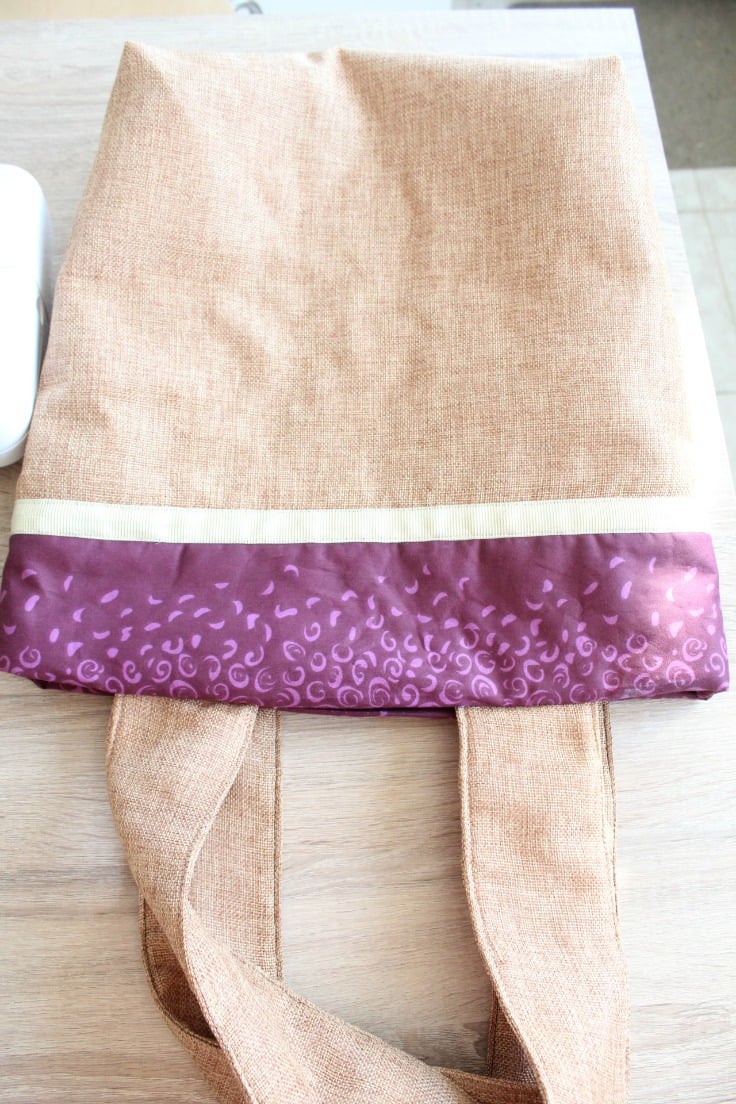
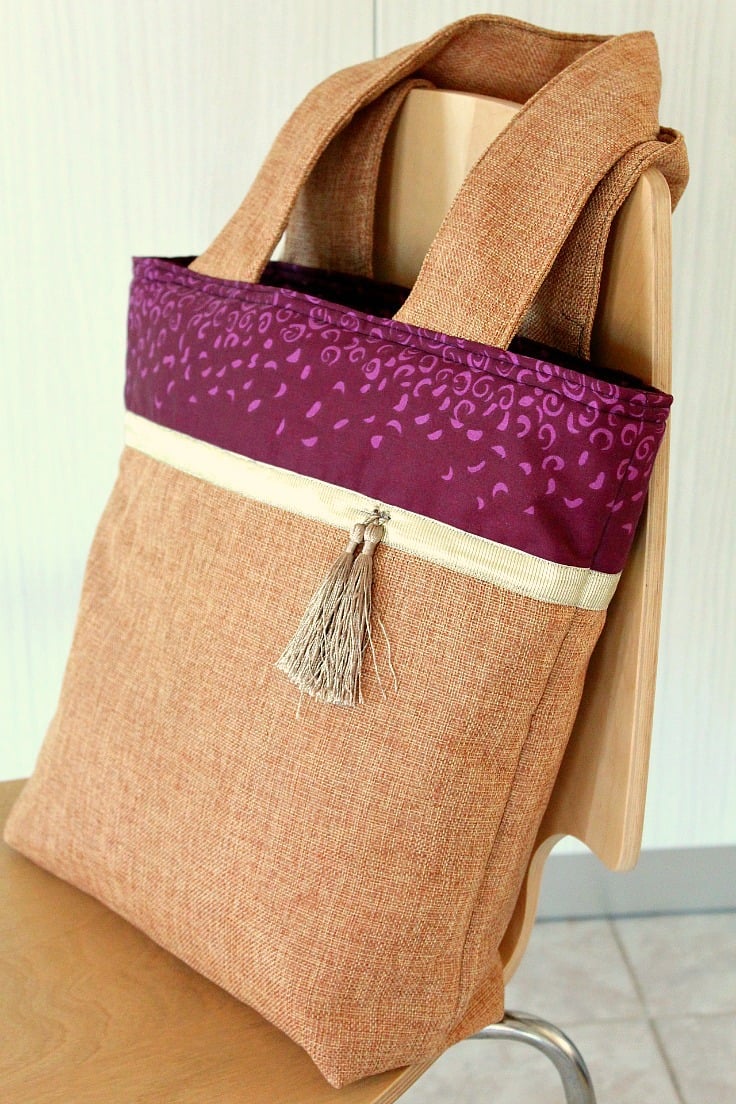
It’s the details that make this handmade burlap tote bag truly stand out, like the burlap fabric, the wide, comfortable to wear handles and the ribbon detail. This two tone tote bag is a medium large bag that I wanted to sew with simplicity in mind as I like clean, simple lines in a bag. The burlap fabric I’ve chosen adds a rustic touch to this wide strap tote bag without making it look too handmade, which I think is due to the golden ribbon addition, the pretty tassels and the extra body I gave the bag by adding some padding.
I also wanted a sturdy bottom in my tote bag so I left the extra fabric in when I boxed the bag corners, on both the exterior fabric and the lining.
If you’re wondering why I made the handles so wide in this burlap tote bag, I’ll tell you right away! It’s because all the bags I have hurt my shoulders because I tend to carry too much stuff with me. So I wanted wider, softer and comfortable handles, to cover a good portion of my shoulders (although this bag turned so pretty I don’t think I’ll have the heart to use it for any “heavy duty” stuff). Plus since I added some padding to the handles, it would’ve made it hard to turn them right side out if they were narrow.
How to sew a Burlap Tote Bag

Materials:
- 1/2 yard of burlap fabric
- 1 yard of upper and lining fabric
- 1 – 2 yards of ribbon
- 2 small tassels
- iron on interfacing or wadding
- scissors
- sewing machine
Directions:
Prepare the bag pieces
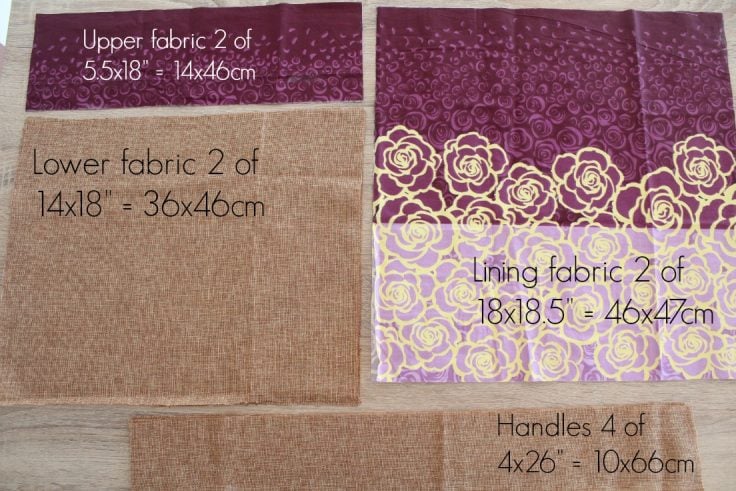
- Cut your pieces of fabric, like shown below. Cut interfacing or wadding to match the exterior fabric panels and the handles (so you’ll have 2 for upper fabric, 2 for lower fabric and 2 for handles). If you want a super sturdy bag, you can add interfacing to the lining fabric too.
- Iron on your interfacing or wadding to the fabric. You’ll have to use interfacing only on 2 of the handle panels.

Prepare the bag panels
- Grab one of your upper fabric pieces and place it together with one of the lower fabric pieces, right sides together. Line up the upper edges and sew them together, using a 1/2″ seam allowance.
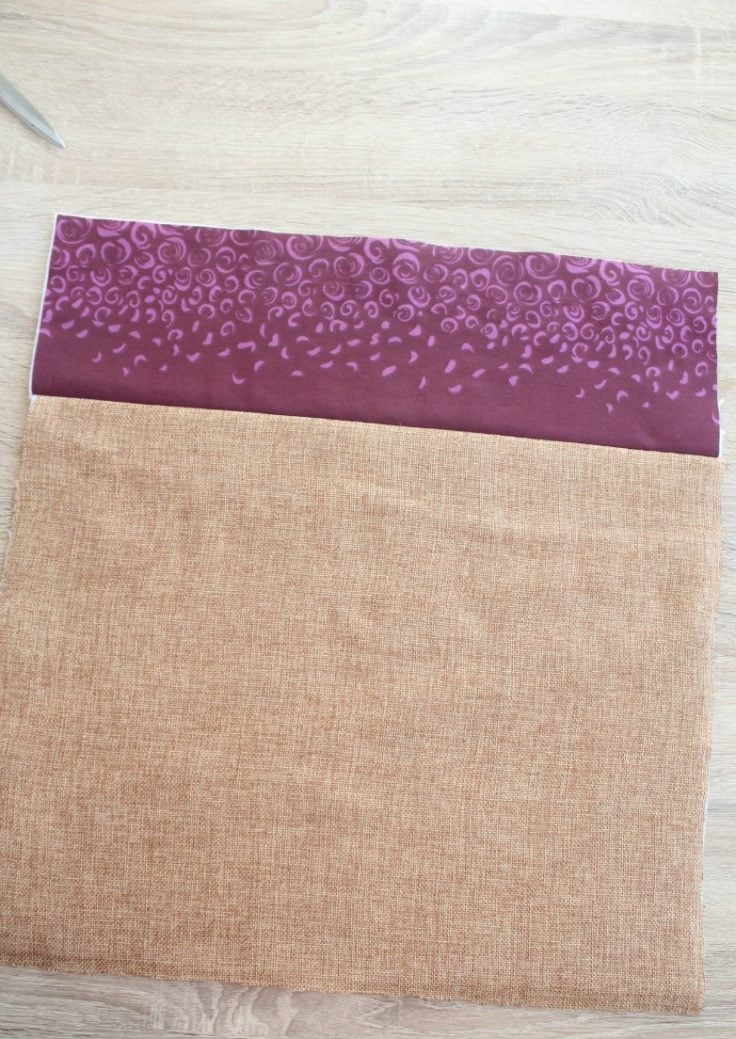
- Open it up and iron flat. Repeat with the other upper and lower fabric pieces.
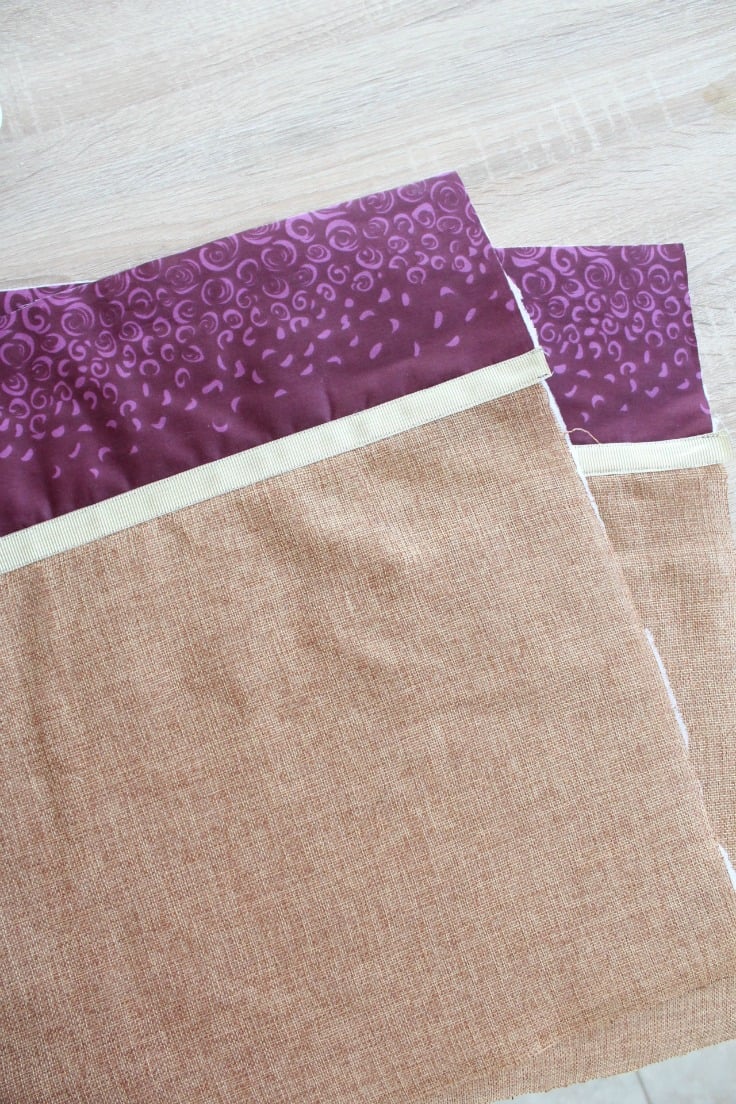
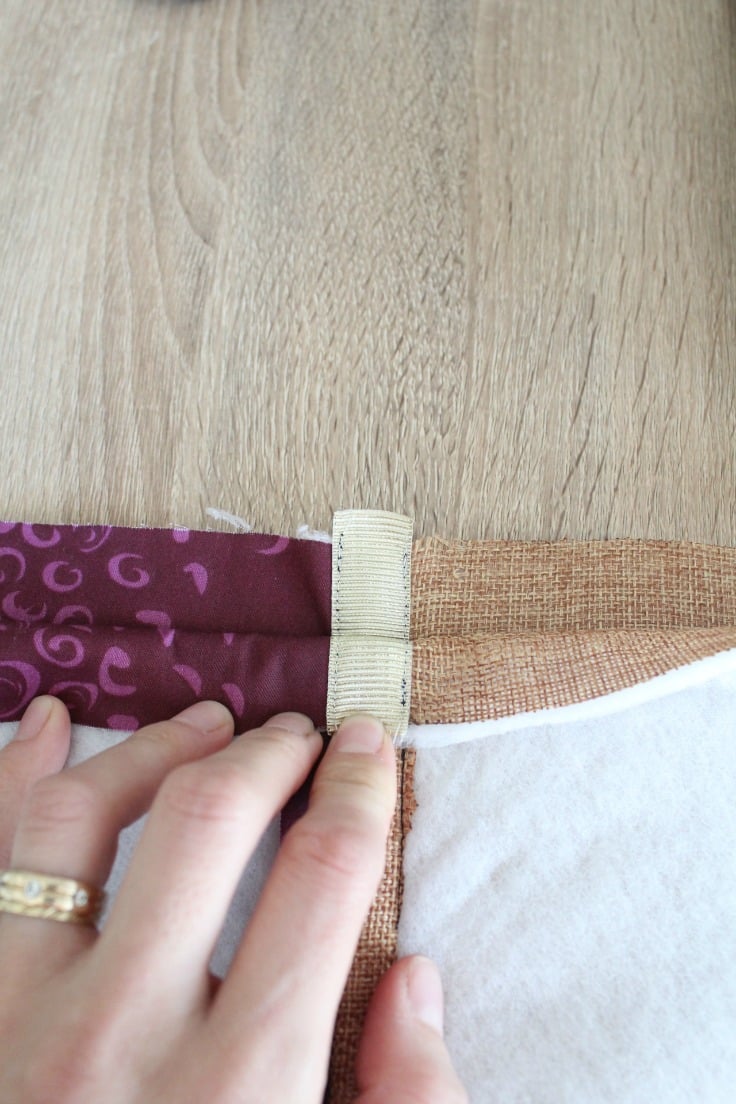
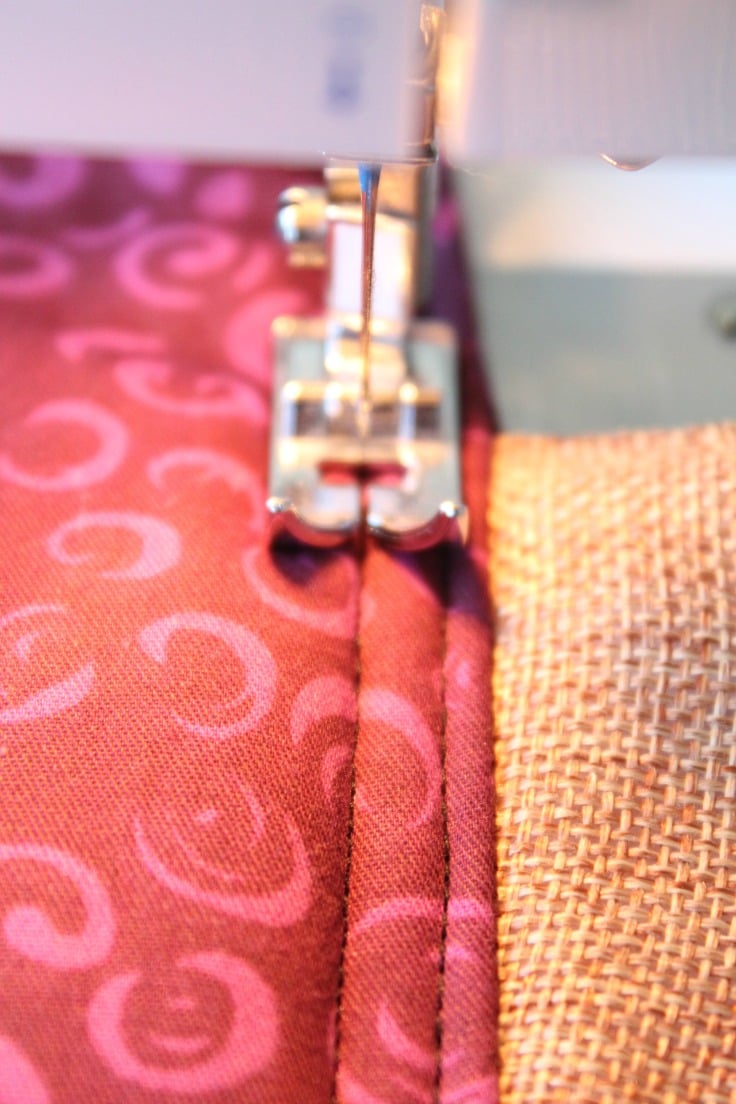
- Line up the ribbon just where the upper and lower fabric pieces join and pin in place. Sew along the top and bottom edge of the ribbon. Repeat for the other panel.

Sew the panels together
- Place the two panels right sides together and make sure you are matching the upper edges together. Then, peek at the sides and match up the ribbon pieces, so that they line up perfectly.
- Sew along the sides and the bottom, using a 1/2″ seam allowance.
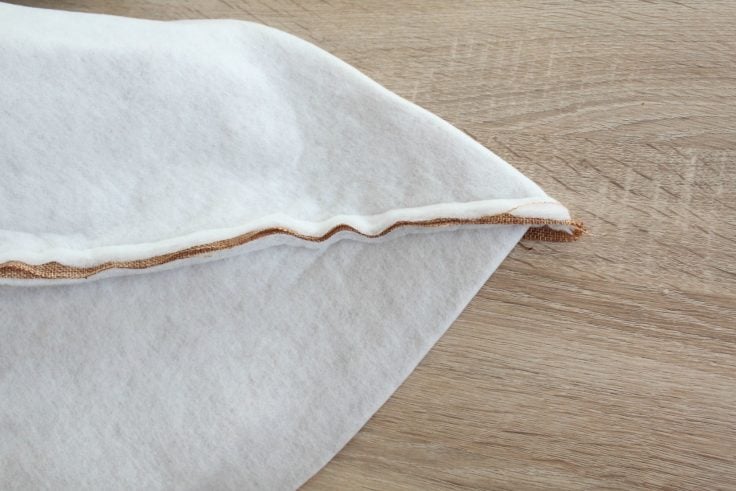
- Grab one of the bottom corners and pull the front fabric away from the back fabric and fold it flat, making a nice, pointy tip by lining up the front and the back seam. Iron it flat.
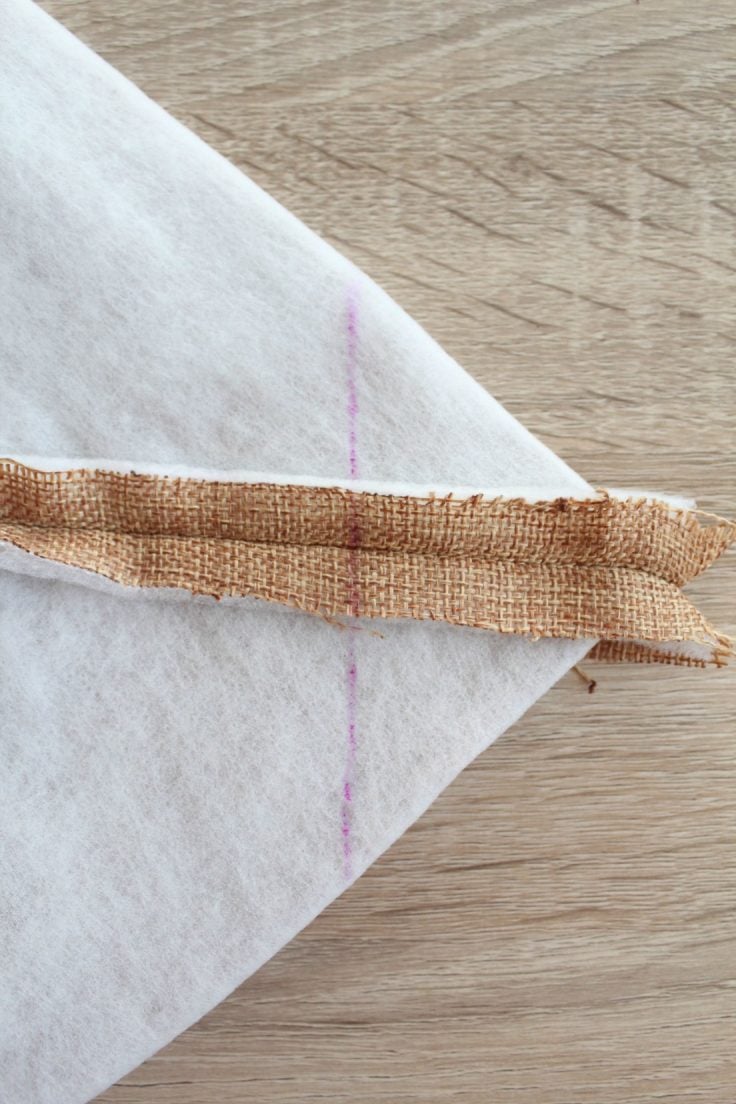
- Measure in 3″ from the pointy corner (not the excess fabric but the corner inside of the seam) and mark with a pin. Sew a straight line perpendicular with the other seam, right at that 3″ mark.
- Repeat with the other corner.
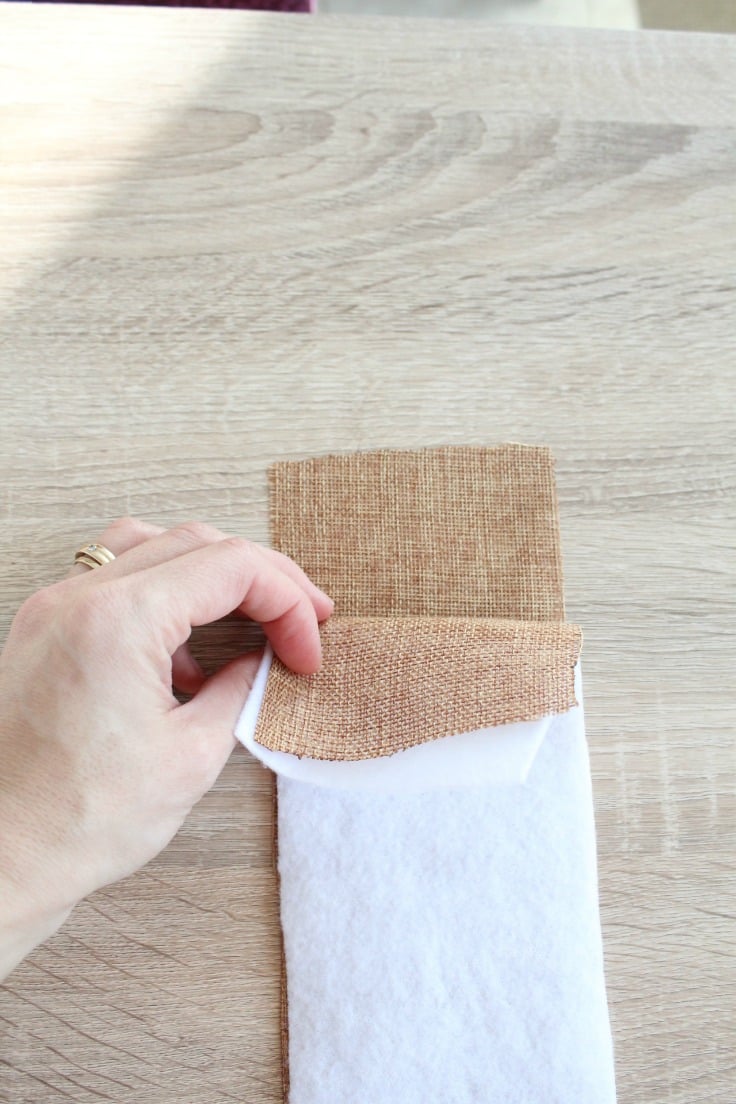
- Turn the the fabric right side out and iron the side seams flat and each corner so that the bottom will stay boxed out. Try and flatten out the bottom seam too without making additional creases in your fabric.
- Repeat the process with the lining fabric, making sure you use the 18″ dimension from side to side and the 18 1/2″ from top to bottom.
Sew the handles
- Grab one of the handle panels with the interfacing and one without interfacing and place them together with right sides together, and sew along each side, using a 1/2′” seam allowance. Do the same with the other handle pieces. Leave both ends open on both handles.
- Turn each handle right side out, and press flat.
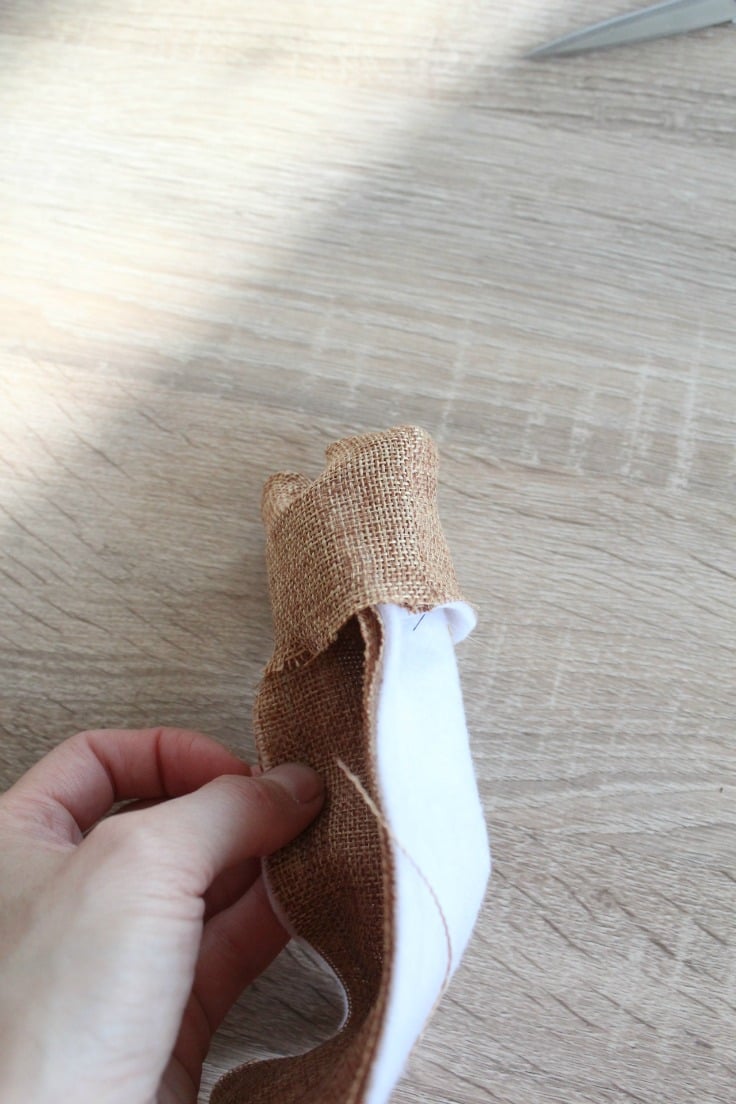
- Sew along the edge, on the sides, as close to the edge as possible.
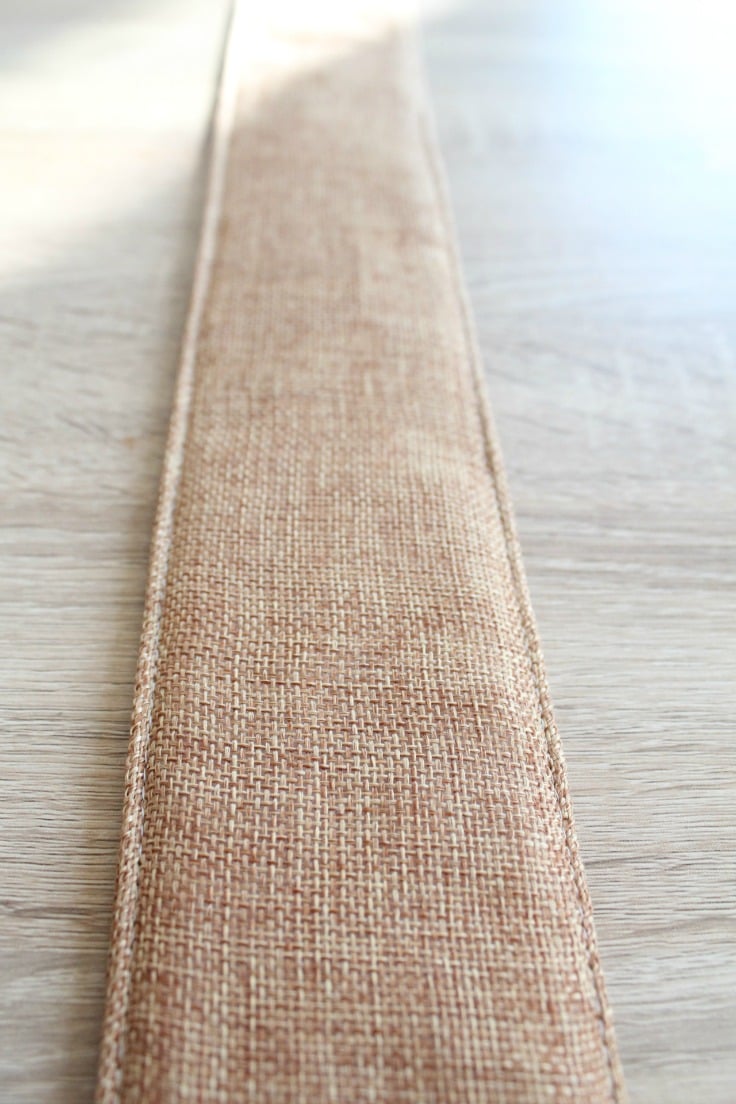
- Make additional stitches inside the handles, for added design if you wish.

Attach the handles to the bag
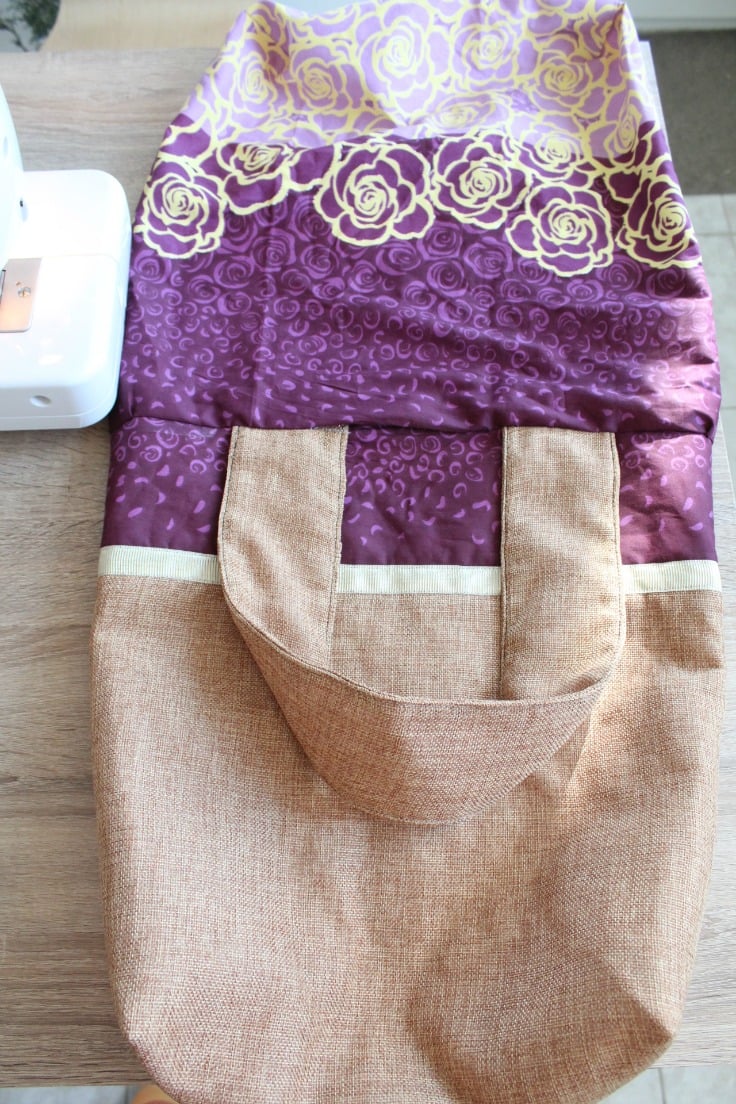
- Grab one handle and place each end 4″ from each side seam. Pin both ends in place. Do the same on the other side of the bag with the other handle.
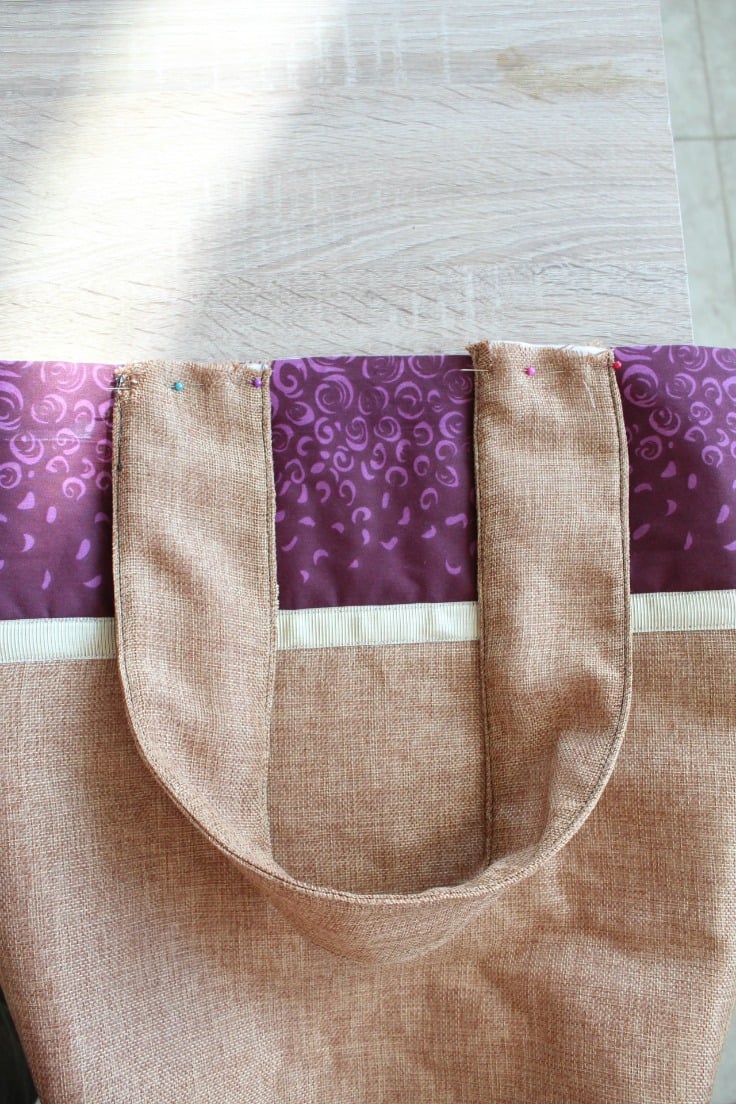
- Sew each handle end in place, using a 7/8″ seam allowance.
Finish the bag
- Slide the outer bag fabric – right side out, inside of the lining fabric – inside out.
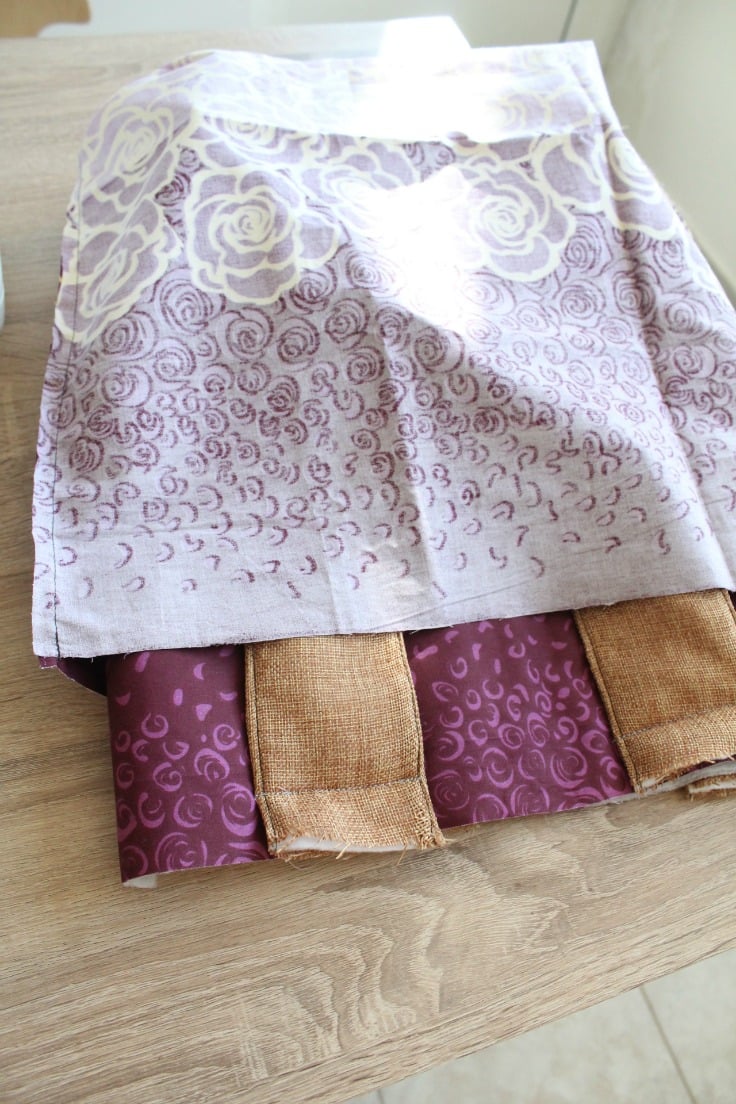
- Match up the top seams and the side seams and pin in place.
- Sew around the top edges, using a 1″ seam allowance. Leave an opening between the handles on one side so you can turn the bag right side out.
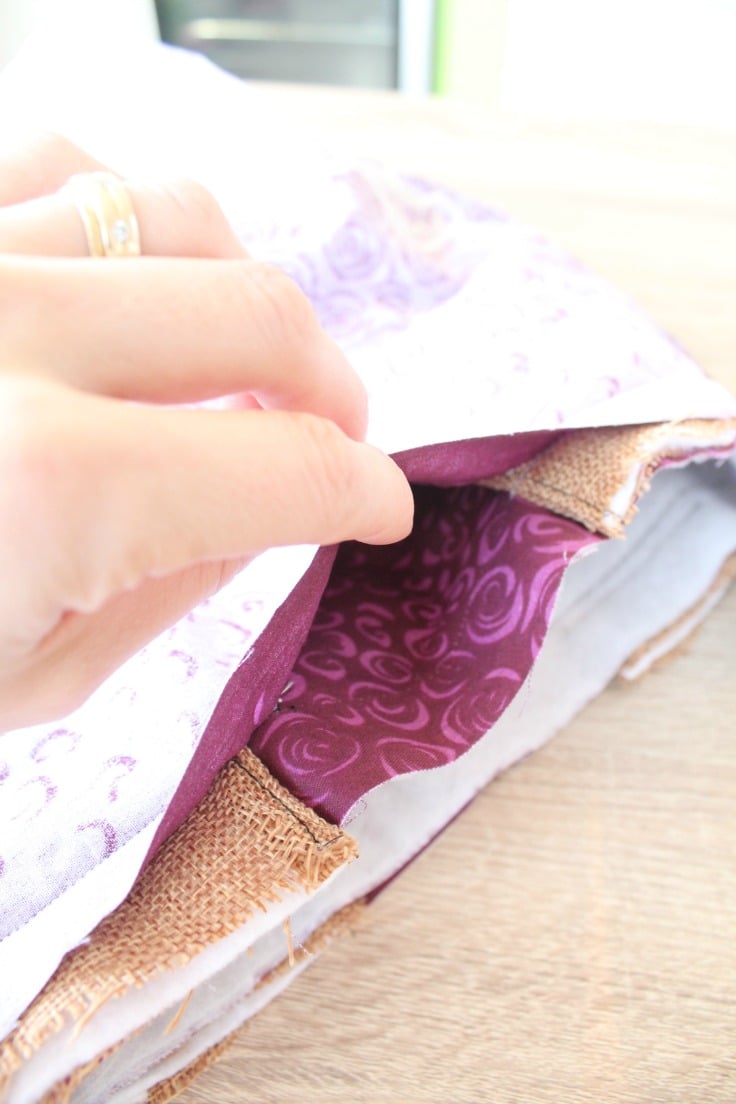
- Then, pull the outer bag fabric out, through the opening that you just left, until all fabric is right side out.
- Place the lining inside the bag.
- Tuck the edges of the opening towards the inside, 1″ and iron flat.
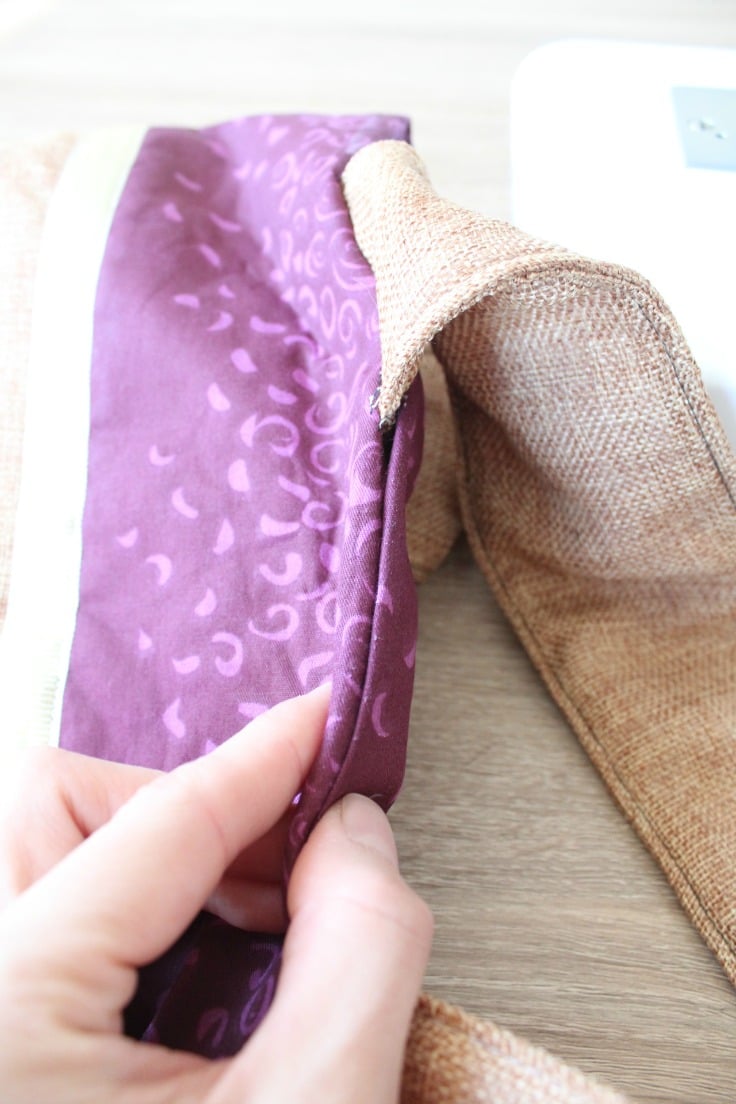
- Close the opening by sewing all along the upper edge of the tote, where the outer fabric meets the lining fabric. I added an extra stitch, 1/4″ below the upper stitch as added design and to give the handles extra strength.
- Now you can embellish your bag with tassels, stitched to the ribbon, a fabric flower or anything that might strike your fancy.
And that’s it! The instructions on this color block tote bag may seem like a lot but it’s only because I wanted to show photos and detailed instructions for every step. Making the bag went on really easily and smoothly though! I love how pretty and sturdy this tote bag turned out and I plan to make a couple more in different fabric choices. Maybe change the design a bit too. Or the pattern. Oh, the possibilities!
Other ideas you will love:
- One handle shopping bag
- Reversible rope handled tote bag
- Quilted snap bag
- Evening purse from a placemat
- Easy rope bag
- Reversible vinyl grocery bag
- Round top canvas bag
- Towel beach bag
- Tips for sewing canvas fabric
- Faux leather crossbody bag
The Ultimate Guide to Sewing the Perfect Burlap Tote Bag!!
Materials
- 1/2 yard of burlap fabric
- 1 yard of upper and lining fabric
- 1-2 yards of ribbon
- matching thread
- 2 small tassels
- iron on interfacing or wadding
Tools
- scissors
Instructions
- Cut your pieces of fabric, like shown below. Cut interfacing or wadding to match the exterior fabric panels and the handles (so you'll have 2 for upper fabric, 2 for lower fabric and 2 for handles). If you want a super sturdy bag, you can add interfacing to the lining fabric too.
- Iron on your interfacing or wadding to the fabric. You'll have to use interfacing only on 2 of the handle panels.
- Grab one of your upper fabric pieces and place it together with one of the lower fabric pieces, right sides together. Line up the upper edges and sew them together, using a 1/2" seam allowance.
- Open it up and iron flat. Repeat with the other upper and lower fabric pieces.
- Line up the ribbon just where the upper and lower fabric pieces join and pin in place. Sew along the top and bottom edge of the ribbon. Repeat for the other panel.
- Place the two panels right sides together and make sure you are matching the upper edges together. Then, peek at the sides and match up the ribbon pieces, so that they line up perfectly.
- Sew along the sides and the bottom, using a 1/2" seam allowance.
- Grab one of the bottom corners and pull the front fabric away from the back fabric and fold it flat, making a nice, pointy tip by lining up the front and the back seam. Iron it flat.
- Measure in 3" from the pointy corner (not the excess fabric but the corner inside of the seam) and mark with a pin. Sew a straight line perpendicular with the other seam, right at that 3" mark.
- Repeat with the other corner.
- Turn the the fabric right side out and iron the side seams flat and each corner so that the bottom will stay boxed out. Try and flatten out the bottom seam too without making additional creases in your fabric.
- Repeat the process with the lining fabric, making sure you use the 18" dimension from side to side and the 18 1/2" from top to bottom.
- Grab one of the handle panels with the interfacing and one without interfacing and place them together with right sides together, and sew along each side, using a 1/2'" seam allowance. Do the same with the other handle pieces. Leave both ends open on both handles.
- Turn each handle right side out, and press flat.
- Sew along the edge, on the sides, as close to the edge as possible.
- Make additional stitches inside the handles, for added design if you wish.
- Grab one handle and place each end 4" from each side seam. Pin both ends in place. Do the same on the other side of the bag with the other handle.
- Sew each handle end in place, using a 7/8" seam allowance.
- Slide the outer bag fabric - right side out, inside of the lining fabric - inside out.
- Match up the top seams and the side seams and pin in place.
- Sew around the top edges, using a 1" seam allowance. Leave an opening between the handles on one side so you can turn the bag right side out.
- Then, pull the outer bag fabric out, through the opening that you just left, until all fabric is right side out.
- Place the lining inside the bag.
- Tuck the edges of the opening towards the inside, 1" and iron flat.
- Close the opening by sewing all along the upper edge of the tote, where the outer fabric meets the lining fabric. I added an extra stitch, 1/4" below the upper stitch as added design and to give the handles extra strength.
- Now you can embellish your bag with tassels, stitched to the ribbon, a fabric flower or anything that might strike your fancy.
Article may contain Amazon & affiliate links. As an Amazon Associate I earn from qualifying purchases at no additional cost to you.

This is a beautiful tote bag. I’m going to give it a try. Your tutorial is fantastic.
Thank you :)
Thanks so much for your lovely comment, Laura! Enjoy making this easy tote, it’s a breeze! 🤗
I loved these ideas. I have been looking for a simple tote pattern so that I can recycle my chicken feed bags into totes or bags with handles.. I am really excited about this project. Thank you so much for the instructions and photos. I might have had several botched attempts without your tutorial, so I am very thankful.
Aww! Thanks so much Dahli! I’m glad you found my tutorial informative and helpful! xoxo
Love the bag and want to make one, I may be being daft but I can’t see what the dimensions are for the handles
Hi Lesley. Dimensions are in the first photo, under Directions. They should read 4 strips of 4″ by 26″
Thank you for the tutorial!!!
This bag looks great!!!
Timi, thank you so much for stopping by and taking the time to leave such a nice comment :)
Saved as a favorite, I love yourr blog!
I just found you through Hometalk. This bag is gorgeous! I may try making one next summer…I haven’t done any sewing since my mother-in-law passed away, she was my sewing mentor. I have signed up for your newsletter and am excited to follow you.
Aww, thank you so much Lisa. You have no idea how much joy you just brought! My dad passed away last week and I feel totally lost and not much can motivate me these days. Nice comments like yours remind me I’m surrounded by beautiful people and that my work here does matter. That’s more than enough to get me back on track. Thank you so much again!
Featured today, Petro…