

DIY Jenga pumpkins rustic home décor
Create charming DIY Jenga pumpkins to elevate your home décor this fall. Follow this simple step-by-step guide for unique and delightful autumn-themed decorations. As the leaves begin to change color and the air turns crisp, it’s the perfect time to enrich your home décor with autumn-inspired crafts.
One delightful and budget-friendly project you can tackle is creating DIY Jenga pumpkins. These charming decorations fuse the playful nature of classic Jenga blocks with the rustic beauty of pumpkins, making them an ideal addition to your seasonal home decor. Whether you’re an experienced crafter or a novice looking for an easy project, DIY Jenga pumpkins are sure to bring joy and creativity into your home.
Jenga pumpkins home décor are incredibly versatile and can add a whimsical touch to any corner of your home. They are easy to make, customizable with various paint colors and patterns, and offer a delightful alternative to traditional pumpkin décor. Plus, this project is a fantastic way to recycle old Jenga blocks, making it both eco-friendly and budget-conscious.
How to Make DIY Jenga Pumpkins
Materials
For this project, you’ll need the following materials, each chosen to give your DIY Jenga pumpkins a unique and polished look:
- Jenga Blocks: The main component of the pumpkins, providing the structure.
- Wood Glue: Essential for securely attaching the Jenga blocks together.
- Wine or Champagne Corks: Used as the pumpkin stems, adding a rustic touch.
- Lace Ribbon: For an elegant finishing touch, tying around the top.
- Waverly Chalk Paint (White, Ocean, Merlot): These colors offer a variety of tones to match your home decor style.
Substitutes
If you don’t have all the materials on hand, don’t worry! Here are some substitutes you can use:
- Wood Glue: Craft glue or a strong adhesive can be used.
- Jenga Blocks: Any similar-sized wooden blocks will work.
- Corks: Wooden dowels or even small twigs can act as pumpkin stems.
- Lace Ribbon: Twine, yarn, or any other decorative ribbon can be used.
- Chalk Paint: Acrylic paint or spray paint are suitable alternatives.
Equipment
To make your crafting process smooth, gather the following equipment:
- Hot Glue Gun: For attaching corks to the pumpkins and other assembly tasks.
- Hot Glue Sticks: Compatible with your hot glue gun.
- Paint Brush: Essential for applying paint evenly to the Jenga blocks.
- Scissors: For trimming the ribbon and making precise cuts.
Instructions to make the DIY Jenga pumpkins
Preparations
First, gather all your materials and equipment. Working on a covered surface can help protect your workspace from any paint or glue spills. Make sure to have everything within reach for a smooth crafting session.
Crafting
Assembling the Blocks
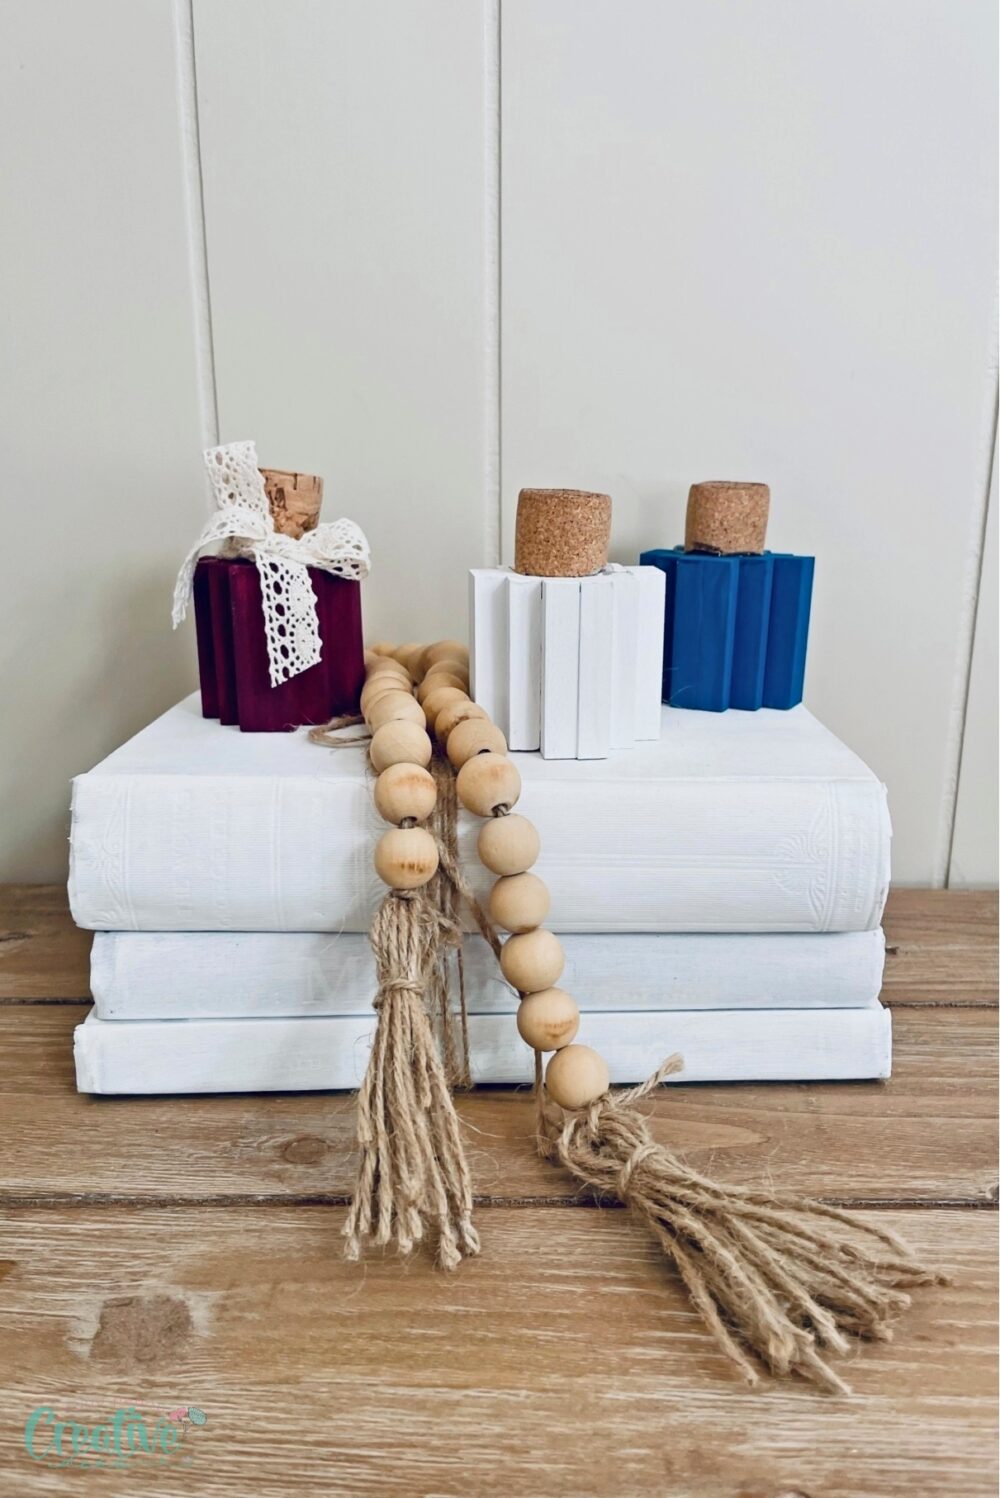
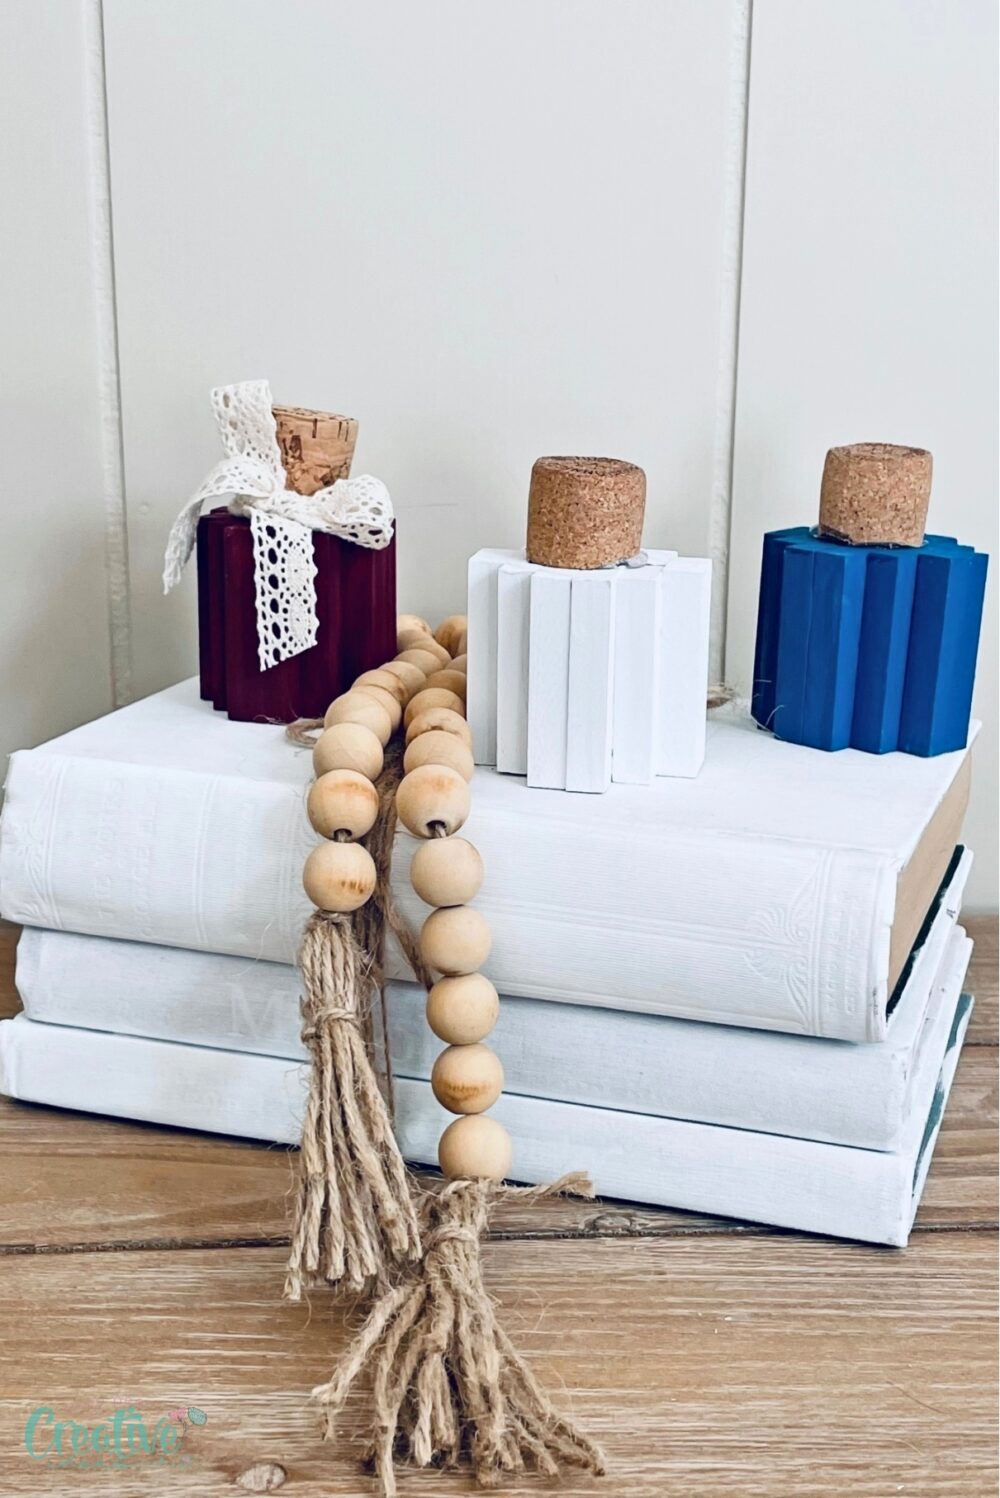
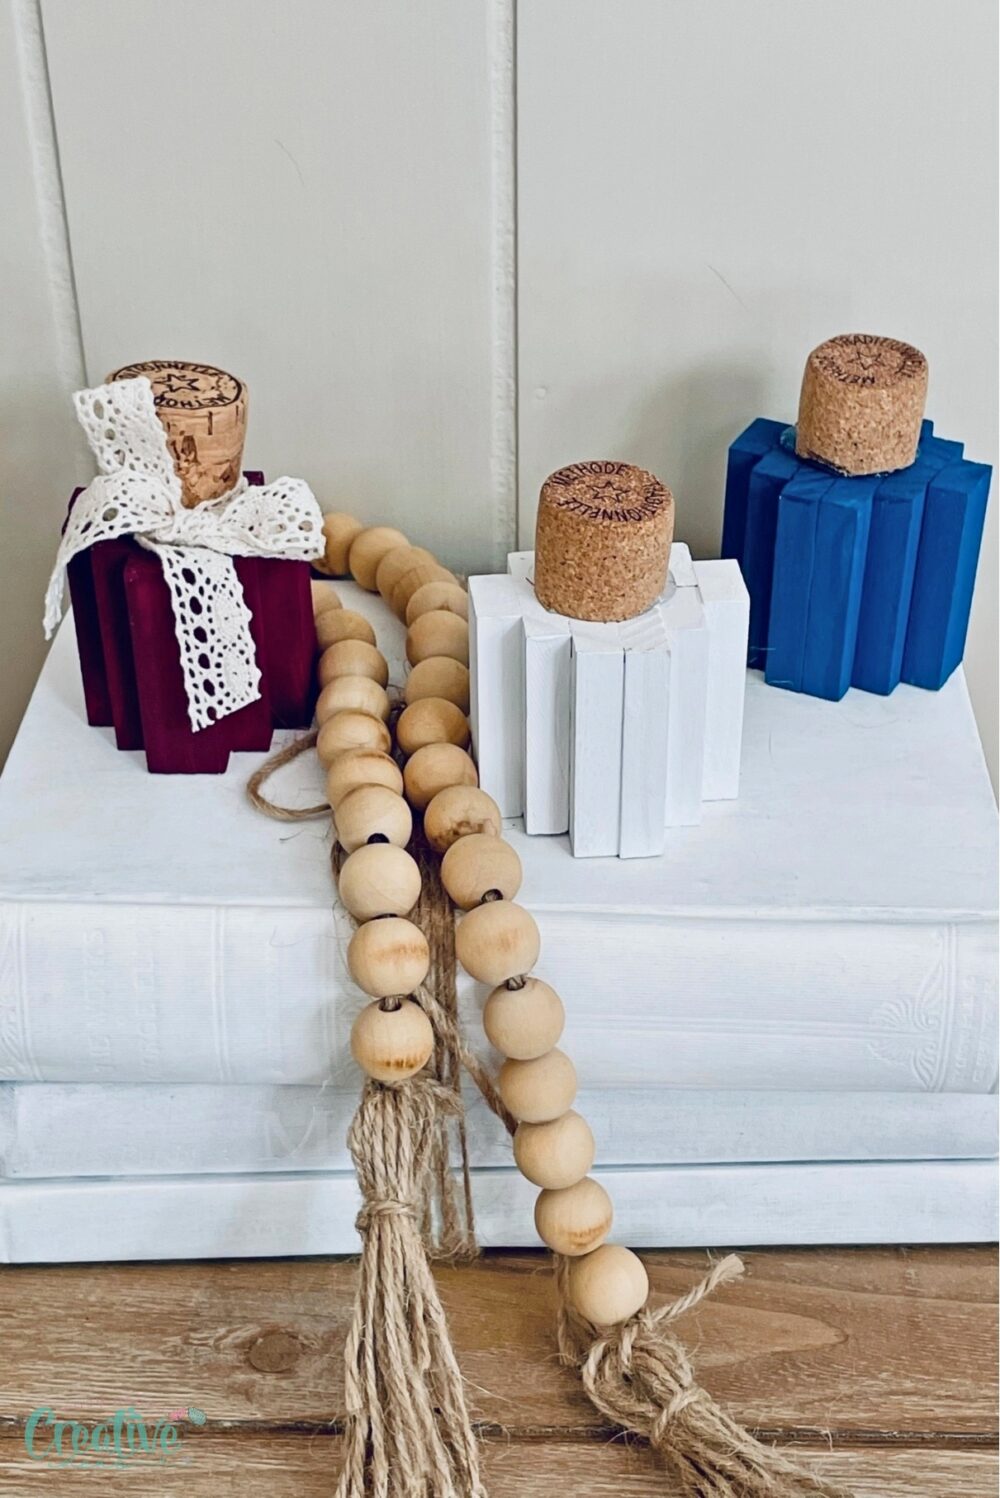
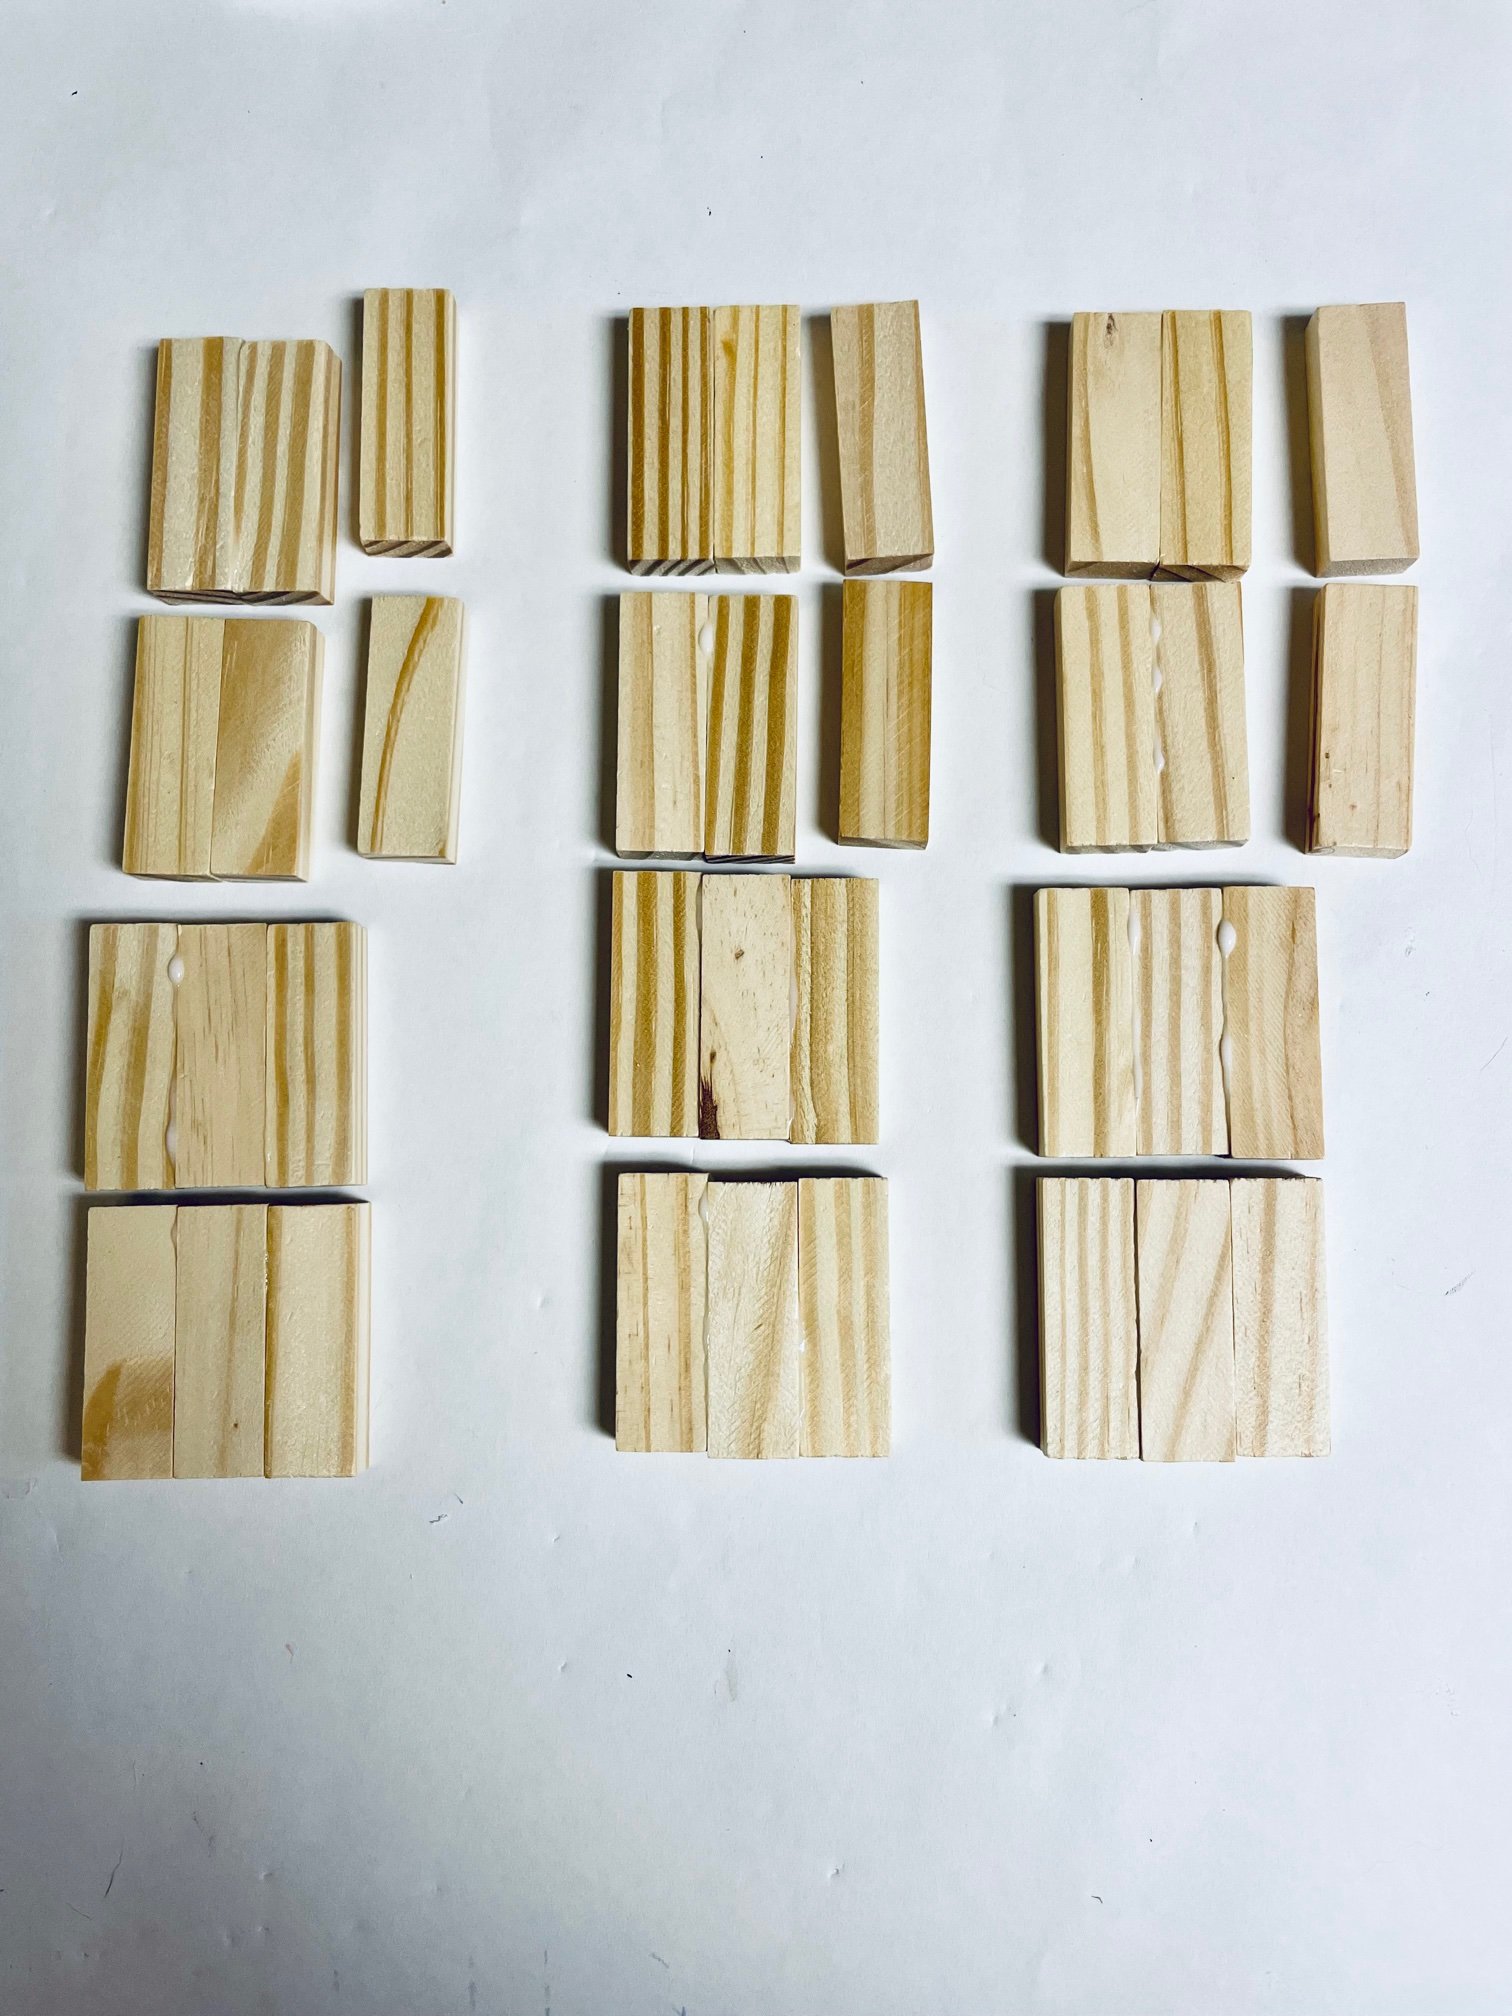
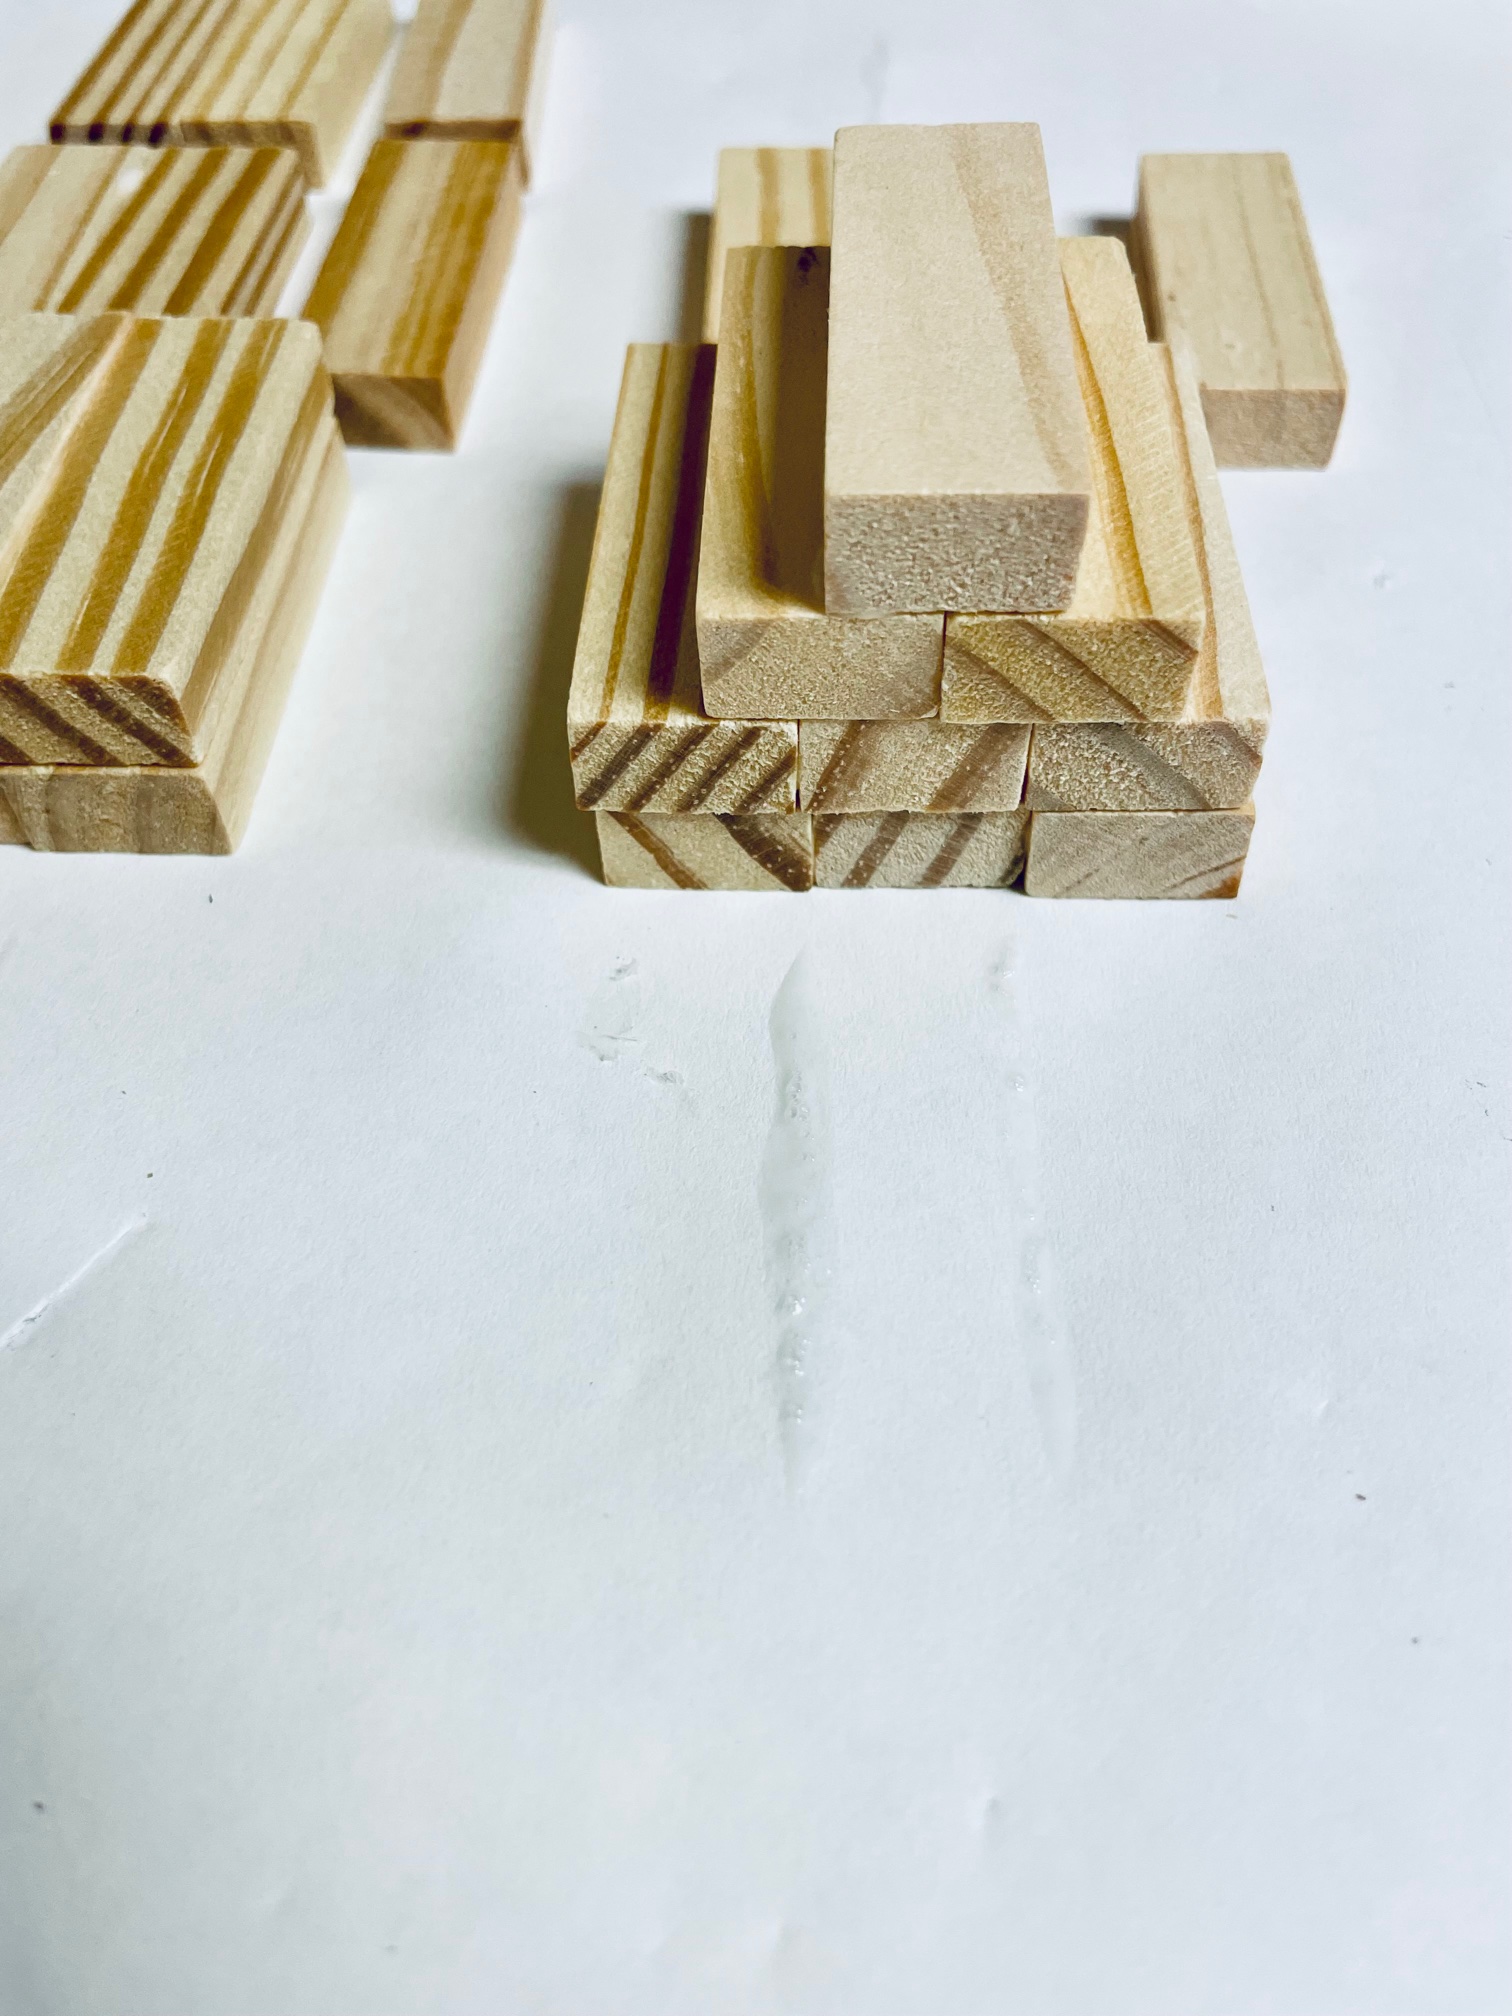
- Take out 36 Jenga block pieces to begin your DIY pumpkins home décor project.
- Start by gluing together six sets of three blocks and six sets of two blocks using wood glue. Allow them to dry for about 30 minutes.
Cutting the Corks
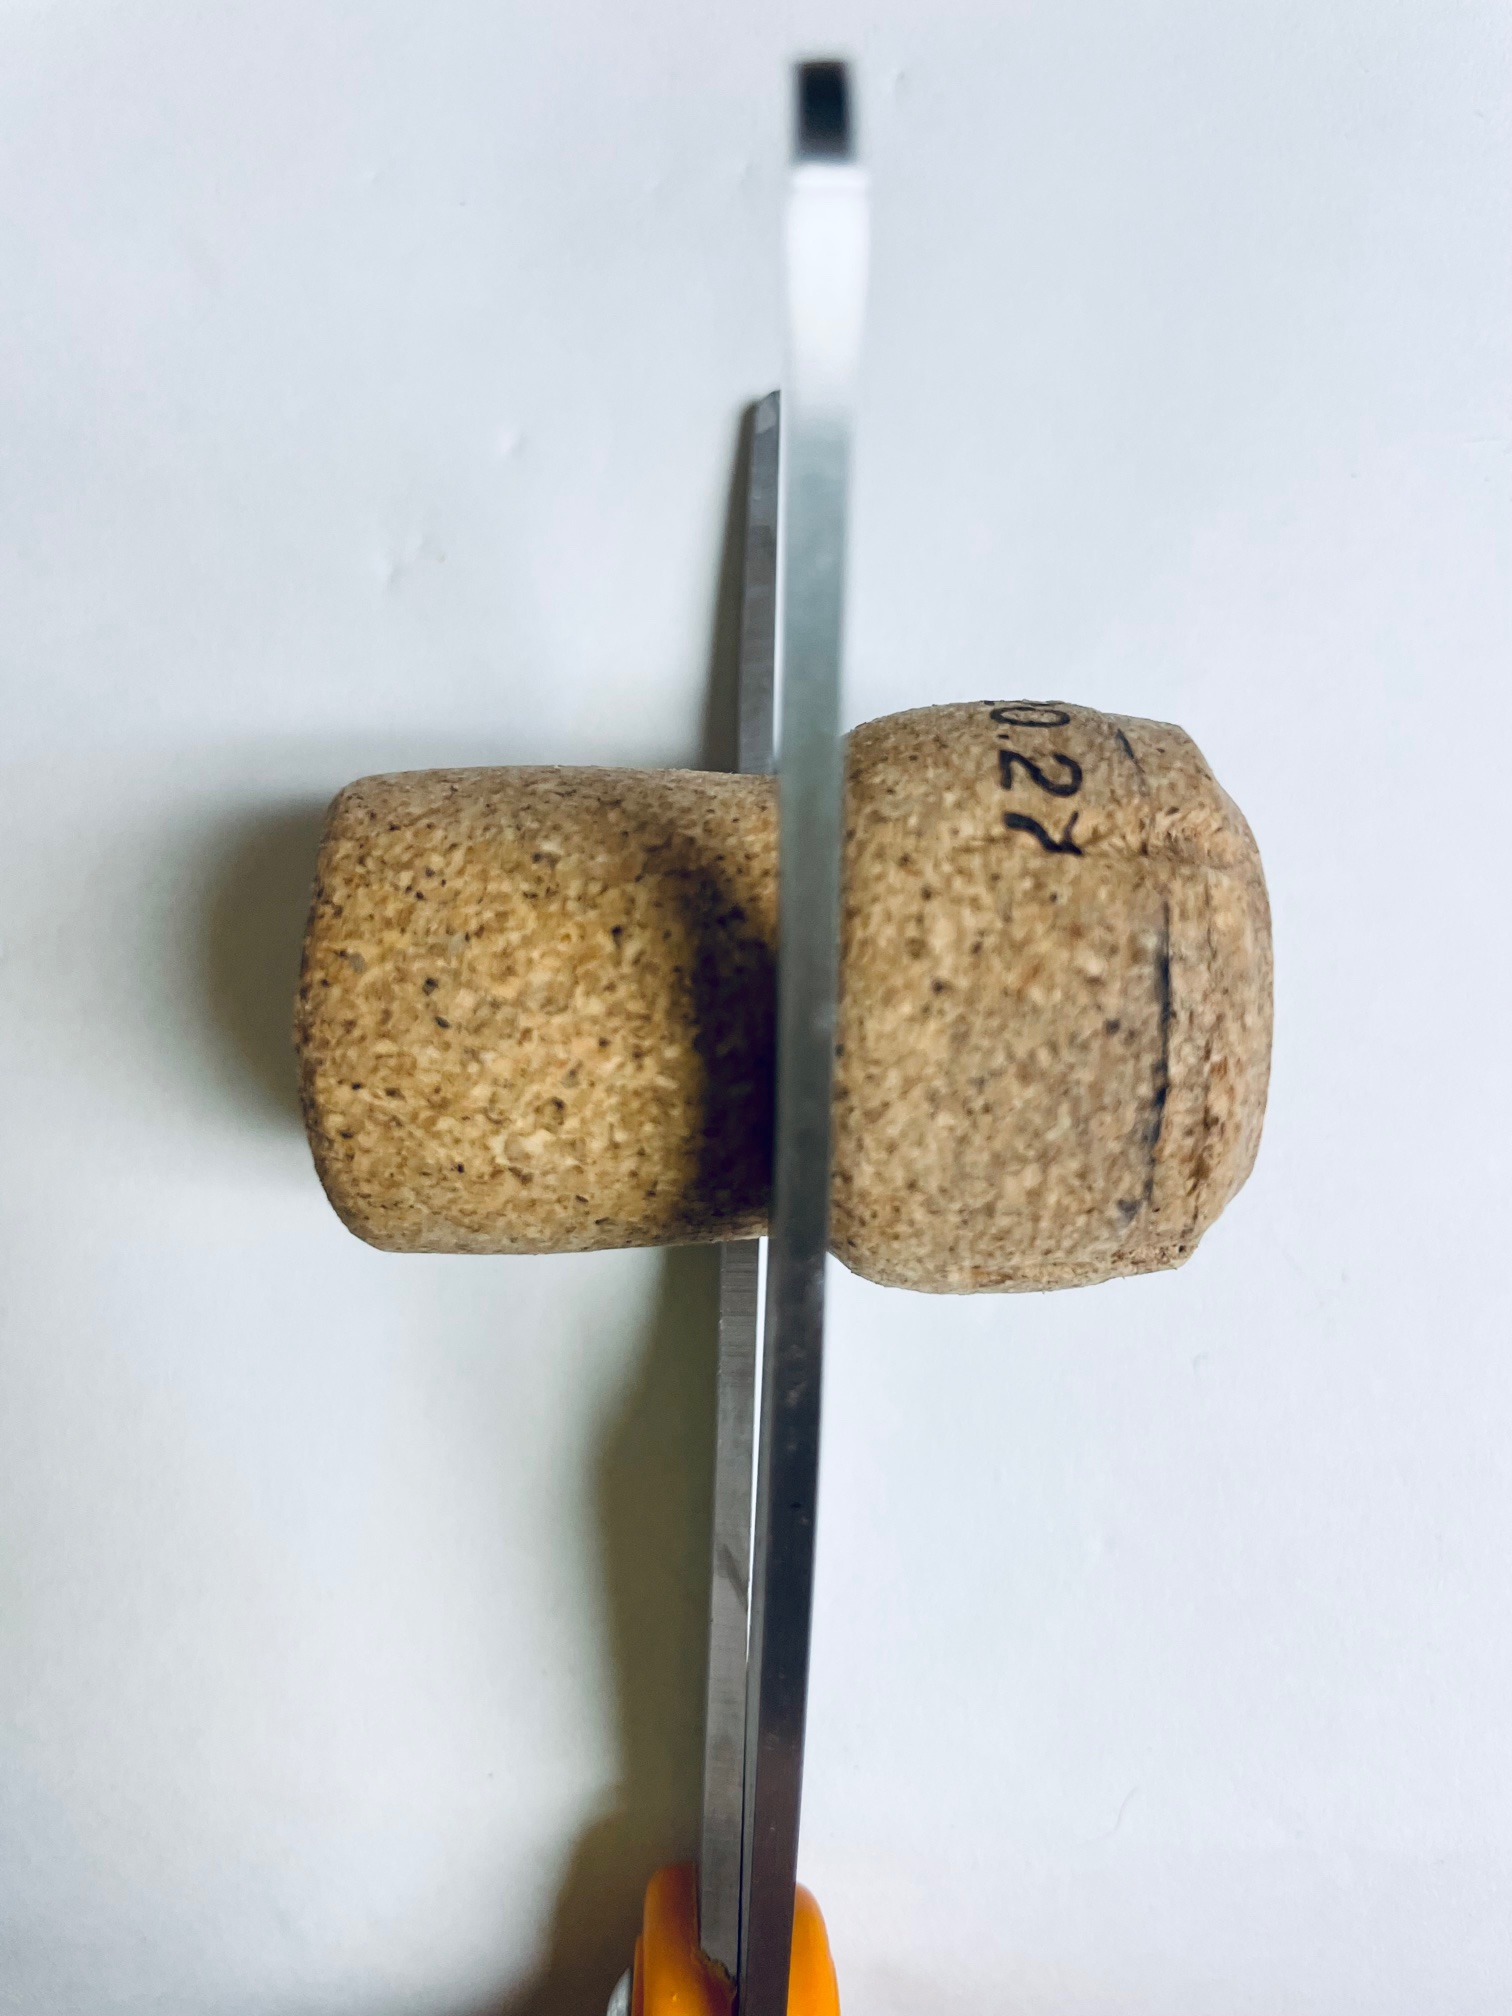
- With scissors or an X-acto knife, carefully cut off the top portion of the champagne cork. This will serve as the pumpkin stem.
Building the Pumpkins
- Glue together two sections of three blocks, then on either side, glue one section of two blocks and a single block. Stand the arrangement up to dry and straighten them to ensure they are level on the top.
- Repeat this process to create two more pumpkins.
Painting
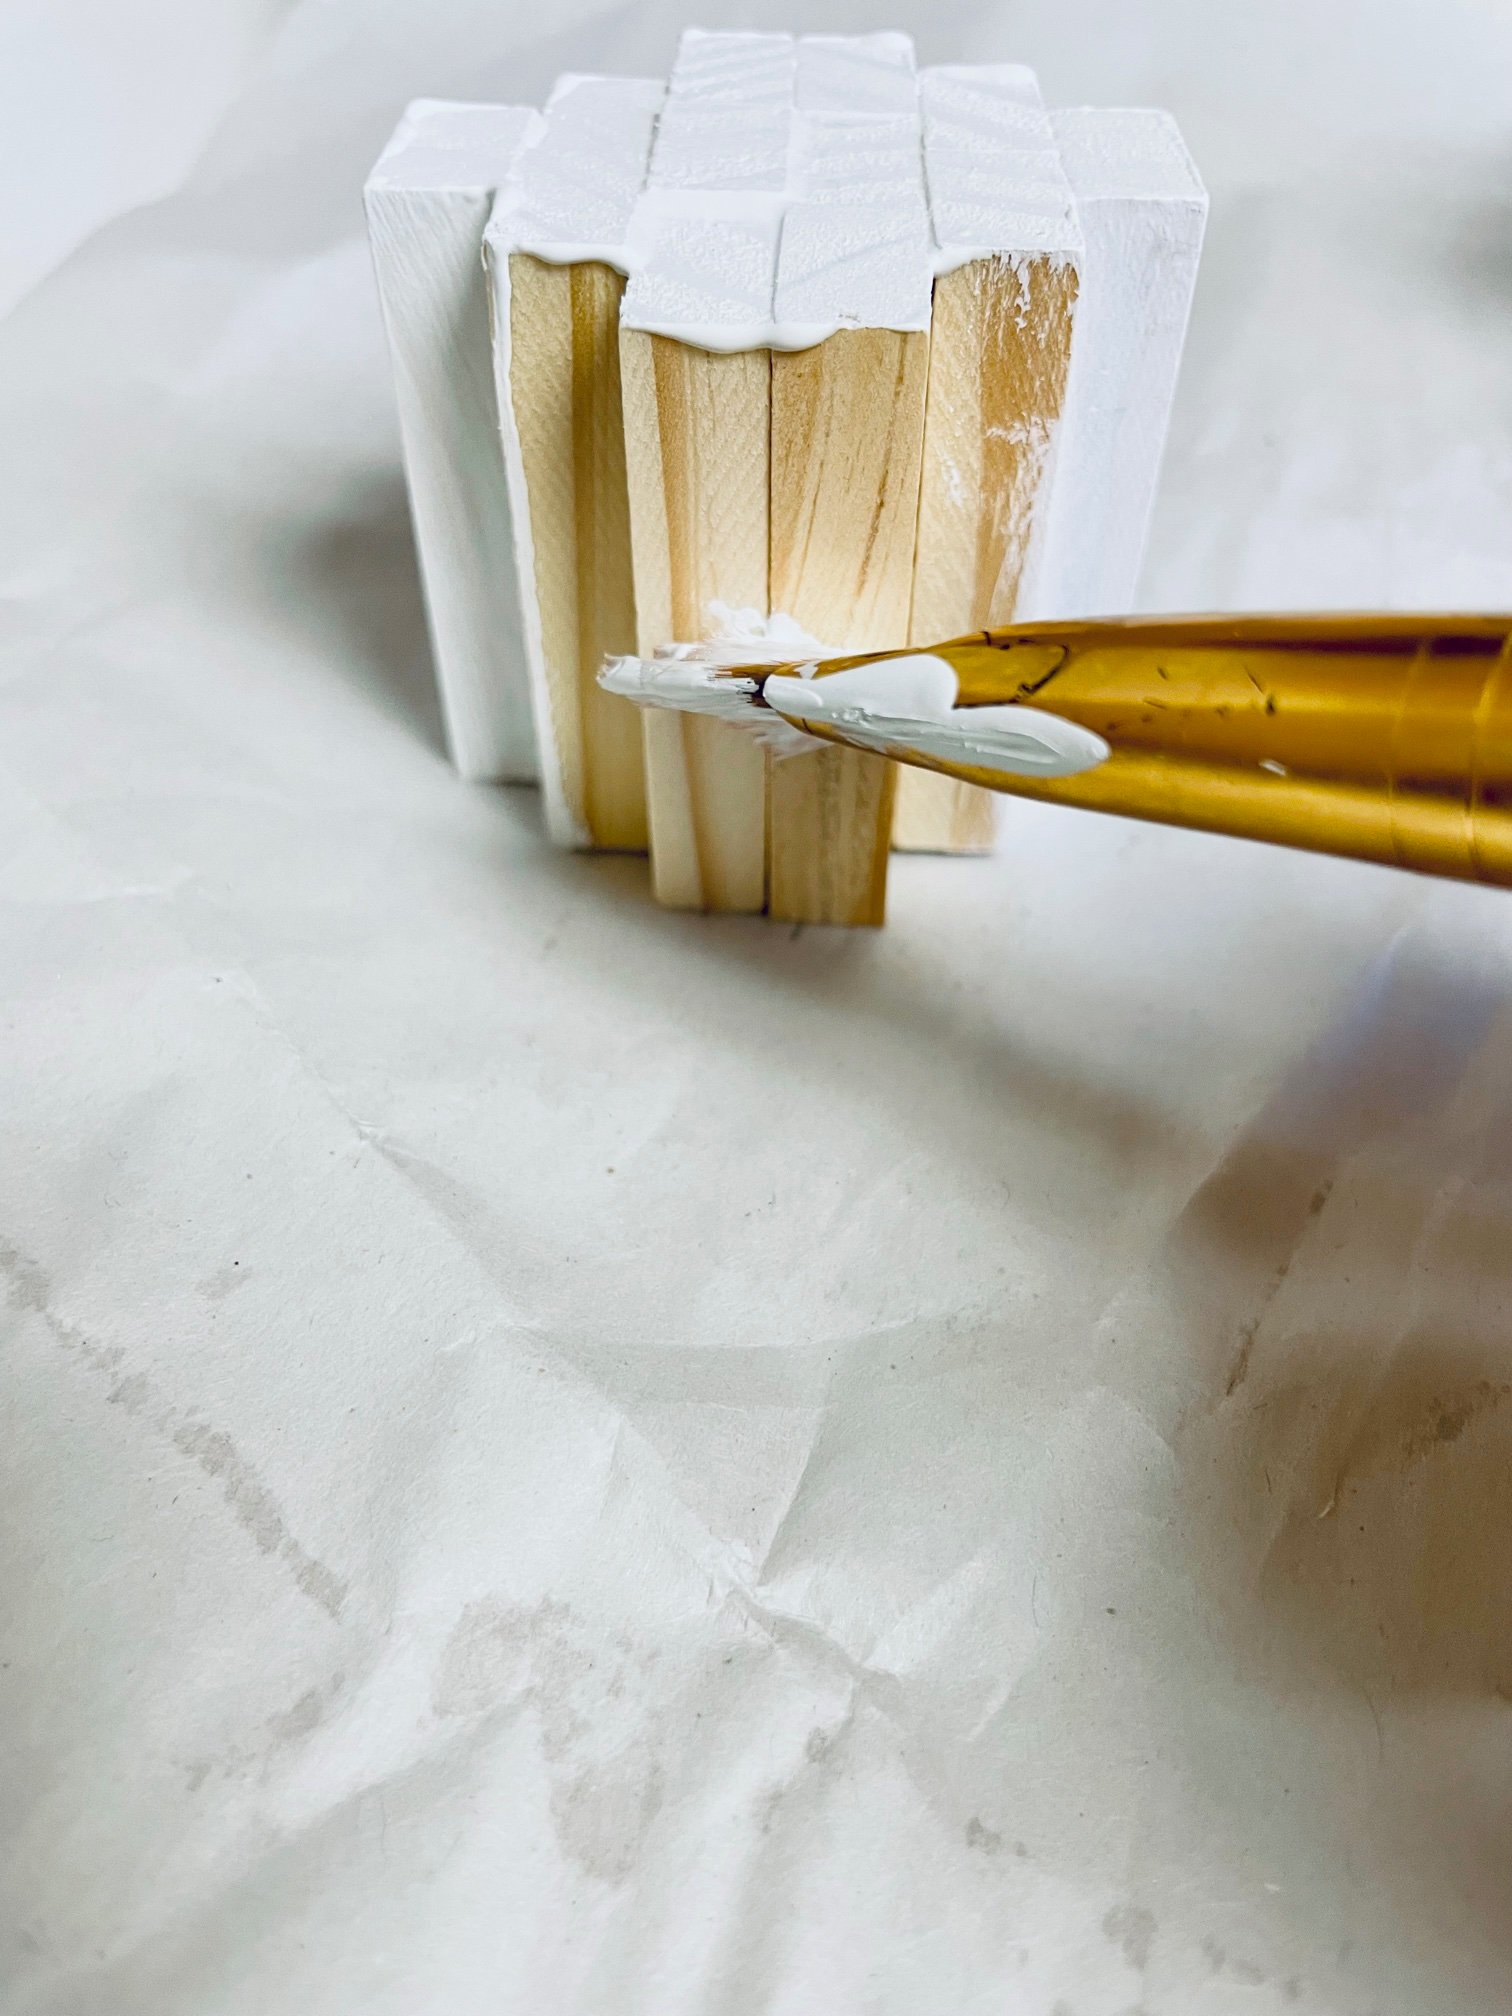
- Once dry, use Waverly White, Merlot, and Ocean chalk paint to fully cover each pumpkin, allowing it to dry completely. Apply additional layers of paint as needed to achieve a solid color.
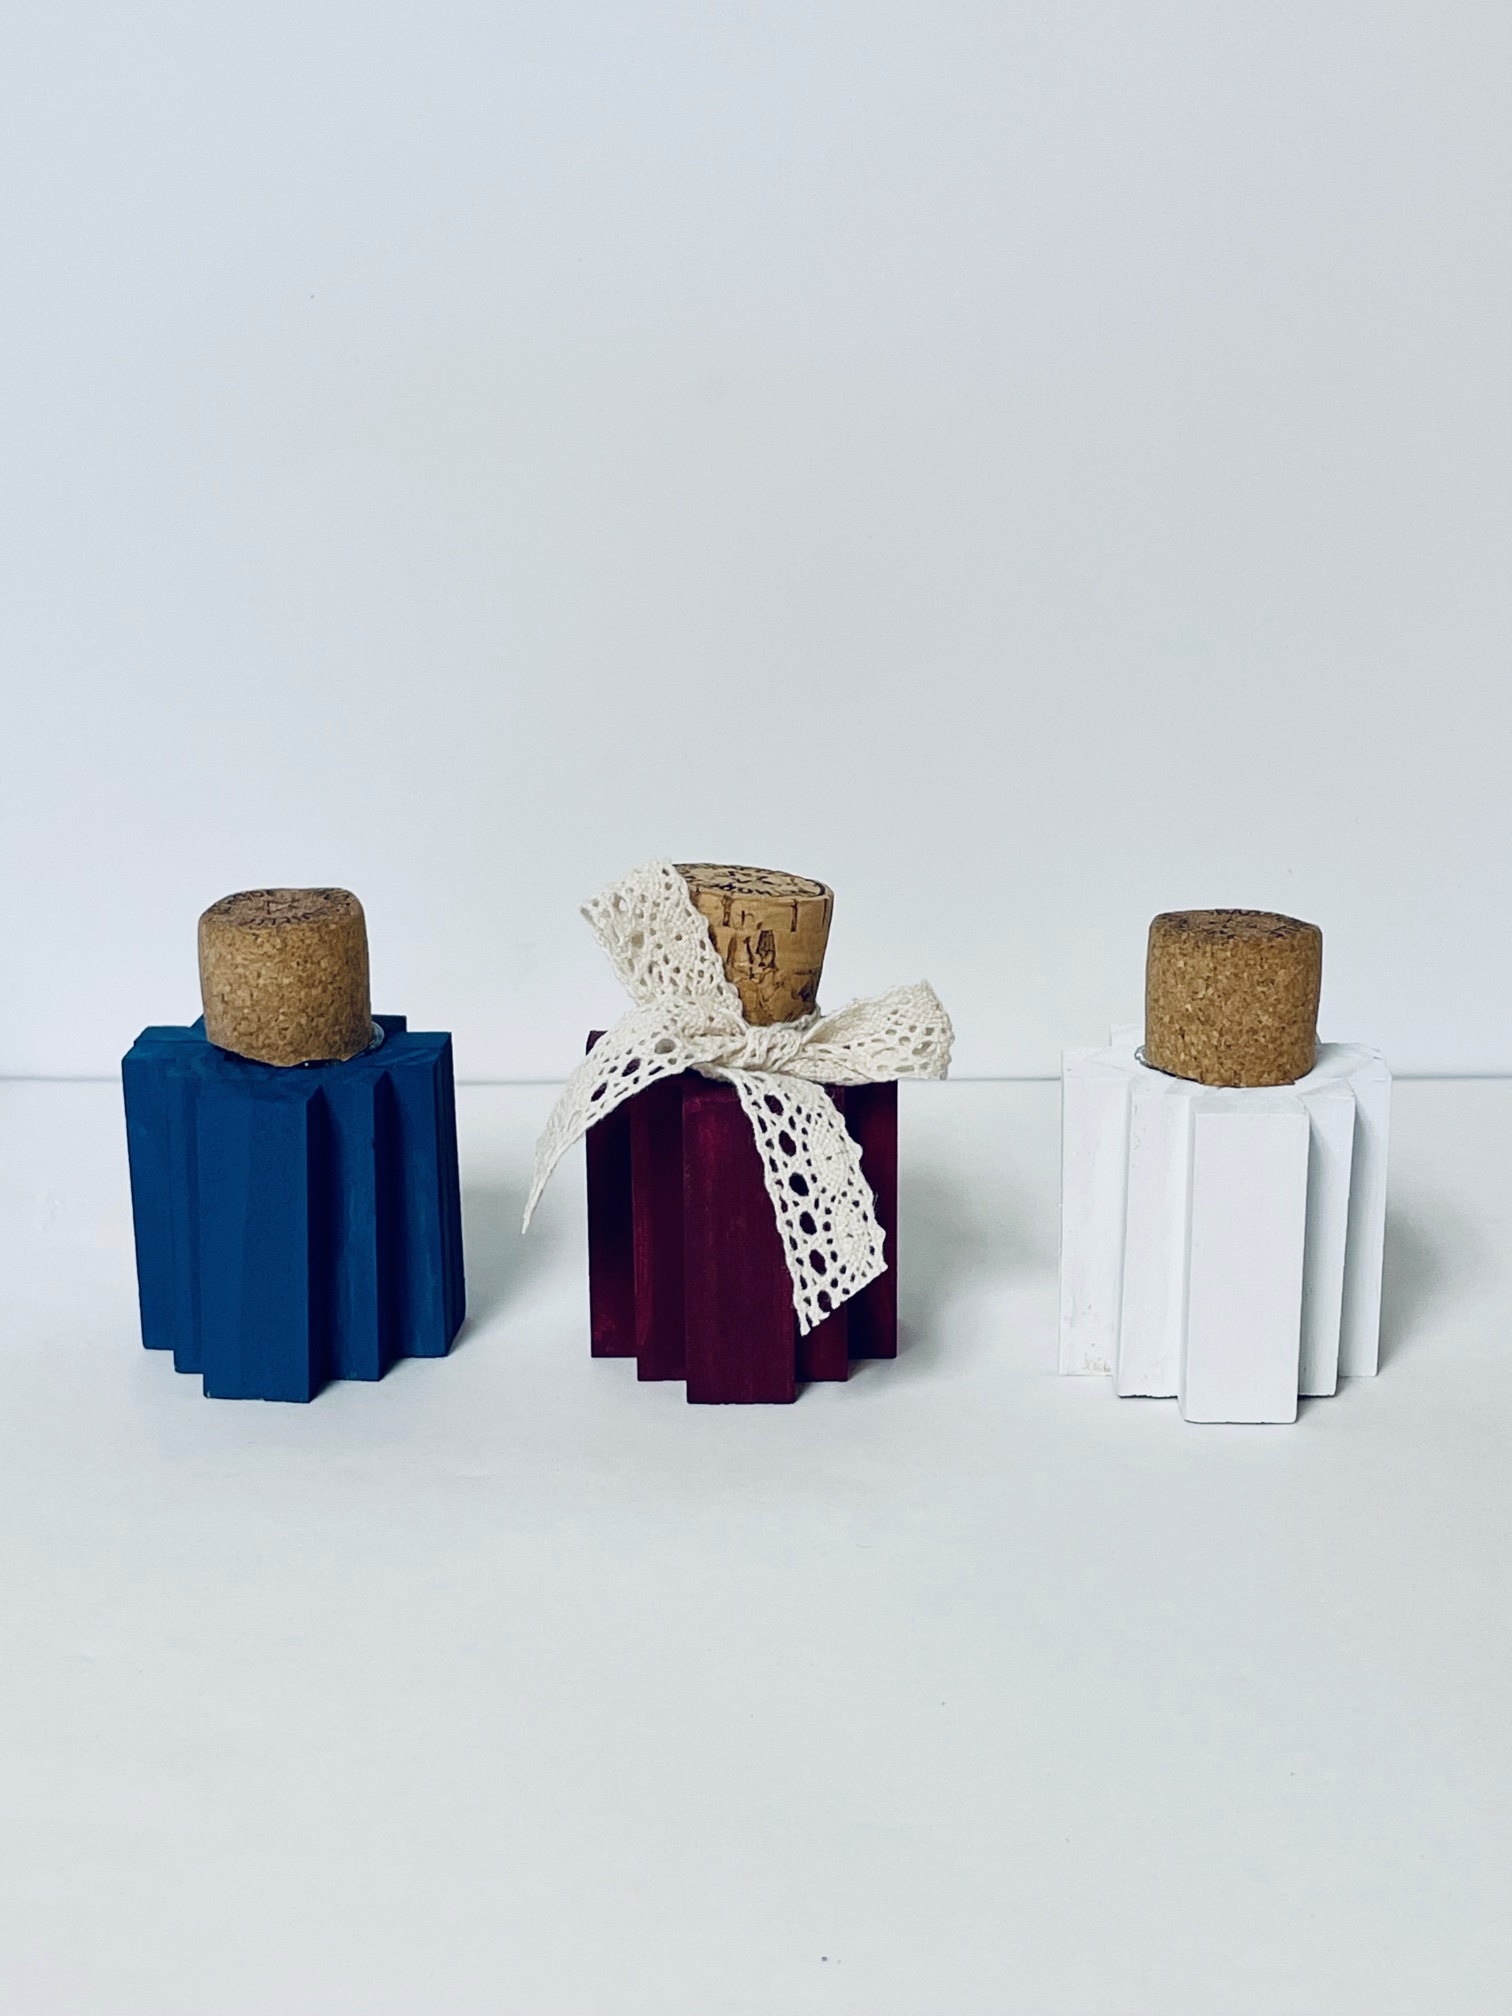
Adding the Stems
- After the paint is fully dried, use the hot glue gun to attach the champagne corks to the top of each pumpkin.
Tying the Ribbon
- Trim a piece of lace ribbon and tie it around the top of one of the pumpkins to add a decorative touch.
Tips
- Choosing the Right Paint: Chalk paint tends to cover surfaces more fully than other types of paint, giving the pumpkins a matte finish that enhances their rustic look.
- Leveling the Blocks: While gluing the blocks, make sure they’re perfectly aligned. You can use a leveler or the edge of a ruler to ensure straightness.
- Drying Time: Allow extra drying time between multiple layers of paint to prevent smudging and ensure an even finish.
Craft Variations
Get creative with your DIY pumpkins home decor by trying out these fun variations:
- Glow-in-the-Dark Pumpkins: Add a spooky twist by using glow-in-the-dark paint for a Halloween-themed look.
- Personalized Pumpkins: Use stencils or vinyl letters to add initials, names, or phrases to your pumpkins for a personalized touch.
- Metallic Pumpkins: Give your pumpkins a sophisticated look with metallic spray paint in gold, silver, or bronze.
- Patterned Pumpkins: Use painter’s tape to create stripes or geometric patterns before painting for a modern, stylish design.
Decorating Your Jenga Pumpkins
Once you’ve created your pumpkins, here are some ideas for displaying and decorating them:
- Centerpiece: Group the pumpkins together on a tray or platter to create an eye-catching centerpiece for your dining table or mantel.
- Mantel Display: Arrange the pumpkins on top of candle holders or books of varying heights to add dimension and interest to your mantel decor.
- Outdoor Welcome Sign: Use larger Jenga blocks to spell out “Welcome” in front of your porch or entryway. Place the pumpkins around it for a festive display.
Displaying Your DIY Jenga Pumpkins
Once your Jenga pumpkins are complete, it’s time to show them off! Here are a few ideas for incorporating them into your home décor:
- Mantel Decor: Arrange your pumpkins along your mantelpiece with other autumn-themed items such as candles, leaves, and pinecones for a cozy, festive display.
- Table Centerpiece: Place a grouping of Jenga pumpkins in the center of your dining or coffee table. Add some burlap, mini-gourds, and a vase of fresh fall flowers to complete the look.
- Entryway Accents: Welcome guests with a charming autumn arrangement by placing your Jenga pumpkins on a console table or bench in your entryway.
- Shelf Styling: Incorporate your pumpkins into a bookshelf or cabinet display, mixing them with books, framed photos, and small decorative items for a balanced and inviting look.
Frequently Asked Questions
- Can I use regular paint instead of chalk paint? Yes, you can use any type of paint for this project. However, keep in mind that chalk paint is ideal for achieving a matte finish and covering surfaces more fully.
- What can I use instead of champagne corks? If you don’t have champagne corks on hand, you can use wooden dowels, twigs, or rolled-up paper to create the stems.
- How long does it take for the pumpkins to dry completely? It typically takes about 1-2 hours for the pumpkins to dry between each layer of paint. For best results, allow them to dry overnight before displaying.
More Fall Crafts You’ll Enjoy
Looking for more fun and festive fall craft ideas? Check out these projects that are perfect for the season:
- Wooden vase with Jenga blocks
- Twig letter wall décor
- Quick & easy denim pumpkins
- Decorative fall lantern
- Front porch décor with bushel basket
Making DIY Jenga pumpkins is an enjoyable and creative way to add a personal touch to your fall décor. With just a few materials and some simple steps, you can create beautiful pumpkins that will impress anyone who sees them.
Happy crafting!

DIY Jenga pumpkins
Materials
- Jenga Blocks
- Wood Glue
- Wine corks or Champagne Corks
- Lace Ribbon
- Waverly Chalk Paint - White, Ocean, Merlot
Tools
- hot glue sticks
- Paint brush
- scissors
Instructions
- Take out 36 jenga block pieces. Start by gluing together with the wood glue 6 (sets of 3) and 6 (sets of 2). Allow them to dry for about 30 minutes.

- Next using the scissors or an x-acto knife, cut off the top portion of the champagne cork
- Next using the wood glue, glue together 2 sections of 3 blocks, then on either side glue one section of the 2 blocks and then a single block. I stood them up to dry and to straighten them a little to make sure they were level on the top. Repeat this for the other 2 pumpkins
- Next using the White, Merlot, and Ocean chalk paint, paint each pumpkin. Allow to fully dry, and add another layer or paint if needed
- Next using the hot glue gun, add the champagne corks to the top of the pumpkins. Trim a piece of ribbon and tie around the top of one of the pumpkins.
Article may contain Amazon & affiliate links. As an Amazon Associate I earn from qualifying purchases at no additional cost to you.
ABOUT PETRO
Hi, I’m Petro, author and founder of Easy Peasy Creative Ideas. Sewist, crafter, avid DIY-er, foodie, photographer, homemaker and mommy to one. I’m an expert at coming up with quick, clever sewing tips, recycling crafts and simple, easy recipes! You can find my ideas featured in reputable publications such as Country Living, Good House Keeping, Yahoo News, WikiHow, Shutterfly, Parade, Brit & Co and more. Thanks for stopping by and hope you’ll stay for a while, get to know me better and come back another time. Stick around for real fun projects! Read more…