

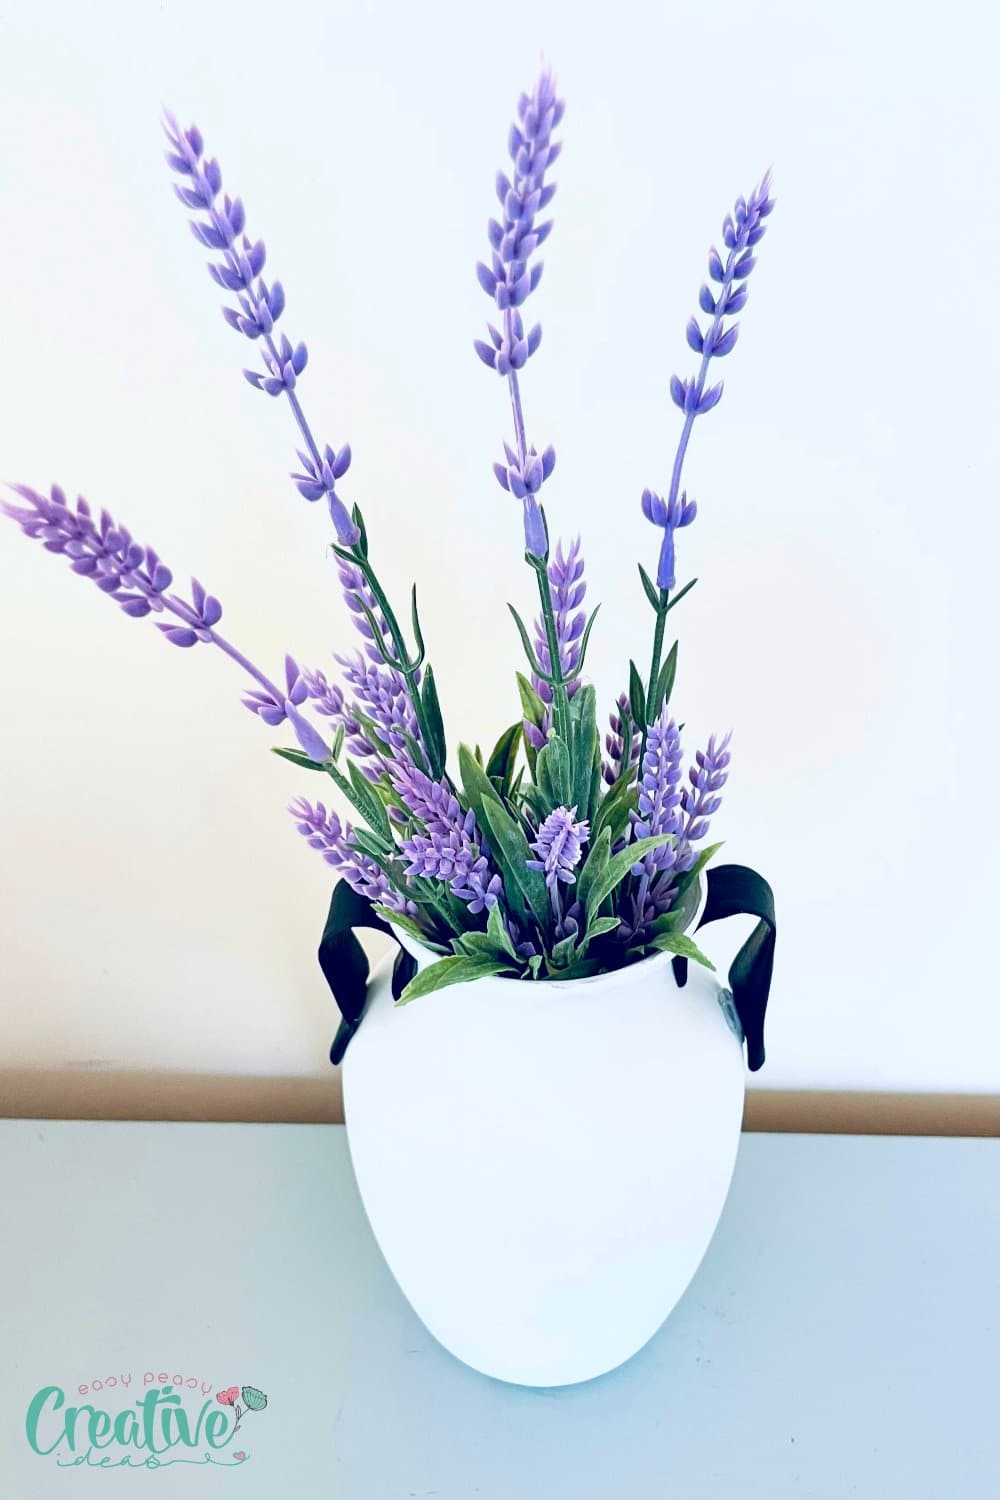
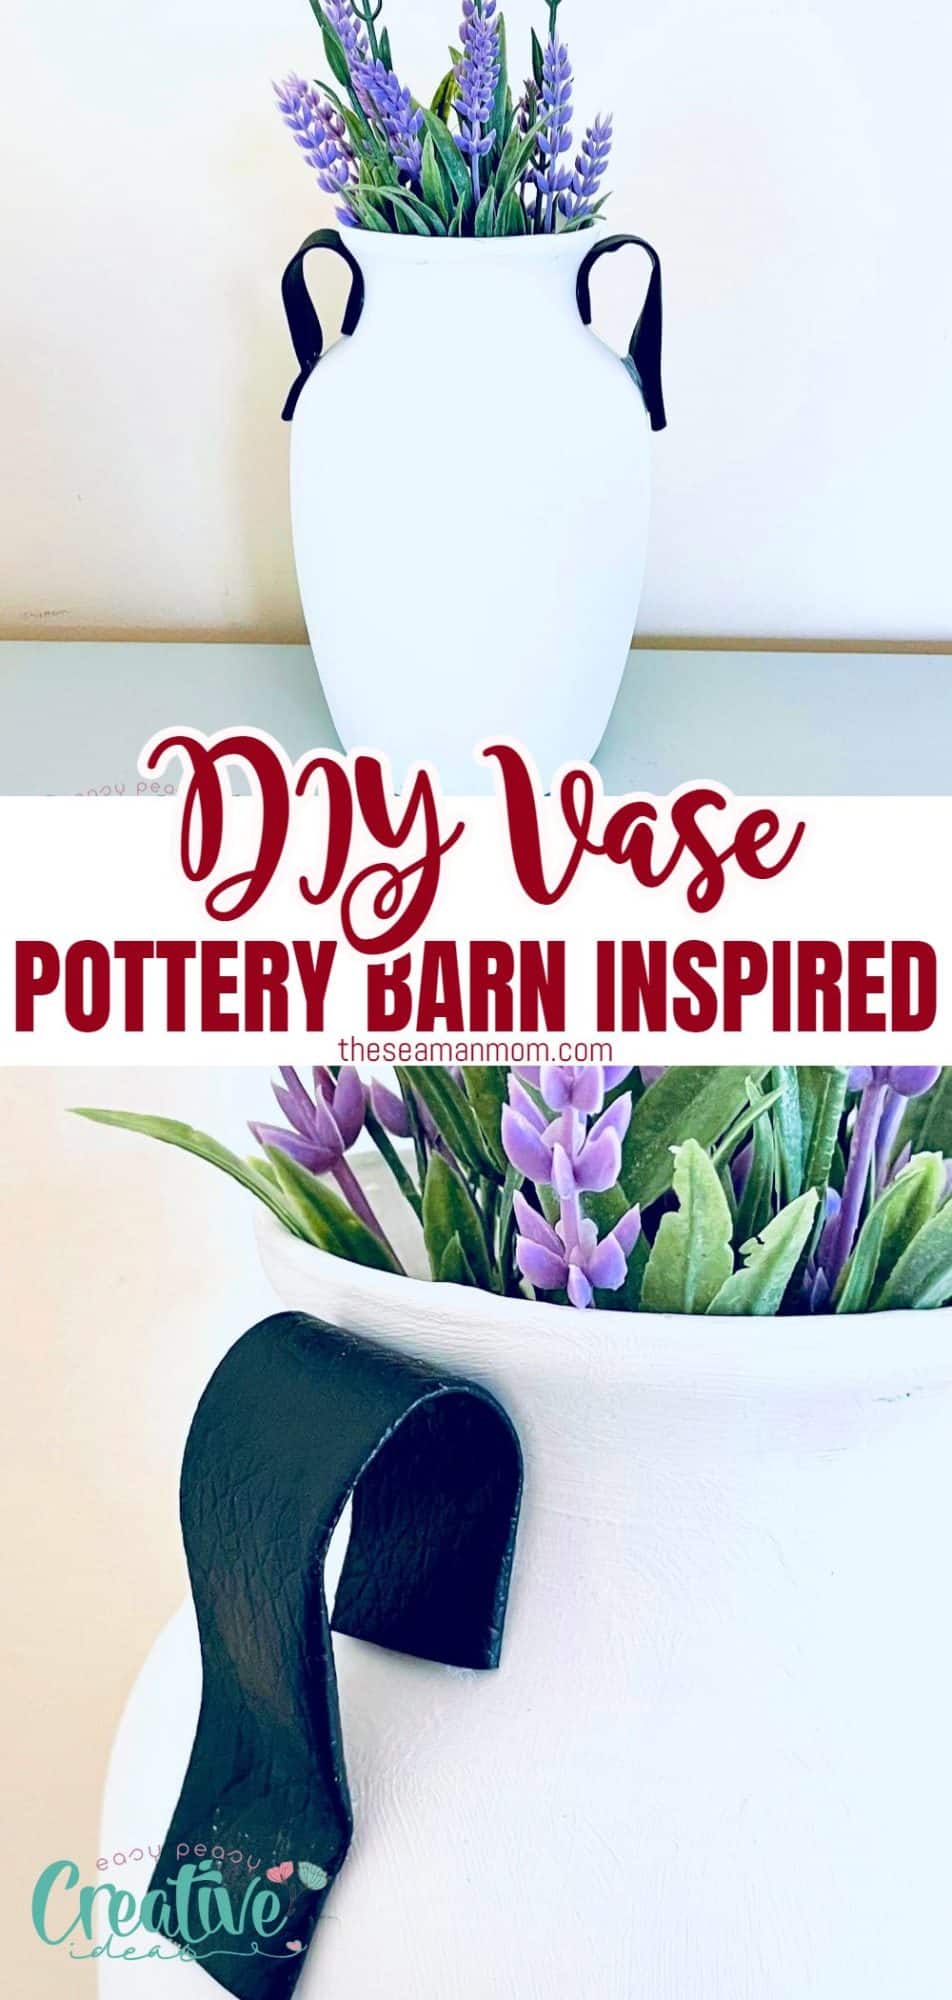
Pottery Barn inspired DIY vase
Making your own vase is a great way to add a personal touch to your home décor. And, it’s easier than you might think! With just a few supplies from the dollar store, you can create a Pottery Barn-inspired vase in no time. So, what are you waiting for? Grab some supplies and get started on your very own DIY vase today!
DIY vase

Decorating your home with Pottery Barn finds is a great way to add classic décor to any room. But filling your home with decorations from Pottery Barn isn’t exactly budget-friendly. Instead of breaking your budget to decorate your house, why not make your own home décor? With the help of the thrift store and a few simple craft supplies, you can create your own Pottery Barn inspired vase for the fraction of the cost of the real thing.
This simple craft is a great way to infuse some new life into old vases, or to create something new from scratch. And, the best part is that it only takes a few minutes to make and it’s so easy, even kids can make one (smaller kids will need supervision)! So, if you’re looking for a quick and easy craft project that will leave your home looking chic and stylish, this DIY vase is the perfect inspiration for you.
Other vase tutorials you will love:
- Plastic bottle flower vase craft
- Adorable rain boot vase
- DIY pumpkin vase centerpiece
- Pastel Spring vase DIY
What materials do you need to make a vase?
Making your own Pottery Barn décor at home doesn’t have to be difficult or expensive. If you have the right supplies on hand, you can easily transform budget décor items from the dollar store into beautiful decorations that look expensive.
To make your own Pottery Barn inspired vase at home, you’ll need:
- Glass vase. The most important item you’ll need to make this rustic craft is a glass vase. I found the perfect vase at Dollar Tree, but you can use any clear glass vase for this simple craft idea. You can even use this DIY vase idea on glass containers, glass bottles or glass jars if you don’t have a vase or don’t want to purchase a new one (fiy mason jar vases look so darn cute!)
- Chalk paint. Give your glass vase a more rustic look with the help of chalk paint. In addition to adding a farmhouse feel to your jar, chalk paint is also a great option for painting glass because of its matte texture. The matte base allows the paint stick to the slick surface of the glass without streaking.
- Faux leather. After grabbing your vase from the dollar store, head to the craft aisle to get a piece of faux leather. I used black leather for the handles on my vase, but any color of leather will work depending on your own home’s décor.
In addition to these three basic supplies, you’ll also need a handful of crafting tools to put this DIY vase project together. A sharp pair of scissors is needed to cut the faux leather, along with a ruler to ensure each handle is the same length. You’ll also need a paintbrush to add the paint to the vase and a hot glue gun to put everything together.

What are some good tips for painting on glass?
To turn a plain dollar store vase into a rustic Pottery Barn knockoff, you’ll need to add some paint. But if you’ve ever tried to paint clear glass, you know that it can be difficult if you don’t know what you’re doing.
Before you start painting your Dollar Tree vase, make sure to check out these tips and tricks for painting on glass:
- Clean the glass. Some clear glass items come with a waxy coating on the outside to help reduce the appearance of fingerprints on the glass. While this coating is great for keeping your glassware clean, it’s not good for paint. Luckily, it’s easy to remove with a little bit of alcohol. Simply add some rubbing alcohol to a cotton ball or paper towel and rub the alcohol all over the outside of the glass. Allow the alcohol to dry – which will only take a few seconds – before painting your vase.
- Use the right paint brush. When painting, the type of brush you use is very important. To avoid streaks on your glass after the paint is dry, make sure you select a brush with soft bristles. It’s also a good idea to check the label on your brush to make sure it’s a good fit for painting on glass.
- Pick the right paint. In addition to using the right brush, it’s also important to pick the right paint. Chalk paint is a good option – especially if you’re hoping to get a rustic, matte look on your glass. For a smoother, glossier finish, try using enamel paint for glass or spray paint.
How do you get paint to stick to glass?
One of the most difficult things about painting glass is getting the paint to actually stick to the surface. If you don’t prepare properly, it’s easy for the paint to just slide right off the glass – no matter how many coats you try to apply.
Luckily, there are a few simple tips and tricks you can use to get the paint to stick to your glass vase:
- Start with a clean surface. As I mentioned before, it’s important to clean the glass before you start painting. But beyond just removing the wax coating, you also need to make sure the glass is free of any dust or dirt. Otherwise, the paint won’t have a smooth surface to adhere to.
- Use a primer. A good primer will help the paint stick to the glass and also provide a smooth surface for the paint to glide onto. If you’re using chalk paint, there’s no need to worry about a primer since most brands of chalk paint come with a built-in primer. But if you’re using a different type of paint, make sure to select a primer that’s specifically designed for use on glass.
- Rough up the surface. If you’re still having trouble getting the paint to stick to your vase, try roughening up the surface of the glass with sandpaper. Just make sure to use a very fine grit sandpaper so you don’t damage the glass. Once you’ve roughed up the surface, wipe away any dust with a damp cloth and then start painting.
Do I need to seal my painted glass vase?
If you want your paint job to last, it’s a good idea to seal your vase with a clear sealant. This will help protect the paint from scratches and wear and tear. You can find clear sealants at most craft stores or online. Just make sure to read the instructions on the bottle before applying so you know how long you need to wait before using your vase.
How long does it take for paint to dry on glass?
The amount of time it takes for the paint to dry on your vase will depend on the type of paint you’re using. If you’re using chalk paint, it should only take about 30 minutes to an hour for the paint to dry. But if you’re using a different type of paint, like spray paint, it’s a good idea to wait 24 hours before using your vase.
Can I bake my painted glass vase?
Some types of paint, like enamel paint, need to be heat-cured in order to set properly. This means you can actually bake your vase in the oven to help the paint set. Just make sure to read the instructions on your paint to see if it needs to be heat-cured. If it does, you’ll need to bake the vase at a low temperature for about 30 minutes.
What type of paint should I use if I want a rustic/vintage look?
If you want your vase to have a rustic, distressed look, then chalk paint is the way to go. Chalk paint comes in a variety of colors, so you can pick the perfect shade to match your décor. And the best part is that chalk paint is very easy to distress once it’s dry. Just rub a piece of sandpaper over the paint to create the perfect rustic look.
What is the best way to distress chalk paint?
As I mentioned before, one of the great things about chalk paint is that it’s very easy to distress. For a quick and simple distressed look, just rub a piece of sandpaper over the paint. If you want a more gradual distressed look, use a wet cloth to rub off some of the paint.
What are some good tips for cutting faux leather?
After you’ve picked out the perfect paint and brush, it’s time to start cutting your faux leather for the handles. Adding handles to your Pottery Barn inspired vase is a great way to add a high-end look to your DIY décor. If you’re not familiar with working with faux leather, don’t worry – it’s easy to cut and glue. Just follow these simple tips:
Use a sharp blade. When cutting faux leather, it’s important to use a sharp blade. A dull blade will cause the leather to fray, making it more difficult to work with.
- Use a ruler. Make sure each handle is the same size by measuring and cutting with a ruler. This will give your vase a more polished look.
- Hot glue gun. The best way to attach the handles to the vase is with a hot glue gun. Hot glue will hold the leather in place without damaging the glass.
What is the best way to cut faux leather?
Adding faux leather handles to your Potty Barn inspired vase is a great way to add a high-end look to your DIY décor. But before you can create handles for your vase, you’ll need to cut the faux leather from Dollar Tree.
When it comes to cutting faux leather, there are a few different tools you can use, including:
- Rotary blade. The best way to cut your faux leather is using a rotary blade. This type of blade will give you the smoothest, cleanest cut on your leather fabric. Start by using a ruler to measure the correct size for your handles, then place the leather on a cutting mat to prevent damage to your work surface. Cut along the length and width of the leather using the rotary tool to create a clean line.
- Cricut. Another simple option for cutting your faux leather is to use your Cricut. To cut faux leather, you’ll need a deep cut blade. After installing the blade, use Design Space to cut the fabric into strips for your handles.
- Scissors. Since faux leather is thick, you’ll need a very sharp pair of scissors to cut through it. But even if your scissors are extremely sharp, getting a smooth, even line using this tool isn’t guaranteed. That’s why it’s not the best option for cutting your faux leather and should only be used if no other options are available.
How do I measure for handles on my vase?
The first step in adding handles to your vase is to measure for the placement of the holes. You’ll want to make sure the holes are evenly spaced and large enough for the hands to fit through. To measure for the placement of the holes, use a tape measure or ruler and mark the spot with a pencil.
The best way to attach your handles is with hot glue. Hot glue will hold the leather in place without damaging the glass.
Can I use real leather instead of faux leather?
Yes, you can use real leather instead of faux leather. Just follow the same steps for cutting and attaching the handles. Real leather is more expensive than faux leather, but it will give your vase a luxurious look and feel.
How do I clean my painted glass vase?
To clean your painted glass vase, simply wipe it down with a damp cloth. If the paint is starting to wear off or you want to change the color of your vase, you can repaint it using chalk paint. Just make sure to clean the vase thoroughly before painting.
What is the best way to store my painted glass vase?
To store your painted glass vase, simply wrap it in a soft cloth and place it in a safe spot. Painted glass is fragile, so be sure to handle it with care. When you’re ready to use it again, just wipe it down with a damp cloth to clean it. If you’re using your DIY vase for gifts, then you can add a bow or ribbon around the neck of the vase for an extra special touch.
What are some ways to decorate my DIY flower vase?
There are endless ways to decorate your homemade vases. Get creative and add some personal touches to make it your own. Here are a few ideas to get you started:
- Wrap the vase in twine, yarn or ribbon for a rustic look.
- Add a monogrammed sticker or label for a personal touch.
- Paint the vase with chalkboard paint and use it to write messages or draw designs.
- Fill the vase with fresh cut flowers or greenery for a pop of color. You can even use it as a centerpiece for holidays. or weddings.
- Decorate the vase with beads, sequins, glitter, lace, gold leaf or other embellishments.
- Use the vase as a candle holder and add a scented candle inside for a relaxing ambiance.
- If you’re using your DIY vase for gifts, then you can add a bow or ribbon around the neck of the vase for an extra special touch.
No matter how you decide to decorate your vase, it’s sure to add personality and charm to your home décor.
With these tips, you should have no problem painting a beautiful glass vase that looks like it came from Pottery Barn – without spending a fortune! Now that you know how to make a DIY vase, put your new skills to the test and make a vase for your home!
How do you make a flower vase step by step?
Making a flower vase is a simple process that only requires a few supplies. To make your own dollar tree vase DIY, follow these simple steps:
- Start by applying 2 or 3 coats of the white chalk paint
- While that is drying, cut (2) 3 inch long and 3 inch wide strips of the faux leather
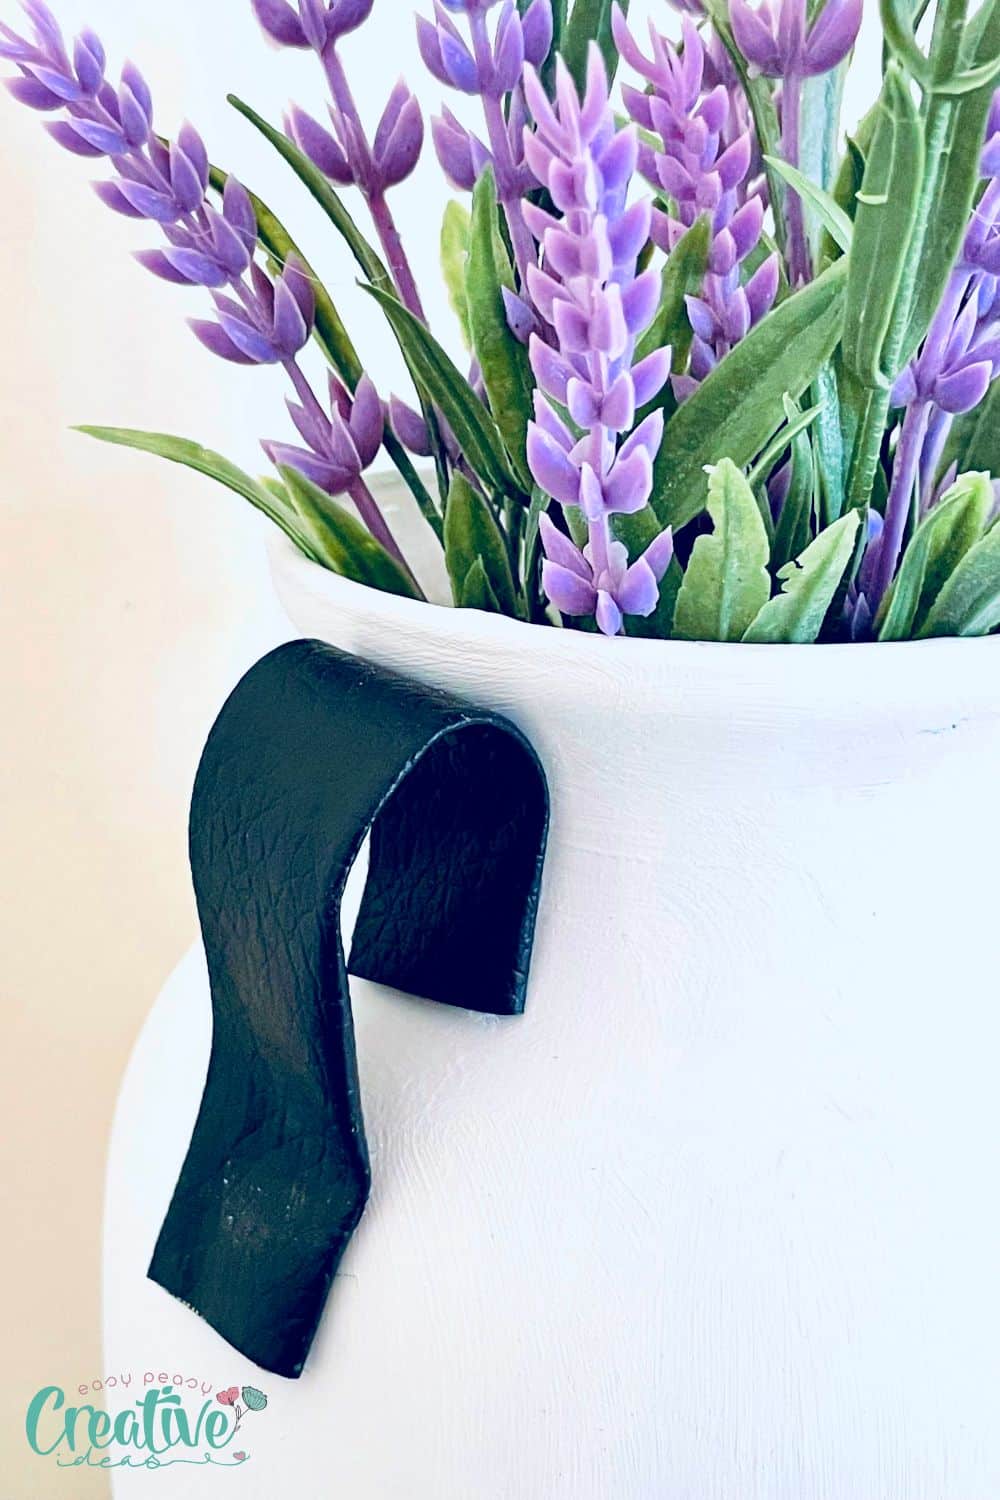
- Fold one inch over the top and fold the remaining inch on top of that. Using the hot glue gun secure this together.
- Once the vase is completely dry using the hot glue gun add a dab of hot glue in the middle of the upper curved section of the pot. Place the faux leather on top. On the bottom section of the vase add some hot glue and fold the faux leather piece back so that it creates the curved handle piece. Repeat this on the other side. Be careful to not carry the vase by the faux leather as it is just for decoration.
Note: if you don’t have hot glue you can use mod podge. But keep in mind the handles will be strictly for decoration purposes, you won’t be able to grab the vase by the handles. Even if you use hot glue, I would recommend caution when carrying the vase by the handles.
Making your own Pottery Barn inspired vase is a great way to add a high-end look to your home décor without spending a lot of money. By following the steps above, you can easily create a beautiful vase that will hold flowers or other decorations. So get creative and enjoy personalizing your own vase! If you have other DIY flower vase ideas, I would love to know them so please leave a comment below.
Thanks for reading! If you enjoyed this tutorial, be sure to subscribe to my blog for more great DIY projects.
Pin to save for later
Print the craft card
DIY vase Pottery Barn inspired
Tools
- scissors
- Paint brush
- ruler
Instructions
- Start by applying 2 or 3 coats of the white chalk paint
- While that is drying, cut two 3 inch long and 3 inch wide strips of the faux leather
- Fold one inch over the top and fold the remaining inch on top of that. Using the hot glue gun secure this together.
- Once the vase is completely dry using the hot glue gun add a dab of hot glue in the middle of the upper curved section of the pot. Place the faux leather on top. On the bottom section of the vase add some hot glue and fold the faux leather piece back so that it creates the curved handle piece. Repeat this on the other side. Be careful to not carry the vase by the faux leather as it is just for decoration.
Article may contain Amazon & affiliate links. As an Amazon Associate I earn from qualifying purchases at no additional cost to you.
ABOUT PETRO
Hi, I’m Petro, author and founder of Easy Peasy Creative Ideas. Sewist, crafter, avid DIY-er, foodie, photographer, homemaker and mommy to one. I’m an expert at coming up with quick, clever sewing tips, recycling crafts and simple, easy recipes! You can find my ideas featured in reputable publications such as Country Living, Good House Keeping, Yahoo News, WikiHow, Shutterfly, Parade, Brit & Co and more. Thanks for stopping by and hope you’ll stay for a while, get to know me better and come back another time. Stick around for real fun projects! Read more…