

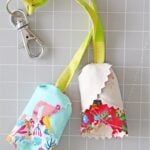
Sew easy scrappy fabric tulips
Learn how to sew beautiful fabric tulips with this super easy step-by-step guide! These charming creations are perfect for keychains, decorative accessories, or unique embellishments for bags, gifts, or home décor. With just a few simple materials and a bit of creativity, you can craft these lovely tulips to add a personal, handmade touch to anything.
Fabric tulips are a charming and versatile craft that lets you combine creativity with practicality. These scrappy tulips are a delightful way to upcycle fabric scraps while creating something special.
Fabric tulips are simple and easy to sew, and perfect for using up leftover fabric scraps. And what makes them even better? They never wilt and always look fresh! You can adapt them to fit any style or occasion, and they’re a great way to experiment with colors and patterns. Not only are they beginner-friendly, but they also allow for endless creativity and personalization.
Whether you’re making tulips to accessorize a bag, decorate a room, or gift to a loved one, fabric tulips are a timeless craft that stands out for its simplicity and elegance.
How to make fabric tulips
Materials:
- Fabric Scraps: Choose fabrics with fun patterns or solid colors to achieve the look you want. Cotton works wonderfully for its flexibility. Use contrasting colors for the back and the front of the tulips.
- Matching Thread: Select a thread color that blends well or contrasts boldly with your fabric for added flair.
Equipment:
- Round Object: Use a jar lid, small bowl, a coaster, or anything circular to trace your pattern. I used a 4 inch coaster.
- Fabric Marker: Helps mark cutting lines without staining the fabric.
- Scissors: For precise cutting of your patterns.
- Pins: Keep your fabric in place while sewing.
- Pressing Iron: Essential for wrinkles and creases.
- Pinking Shears: Prevent fraying by creating zigzag edges on the fabric.
- Hand Sewing Needle: For securing details and reinforcing the structure.
- Key Ring/Carabiner: If making tulip keychains.
Step by step instructions:
Preparations:
- Pre-wash your fabric scraps to prevent shrinkage.
- Iron the fabric to remove wrinkles and make cutting easier.
Making:
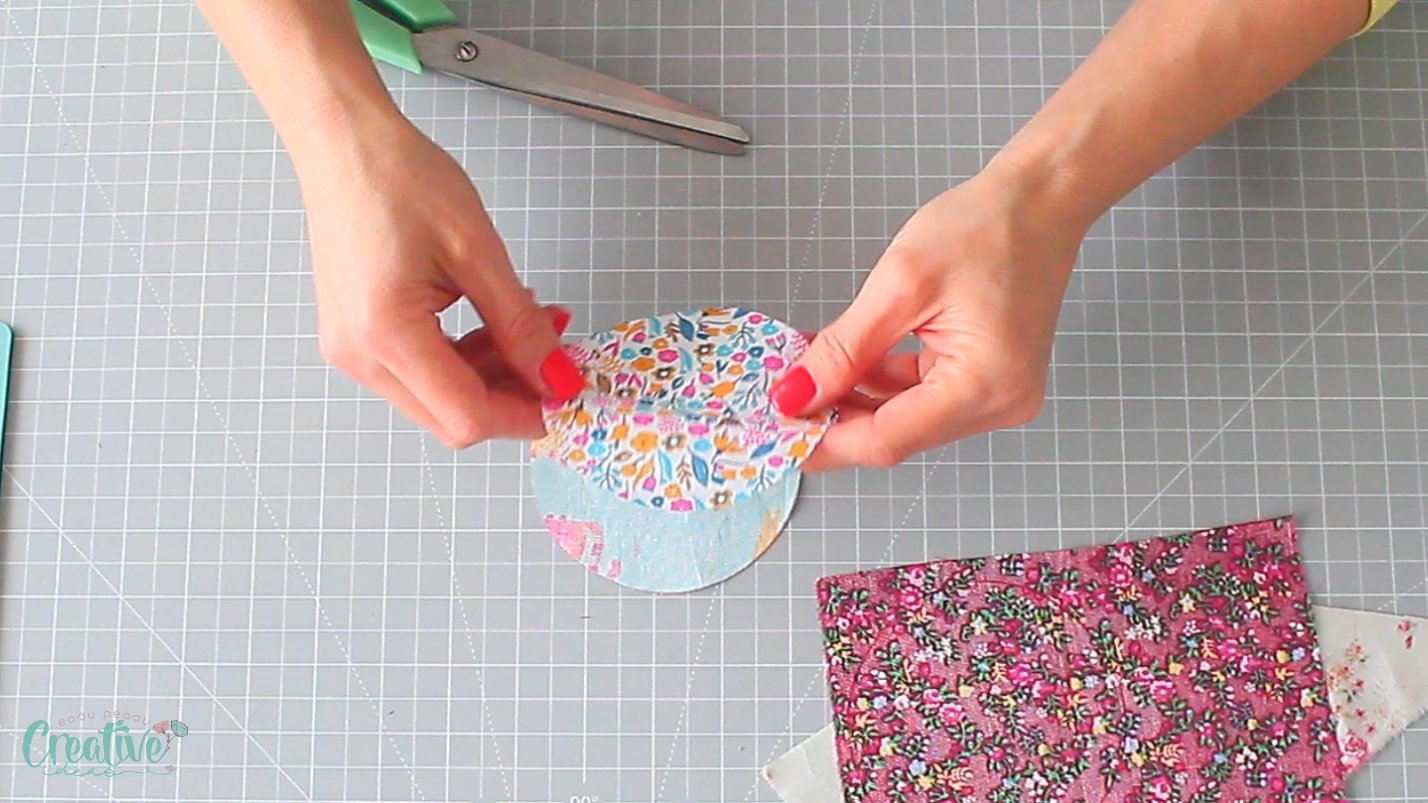
- Use your round object to trace 4 circles on the fabric with a fabric marker, then cut them out neatly.
- Place two fabric circles wrong sides together and pin them in place. Repeat with the other two circles.
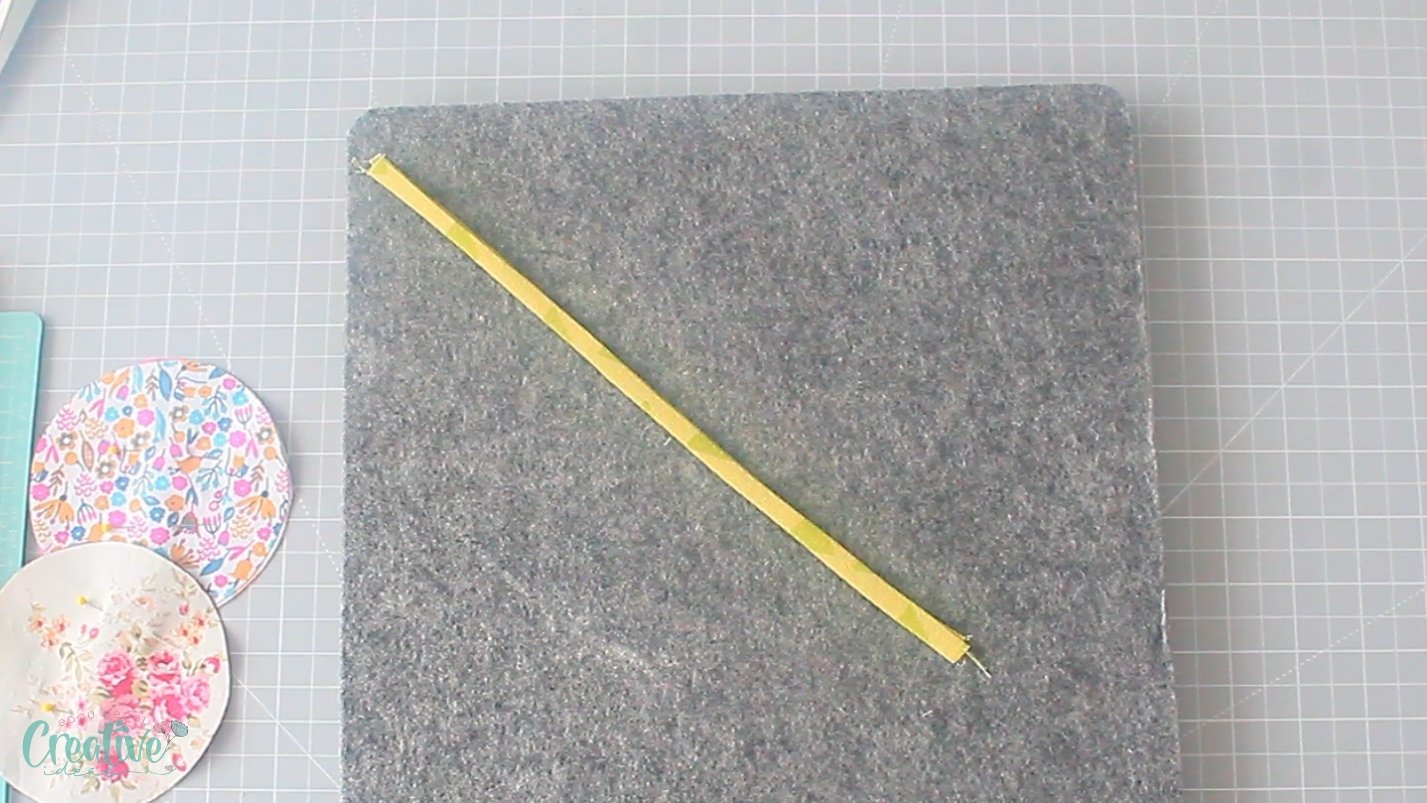
- To make the strap, cut a long fabric strip (9 inches by 1 inch), fold it in half, and press. Fold each half inward and press again.
- Close the strap and press.
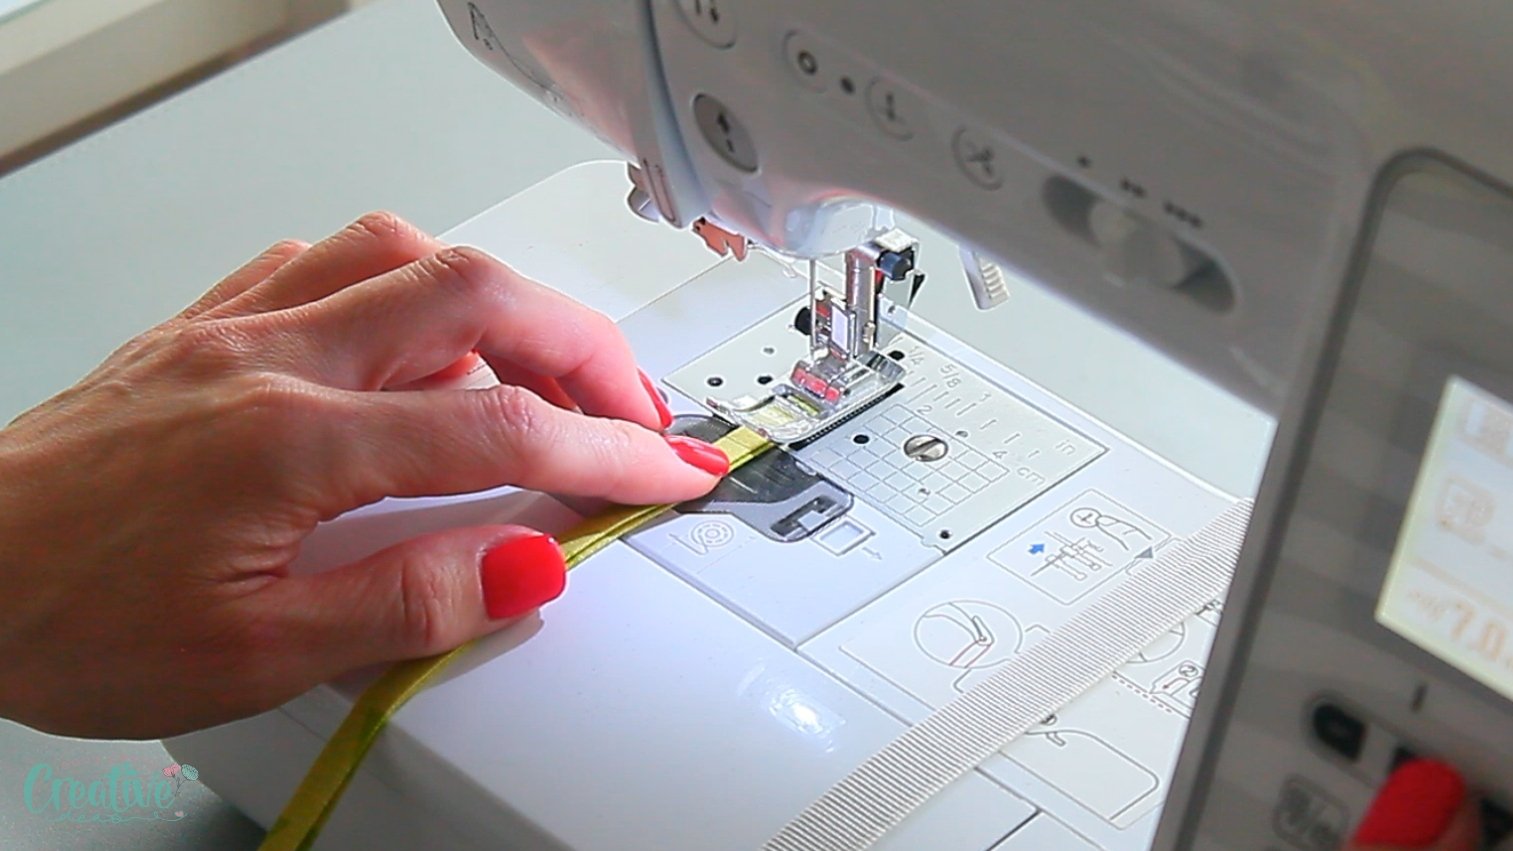
- Then sew along the edge to secure it.
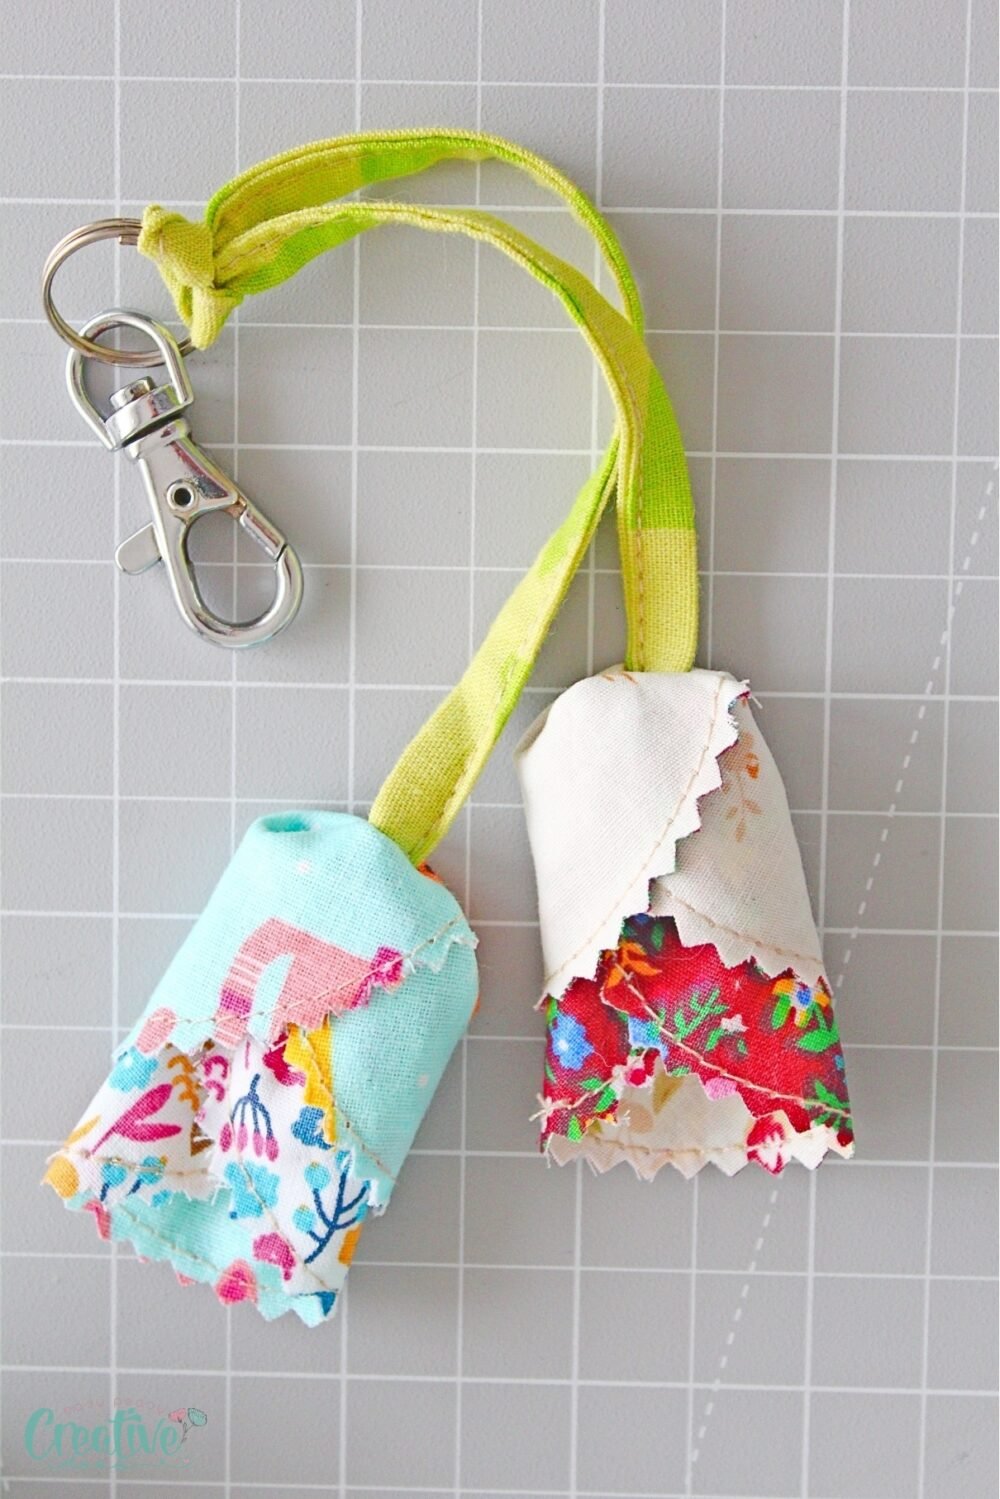
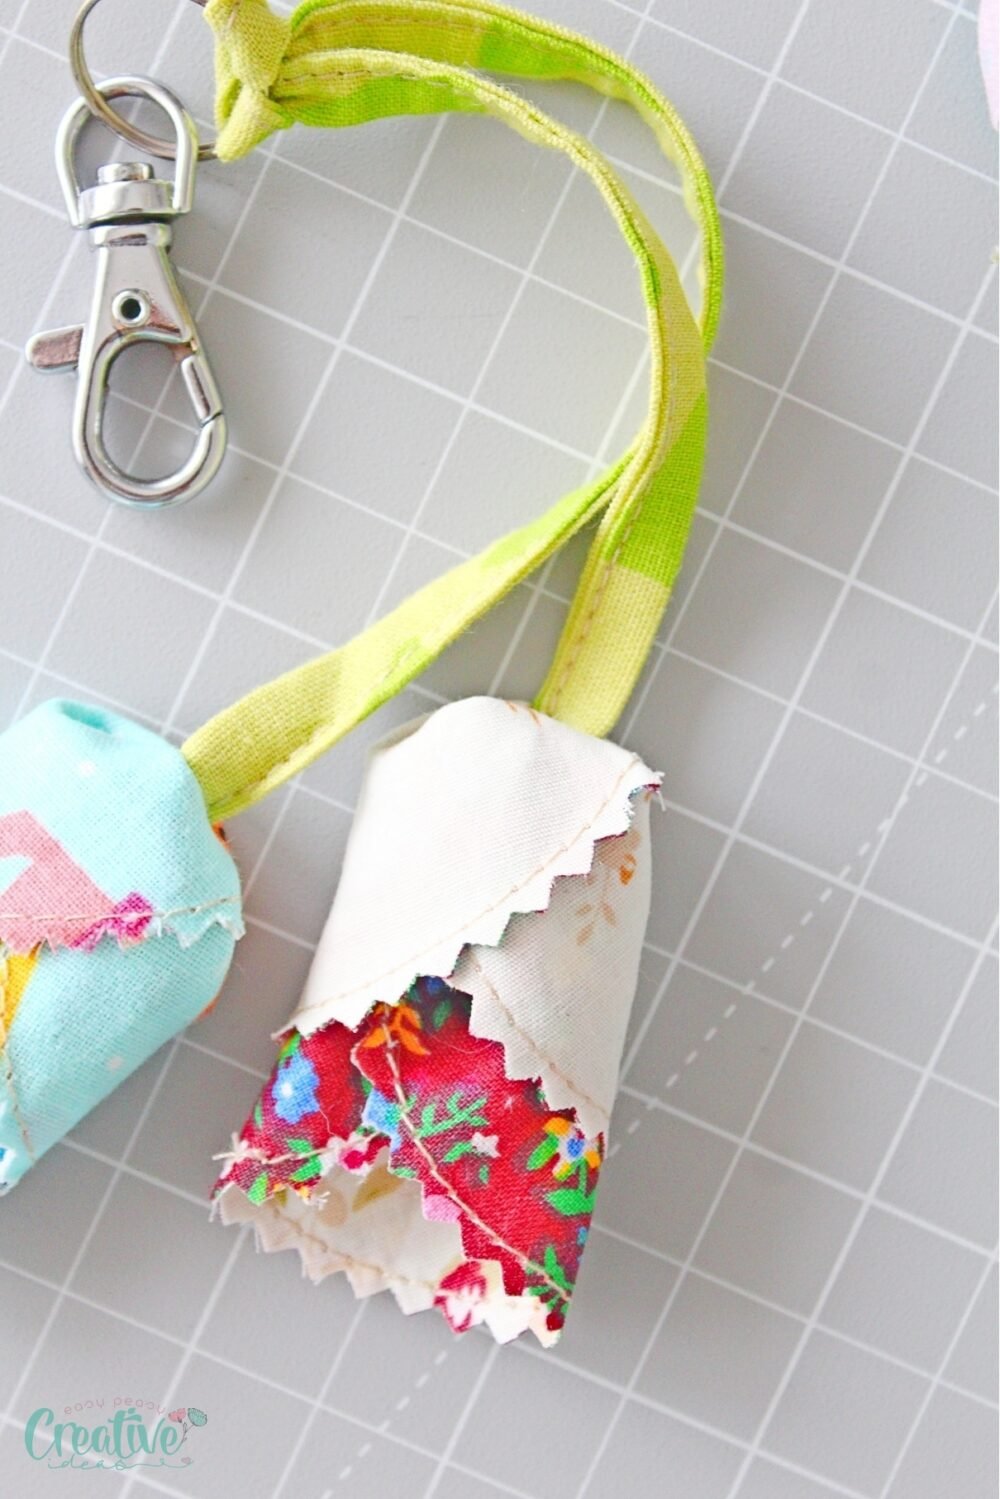
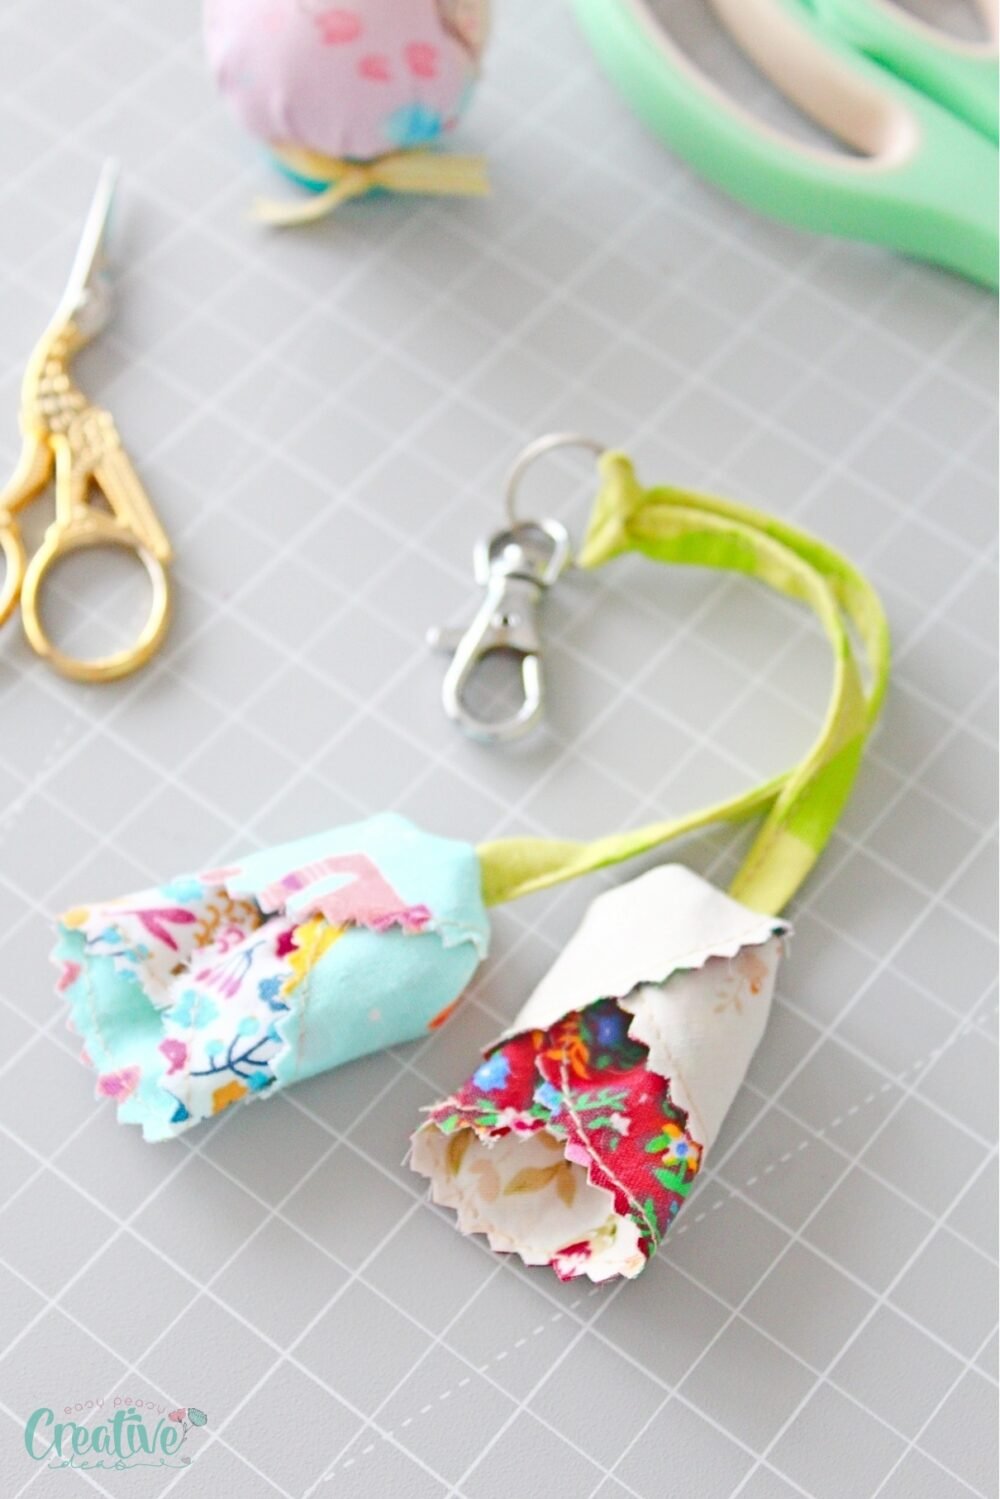
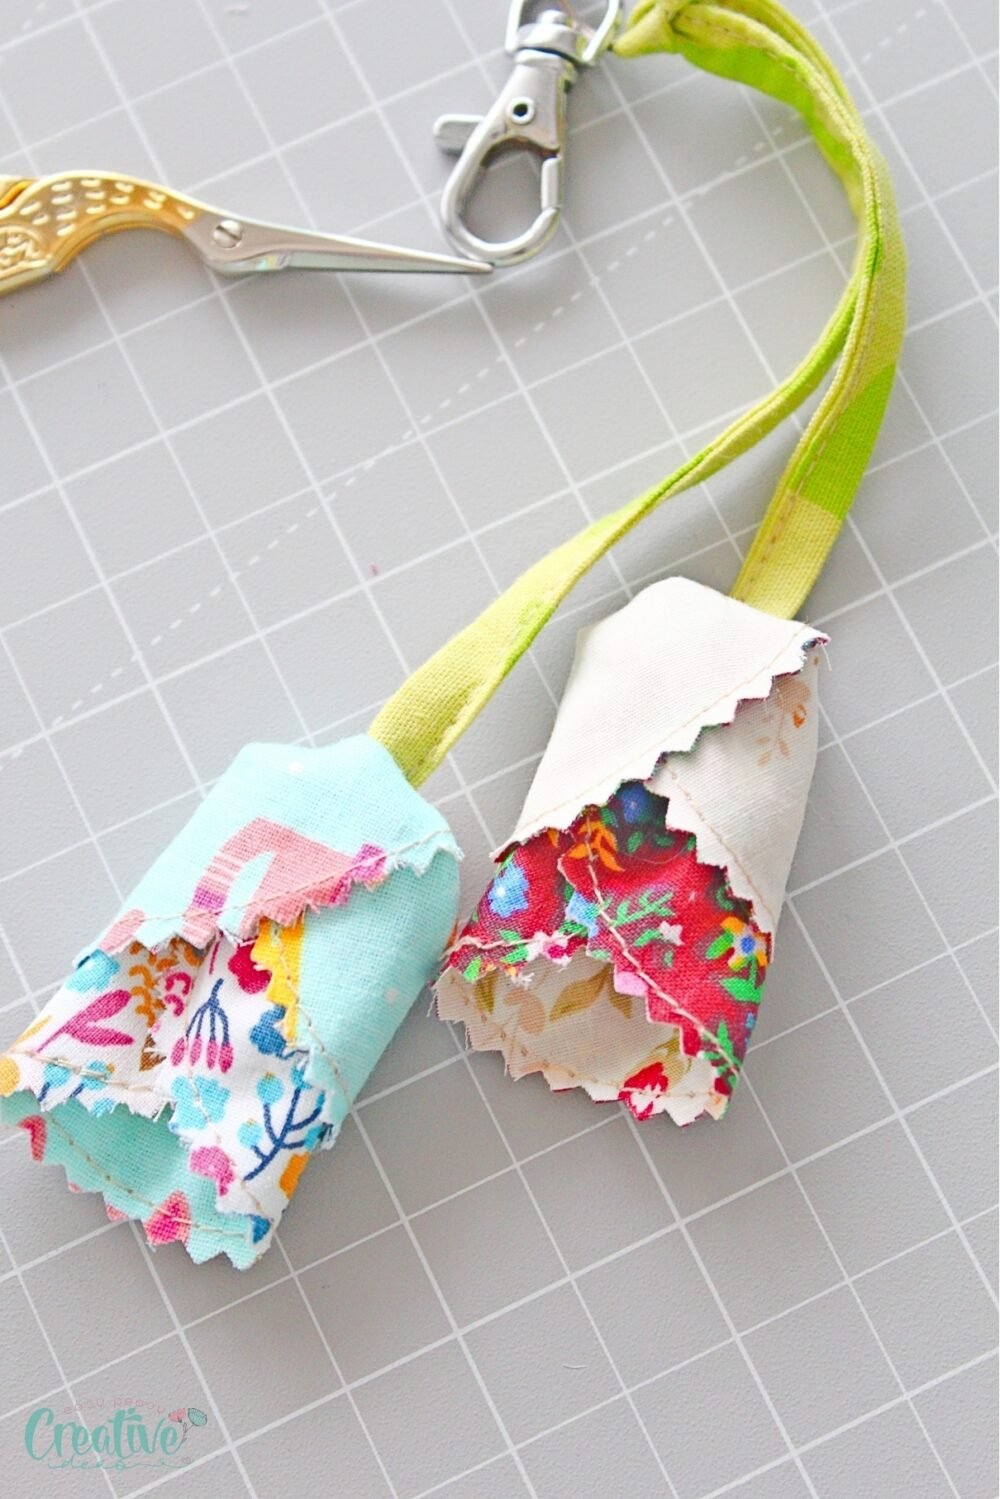
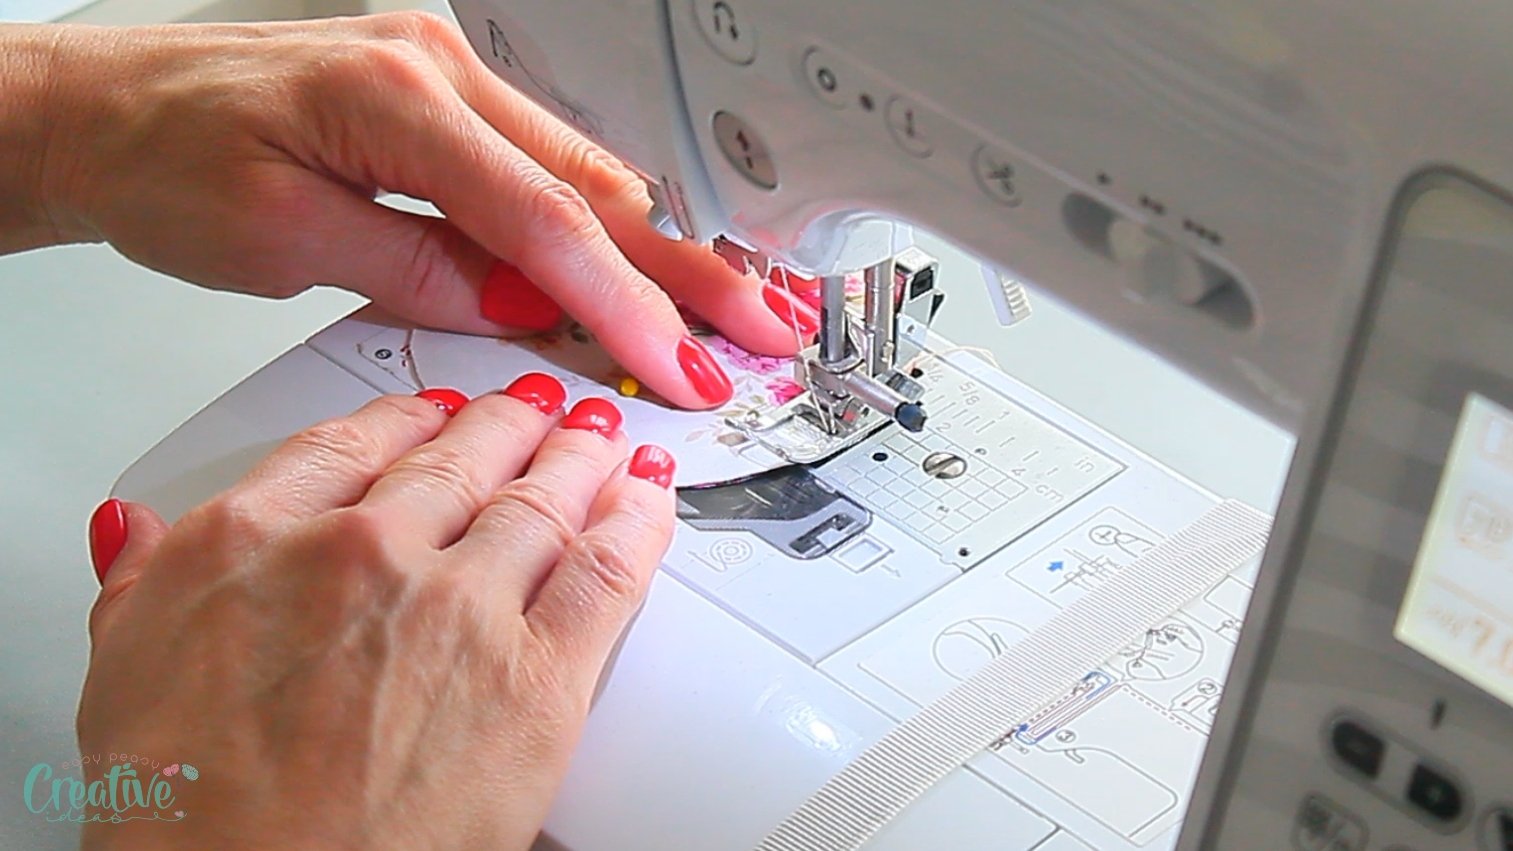
- Sew the circles together with a 1/4″ seam allowance.
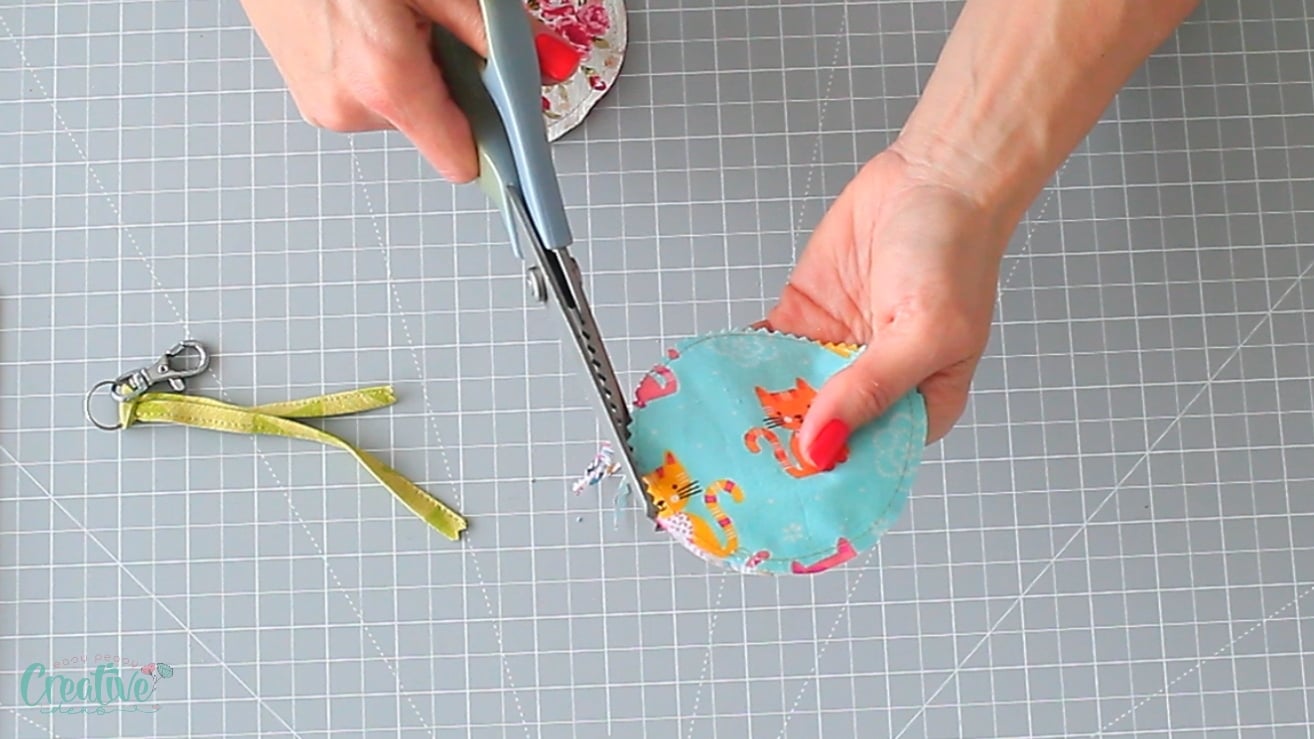
- Use pinking shears to trim the seams and the ends of the strip.
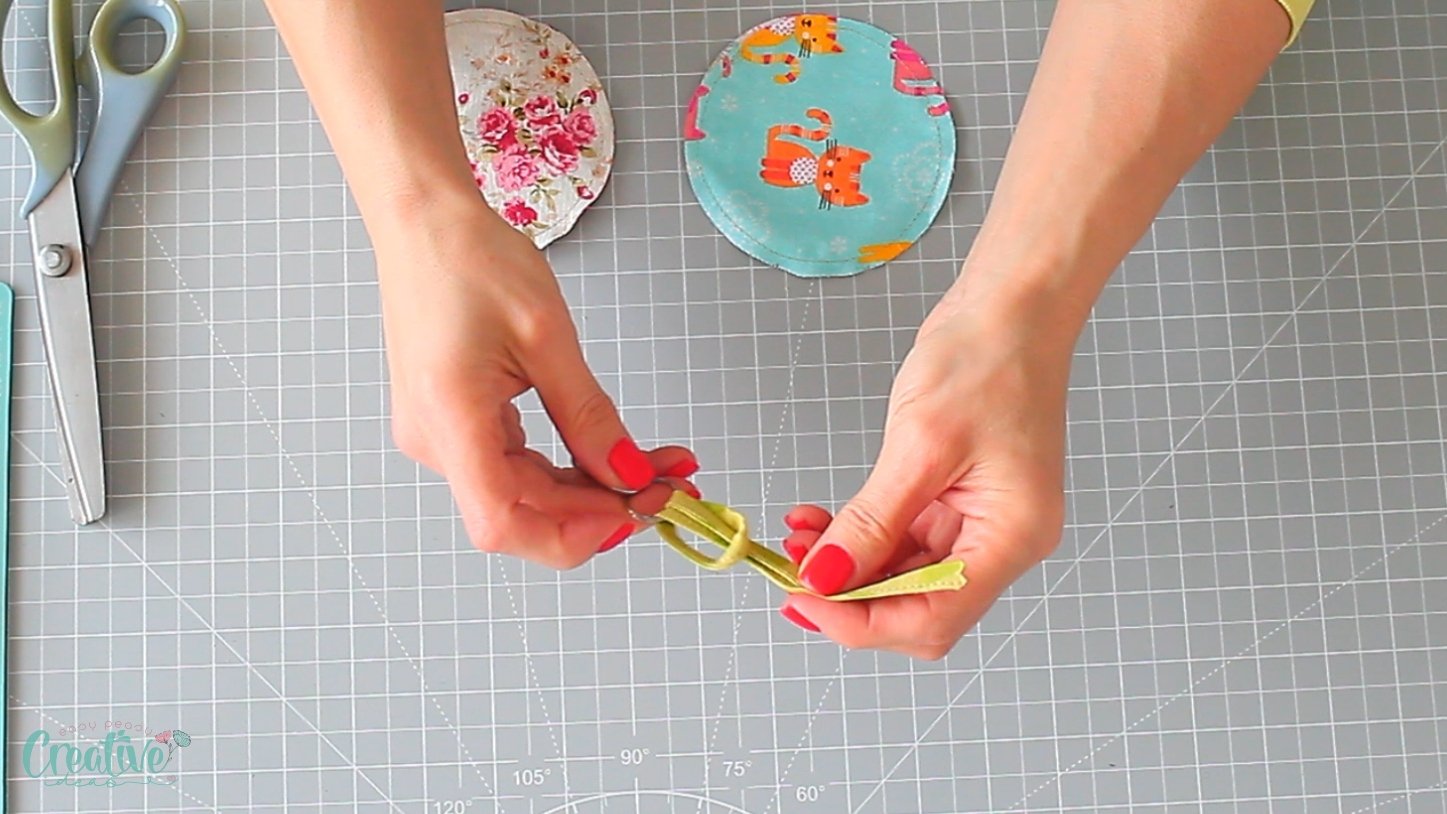
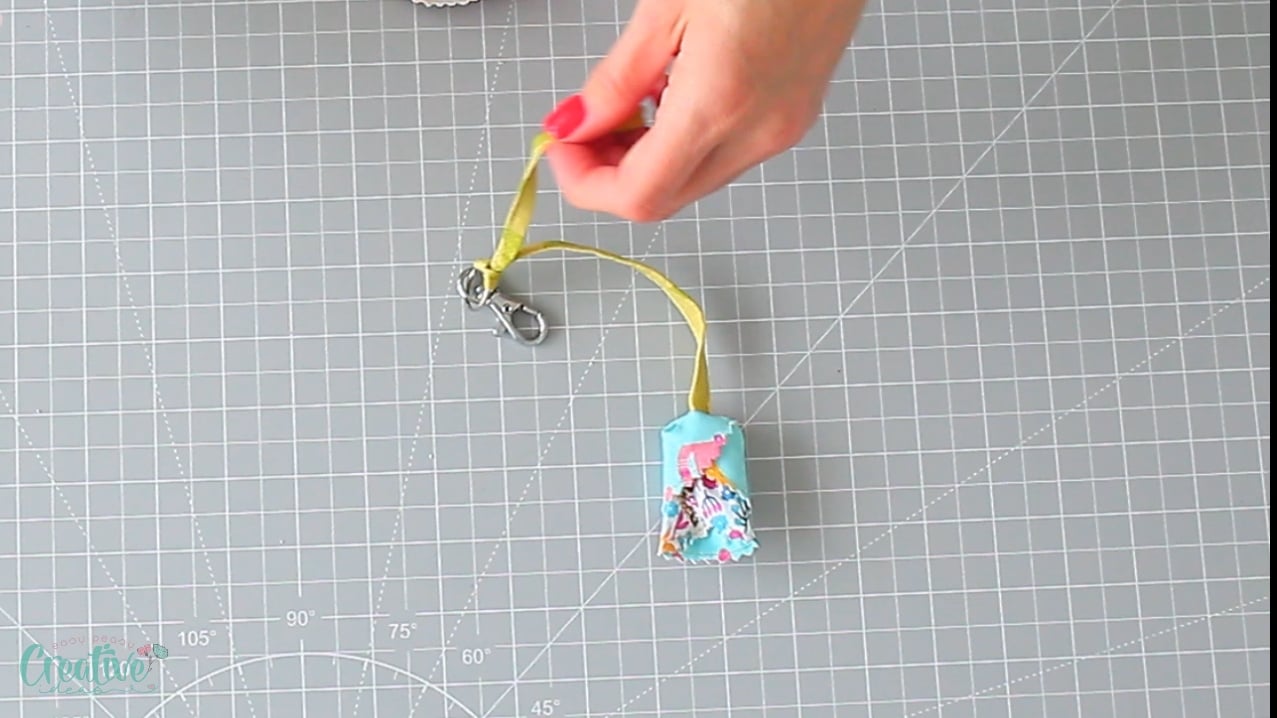
- If making a keychain, tie the strip around a key ring or carabiner.
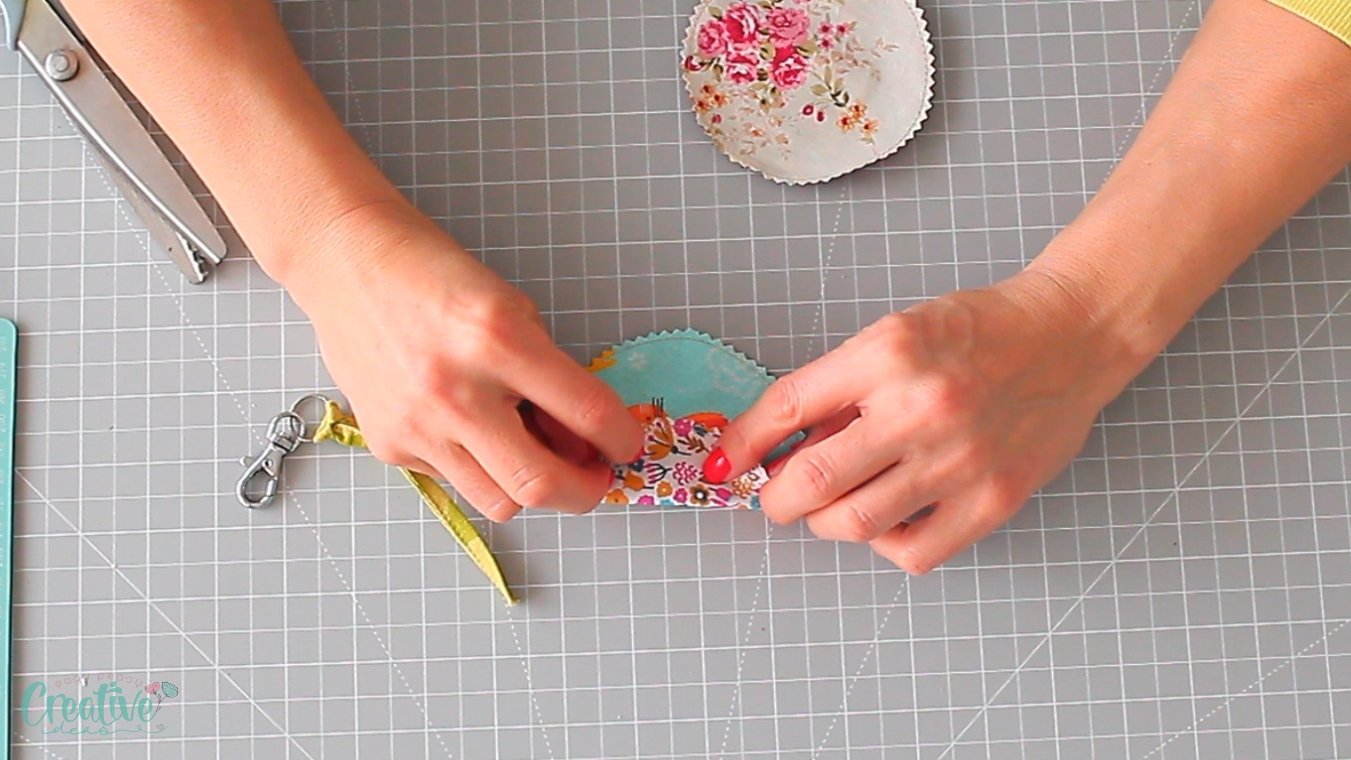
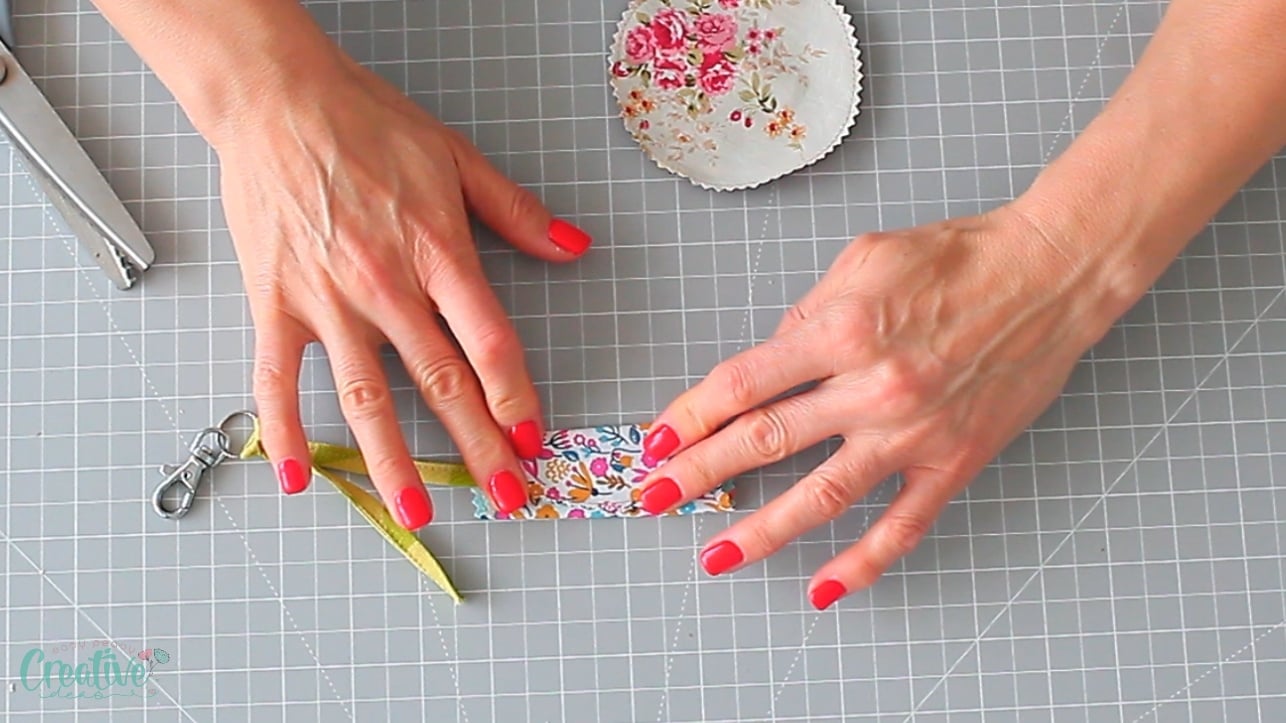
- Attach one end of the strip to the center of the circle fabric and sew it.
- Fold the circle over the strip’s middle once
- Then fold the other side.
- Sew the folds in place.
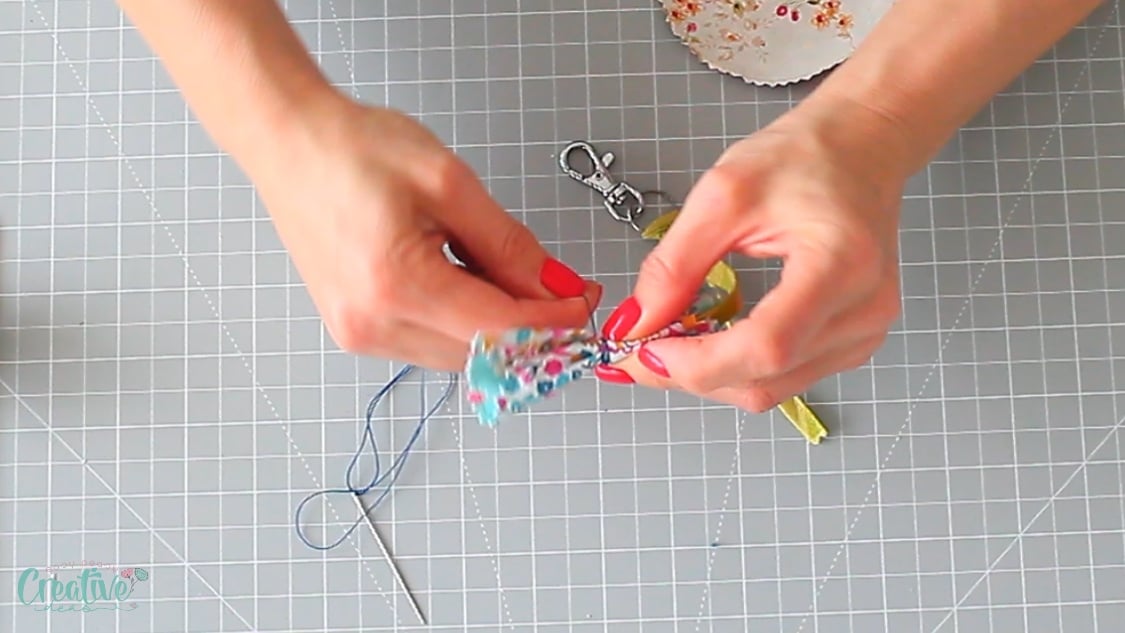
- Secure and tie the middle with thread using a hand needle.
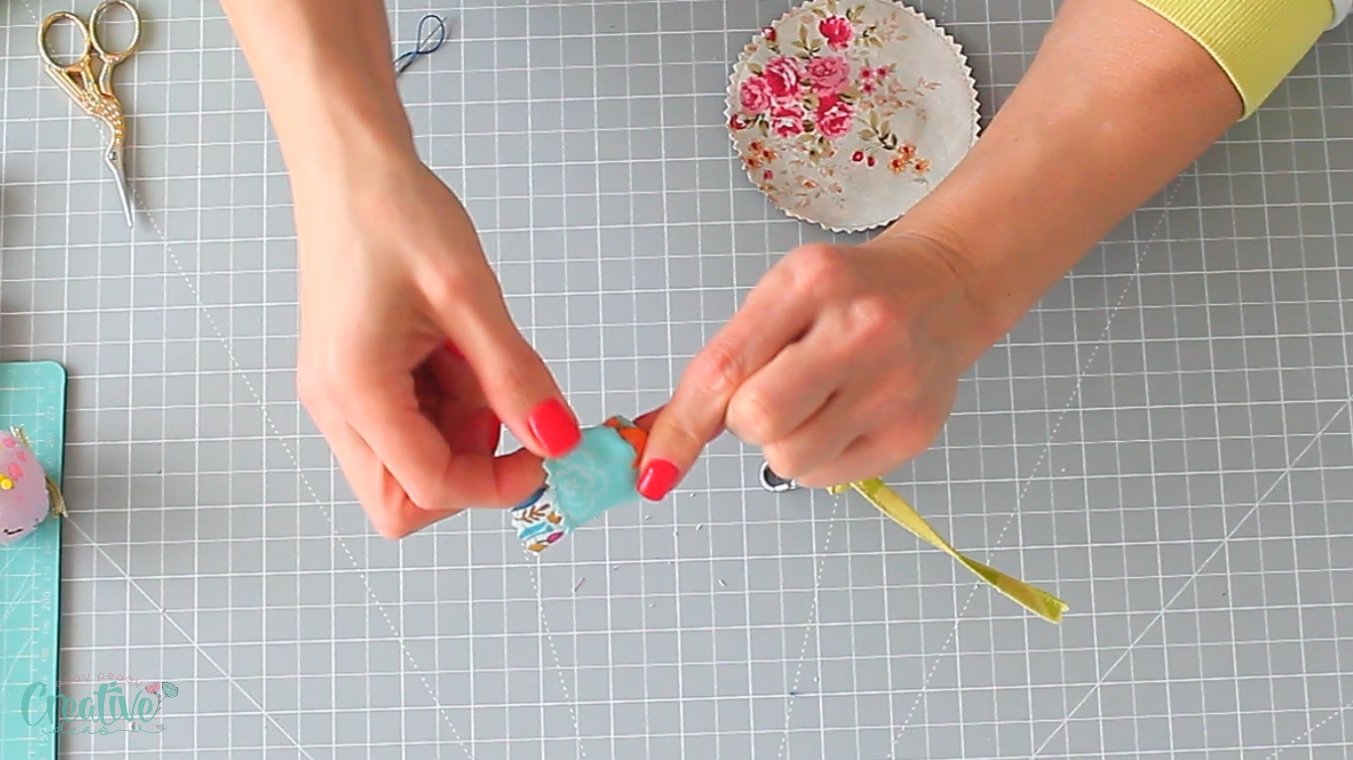
- Fold one of the fabric ends to shape into tulip petals.
- Repeat with the second circle to create a second tulip.
Tips:
- Use contrasting thread for a decorative stitch that adds character to your tulips.
- Experiment with different fabrics like linen or silk for a unique texture and finish.
- Make multiple tulips in different sizes to create a bouquet-style decoration.
Project Variations:
- Tulip Bouquet: Skip sewing the strap then attach several tulips to wooden skewers wrapped in green fabric to create a realistic bouquet.
- Fabric Tulip Garland: String multiple tulips together to create garlands for parties or home décor.
- Tulip Brooches: Add a pin backing to turn your fabric tulips into wearable accessories.
Frequently Asked Questions:
How long does it take to make a fabric tulip?
It typically takes about 10 minutes per tulip, depending on your skill level.
Can I hand-sew instead of using a machine?
Absolutely! This project is perfect for hand-sewing if you don’t have access to a sewing machine.
What fabrics work best for tulips?
Cotton and linen are great options because they hold their shape well and they are easy to sew.
Caring for Your Fabric Tulips:
- Spot clean with a damp cloth if necessary.
- Avoid machine washing to preserve their shape. If necessary, wash them using a small brush and air dry. Iron them with a mini iron.
- Keep them away from direct sunlight to prevent fading.
More sewing ideas you’ll enjoy:
Size Guide:
These tulips are about 2 inches by 1 inch. You can easily scale your fabric tulips by using larger or smaller circles. For tiny keychain tulips, use a 3-inch circle. They’re harder to sew but they’re so adorable, it’s worth it. For larger decorative tulips, go up to 6 inches. If doing larger than this you might want to use interfacing to make the petals stiffer.
Ready to create your own fabric tulips? Grab your fabric scraps and get started today! Don’t forget to sign up for our newsletter for more fun sewing projects and ideas like this.
Happy sewing!
Fabric tulips to sew
Materials
- Fabric Scraps
- Matching Thread
Tools
- Round Object
- scissors
- pressing iron
- Hand Sewing Needle
- Key Ring/Carabiner
Instructions
- Pre-wash your fabric scraps to prevent shrinkage.
- Iron the fabric to remove wrinkles and make cutting easier.
- Use your round object to trace 4 circles on the fabric with a fabric marker, then cut them out neatly.

- Place two fabric circles wrong sides together and pin them in place. Repeat with the other two circles.

- To make the strap, cut a long fabric strip (9 inches by 1 inch), fold it in half, and press. Fold each half inward and press again. Close the strap and press.

- Then sew along the edge to secure it.

- Sew the circles together with a 1/4" seam allowance.
- Use pinking shears to trim the seams and the ends of the strip.

- If making a keychain, tie the strip around a key ring or carabiner.

- Attach one end of the strip to the center of the circle fabric and sew it.

- Fold the circle over the strip’s middle once

- Then fold the other side.

- Sew the folds in place through the middle.

- Secure and tie the middle with thread using a hand needle.

- Fold one of the fabric ends over the middle to shape into tulip petals.

- Repeat with the second circle to create a second tulip.


Video
Article may contain Amazon & affiliate links. As an Amazon Associate I earn from qualifying purchases at no additional cost to you.
ABOUT PETRO
Hi, I’m Petro, author and founder of Easy Peasy Creative Ideas. Sewist, crafter, avid DIY-er, foodie, photographer, homemaker and mommy to one. I’m an expert at coming up with quick, clever sewing tips, recycling crafts and simple, easy recipes! You can find my ideas featured in reputable publications such as Country Living, Good House Keeping, Yahoo News, WikiHow, Shutterfly, Parade, Brit & Co and more. Thanks for stopping by and hope you’ll stay for a while, get to know me better and come back another time. Stick around for real fun projects! Read more…