

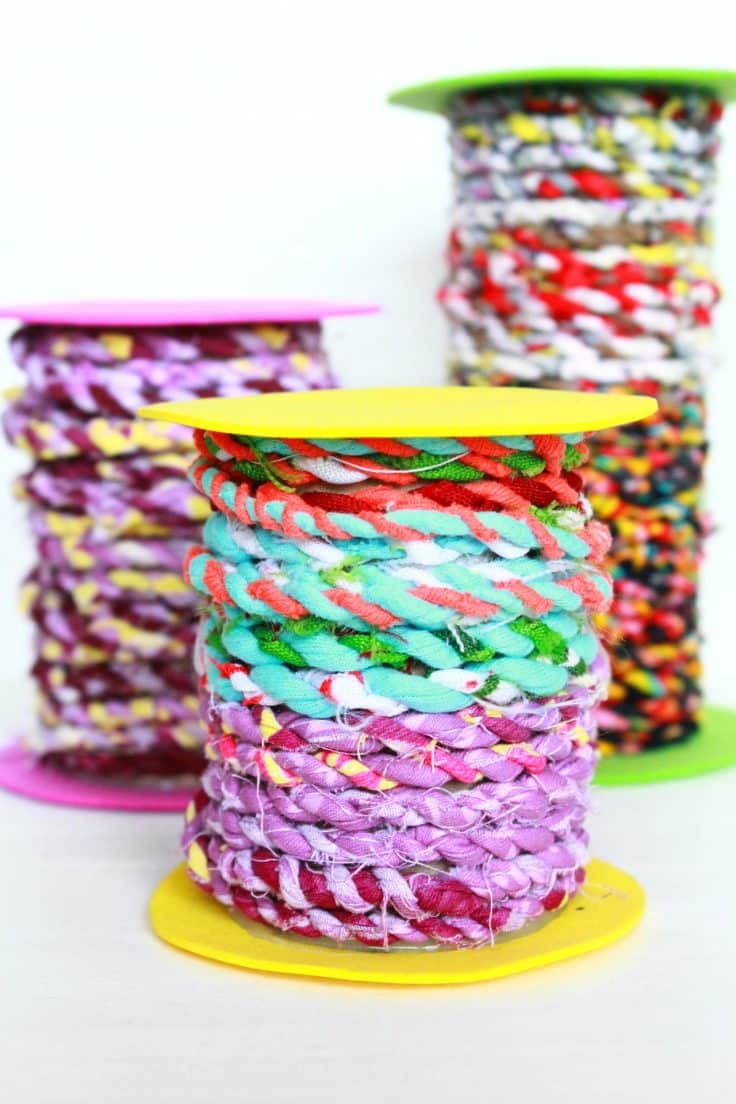
How to make Fabric Twine from scraps
Do you have an abundance of fabric scraps in your collection? Or perhaps you’re seeking enjoyable and fun scrap fabric projects? Take the opportunity to declutter your stash and put those cherished scraps to good use with this delightful fabric twine tutorial!
How to create Fabric twine
Hey, guys! Today I’ll be sharing a super fun project for all you sewing fans out there! I’m pretty sure you have an overabundance of fabric scraps, just as myself; and there’ve been many times when you thought about simply throwing them away because you couldn’t see anything good coming out of a big pile of fabric strips that are way too thin to use in sewing projects.
Well, you were wrong! Here I’ll show you how to make your own fabric twine so you can create tons of beautiful projects with all those scraps you’ve been saving for ages! Nothing goes to waste when it comes to fabric, right? And this scrap fabric twine project is perfect for this kind of scraps!
More scrap projects you might like:
- Chicken fabric weights
- Yoyo flowers
- DIY fabric bunting
- Lined zipper pouch
- Small lavender bags
- Reusable fabric bowl cover
- Quilted sewing mat with thread catcher
- Triangle pattern weights
- Wine glass coasters
- Fabric covered buttons
- Scrappy tulip keychain
But here’s a fair warning! Making twine or fabric yarn as some call it, can get pretty addictive and pretty soon you’ll find yourself thinking about turning your entire fabric stash into scraps. Resist the urge, don’t turn yourself into a fabric murderer, you’ll eventually get there without sacrificing your beautiful fabric! Plus making fabric twine takes time, like lots of it and meanwhile you can just go ahead with your other sewing projects and save all the resulting scraps.
I find that not many things are prettier than all different fabrics twisted and wrapped up together! I have a rug in my bathroom made out of t-shirt scraps, twisted and then waved together and I would love to make a replica but in a slightly different design.
Can I use different fabrics to make fabric twine?
In my experience, I found that using various fabrics yields satisfactory results. I was eager to make use of as many fabric scraps as possible within a limited timeframe, so I dove into my fabric stash without much consideration for the fabric types. My focus was mainly on the colors and weight of the fabrics.
For instance, instead of combining lightweight fabrics with medium-weight ones, I opted to use fabrics of similar weights. However, I did mix stretch fabrics with cottons or canvas. I also took care to consider the width of the fabric strips, using scraps that were of similar width.
And it turned out great! I was then able to sew my fabric twine into these beautiful trivets with no problems.
What are some examples of projects that can be made with fabric twine?
- Coasters
- Placemats
- Trivets
- Baskets/bins
- Rugs/mats
- Decorative garlands or banners
- Jewelry (bracelets, necklaces)
- Keychains or bag charms
- Gift wrapping accents/twist ties
The possibilities are endless! Just use your imagination and get creative with your fabric twine. Plus, not only is it a great way to use up your fabric scraps, but it also adds an interesting and unique texture to your projects.
How long does it take to make fabric twine?
The time it takes to make fabric twine varies depending on the thickness and length of your strips, as well as how fast you are at twisting the fabric. It can take anywhere from a few hours to a few days for larger projects. But don’t worry, the end result is definitely worth the time and effort! Plus, it can be a relaxing and therapeutic activity.
Is there a limit to how many fabrics can be used in one piece of twine?
There is no limit to how many fabrics can be used in one piece of fabric twine. In fact, the more variety you have, the more unique and interesting your twine will look. Just keep in mind that using too many different weights or widths of fabric strips may affect the overall strength and durability of the twine.
Are there any tips for choosing which fabrics to use together?
Here are a few tips to keep in mind when choosing which fabrics to use together for your fabric twine:
- Stick to fabrics with similar weights and widths for a more cohesive look.
- Use fabrics in complementary or contrasting colors for added visual interest.
- Consider the purpose of your project and choose fabrics accordingly (e.g. sturdier fabrics for baskets, softer fabrics for rugs).
- Don’t be afraid to experiment and mix different fabric types, but keep in mind that some may not work well together due to their stretch or stiffness.
While super enjoyable and relaxing, fabric twine is super time consuming, especially when you need it for large projects so it’ll probably take me a while before I’m able to share this project with you, if ever. Meanwhile, here’s how to make fabric twine!
How to Make Twine
Materials:
- fabric scraps in assorted colors (mine are about 1/2″ wide)
- scissors
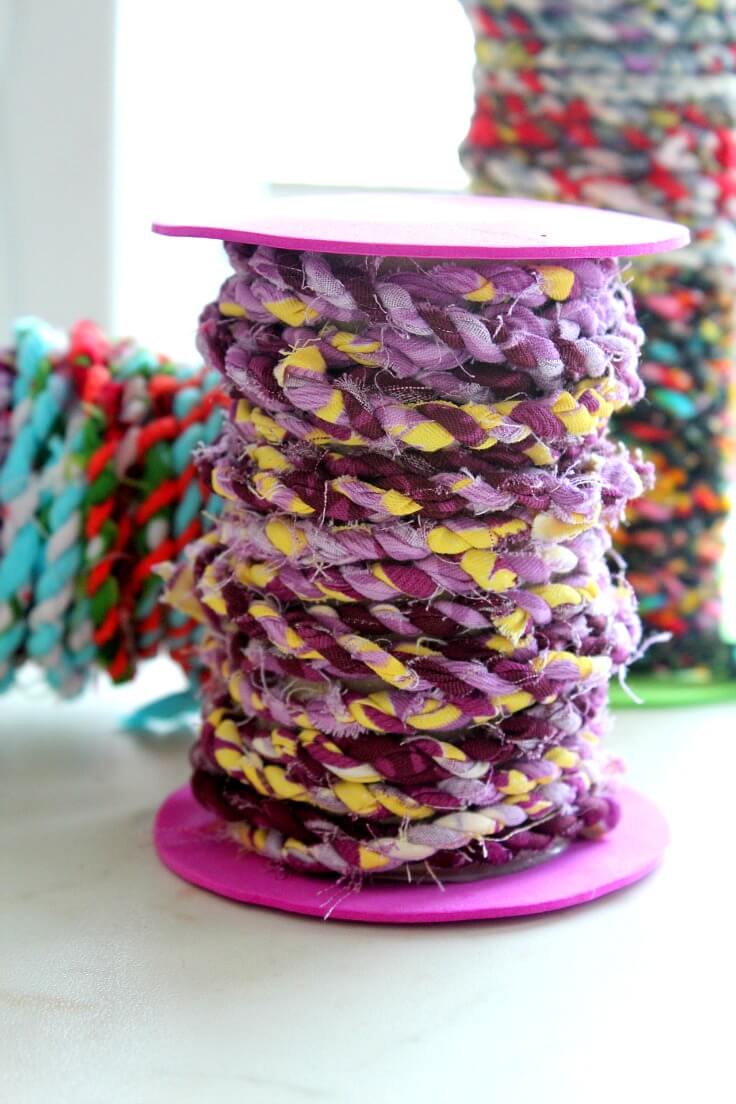
- large spools (preferably) or something else large enough to wind your twine on to (I made my own).
- finger moistener (optional but very helpful)
How do you make a fabric rope?
- Before you start here’s a tip: it helps to have moist fingers, it will make the process a little faster and the twine will end up tighter and stronger. So keep a finger moistener on hand, just in case.
- Gather all your fabric scraps and cut or tear into strips of different length. I didn’t have the patience to use my scissors on all so I ripped most of the strips.
- Start by using one short and one long strip and tie them together with a knot.
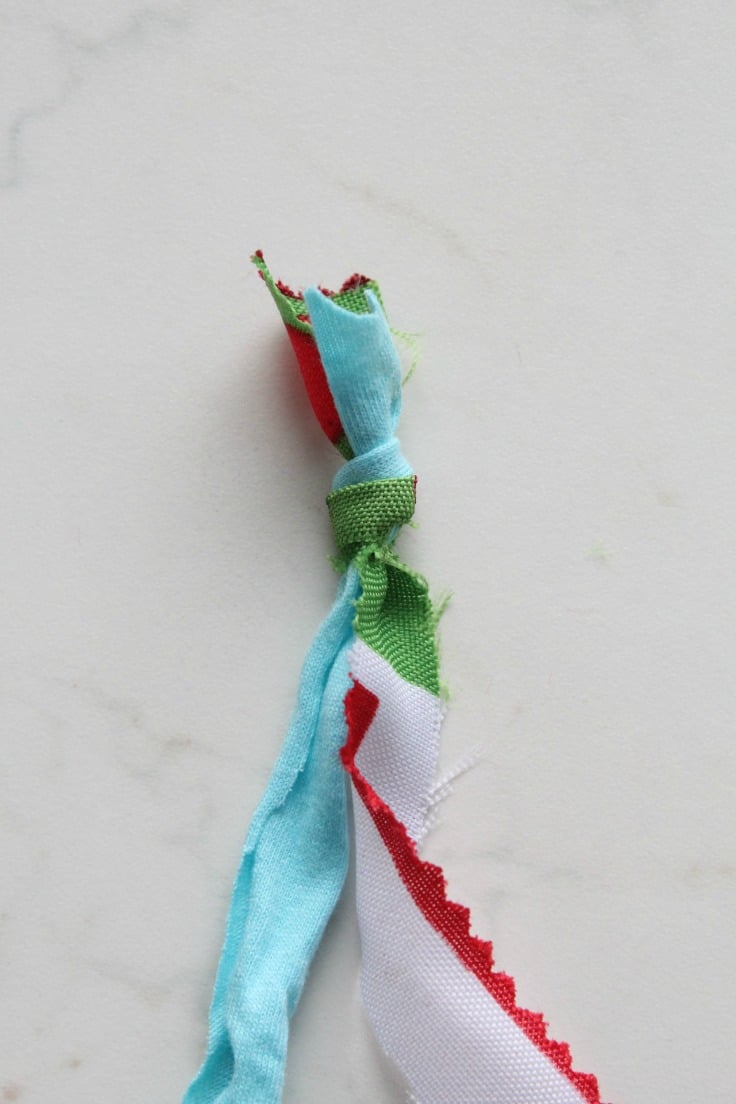
- Slide the knot under something heavy to keep strips still (like a stack of books, or a large flower pot or even your sewing machine).
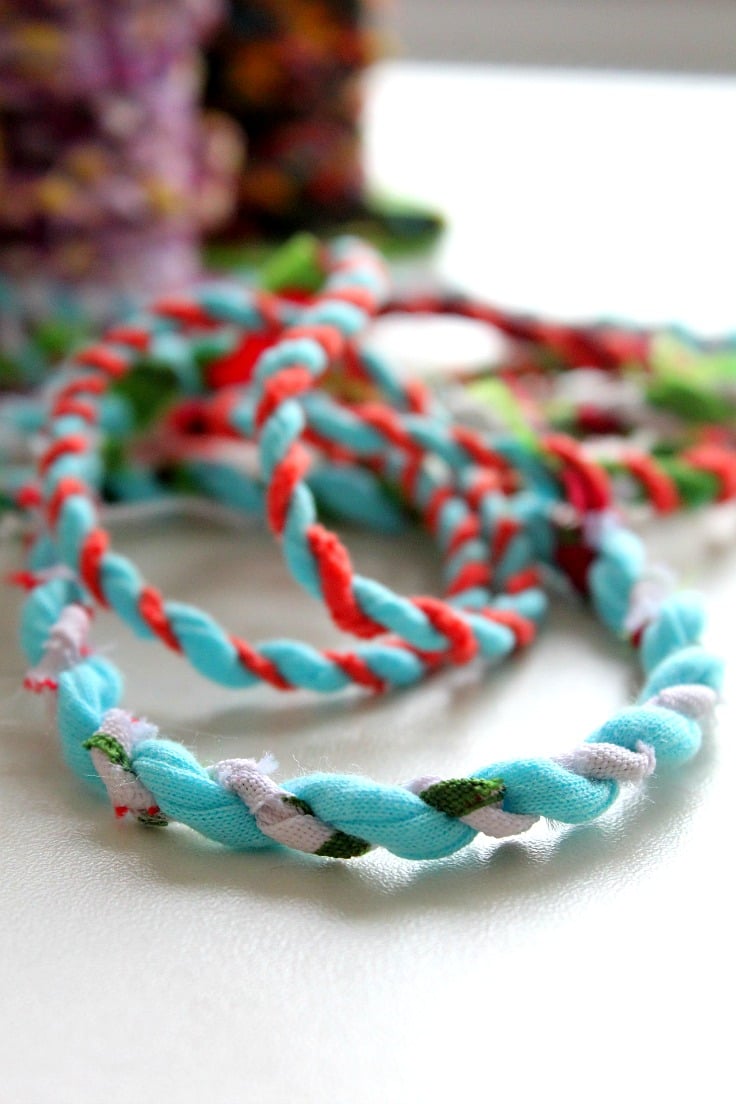
- Twist each strip towards your right.
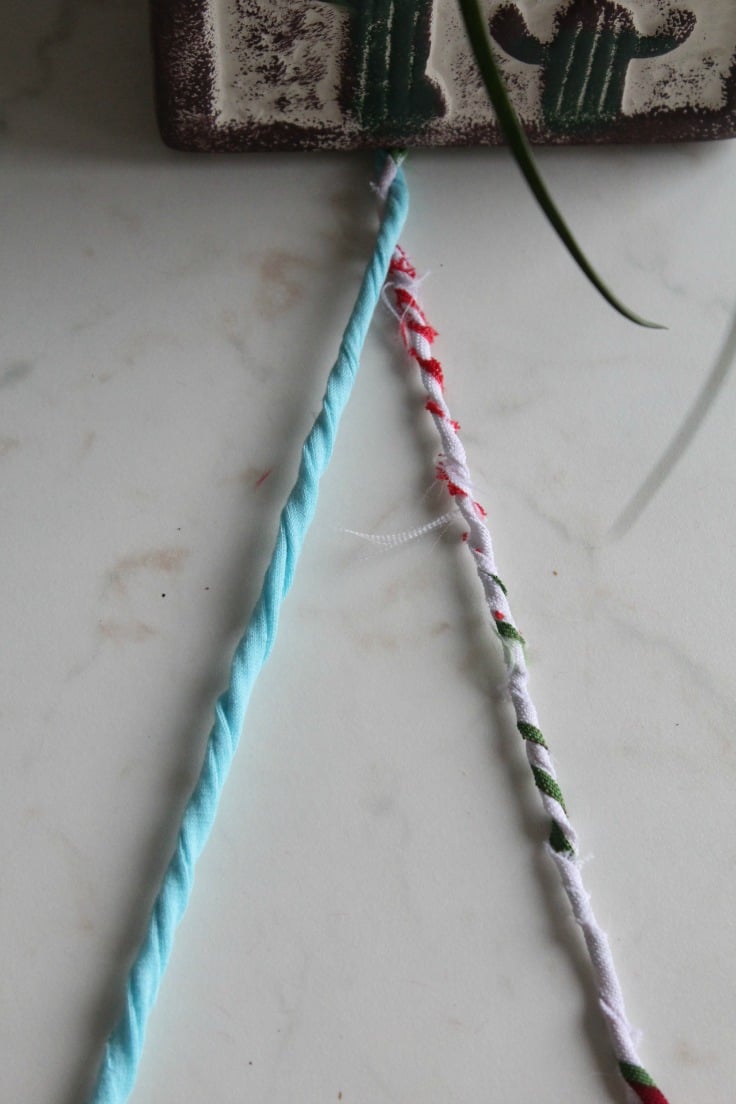
- Then twist each strip around each other. Work in small areas.
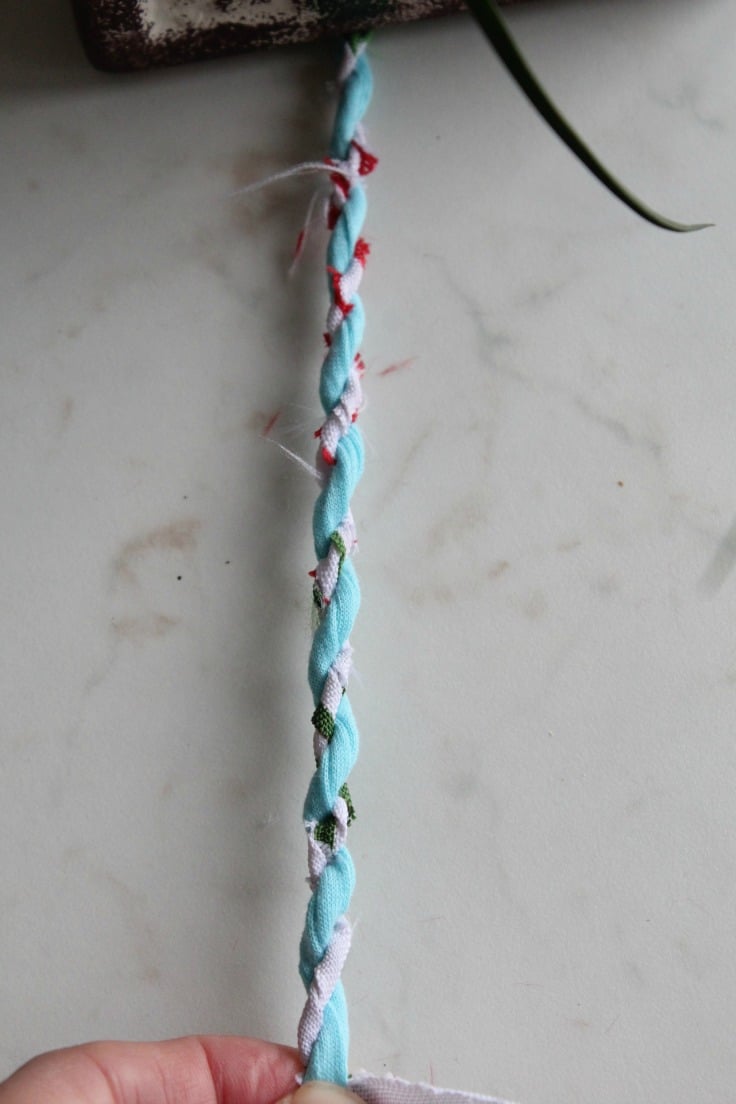
- Follow the above steps until you finish the short strip.
- To add another strip and join, just leave a tail of about 1″ and wrap the new strip around it.
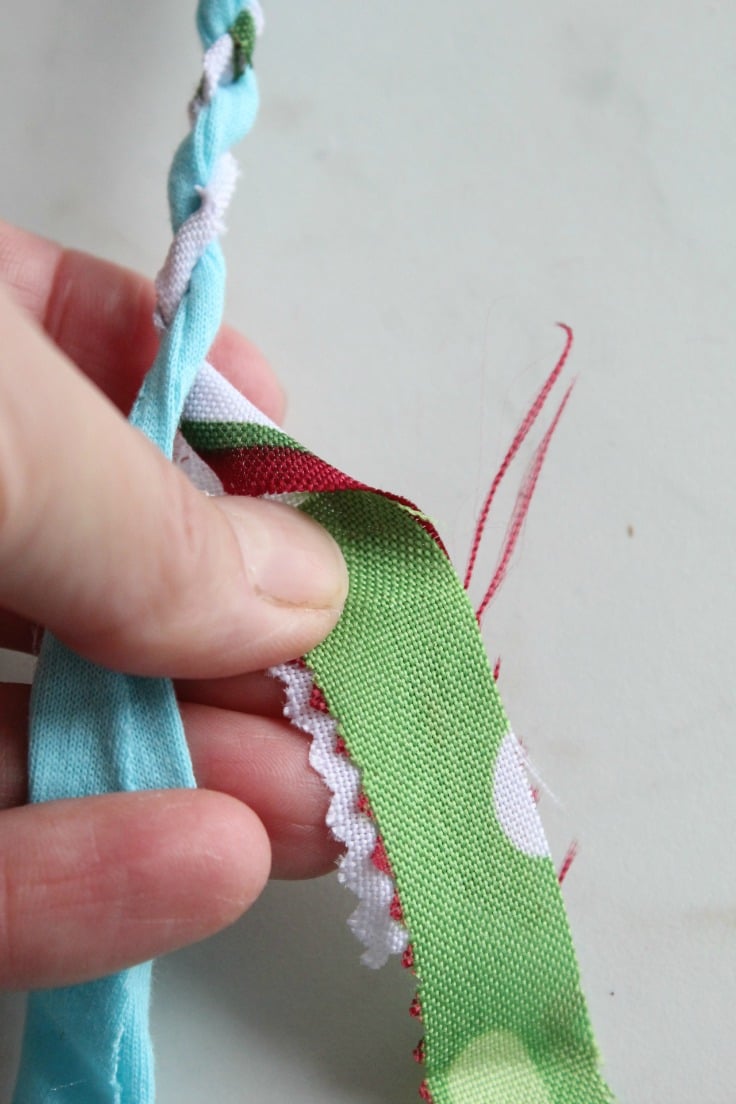
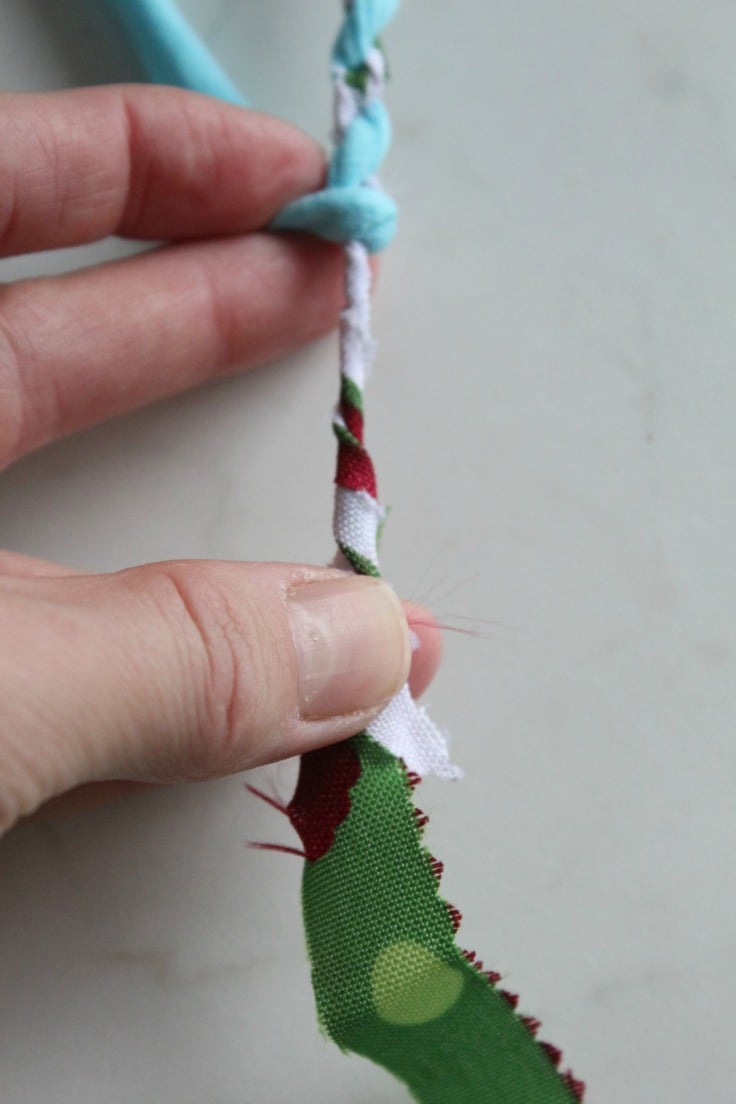
- Make sure both your strips don’t finish at the same time or your join may be weakened; that’s why is best to start with one short and one long strip.
- When done, end with another knot.

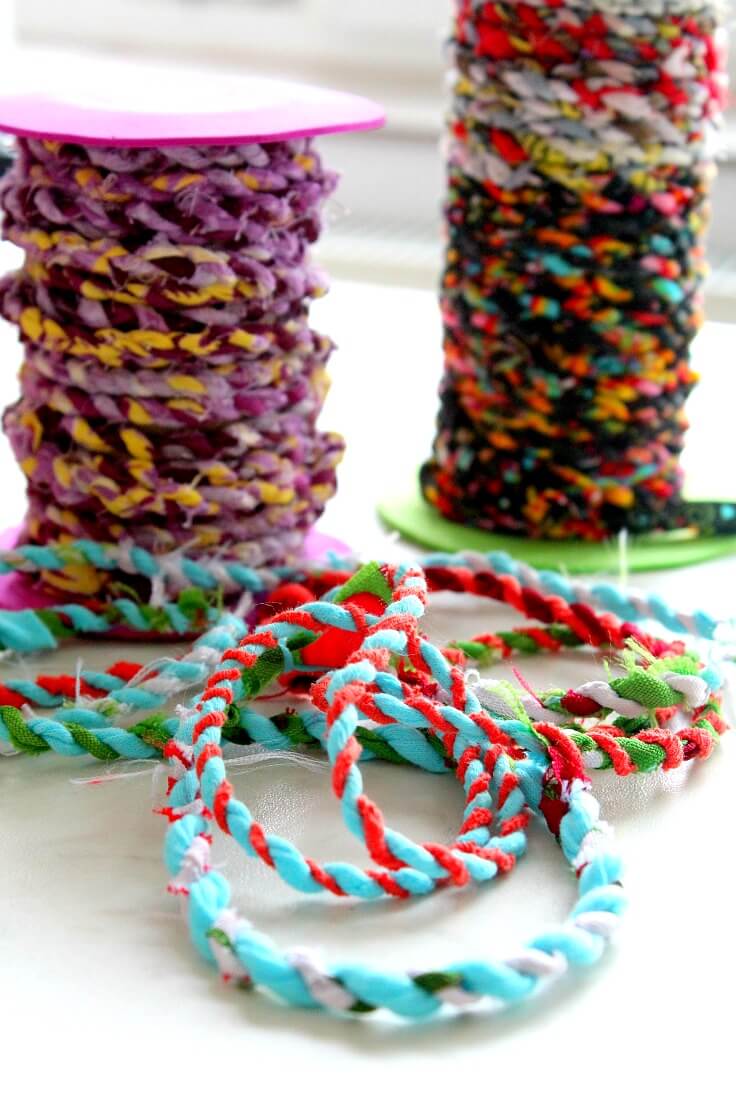
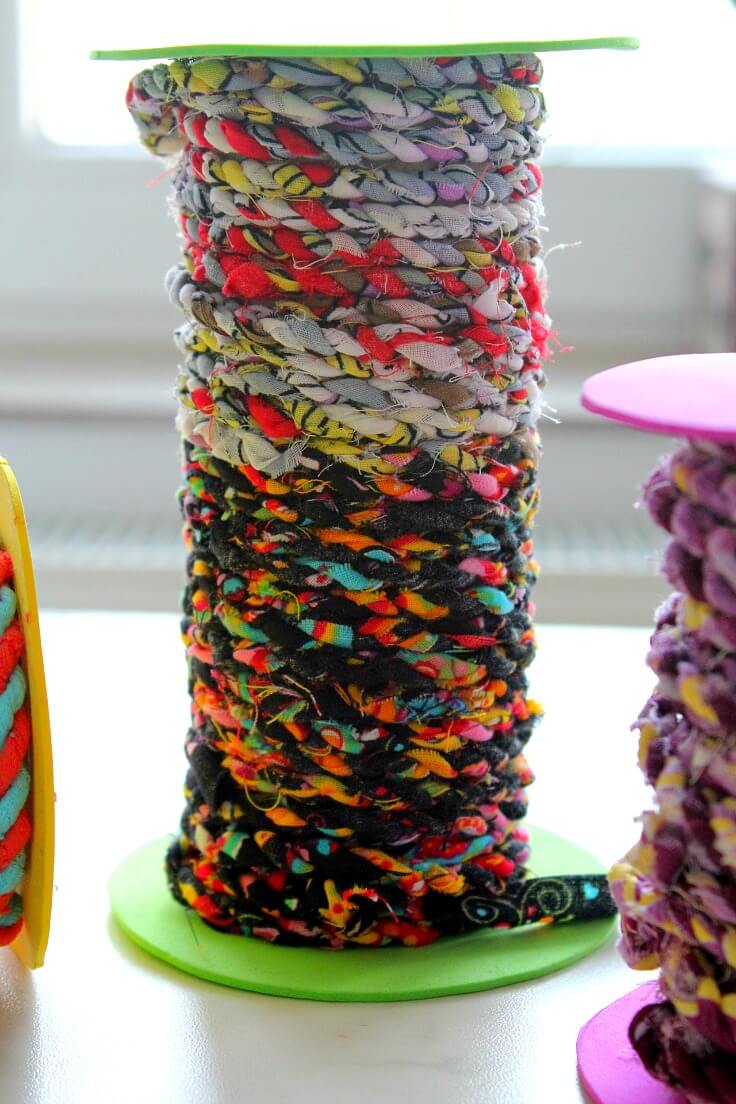
- Then just wrap the twine around spools.
And that’s it! You now have your very own handmade fabric twine, made from all those scraps you thought would never be useful. This project is not only a great way to upcycle and reduce waste, but also a fun and relaxing activity for any sewing enthusiast. So don’t throw away those scraps, turn them into beautiful twine and stitch it into beautiful, creative projects! Happy crafting!
Article may contain Amazon & affiliate links. As an Amazon Associate I earn from qualifying purchases at no additional cost to you.

I’m working on making fabric twine…can you share an oval rug pattern?
Hi Shirley. I don’t have an oval rug but my technique for making these fabric twine trivets is similar. https://theseamanmom.com/fabric-twine-trivets-sewing-tutorial/ Just start sewing the rug into an oval instead of a circle.
Do you offer instructions on attaching your “twine” to clothing?
Another way to join the strips is by making a slit in the end of the first one and in the end of the second one you want to add. Push second strip into slit in first and then into its own slit. Pull tight and you have a nearly undetectable join with no knots.
After twisting the two separate pieces to the right, which direction do you then twist them together? Left or right?
Charity, after twisting each strand, I place one end under a heavy object then I push each piece to the middle. Once there, I don’t twist the individual pieces anymore but twist them onto each other.
She asked which direction to twist once the two peices are together. I’d like to know, too.
If you join strips together, you can make long ropes in a flash by anchoring one end to something like a drawer pull, then straightening one end of a paper clip, inserting that into a handdrill (oh, yeah, who has one those these days?), looping the far end of the strip into the drill, and twisting away. When it’s good and tight, hold it in the middle and carefully let it twist together on itself. If you want to different fabrics, join them in the middle. This will work for twine up to about a yard long. You can also twirl a pencil on the far end. That’s slower, but it works.
Thanks so much for this! Not only does knowing how to do this step up my craft game….but it could potentially come in really good use in a emergency! You can make twine with strips from bark or plants if you really needed to make rope. Ok, so I’m playing with the idea of making a hand woven rug or placemats /wall hanging type of bohemian-ish item and this will work. I’ve made a braided fabric rug in the past ( it took months) thus I was some what familiar with the process. I found that some of the pieces of fabric don’t twist as tightly into each other and I opted to knot these pieces and cut off any extra fabric later. You can also sew the pieces together, which is what I did with the braided rug, but, that’s really just more work. While I was twining my twine, it came to me that you could prob. tie your fabric to your drill and it might cut you some time. If you have two drills ( which I do) you could be shooting fabric twine in no time! (I have not tried this and should you chose to, it would be at your own risk) I starched and twisted the whole piece afterwards and I think it will give it a little extra staying power. If your scraps are shorter then a foot or 6 inches….it would be more work then it’s worth. . I use small scraps to stuff pillows, patch holes, or fabric mache. Happy crafting!!!!
I had the thought about using a drill also. You could get tons done in very little time. And less strain on your hands too!
Hello!! This is an older post and I am replying to an old comment. I understand this. ;) However, I’d like to chime in that using a drill is by far a miracle worker. I’ve made beaded knitting amulets with matching perle cotton strings for the long rope necklace part. Get yourself an open hook or anchor of some sort that won’t end up stuck on your piece to attach the end point–middle-ish of your overall length. Then use another open-eye hook to grab with the chuck of the drill. For a reference, I use the little cup hooks that screw into the underside of the cupboard to hang hooks from. Make a slipknot in the end of your first {strip} and begin twisting one side. It doesn’t matter which direction [clockwise or counter-] as long as right and left are both the same. When you feel the tension is enough (tighter is best), anchor it somewhere that can secure it tightly and set it aside for right now. Repeat with the other side. Once both are about equal twist tension, end same as the first side. ***I’ve found that, depending on the length of your desired piece, you may need an assistant for the next part.*** Grab them together on your end where they comfortably meet (one may be longer than the other), then grab the anchored end. Now, instead of manually twisting the two strips together, SLOWLY begin to allow them to twist themselves together. If htey go crazy and start twisting up all over the place, don’t worry. Once they are done wriggling their little worm dance, you can pull it straight again ~and again~ until it rests quietly. This now results in a securely twisted twine that can be as pliable as you need it to be. If you do find that you want it to be tighter, reposition the anchor end and pull the sides apart. Twist some more with the drill and repeat the process. If you do happen to let it slip, rest assured that you have not wasted hours manual twisting and hand cramps. You’d likely can the whole thing, like, say, ten minutes ago!! Tragic disaster. Remember you are now armed with a bionic arm attachment.
TWIST IT SISTERS!!
note: This is a superb way to erase any recollections we may have of the 80’s rock band. Oooof!!
What a good idea, I will be trying this. Thank you for sharing.
i HOPE I CAN MAKE THE MAT WITH “ALL’ MY MATERIAL. I have so much.
Hi, Linda! You’ll be using a good portion of that stash if not all :) Have fun!
Interesting
I don’t have to feel guilty for keeping all those “useless” scraps anymore! I was curious about your spools too. What is rubber-coated paper? Can’t wait to see what kinds of uses you find for the twine!
Hi Jaclyn. Gummed or rubber coated paper is an item more popular in UK and Europe. You can always use this kind of felt instead http://amzn.to/2g6mUFW
But what is “rubber coated” paper? It it just paper with an adhesive on the back? We probably have the same product but call it something else here is the U.S. We also have adhesive coated decorative vinyls, the most popular sold under the name “Contact Paper”. Thanks!
But what then do you use the fabric twine to make? I wouldn’t use it for the usual uses I put twine to, like tying garden plants to stakes. It would rot too readily and seems a waste of pretty fabric. I guess I only use twine (usually burlap type or polyester seine twine) outside. This fabric twine would lend itself to craft type projects, but as creative as I usually am, I could not think projects to use it for. Any ideas? Maybe to hang banner or pennants, but in that case, I want the focus on the banners, not what they hang from. I’m not being dismissive, just asking for ideas.
Hi Patty. I’m just preparing a small but pretty project for my fabric twine and I’ll be posting the idea soon, so stay tuned :)
Thanks! I’m looking forward to seeing it.
What is the project called?
Hi Bec. This is the project https://theseamanmom.com/fabric-twine-trivets-sewing-tutorial/
I have crocheted beautiful rugs with mine. You can also make baskets. I have found instructions on line to make both but haven’t made baskets…yet.
I’m thinking of using it to tie up my Christmas gifts. I use plain brown paper that I print on and this twine would look very pretty. My family could then save and use again next year.,
That is such a creative idea! The gifts will look truly special! Thanks for the tip, Angela!
You could use the twine as you would use cording to make baskets.
Great post. Just out of curiosity, what did you use to make your spools?
Thanks so much! You’re gonna laugh; I used toilet paper rolls and rubber coated paper :)