

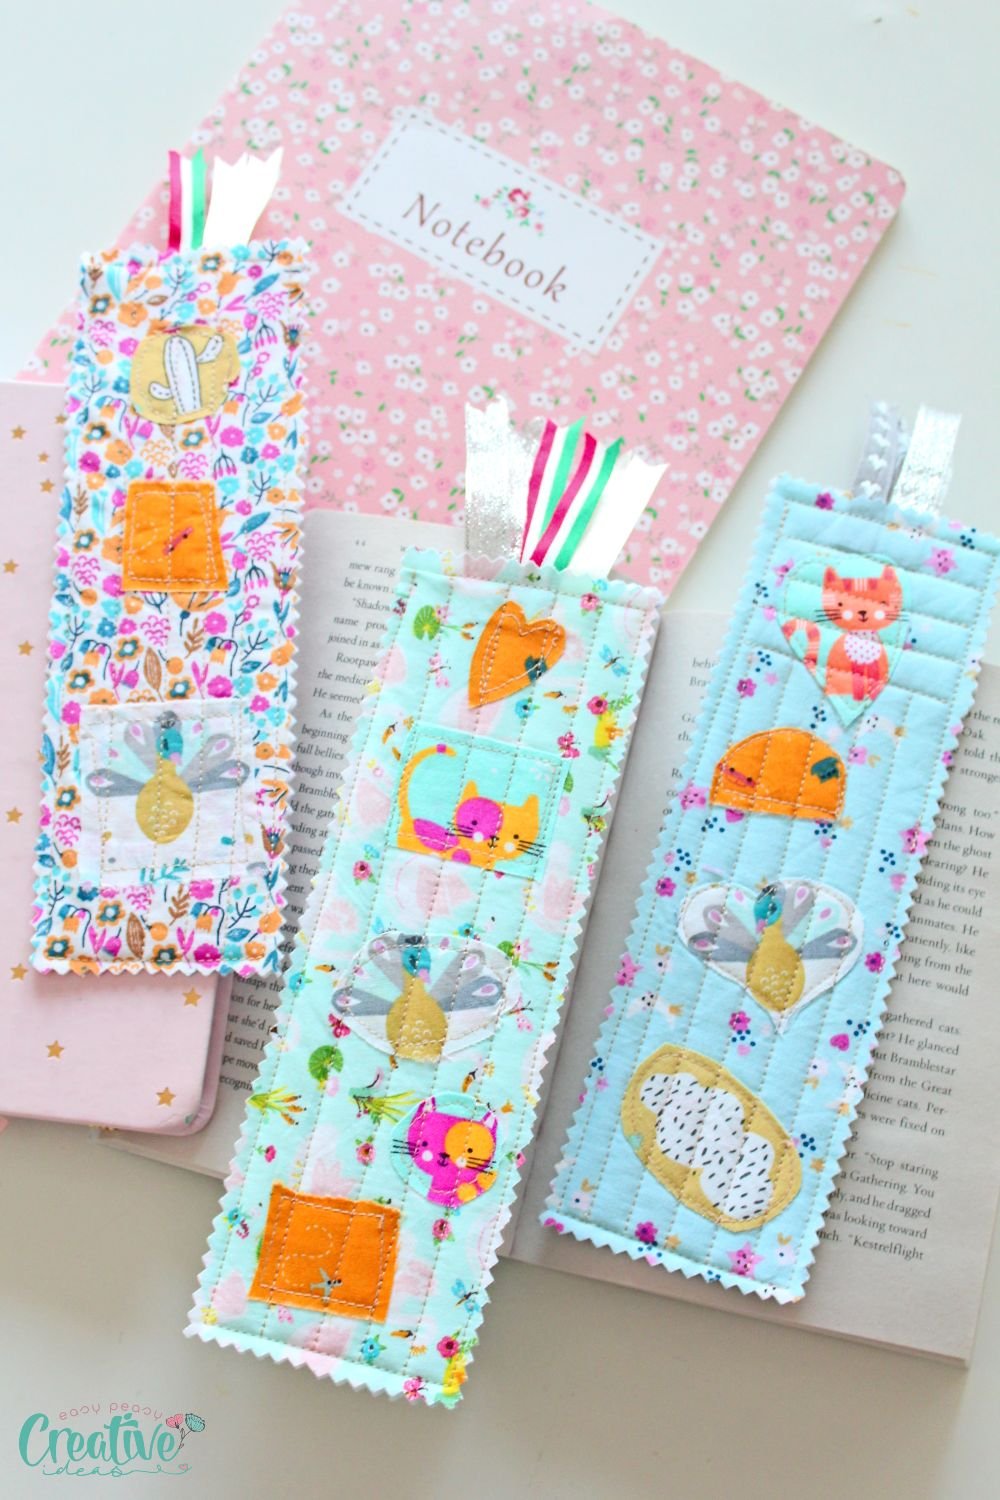
Easy bookmarks to sew with fabric scraps
Looking for a simple yet stylish way to accessorize your reading material? Look no further! In this blog post, I’ll teach you how to stitch your way to style by creating easy bookmarks from fabric scraps. Get ready to showcase your creativity and add a touch of elegance to your reading accessories!
Are you tired of using old receipts and random scraps of paper as bookmarks? Want to step up your reading game with a touch of style and elegance? Look no further! In this article, I’ll show you how to unleash your creativity and stitch your way to style by creating easy bookmarks with fabric scraps.
This article has been converted to a PDF file, available to purchase HERE! However this tutorial is free to read on the website.
Whether you’re a fashionista or just appreciate the beauty of handmade items, you’ll love the satisfaction of crafting these unique and easy bookmarks that perfectly complement your favorite books. So, grab your fabric scraps and get ready to embark on a creative journey that will transform your reading experience.
By following the simple steps in this tutorial, you can easily create your own stylish simple bookmarks using fabric scraps. Whether you’re making them for yourself or as gifts for friends and family, these DIY bookmarks are sure to impress. Now it’s time to unleash your creativity and add a personal touch to your reading accessories.
How to sew easy bookmarks with fabric scraps

Gather Your Materials
To embark on your creative journey of making personalized fabric scrap bookmarks, it’s essential to gather your materials first. Here’s a list of what you’ll need to bring your unique bookmark designs to life:
- Fabric scraps for the bookmark and the embellishments if you choose to make it same as mine.
- Medium weight double sided fusible interfacing
- Optional: a layer of batting if you prefer to add more structure and stiffness to your bookmarks
- Ribbon or yarn
- Ruler or measuring tape
- Scissors or a rotary cutter
- Cutting mat if you’re using a rotary cutter
- Pinking shears
- Matching thread
- Sewing machine
- Iron
- Optional: additional embellishments and trim
Instructions to sew a fabric bookmark
- Start by choosing the fabric scraps you want to use for your bookmark. Consider selecting complementary colors or patterns that reflect your personal style.
- Measure and cut your fabric scraps into a rectangle shape based on your book measurements, ensuring it’s long enough to fit your desired bookmark size.
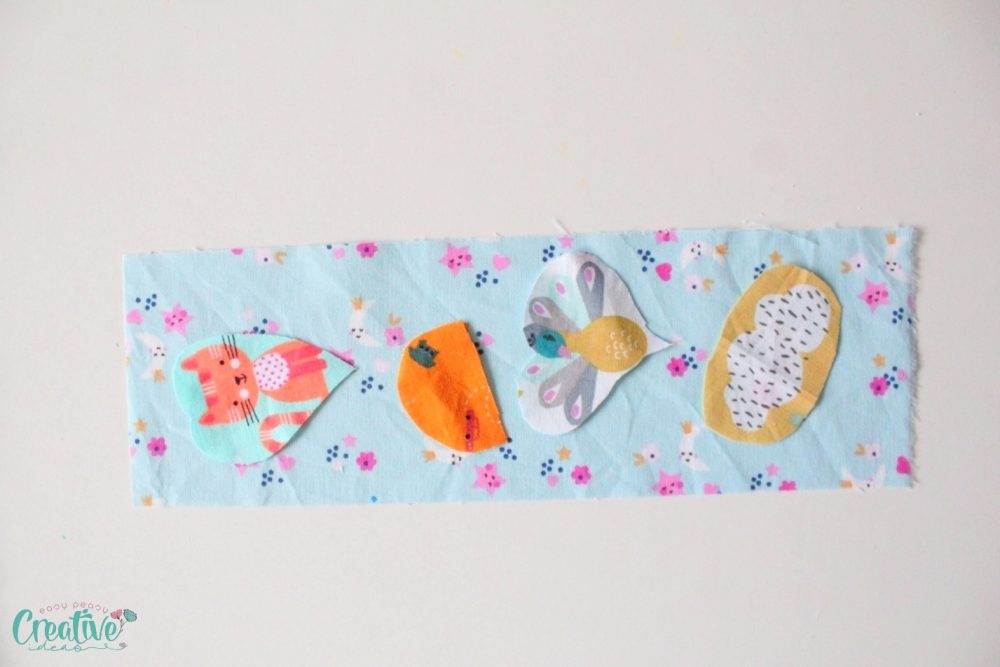
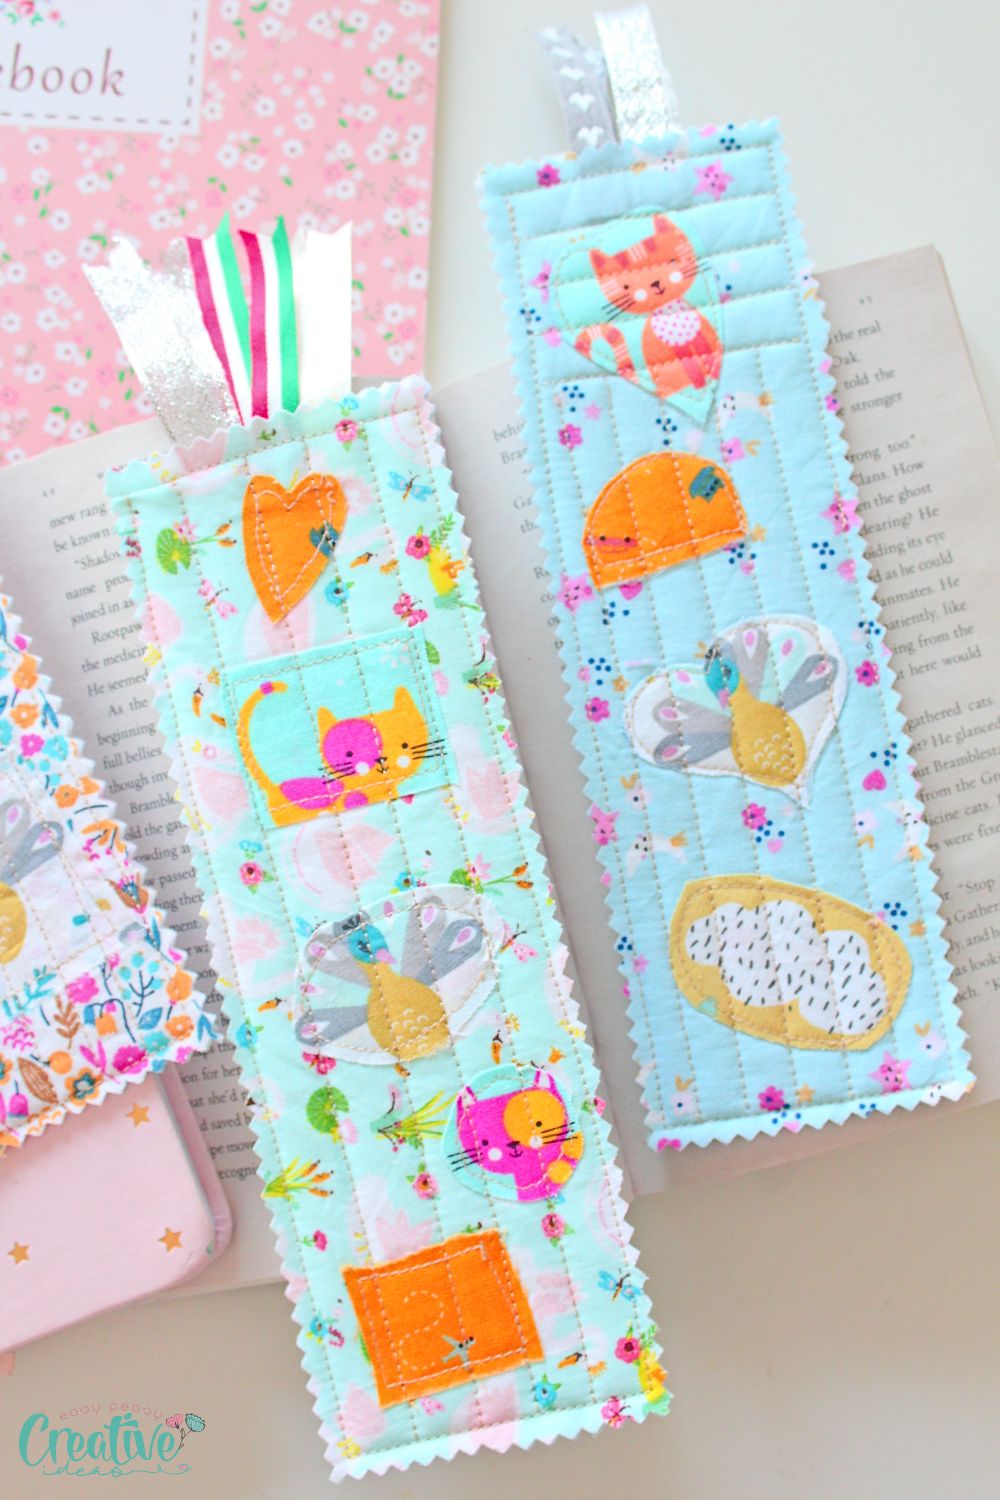
- Cut a few small fabric pieces in different shapes (rectangles, squares, hearts, ovals etc)
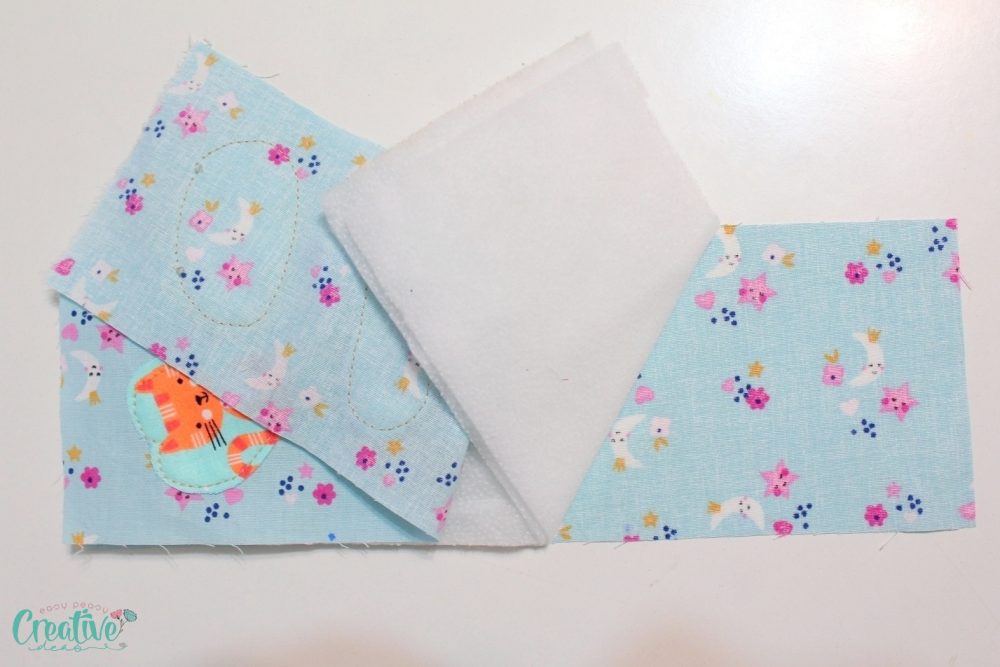
- Cut two pieces of double sided fusible interfacing in the size of the bookmark fabric.
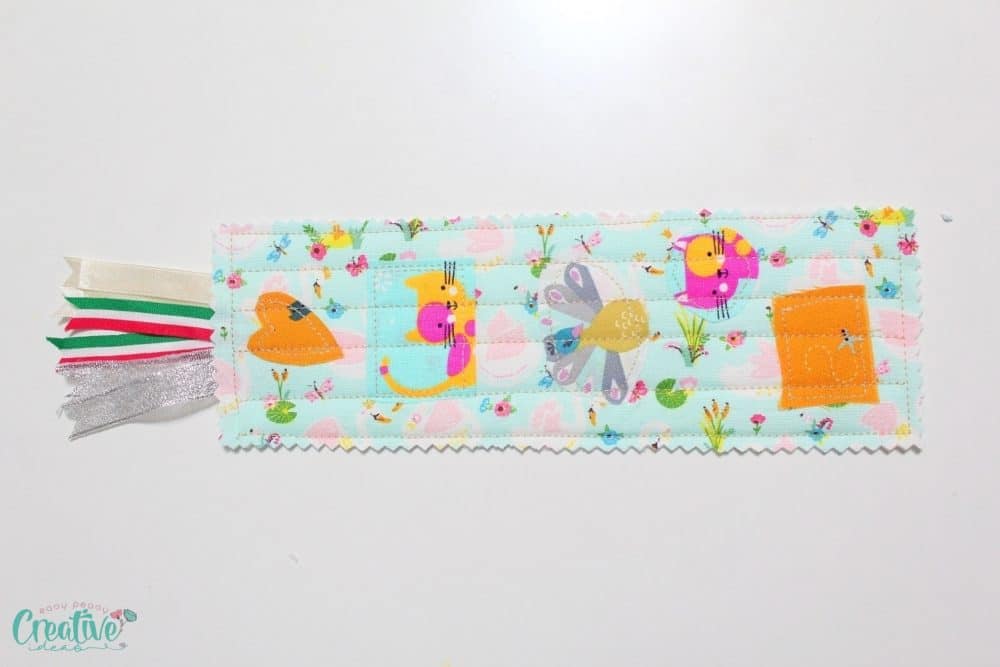
- Take the front piece and place the small scraps on top, all facing up.
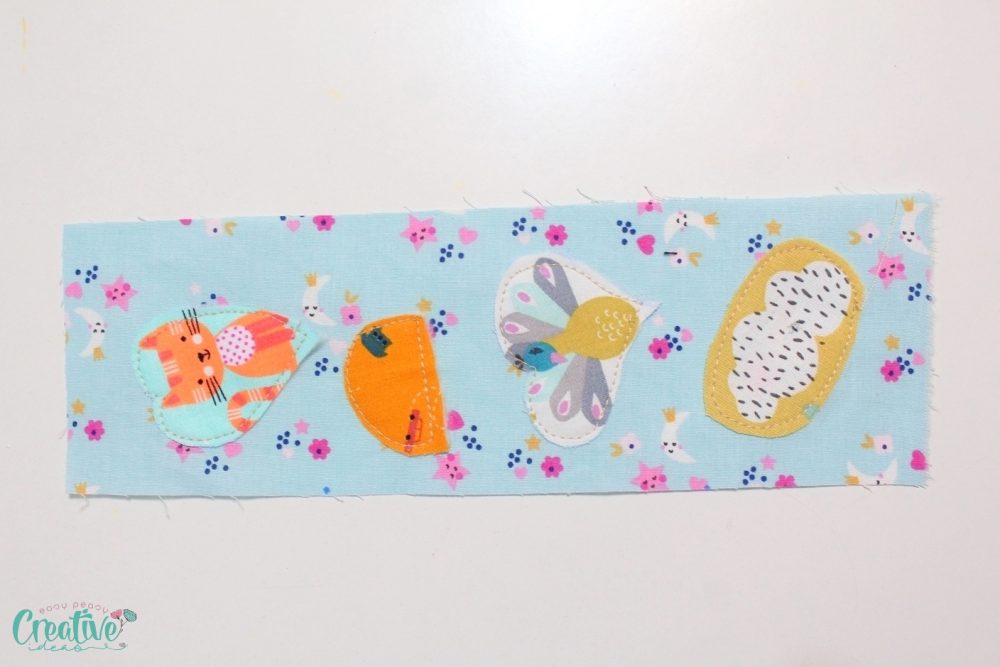
- Sew the edges of the small scraps onto the front fabric. You can add a stabilizer or double sided tape under the appliques to help with sewing them neatly.
- Sandwich the interfacing between the front piece and the backing piece of fabric.
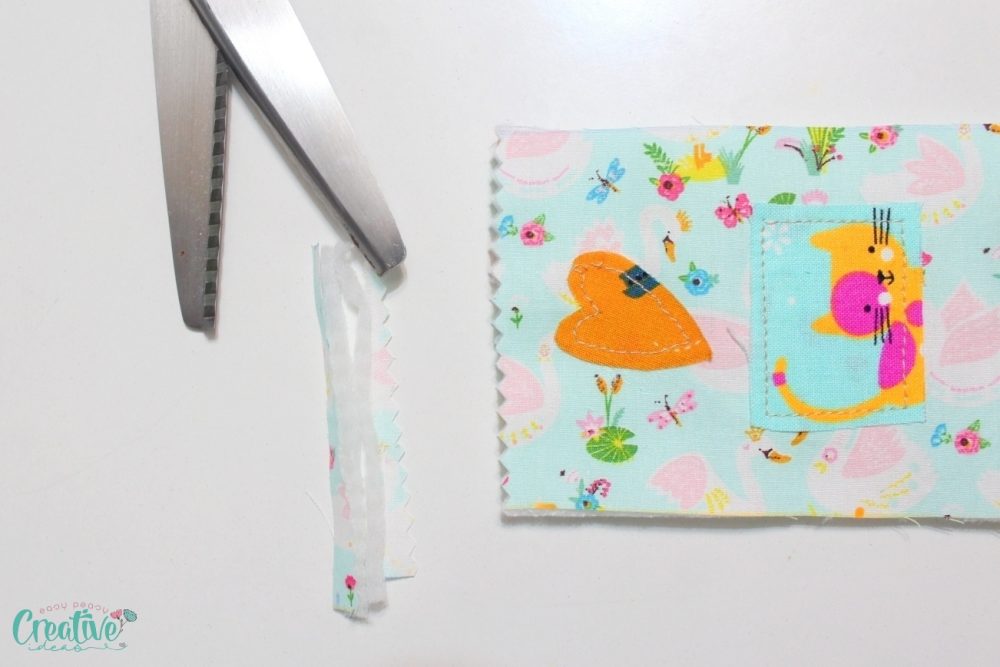
- Trim the top with pinking shears.
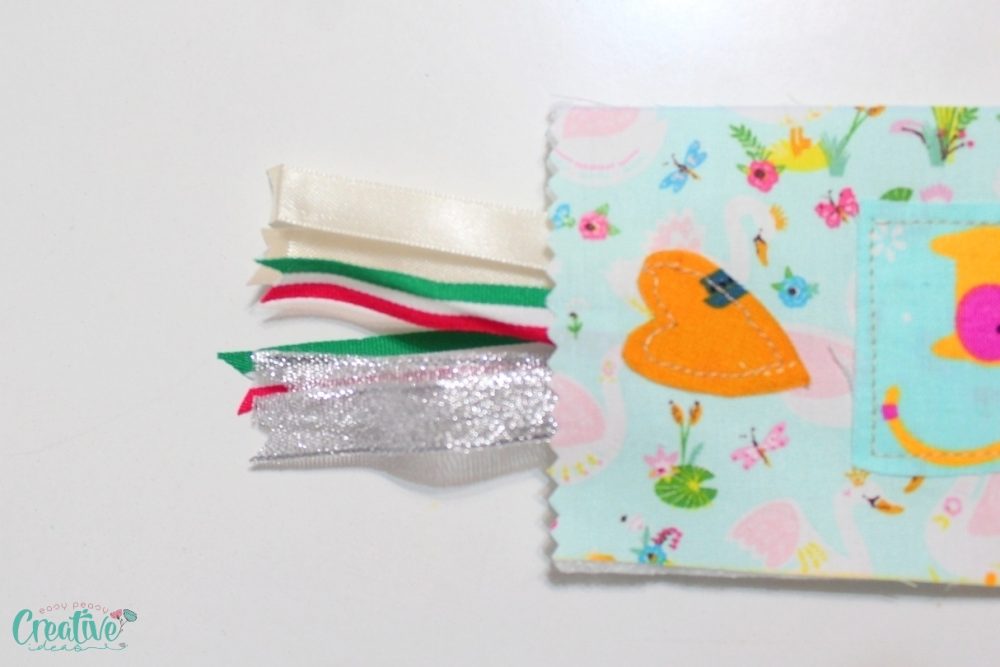
- Add a couple of folded ribbons to the top.
- Press to fuse.
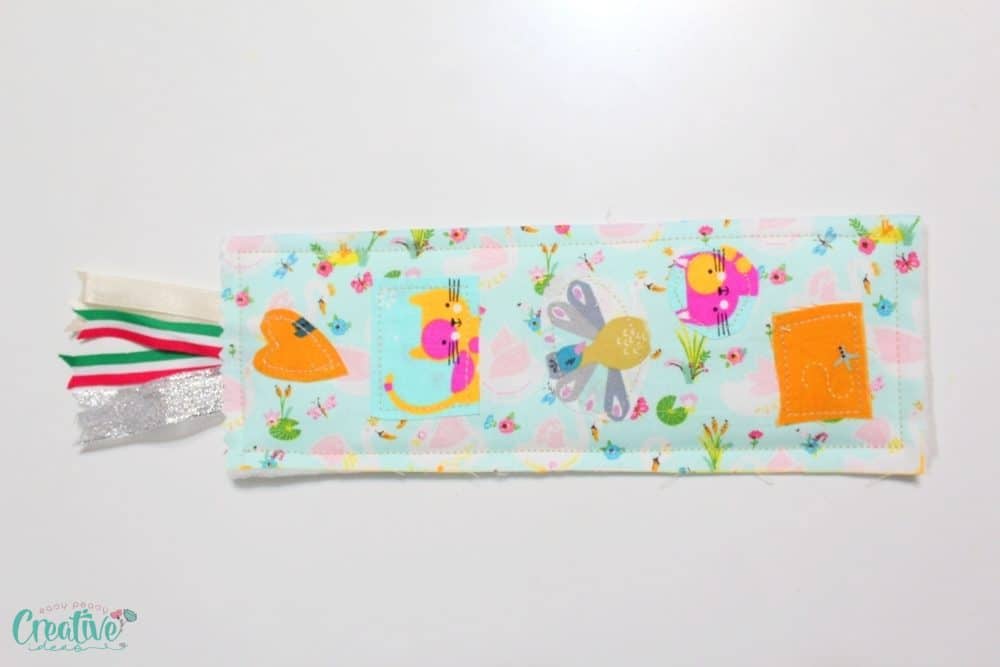
- Sew around the bookmark with 1/4″ seam allowance.
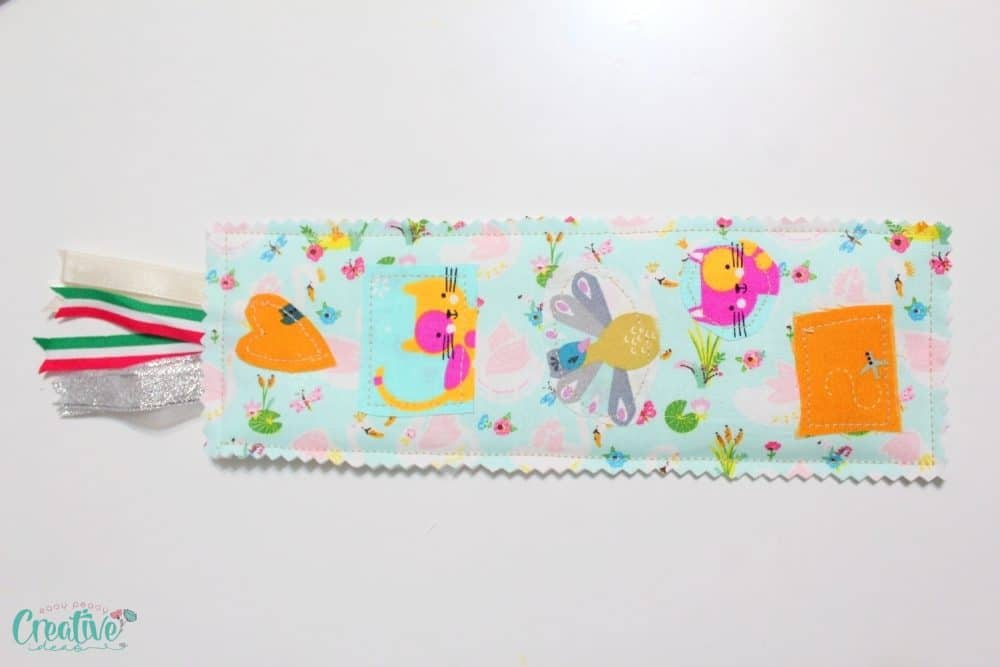
- Trim the rest of the seams with pinking shears.
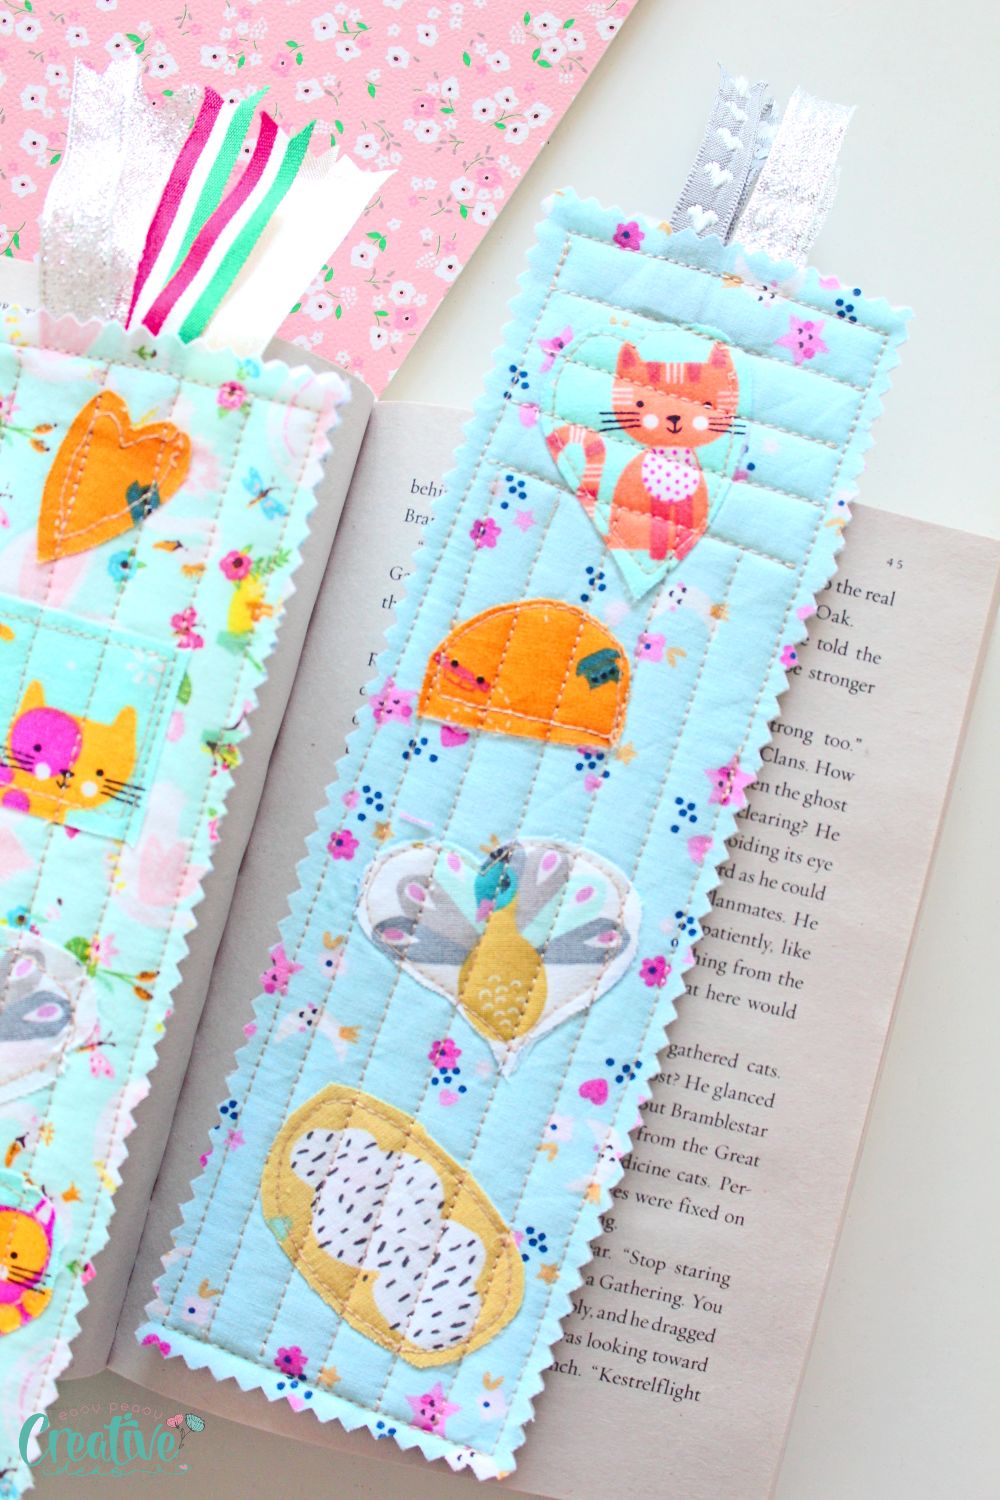
- Sew parallel lines about 1/2″ apart along the bookmark to finish it.
And your beautiful easy bookmarks are ready in no time!
Tips for cutting and preparing the fabric
When cutting and preparing your fabric, precision is important. Measure your book first to decide the length and width of your bookmarks. Before cutting the fabric, you may want to consider ironing it to create a neater finish.
Lay out your fabric on a smooth and flat surface. Measure and mark the desired length for your bookmark using a ruler or measuring tape. Keep in mind the balance between functionality and aesthetics as you determine the length.
Once you have marked the length, carefully cut along the line using sharp fabric scissors or a rotary cutter. This will ensure precise edges for your bookmark.
Bookmark variations
When it comes to adding embellishments, the possibilities are endless. You can let your creativity soar and choose from a wide array of options to make your bookmarks truly unique and eye-catching.
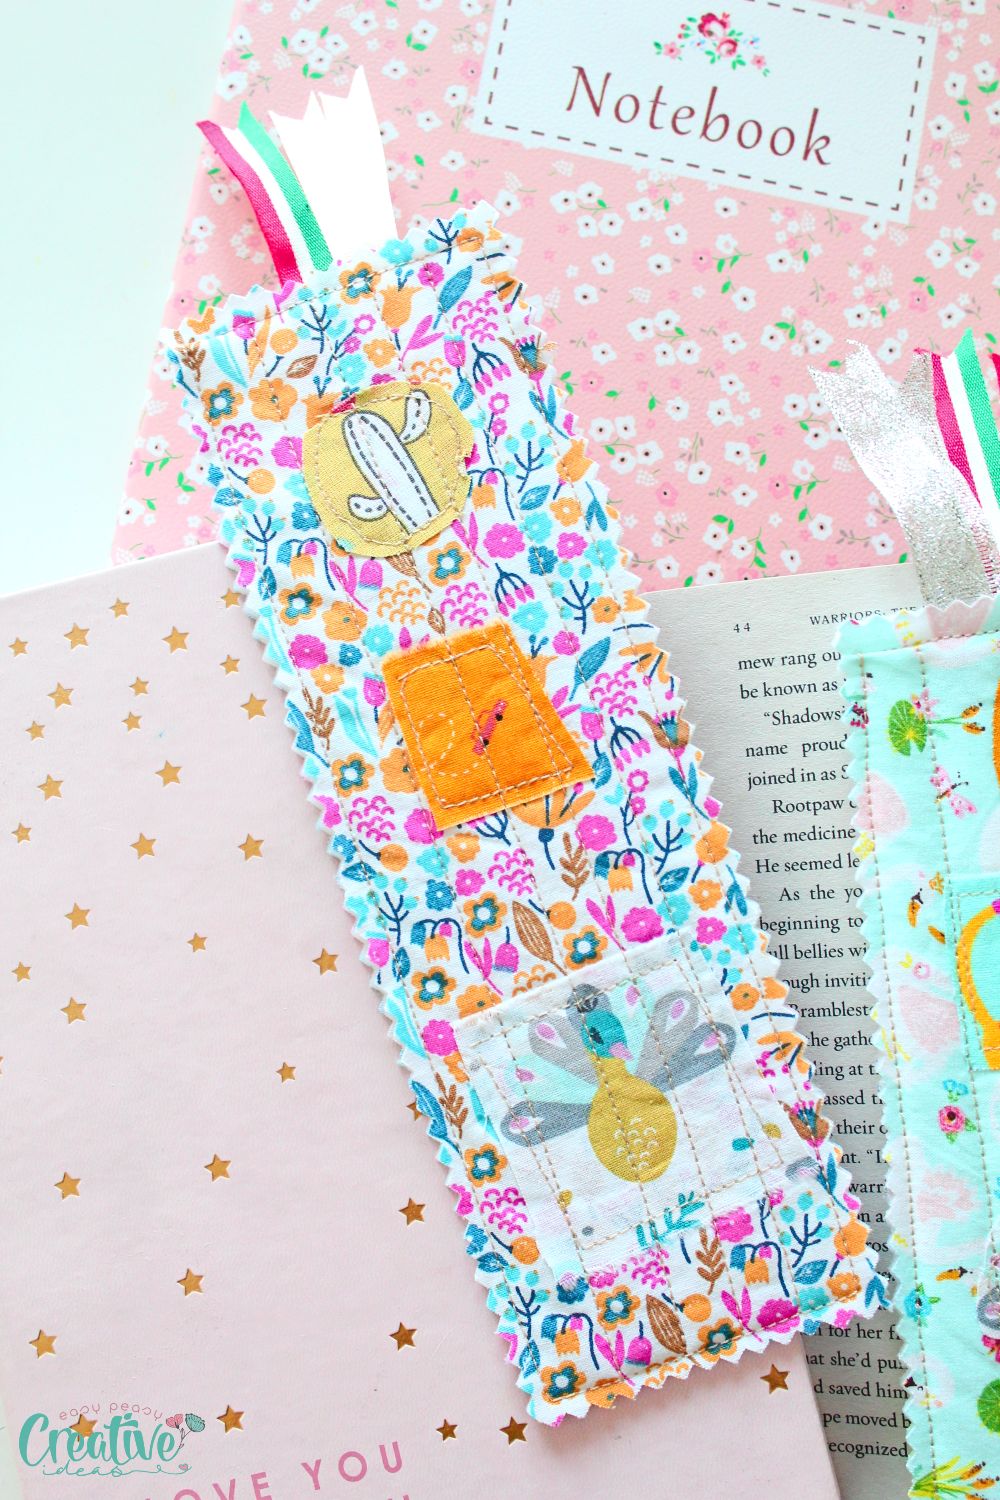
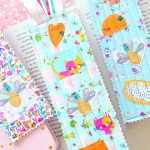
I simply added a few small scraps of fabric that I’ve sewn onto the front side of the bookmark. You may want to consider adding other decorative elements such as buttons, ribbons, sequins, or embroidery to elevate the overall look of your bookmarks.
Buttons can add a charming and whimsical touch to your fabric scrap bookmarks. Choose buttons in various shapes, sizes, and colors that complement your fabric choice. Sew them on securely with a coordinating thread, making sure they are centered and well-positioned. But keep in mind buttons add bulk to your bookmarks.
If you prefer a more delicate and elegant touch, ribbons can be the perfect embellishment. Select ribbons in different textures, patterns, and widths that complement your fabric colors. Cut the ribbons to the desired length and position them on the fabric, either in a straight line or in a crisscross pattern. Secure them in place with a few stitches or fabric glue for a polished look. I added ribbons to the top of my bookmarks to be able to locate the page easier.
For those who are skilled in embroidery or want to delve into a new craft, adding intricate stitching patterns can bring your fabric scrap bookmarks to life. Use embroidery floss in contrasting colors to create beautiful designs, such as flowers, names, or patterns. This personal touch will make your bookmarks truly one-of-a-kind.
Final Touches and Care Tips
First, take a moment to step back and assess your design. Look for any loose threads, uneven edges, or areas where the fabric might be fraying. To give your bookmark a polished appearance, carefully trim any excess threads or fabric using a pair of sharp scissors. This small step can make a big difference in the overall aesthetic of your creation.
Next, consider adding a protective layer to your bookmark. A coat of clear fabric glue or a thin layer of Mod Podge can help seal the edges and prevent fraying over time. Apply the glue or Mod Podge with a small brush, making sure to cover all exposed fabric. Allow it to dry completely before handling or using the bookmark.
When it comes to caring for your fabric scrap bookmark, a little extra attention can go a long way. While fabric can withstand everyday use, it’s important to avoid excessive moisture, direct sunlight, and harsh chemicals. If your bookmark becomes soiled, gently spot clean it with a damp cloth and mild detergent. Avoid using bleach or strong cleaning agents that could damage the fabric or its embellishments.
If your embellishments permit it, you can simply toss your bookmark in the washing machine with the rest of the laundry. Air dry it to prevent the fabric from shrinking or distorting.
Frequently asked questions
What is the best material for sewing bookmarks?
When it comes to creating the perfect bookmark, one of the key considerations is the choice of material. The best material for bookmarks should strike a balance between durability, flexibility, and aesthetic appeal. While there are a variety of options available, cotton fabric stands out as a top contender for its versatility and tactile quality.
Cotton fabric offers a wide range of patterns, textures, and colors, allowing you to truly personalize your bookmark. Whether you prefer bold and vibrant prints, delicate florals, or understated solids, there is a fabric out there to suit your style. Additionally, fabric scraps are easily accessible and can be repurposed into unique bookmarks, giving new life to materials that might otherwise go to waste.
Durability is another important factor to consider when choosing a material for your bookmark. Cotton fabric is inherently sturdy, making it less prone to tearing or wear. This means your fabric bookmark will withstand the test of time, accompanying you on countless reading adventures without losing its shape or functionality.
How do you make fabric bookmarks stiff?
One of the challenges with fabric bookmarks is that they can sometimes be too floppy or soft, making it difficult to keep them in place or easily locate your page. However, there are a few simple techniques you can use to make fabric bookmarks stiff and more functional.
One popular method is to use interfacing, a material that adds stiffness and structure to fabric. To make your fabric bookmark stiff using interfacing, start by cutting a piece of interfacing slightly smaller than your fabric. Place the interfacing on the wrong side of the fabric, then carefully press with an iron to fuse them together. Be sure to follow the manufacturer’s instructions for the specific type of interfacing you are using.
Another approach is to use a lightweight cardboard or cardstock as a stiffening layer. Cut a piece of cardboard or cardstock slightly smaller than your fabric, then sandwich it between two pieces of fabric. Sew around the edges to secure the layers together, leaving a small opening to turn the bookmark right side out. Once you’ve turned it right side out, you can topstitch around the edges to close the opening and add extra durability. The problem with this solution is that the cardboard gets damaged if you wash the bookmark.
If you prefer a more flexible bookmark that still has some structure, you can also try using a fusible hem tape or fabric glue. Cut a piece of fusible hem tape or apply fabric glue along the edges of your fabric bookmark. Fold the edges inward and press them together firmly, allowing the tape or glue to bond the layers together. This method will provide some stiffness while still allowing for some flexibility.
Should bookmarks be longer than books?
As you consider the ideal length for your easy bookmarks, it’s essential to keep in mind that they should be long enough to comfortably fit between the pages of your book without adding excessive weight or bulk.
Finding the right length for your fabric bookmarks is crucial to their functionality. If the bookmark is too short, it may not securely hold your place in the book, leading to frustration as you try to find your spot again. On the other hand, if the bookmark is too long, it may protrude from the book awkwardly or add unnecessary heft, making it more cumbersome to carry around.
Consider the size of your books and the specific use case for the bookmark. For smaller paperbacks, a shorter bookmark may be sufficient, while larger hardcovers might require a longer one. Additionally, if you plan to carry your book around in a bag or purse, you’ll want to ensure the bookmark is compact and doesn’t add unnecessary bulk.
It’s also worth considering the type of fabric you use for your bookmarks. Some fabrics may naturally have more weight or stiffness, which could affect the ideal length. Experiment with different fabrics and lengths to find the perfect combination that suits your personal preferences and reading habits.
Ultimately, the length of your fabric bookmark should be a balance between functionality and aesthetics
Similar posts you might like:
- Ghost coasters
- DIY cord organizers
- Selvage fabric bookmarks
- 10 Minutes hand warmers
- Heart shaped corner bookmark
- Corner bookmarks with scraps
- Scrappy tulip keychain
Adding embellishments and putting your own personal touches will make them truly unique. These DIY fabric bookmarks are a great sewing project for a beginner and can also make thoughtful gifts for loved ones. So, unleash your creativity and let your imagination soar as you stitch your way to style. Happy sewing!
Easy bookmarks to sew with fabric scraps
Materials
- Fabric scraps for the bookmark and the embellishments if you choose to make it same as mine.
- Medium weight double sided fusible interfacing
- Optional: a layer of batting if you prefer to add more structure and stiffness to your bookmarks
- Ribbon or yarn
Tools
- Ruler or measuring tape
- Scissors or a rotary cutter
- Cutting mat if you're using a rotary cutter
- matching thread
- Iron
Instructions
- Start by choosing the fabric scraps you want to use for your bookmark. Consider selecting complementary colors or patterns that reflect your personal style.
- Measure and cut your fabric scraps into a rectangle shape based on your book measurements, ensuring it's long enough to fit your desired bookmark size.
- Cut a few small fabric pieces in different shapes (rectangles, squares, hearts, ovals etc)
- Cut two pieces of double sided fusible interfacing in the size of the bookmark fabric.
- Take the front piece and place the small scraps on top, all facing up.
- Sew the edges of the small scraps onto the front fabric. You can add a stabilizer or double sided tape under the appliques to help with sewing them neatly.
- Sandwich the interfacing between the front piece and the backing piece of fabric.
- Trim the top with pinking shears.
- Add a couple of folded ribbons to the top.
- Press to fuse.
- Sew around the bookmark with 1/4" seam allowance.
- Trim the rest of the seams with pinking shears.
- Sew parallel lines about 1/2" apart along the bookmark to finish it.
Most popular sewing projects:


Article may contain Amazon & affiliate links. As an Amazon Associate I earn from qualifying purchases at no additional cost to you.
ABOUT PETRO
Hi, I’m Petro, author and founder of Easy Peasy Creative Ideas. Sewist, crafter, avid DIY-er, foodie, photographer, homemaker and mommy to one. I’m an expert at coming up with quick, clever sewing tips, recycling crafts and simple, easy recipes! You can find my ideas featured in reputable publications such as Country Living, Good House Keeping, Yahoo News, WikiHow, Shutterfly, Parade, Brit & Co and more. Thanks for stopping by and hope you’ll stay for a while, get to know me better and come back another time. Stick around for real fun projects! Read more…