

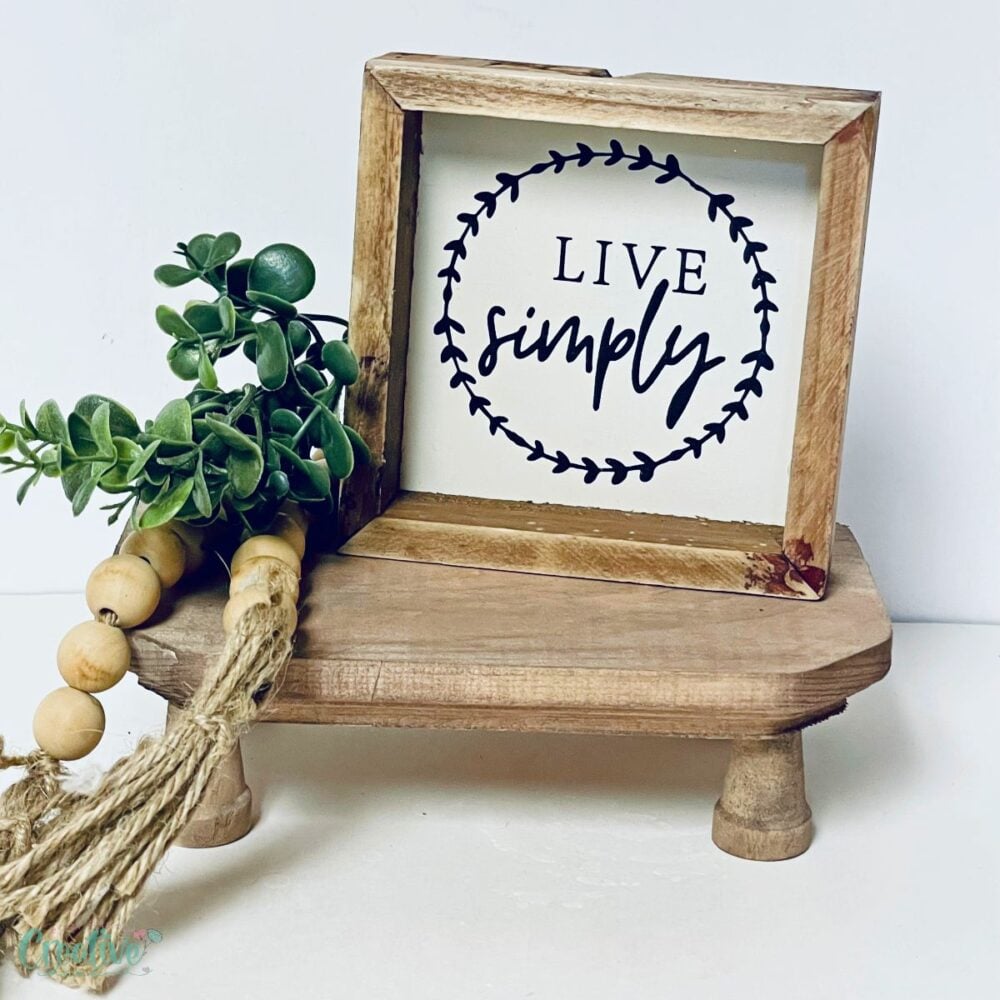
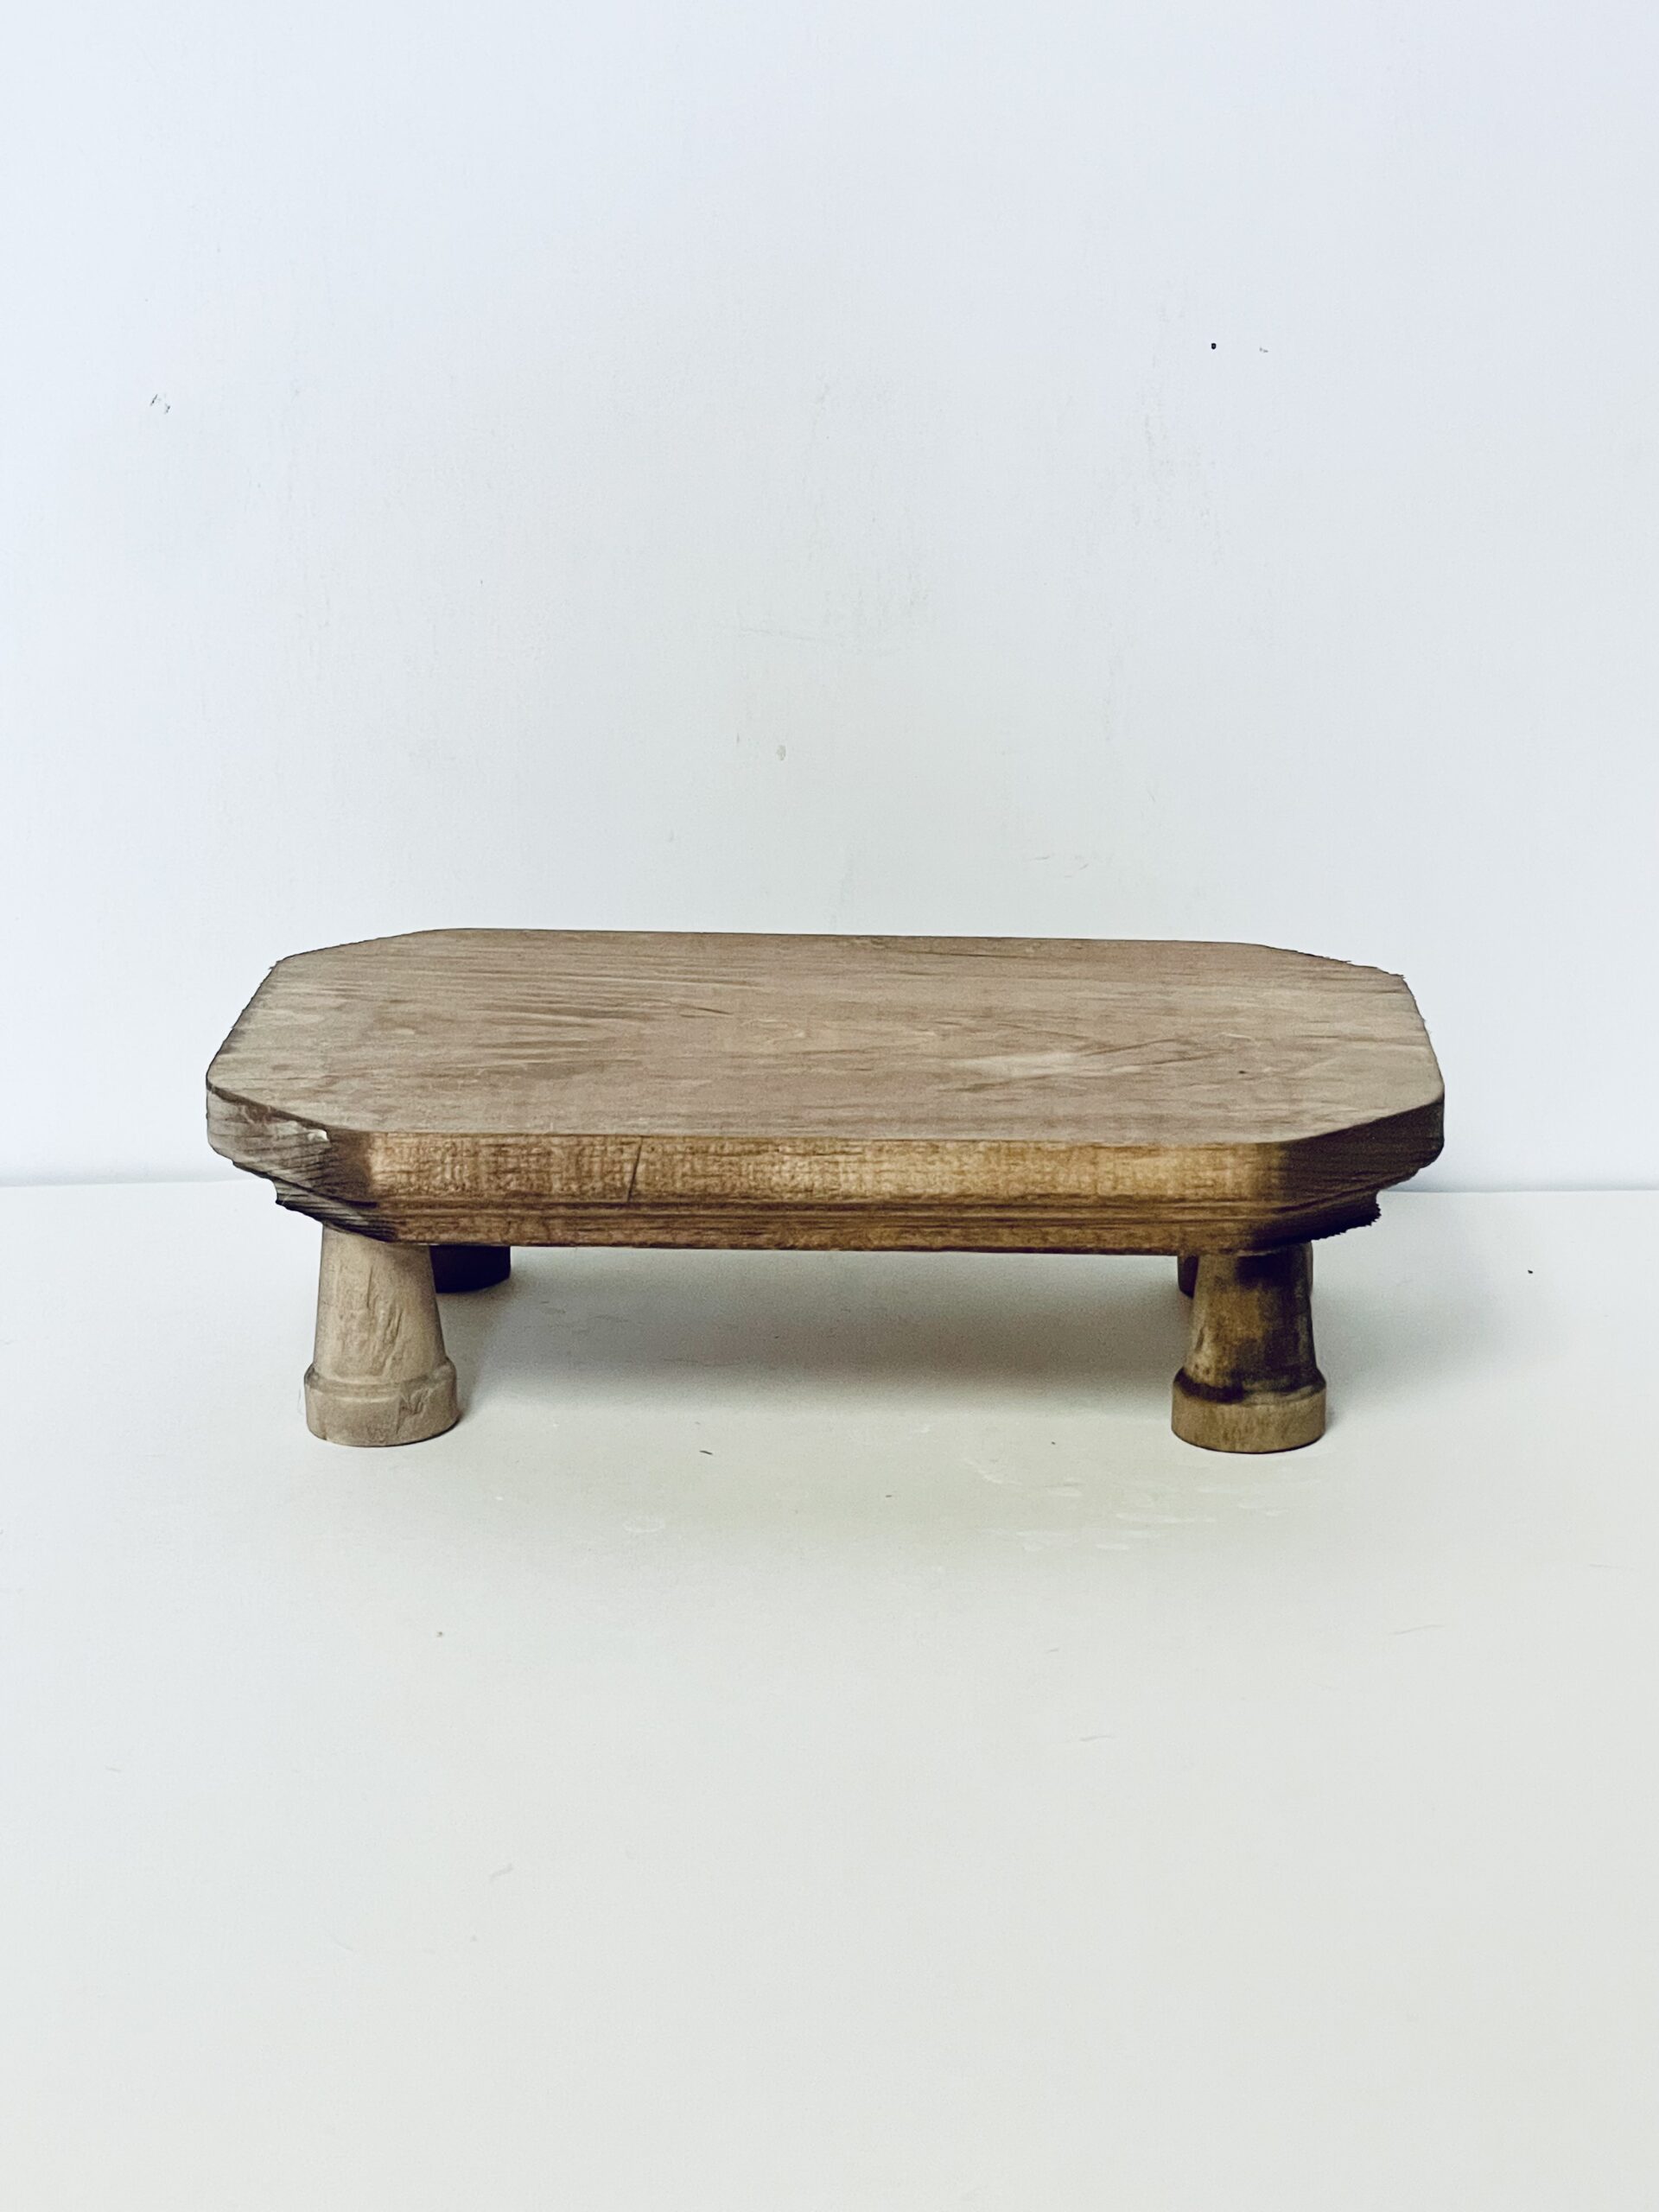
How to make a farmhouse wooden riser
Discover how to create a stunning wooden riser with a charming farmhouse vibe, perfect for adding a touch of rustic elegance to your home décor. Whether you use it to display candles, plants, or kitchen essentials, this DIY project is both simple and stylish!

A wooden riser is the perfect piece to add charm and functionality to your home décor. Whether you’re looking to elevate your favorite décor items, create a stylish wooden shelf, or organize small essentials with an elegant touch, a wooden riser checks all the boxes. It’s not just practical—it’s also a delightful way to showcase your creativity.
Wooden risers are versatile, sturdy, and aesthetically pleasing, making them ideal for any home or office space. They provide a rustic yet refined touch to your décor, effortlessly combining style and function. What’s even better? This DIY wooden riser is budget-friendly and incredibly easy to make, so you don’t need to break the bank to create something amazing.
How to make a wooden riser

Materials you need
- 2 Packages of Mini Pots – The mini pots act as a sturdy base for your riser, adding a unique and creative flair. Lightweight yet durable, these pots provide excellent support to ensure stability.
- Wooden Beveled Edge Plaque – The wooden plaque becomes the top of your riser, offering an elegant shape and smooth surface, perfect for supporting items or showcasing your favorite décor.
- Burnt Umber Acrylic Paint (or Stain) – Give your wooden riser a polished, rustic look with this rich paint or stain. It adds depth and character to the final piece, making it a standout in any room.
Equipment
To bring this project to life, you will need a few simple tools and supplies:
- Hot Glue Gun – This essential tool helps securely attach the mini pots to the wooden plaque, ensuring a strong bond that holds everything together.
- Paint Brush – Use a small paintbrush to apply the burnt umber acrylic paint or stain to the wooden plaque and pots. Its fine bristles allow for precise application, giving you full control over the final look of your riser.
- Small Bowl – This will serve as your mixing bowl for diluting the paint with water.
Step by step instructions to make this wood riser
Preparations
Before getting started, make sure you have all your materials and equipment ready and within reach. This will help streamline the process and ensure a smooth crafting experience. You may also want to lay down some newspaper or a drop cloth to protect your work surface from any potential spills or drips.
Making the riser
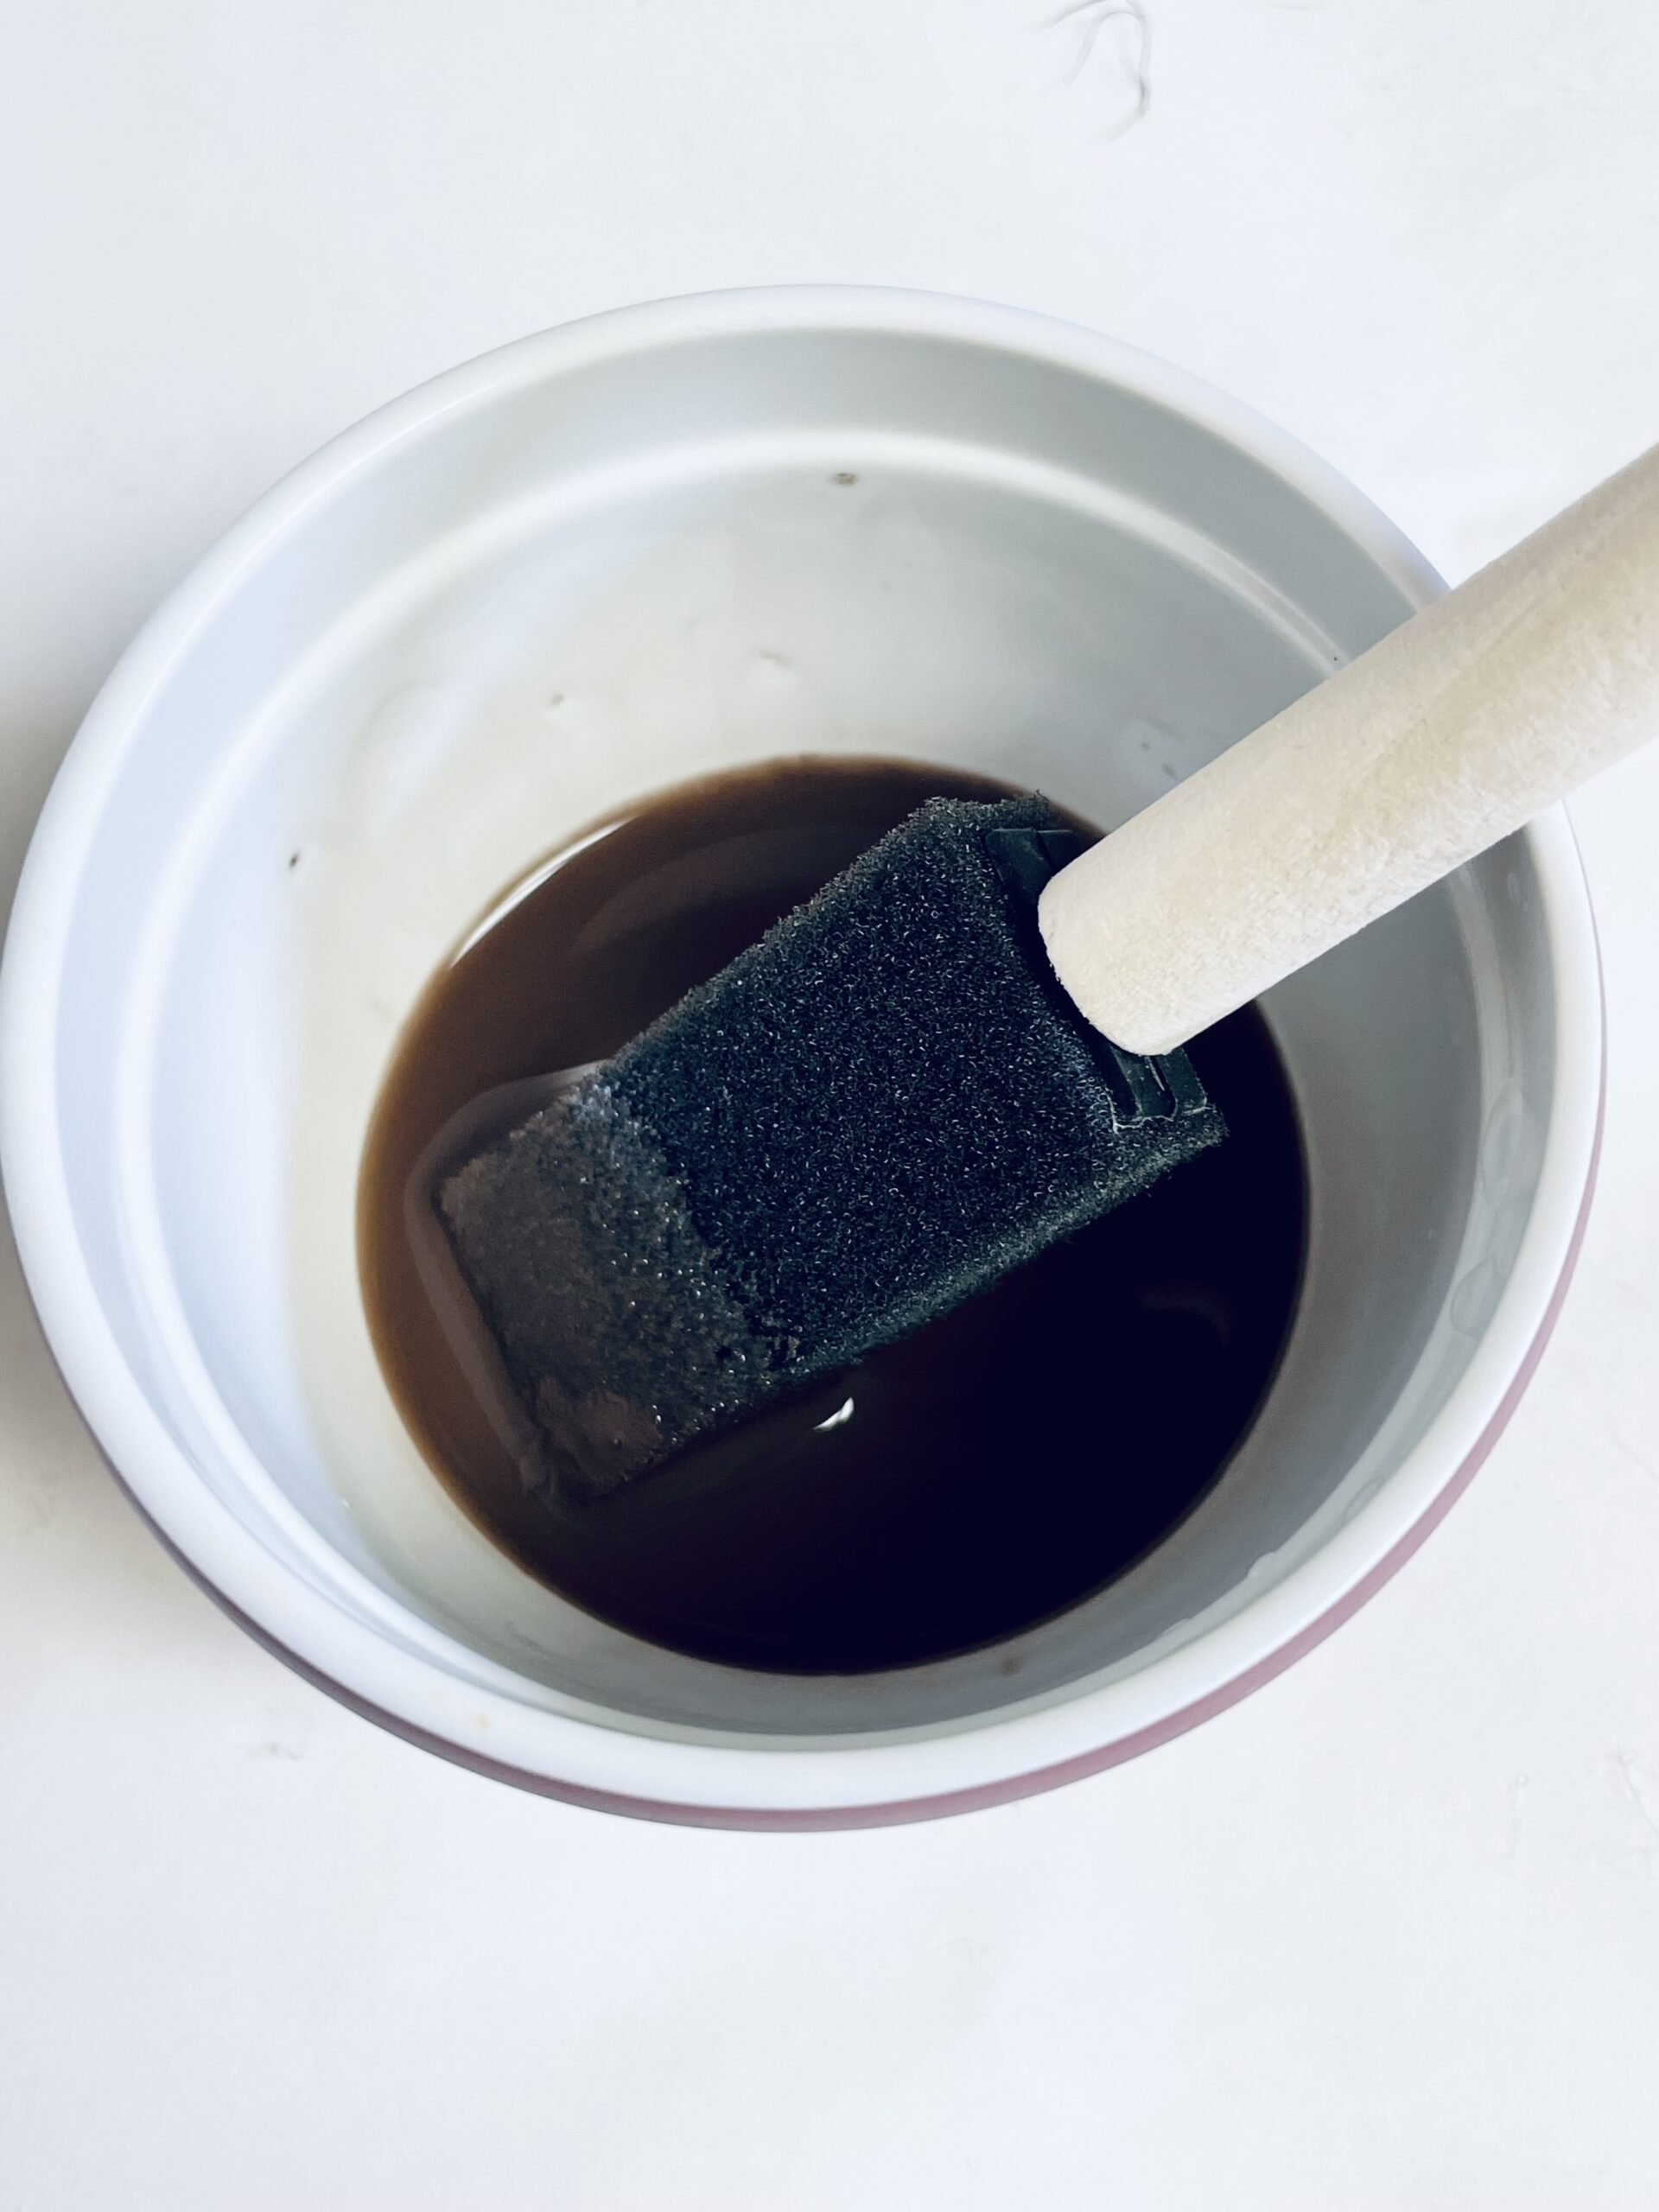
- In a small bowl, mix a few drops of burnt umber acrylic paint with 2 tablespoons of water until well combined.
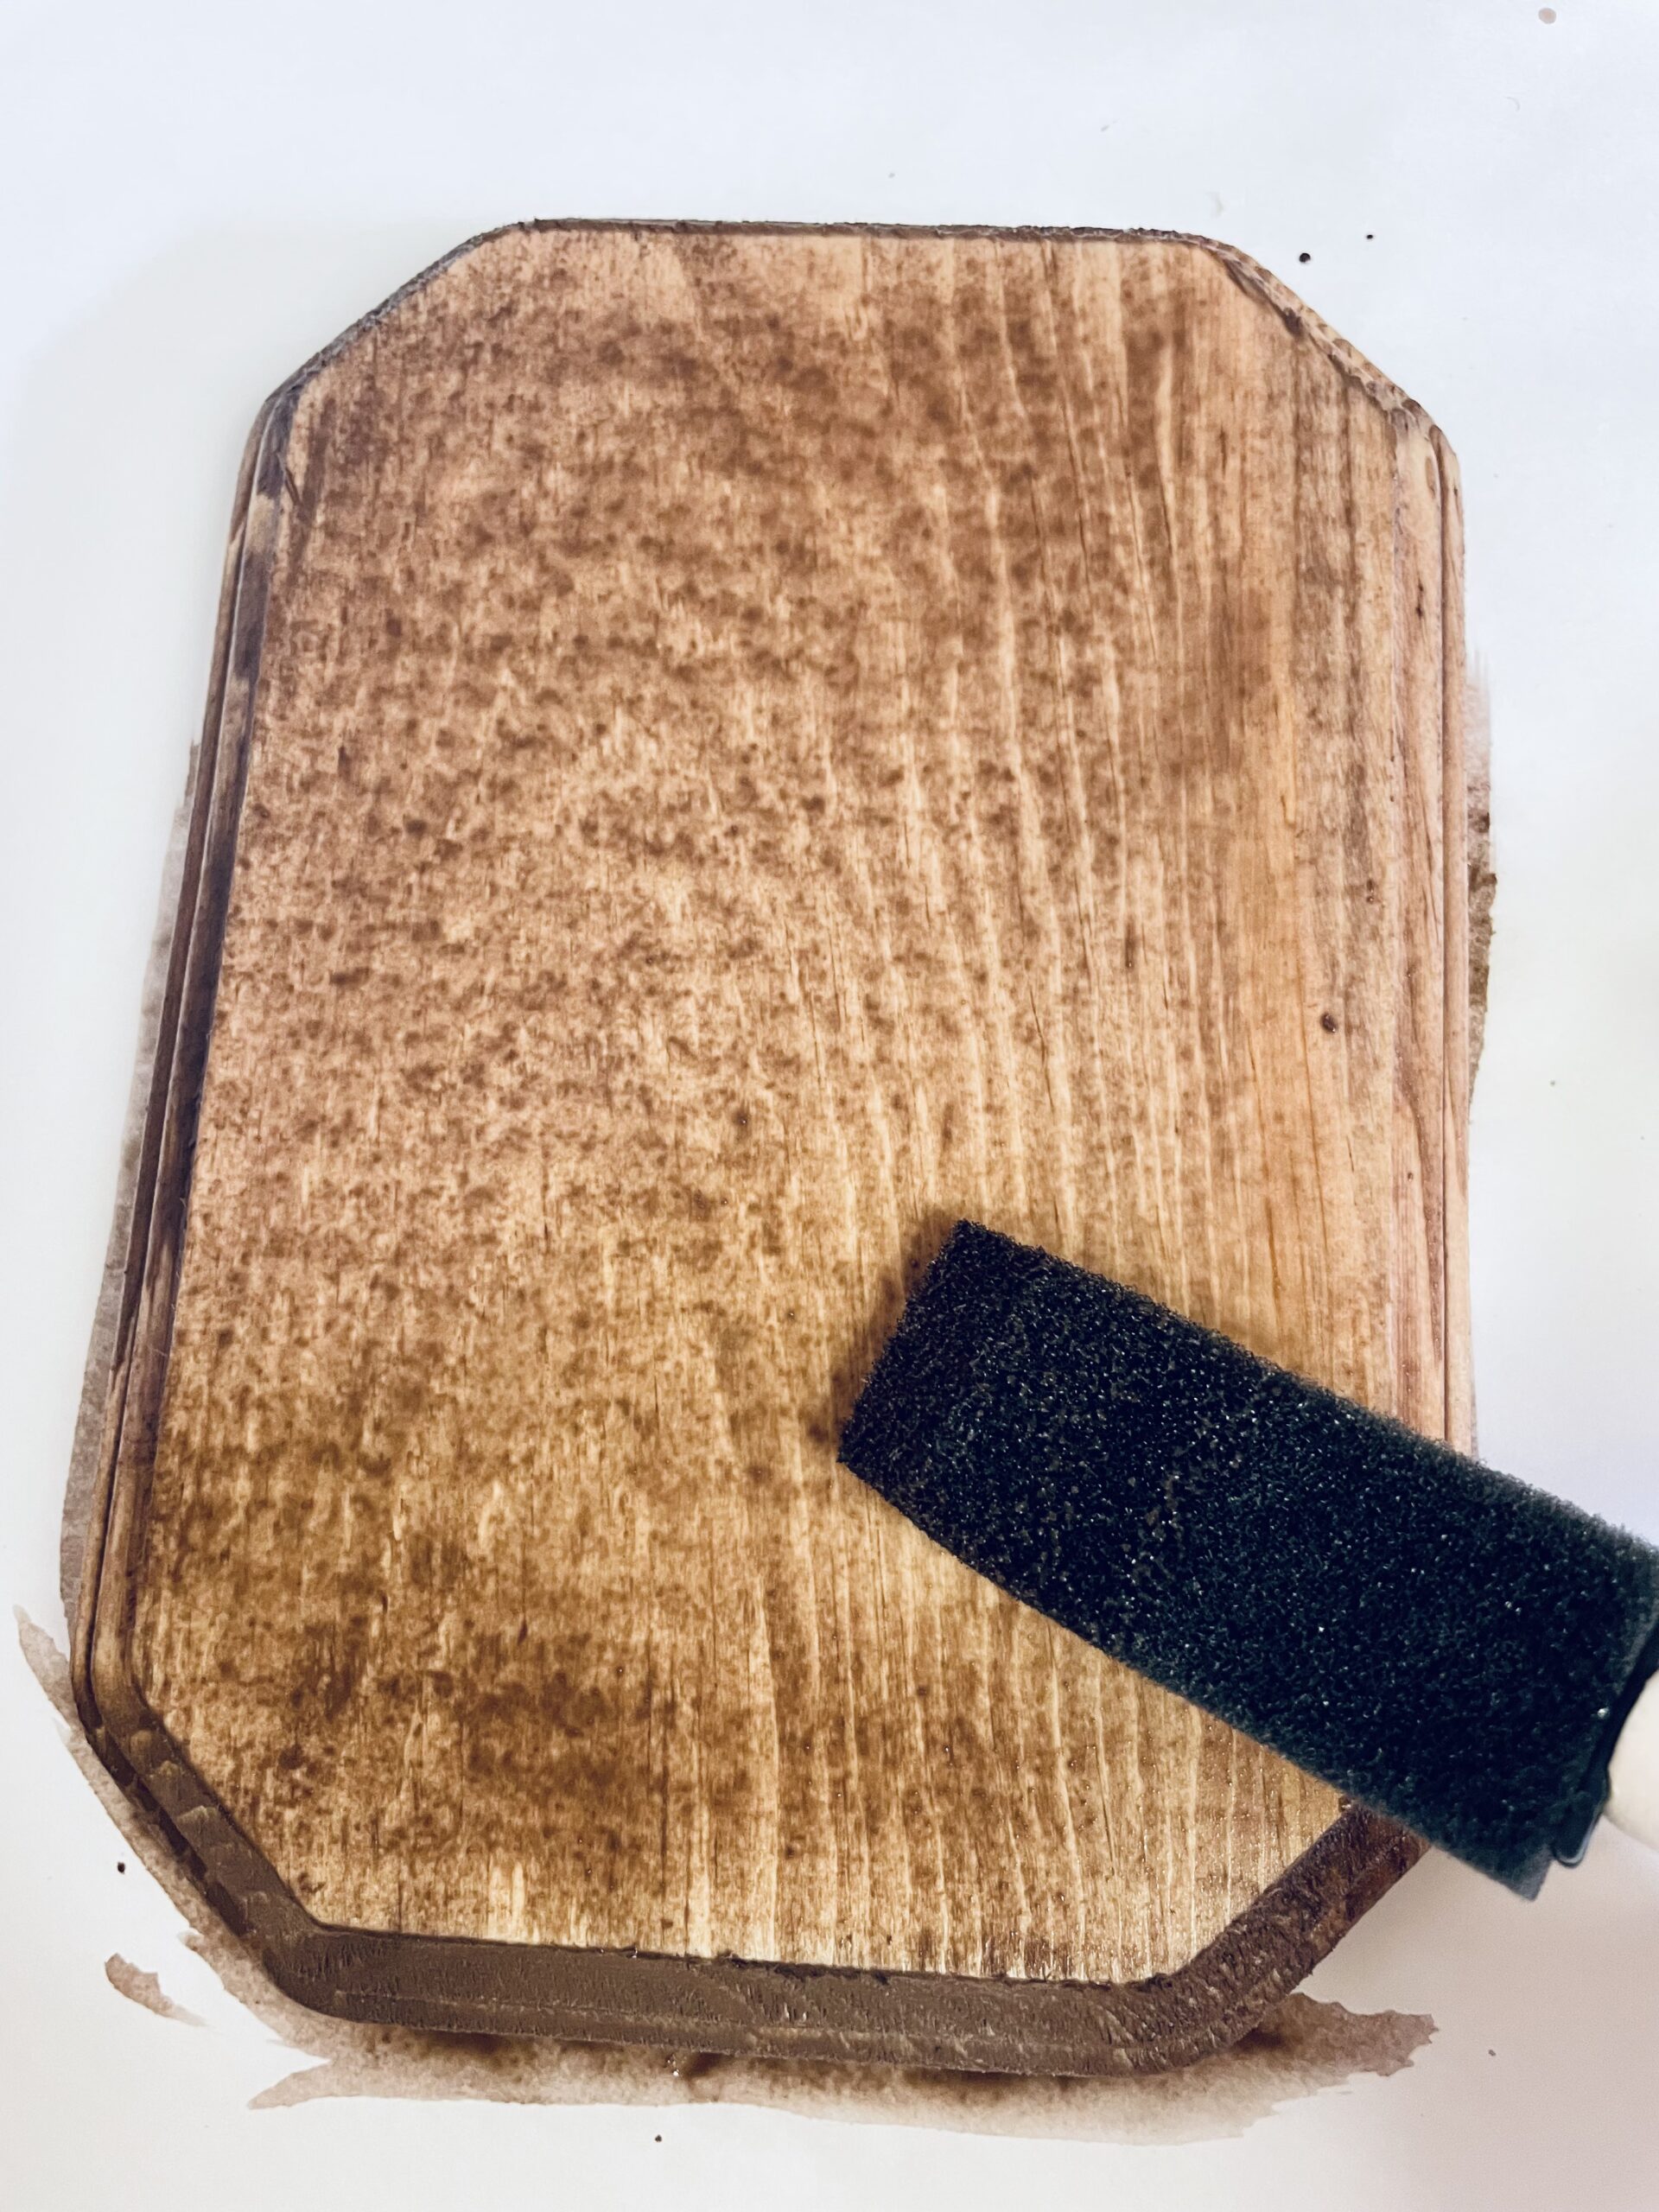
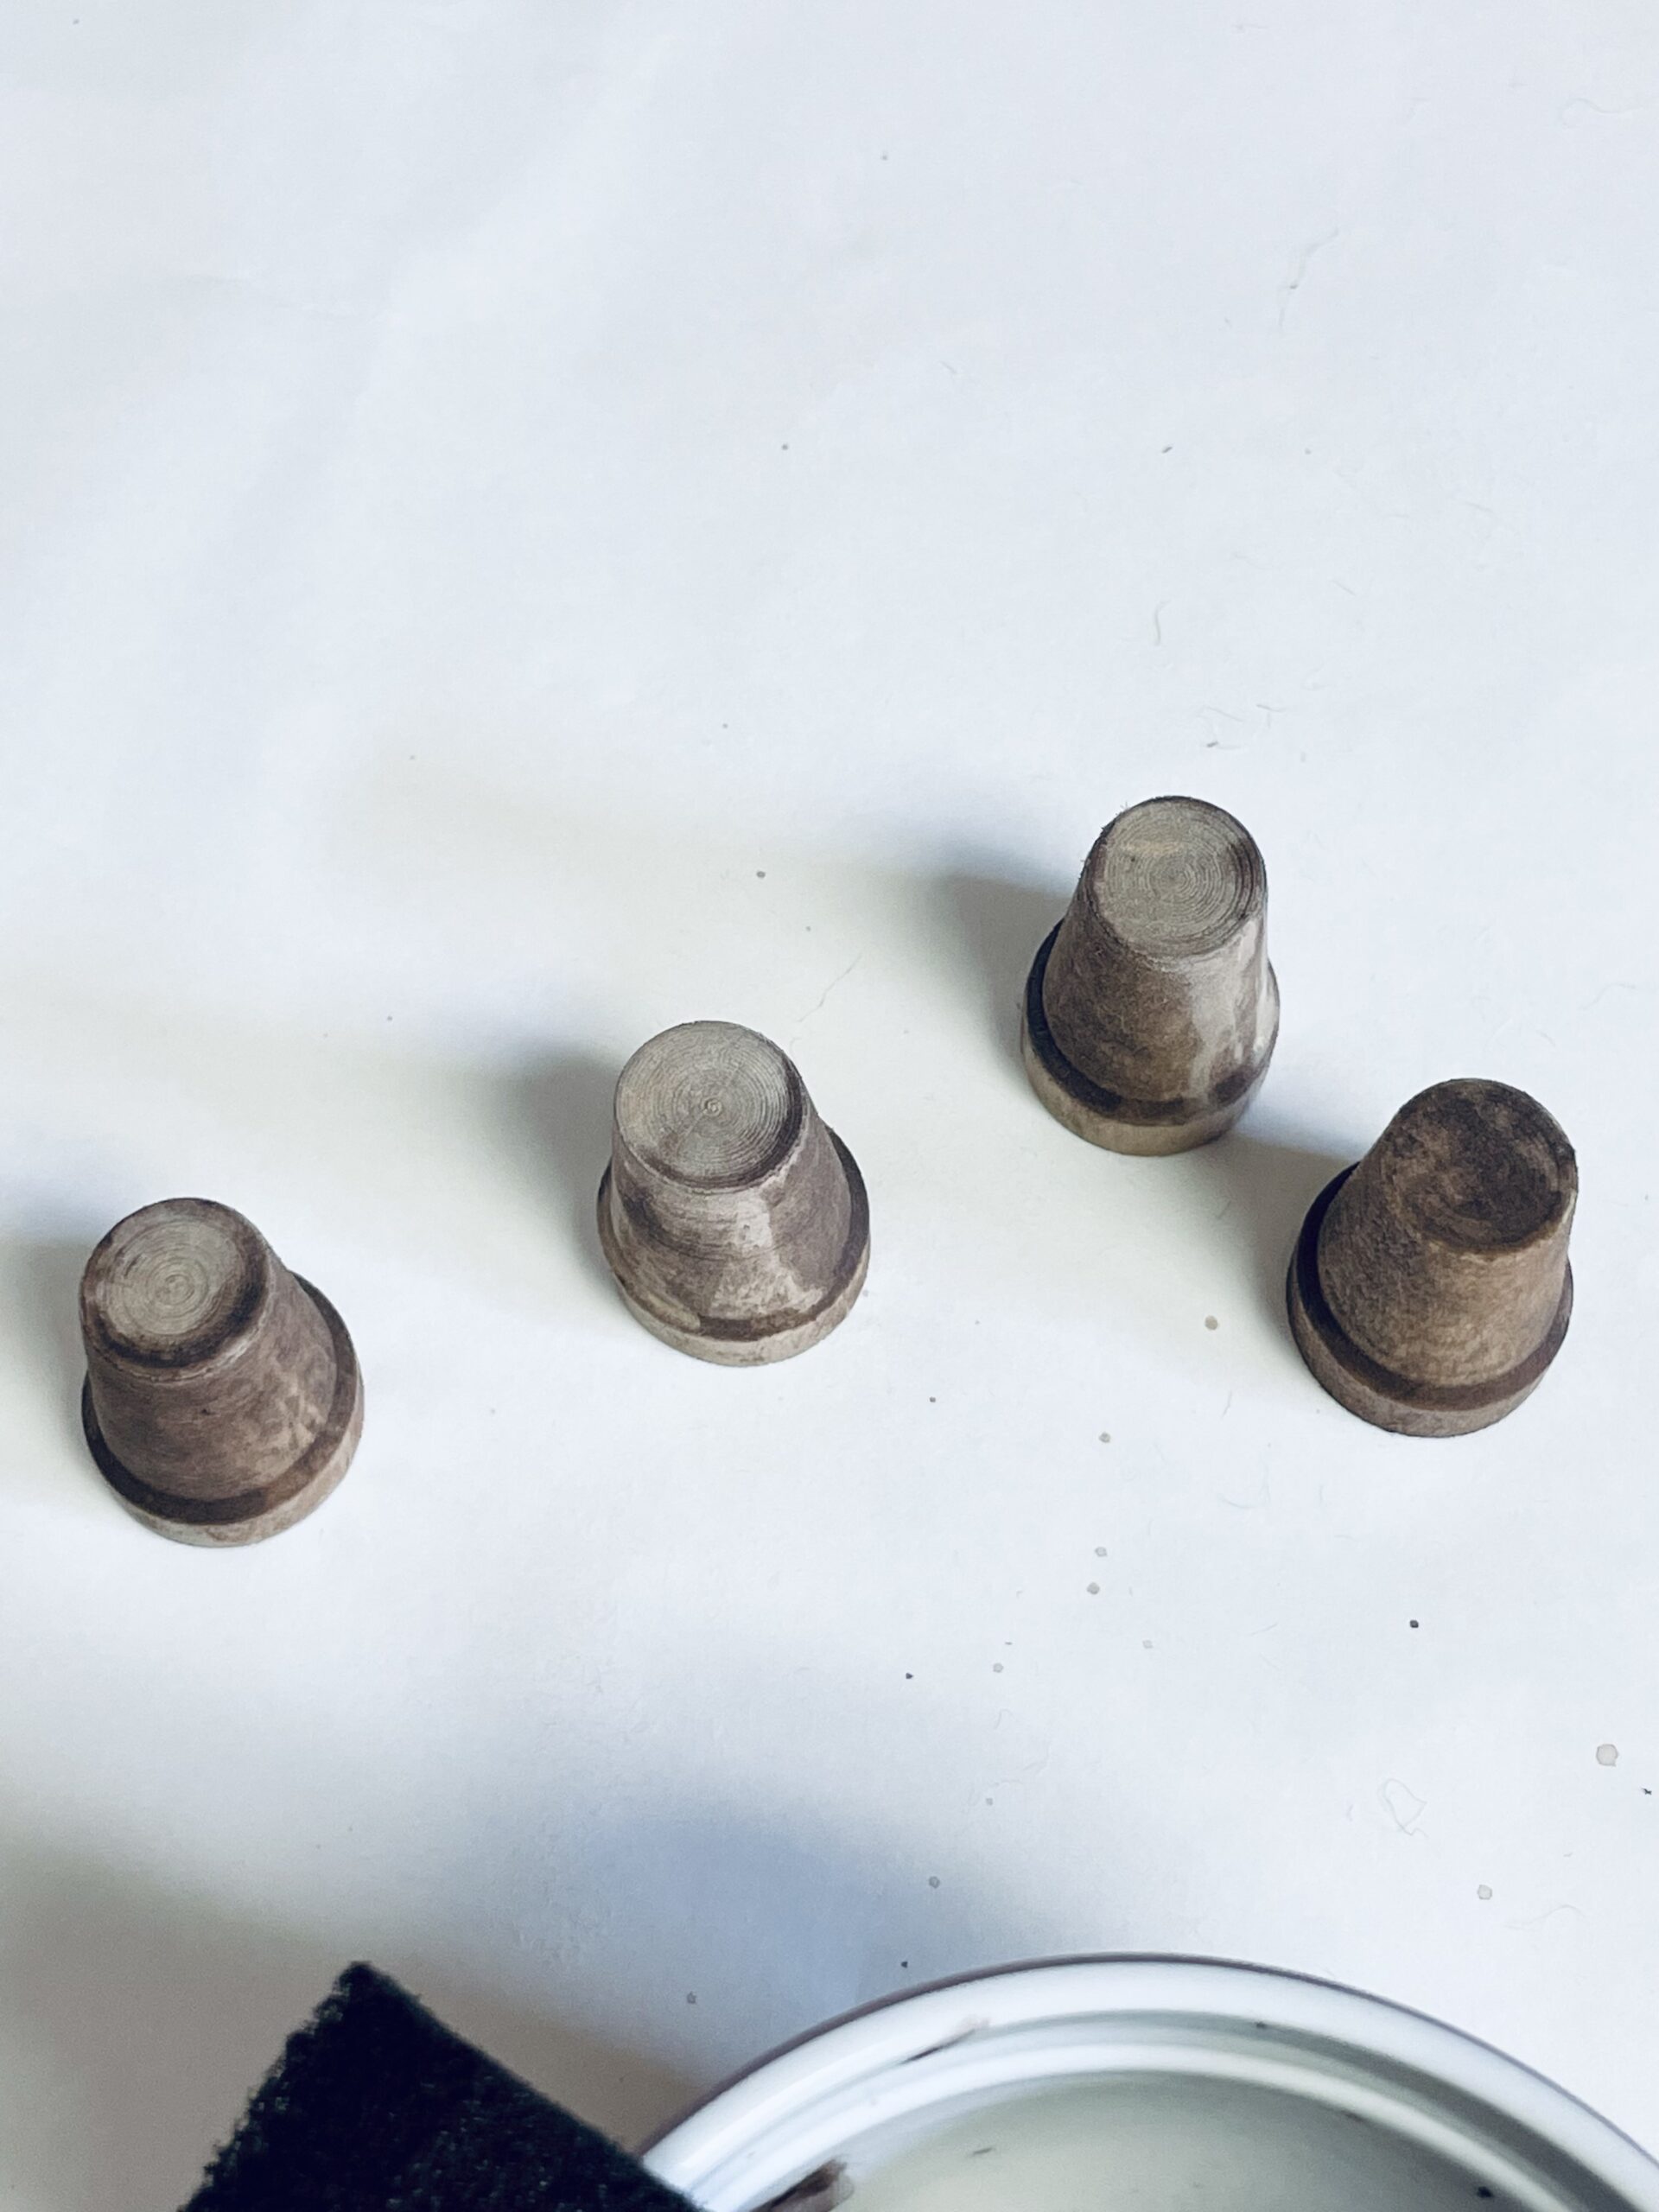
- Using your paintbrush, lightly brush the mixture onto the entire wooden plaque and four of the smaller pots.
- Allow the painted pieces to completely dry before moving on to the next step.
- Once fully dried, use your hot glue gun to add a small amount of glue to the bottom of each pot.
- Firmly press the pots onto the front side of the wooden plaque (the side with the beveled edge). Make sure you position them evenly and securely, with the flat side of the pots facing up to create a solid base for your riser.
- Let everything dry completely before using or displaying your new wooden riser!
Tips
- If you don’t have burnt umber acrylic paint on hand, you can use any other dark brown paint or stain.
- To personalize your riser, feel free to experiment with different colors and finishes. You can even add patterns or designs using stencils for an extra touch of creativity.
Craft Variations
If you want to switch up the look of your wooden riser, here are a few fun variations you can try:
- Painted Pots Riser – Instead of using plain pots, paint them in different colors and patterns before attaching them to the wooden plaque.
- Floral Riser – Add fresh or faux flowers into the mini pots for a pretty and fragrant touch.
- Seasonal Riser – Decorate your riser according to the season or holiday by changing out the items displayed on top, such as pumpkins for fall or ornaments for Christmas.
More ideas you will enjoy
Ready to create your own wooden riser? Not only does it provide functional storage or display options, but it also adds a touch of rustic charm and creativity to your décor. So why wait? Gather your supplies and start crafting today!
Happy Crafting!

How to make a wooden riser
Materials
- Burnt Umber acrylic paint or stain if you prefer
- 2 packages mini pots
- Wooden beveled edge plaque
Tools
- Paint brush
- small bowl
Instructions
- Mix a few drops of the burnt umber acrylic paint with 2 tablespoons of water. Mix together with the paint brush.

- Lightly brush onto the entire plaque
- Then do the 4 of the smaller pots.
- Allow for them to completely dry. Once they are fully dry, using the hot glue gun, add some hot glue to the bottom of the pots.
- Then press firmly onto the front side of the plaque (the side with the beveled edge) you want the flat side to be the top of the riser
Article may contain Amazon & affiliate links. As an Amazon Associate I earn from qualifying purchases at no additional cost to you.
ABOUT PETRO
Hi, I’m Petro, author and founder of Easy Peasy Creative Ideas. Sewist, crafter, avid DIY-er, foodie, photographer, homemaker and mommy to one. I’m an expert at coming up with quick, clever sewing tips, recycling crafts and simple, easy recipes! You can find my ideas featured in reputable publications such as Country Living, Good House Keeping, Yahoo News, WikiHow, Shutterfly, Parade, Brit & Co and more. Thanks for stopping by and hope you’ll stay for a while, get to know me better and come back another time. Stick around for real fun projects! Read more…