

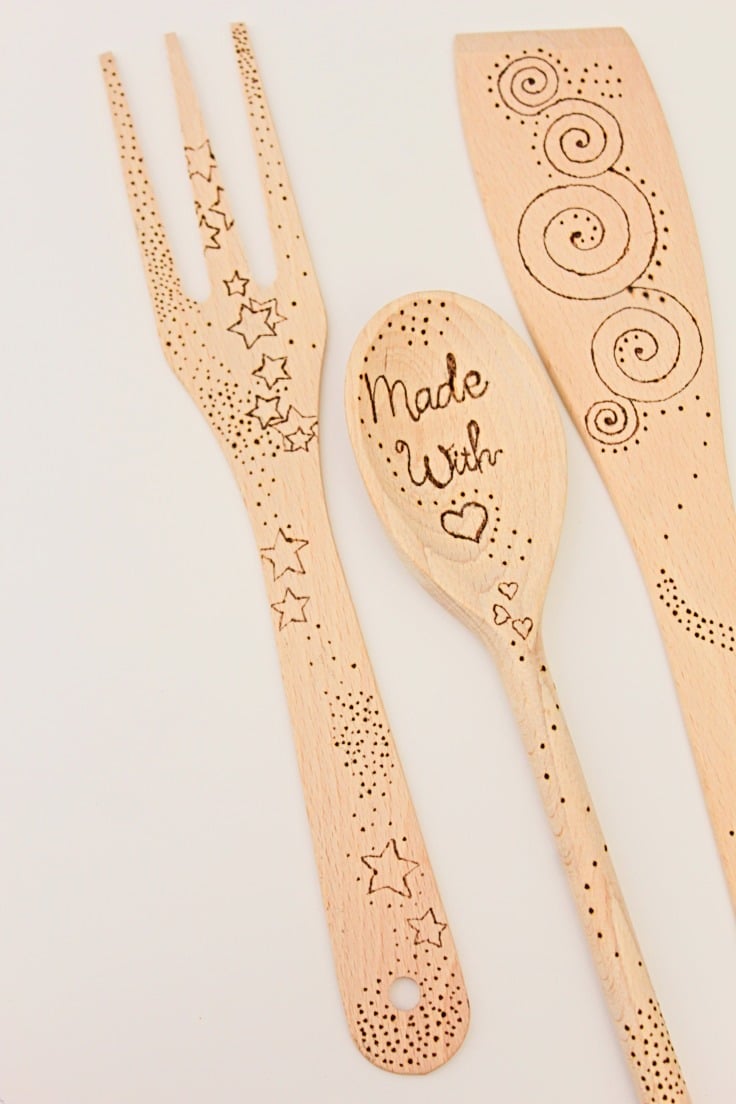
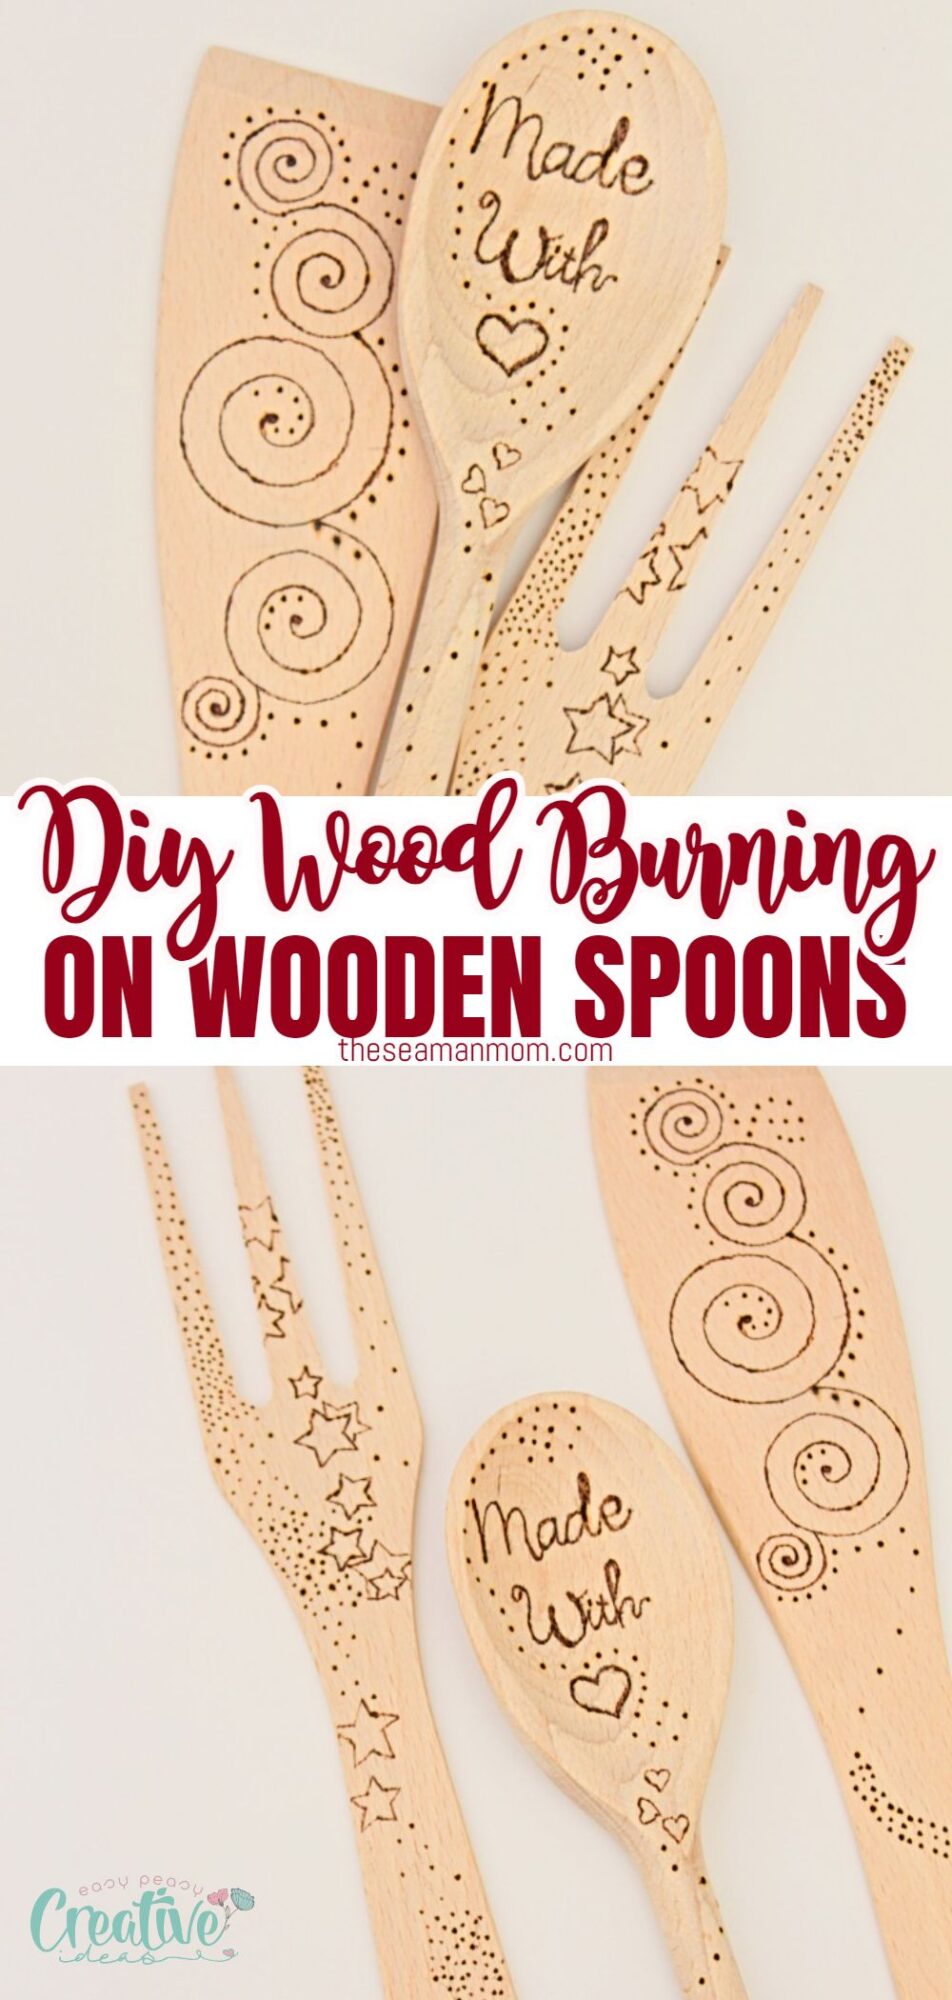
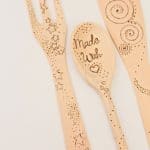
DIY wood burning on wooden spoons
DIY wood burning offers a delightful approach to crafting customized wooden pieces! In today’s session, we’ll focus on creating beautiful wood burned spoons. Whether you’re designing your own simple wood burning patterns or opting for purchased ones, these artistic spoons will serve as an exceptionally creative gift idea that’s sure to be adored by all!
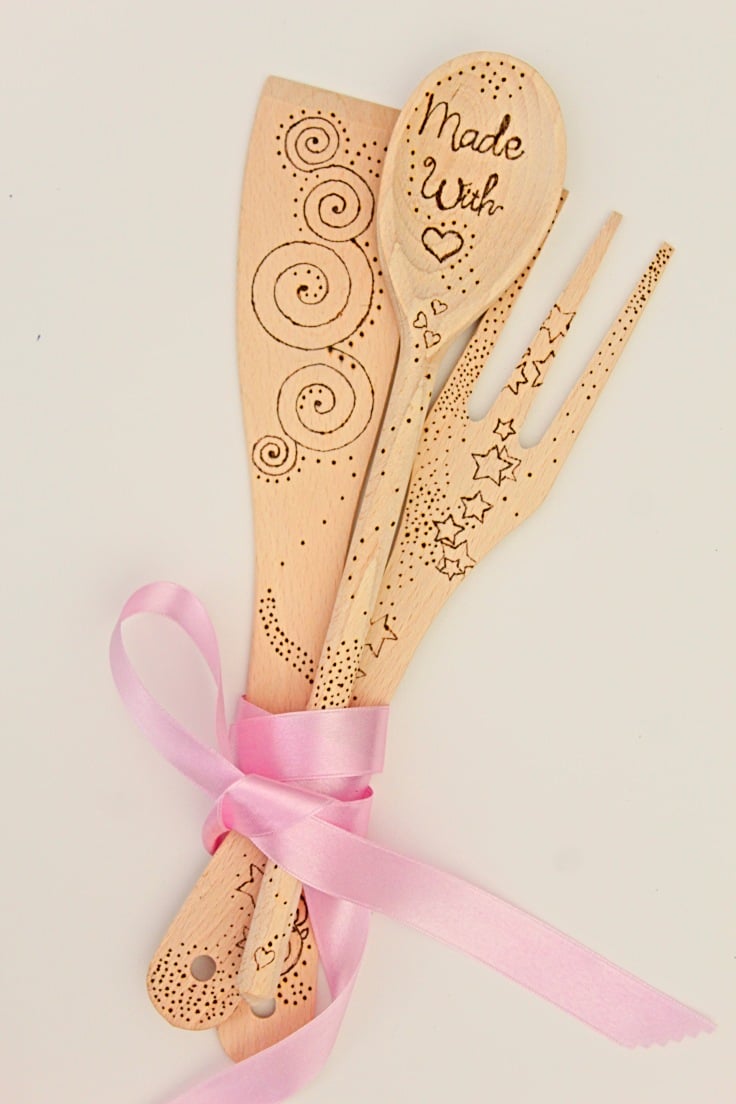
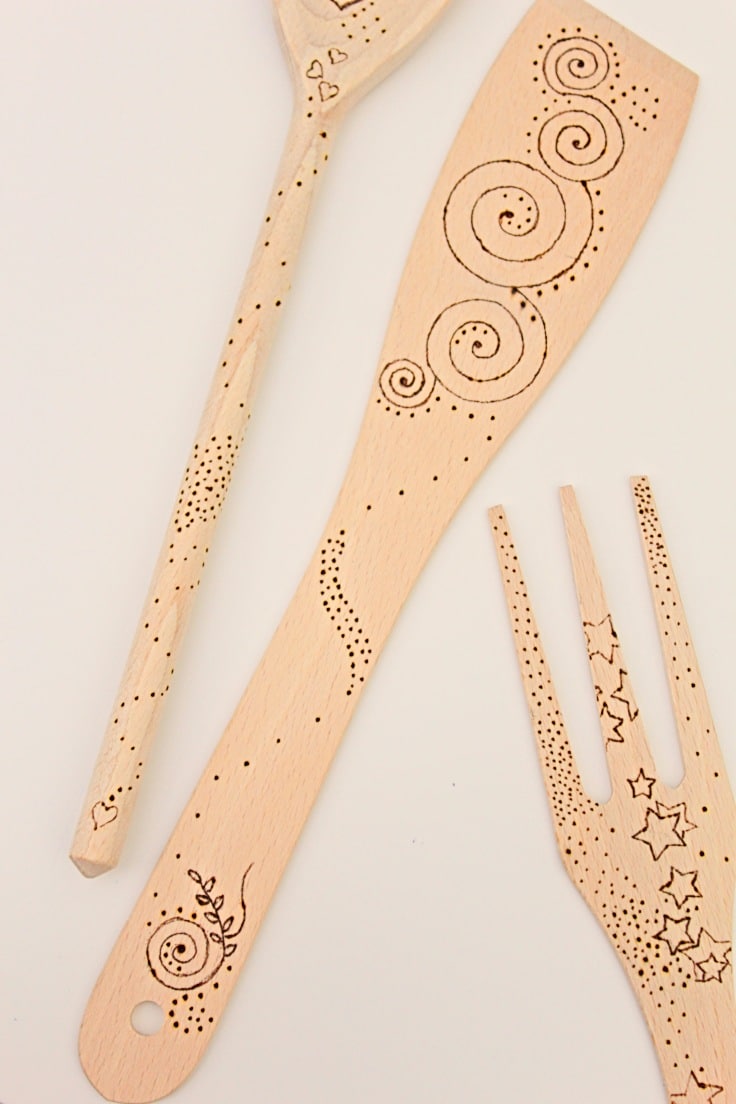
Learning DIY wood burning is both straightforward and enjoyable! The basic wood burning designs I’ve created are the ideal base for a beginners project. When applied to wooden spoons, they transform into an impressively unique gift idea that’s sure to make an impact on everyone! These elegantly simple wood burning creations are guaranteed to spark engaging conversations at your next gathering!
I’ve been super into pyrography, or wood burning DIY, since I was a kid. But only recently did I dive into a real project and made these wood burned spoons. It’s been ages since I last used a wood burning tool, so I was really happy to see how awesome the spoons turned out!
But wait! What is pyrography? Pyrography, also known as pyrogravure is the art of decorating wood or other materials through burning marks, using a heated tool that resembles a thick pen or marker. Pyrography is most commonly known as wood burning and the term comes from Greek (“pur” and “graphos”), meaning “writing with fire”.
DIY wood burning tutorial
Materials:
- wooden kitchen spoons
- wood burning designs
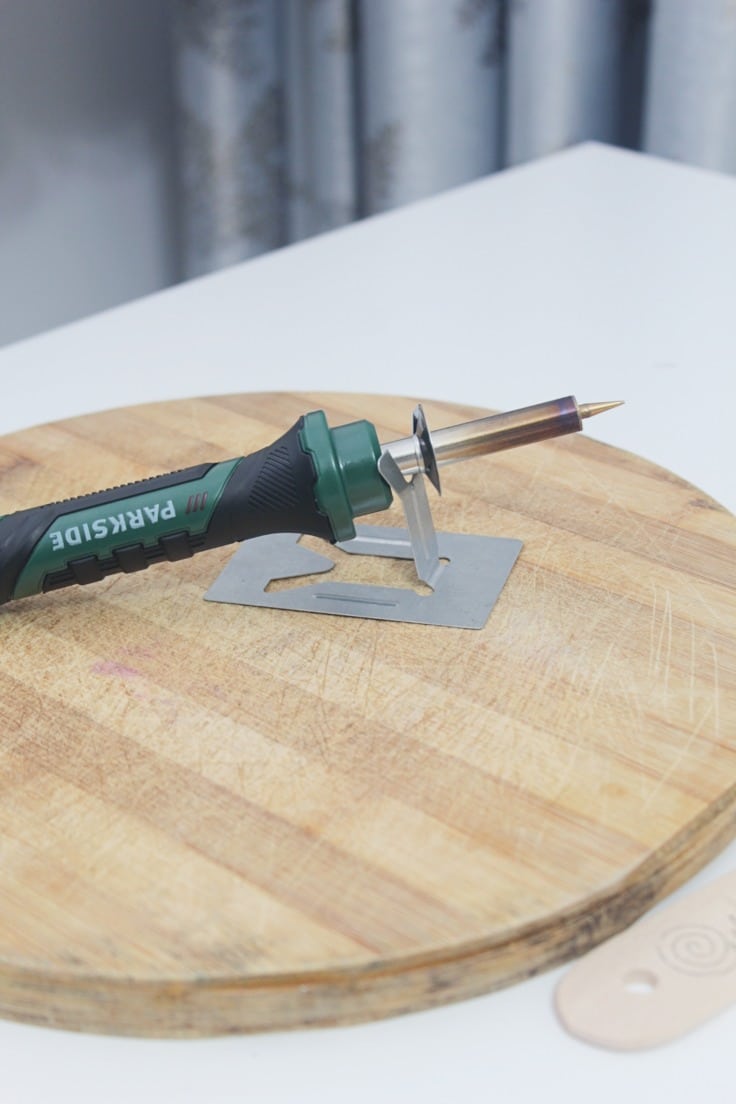
- wood burning tool
- holder to safely store your burning tool when not in use
- pliers to remove the tips
- sanding block
- optional – coconut oil
Instructions to wood burn wooden spoons
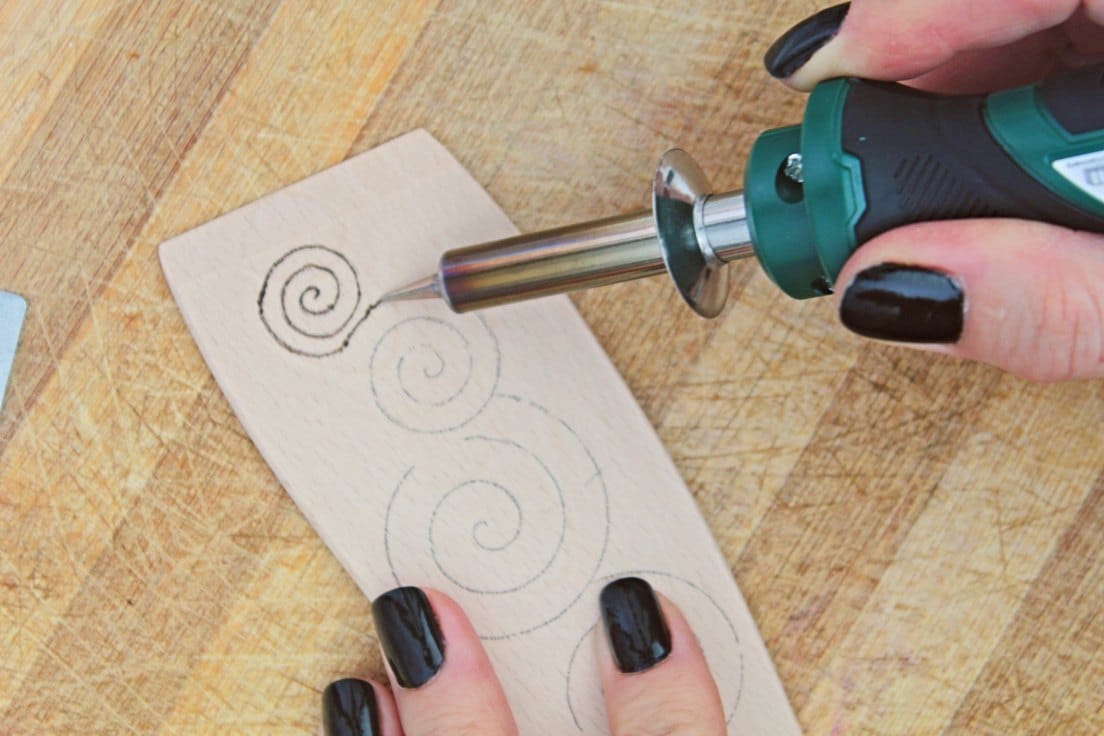
- Follow this technique to print your designs and transfer them to your piece of wood.
- Allow the ink to dry a little so it won’t smudge if you accidentally touch the design with your fingers when you start burning.
- If you’re using my designs choose a round, medium fine tip for your burning tool. I used only one tip for these tools but if you want to apply heavier or lighter marks, you need to switch tips.
- Allow the tool to heat up completely before applying your first stroke. Use a holder to safely store the pen.
- Start working from one end to the other and use small, but even strokes.
- Work with your pen at an angle. Make sure you don’t keep the pen too long on one spot otherwise you’ll end up with an uneven design. If this happens, don’t worry, you can always go back to the starting point and just enlarge the design with the wood burning pen until the mistake is covered.
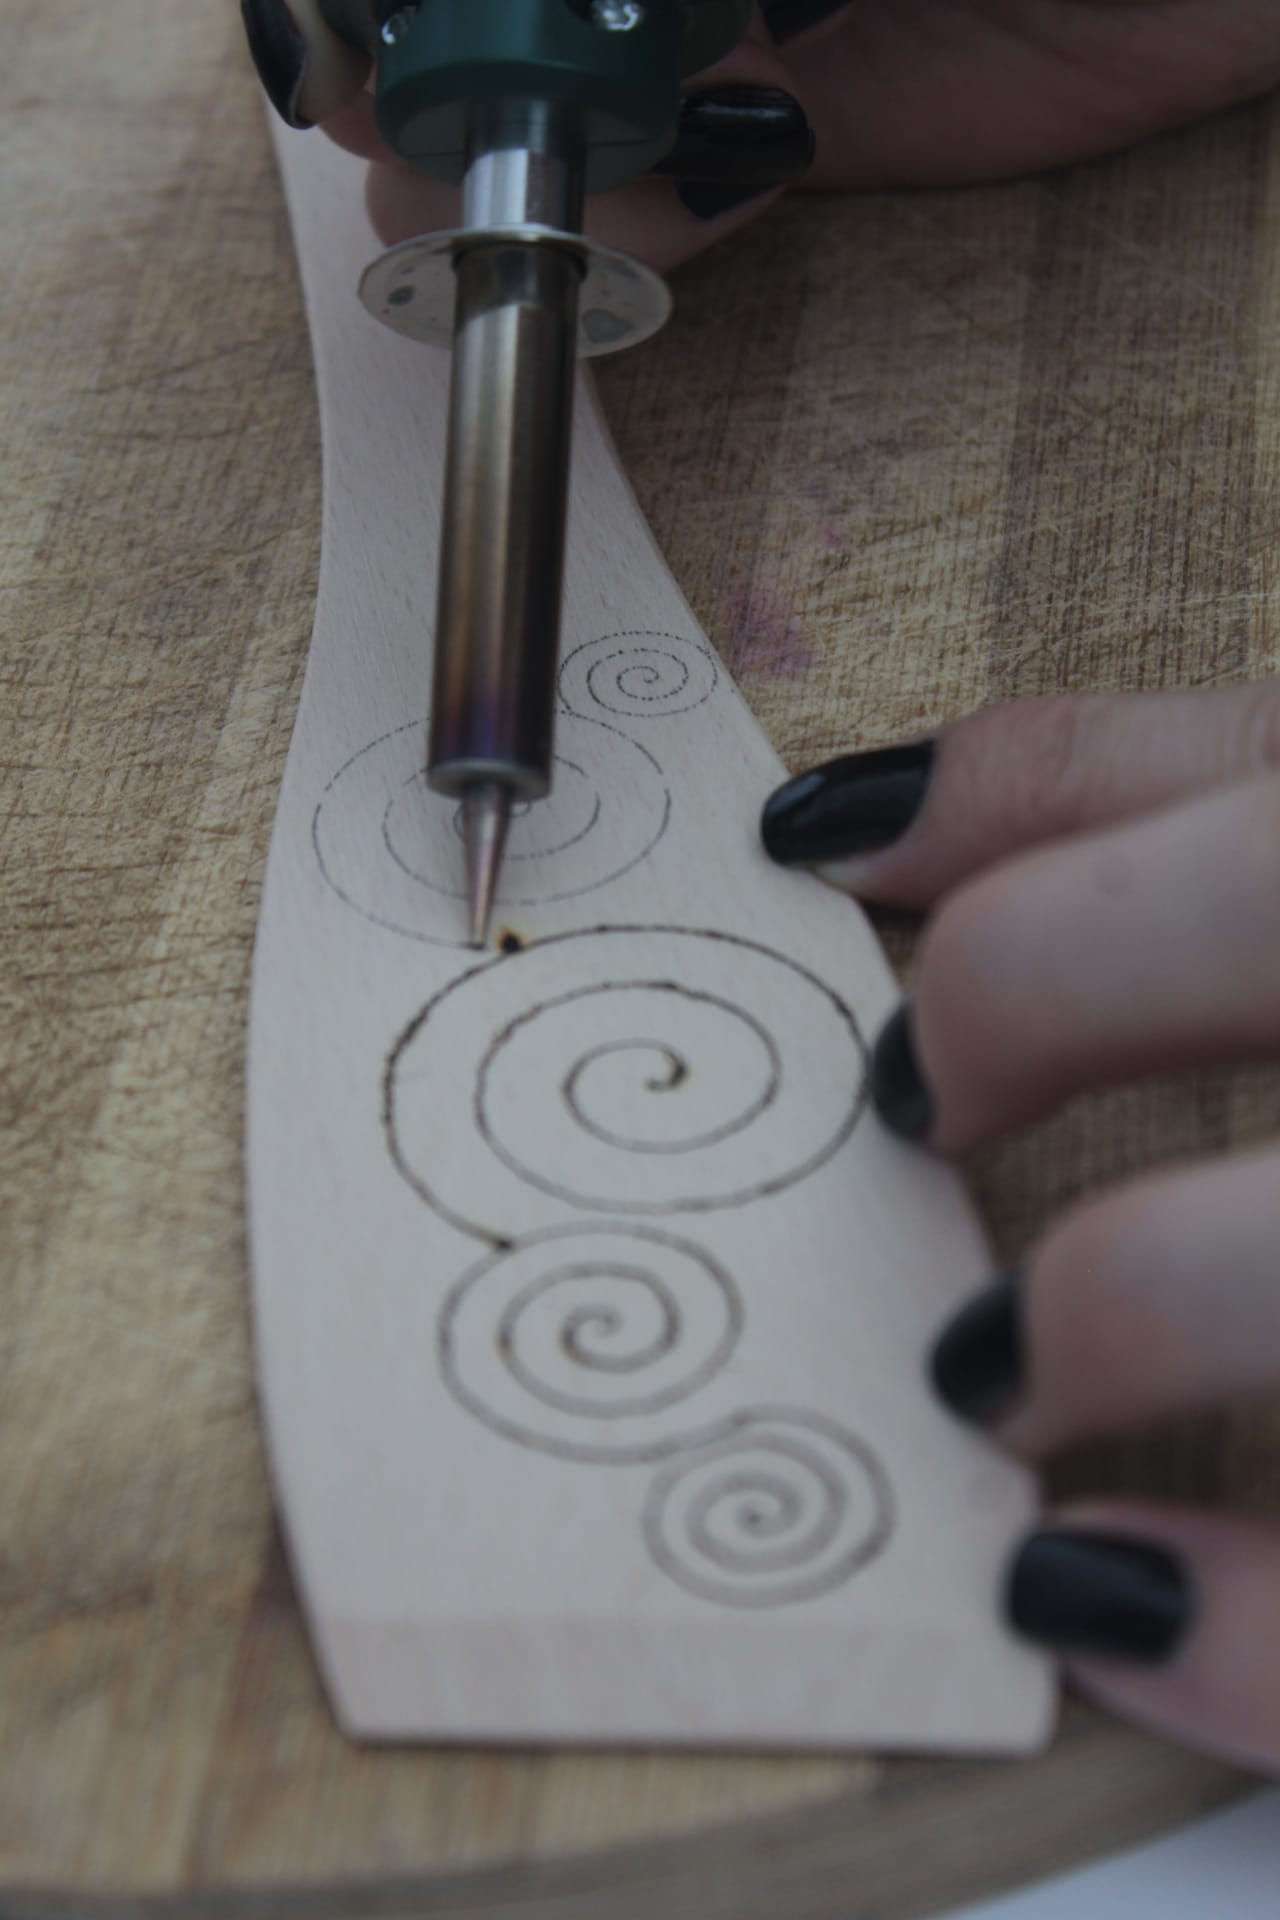
- Go with the wood grain whenever possible. Burning against the grain will offer up more resistance but it’s not impossible. Just don’t press too hard or you may lose control of the tool.
- Don’t be afraid to burn the same part of the outline three or four times if needed.
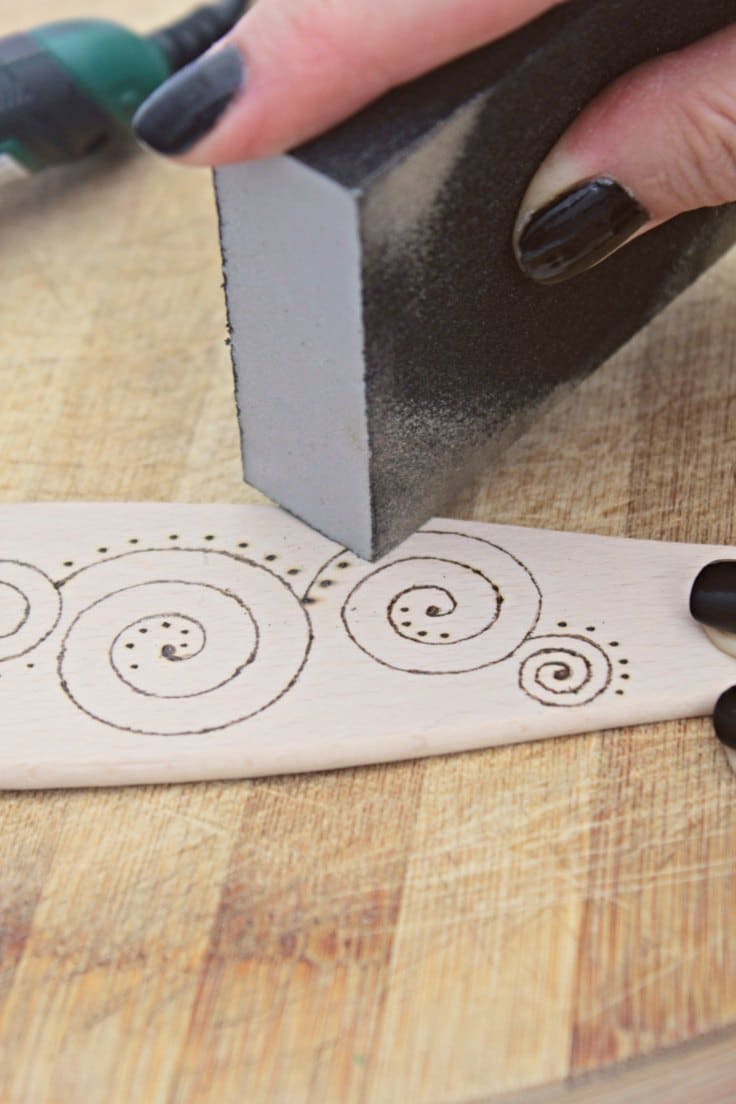
- But don’t press the tool too hard onto the design or you’ll end up with burning marks. This is expected for beginners though and if this happens, don’t panic. Finish burning all around your design then use a sanding block to sand the ugly areas or spots. For deeper burns, you’ll need a harsher sanding block for shallow burns you’ll need a very fine sanding block. When done sanding, blow the dust and wipe your work with a slightly damp cloth.
- Optional – when your project is finished, rub a little oil to polish your spoons a little. Or use a small blow torch to give the whole item a little burn all over.
Tips for choosing your wood burning tool:
- Burning tools come in various shapes, sizes and prices. Choose one that is easy to hold and control with your fingers.
- Purchase a variety of assorted burning heads/tips for your wood burning tool, don’t settle for the basic ones that come with the package.
- Choose a tool that doesn’t overheat after a couple of hours of use. The cheaper versions are great until you need to work on projects for a few hours. That’s when they start burning your fingers and you need to take a break to allow them to cool.
- Opt for a tool with high performance if you need to burn wood for hours. On these you get to switch the whole “pen” when you need to draw new effects, instead of changing the tips. Don’t worry if you don’t want to invest too much though you can always change the tip using some pliers instead of waiting for them to cool.
- Clean your tips regularly to make sure they’re delivering maximum heat. Run a sanding block over your tips or clean them on a strop using aluminum oxide to remove excess carbon that sticks to the tips. Make sure the tips are completely cooled before cleaning them.
Tips for burning wood:
- Work in a well ventilated area. There will be a lot of smoke forming and it will irritate your lungs. Consider using a fan to blow the smoke away from you, from behind you or on a side (anywhere, really as long as it doesn’t blow the smoke into your face).
- Make sure your design is transferred correctly onto the wood. If the lines are blurry or uneven, you will not have much control over these during your DIY wood burning.
- Try and use precise traces.
- Burn lines and curves using one stroke if possible and do it slowly. Don’t rush but also don’t spend a lot of time in the same spot or the burning will leave marks.
- To have more control over your burning tool, choose a round tip which doesn’t sink into the wood and gives you freedom of movement. With a round tip you can also change directions easily.
- When tracing curves, move both your hand and the wood.
- Don’t try and fill your designs quickly by using as much heat as possible or pressing the tool hard as this technique will also leave ugly burning marks. Work with regular heat and work in circles, slowly darkening each area that needs filled.
- For super dark fillings that cover larger areas use a flat tip
How to seal wood burned spoons
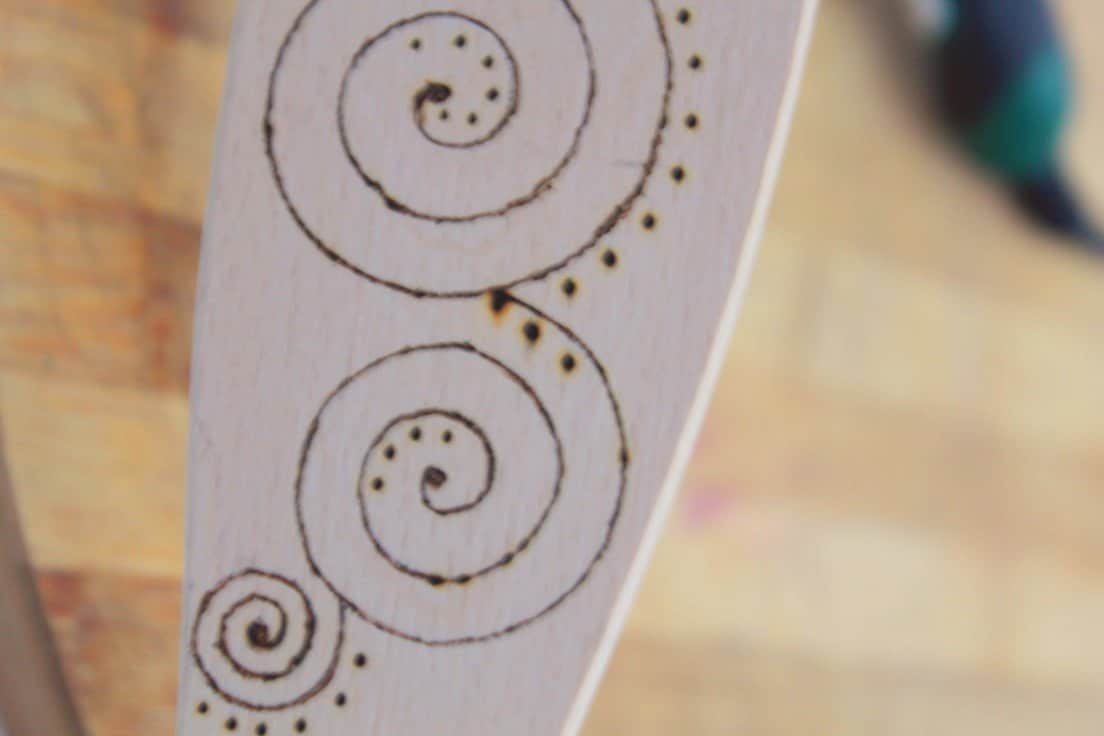
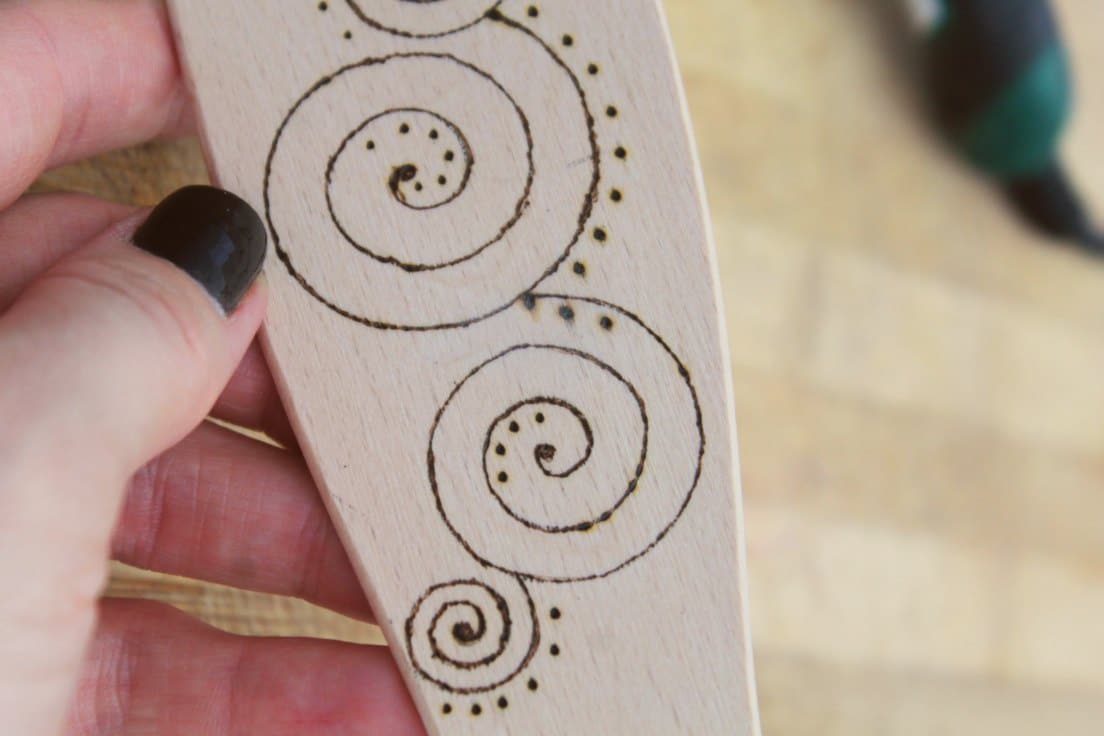
These wood burned spoons are food safe as the designs are burned in. The designs are initially painted on, with this print on wood technique but the ink is then destroyed through burning with the heated tool. This means the designs will not rub off or wear down over time. My wood burning tool comes with a large variety of heads/tips and I chose a medium thin one to apply a soft burning stroke over my designs. Feel free to use the head/tip you prefer but if you’ve decided to use my designs, I think these look best in thin stokes.
I didn’t use any sealant as I use these spoons for preparing food but if you feel you need to apply a finish/sealant to your wood spoons, choose a food safe one like food-safe mineral oil, coconut oil, flaxseed oil, Tung oil or walnut oil (if you’re not allergic to nuts).
How to use these wood burning designs
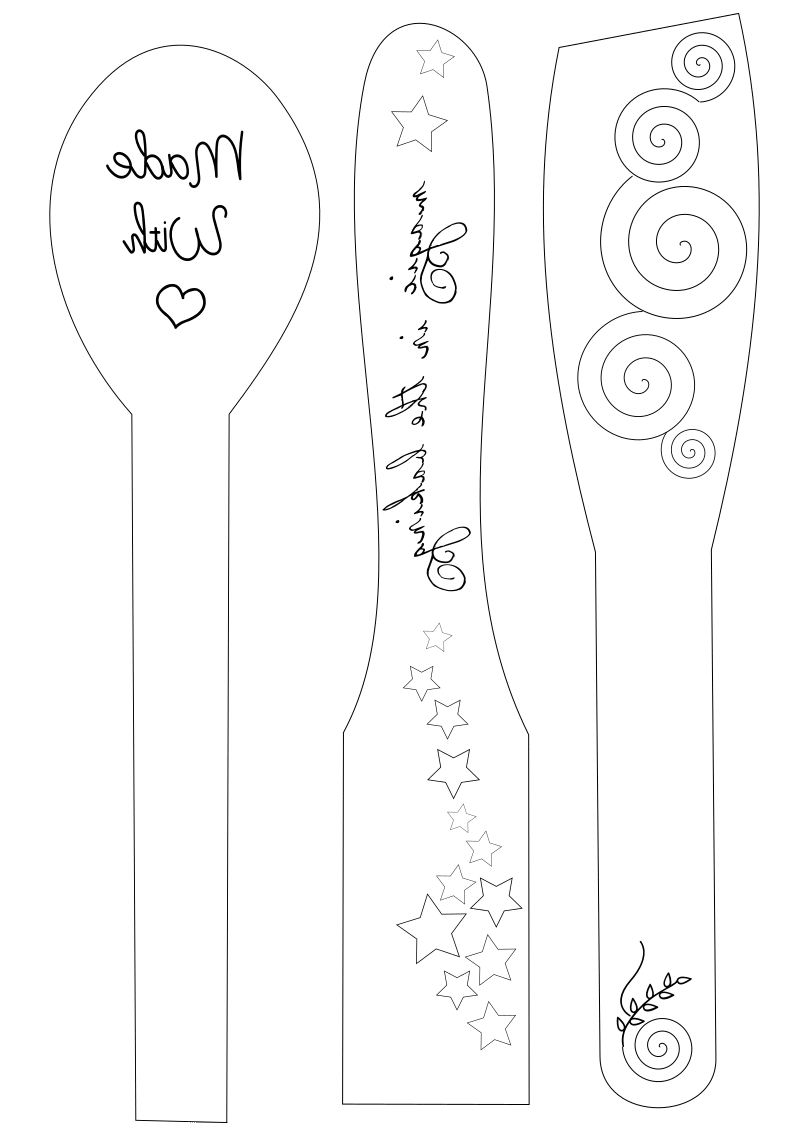
The designs come printed on reverse so they’ll transfer to the right side onto the wood. So they’ll print out like this:
And will look like this when applied to wood:
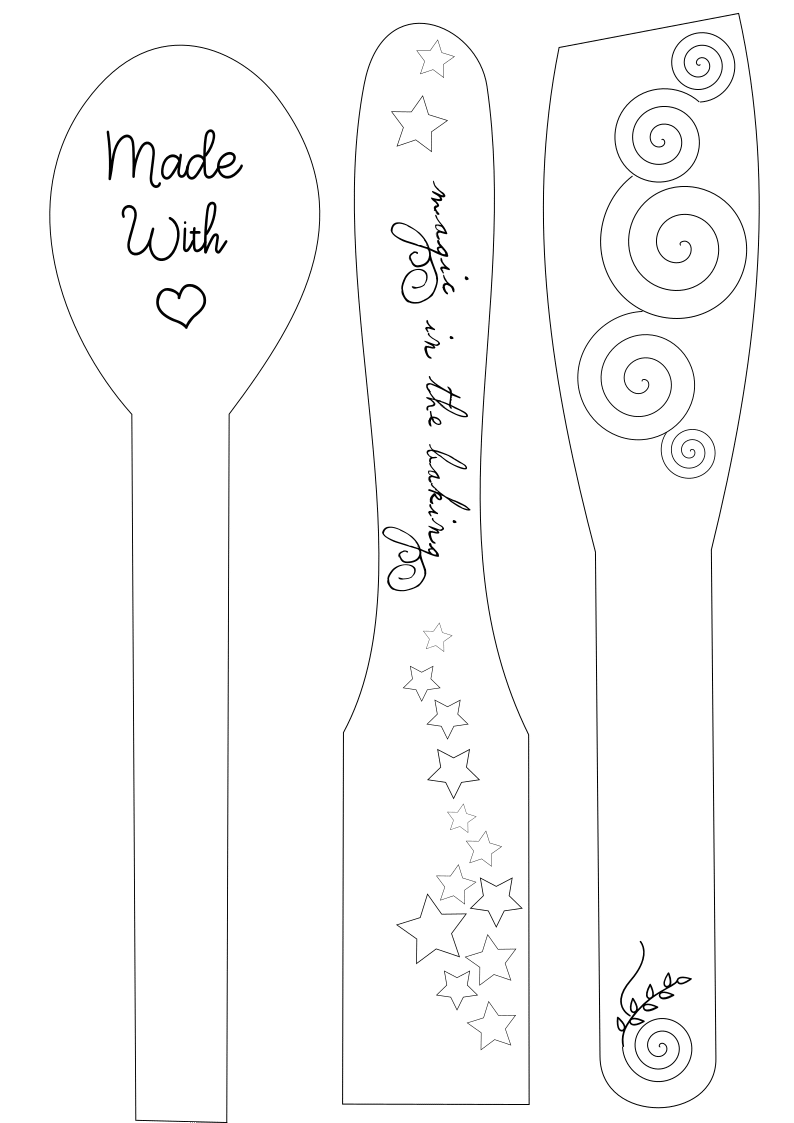
As you may notice, only the writing is flipped, the drawings won’t matter if they’re flipped or not. These wood burning designs can be used on a variety of wooden surfaces such as cutting boards, coasters, picture frames, and more.
Wood burning can be a fun and creative way to add designs to your DIY wooden projects. You can achieve beautiful results and create unique pieces that showcase your personal style. So grab your wood burning tool and get ready to add beautiful designs to your next project! So go ahead, let your creativity run wild and have fun with wood burning.
I hope you enjoyed this tutorial! Please let me know in the comments below if you have any questions or if you try out these designs and don’t forget to rate the craft card!
Happy crafting!
DIY wood burning
Materials
Tools
- holder to safely store your burning tool when not in use
- pliers to remove the tips
Instructions
- Print your designs and transfer them to your piece of wood.
- Allow the ink to dry a little so it won't smudge if you accidentally touch the design with your fingers when you start burning.
- If you're using my designs choose a round, medium fine tip for your burning tool. I used only one tip for these tools but if you want to apply heavier or lighter marks, you need to switch tips.
- Allow the tool to heat up completely before applying your first stroke. Use a holder to safely store the pen.
- Start working from one end to the other and use small, but even strokes.
- Work with your pen at an angle. Make sure you don't keep the pen too long on one spot otherwise you'll end up with an uneven design. If this happens, don't worry, you can always go back to the starting point and just enlarge the design with the wood burning pen until the mistake is covered.
- Go with the wood grain whenever possible. Burning against the grain will offer up more resistance but it's not impossible. Just don't press too hard or you may lose control of the tool.
- Don't be afraid to burn the same part of the outline three or four times if needed.
- But don't press the tool too hard onto the design or you'll end up with burning marks. This is expected for beginners though and if this happens, don't panic. Finish burning all around your design then use a sanding block to sand the ugly areas or spots. For deeper burns, you'll need a harsher sanding block for shallow burns you'll need a very fine sanding block. When done sanding, blow the dust and wipe your work with a slightly damp cloth.
- Optional - when your project is finished, rub a little oil to polish your spoons a little. Or use a small blow torch to give the whole item a little burn all over.
Article may contain Amazon & affiliate links. As an Amazon Associate I earn from qualifying purchases at no additional cost to you.

I’m curious as to where you purchase the wooden spoons?
Hi Stacey. There’s a link in the materials section.