

Mini Red Velvet Cake Cookies For Valentine’s Day
Share the LOVE this Valentine’s day with these cute, easy to make and festive looking red velvet cake cookies. They make perfect gifts for friends and family too!
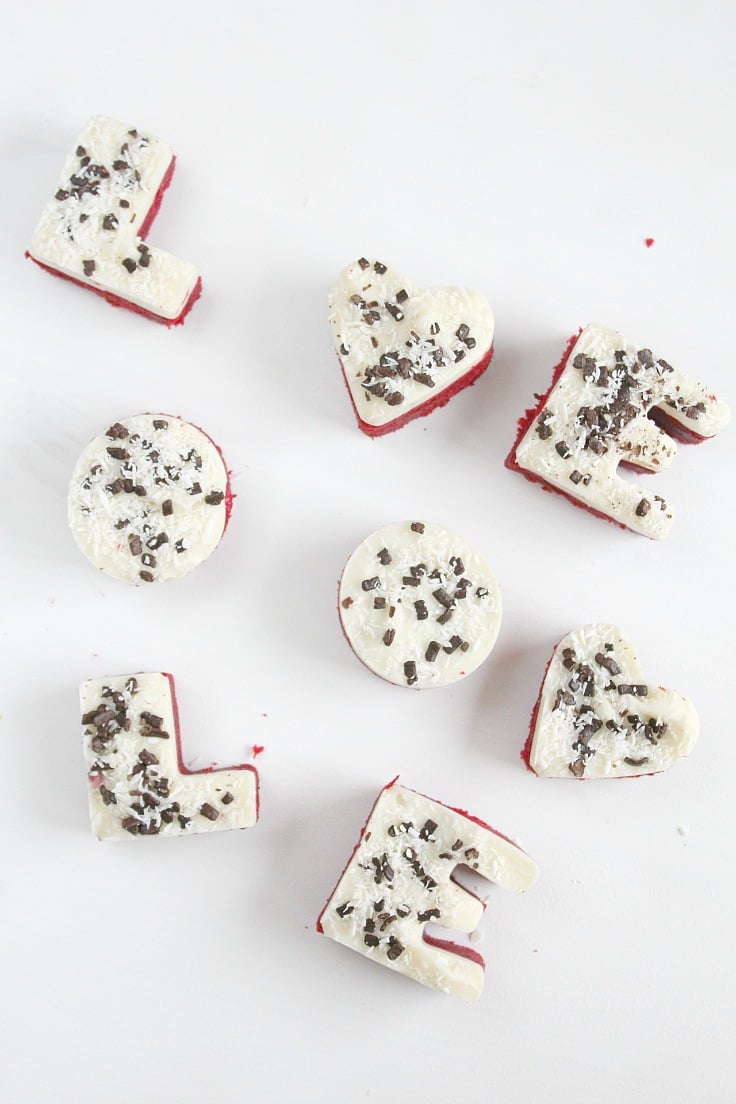
To me, nothing speaks Valentine’s Day better than a red velvet cake, cupcake or cookie and these red velvet cake cookies, in an adorable mini version fit the bill perfectly. These little red velvet cakes delights are so easy to make if you have some LOVE cookie cutters like any of these cuties here.
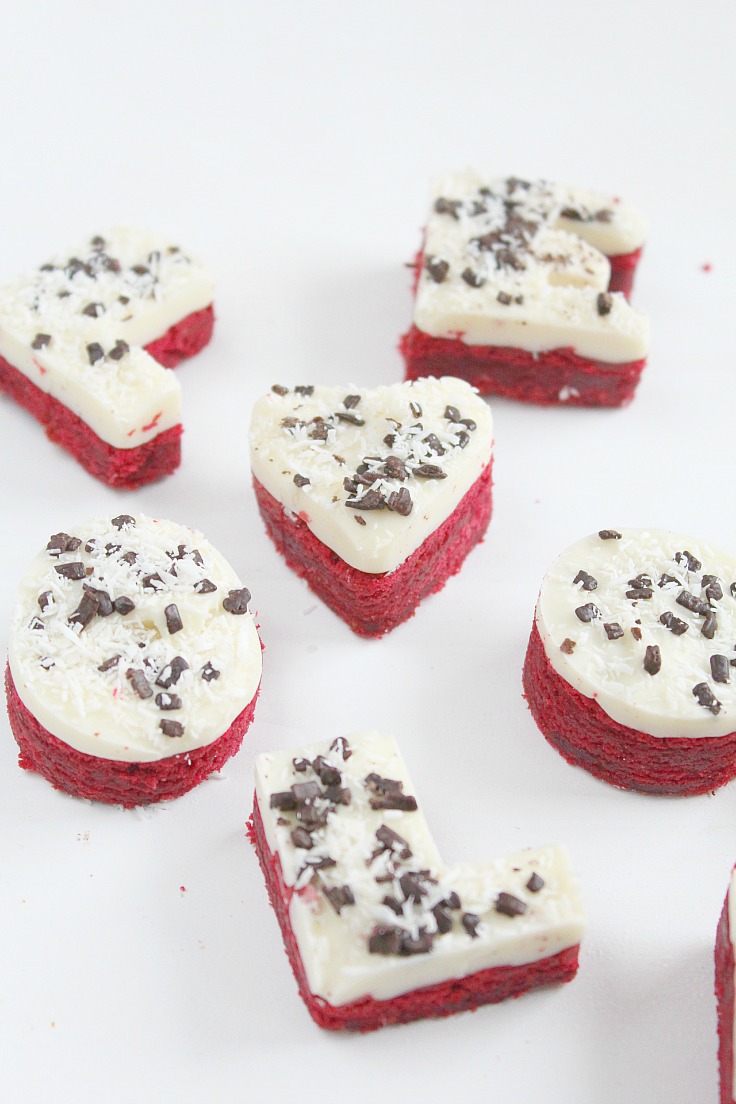
I think the key to a good red velvet cake with a lovely color is in keeping the ingredients at room temperature and using the right food coloring. I think gel food coloring is the best so if you have it, use it! Fluffy and moist, these red velvet cake cookies are my latest favorites!
How to make red velvet cake cookies
Ingredients you need:
- Cake flour – creates soft, tender baked goods. It’s the ideal base for cakes and cupcakes, giving them a delicate and fluffy texture.
- Salt – enhances the flavor of baked goods and balances sweetness. It also strengthens the dough structure, ensuring a stable final product.
- Cocoa powder – adds a rich chocolate flavor and a subtle bitterness, balancing the sweetness of the recipe. It also helps contribute to the signature reddish-brown color in red velvet desserts.
- Unsalted Butter (Room Temperature) – Butter provides richness and moisture to baked goods. Using it at room temperature ensures it creams easily with sugar, creating a light and airy texture.
- White Sugar – Sugar sweetens the recipe while also helping to retain moisture. It plays a role in creating the tender, moist crumb of cakes or cupcakes.
- Large Eggs (Room Temperature) – Eggs act as a binding agent, giving structure to the batter. They also add richness and help the cake rise, creating a light and fluffy texture.
- Vanilla Extract – Vanilla extract adds a warm, aromatic flavor that complements other ingredients and enhances the overall taste of the baked good.
- Heavy Cream – Heavy cream contributes to the moist, velvety texture and richness of the cake. It also helps in achieving a soft crumb and enhances the flavor.
- Gel Red Food Coloring – This concentrated food coloring provides the vibrant red hue iconic to red velvet desserts without altering the batter consistency. Gel coloring is preferred for its intensity and ease of use. Buy Gel Red Food Coloring here.
- White Vinegar – Vinegar reacts with baking powder to create a tender, airy texture in the cake. It also helps deepen the red color of the cocoa when combined with the food coloring.
- Baking Powder – Baking powder is a leavening agent that creates air bubbles in the batter when heated, allowing the cake to rise and become fluffy.
- White Chocolate (1 Large Baking Bar) – White chocolate is rich and creamy, often melted or grated for toppings, adding sweetness and visual appeal to desserts.
- Dark Chocolate Flakes/Sprinkles – These add a touch of bitter chocolate flavor and texture contrast to the dessert, making it visually appealing and flavorful.
- Coconut Flakes – Coconut flakes provide a natural sweetness and chewy texture, serving as a garnish or mix-in to complement the richness of the cake.
Equipment:
- Love Cookie Cutters (you may need a few sets if you want to work faster)
- Cake pan
- Mixing bowls
- Hand mixer
Step-by-step instructions:
- Preheat oven to 350 F
- Butter two 9 inch round cake pans and line the bottoms of the pans with parchment paper. Set aside.
- In a mixing bowl sift together the flour, salt, and cocoa powder. Set aside.
- With a hand mixer, beat the butter until soft about 2 minutes.
- Add the sugar and beat until light and fluffy about 3 minutes.
- Add the eggs, one at a time, beating well after each addition.
- Scrape down the sides of the bowl.
- Add the vanilla extract and beat until combined.
- Whisk the heavy cream with the red food coloring.
- With the mixer on low speed, alternately add the flour mixture and heavy cream mixture to the butter mixture, in small additions, beginning and ending with the flour.
- Combine the vinegar and baking powder. Allow the mixture to fizz and then quickly fold into the cake batter.
- Divide the batter evenly between the two prepared pans and smooth the tops with a spatula.
- Bake in the center of the preheated oven for approximately 25 – 30 minutes, or until a toothpick inserted in the center of the cakes comes out clean.
- Cool the cakes in their pans on a wire rack for 10 minutes.
- Place a wire rack on top of the cake pan and invert, lifting off the pan.
- Once the cakes have completely cooled, place the cake layers in the refrigerator for 1/2 an hour.
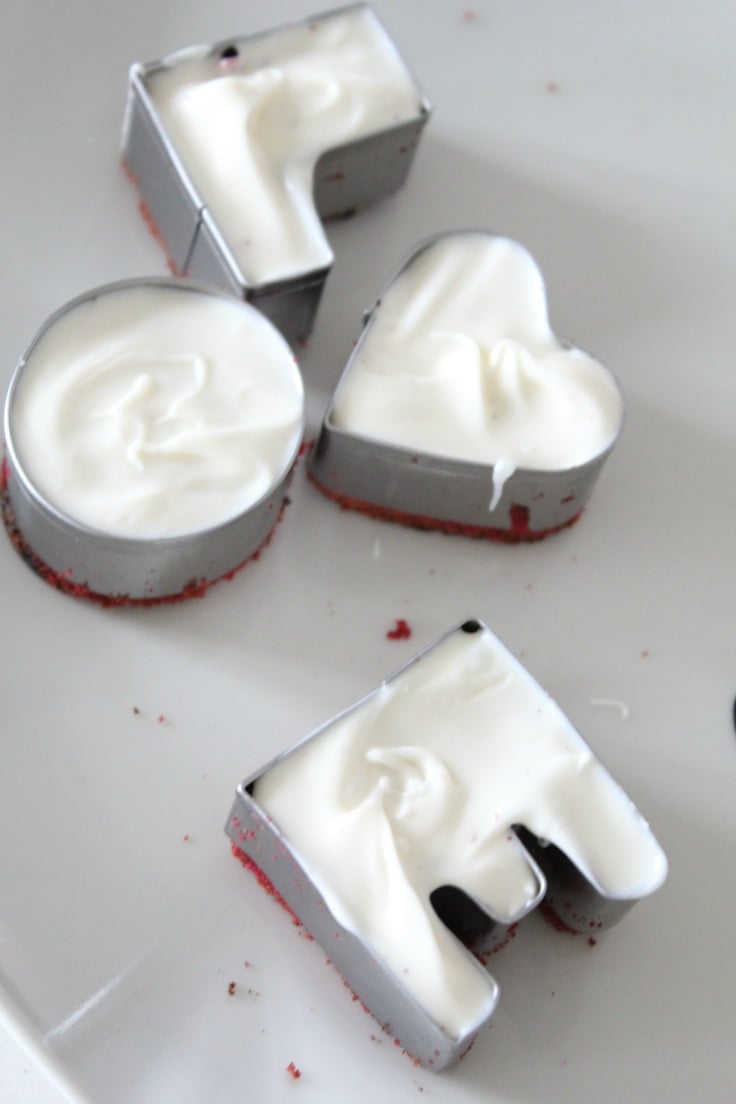
- Cut LOVE letters with the cookie cutters and place on a large plate. Don’t remove the red cookies from the cookie cutters (that’s why is best to have a few sets on hand)
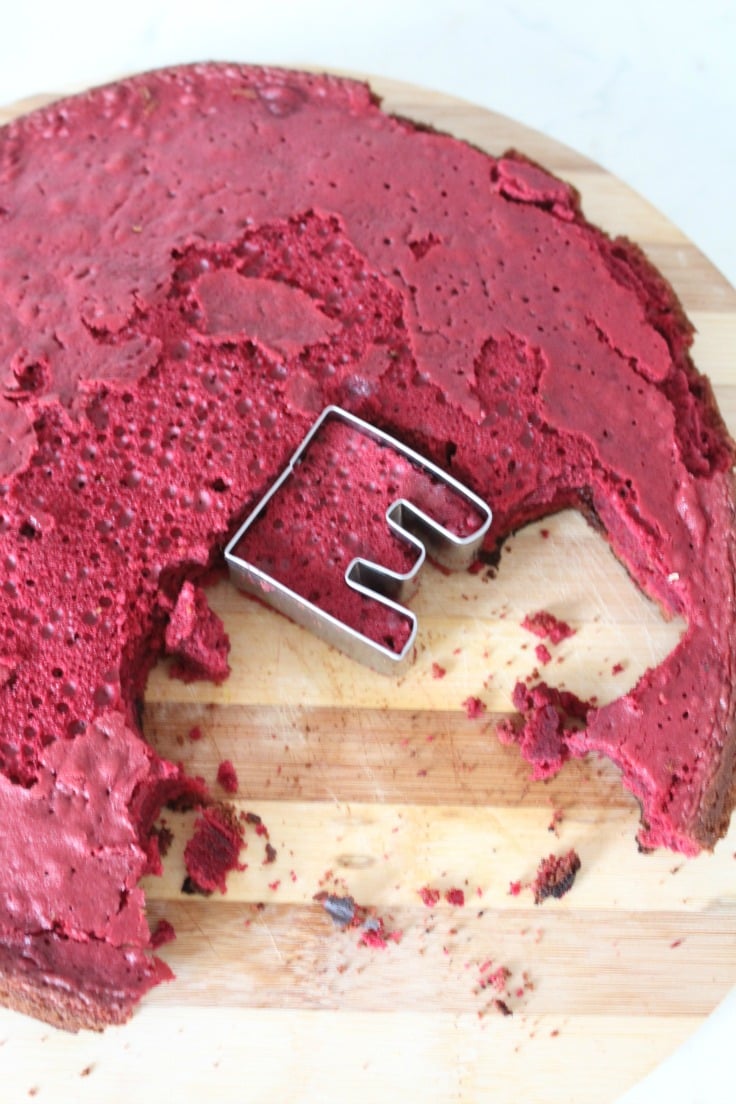
- Take each letter and lightly press the cakes down to make room for pouring the white chocolate
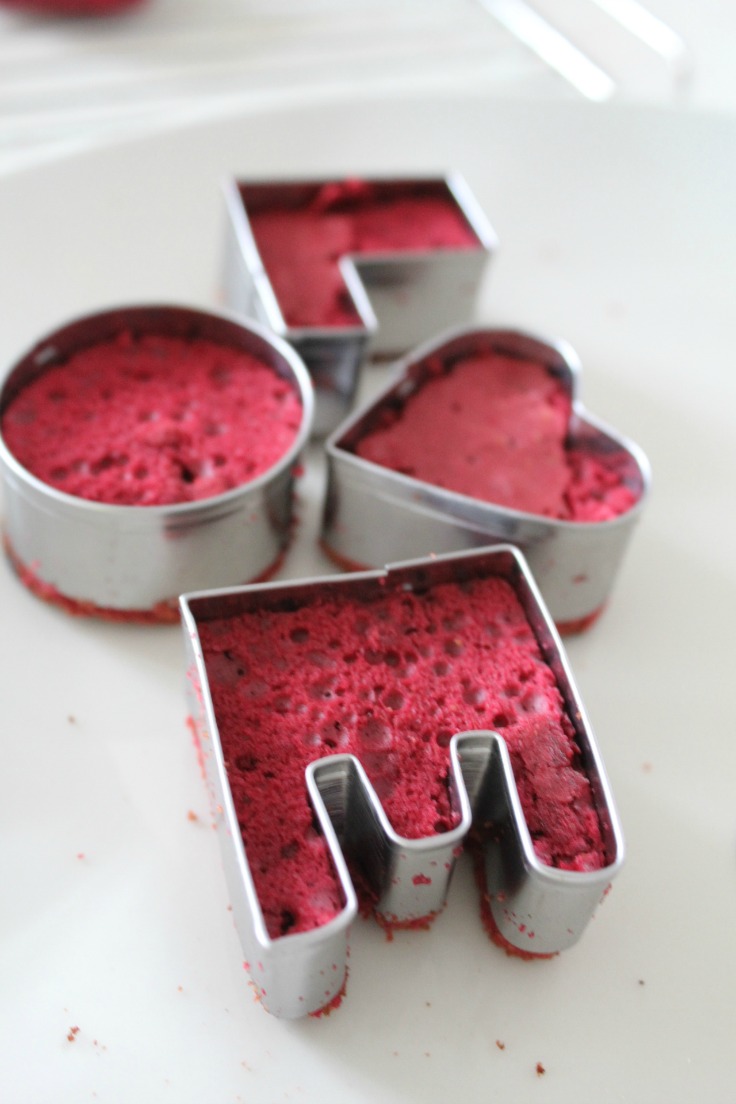
- Melt the white chocolate. Place the chocolate in a microwavable bowl, keep in the microwave on high temperature for 30 seconds, than in increments of 15 seconds until all chocolate is melted. Lightly stir in between sessions.
- Pour the chocolate over the cakes in the cookie cutters, sprinkle dark chocolate flakes/sprinkles and coconut flakes and place on a large plate.
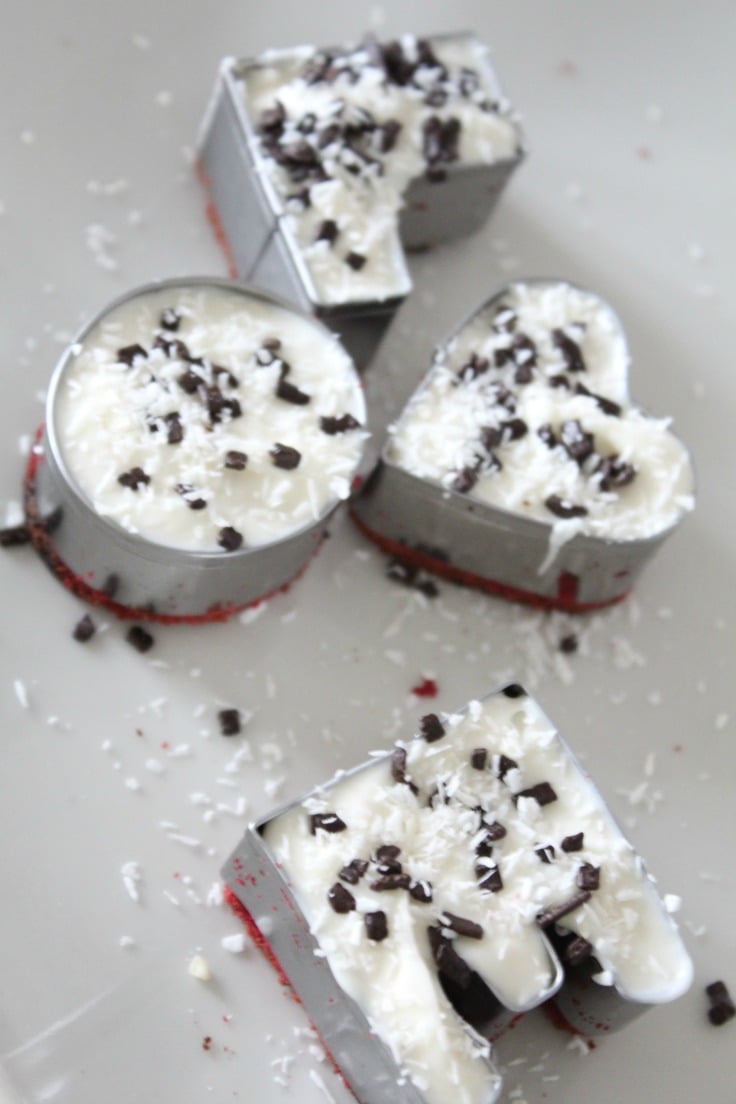
- When all cookies are topped with chocolate, place the plate in the fridge for 15-20 minutes.
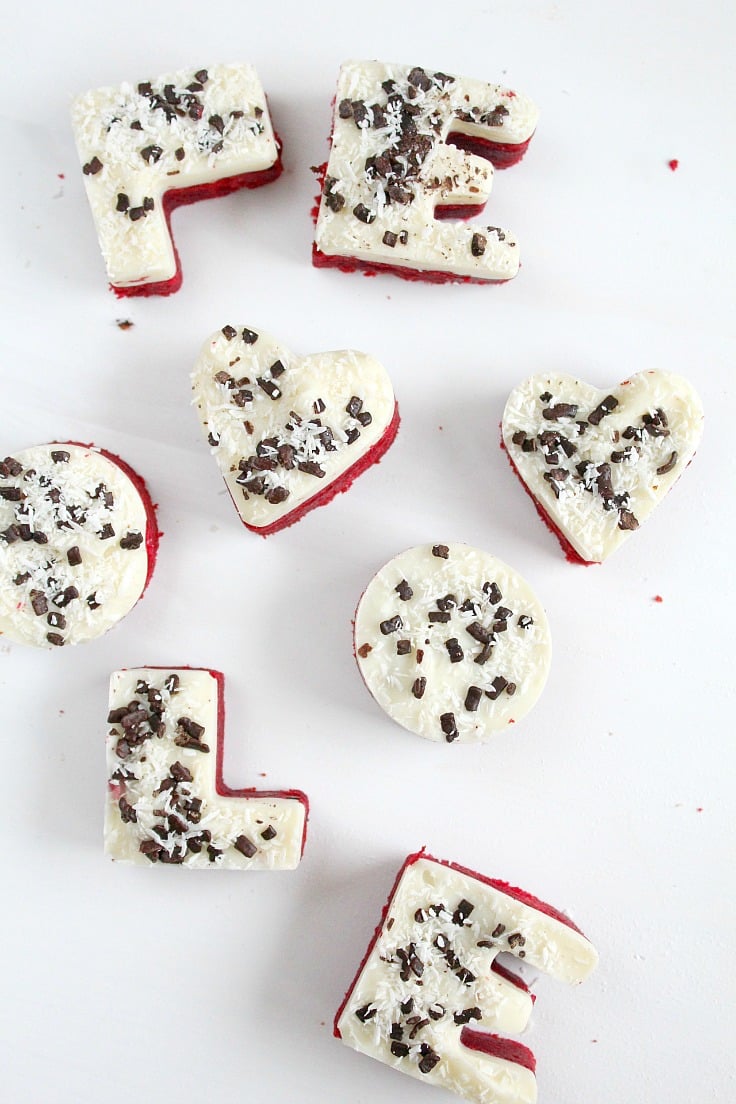
- Gently press the cakes from the chocolate covered tops to remove from cookie cutters.
- Enjoy your red velvet chocolate chip cookies!
Tips:
- For an extra touch of sweetness, drizzle additional white chocolate over the top of the cookies before serving.
- These cookies can also be made with different shapes and designs using various cookie cutters.
- Experiment with different types of chocolate chips or chunks for added texture and flavor. You can also try adding nuts or dried fruit to mix things up.
- If you don’t have cake flour on hand, you can make your own by combining all-purpose flour and cornstarch in a 1:2 ratio, sifting them together twice.
- Make sure to let the cakes cool completely before cutting into shapes with the cookie cutters. If they are still warm, they may crumble or break apart.
What to serve with red velvet chocolate chip cookies:
- These cookies pair well with a glass of milk or a cup of coffee for a classic dessert experience.
- For an indulgent treat, top the cookies with a scoop of vanilla ice cream and drizzle with caramel sauce.
- If you’re feeling adventurous, try making an ice cream sandwich by placing a scoop of your favorite ice cream between two cookies.
- Serve them as part of a dessert platter alongside other treats like brownies, cupcakes, and fruit slices for variety.
Frequently asked questions
- Can I use a different type of food coloring besides gel red food coloring?
- Yes, you can use liquid food coloring but you may need to adjust the amount used to achieve the desired red color.
- Can I make these cookies without cookie cutters?
- Yes, you can make them in a regular round or square shape using a cookie cutter or simply by cutting them with a knife after they have cooled.
- How should I store these cookies?
- These cookies can be stored in an airtight container at room temperature for up to 3 days, or in the fridge for up to a week. You can also freeze them for longer storage and thaw before serving.
More recipes you will enjoy
Whether you’re making them for Valentine’s Day or any other occasion, these red velvet cake cookies are sure to be a hit with their rich flavor and eye-catching design. So why not gather up your ingredients and give this recipe a try? You won’t regret it! Happy baking!
Valentine’s Day Mini Red Velvet “LOVE” cakes
Ingredients
- 2 1/2 cups Cake Flour
- 1/2 teaspoon salt
- 2 tablespoons cocoa powder
- 1/2 cup unsalted butter room temperature
- 1 1/2 cups white sugar
- 2 large eggs room temperature
- 1 teaspoon vanilla extract
- 1 cup heavy cream
- 2 tablespoons liquid red food coloring
- 1 teaspoon white vinegar
- 1 teaspoon baking powder
- white chocolate 1 large baking chocolate bar
- dark chocolate flakes
- coconut
Equipment
- Love Cookie Cutters
- Cake pan
- mixing bowls
Instructions
- Preheat oven to 350 F
- Butter two 9 inch round cake pans and line the bottoms of the pans with parchment paper. Set aside.
- In a mixing bowl sift together the flour, salt, and cocoa powder. Set aside.
- With a hand mixer, beat the butter until soft about 2 minutes.
- Add the sugar and beat until light and fluffy about 3 minutes.
- Add the eggs, one at a time, beating well after each addition.
- Scrape down the sides of the bowl.
- Add the vanilla extract and beat until combined.
- Whisk the heavy cream with the red food coloring.
- With the mixer on low speed, alternately add the flour mixture and heavy cream mixture to the butter mixture, in small additions, beginning and ending with the flour.
- Combine the vinegar and baking powder. Allow the mixture to fizz and then quickly fold into the cake batter.
- Divide the batter evenly between the two prepared pans and smooth the tops with a spatula.
- Bake in the center of the preheated oven for approximately 25 - 30 minutes, or until a toothpick inserted in the center of the cakes comes out clean.
- Cool the cakes in their pans on a wire rack for 10 minutes.
- Place a wire rack on top of the cake pan and invert, lifting off the pan.
- Once the cakes have completely cooled, place the cake layers in the refrigerator for 1/2 an hour.
- Cut LOVE letters with the cookie cutters and place on a large plate. Don't remove the mini cakes from the cookie cutters.
- Take each letter and lightly press the cakes down to make room for pouring the white chocolate
- Melt the white chocolate. Place the chocolate in a microwavable bowl, keep in the microwave on high temperature for 30 seconds, than in increments of 15 seconds until all chocolate is melted. Lightly stir in between sessions.
- Pour the chocolate over the cakes in the cookie cutters, sprinkle dark chocolate flakes and coconut flakes and place on a large plate.
- When all cookies are topped with chocolate, place the plate in the fridge for 15-20 minutes.
- Gently press the cakes from the chocolate covered top to remove from cookie cutters.
Nutrition
Article may contain Amazon & affiliate links. As an Amazon Associate I earn from qualifying purchases at no additional cost to you.
ABOUT PETRO
Hi, I’m Petro, author and founder of Easy Peasy Creative Ideas. Sewist, crafter, avid DIY-er, foodie, photographer, homemaker and mommy to one. I’m an expert at coming up with quick, clever sewing tips, recycling crafts and simple, easy recipes! You can find my ideas featured in reputable publications such as Country Living, Good House Keeping, Yahoo News, WikiHow, Shutterfly, Parade, Brit & Co and more. Thanks for stopping by and hope you’ll stay for a while, get to know me better and come back another time. Stick around for real fun projects! Read more…