

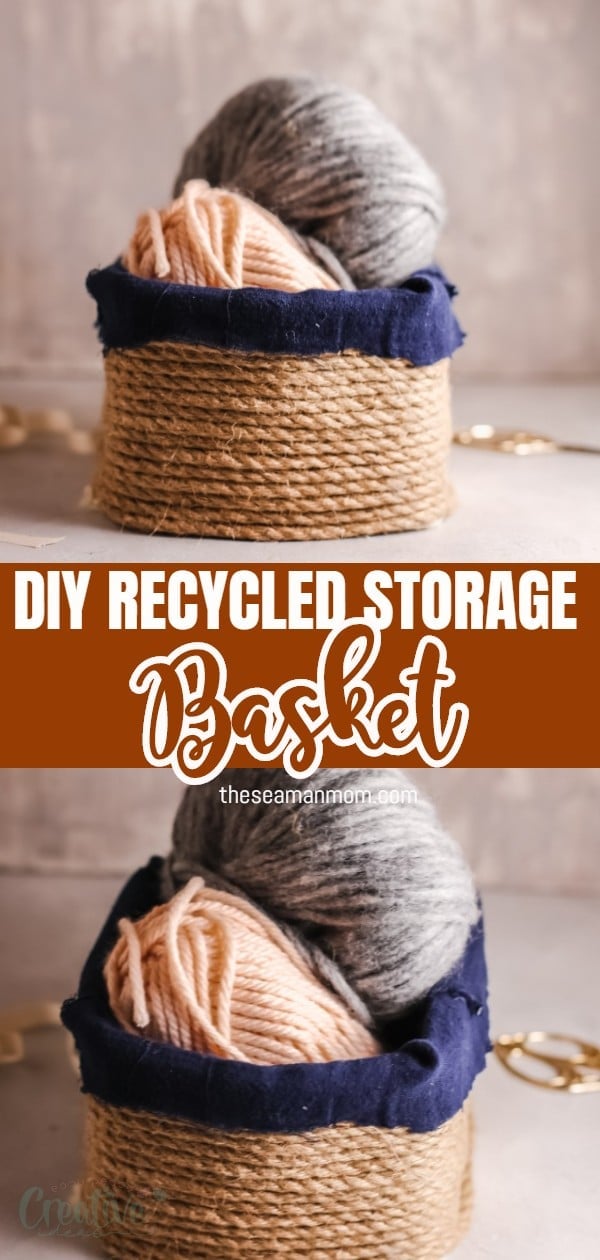
DIY rope basket from upcycled box
What if I tell you you can upcycle almost any box into a beautiful DIY rope basket? Yes, this is totally true and you don’t need to be a pro at crafting, just a couple of really simple materials and a bit of time.
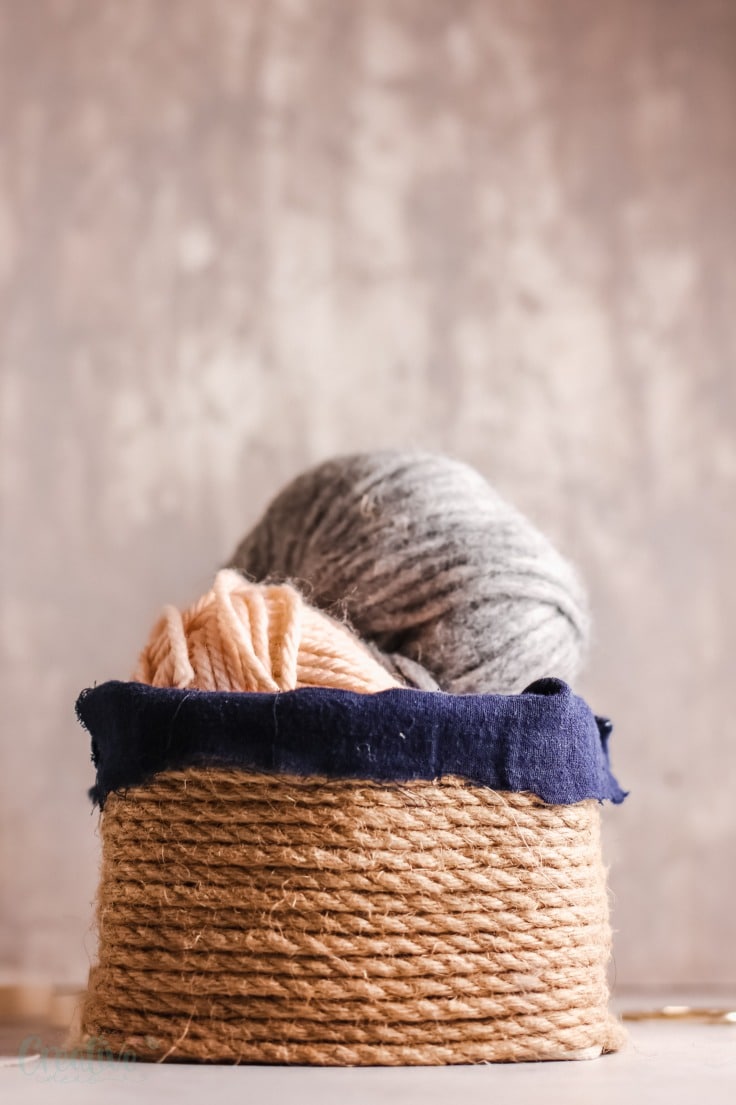
DIY rope basket

I’m a huge fan of baskets! If I could organize my whole home into one I would do it! Actually I kind of do it. Because let’s be honest, anything inside a basket looks a million times more organized and put together.
However baskets and storage boxes can be kind of expensive. So I’ve been looking for a couple of ways to save a bit by making them myself. After some trial and error I found a way that’s super affordable, incredibly easy and that creates a beautiful and long lasting product that works for pretty much anything.
More rope ideas you will love:
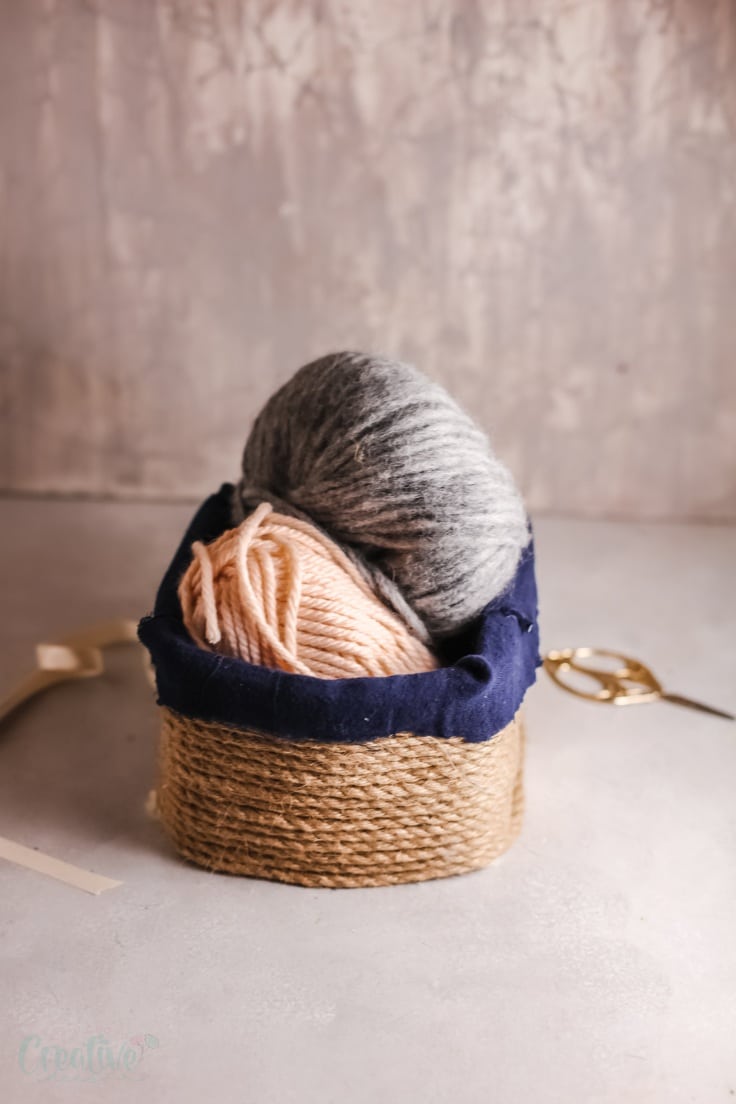
What can you use your DIY storage basket for?
You can literally use this recycled basket for almost anything depending on the size of the box you have.
I love to use small boxes to store my craft supplies and accessories. If you have a large box you can also use it to organize your clothes or your linen closet. You can even use them to organize your pantry!
A cardboard box or an old box that you don’t like anymore would work great! You can use any box you have on hand. A cardboard box or cereal box work just as fine but you can also use a cheap dollar store box too.
DIY storage box
Materials:
- A box
- Duct tape and hot glue
- Rope or twine
- A pillowcase to make the linen
Directions:
1. Start by taping one end of the rope to the box. I prefer to use duct tape to keep it in place and in my experience it’s easier than using hot glue.
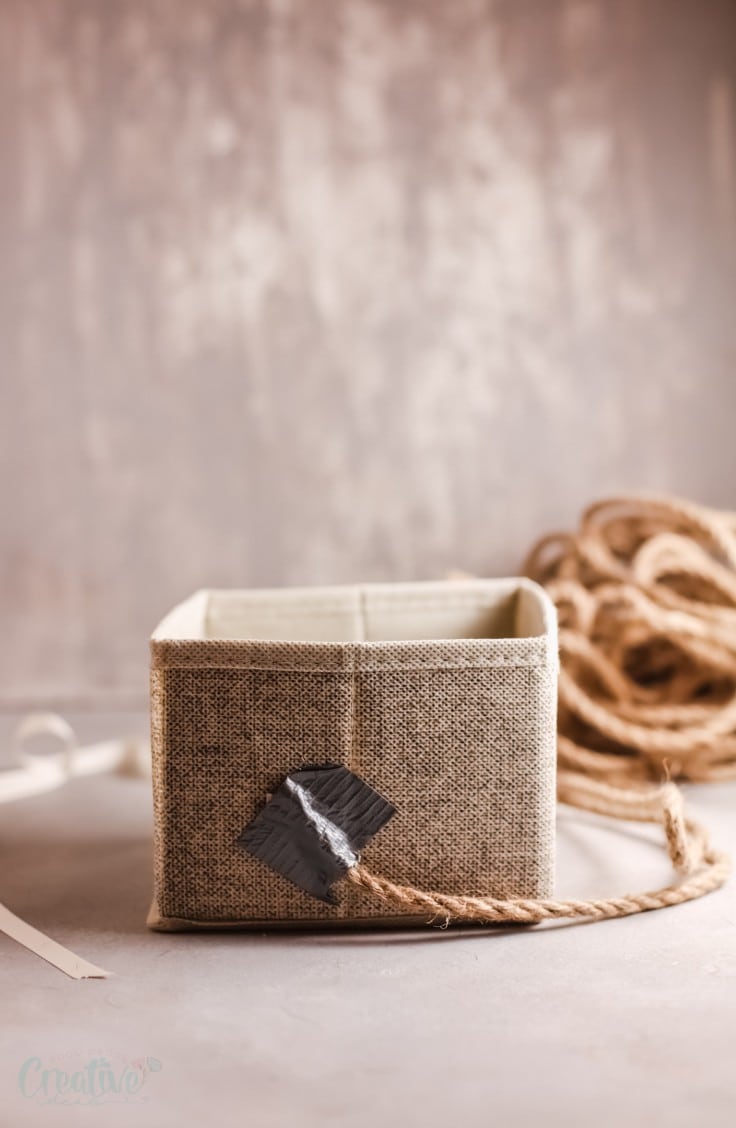
2. Twist the rope around the box to cover it completely.
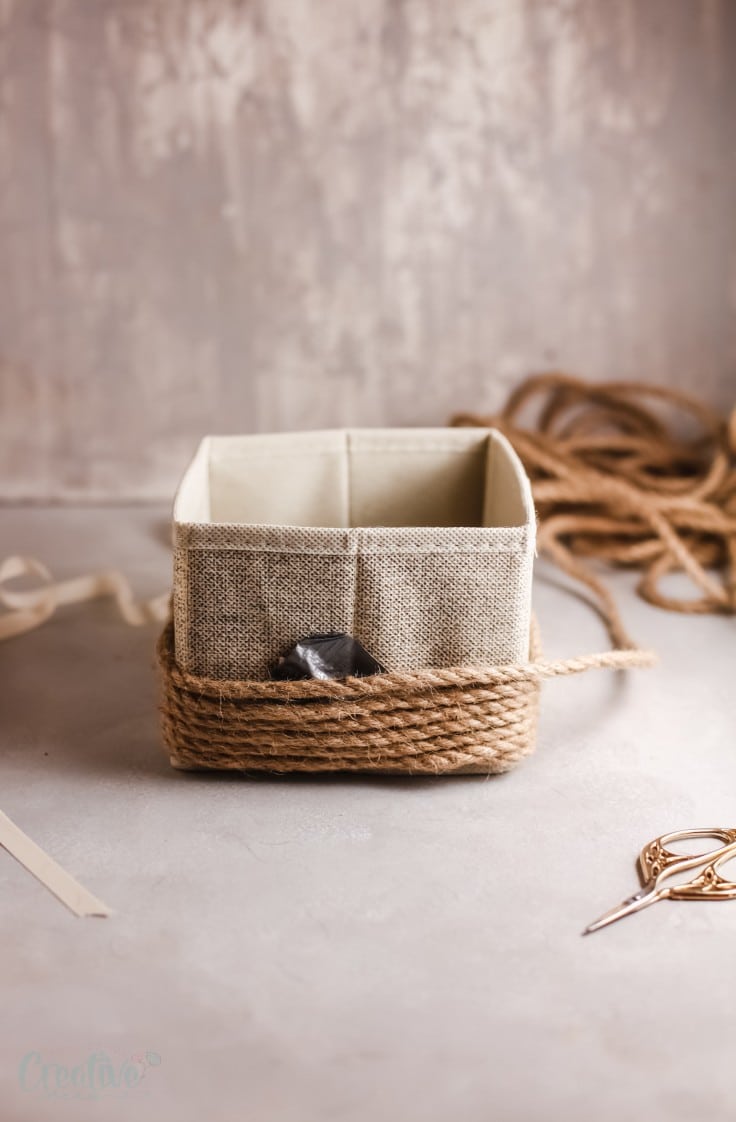
3. Once you reach the end cut it leaving around 4 inches
4. Place a bit of hot glue in the end and tuck it under the box.
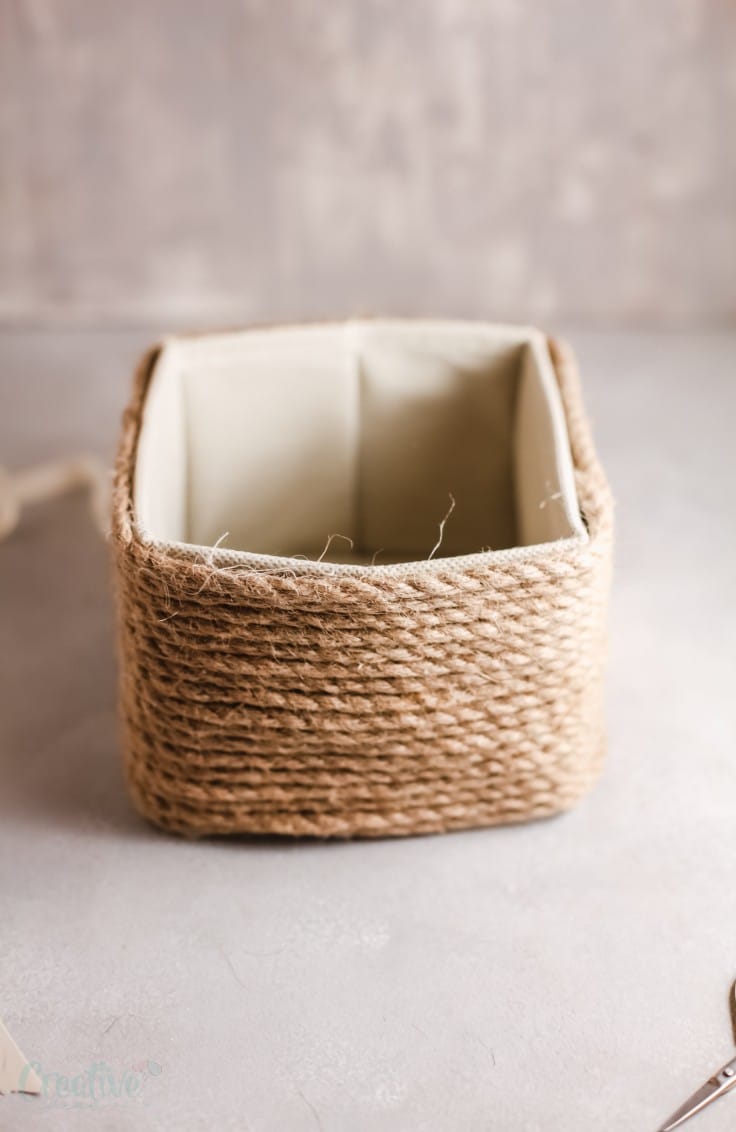
5. Let it dry completely before doing the basket liner.
6. Place the pillow cover inside the box.
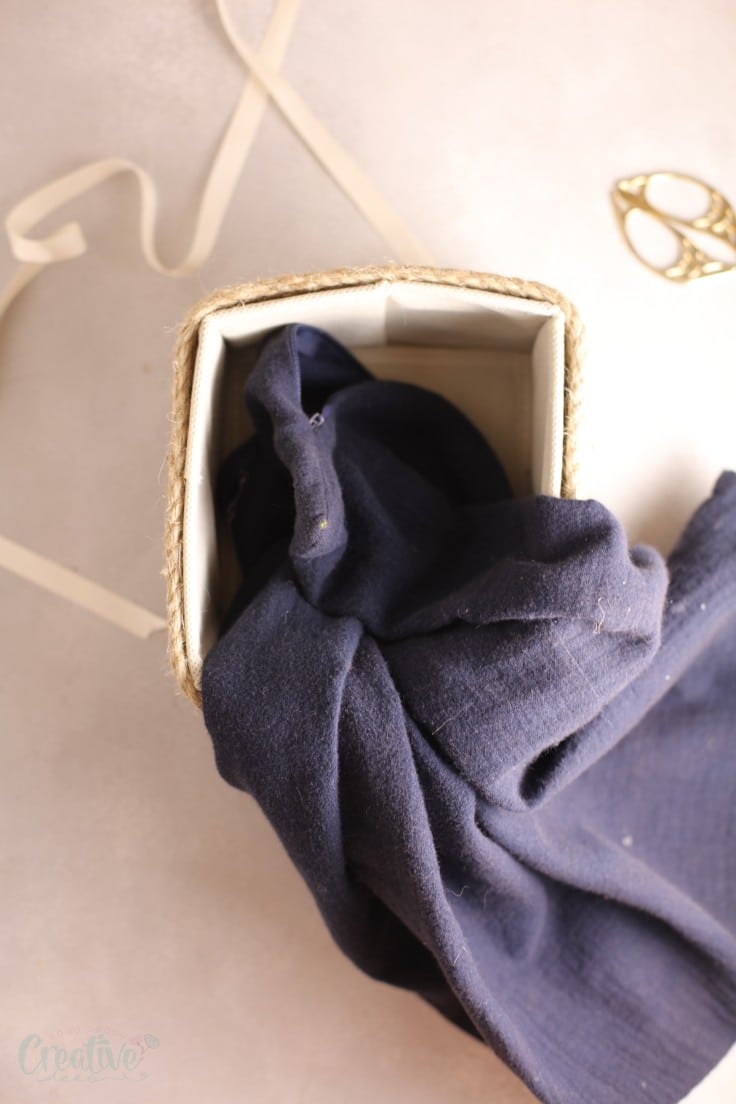
7. Arrange it so there’s not a lot of extra fabric. Fold the corners to the outside, cut the extra fabric and stick it to the box with one drop hot glue on each corner. This method is optional. Alternatively you can leave the pillowcase intact and simply fold it to the outside to fit the box. I personally love the first method because the casual/careless trim of the pillowcase adds to the farmhouse feel of this box.
8. Let it air dry completely before filling it.
You can also decorate your storage basket with ribbon, twine, sequins, fabric, garlands and just about anything your heart desires.
Pin to save for later
Article may contain Amazon & affiliate links. As an Amazon Associate I earn from qualifying purchases at no additional cost to you.
ABOUT PETRO
Hi, I’m Petro, author and founder of Easy Peasy Creative Ideas. Sewist, crafter, avid DIY-er, foodie, photographer, homemaker and mommy to one. I’m an expert at coming up with quick, clever sewing tips, recycling crafts and simple, easy recipes! You can find my ideas featured in reputable publications such as Country Living, Good House Keeping, Yahoo News, WikiHow, Shutterfly, Parade, Brit & Co and more. Thanks for stopping by and hope you’ll stay for a while, get to know me better and come back another time. Stick around for real fun projects! Read more…