

DIY Coiled Rope Rug
Spruce up your entry way with a touch of nautical charm by sewing your own DIY rope rug! This delightful coiled rug effortlessly adds a fun and stylish element to your front door area.
Ever wanted to make your own rope doormat? Now it’s the perfect time to put those dreams into action because I’ve got the coolest project ever: a coiled rope rug!
This DIY jute rug looks super funky and adds so much fun to your front door decor! Not to mention how practical this rope doormat is! Perfect for outdoors, this coiled rope rug will stand is made with durable jute rope so it will stand the test of time with no problems!
I made an outdoor rug before (check out the tutorial here) but that’s for the back door. And now the front door really needed one too as the old kitty cat shaped rug we had purchased a while ago has given up on us, after so much use! So I decided to add the same nautical vibe as the back door. But I wanted something real special since the front door gets the most use and also our guest will be impressed with our fun coiled rope rug as this is the first thing they see when visiting.
While this project seemed like such a breeze I did encounter a few problems I want you to know about so you can avoid getting into the same troubles as I have. I’m literally in love with sewing and since my sewing skills have been pretty good lately I thought sewing this coiled rope rug would make total sense to me.
Turns out it was a bad move! Even though I used a jeans needle and think jeans thread, sewing such thick rope with my little sewing machine was not an easy task. Plus the threads from the rope would get all over the place, in the presser foot, inside the bobbin, on the table, the floor etc It took me a long time to clean my machine while sewing. Also because I used thick jeans thread, I had to refill the bobbin sooo many times, I lost count!
So even if you love sewing like I do and even if sewing the coils will make the rug more durable, I would recommend you stick to the old fashion way: just glue the damn rope! Get a cheap doormat, draw a pattern on it then coil the rope following that pattern, while gluing it to the cheap doormat. Easy peasy and less time consuming!
If you decide to get stubborn as me and give yourself a bit of a headache, by all means follow my lead! I hope you have a heavy duty sewing machine though, in which case this project should actually be a breeze. The tutorial below is for you as I’ll highlight the exact steps I took to make my coiled rope rug. The materials listed below are for my rug which is a medium size rug; if you want yours bigger, add some more materials accordingly.
And now it’s time to turn that boring rope into the most charming DIY jute rug in less than a couple of hours!
How to sew a DIY Rope Rug
List of the materials:
- jute rope (I used 82 feet of rope for my door mat, 5/16″ thick; have a few ft of extra rope in hand just in case you need to make your mat larger)
- jeans needle
- jeans thread
- sewing scissors
- sewing machine
- cheap rubber doormat
- craft scissors or razor knife/utility knife
- chalk pencil
- strong construction adhesive
- Caulking gun
Jute twine rug step-by-step tutorial
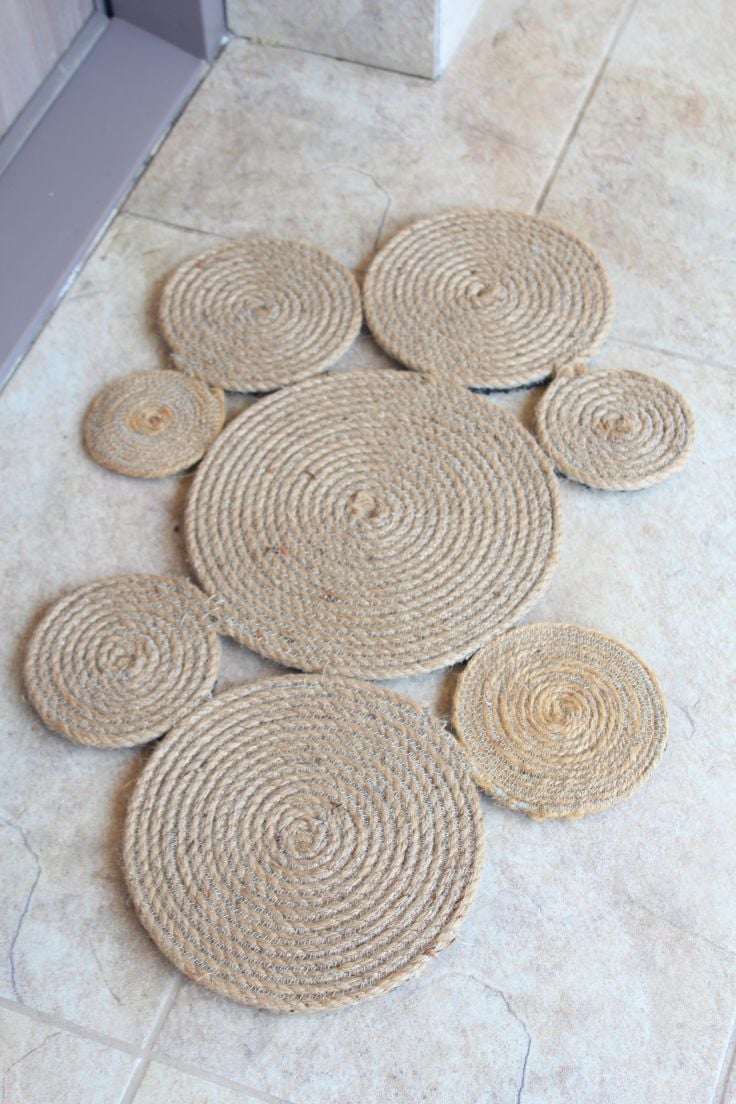
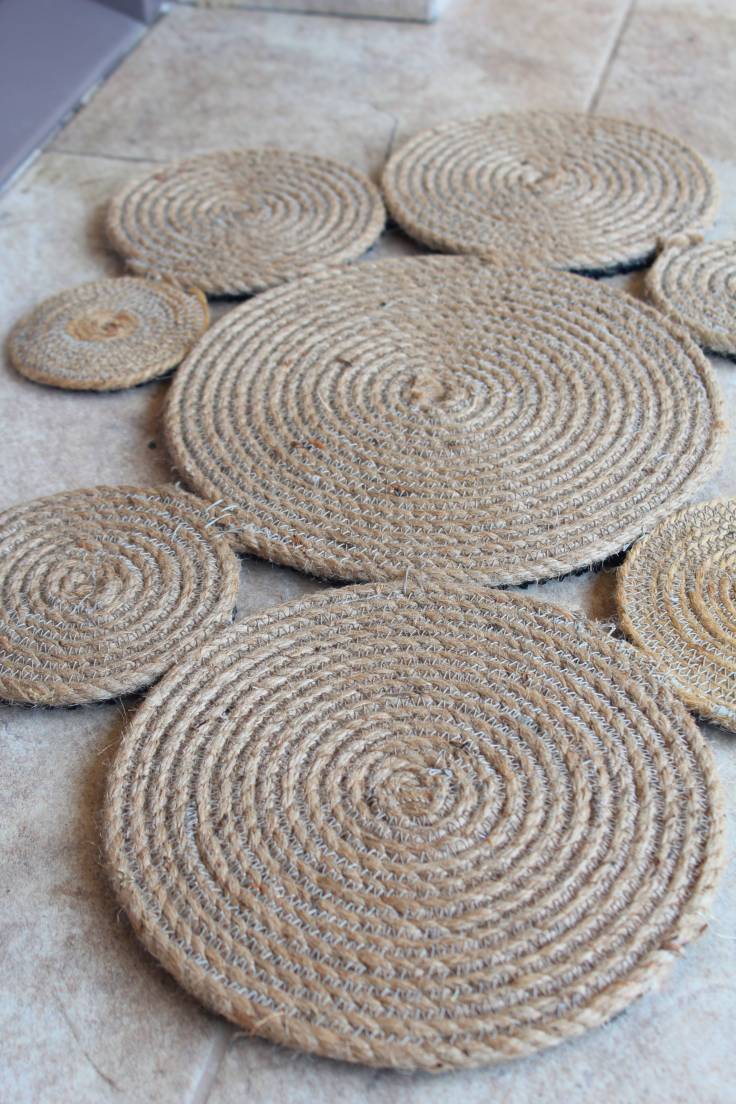
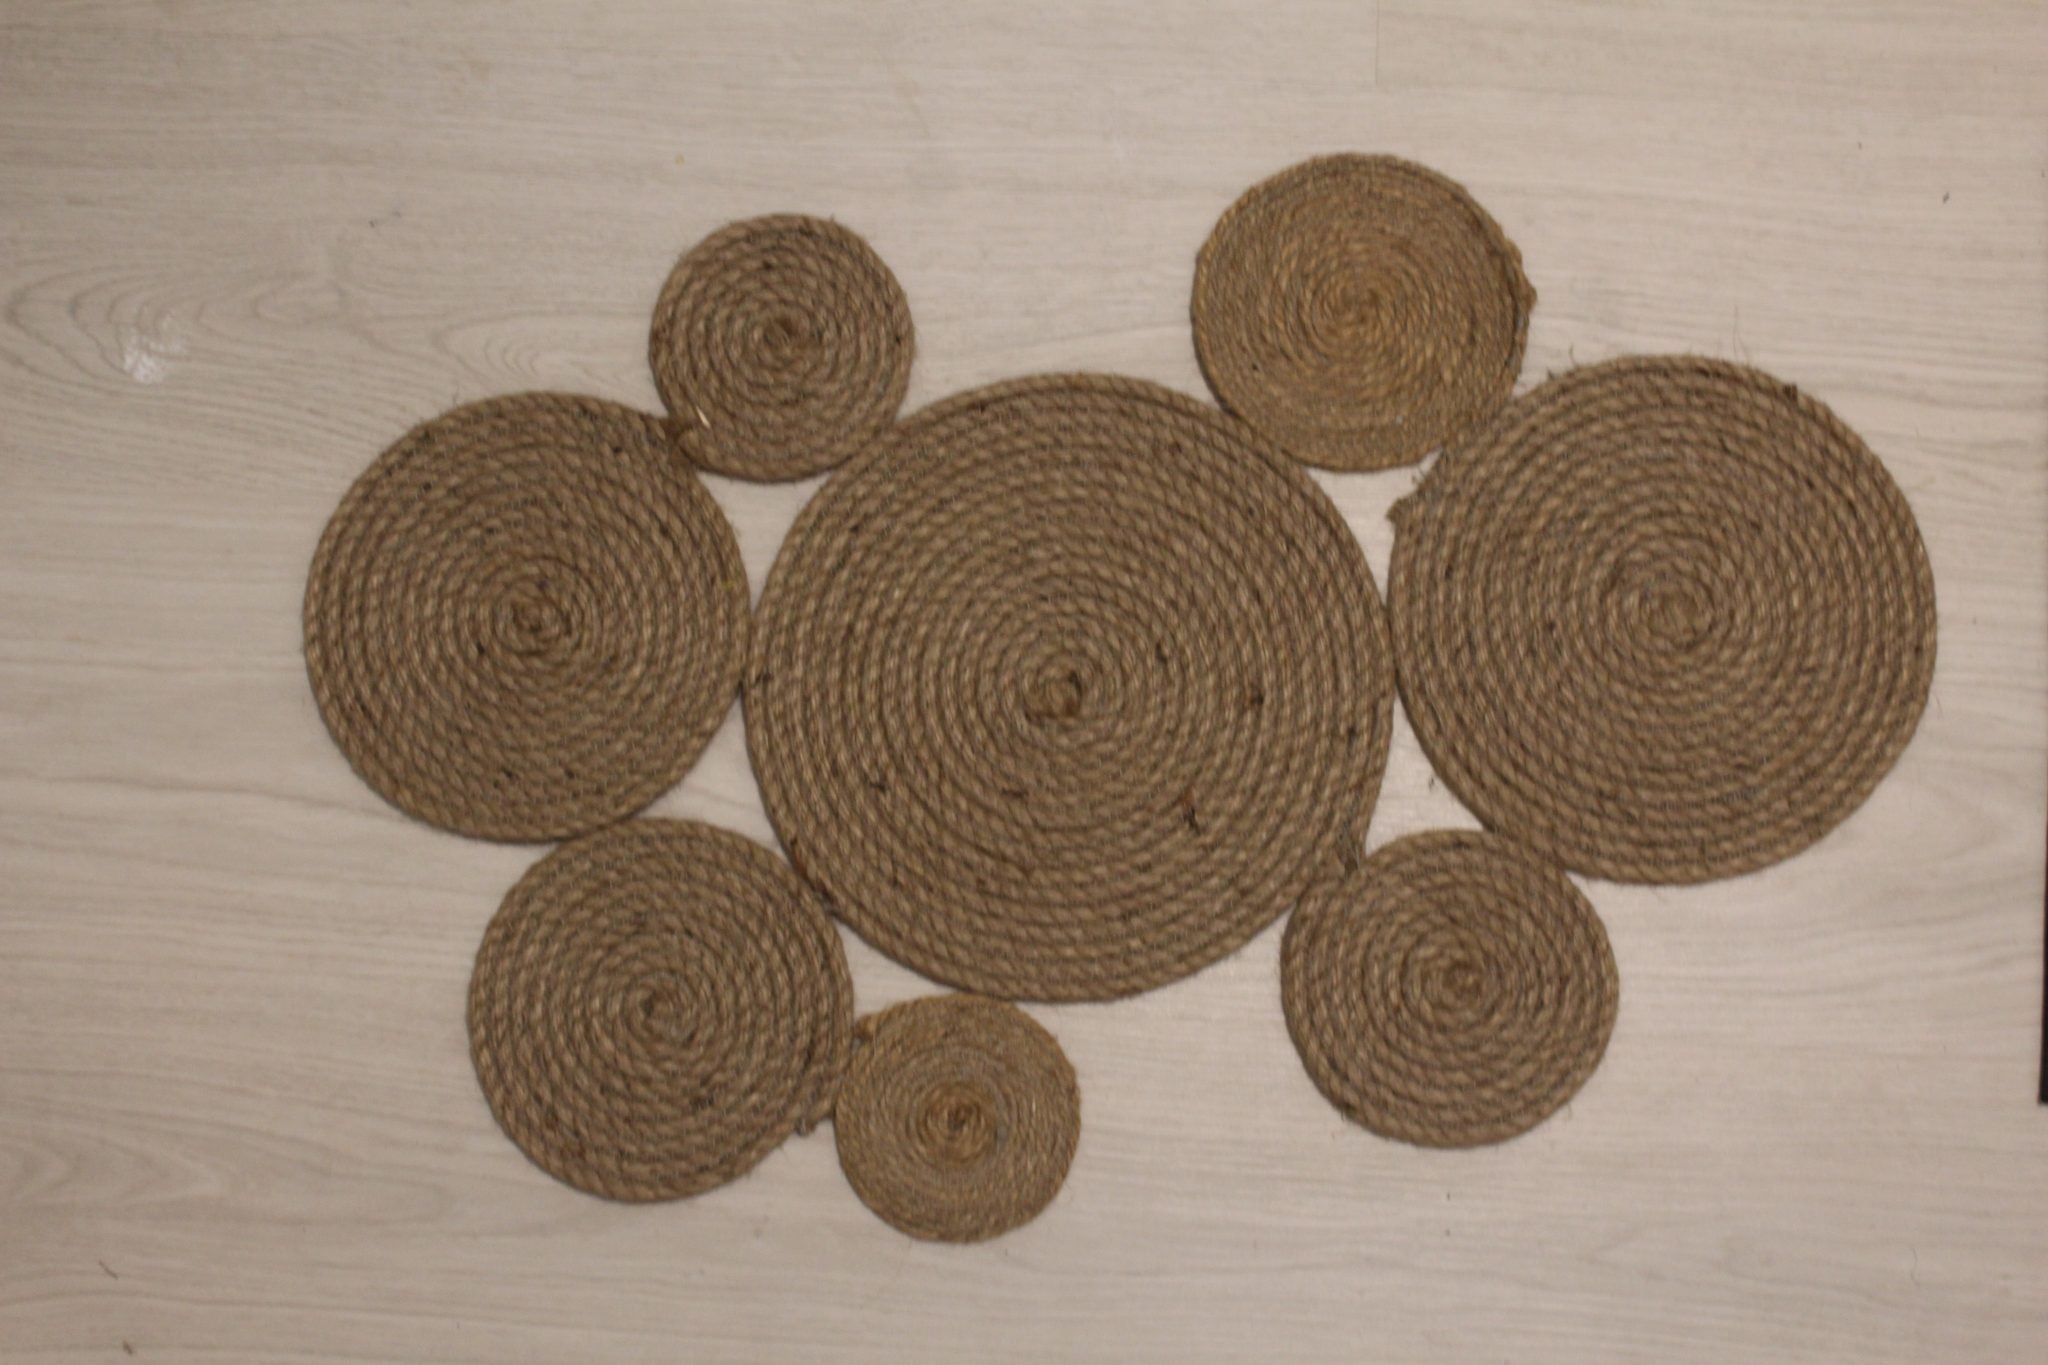
Making the coils
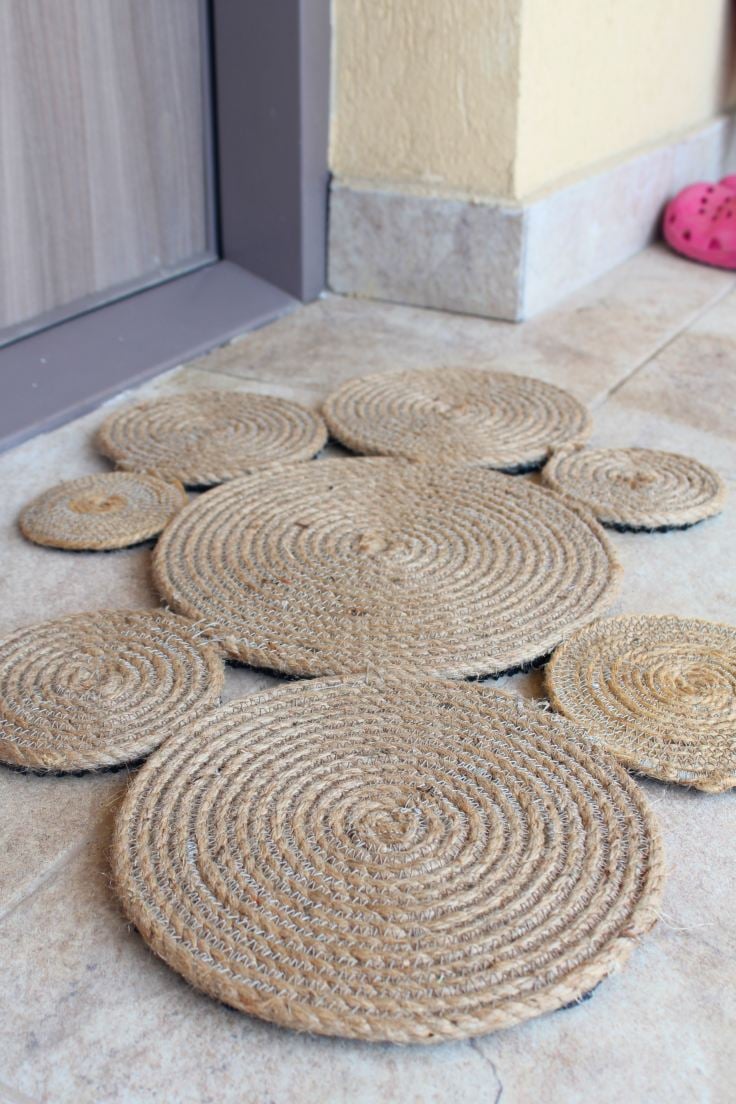
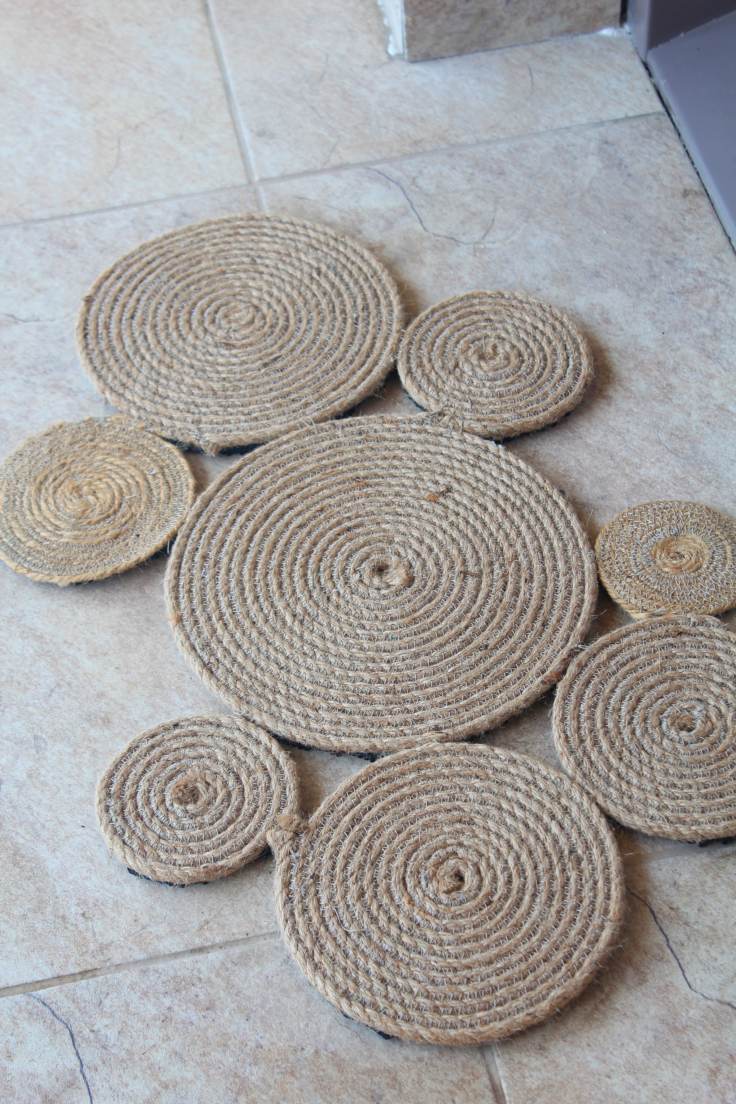
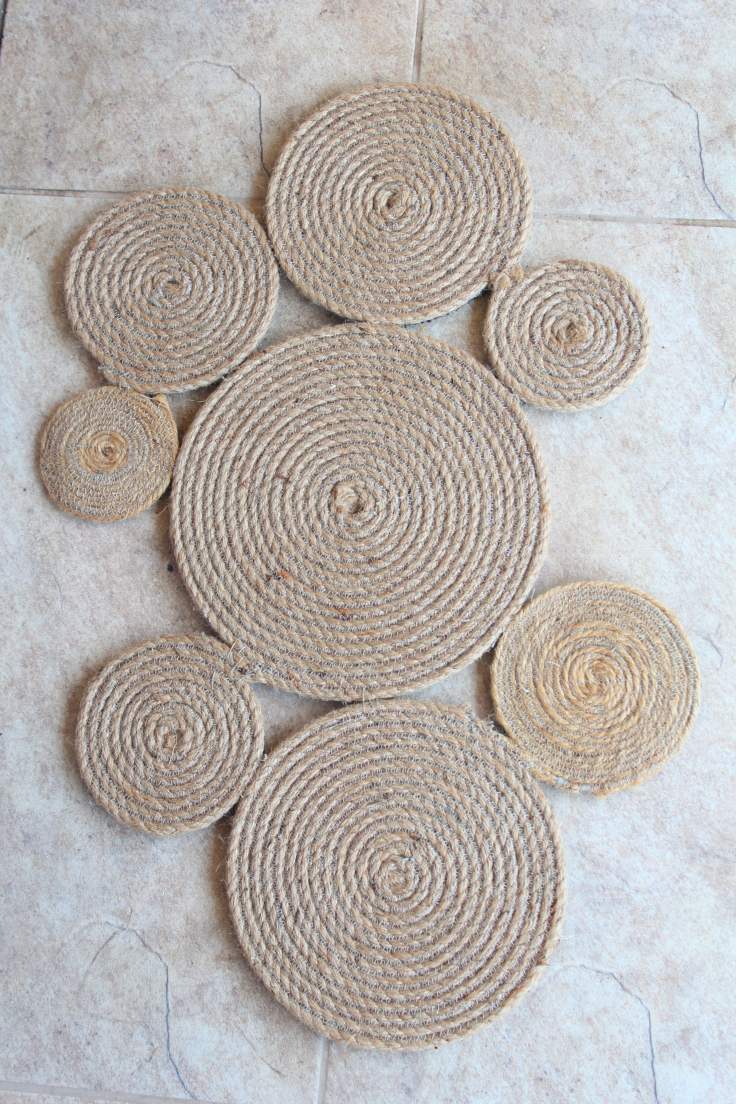
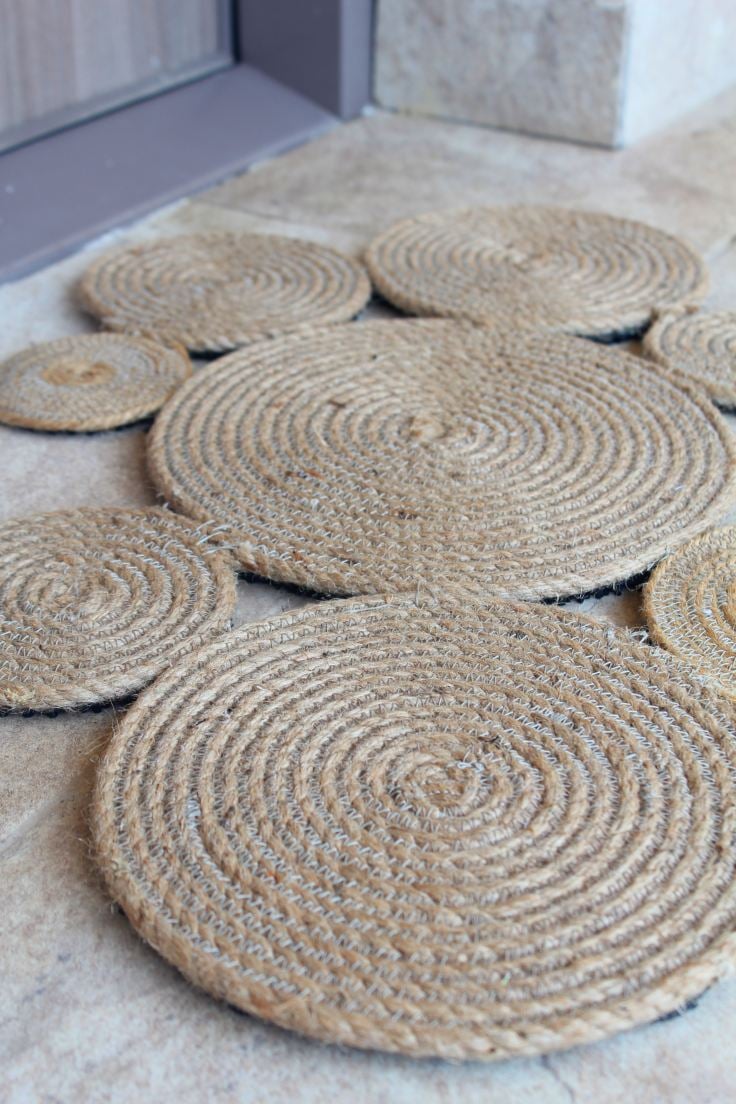
- Roughly estimate the final pattern and the size of your coiled rope rug.
- Sew the coils as instructed in this tutorial. Make the “trivets” in various sizes.
- Sew the trivets together with the same zig-zag stitch you used for making the trivets. This step might pose a few issues if your rug is large because the jute rope is not very flexible. If you find that you are unable to sew the coils together with your sewing machine, grab a large hand needle and jeans thread and hand stitch them together.
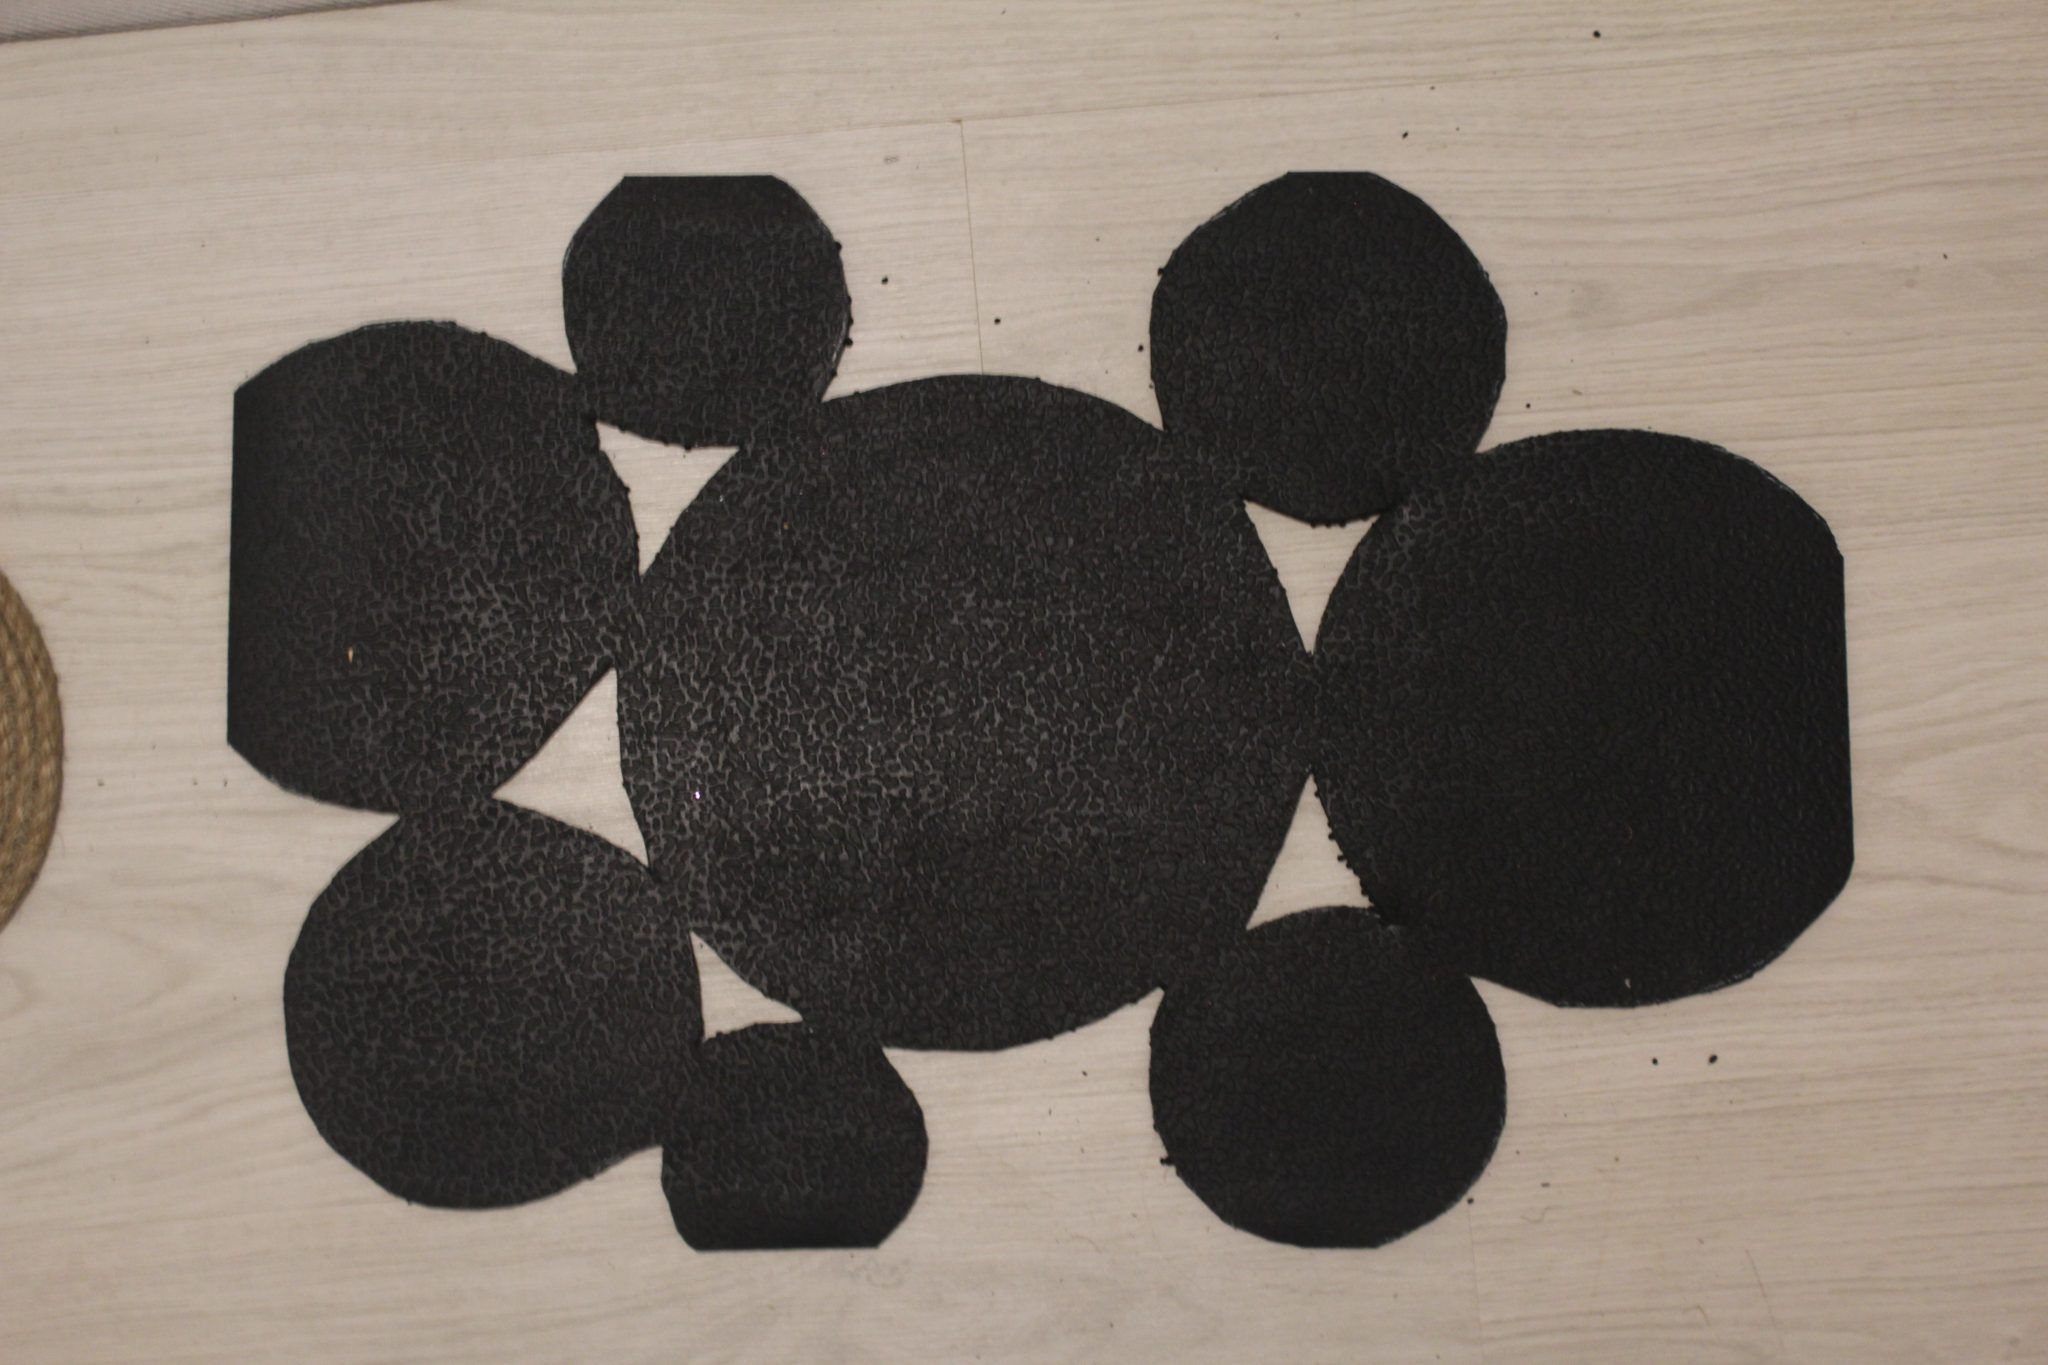
Preparing the rubber mat
- After all coils are attached into a rug, place the rope rug on the rubber doormat.
- Draw around the rope rug using a chalk pencil. My rubber mat turned out to be a little smaller than the rope rug but I’m not worried. My rug looks so pretty that every is barely touching it with their dirty shoes lol

- Once the rug pattern is drawn onto the rubber mat, remove the rope rug and cut out the rubber pattern, using your craft scissors. You need strong scissors with a sharp tip or a razor knife able to offer good hand control.
Attaching both mats together
- Cover one side of the rubber mat with construction adhesive. If you decided to purchase the adhesive I recommended you need to move pretty quickly as the adhesive dries out quite fast.
- Press the rope rug onto the rubber mat and apply even pressure with a hard object that is larger than the mat (or use or a stack of heavy books). Leave overnight to dry completely.
- And your beautiful new rug for your entryway is ready! If you want to cover the rubber mat completely, you can add a line of rope to the edge of the rug and glue it with construction adhesive or use a hot glue gun.
Want more rope ideas?
I hope you enjoyed this tutorial. Please let me know your thoughts on this DIY in the comments below! Thanks!


How to sew a rope rug
Materials
- jute rope I used 82 ft, 5/16" thick
- jeans thread
Tools
- jeans needle
- cheap rubber doormat
- craft scissors or razor knife/utility knife
- chalk pencil
- strong construction adhesive
Instructions
- Roughly estimate the final pattern and the size of your coiled rope rug.
- Sew the coils as instructed in this tutorial. Make the "trivets" in various sizes.
- Sew the trivets together with the same zig-zag stitch you used for making the trivets. This step might pose a few issues if your rug is large because the jute rope is not very flexible. If you find that you are unable to sew the coils together with your sewing machine, grab a large hand needle and jeans thread and hand stitch them together.
- After all coils are attached into a rug, place the rope rug on the rubber doormat.
- Draw around the rope rug using a chalk pencil. My rubber mat turned out to be a little smaller than the rope rug but I'm not worried. My rug looks so pretty that every is barely touching it with their dirty shoes lol
- Once the rug pattern is drawn onto the rubber mat, remove the rope rug and cut out the rubber pattern, using your craft scissors. You need strong scissors with a sharp tip or a razor knife able to offer good hand control.
- Cover one side of the rubber mat with construction adhesive. If you decided to purchase the adhesive I recommended you need to move pretty quickly as the adhesive dries out quite fast.
- Press the rope rug onto the rubber mat and apply even pressure with a hard object that is larger than the mat. Leave overnight to dry completely.
Most popular sewing projects:


Article may contain Amazon & affiliate links. As an Amazon Associate I earn from qualifying purchases at no additional cost to you.
ABOUT PETRO
Hi, I’m Petro, author and founder of Easy Peasy Creative Ideas. Sewist, crafter, avid DIY-er, foodie, photographer, homemaker and mommy to one. I’m an expert at coming up with quick, clever sewing tips, recycling crafts and simple, easy recipes! You can find my ideas featured in reputable publications such as Country Living, Good House Keeping, Yahoo News, WikiHow, Shutterfly, Parade, Brit & Co and more. Thanks for stopping by and hope you’ll stay for a while, get to know me better and come back another time. Stick around for real fun projects! Read more…