

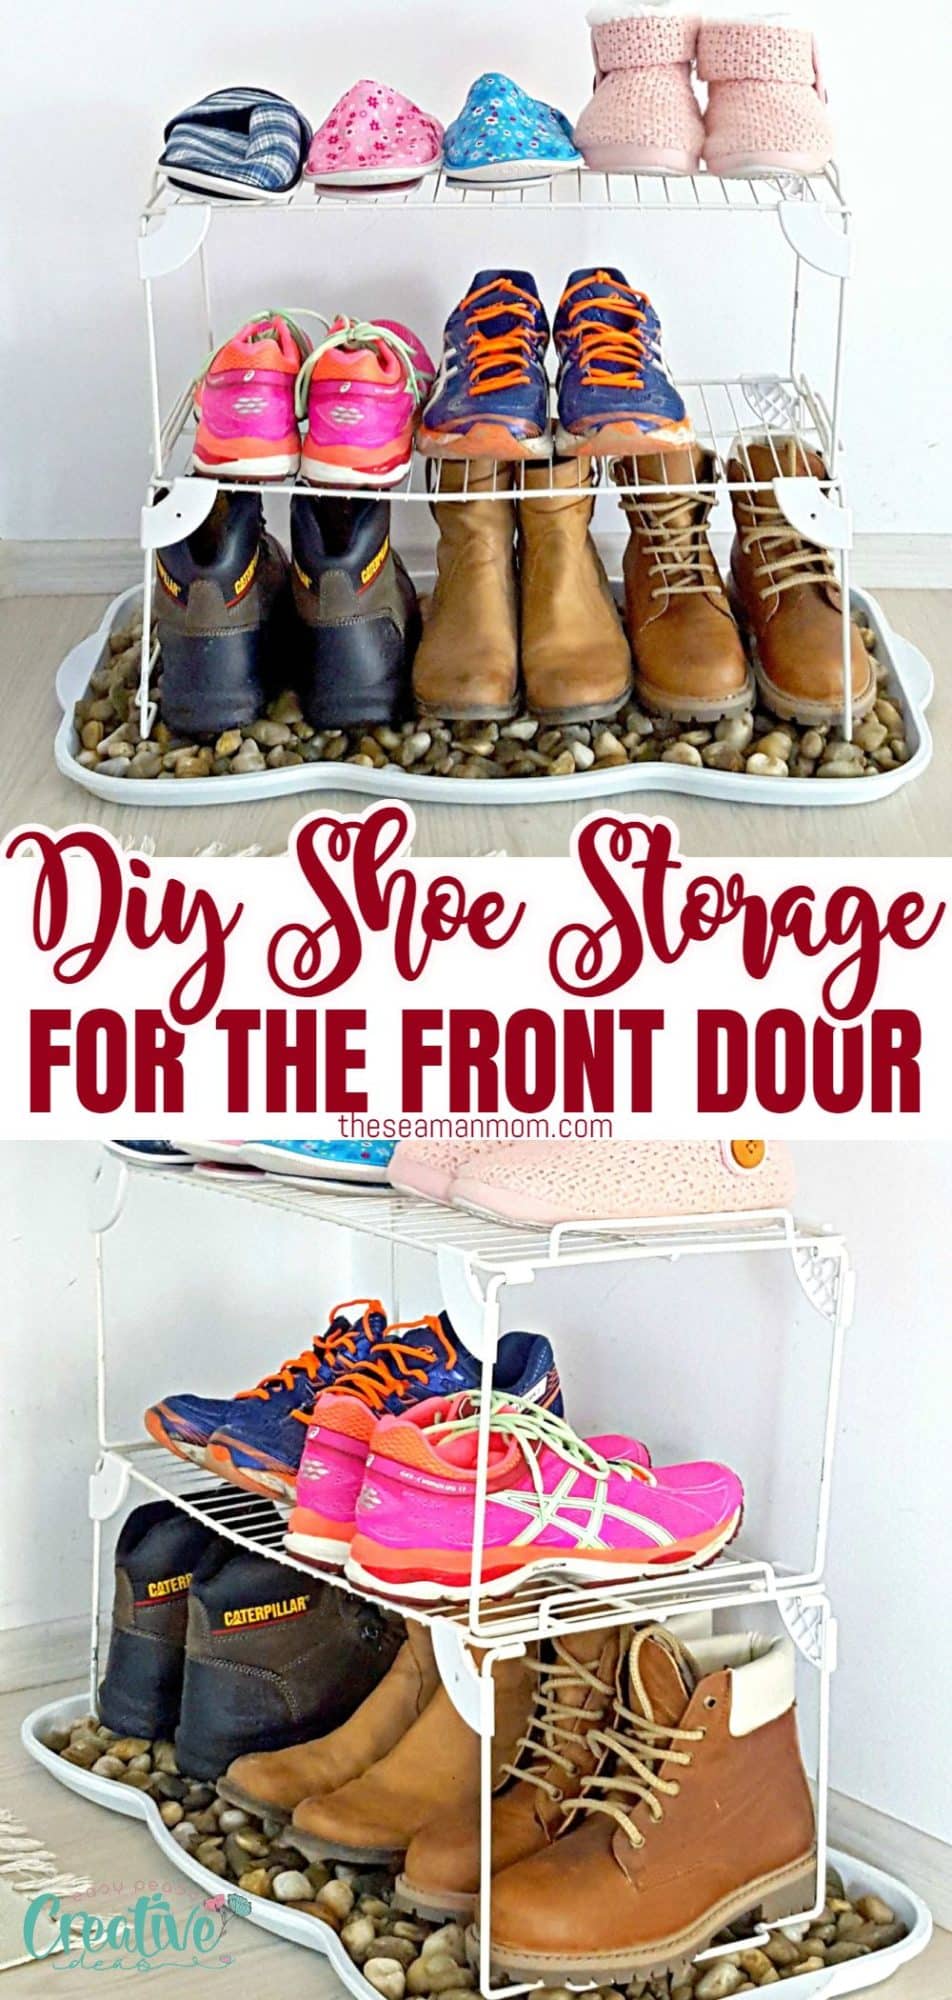
The best DIY Shoe Storage For The Front Door
Transform your entryway with this DIY shoe storage idea! Easily make a shoe rack for snowy boots using an old boot tray and get the perfect front-door shoe storage solution today!
DIY Shoe Storage
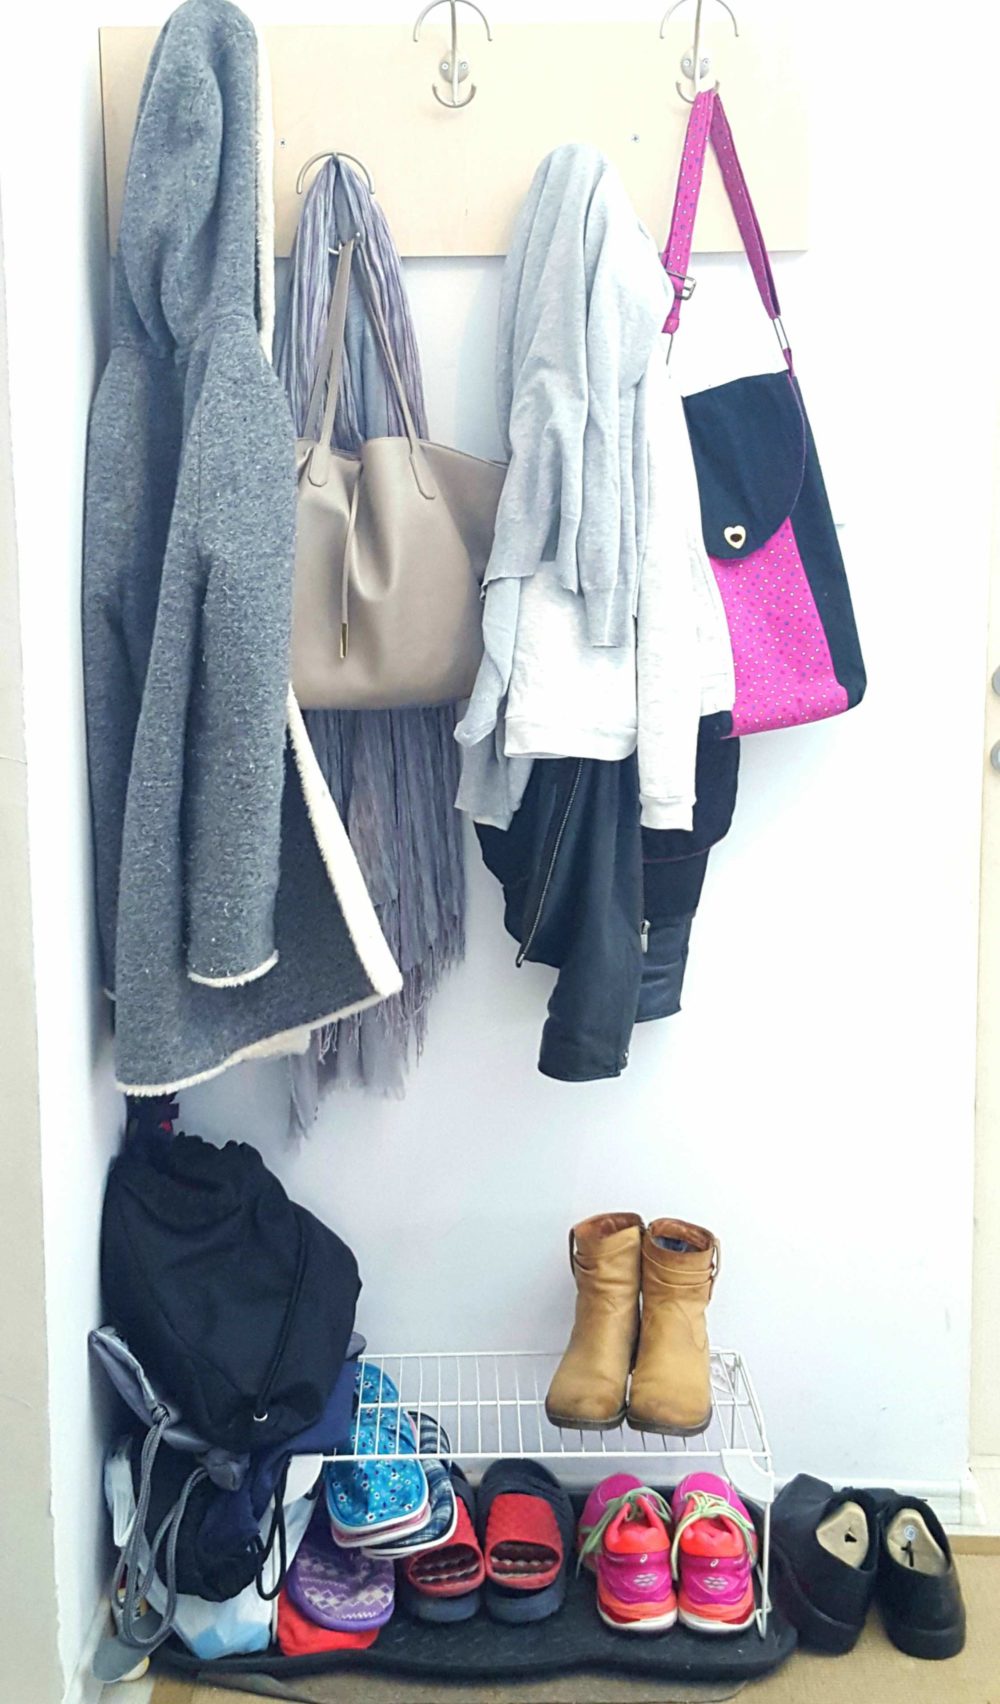
Hey, guys! Today I’ll begin by admitting I’m a total mess! And so is my house! Don’t just take my word for it! Just look at the photo below! My entryway really needed this DIY shoe storage idea, it was practically begging for a makeover!
So, if you’re like me and desperately need to get organized, this DIY shoe storage idea is perfect for you! With some simple supplies and a few minutes of your time, you can create a beautiful and functional shoe rack that will transform the look of your entryway.
This front door shoe storage idea is not only incredibly easy to put together but it also looks great – seriously! You won’t believe how much better your entryway will look after this DIY project. Plus, it’s super affordable too so there’s no reason not to give it a try!
The materials needed are basic items most households have on-hand: an old boot tray (or any other shallow container), paint, a paintbrush, and some shoe holders. You can pick up a boot tray from any dollar store or craft supply store. Once you have the supplies ready to go, you’re all set for a DIY shoe storage makeover!
Similar ideas you will love:
- Recycled plastic bottle vase
- DIY planters from recycled cans
- DIY phone holder from toilet paper rolls
The great thing about this front-door shoe storage idea is that it helps reduce clutter while keeping shoes organized and looking stylish. This simple project will instantly transform the look of your entryway while adding convenient shoe storage. This easy DIY idea is the perfect solution for a small entryway or if you don’t want to invest a lot.
The makeover I had in mind was not a good fit for my tiny budget or my non-existent free time! So I thought I should start small and upgrade a couple of old shoe trays for the front door. They were black and ugly, they’d been around for ages and time really took a toll on them! So it was time for a change. Time for an easy peasy DIY shoe storage.
What you need for this project
I saw this pebble tray at Martha Stewart’s and I thought this is an awesome idea for winter. We get a lot of snow and our entryway is usually a mess. I bought these old black boot trays years ago with this purpose in mind but it all became a huge mess eventually, more like a storage space for just about everything. It made me choke every time I saw it! Now, this new shoe and boot tray is a totally different story.
It looks much better, it’s tidy and neat and makes the place look cleaner. And the best part is, I had everything I needed to make this awesome DIY shoe storage! I had the trays, I had pebbles, I had paint and paint roller and it all took minutes to put together. Once the paint was dry, that is!
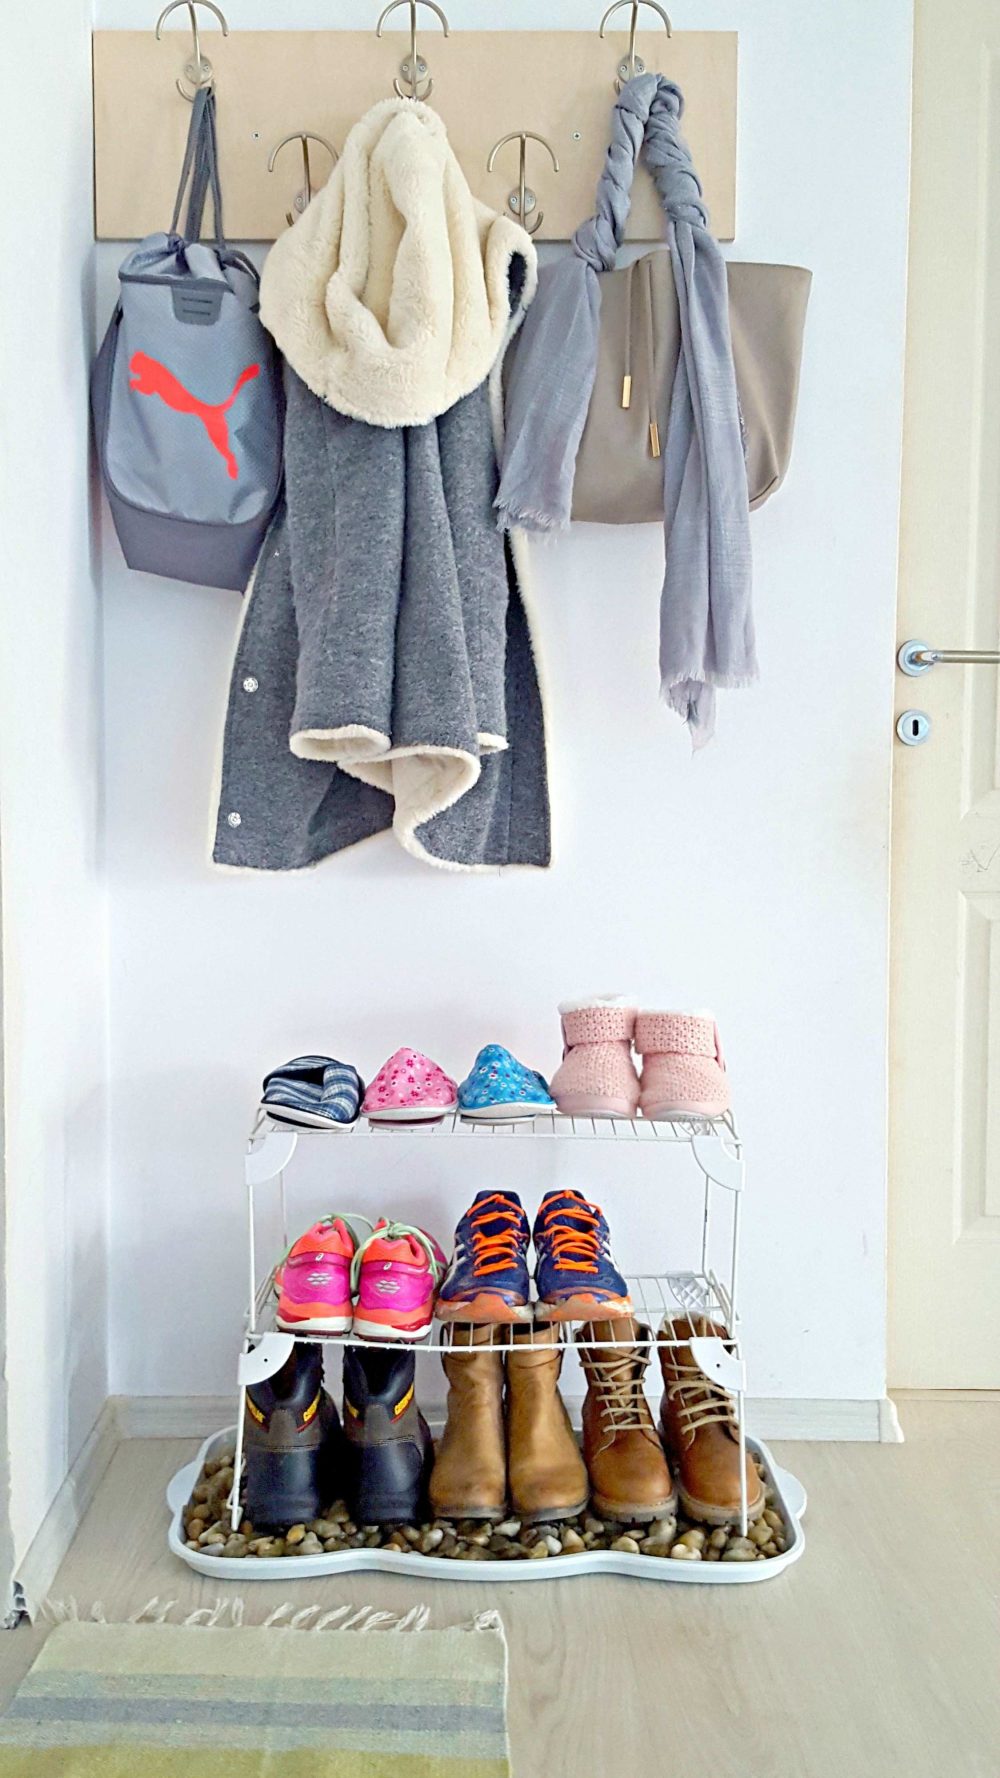
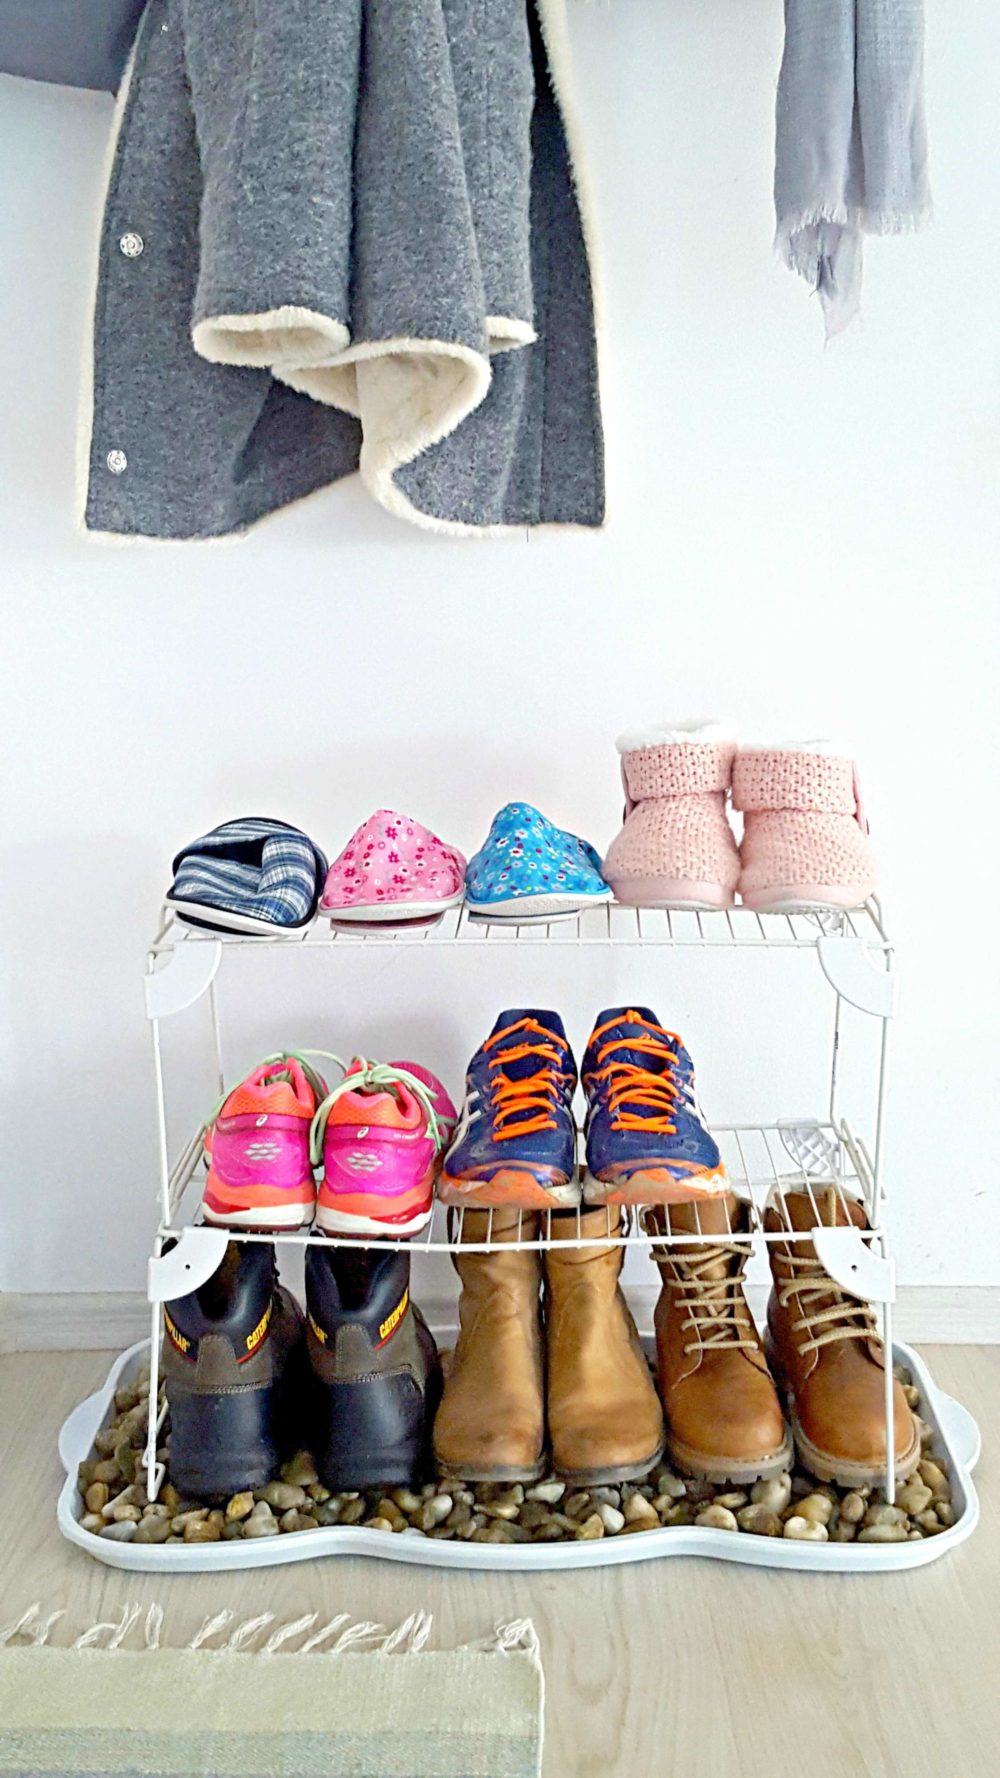
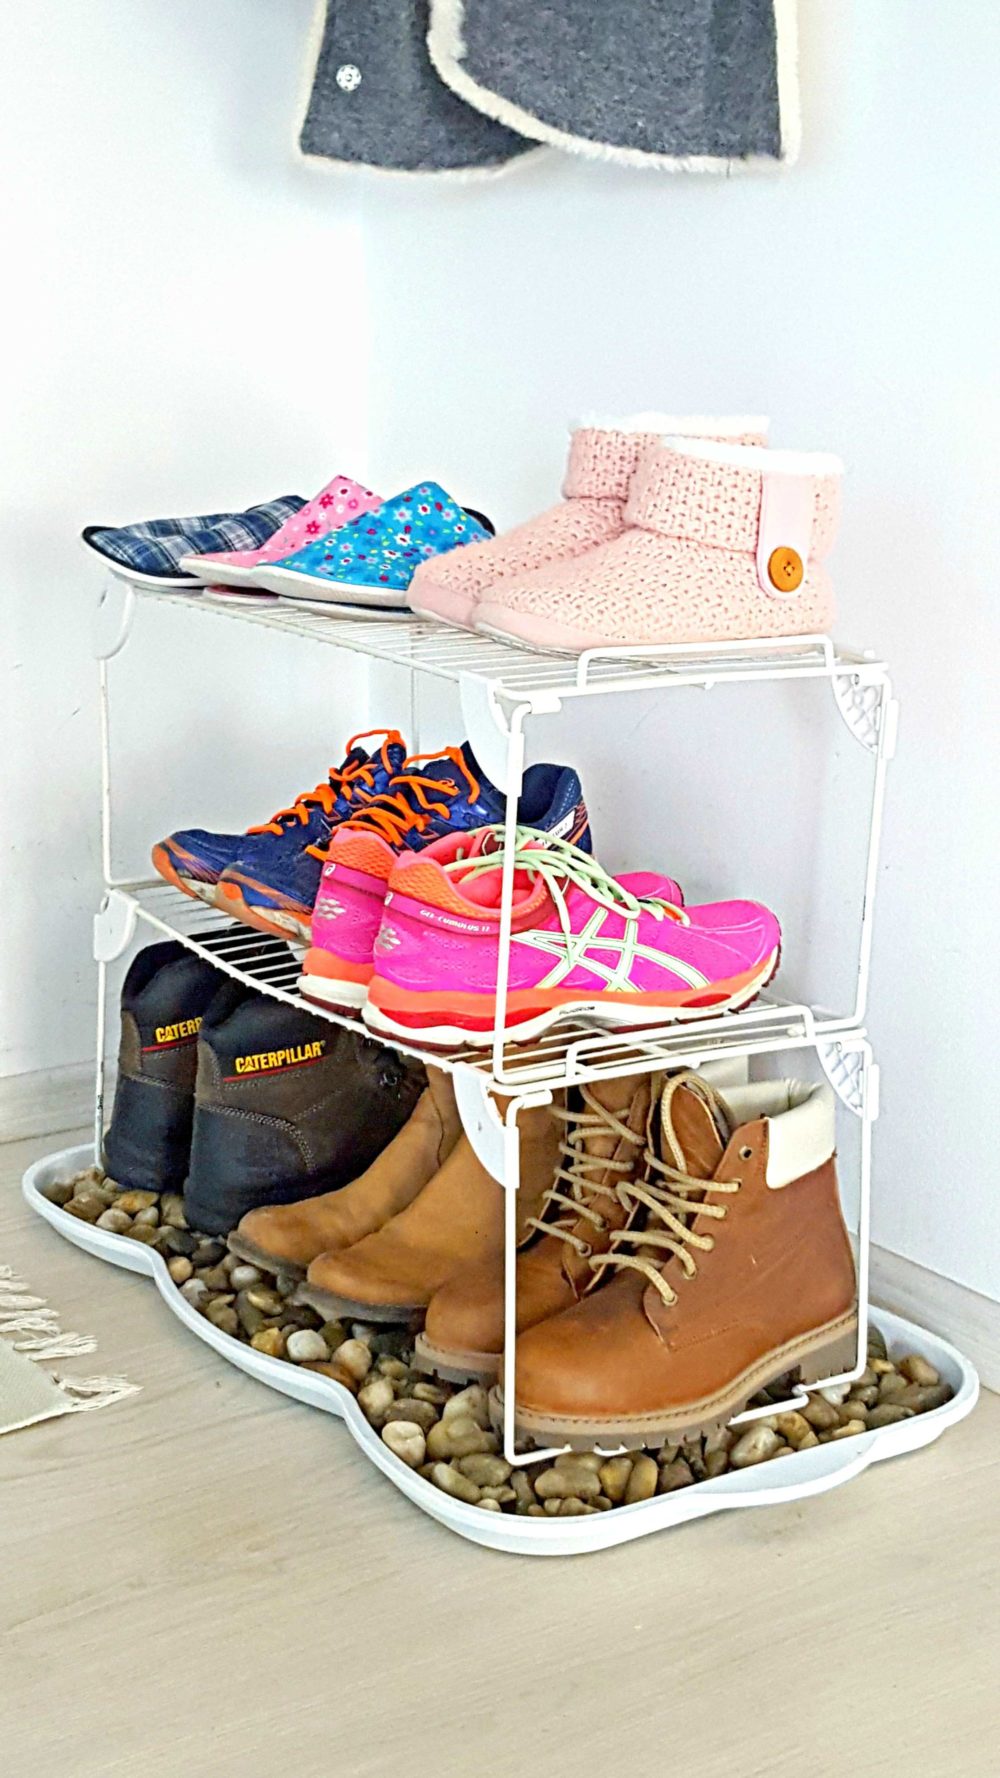
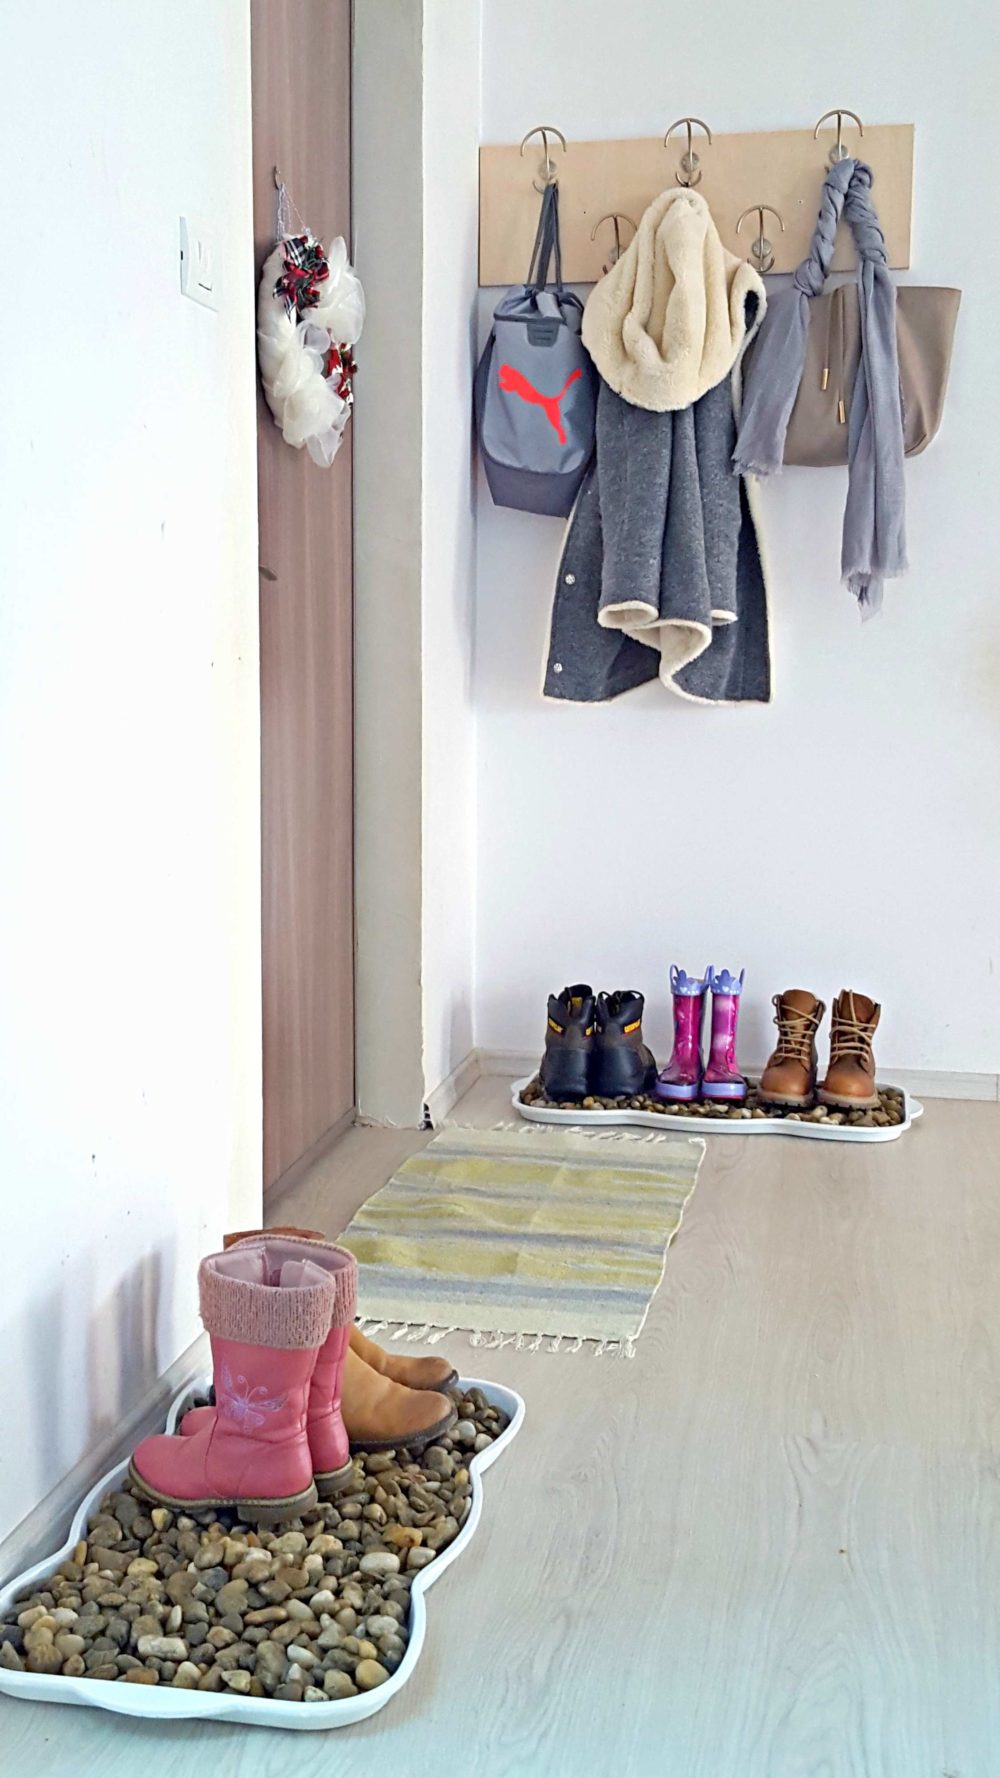
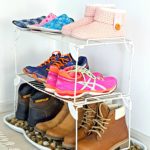
Once the tray was ready and filled with pebbles I decided to take advantage of the old metal shoe racks I had (which were in super good shape, it would’ve been such a shame not to use them!). So I decided to stack them up and place them on top of the pebble tray as extra storage space. We now use the pebble-filled bottom for snowy boots, the middle rack for our sports shoes, and the top for lounging shoes and slippers.
What is the best way to store a lot of shoes?
The best way to store a lot of pairs of shoes is by using shoe racks and shoe organizers. You can use shoe racks in your closet, entryway, or hallway for easy storage. If you have more shoes than the shoe rack can hold, then you can use shoe organizers that are designed to fit over the door or hang on a wall. These shoe organizers are great for keeping all your shoes in one place and out of sight.
You can also purchase shelving systems specifically designed for shoe storage as well. These shelves come with adjustable dividers to store different types of shoes such as sandals, heels, boots, and sneakers. You can also add shoe boxes to these shelves for even more organized shoe storage!
What can I use instead of a shoe rack?
If you don’t have a shoe rack, there are other ways you can store your shoes. You can use shoe boxes for small collections of shoes, or even repurpose old plastic containers such as bins and drawers.
Other shoe storage ideas include hanging shoe organizers over the door, using shoe benches in an entryway or closet, and making DIY shoe racks from scrap wood. Investing in some sturdy shoe shelves is also a great way to maximize your shoe storage space in any room!
An old ladder can also be repurposed as shoe storage. Just lean it against a wall and place shoes on the steps to keep them organized and off the floor.
No matter what your budget or space limitations are, there are plenty of creative ways to make the most out of your shoe storage needs. From simple DIY projects to more sophisticated shoe organizers, the options are endless!
How do you organize your shoes if you don’t have space?
If you don’t have enough space to store your shoes, especially if you live in a small apartment, there are still some solutions to store shoes without taking up a lot of space.
- You can use shoe boxes with lids to hide smaller collections of shoes in your walk-in closet, mudroom, shoe cabinet or under the bed or even in the garage.
- You can also try using shoe bins and hanging shoe organizers as mentioned above, which are both great options if you have limited floor space.
- Wall-mounted shoe racks are a great way to make the most out of tight spaces, as they provide plenty of storage without taking up any floor space. Place shoes in a basket first or use some vintage crates, then store them on the shoe rack. A wooden shoe rack looks best and is also more durable than plastic shoe racks.
- Try repurposing the furniture you already have! An old dresser can easily be turned into a shoe storage unit with a few shelves, drawers, and shoe boxes.
- Finally, if you really don’t have any extra room for shoe storage, then consider investing in multi-functional furniture such as ottomans with built-in compartments or shoe storage benches with hidden shoe cubbies on the side! These pieces may cost a bit more, but they will save you a lot of space in the long run.
No matter what shoe storage solution you choose to go with, the most important thing is to find something that works for your small spaces needs and fits in with your lifestyle! With the right shoe storage ideas, you’ll be able to keep your shoes neatly organized without taking up too much space.
Why you should make your own DIY shoe rack
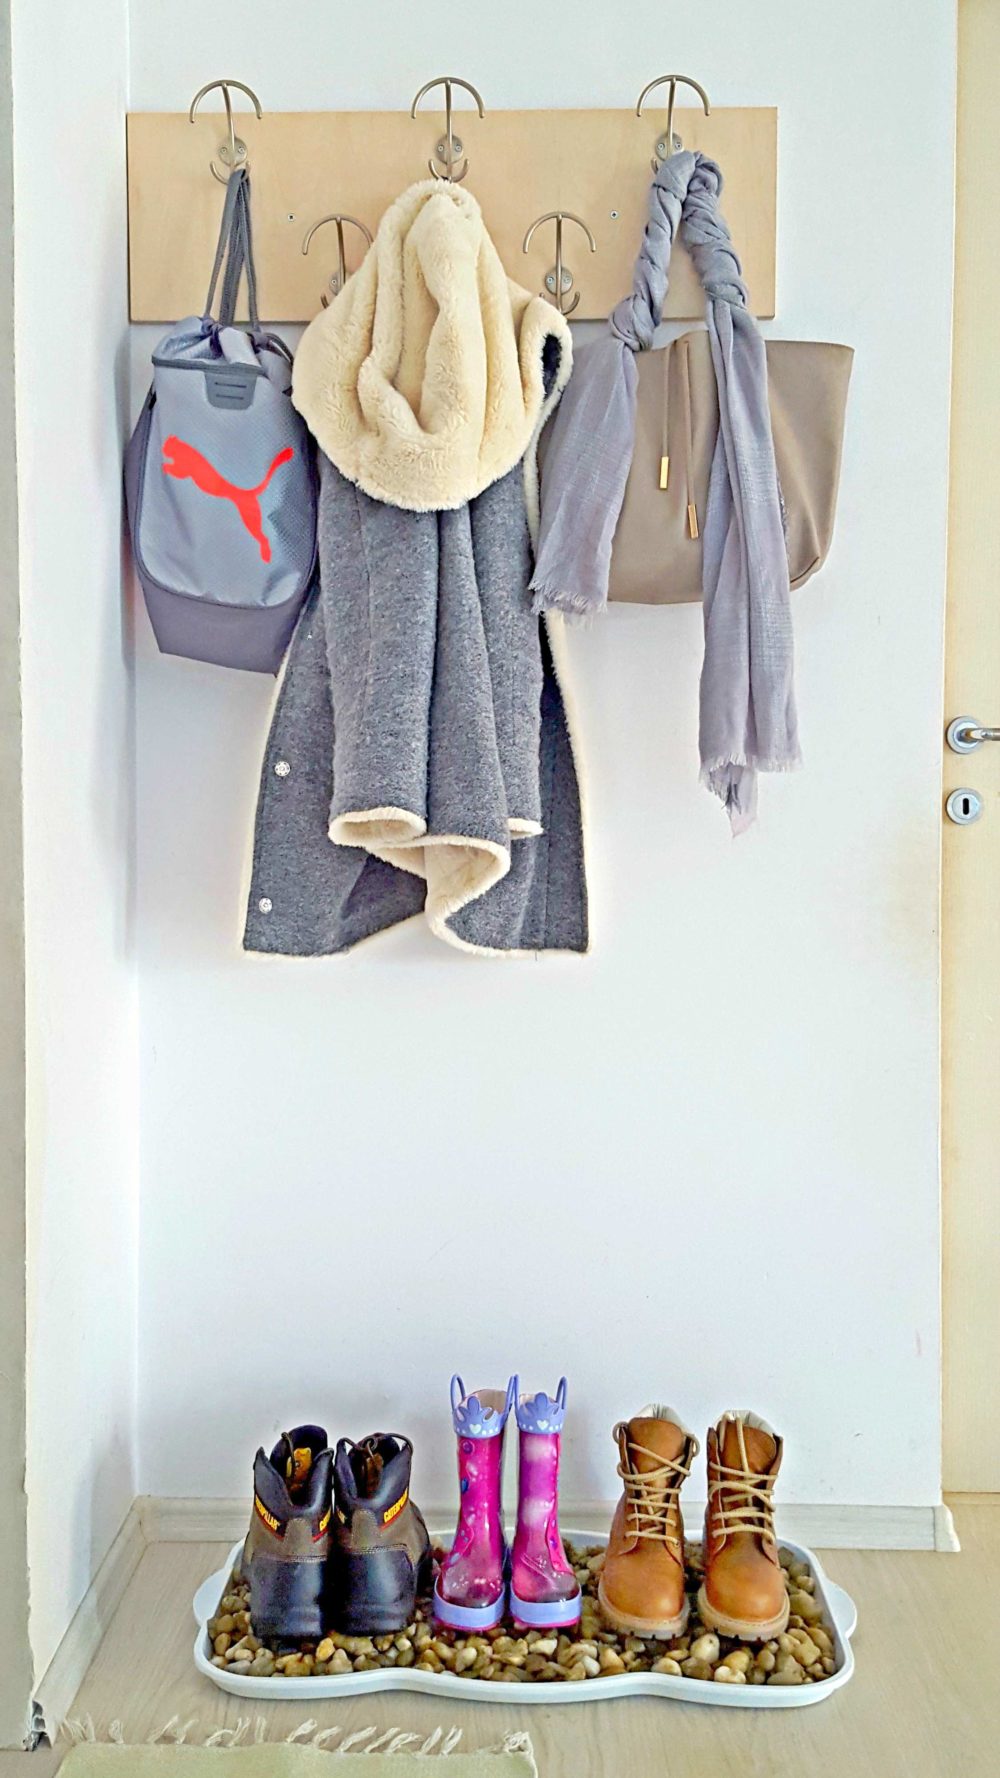
I am so much happier about my entryway now with this simple DIY shoe rack in place! I think it looks a lot tidier, cleaner, and clutter-free! And I added an extra tray by the door, for guests’ shoes and boots.
So, if you’re looking for an easy and affordable way to get organized, give this DIY shoe storage idea a try! With just a few supplies and some time, you can create a great-looking shoe rack that will keep all the shoes in your entryway neat and tidy. Plus, it’s an easy project that anyone can do and works great even in households with a lot of kids and “action” in the entryway area! Here’s the step by step process and the materials used for all these small changes.
DIY shoe rack step-by-step instructions
Materials:
- newspapers
- plastic boot tray
- 220 grit sandpaper
- rubbing alcohol
- cotton pads
- primer
- acrylic paint in color of choice (I got white, it fits my home decor). Use paint that is suitable for plastic. Alternatively, use spray paint
- paint roller
- acrylic sealer
- pebbles
- 2 metal shoe racks
Note: I had some suggestions to use sand under the pebbles to stabilize them. But I find this is not a good idea as it gets wet and stays wet for long periods of time and can create mold in the area.
Directions:
- Cover your work surface with newspaper or cardboard.
- If you’re using an old tray as mine, wash it well with soap and water then dry.
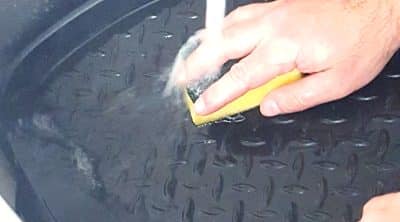
- Wipe surface down with a cloth.
- Wipe down the tray with rubbing alcohol. This will remove any oils that might prevent the paint from sticking.
- Apply a coat of primer and let it dry completely.
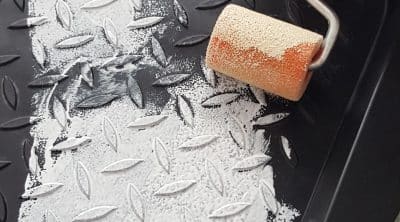
- Using your paint roller, apply the paint, following the instructions on the label. Alternatively use spray paint. I found it harder to stick to plastic and to apply. Apply several coats of paint until you’re happy with the result. Make sure each coat has dried completely before applying the next coat. I applied 4 coats for my black tray. Allow to dry for a few hours.
- Do a coat of acrylic sealer for durability – completely optional. Allow to completely dry.
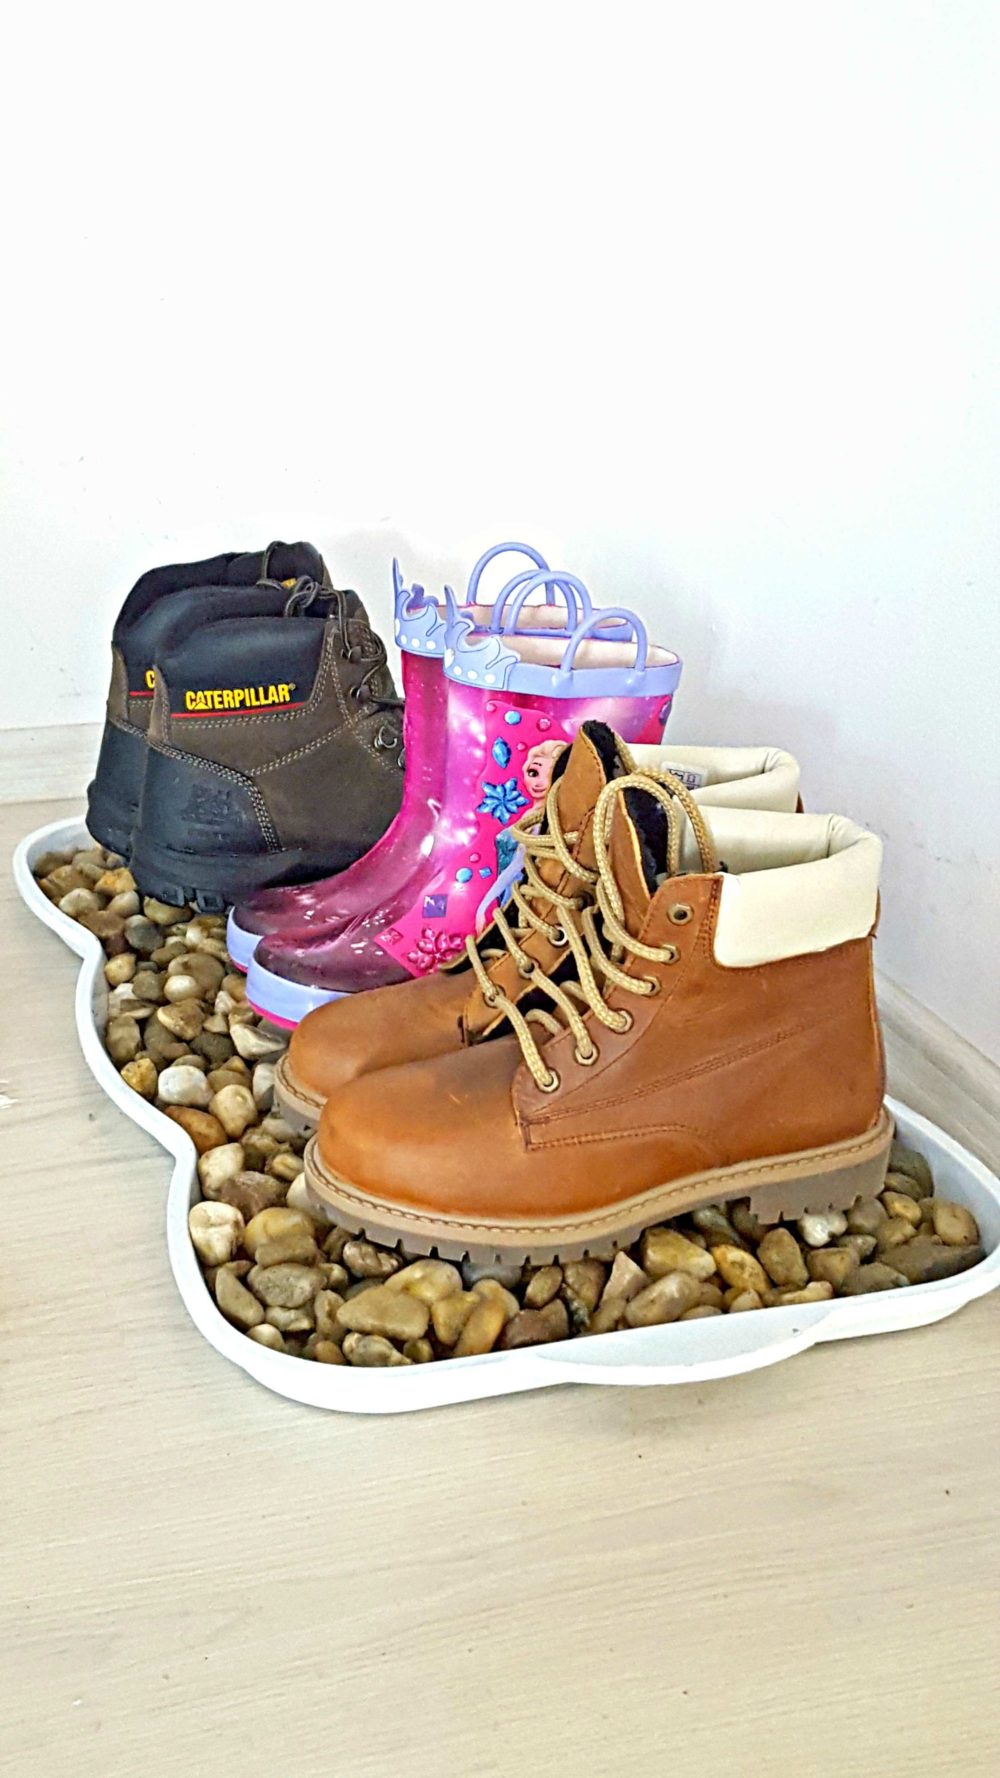
- Fill about 2/3 of the tray with pebbles.
- Make sure you clean out the tray regularly by removing the pebbles and wiping or washing the tray.
- Stack up the metal shoe racks and place them on top of the pebble filled tray for extra shoe storage. Keep your favorite pair of shoes like high heels or trainers at the top of the tray for easy access on top and the rest on the shoe racks.
Shoe storage doesn’t have to be difficult or expensive! With a few simple and affordable materials, you can create your own DIY shoe storage solution that will keep all of your shoes organized. Plus, it won’t take up too much space in your house either.
Thank you for reading. Happy shoe organizing!
Pin to save for later
Print the DIY card
DIY shoe storage rack
Materials
- newspapers
- plastic boot tray
- 220 grit sandpaper
- rubbing alcohol
- cotton pads
- primer
- acrylic paint in color of choice I got white, it fits my home decor. Use paint that is suitable for plastic. Alternatively, use spray paint
Instructions
- Cover your work surface with newspaper or cardboard.
- If you're using an old tray as mine, wash it well with soap and water then dry.

- Wipe surface down with a cloth.
- Wipe down the tray with rubbing alcohol. This will remove any oils that might prevent the paint from sticking.
- Apply a coat of primer and let it dry completely.
- Using your paint roller, apply the paint, following the instructions on the label. Alternatively use spray paint. I found it harder to stick to plastic and to apply. Apply several coats of paint until you're happy with the result. Make sure each coat has dried completely before applying the next coat. I applied 4 coats for my black tray. Allow to dry for a few hours.
- Do a coat of acrylic sealer for durability - completely optional. Allow to completely dry.
- Fill about 2/3 of the tray with pebbles.
- Make sure you clean out the tray regularly by removing the pebbles and wiping or washing the tray.
- Stack up the metal shoe racks and place them on top of the pebble filled tray for extra shoe storage. Keep your favorite pair of shoes like high heels or trainers at the top of the tray for easy access on top and the rest on the shoe racks.

Article may contain Amazon & affiliate links. As an Amazon Associate I earn from qualifying purchases at no additional cost to you.
ABOUT PETRO
Hi, I’m Petro, author and founder of Easy Peasy Creative Ideas. Sewist, crafter, avid DIY-er, foodie, photographer, homemaker and mommy to one. I’m an expert at coming up with quick, clever sewing tips, recycling crafts and simple, easy recipes! You can find my ideas featured in reputable publications such as Country Living, Good House Keeping, Yahoo News, WikiHow, Shutterfly, Parade, Brit & Co and more. Thanks for stopping by and hope you’ll stay for a while, get to know me better and come back another time. Stick around for real fun projects! Read more…