

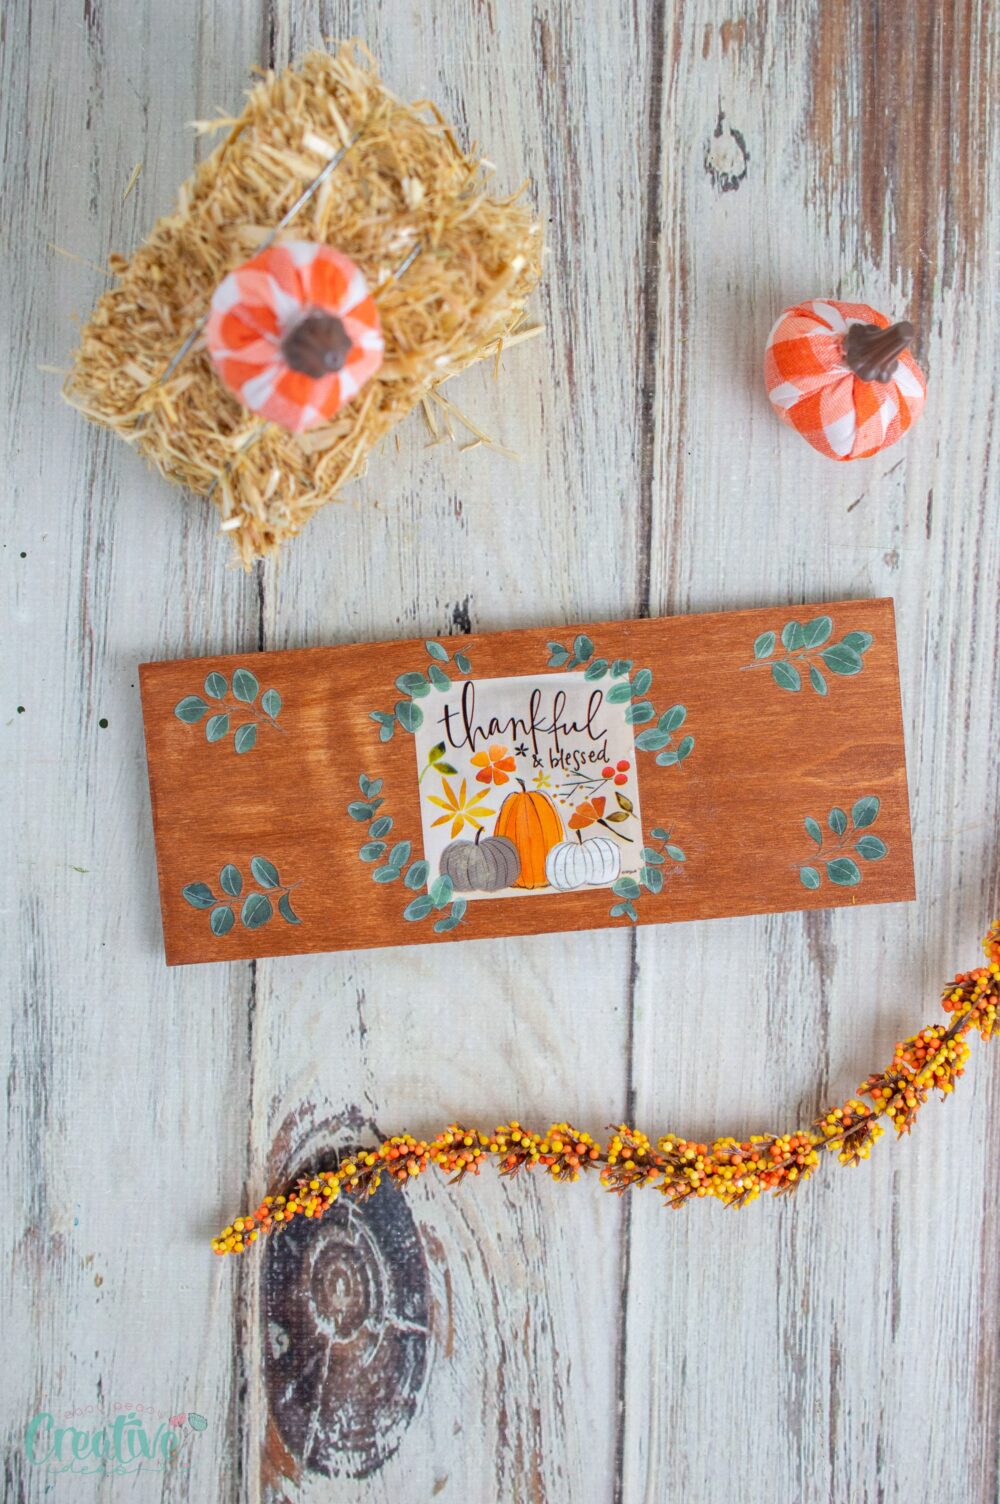
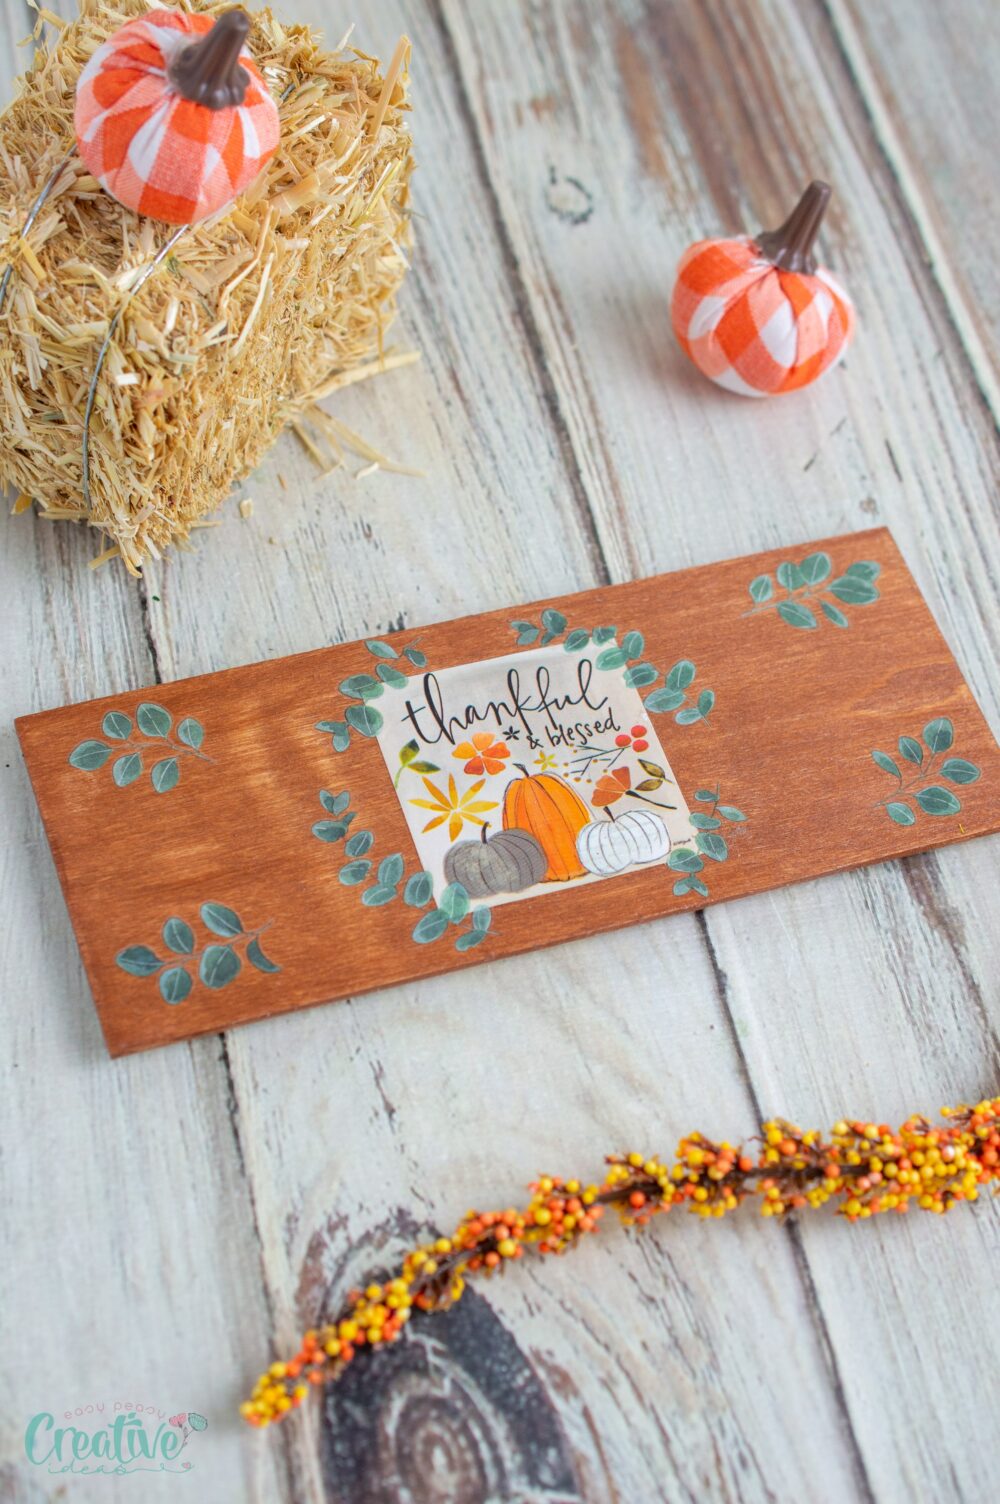
Thankful & Blessed DIY magnet
Get into the spirit of the season with a delightful Thanksgiving magnet that’s perfect for decorating your home or gifting to loved ones. Bring a touch of creativity and warmth to your Thanksgiving celebrations!
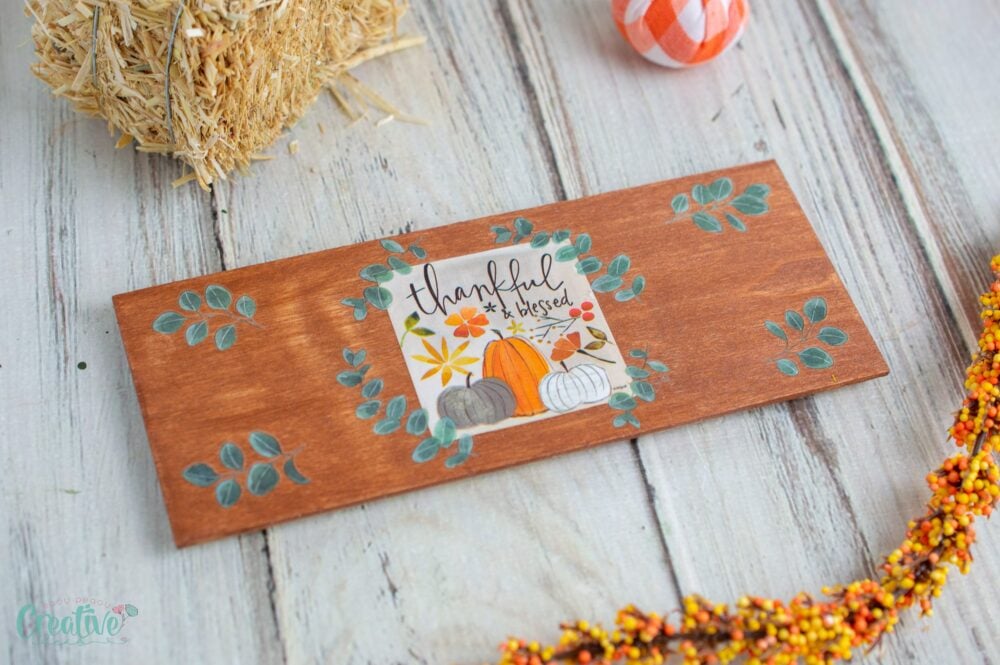
Thanksgiving is a time for gratitude, family gatherings, and festive decorations and what better way to celebrate than with a charming Thanksgiving magnet? This creative DIY magnet not only gives you a chance to express your artistic side but also results in a meaningful keepsake that can be cherished for years. Whether you’re an experienced crafter or a novice looking for a fun activity, this Thanksgiving magnet is a perfect addition to your holiday décor.
You’ll fall in love with this Thanksgiving magnet because it combines creativity with a personal touch. Handcrafted from simple materials, it embodies the spirit of thankfulness and togetherness. Every time you see this magnet on your fridge, it’ll remind you of the joy of family, friends, and the beautiful moments shared during the holiday season.
How to make a Thanksgiving magnet
Materials
To create your stunning Thanksgiving magnet, you’ll need the following materials:
- “Farmer’s Market” Calendar from Dollar Tree: The perfect source for vibrant images and phrases to capture the essence of Thanksgiving.
- Rectangular Wood Planks (125” x 2.875”): These will serve as the base for your magnet, offering a sturdy and rustic feel.
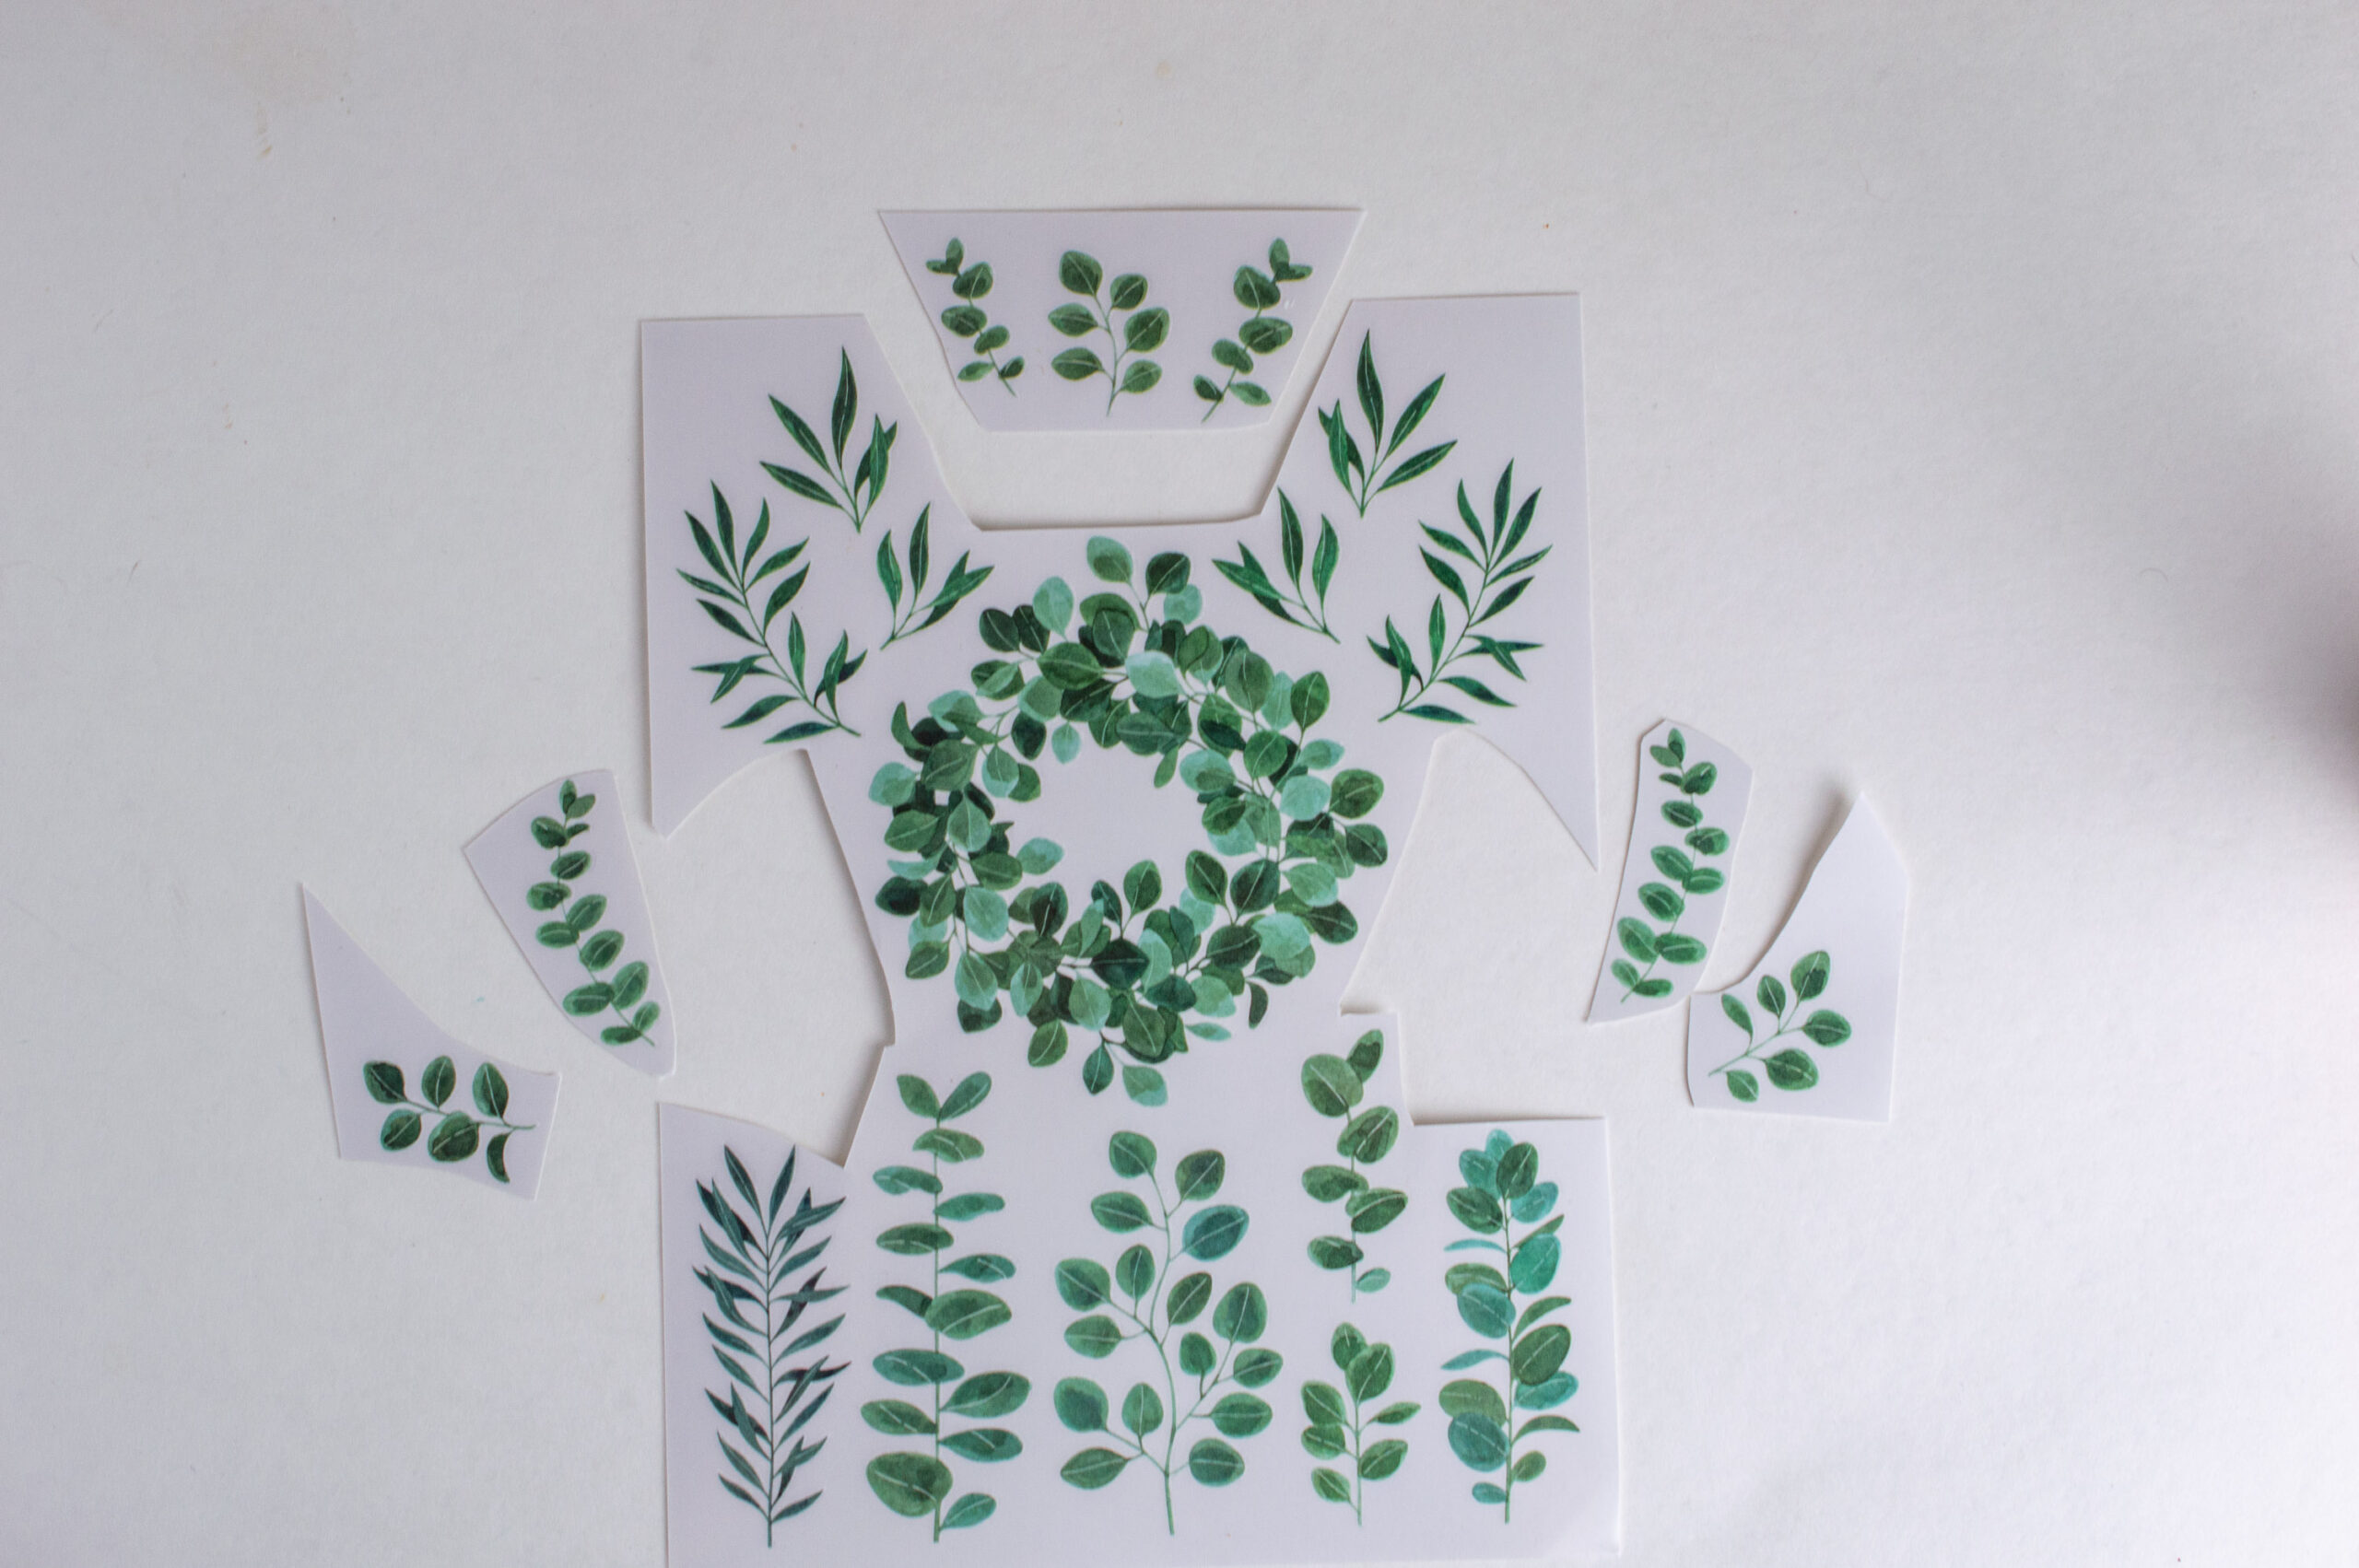
- Leaf Rub-On Transfers: Adds a seasonal touch with lovely designs that embody the spirit of fall.
- Foam Brush(es): Essential for applying paint and Mod Podge smoothly.
- Brown Acrylic Paint (Apple Barrel 20521E Nutmeg): This warm colour anchors the magnet and complements the autumn theme.
- Mod Podge: A versatile medium used for sealing and enhancing the overall finish.
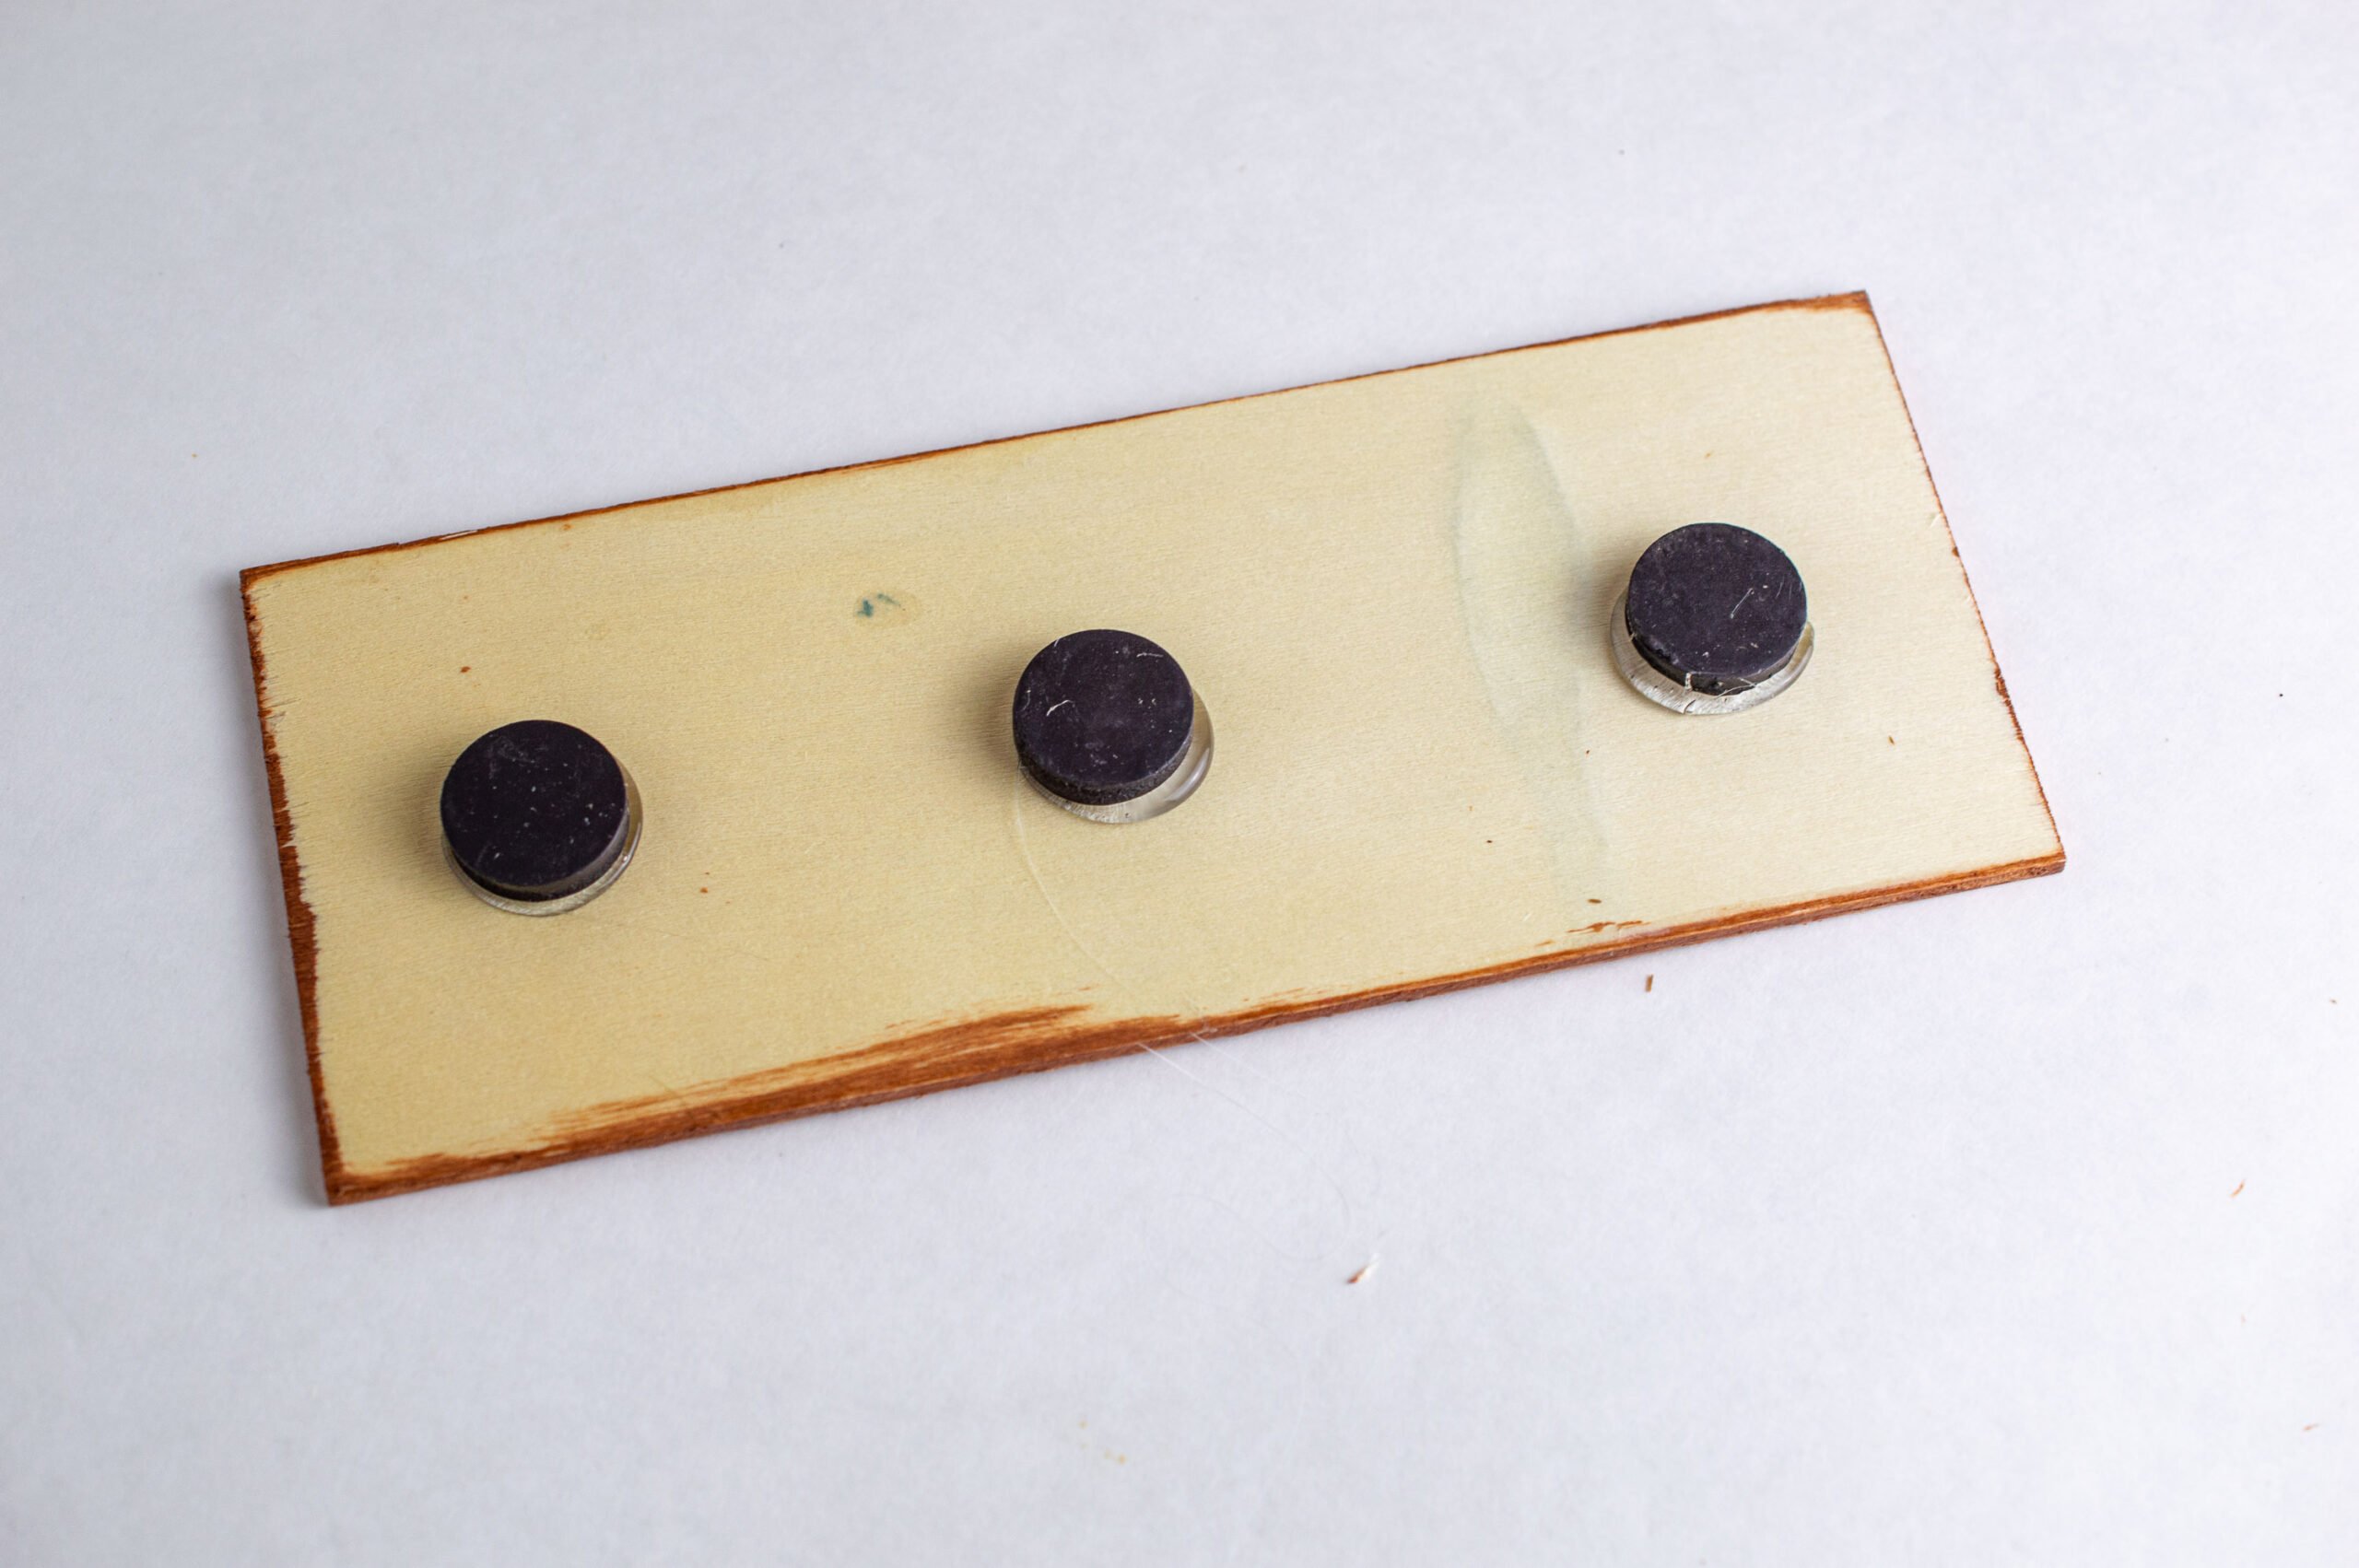
- 3 Button Magnets: Attach these to the back to ensure your beautiful creation sticks proudly to your fridge.
Equipment
You’ll also need some basic crafting equipment to bring your vision to life:
- Scissors: For trimming your materials precisely.
- Hot Glue Gun: An essential tool for attaching the button magnets securely to the wood.
- Hot Glue Sticks: These fuel your hot glue gun and ensure a strong bond.
- Craft Stick: Useful for spreading Mod Podge and pressing down your transfers.
Step by Step Instructions
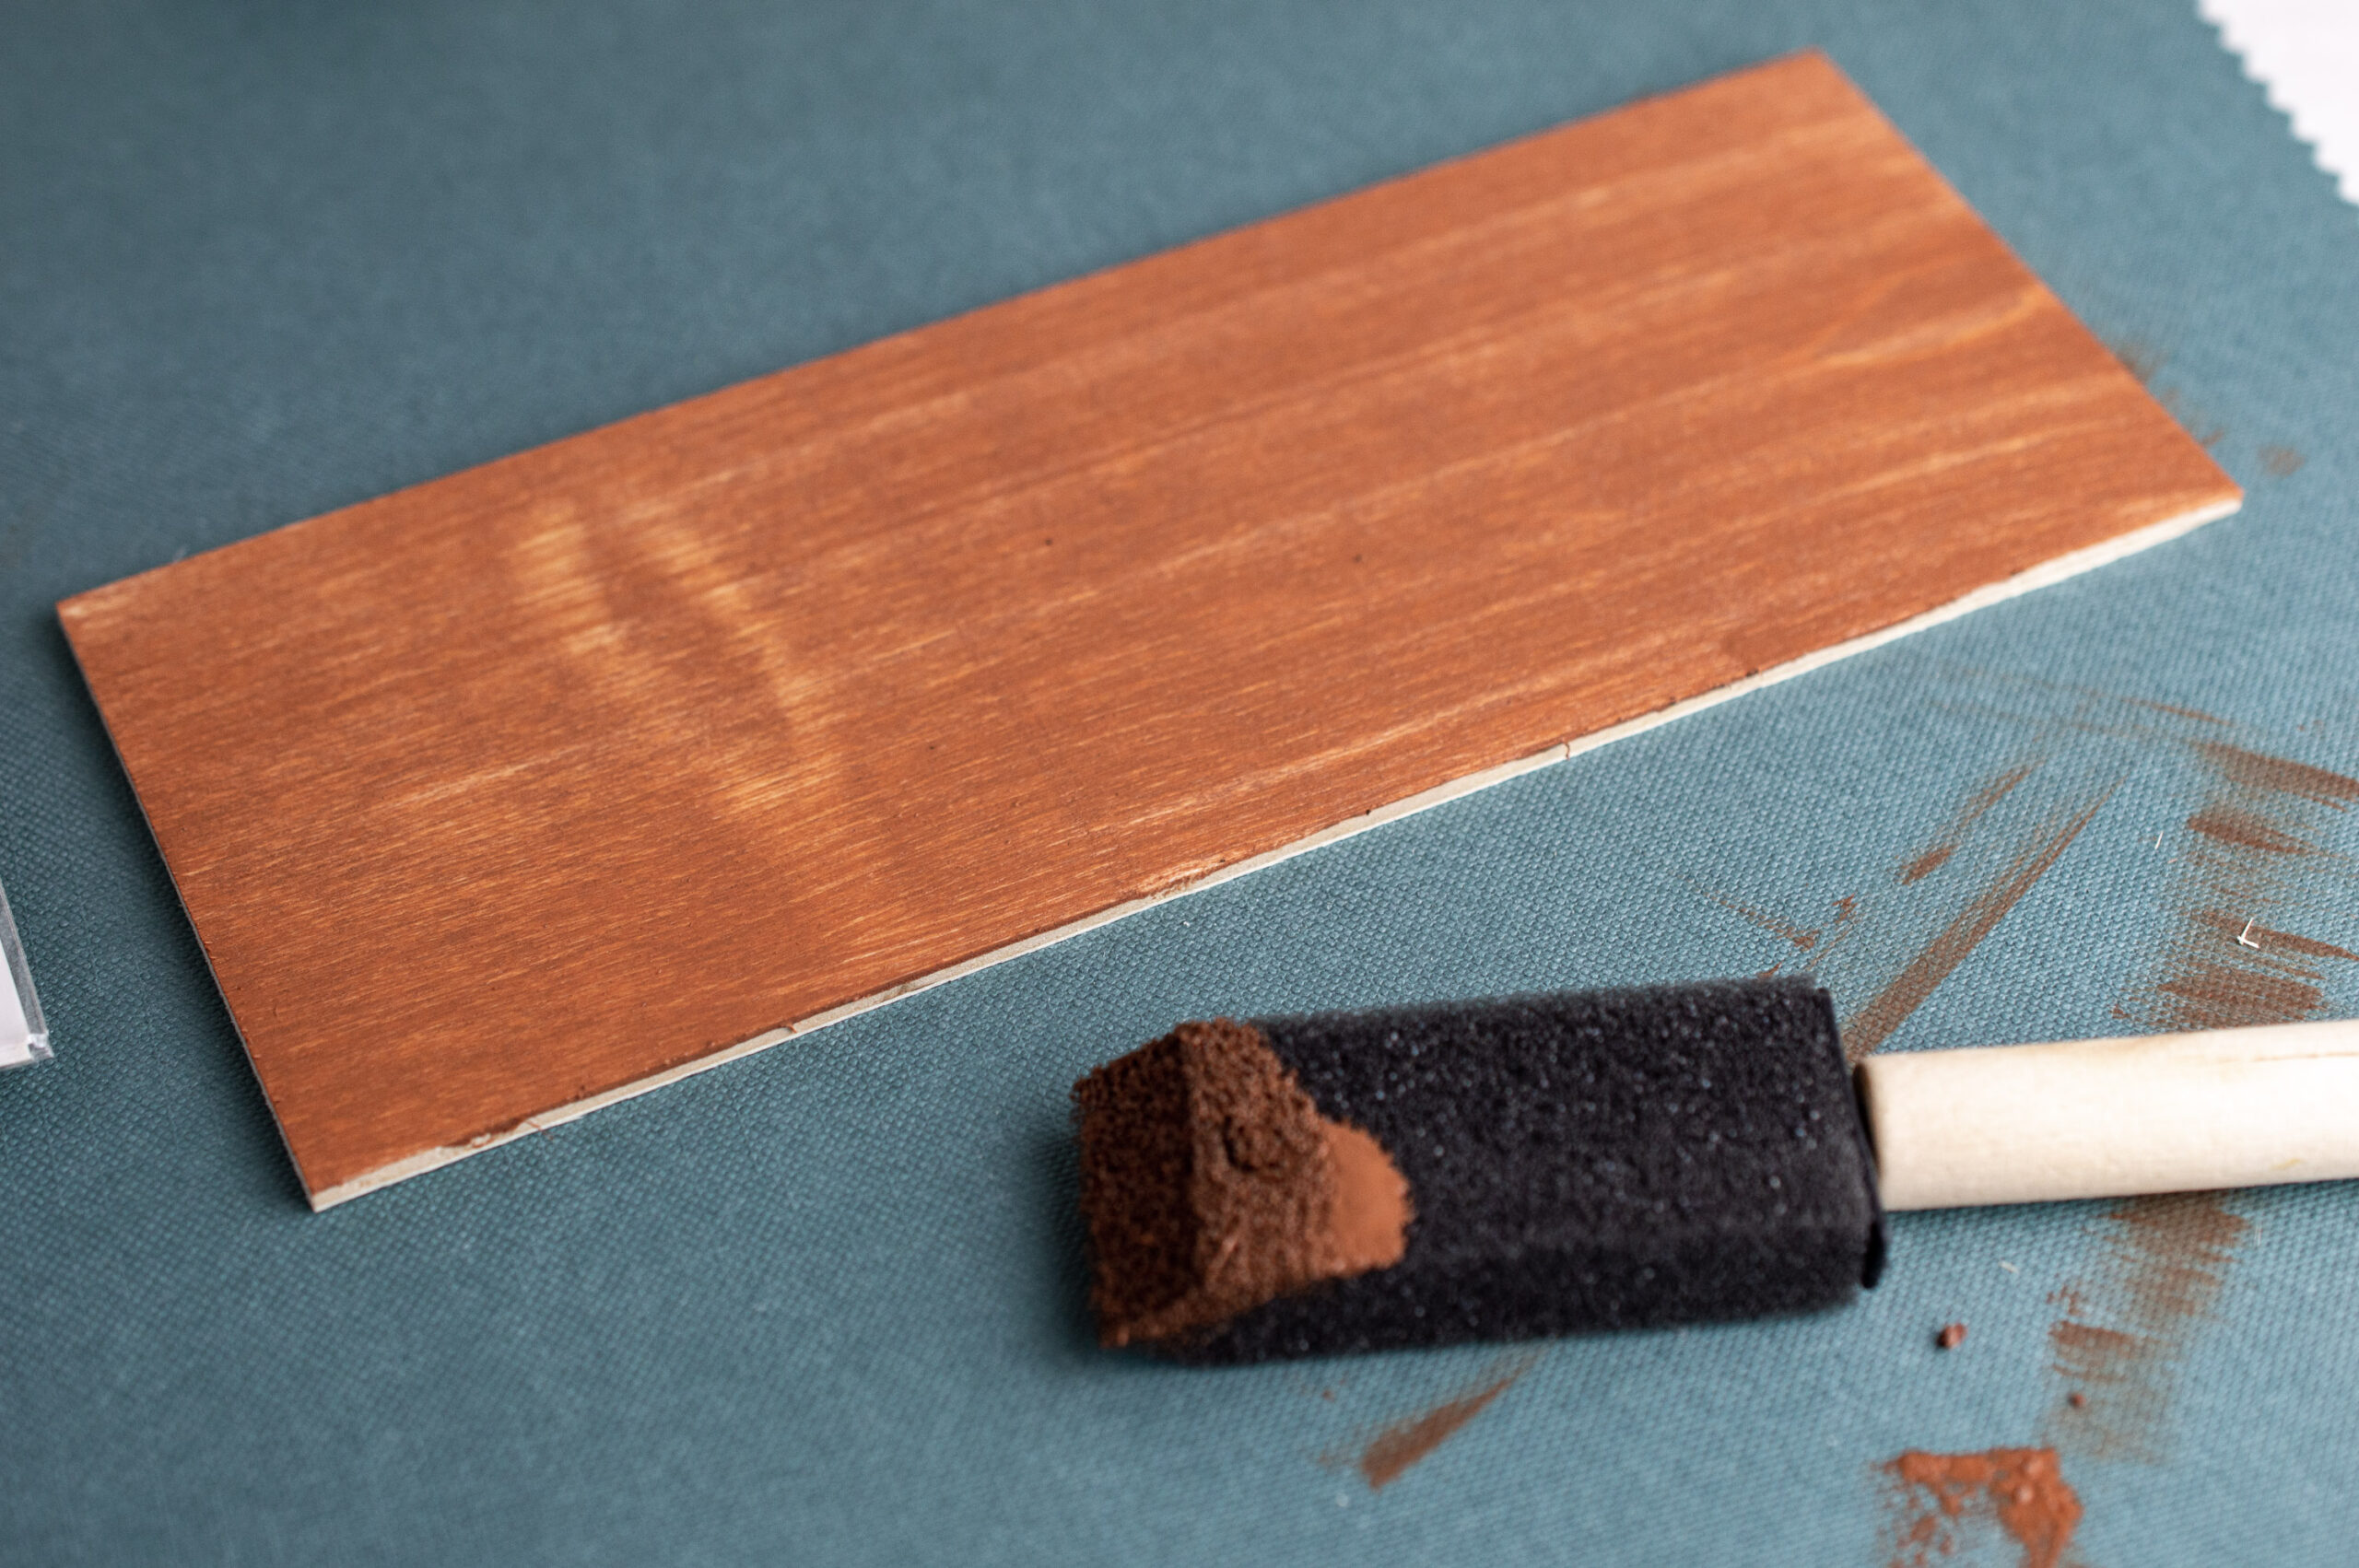
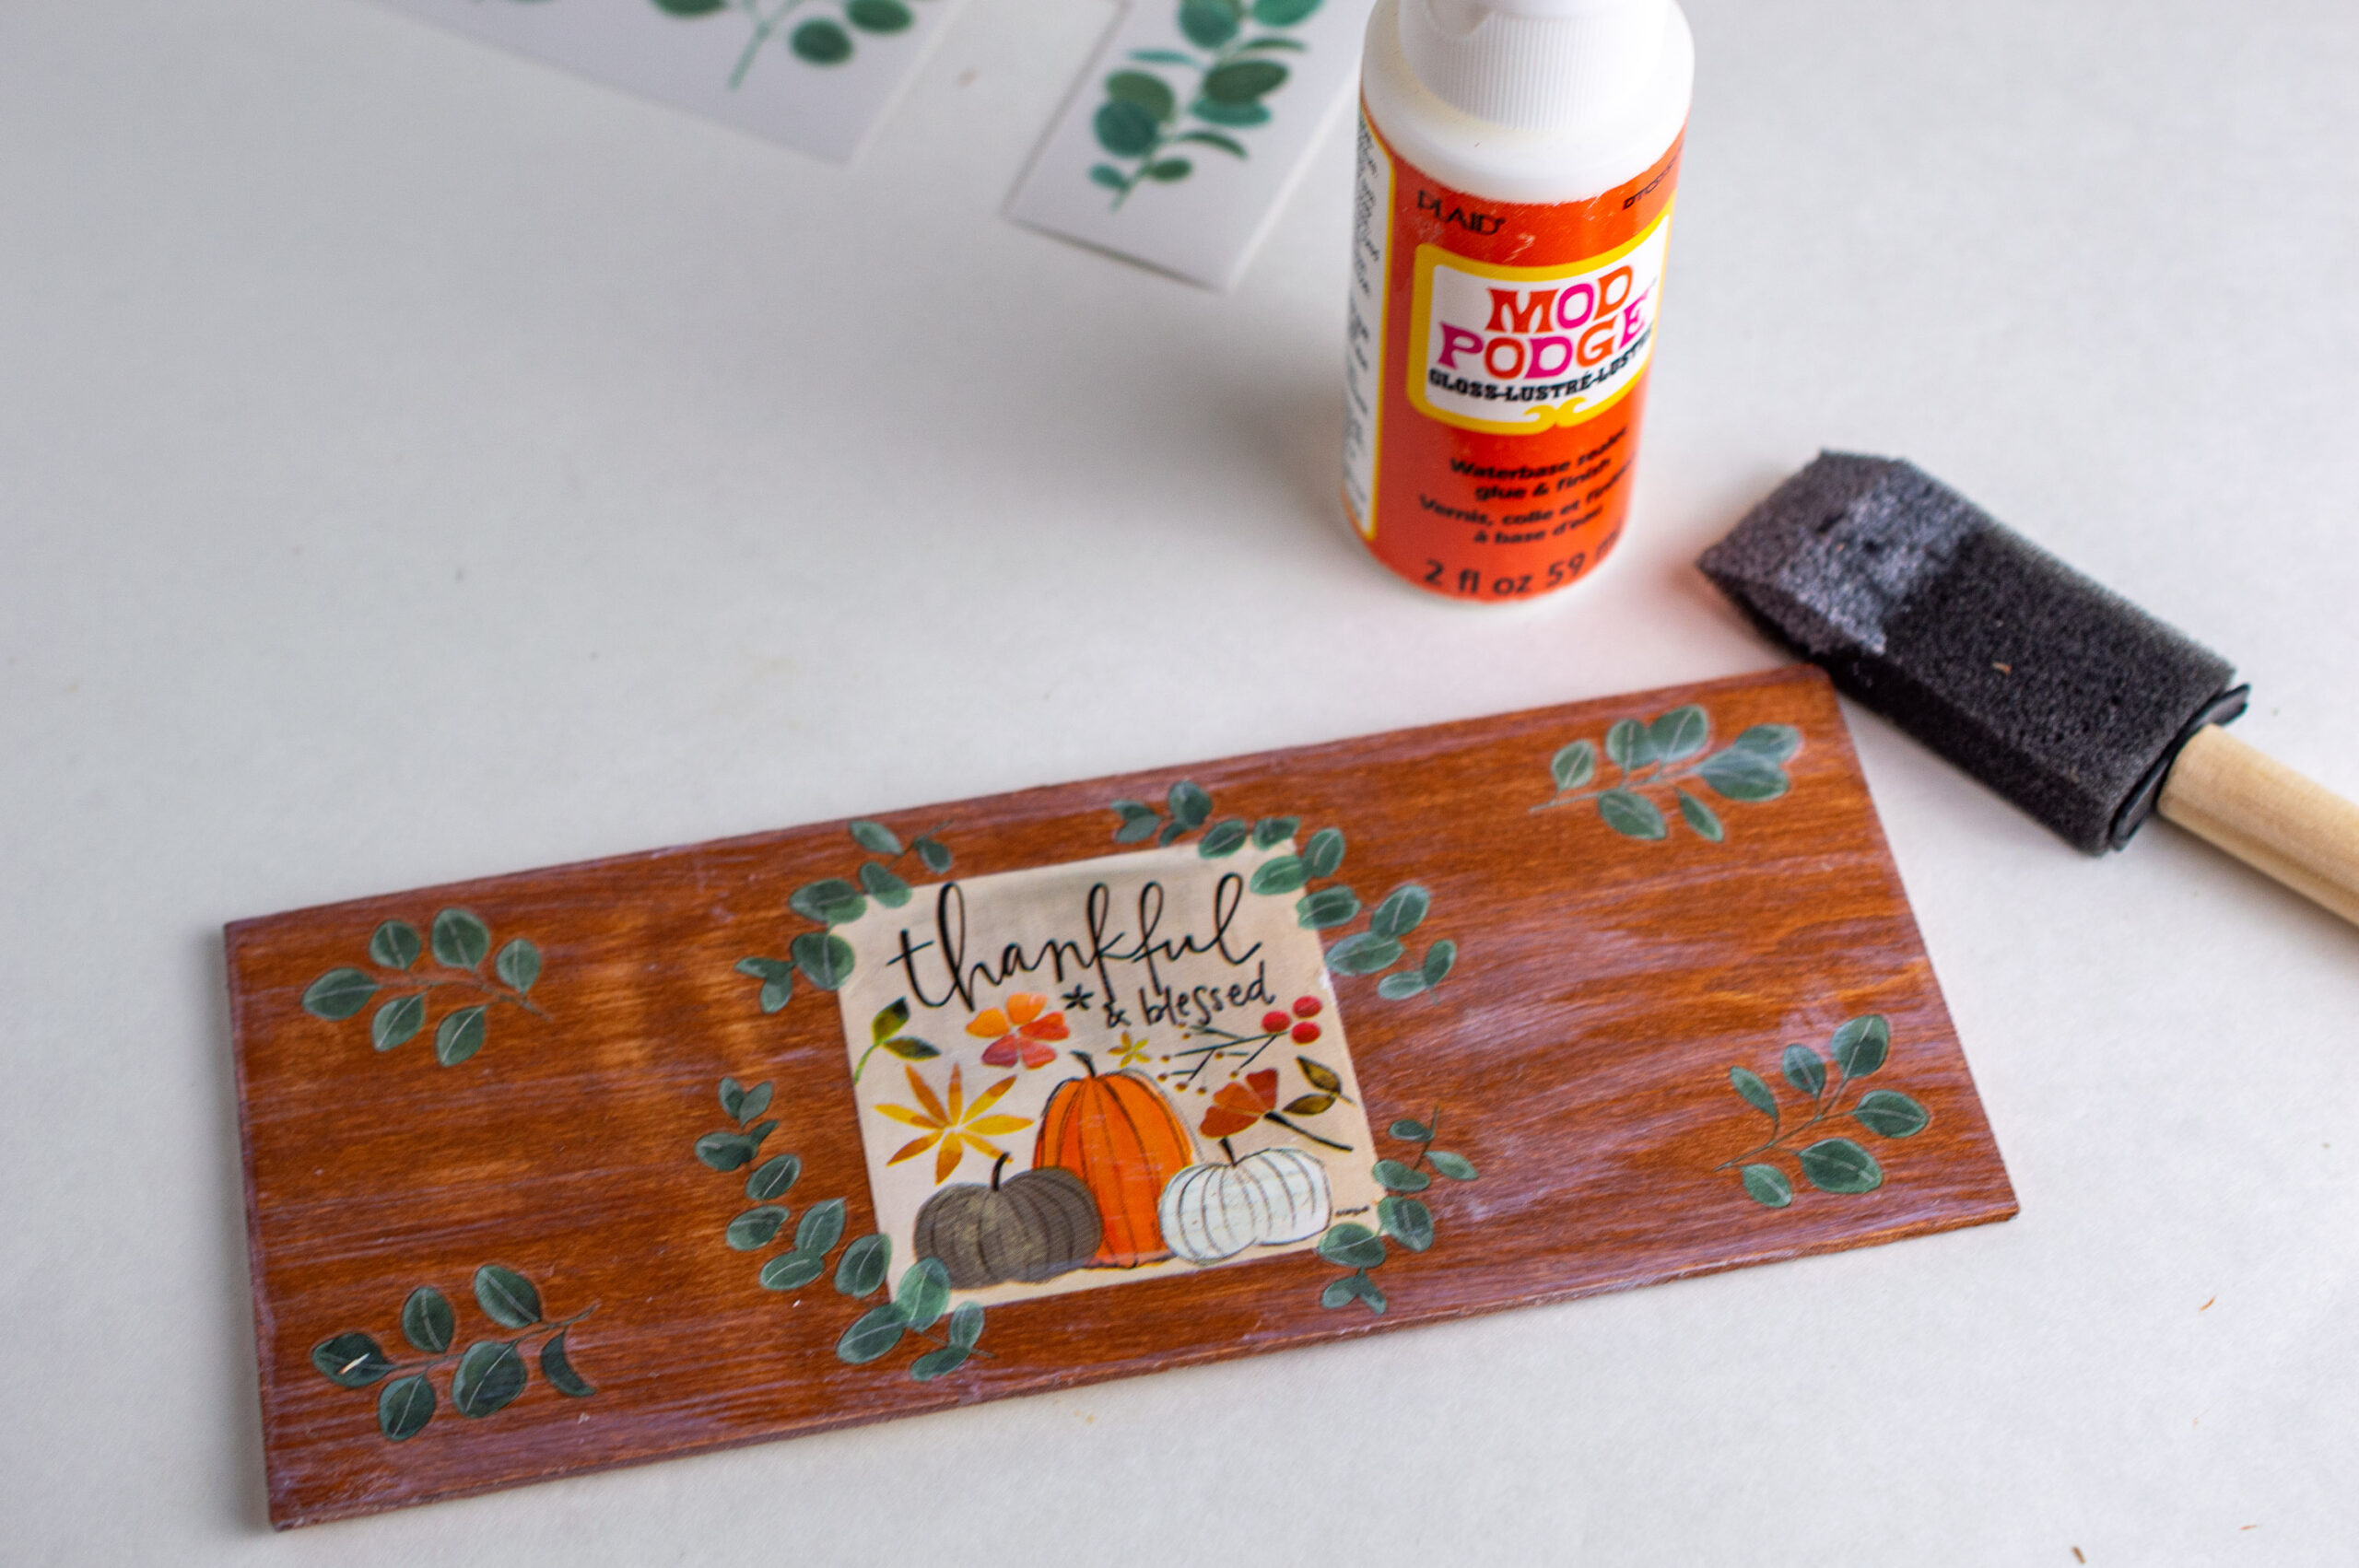
- Paint the wooden plank with a thin coat of brown acrylic on the “front” side, covering the edges as well. Let dry for about 20 minutes.
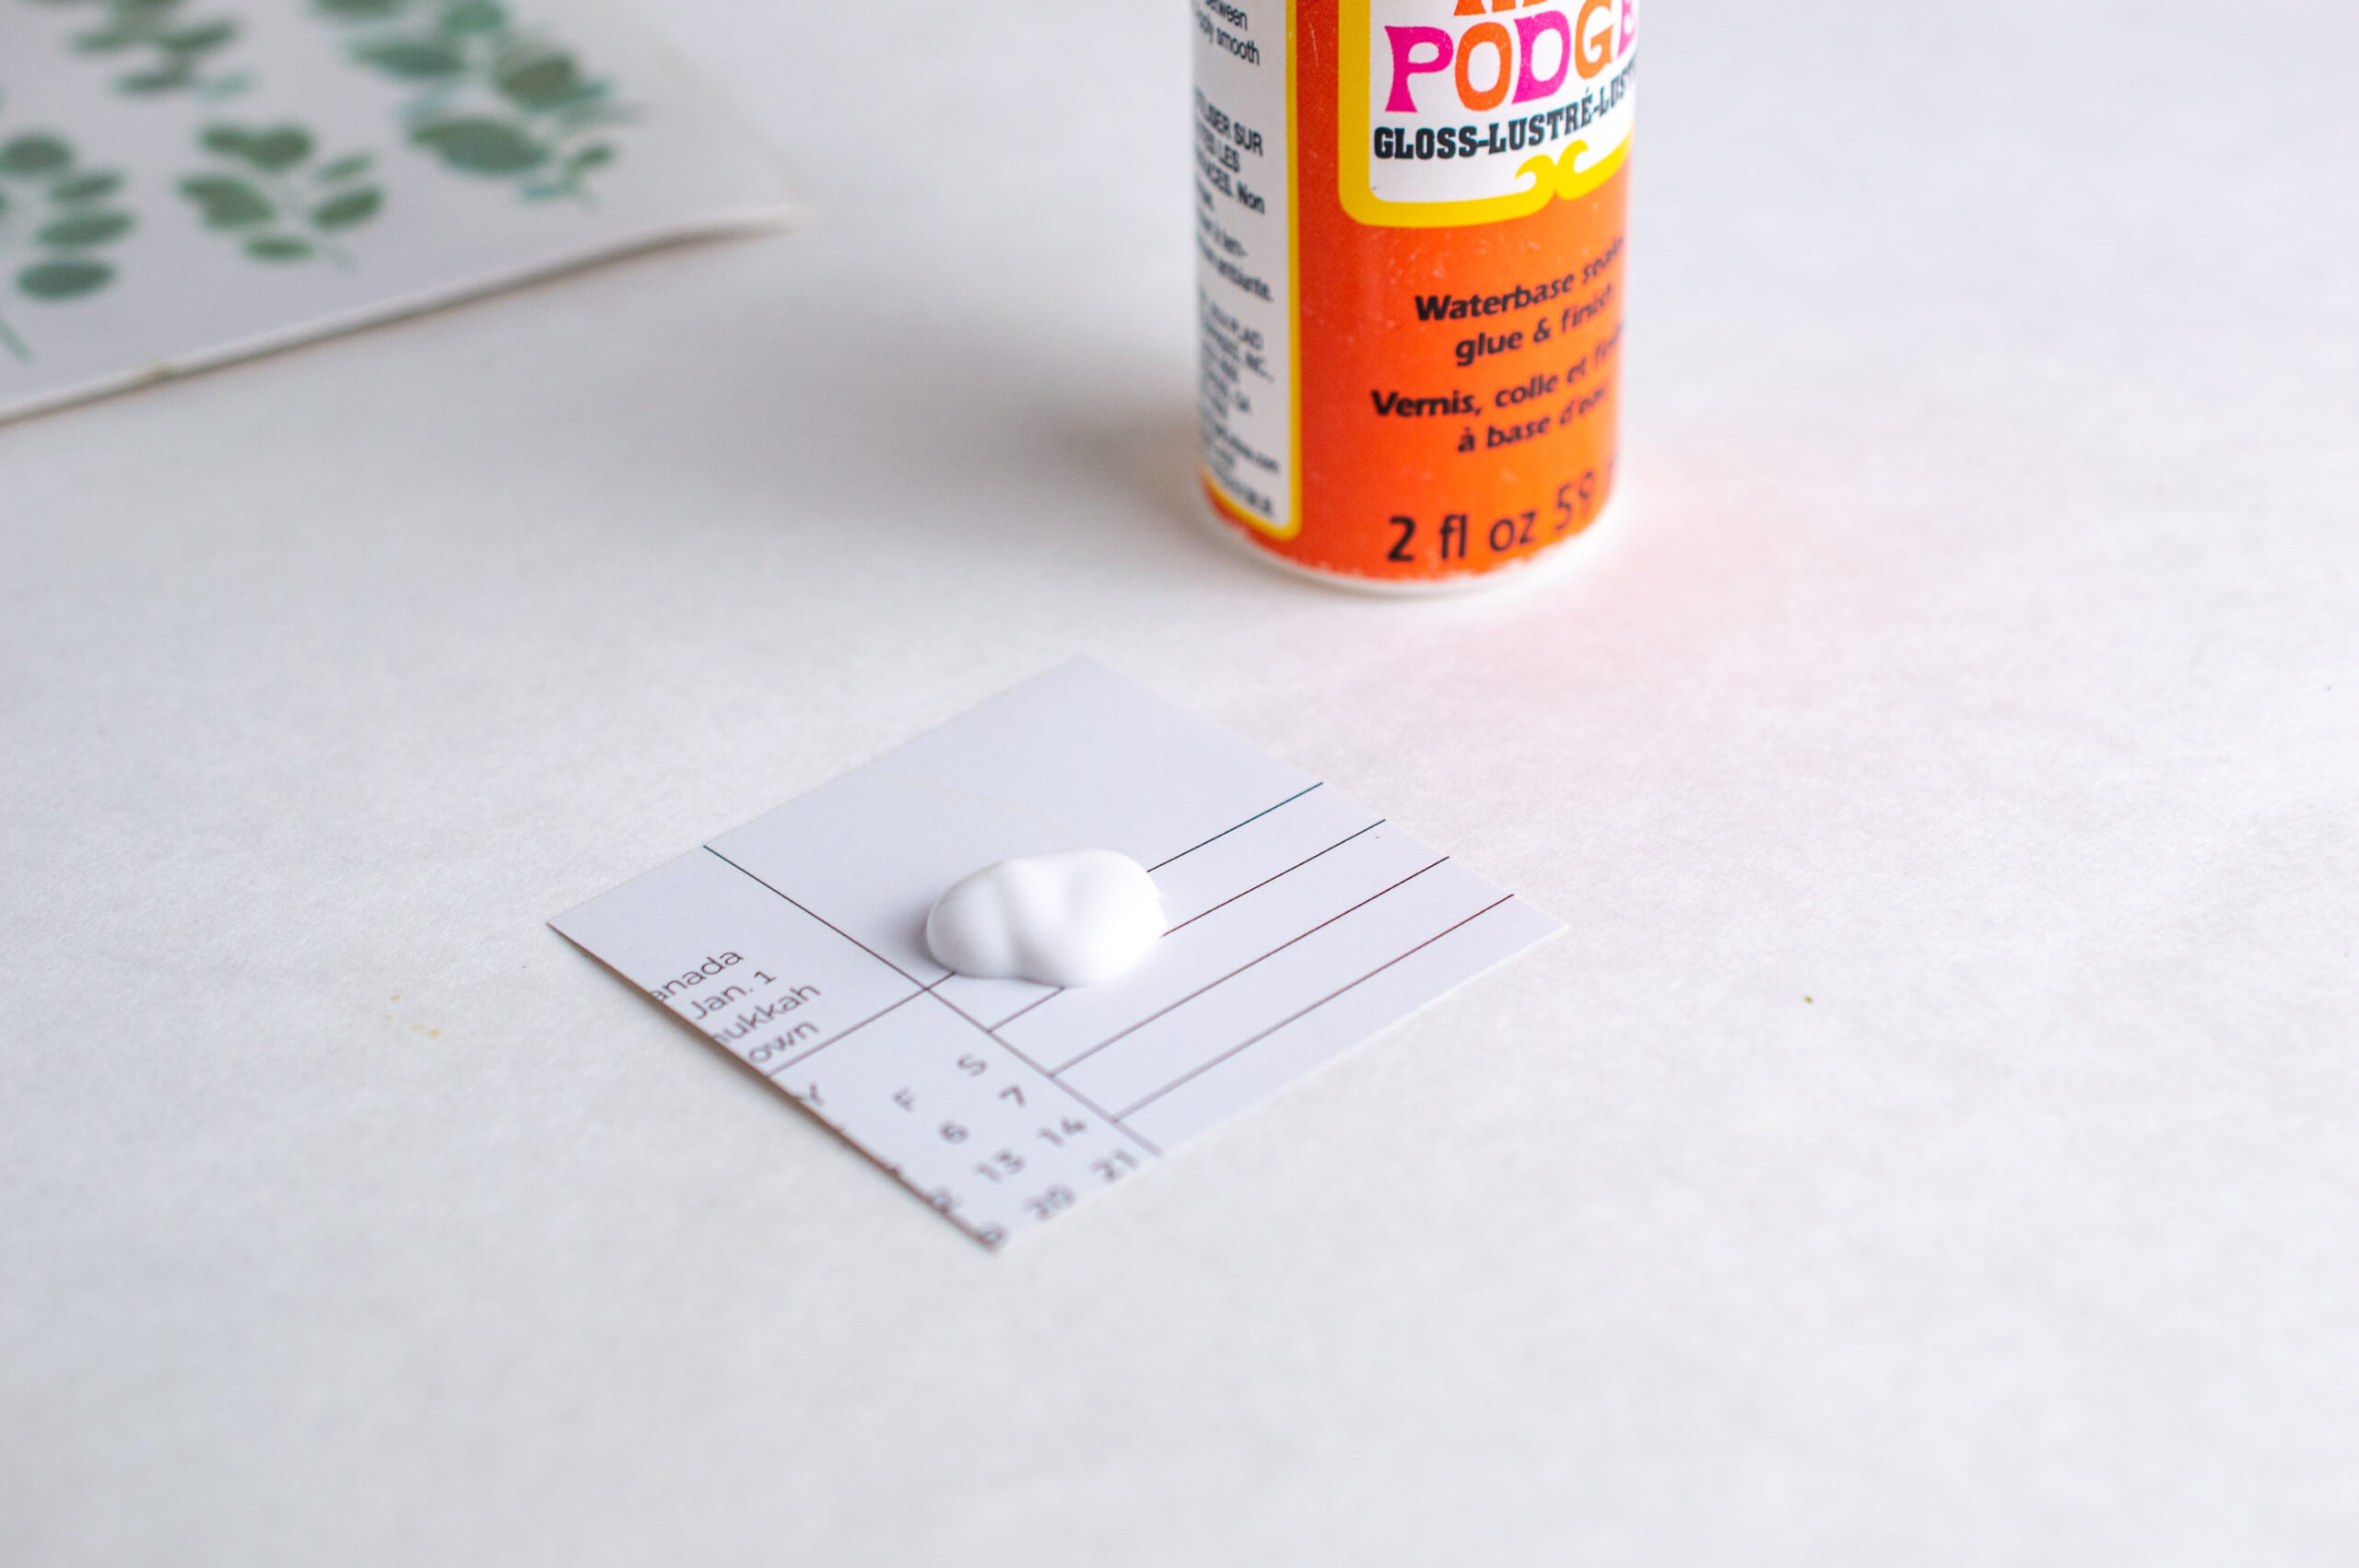
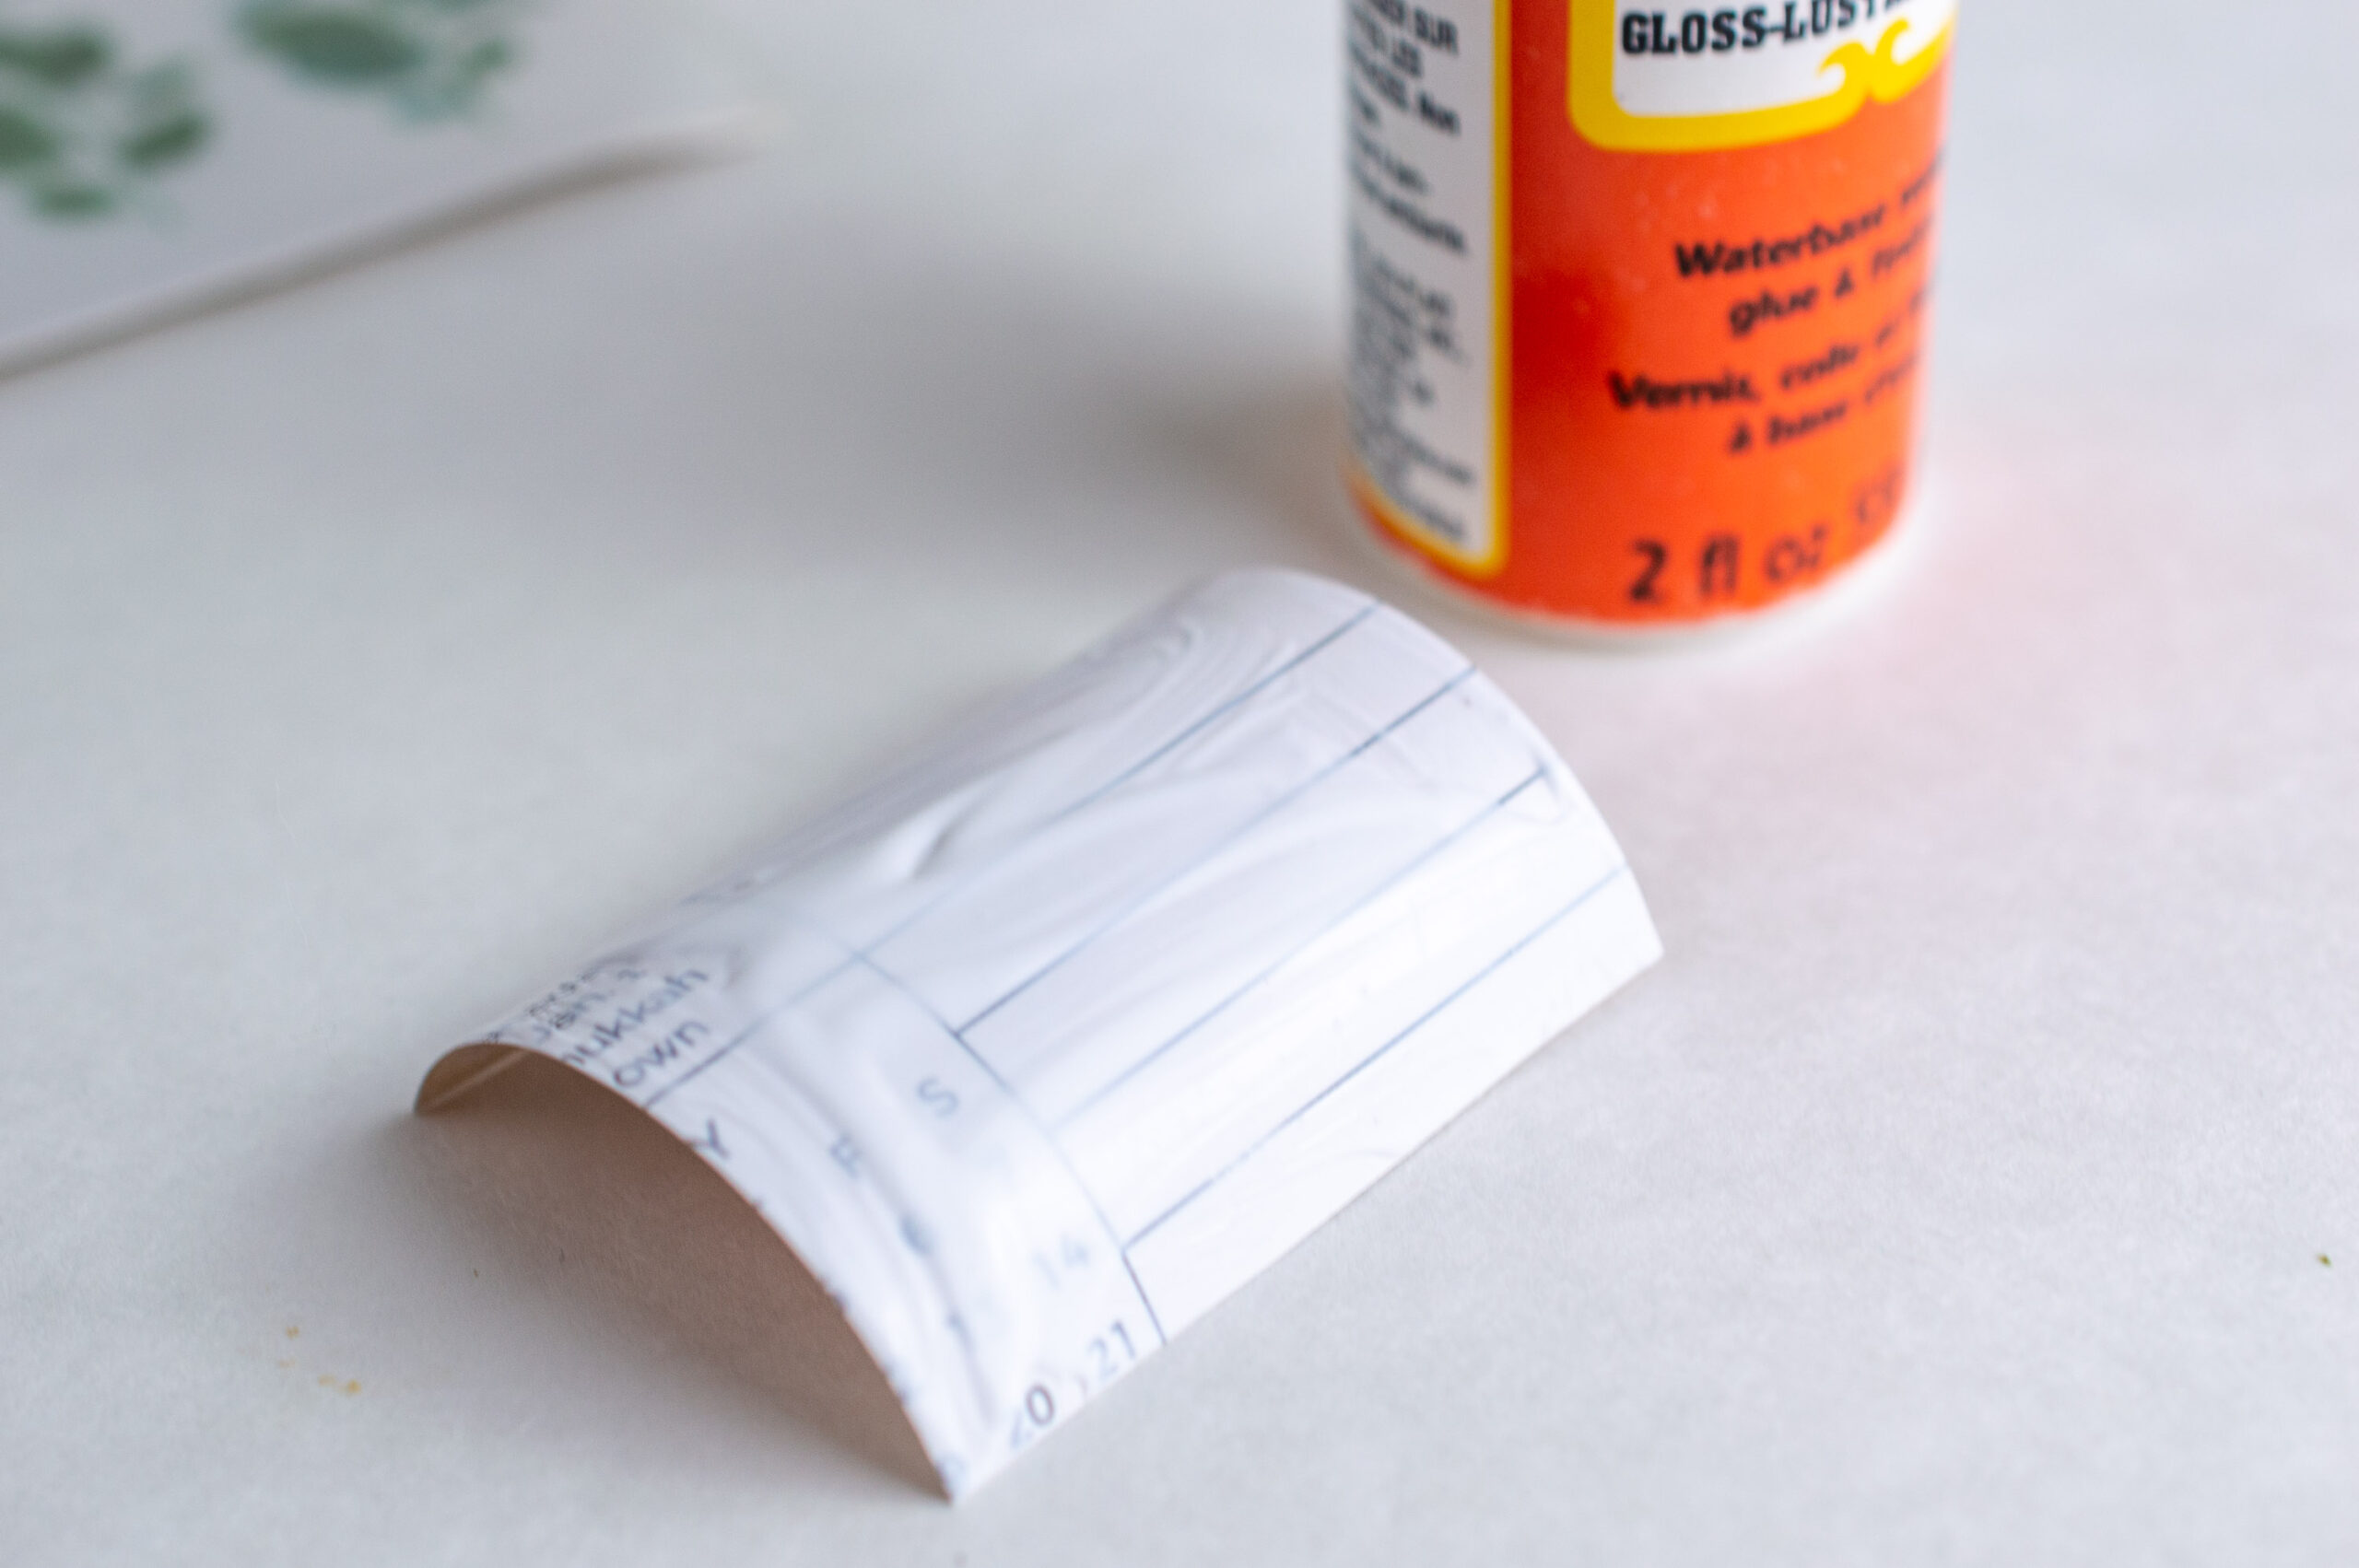
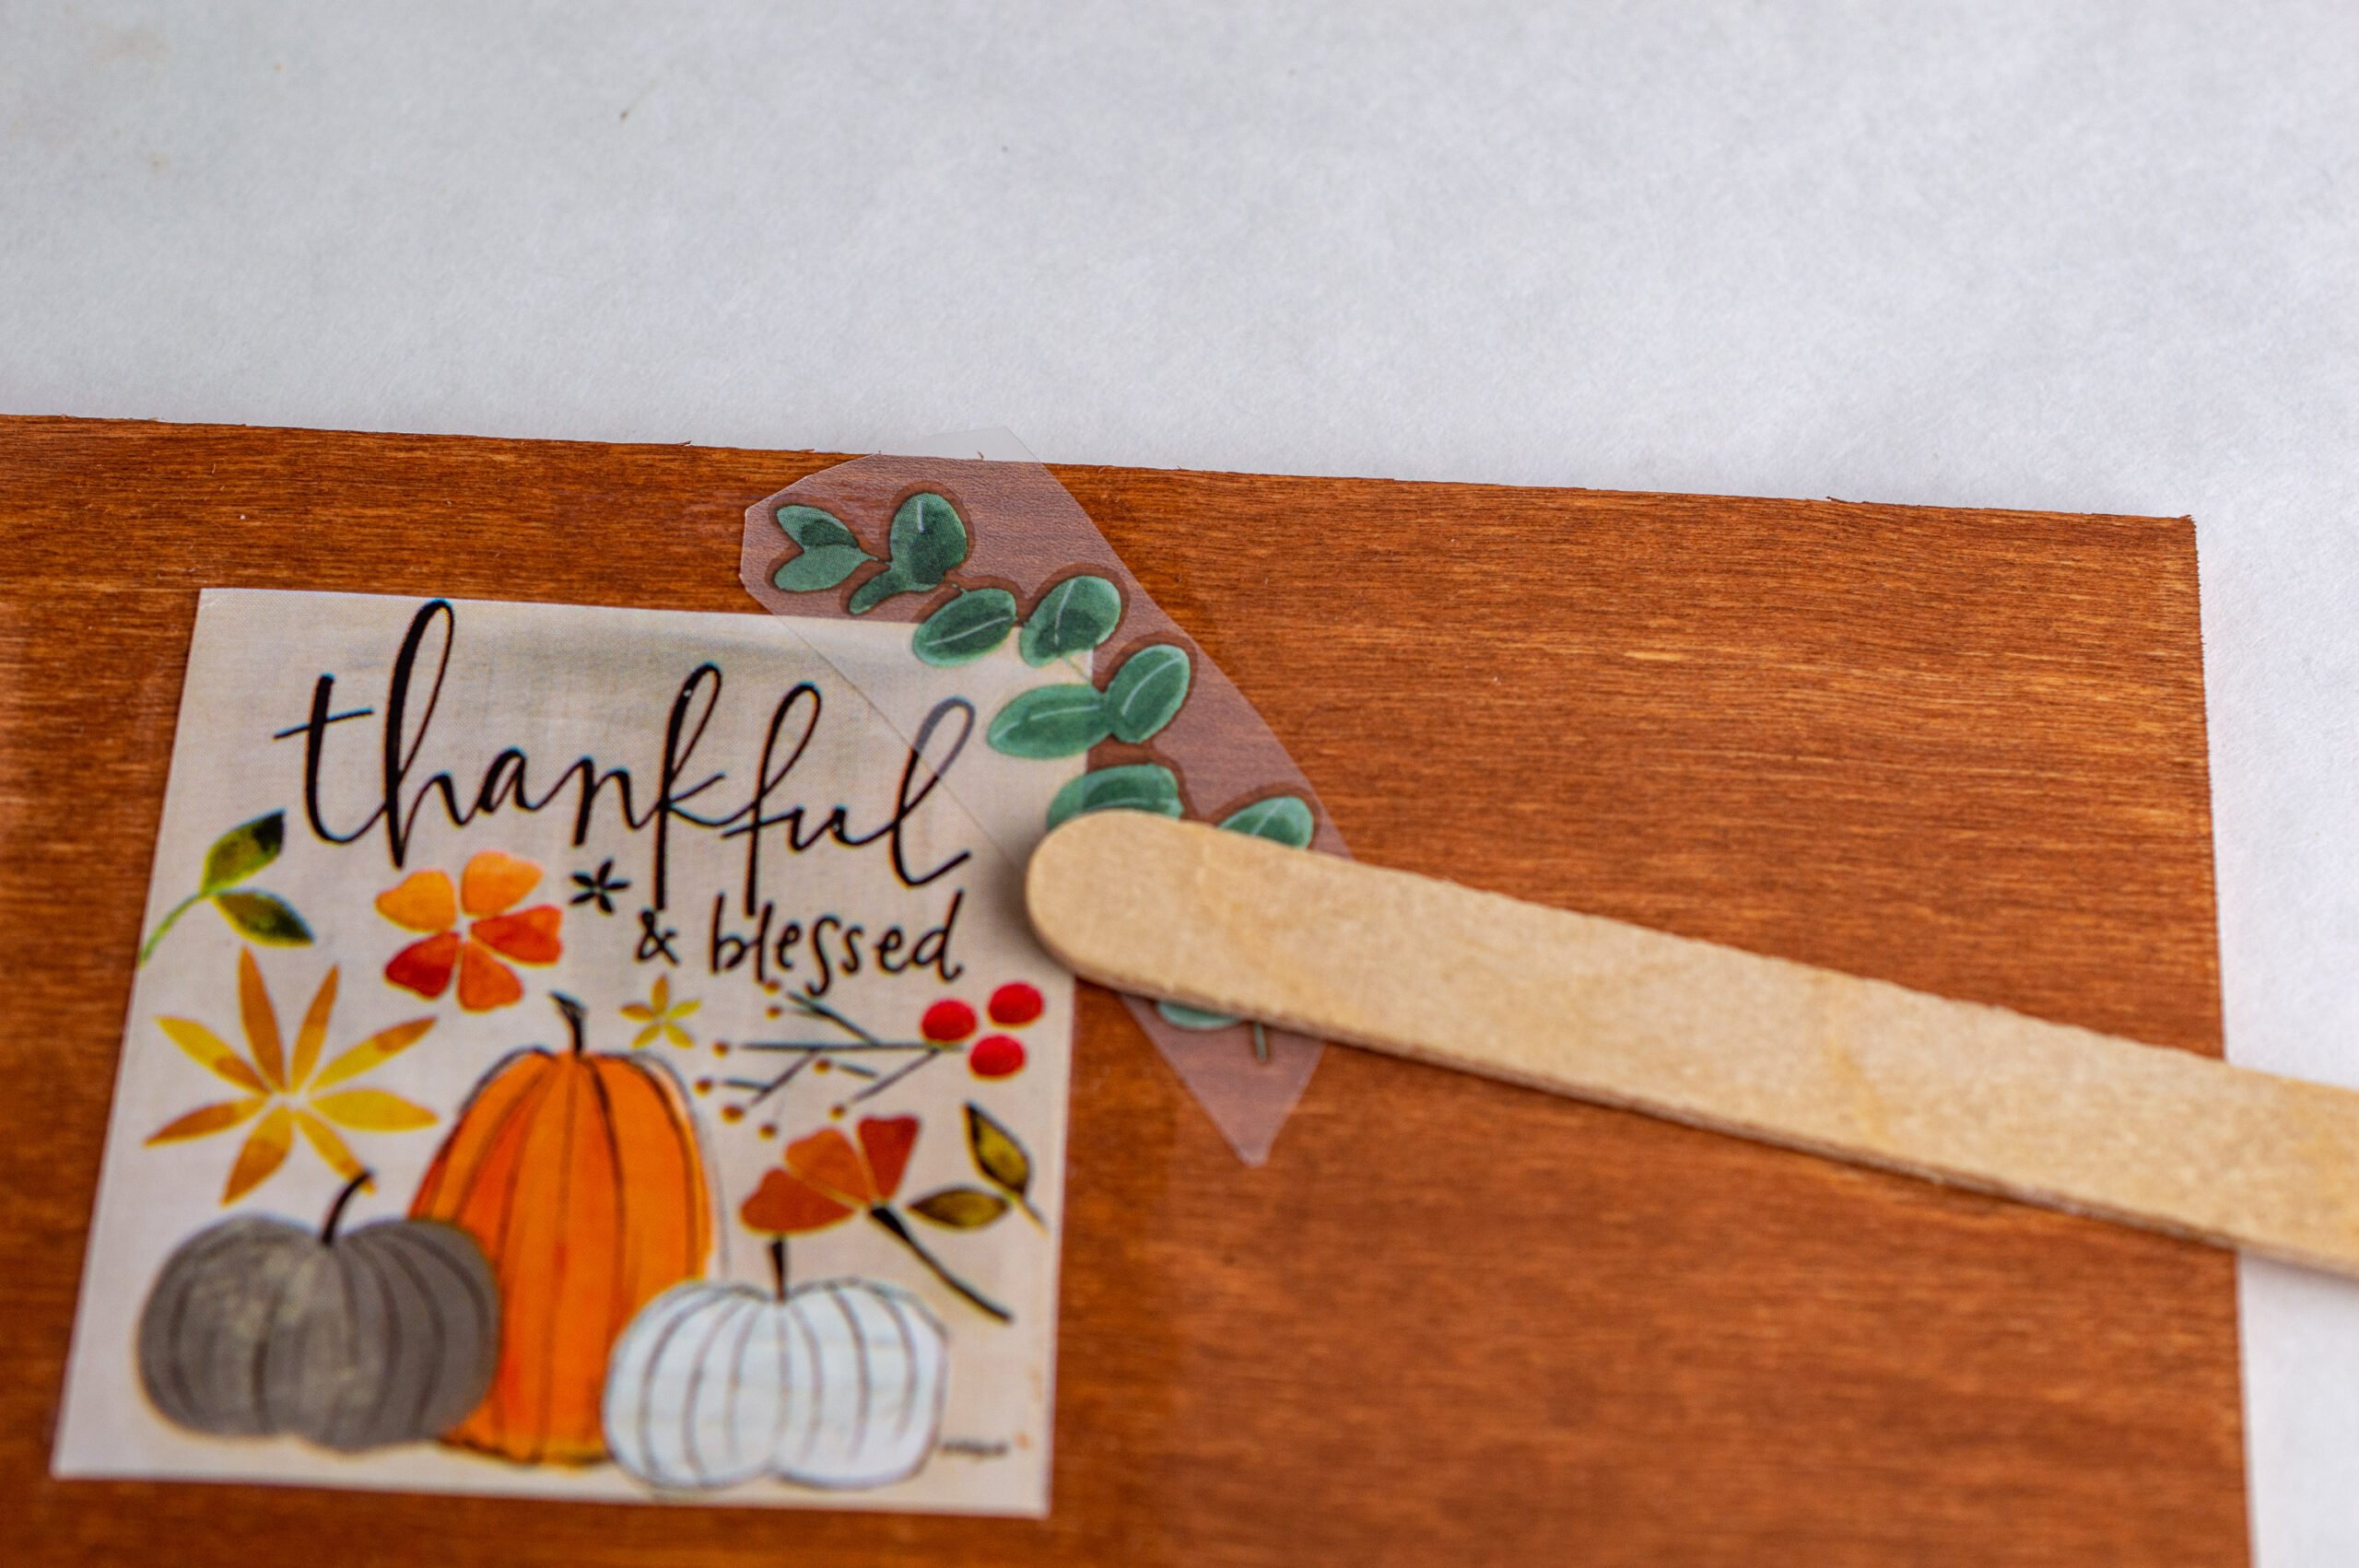
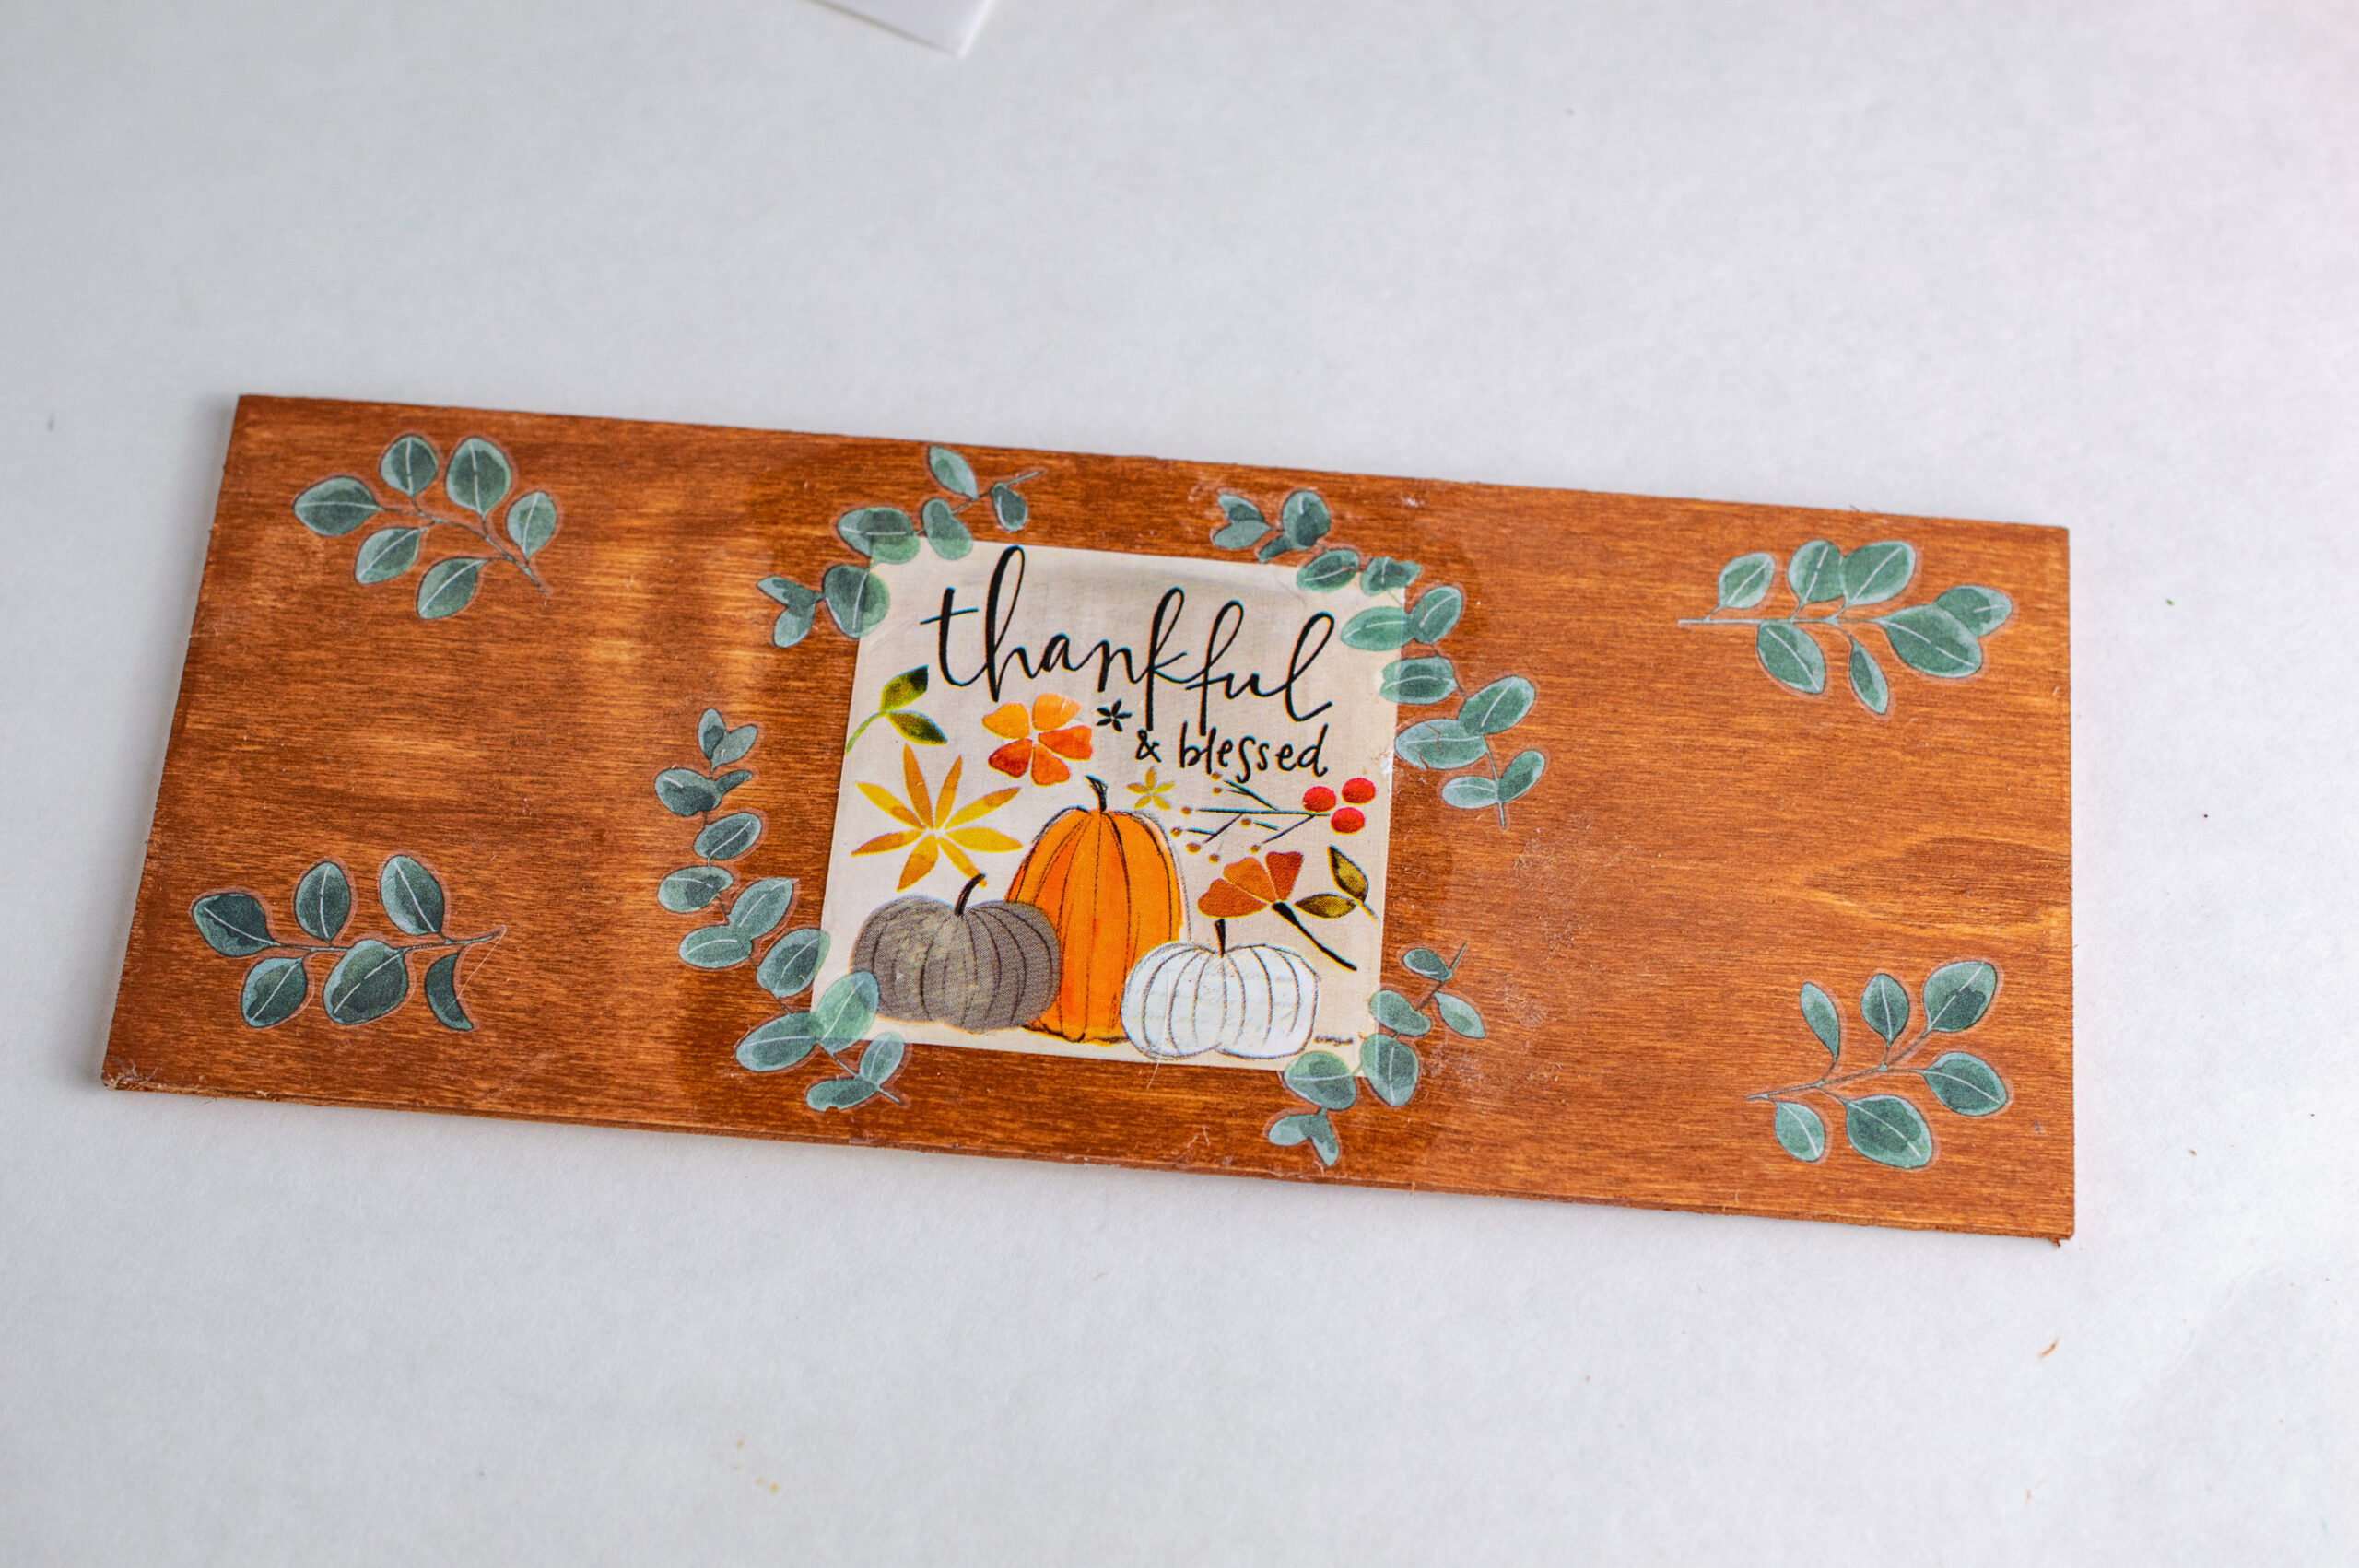
- Cut out the “thankful & blessed” square from the back of the calendar. Apply Mod Podge to the back and use your finger or a foam brush to spread it evenly.
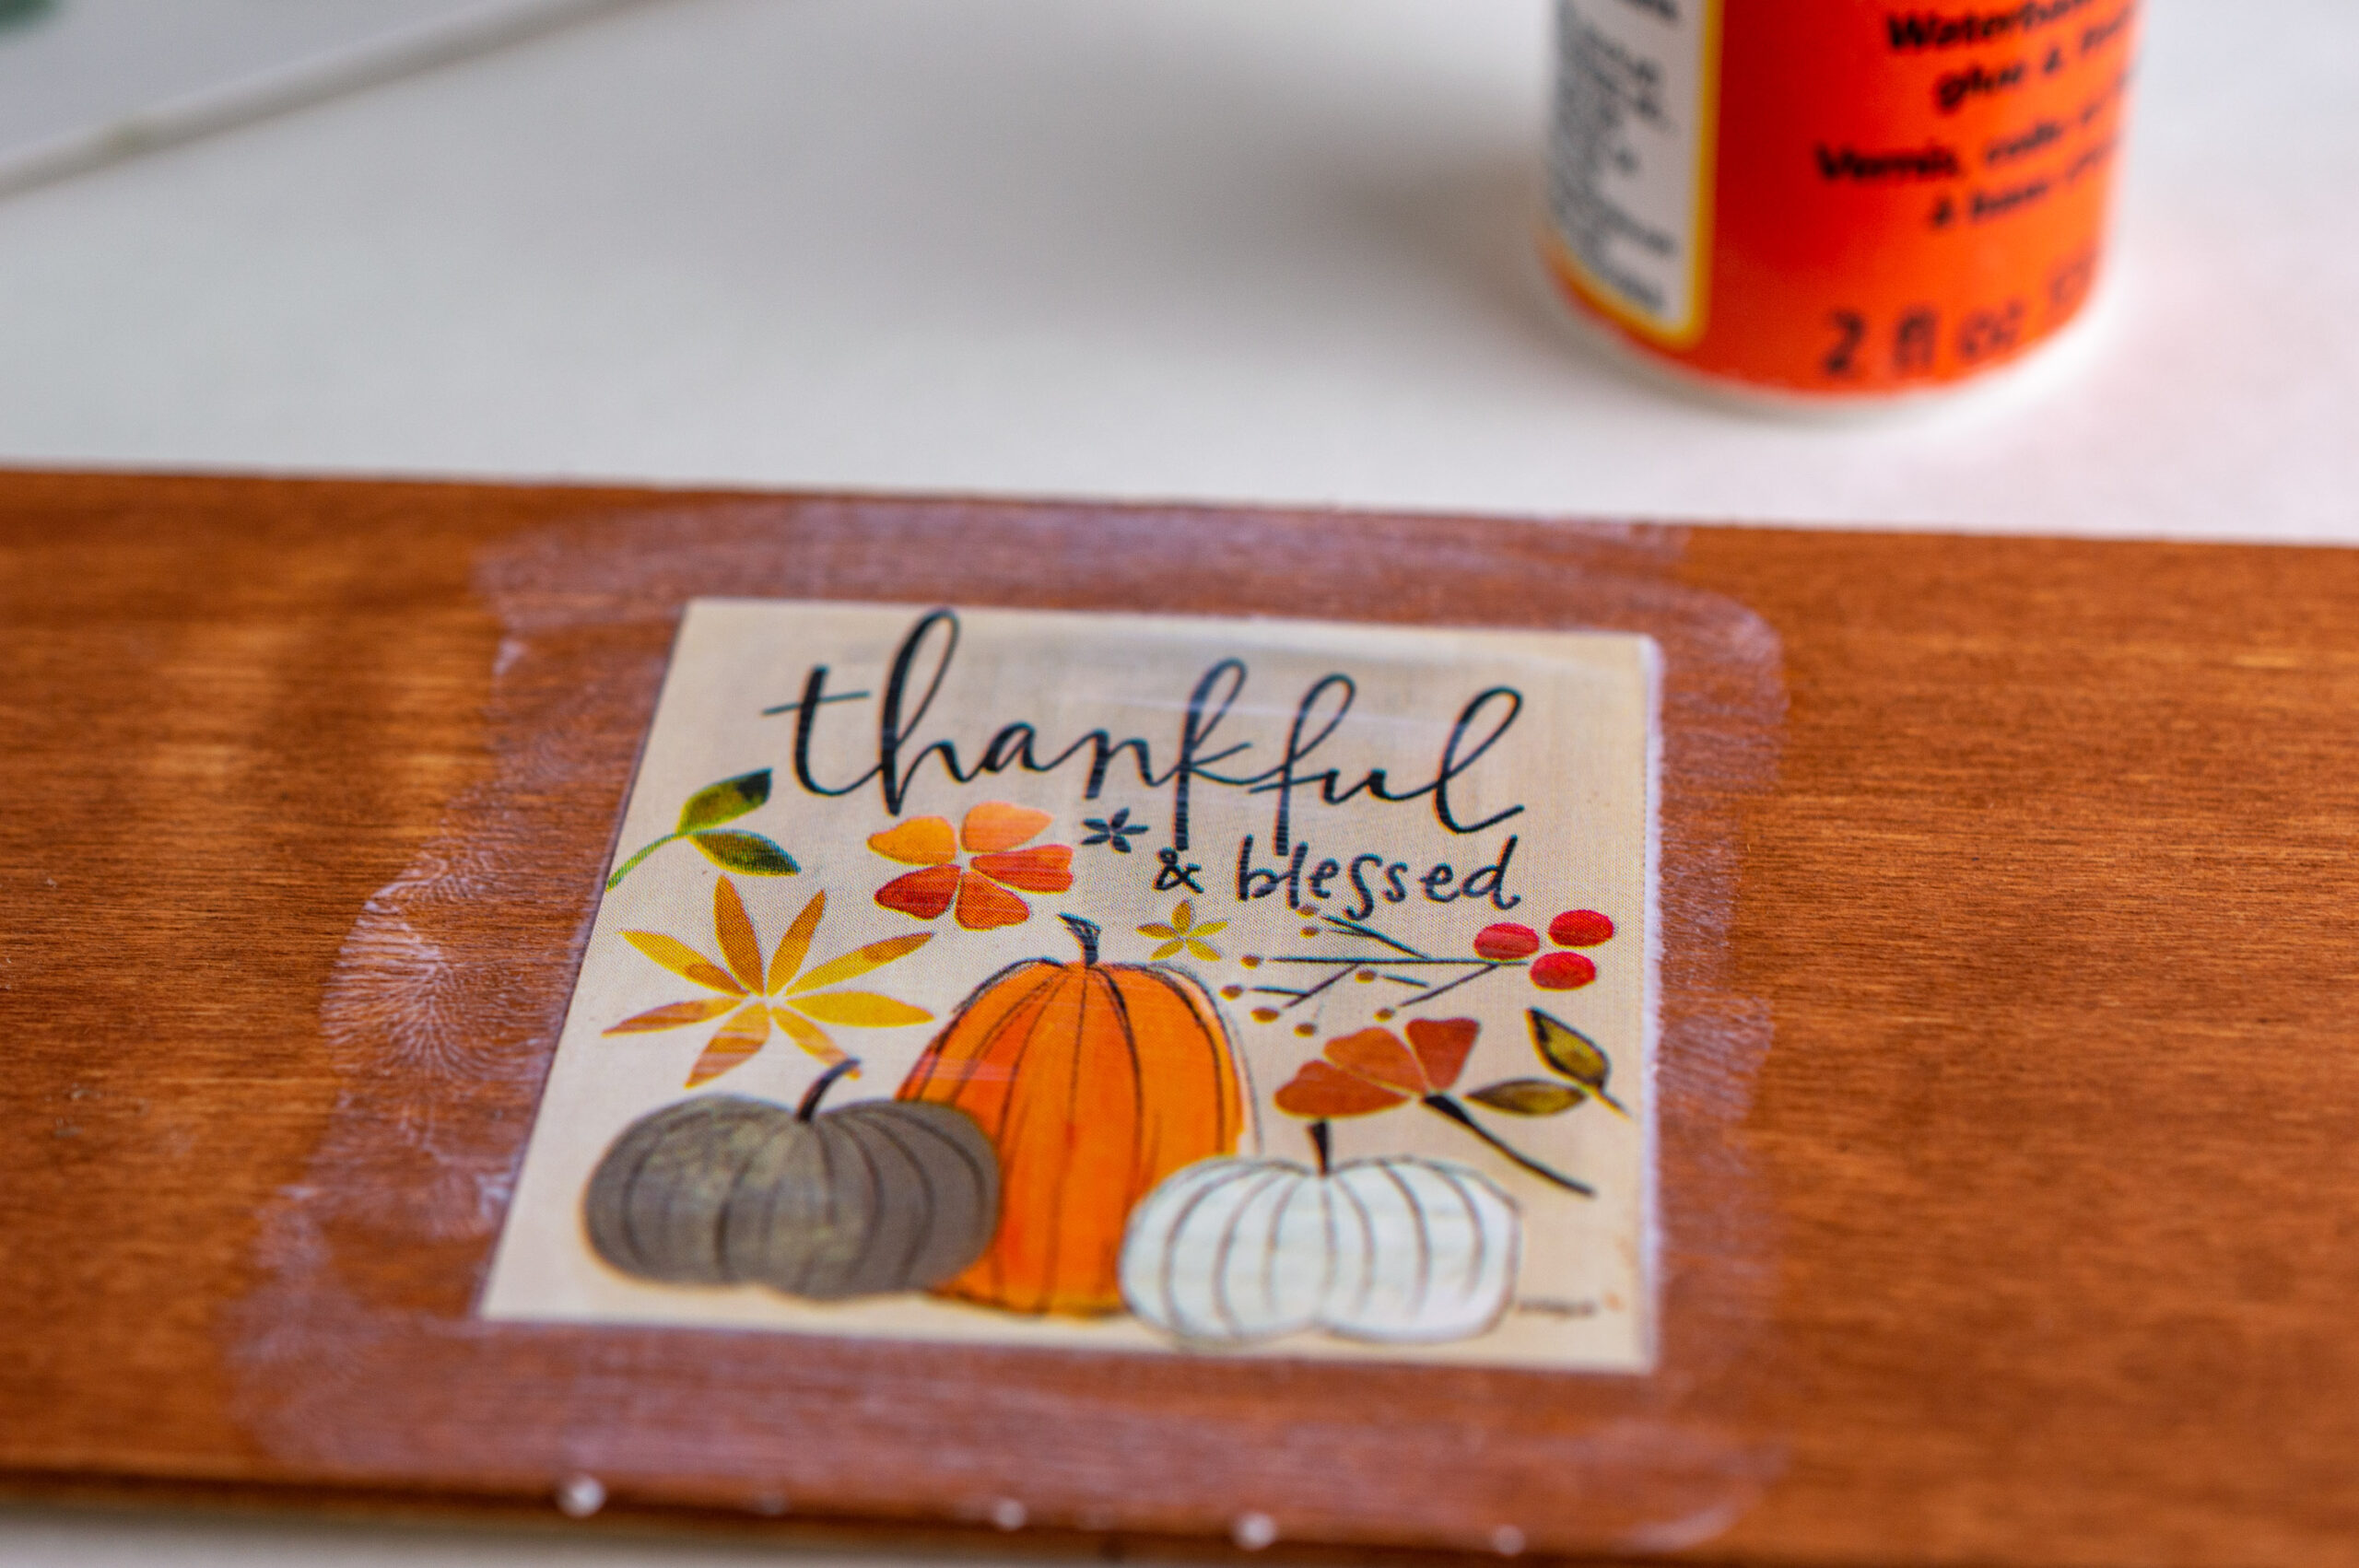
- Center the square on the wooden plank and press it down with a craft stick, pushing from the center outward to push out any excess Mod Podge. Allow it to dry for another 20 minutes.
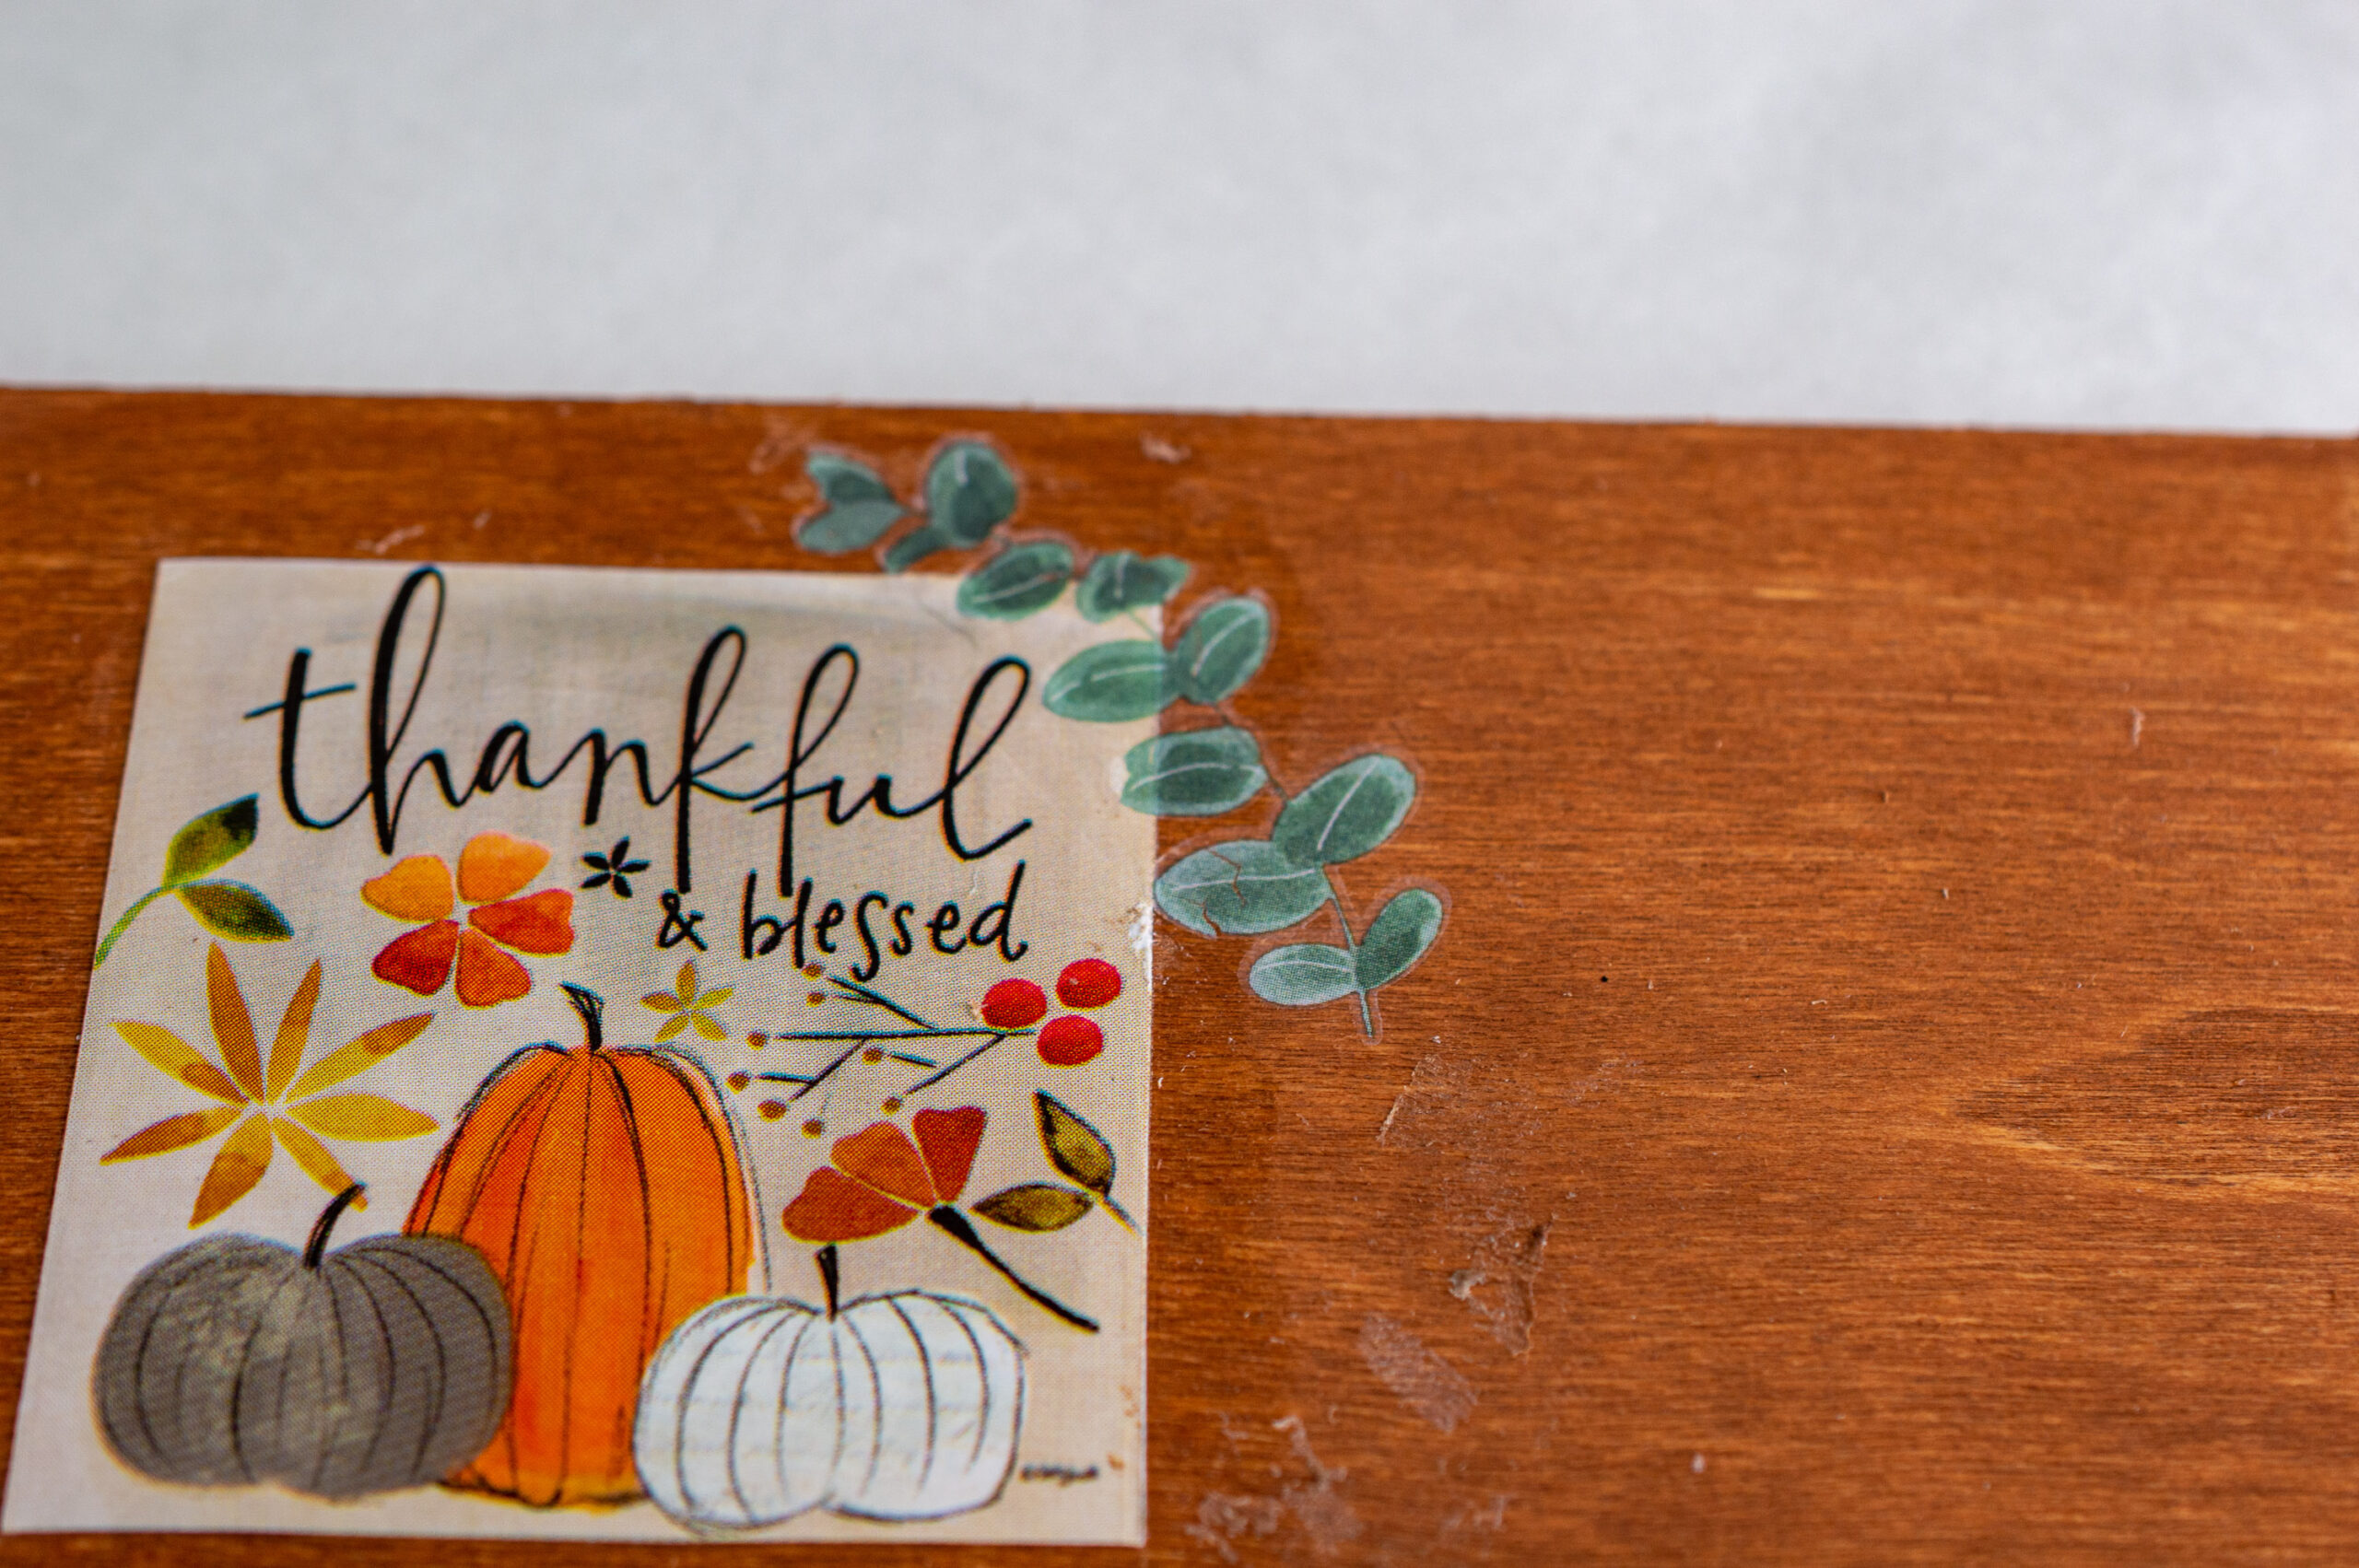
- Choose your desired leaf rub-on transfers and cut them out. Remove the backing from the transfer and place it where you wish, using the craft stick to rub it in place before peeling off the clear film.
- Repeat the transfer application until you’re pleased with the design. Seal everything with a layer of Mod Podge using a foam brush, and let dry for 20 minutes.
- Attach the 3 button magnets to the back of the wood using your hot glue gun, and allow to sit for about an hour to fully dry before displaying.
Tips
- Layer Your Design: For added depth, consider layering different elements like a patterned paper behind the phrase or using multiple transfers for a richer look.
- Use Seasonal Colors: Experiment with various shades of acrylic paint and transfers that resonate with fall themes for a more visually appealing magnet.
Craft Variations
- Create a thankful tree by designing small leaves with different family member’s names or gratitude notes.
- Make a family photo magnet by substituting the calendar square with a cherished family portrait.
Frequently Asked Questions
- Can I use other images besides calendar pages?
Yes, feel free to incorporate printed images, photos, or even drawings as the focal point of your magnet!
- What if I don’t have button magnets?
You can use strong adhesive magnets or magnetic strips as alternatives.
More Crafts You’ll Enjoy
- Printable Thanksgiving bunting
- Printable Give Thanks banner
- Holiday napkin cutlery holder
- Burlap table runner
- Farmhouse fall centerpiece
Enjoy the process of making this charming Thanksgiving magnet and let it add a personal touch to your holiday celebrations. Let’s celebrate gratitude, creativity, and family together. Happy Crafting!
Thanksgiving magnet
Materials
- “Farmer’s Market” Calendar
- Rectangular wood planks 7.125” x 2.875”
- Leaf rub-on transfers
- Foam brushes
- Brown acrylic paint used Apple Barrel 20521E Nutmeg
- Mod Podge
- 3 button magnets
Tools
- scissors
- hot glue stick
- craft stick
Instructions
- Paint the wooden plank with a thin coat on your “front” side. Also go around the edges. Let dry for about 20 minutes.

- Cut out the “thankful & blessed” square on the back of the calendar.
- Add Mod Podge to the back.
- Use your finger or foam brush to spread it.
- Eye ball where the center is on the wood and place down. Use a craft stick to press from the center out to get all of the extra Mod Podge out. Let dry for about 20 minutes. Spread the rest.
- Choose the rub-on transfers of your choice and cut them out.
- Pull off the backing of a transfer (the white paper) and add it where you would like. Use the craft stick to rub the transfer.
- Peel off the clear film.
- Repeat until you have added all of the transfers.
- Use a foam brush to add a coat of Mod Podge on top of the whole front and around the sides to seal.
- Let dry for about 20 minutes.
- Glue the 3 magnets to the back of the wood.
- Allow to sit for an hour or so before you hang up to completely dry.


Article may contain Amazon & affiliate links. As an Amazon Associate I earn from qualifying purchases at no additional cost to you.
ABOUT PETRO
Hi, I’m Petro, author and founder of Easy Peasy Creative Ideas. Sewist, crafter, avid DIY-er, foodie, photographer, homemaker and mommy to one. I’m an expert at coming up with quick, clever sewing tips, recycling crafts and simple, easy recipes! You can find my ideas featured in reputable publications such as Country Living, Good House Keeping, Yahoo News, WikiHow, Shutterfly, Parade, Brit & Co and more. Thanks for stopping by and hope you’ll stay for a while, get to know me better and come back another time. Stick around for real fun projects! Read more…