

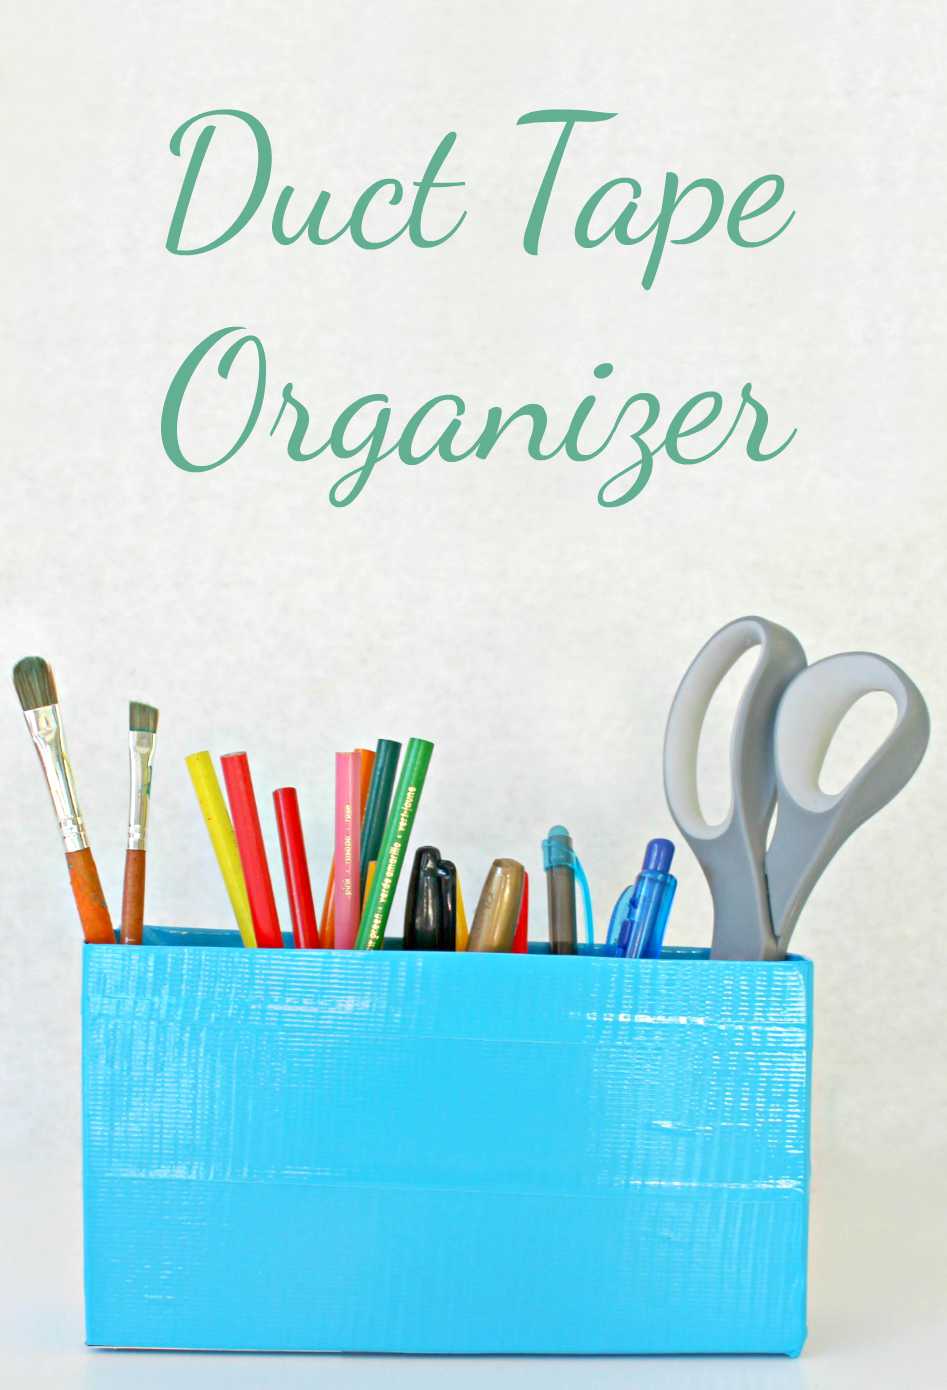
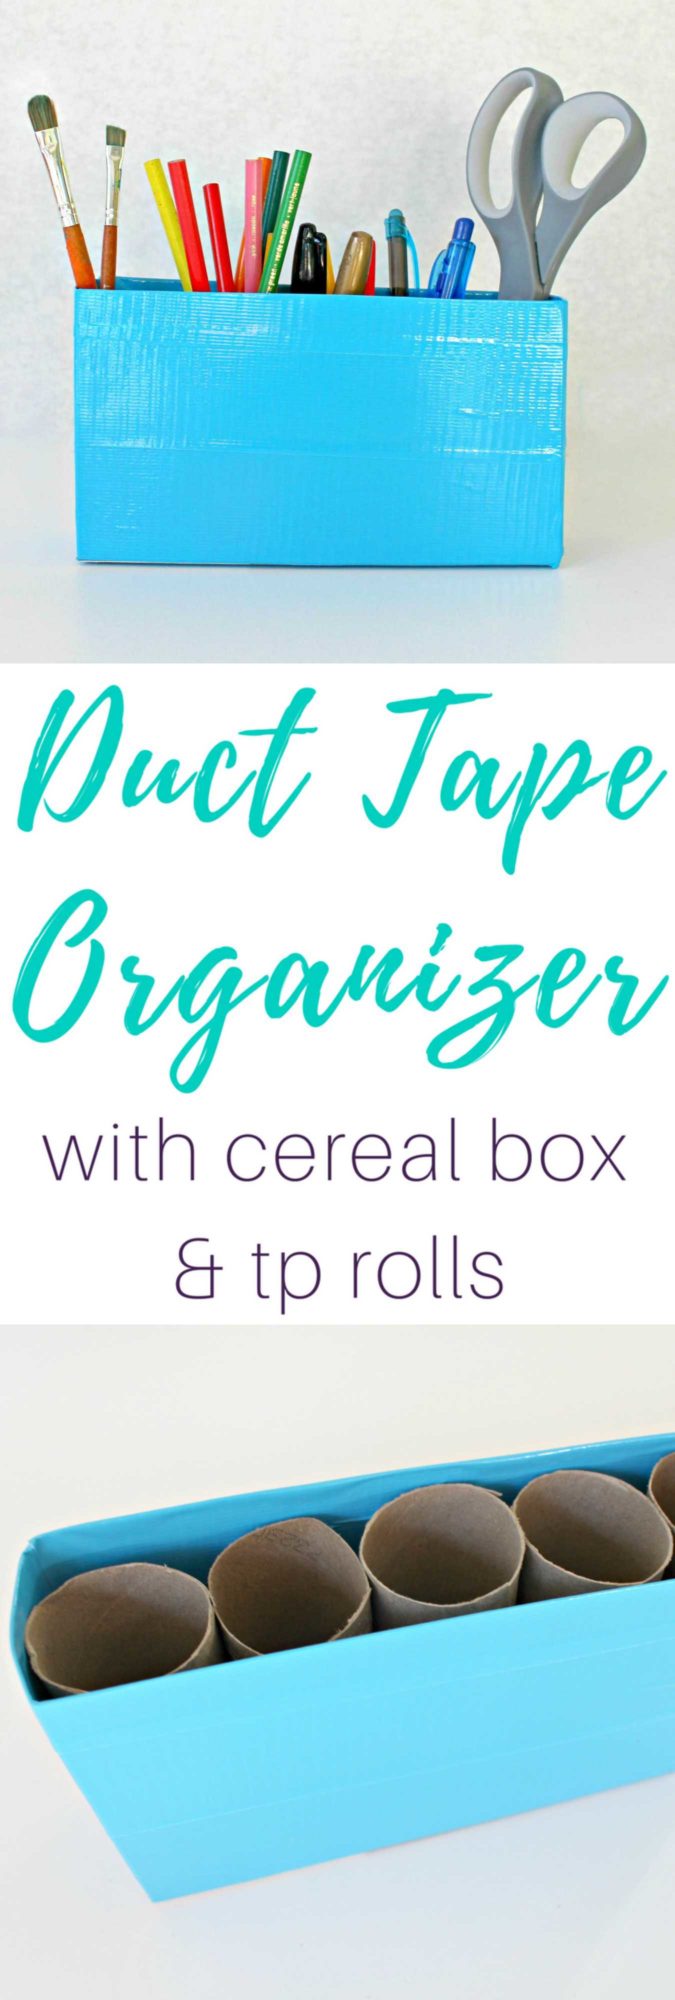
DIY Duct Tape Organizer
Running out of space for your art, craft or office supplies? Quickly put together a duct tape organizer using just a handful of supplies you most likely have on hand!
Duct Tape Box
I try to live a simple life and I normally purchase exactly what my family and I need. But not when it comes to art supplies for Ellie and craft supplies for myself. Not my fault, really! I’ll have you know these are super addictive and they practically beg me to take them home with me! So I always need additional space to store them and this is how I had to create this duct tape organizer.
Every time I’m convinced I have everything under control, a few weeks later it’s all a big mess, thanks to the never ending crafts supplies that seem to multiply buy the minute!
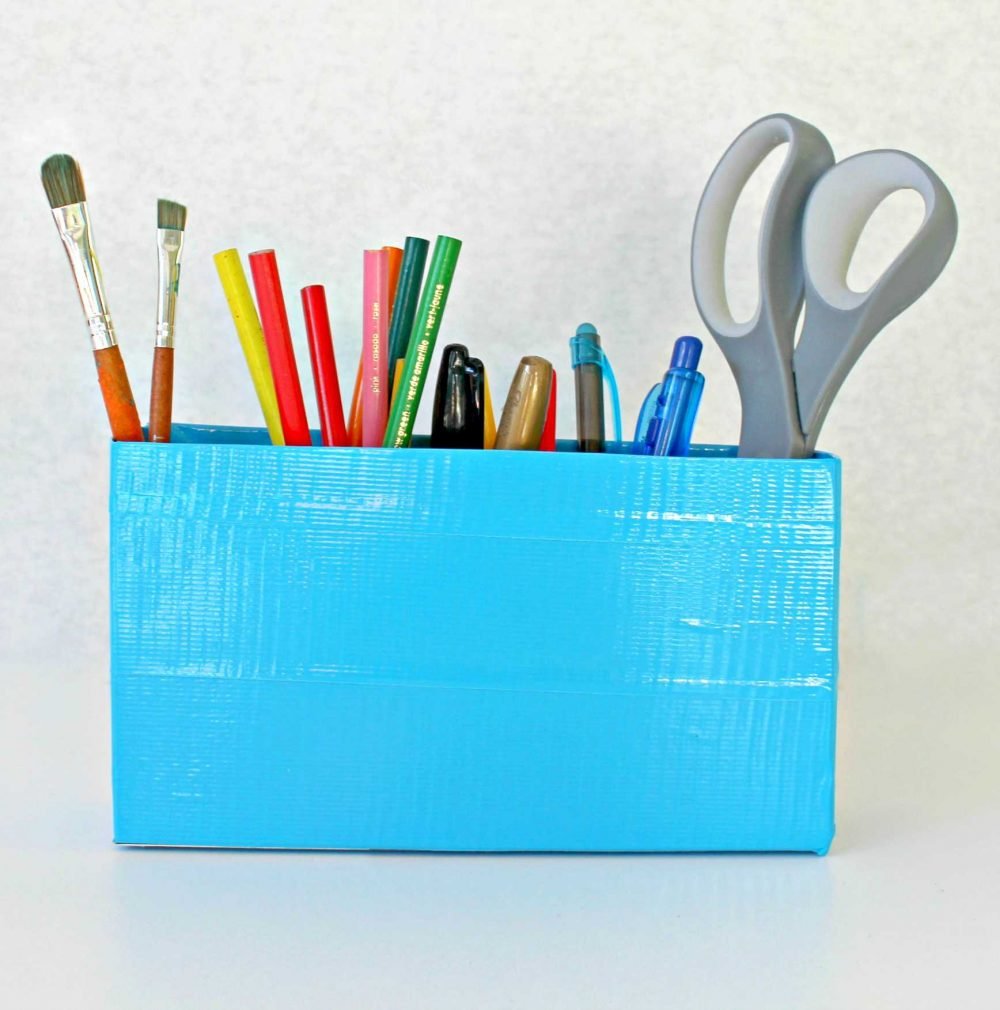
This handy dandy duct tape storage box is super simple and quick to make and sooo affordable, it only requires a handful of supplies you probably already have on hand. This duct tape organizer is also a great way to upcycle used cereal boxes.
These are super useful to keep your craft, art, sewing or even office supplies organized and can be easily personalized. Duct tape comes in such a large variety of colors, these organizers will be super fun to decorate!
Duct Tape Organizer
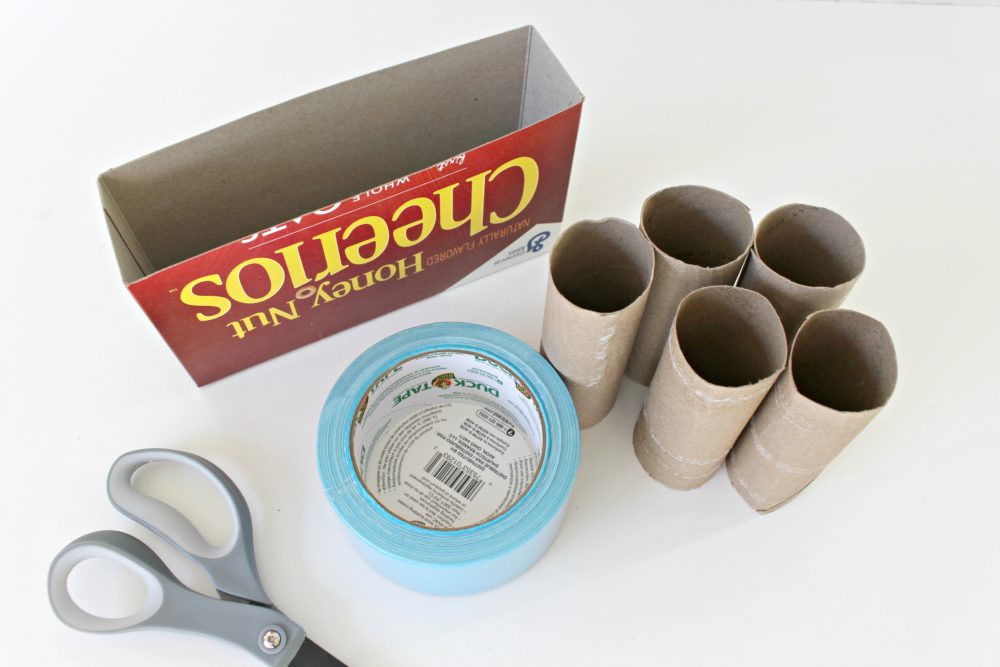
Materials:
- Small cardboard cereal box (like Honey Nut Cheerios Box 12.25 oz.)
- Light blue duct tape
- Scissors
- 5 empty toilet paper rolls
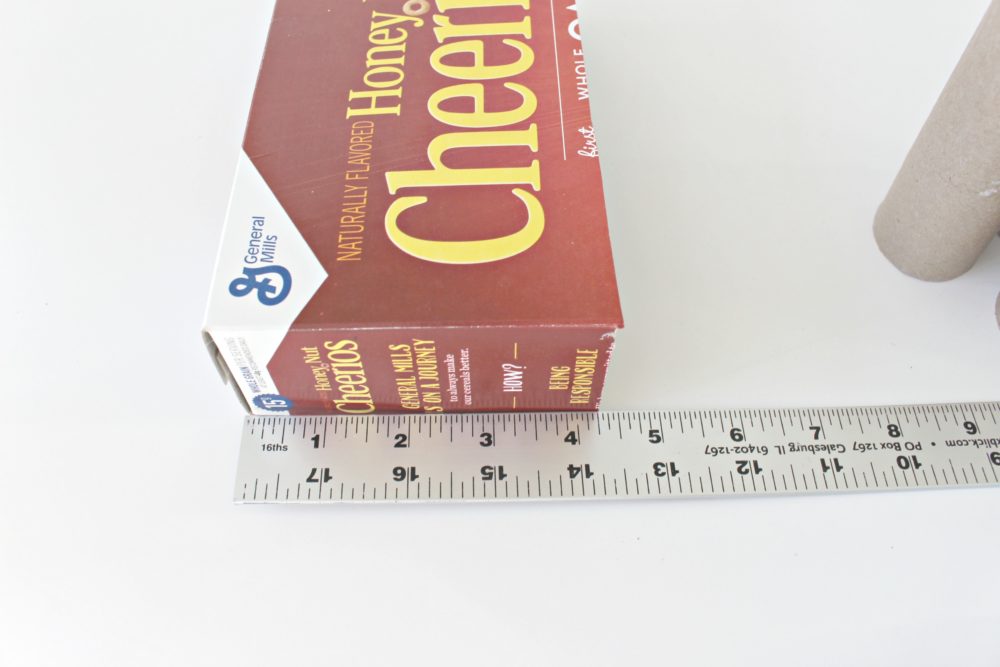
Directions:
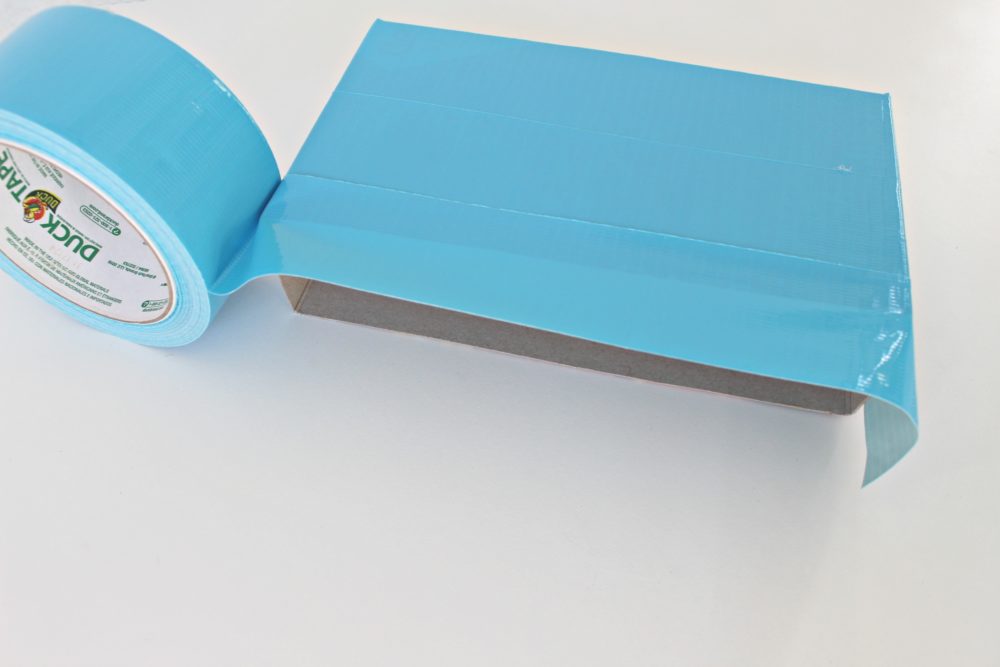
- Cut the top or bottom of the cereal box so that it is 4 ¼ inches tall.
- Start at the bottom edge and apply a row of duck tape all the way around the box.

- Move the tape up and apply another row so that the edges of each row of duck tape is touching and the box does not show through the seams. Continue doing this up the box until you get to the top piece with an overhang length.
- Make a cut vertically down each corner of the overlapping tape.
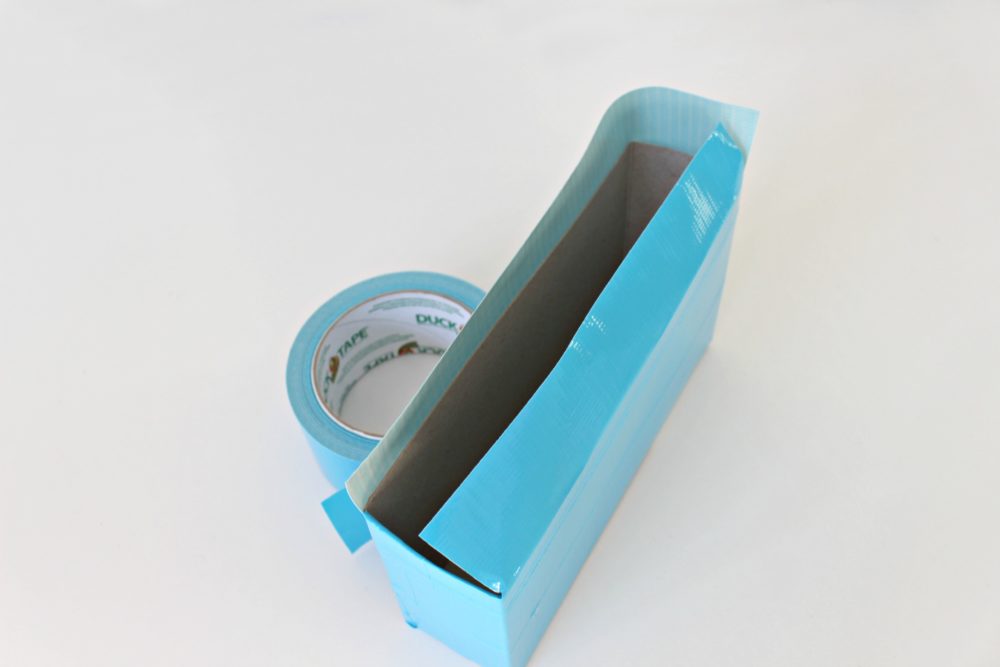
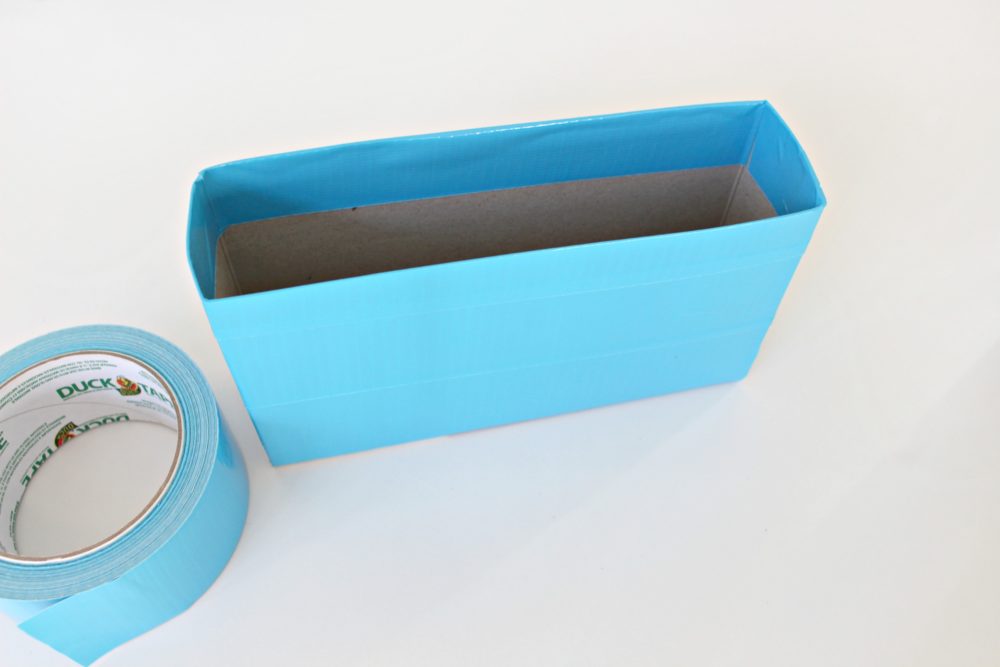
- Fold each of these four edges of tape into the inside edge of the box.
- Squeeze all 5 of the toilet paper rolls into the box.
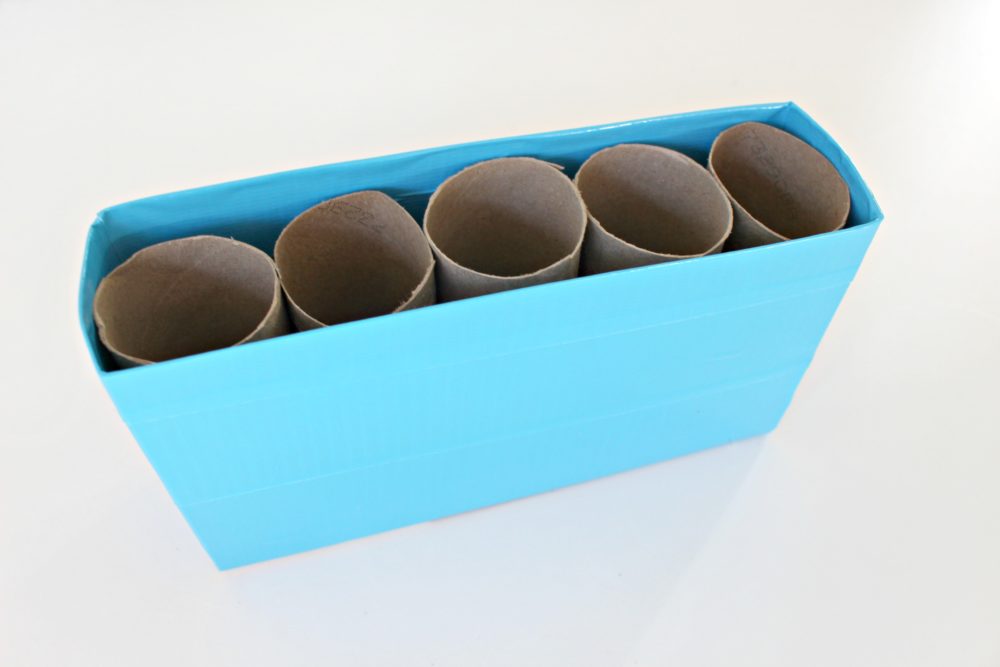
- Organize and add your art supplies.


Most popular craft

Article may contain Amazon & affiliate links. As an Amazon Associate I earn from qualifying purchases at no additional cost to you.
ABOUT PETRO
Hi, I’m Petro, author and founder of Easy Peasy Creative Ideas. Sewist, crafter, avid DIY-er, foodie, photographer, homemaker and mommy to one. I’m an expert at coming up with quick, clever sewing tips, recycling crafts and simple, easy recipes! You can find my ideas featured in reputable publications such as Country Living, Good House Keeping, Yahoo News, WikiHow, Shutterfly, Parade, Brit & Co and more. Thanks for stopping by and hope you’ll stay for a while, get to know me better and come back another time. Stick around for real fun projects! Read more…