

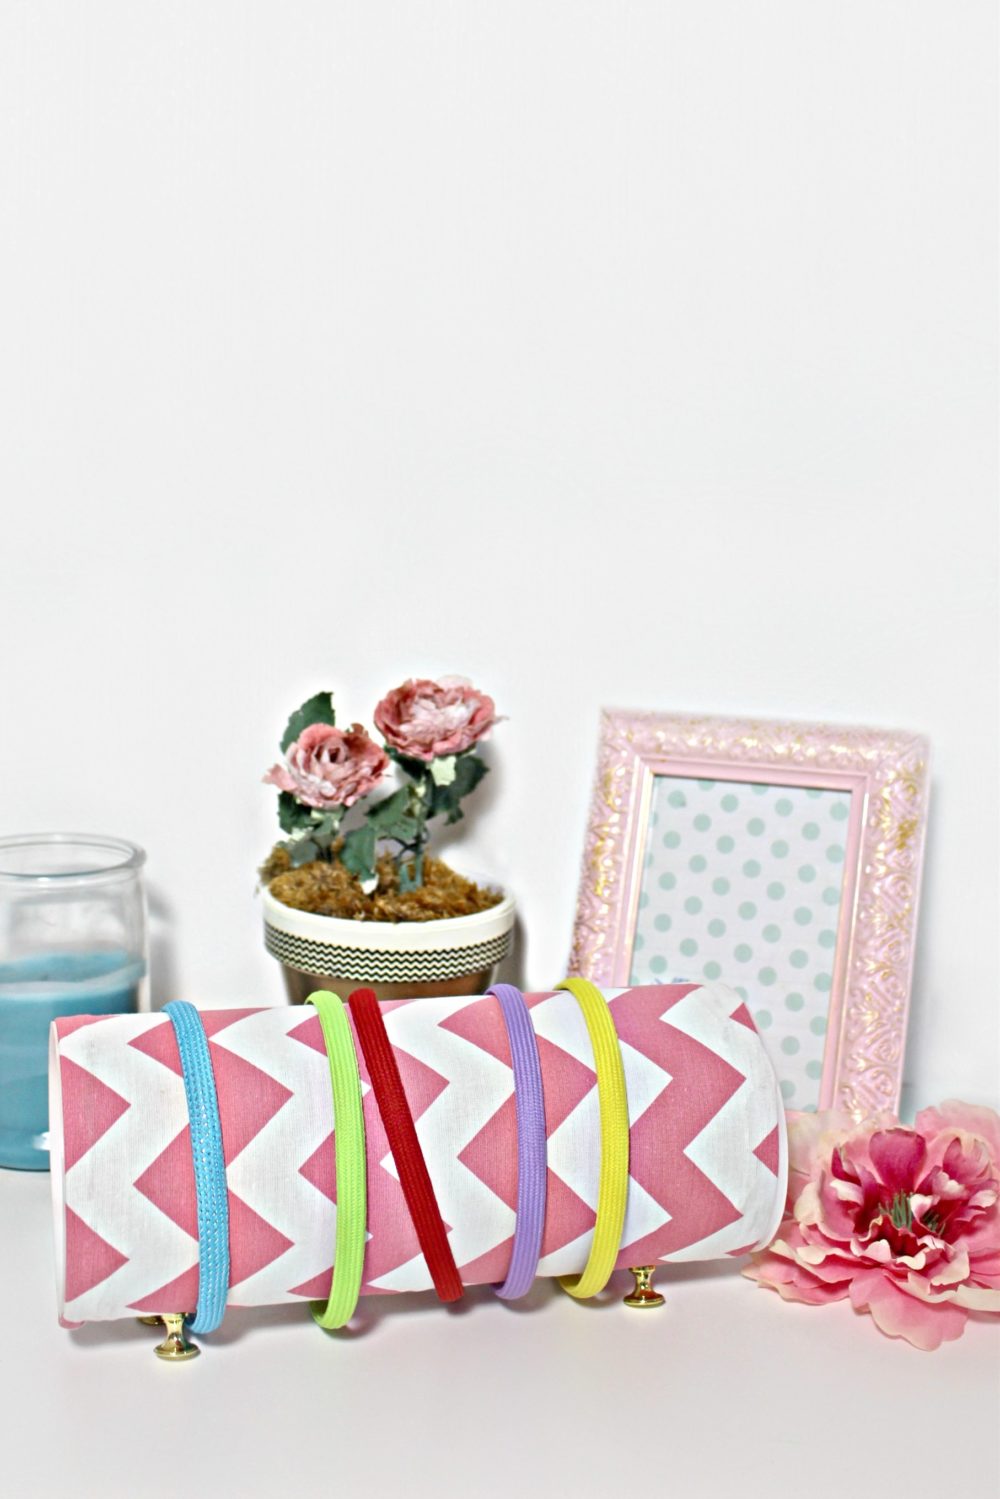
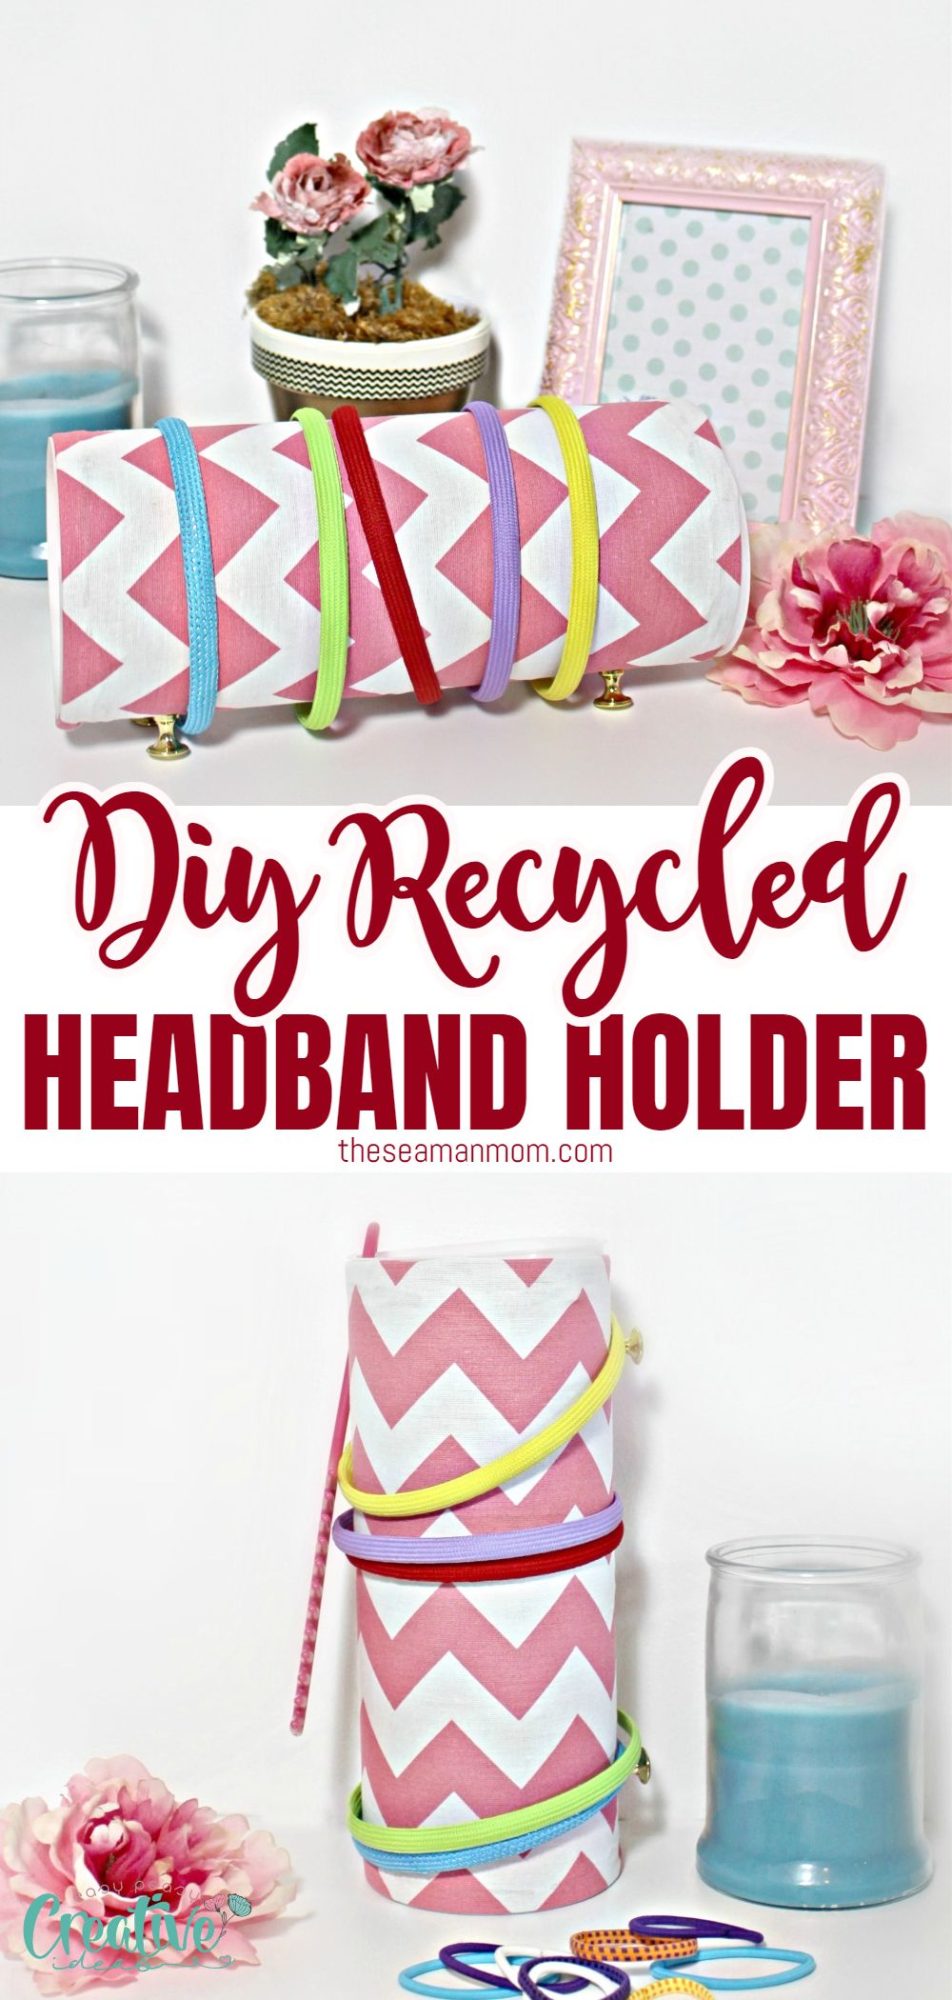
DIY Headband Holder
Say goodbye to chaos and create your very own stylish DIY headband holder effortlessly, with a fun and rewarding project. This simple yet enjoyable recycling idea will not only help you declutter your space, but also inject a dose of creativity and personal touch to your room, making it uniquely yours.
If you’re tired of constantly searching for your headbands and struggling to keep them organized, then it’s time to create your own DIY headband holder! This easy headband organizer is ideal for simplifying access to all your headbands and keeping them all tidy and organized! Customize it to complement the décor of your child’s or your own room. It’s a simple, quick, and beautiful solution for organizing headbands and, most importantly, eliminating mess!
What I love about this DIY headband holder is that it’s incredibly easy to make and it’s a great opportunity to recycle items around the house! All you need to do is recycle a cardboard cylinder container instead of throwing it in the trash bin as you normally do! This adorable headband organizer is so ultra affordable, easy, and quick; a great way to recycle and use up some of those fabric scraps!
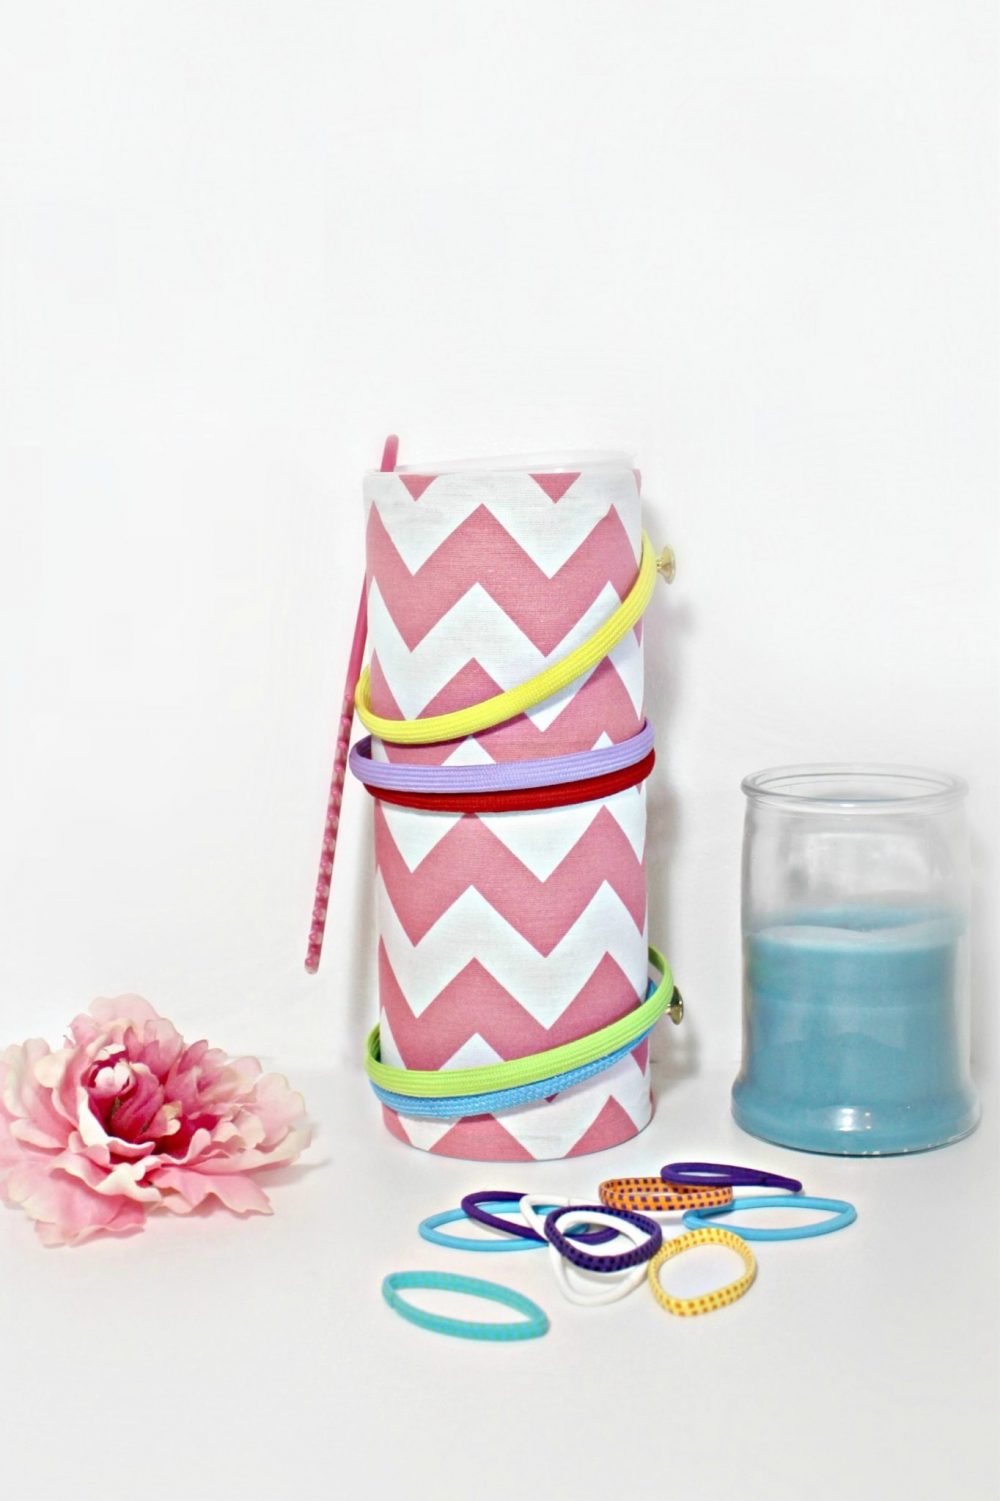
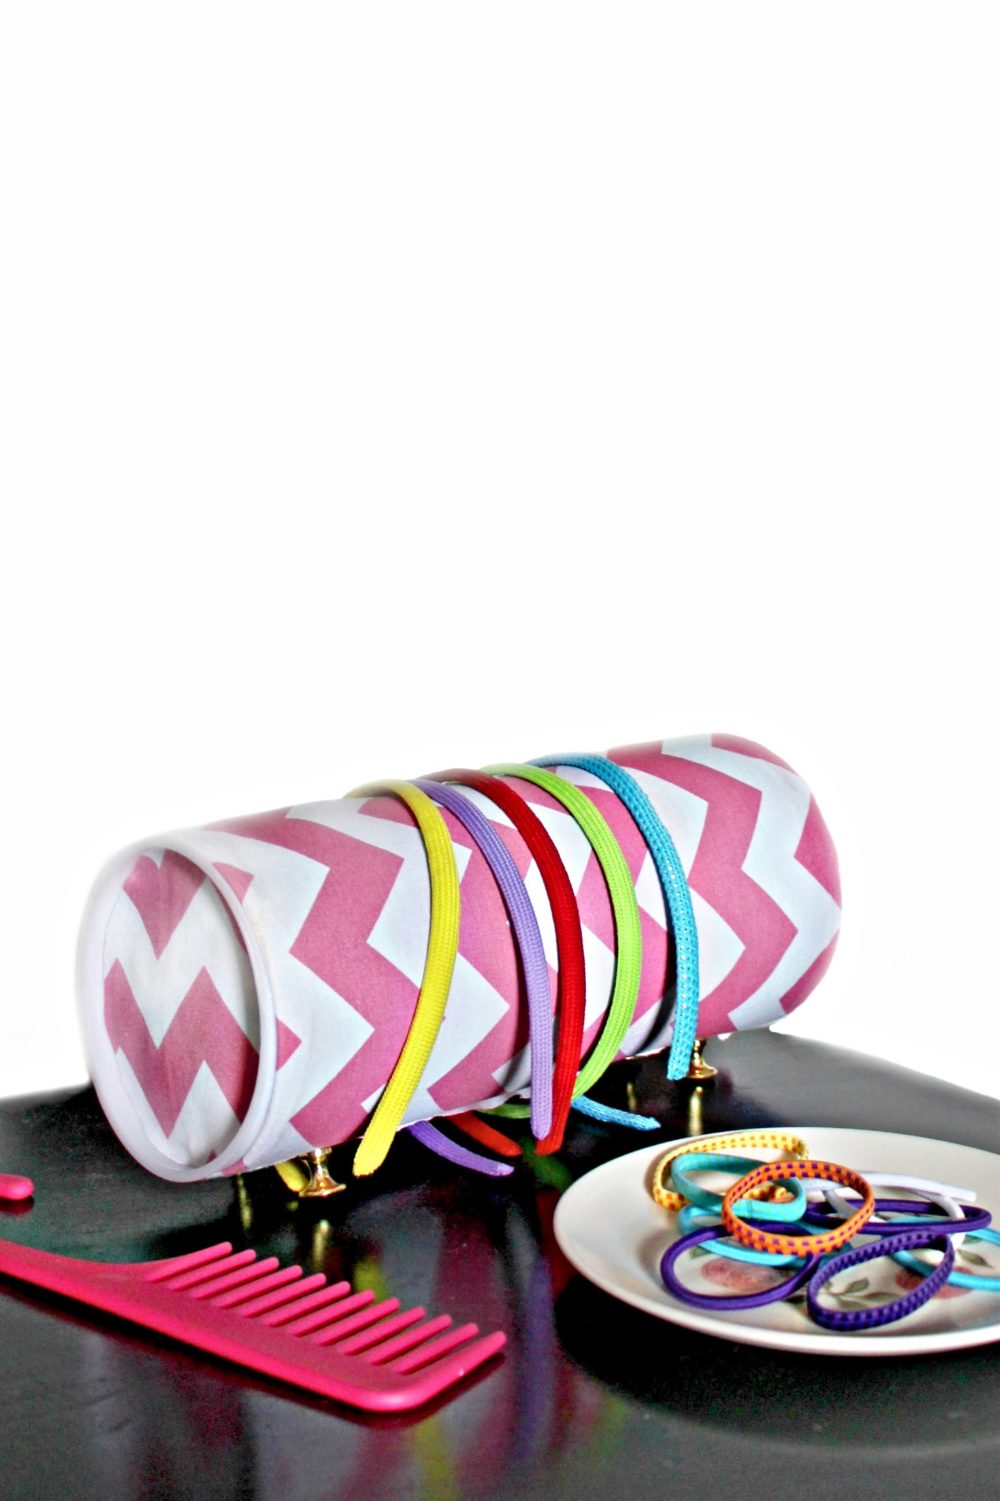
Crafted from common materials you probably have at home, my headband and bow holder is a simple yet versatile piece. Using fabric scraps, a recycled cylinder, glue, and push pins, this holder can be showcased horizontally or vertically to optimize your space usage!
How to make a DIY headband holder
Materials:
- Cardboard cylinder container 10” tall and 5” across
- Piece of fabric that can be cut to 12” long and 11” wide
- Strip of fabric that can be cut into two circles that are a little less than 5 inches across.
- Scissors
- Ruler
- Glue gun
- 4 extra large push pins
Substitutes:
- Instead of a cardboard container, you can also use a tin can, a plastic bottle or a paper towel roll.
- For the fabric scraps, if you are not a sewist you probably don’t have any on hand. You can use ribbon or yarn to cover the entire cylinder.
- Instead of push pins as legs, you can use a small piece of wood or plastic to create a stand.
Headband organizer DIY step-by-step instructions:
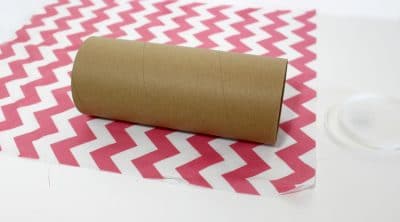
- Step 1. Make sure that the fabric is ironed and wrinkle free. Lay the fabric on the table.
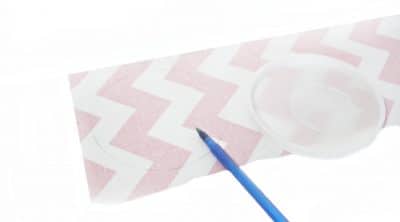
- Step 2. Lay the cylinder container on the fabric and make sure that your measurements are correct in that the fabric will cover the cylinder and fold inside on both ends 2 inches.
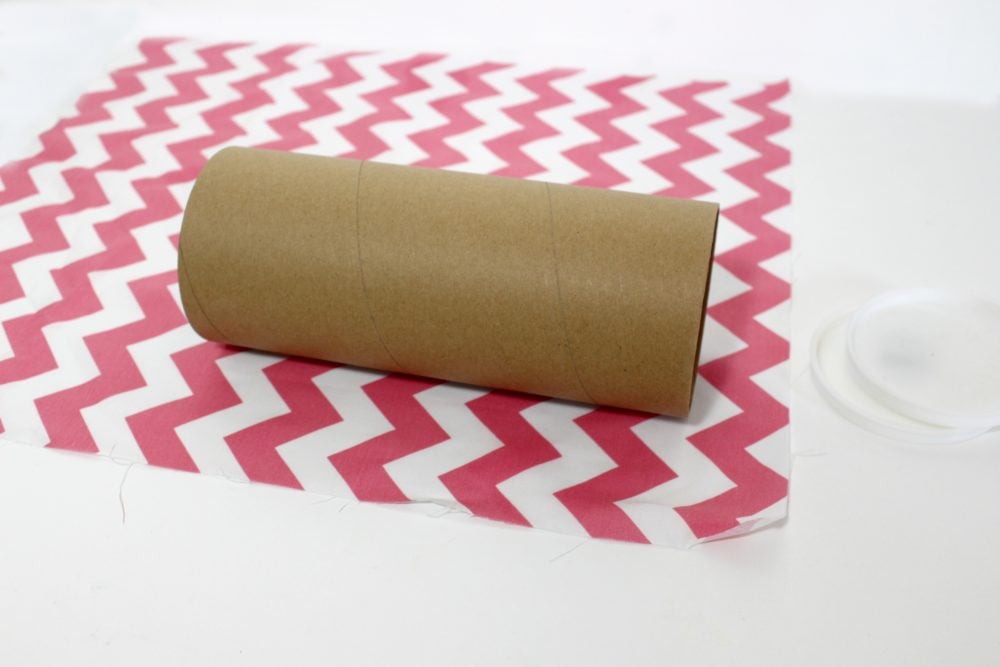
- Step 3. Use the scissors to trim the fabric.
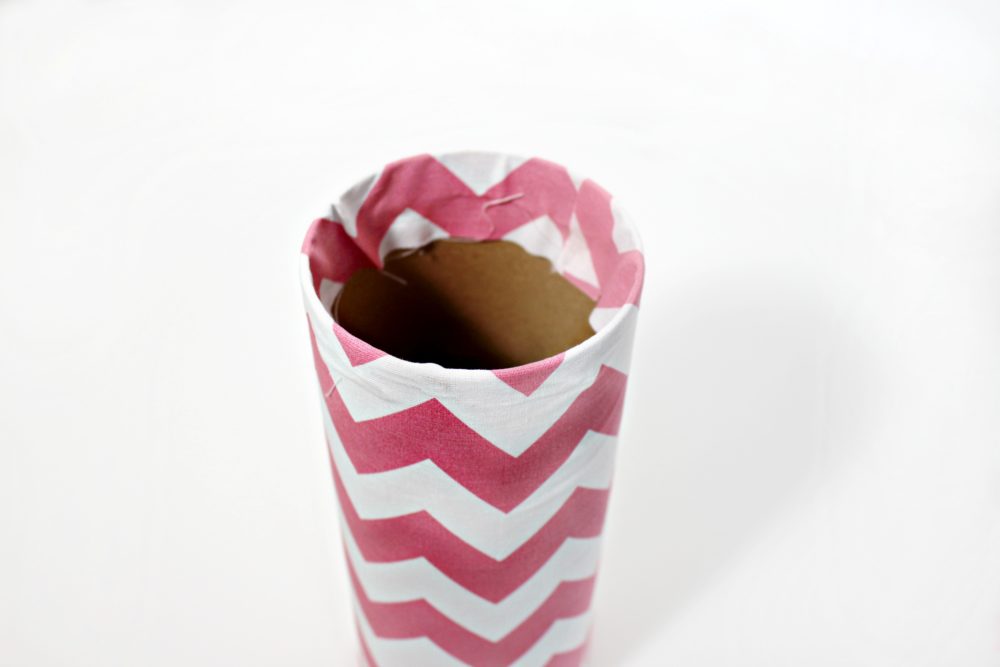
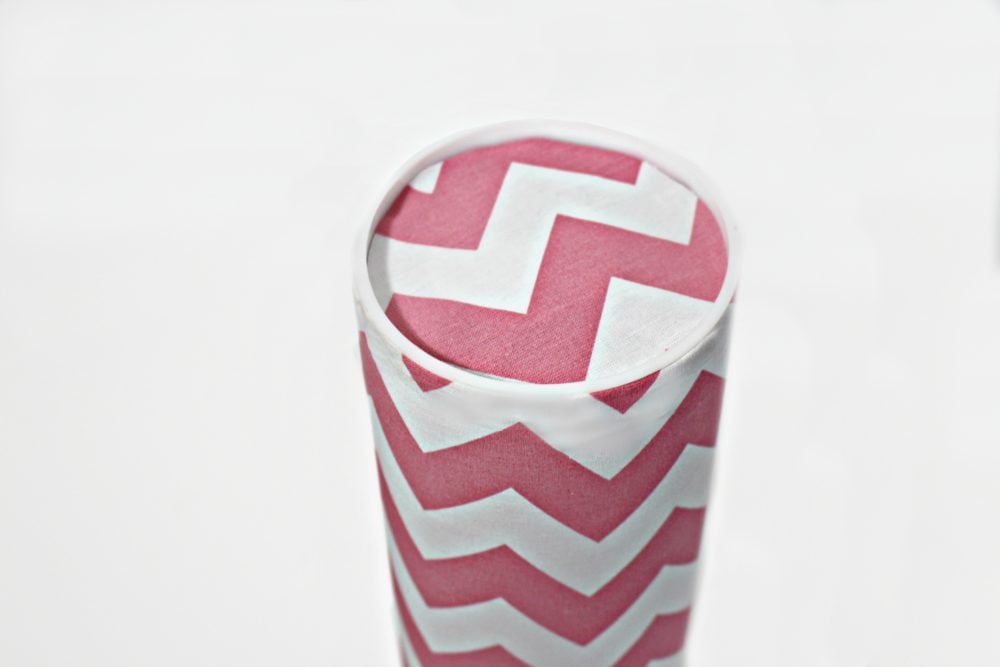
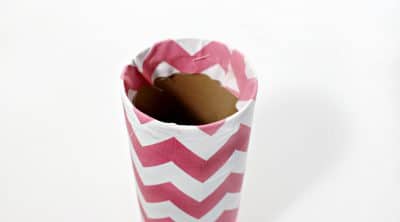
- Step 4. Heat up the glue gun and cover the cylinder with the fabric. Put hot glue on the first 2 inches inside of the container. Fold and press the fabric down inside so that it is sealed. If you want to you can cover those raw edges of the fabric inside with a strip of ribbon. This way your headband organizer will look pretty on the outside and the inside.
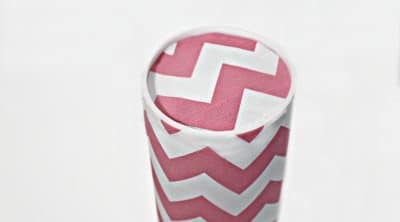
- Step 5. Cut two circles of fabric that will fit inside the lids of the container.
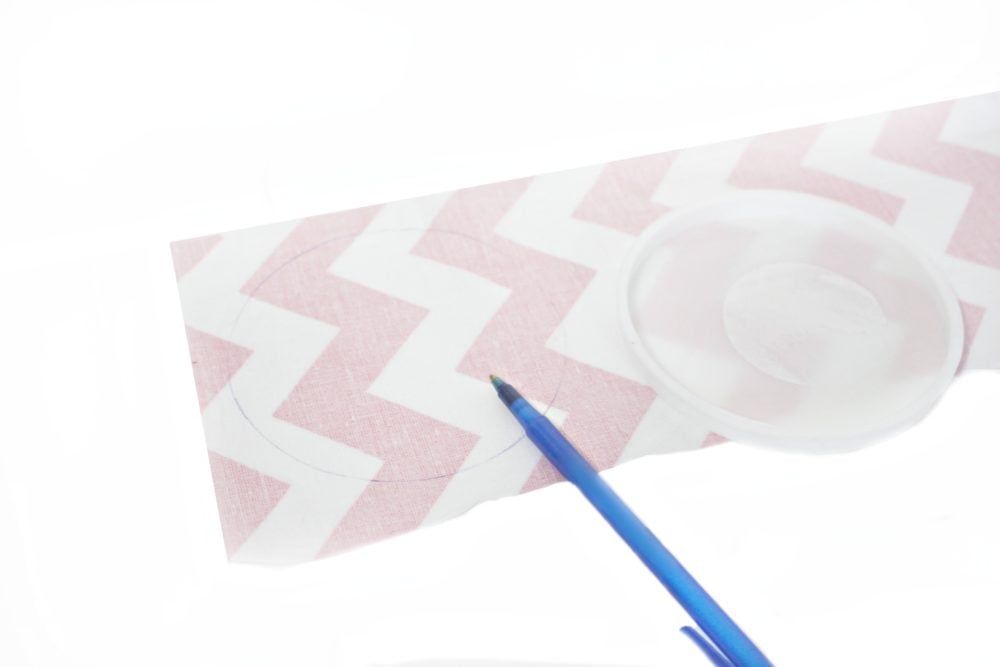
- Step 6. Glue them into the lids.
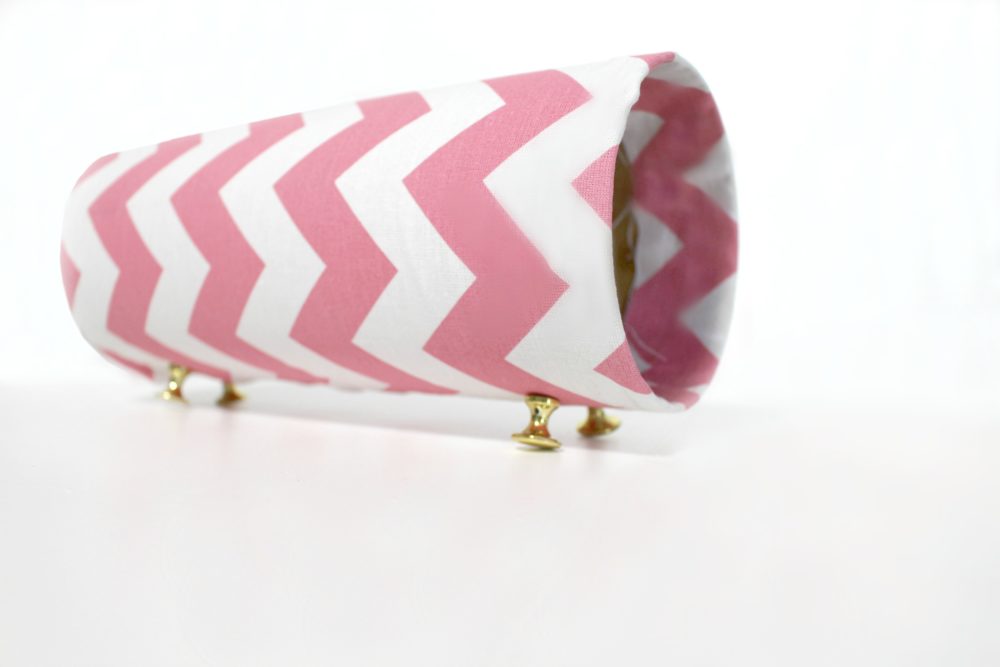
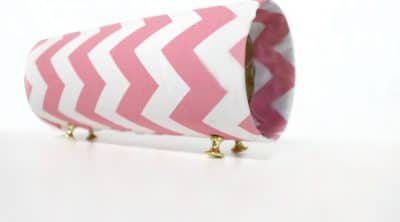
- Step 7. Apply glue to the inside edge of the push pins where the pin sticks out. Press them into the bottom of the container so that they act as legs to hold up the container. You can also opt for decorating the outside of your holder with embellishments such as buttons, felt appliques, small bows, pearl studs, gems etc
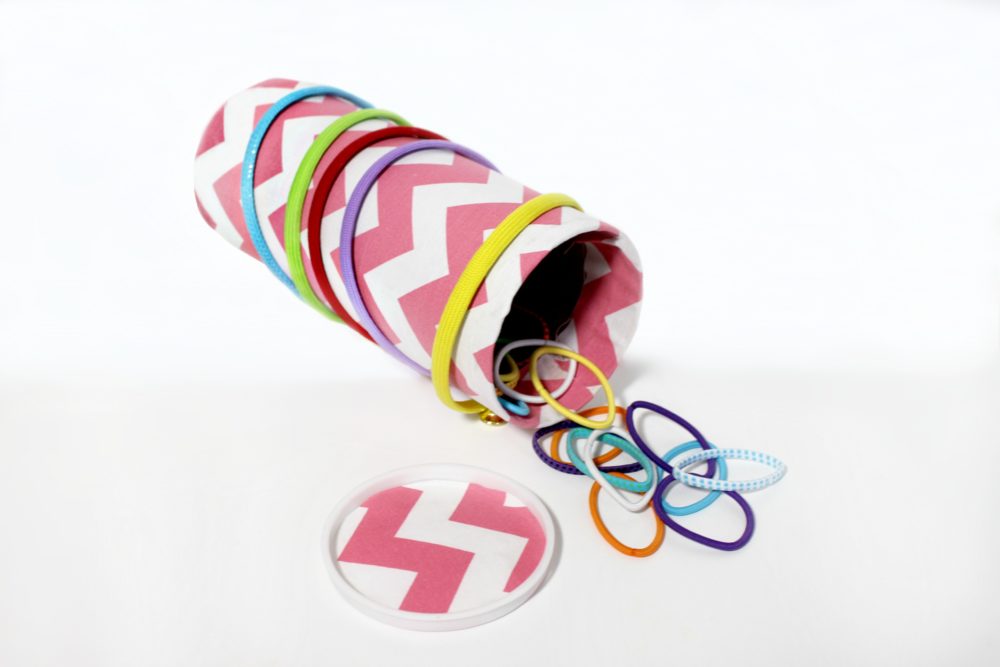
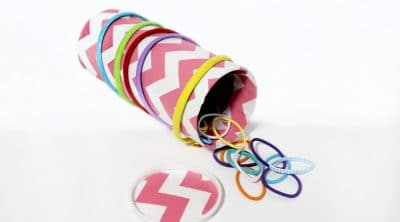
- Step 8. Fill the inside with hair clips, hair bows, hair elastics and other hair ties. Put the headbands on the outside.
Tips to make your headband holder more functional and sturdy
- To make the headband holder sturdier, you can add a layer of foam sheet inside the fabric before wrapping it around the cylinder.
- If using push pins as legs, make sure they are evenly spaced and glued securely to avoid the holder from tipping over.
- You can also add extra storage by attaching small hooks or push pins on the sides of the cylinder for hanging hair clips or small accessories.
Variations of this DIY headband holder
- Use different patterns or colors of fabric to match your room’s aesthetic.
- Personalize the holder by adding a monogram or a name using iron-on letters or fabric paint.
- Instead of push pins, you can use wooden dowels attached to the sides of the cylinder.
- Decorate with other elements such as lace, ribbons or pompoms for a more intricate and fun look.
- If you want to keep your organizer vertical, you can add a ribbon or fabric strap to hang it on the wall or glue the base to a nice decorative plate.
FAQ’s you might find useful
Can I make this holder without a cardboard cylinder?
Yes, you can also use other materials such as paper towel rolls or PVC pipes. Just make sure to adjust the measurements accordingly.
Can you use an oatmeal container to make this headband holder?
Yes, you can use any type of container to make this headband holder. Just make sure that the container is sturdy and has a flat bottom so it will stand on its own.
How long does it take to complete this project?
This DIY headband holder is quick and easy to make, taking only about 30 minutes to an hour to complete. It’s a great weekend project that you can enjoy with your family or friends.
What type of fabric should I use?
You can use any type of fabric you like for this project. Just make sure that it is a sturdy fabric that will hold up well over time.
How do I attach the fabric to the container?
There are several ways you can attach the fabric to the container. You can use hot glue, fabric glue, or staples. Be sure to use a strong adhesive so the fabric will stay in place.
Is it necessary to use glue and push pins?
While using glue and push pins is the most secure way to create the headband holder, you can also use other materials such as tape or staples. However, keep in mind that these may not hold as well and could potentially damage your headbands. So, it’s recommended to use glue and push pins for a sturdy and long-lasting holder.
How do I make the holder stand on its own?
If you want to use this holder in an upright position and have too many headbands to hang, you can add a cardboard bottom or a larger decorative plate to the container to add stability and make it stand on its own. Just cut a piece of cardboard to fit inside the container and using spray adhesive, adhere it to the bottom. Then use hot glue or fabric glue to attach the fabric to the cardboard.
What types of headbands can I store with this DIY headband holder?
This DIY headband holder is versatile and can hold a wide range of headbands, such as fabric, elastic, and plastic ones. You can also use it to store hair clips, bows, and other accessories.
Is this project suitable for children?
Yes, this DIY headband holder is a great activity to do with kids. It’s simple and safe, making it perfect for a fun crafting session with your little ones. You can also encourage them to use their creativity and personalize their own headband holders. Just make sure you are handling the glue gun or use one that allows for low temperatures.
More organizing ideas you will love
- DIY phone stand with tp rolls
- Duct tape organizer
- Toilet paper rolls organizer
- School supplies felt organizer
- Makeup storage containers
- Jewelry organizer tree
Enjoy making this easy headband holder! It’s a great way to keep all of your headbands organized and tidy. And it’s a quick and easy project that you can complete in no time! Have I convinced you? Let’s start making this bad boy!
P.S. If you love crafting with fabric or are a sewist, you might like these great tutorials on using up fabric scraps.
Headband holder DIY
Materials
- 1 piece Cardboard cylinder container 10” tall and 5” across
- 1 piece fabric cut to 12” long and 11” wide
- 1 strip fabric cut into two circles that are a little less than 5 inches across.
- 4 push pins extra large
Tools
- fabric scissors
- glue gun
- ruler
Instructions
- Make sure that the fabric is ironed and wrinkle free. Lay the fabric on the table.

- Lay the cylinder container on the fabric and make sure that your measurements are correct in that the fabric will cover the cylinder and fold inside on both ends 2 inches.
- Use the scissors to trim the fabric. Heat up the glue gun and cover the cylinder with the fabric. Put hot glue on the first 2 inches inside of the container. Fold and press the fabric down inside so that it is sealed.
- Cut two circles of fabric that will fit inside the lids of the container.
- Glue them into the lids.
- Apply glue to the inside edge of the push pins where the pin sticks out. Press them into the bottom of the container so that they act as legs to hold up the container.
- Fill the inside with hair clips, hair elastics and other hair ties. Put the headbands on the outside.
Video
More recycled crafts you will enjoy
Article may contain Amazon & affiliate links. As an Amazon Associate I earn from qualifying purchases at no additional cost to you.

So nice idea