

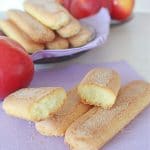
Homemade ladyfinger cookies for tiramisu
Light, crisp, and perfectly airy, ladyfinger cookies are the magic behind the irresistible charm of a classic Tiramisu. Ready to step up your baking game? Try this easy, no-fail recipe and whip up these delicious cookies right in your own kitchen!
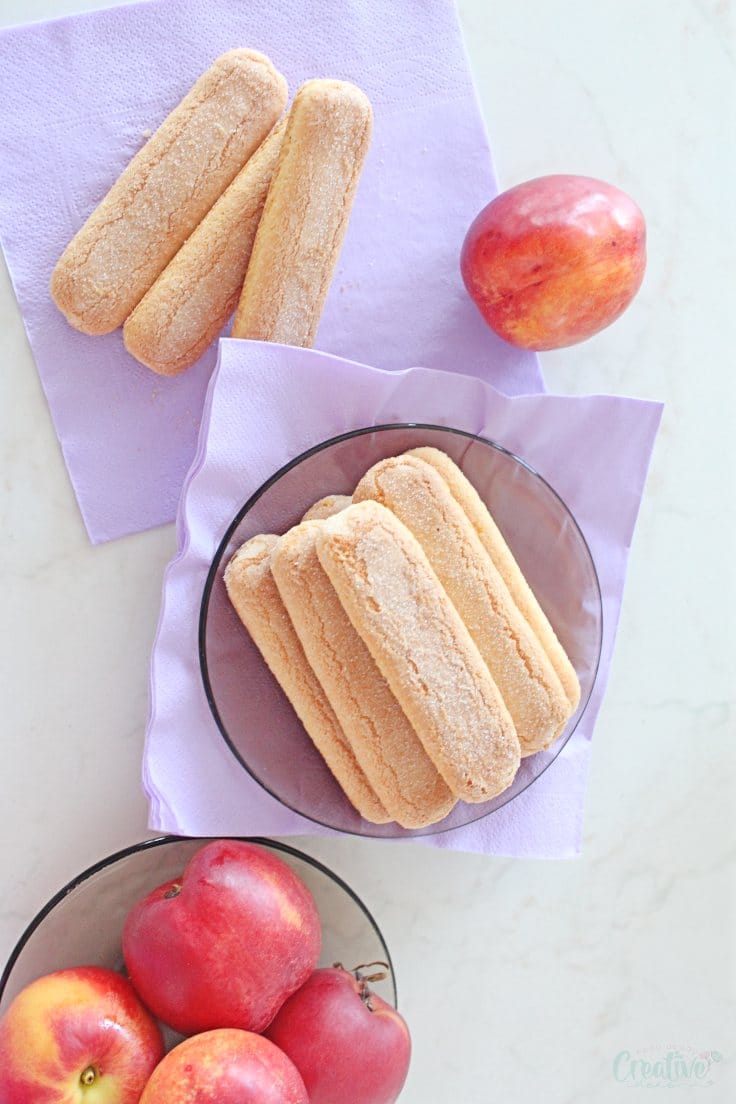
Have you ever thought about making your own lady finger cookies when preparing a Tiramisu cake? These delicate, crispy sponge cakes may seem simple on their own (though I admit, they’re delightful with a cold glass of milk). However, they are the heart and soul of this classic Italian dessert, bringing the texture and flavor that make Tiramisu truly unforgettable.
Tiramisu isn’t the only dessert where Italian ladyfinger cookies work their magic! They’re a perfect addition to trifles and other layered treats. Think these delicate bites of heaven can only be store-bought? Think again! With the right recipe, you can easily bake your own ladyfinger cookies at home.
I realize it may seem intimidating to bake these ladyfinger cookies, I had the same feeling and postponed making this ladyfinger recipe for ages (literally). Little I knew, the main secret of having big success with this recipe is…the air! Yup! Much like these French cream puffs, the tiramisu lady fingers need air to bake so light and spongy!
How to make ladyfinger cookies
Lady fingers ingredients:
- Large Free-Range Eggs – These are the foundation of your recipe, providing structure and richness. Opt for free-range eggs for better flavor and quality.
- Granulated Sugar – Adds the perfect level of sweetness while helping to create a smooth texture in your baked goods.
- Salt – A small pinch of salt enhances the flavors and balances the sweetness, ensuring your recipe isn’t overly sugary.
- Vanilla Extract – Brings a warm, aromatic flavor and adds depth to the overall taste. Use pure vanilla extract for the best results.
- All-Purpose Flour – The go-to flour for most recipes, it provides the right amount of structure without being too dense.
- Cornstarch – A secret weapon for achieving a soft, tender texture. It keeps your baked goods light and airy.
- Optional – Lemon Zest – For a bright, citrusy twist, add fresh lemon zest. It complements the sweetness and adds a refreshing flavor.
- Powdered Sugar for Dusting – A finishing touch that adds a delicate sweetness and makes your creation look bakery-perfect.
Equipment:
- 2 cookie sheets
- baking paper
- large bowl
- standing mixer
- hand mixer
- silicone spatula
- small whisk
- large piping bag fitted with a 1/2-inch round tip
If you want to bake your ladyfinger cookies to perfection and have them look like they’re bought from the store instead of homemade, use this silicone mold to bake them.
Instructions to bake the ladyfingers
Preheat your oven to 350°F and position the rack in the middle. Line two cookie sheets with baking paper. Set up a large piping bag with a 1/2-inch round tip, placing it in a tall glass for easy filling.
Separate the egg yolks and whites into two bowls. Place the yolks in a large bowl and the whites in a stand mixer with a whisk attachment. Whip the yolks with half the sugar until pale and fluffy, then mix in vanilla extract (add lemon zest if you’d like). Whip the egg whites on medium-high, gradually adding the rest of the sugar, until stiff peaks form. Gently fold the whites into the yolk mixture to keep the batter airy.
In a bowl, whisk together the flour, cornstarch, and salt. Gradually fold into the wet mixture until combined. Fill a piping bag with the batter and pipe 3-inch-long, 1-inch-wide fingers onto the cookie sheets, leaving 1 inch between each. Hold the piping bag at an angle and lift to finish each cookie.
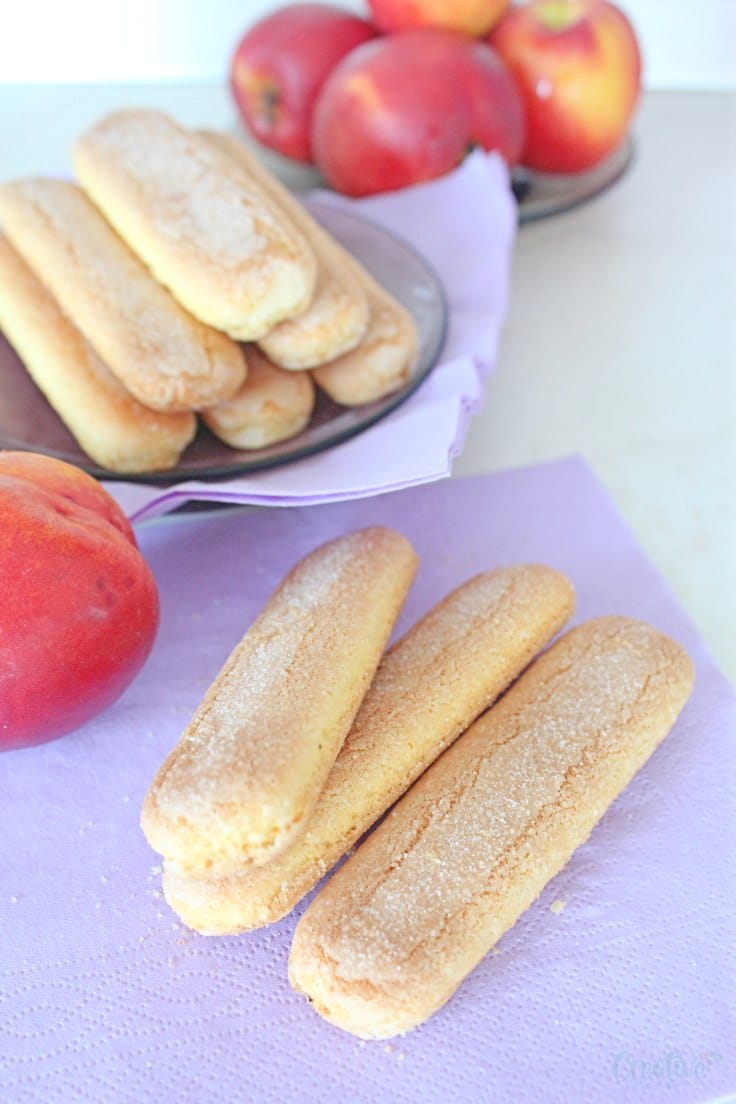
Dust the cookies with powdered sugar and bake for 12–15 minutes, until puffed and golden. Let them cool on the tray before serving or storing. Repeat with the second tray if needed.
Tips to make the best lady finger cookies
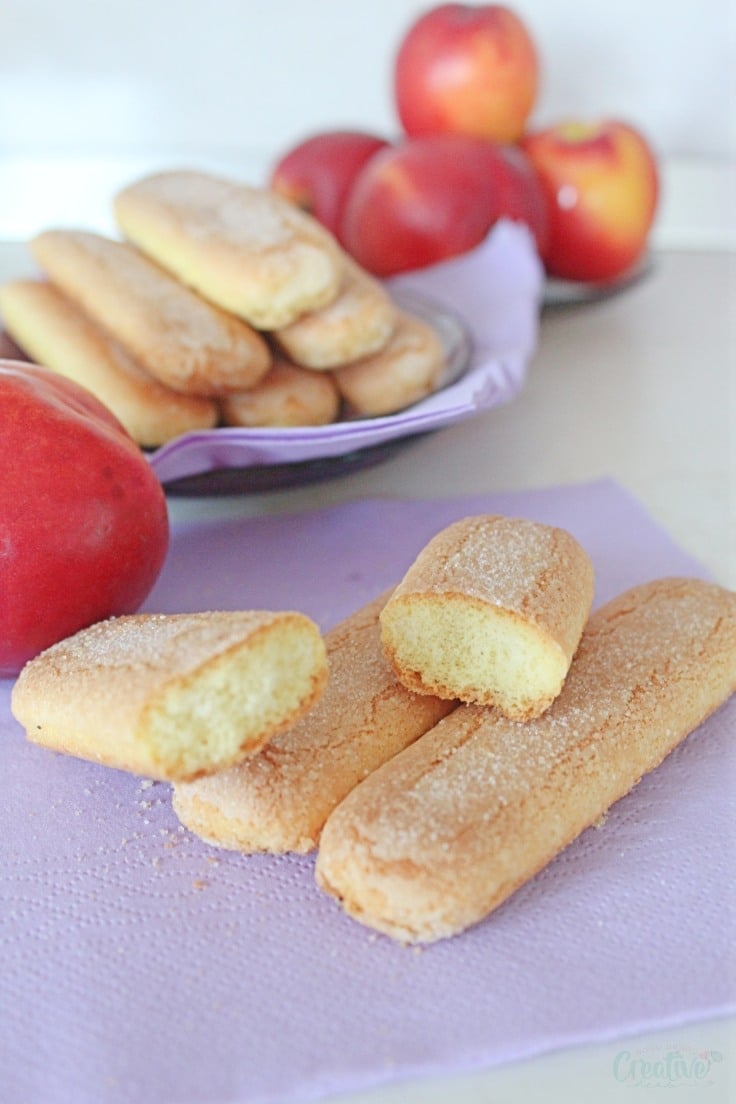
- The sponge interior and the crisp exterior is what makes this lady finger cookies recipe so special and so easy to achieve! All you need to do is beat the egg whites until stiff peaks form and the egg yolks until pale and fluffy.
- The flour needs to be sifted and then gently folded into the batter.
- Another little secret about this crispy lady fingers recipe is how careful you bake them: no cold air is to enter the oven when baking so please do your best and refrain from taking a peek while this awesomeness bakes in the oven!
- When they’re fresh out of the oven, these cookies are quite delicate on the inside and just a little crisp on the outside. While you leave them to cool completely they’ll firm up and get crispier and spongy on the inside. So handle with care when they’re hot from the oven or simply just leave them in the baking sheet until completely cool.
More desserts you will enjoy:
What to serve with ladyfinger cookies
Ladyfinger cookies are incredibly versatile and pair well with a variety of beverages and desserts. Traditionally, they are served alongside a cup of espresso or strong black coffee, as their slightly sweet, airy texture makes them perfect for dipping. They also complement teas, such as Earl Grey or chamomile, for a lighter pairing.
Beyond beverages, ladyfingers are a key ingredient in classic desserts like tiramisu or charlotte cakes, where their sponge-like quality soaks up rich creams and flavorful syrups.
For a simple yet indulgent treat, serve them with a dollop of whipped cream or a small bowl of chocolate or fruit dipping sauce.
Frequently asked questions
Can I make the cookie dough ahead of time?
Yes, you can prepare the dough in advance. Store it in the refrigerator for up to 48 hours in a covered container or tightly wrapped in plastic wrap. If freezing the dough, shape it into individual cookie portions before freezing to make baking quick and easy. This way, you can have fresh-baked cookies whenever you crave them without the hassle of measuring out ingredients and preparing the dough.
How do I know when the ladyfinger cookies are done baking?
Ladyfinger cookies are done baking when they are lightly golden around the edges and feel firm but still slightly springy to the touch. Depending on your oven, baking times may vary slightly, so it’s essential to start checking them towards the end of the recommended baking time. Additionally, avoid opening the oven door frequently during baking, as this can cause the cookies to deflate. Once done, allow the cookies to cool completely before serving or using them in your desired recipe.
Storage tips
Once cool, transfer the ladyfingers to an airtight container if not used immediately as they’ll begin softening in the air. Use immediately or store in an airtight container, at room temperature for up to 3 weeks.
This recipe doesn’t freeze well as the cookies gets soft when thawed.
Ladyfinger cookies are incredibly versatile, making them an excellent addition to a range of desserts. Whether you use them to craft a classic tiramisu, layer them in a trifle, or enjoy them on their own with a cup of coffee or tea, their delicate texture and subtle sweetness shine through. So give them a try and let me know in the comments below how you use ladyfinger cookies in your own culinary creations. Happy baking!
Ladyfingers cookies
Ingredients
- 3 large eggs free range
- 2/3 cup granulated sugar
- pinch of salt
- 1/4 tbsp vanilla extract
- 1 cup all purpose flour sifted
- 2 tbsp cornstarch
- 1 tsp lemon zest optional
- powdered sugar for dusting
Equipment
- 2 cookie sheets
- baking paper
- large bowl
- standing mixer
- silicone spatula
- small whisk
- large piping bag fitted with a 1/2-inch round tip
Instructions
- Adjust oven rack to middle position and preheat to 350°F.
- Line two cookie sheets with baking paper.
- Fit a large piping bag with a 1/2-inch round tip. Roll the bag open and stand upright in a tall glass or jar so it can be filled hands-free.
- Separate the eggs, place the yolks in a large bowl and the whites in a stand mixer fitted with a whisk attachment.
- Using a hand mixer, whip the egg yolks with half the sugar, until pale and fluffy.
- Beat in vanilla extract.
- Fold in the lemon zest (optional) using the silicone spatula.
- Whip the egg whites on medium-high speed, until fluffy. Once light and fluffy, slowly add the rest of the sugar while continuing whipping. Whip until stiff peaks form. This is crucial as if the foam is unable to hold soft peaks, the lady fingers will spread flat in the oven!
- Using a silicone spatula, gently fold in the whipped whites into the yolk fluff, taking care not to deflate all of the incorporated air.
- Mix flour with cornstarch and salt using a small whisk.
- Add the flour mix slowly, folding gently with a spatula to combine in a lump free batter.
- Transfer to the piping bag, twist to close, and pipe fingers of about 3" x 1", leaving 1" between each one. Hold the bag at an angle when pipping and firmly lift the bag straight up when finishing pipping.
- Dust the cookies with powdered sugar and bake until puffed and a little golden, 12 to 15 minutes.
- Bake the second tray in a similar way.
- Cool the cookies completely in the tray, at room temperature.
- Transfer to an airtight container, if not used immediately as they'll begin softening in the air.
- Use immediately or store in an airtight container, at room temperature for up to 3 weeks.
Nutrition
Article may contain Amazon & affiliate links. As an Amazon Associate I earn from qualifying purchases at no additional cost to you.

These were awesome. Perfect for filling in my molds they rose beautifully. Thank you for sharing.
I just bought the 2-Pack Finger Shaped Molds Cylinder Silicone Trays for Baking. Are they the type of molds that you used? Looking forward to trying this recipe.
Hi, Valerie. Yes, we use a similar mold.
I seriously love this recipe! It makes the perfect Lady Fingers every time! 😊 perfect for tiramisu!
These were amazing! First time making lady fingers and finally settled on this recipe and I’m glad I did.
So glad you enjoyed my recipe! Thanks for letting me know, Kayla!
This is a great recipe! 1st time making because I couldn’t find them in any store.They turned out awesome
Thanks so much for letting me know! So happy you enjoyed my recipe!
The ingredients squeaking powder, the instructions say corn starch. Which is it?
I’m not seeing powder, Dawn, just powdered sugar. It’s cornstarch in ingredients & instructions.
Hi, can these be made as a single layer sponge cake?
Dana, I’m sorry, I haven’t tried it as a cake! I’m thinking maybe, if the layers are thin, it should work. Just not sure the baking time would be the same, you probably need to keep an eye on the cake while baking.
Will give it a try and let you know! Thanks for your reply.
can i leave out corn starch?
Clarence, for a successful recipe none of the ingredients can be left out.
i thought i might need fancy ingredients but this was simple☺️
The only other time I’ve tried homemade lady fingers, they ended up flat and soft and didn’t work very well at all as a part of tiramisu. However, these lady fingers are exactly what I wanted them to be! They baked up puffy and delicious! The only thing I did differently is that after they cooled, I put them back in a very low oven for about 30 minutes so they would get even crispier and give me the texture I’m looking for in my tiramisu. Thanks for the great recipe!
Shawndra, thanks so much for your lovely feedback on this recipe! I’m very happy you had great success making it & thanks for the tip on the extra baking time, that’s a brilliant idea for those who love crispier ladyfingers!
Tried the lady fingers recipe. Awesome verY easy I’m not a baker but was sooo easy
Thanks, Michele! I’m very happy you had great results with this recipe!
Can they be frozen and regain crispness when thawed?
Cindie, I don’t have experience with frozen ladyfingers. I store mine in an airtight container, at room temperature for up to 3 weeks.
Can not believe that these are homemade!!!! Oh my.