

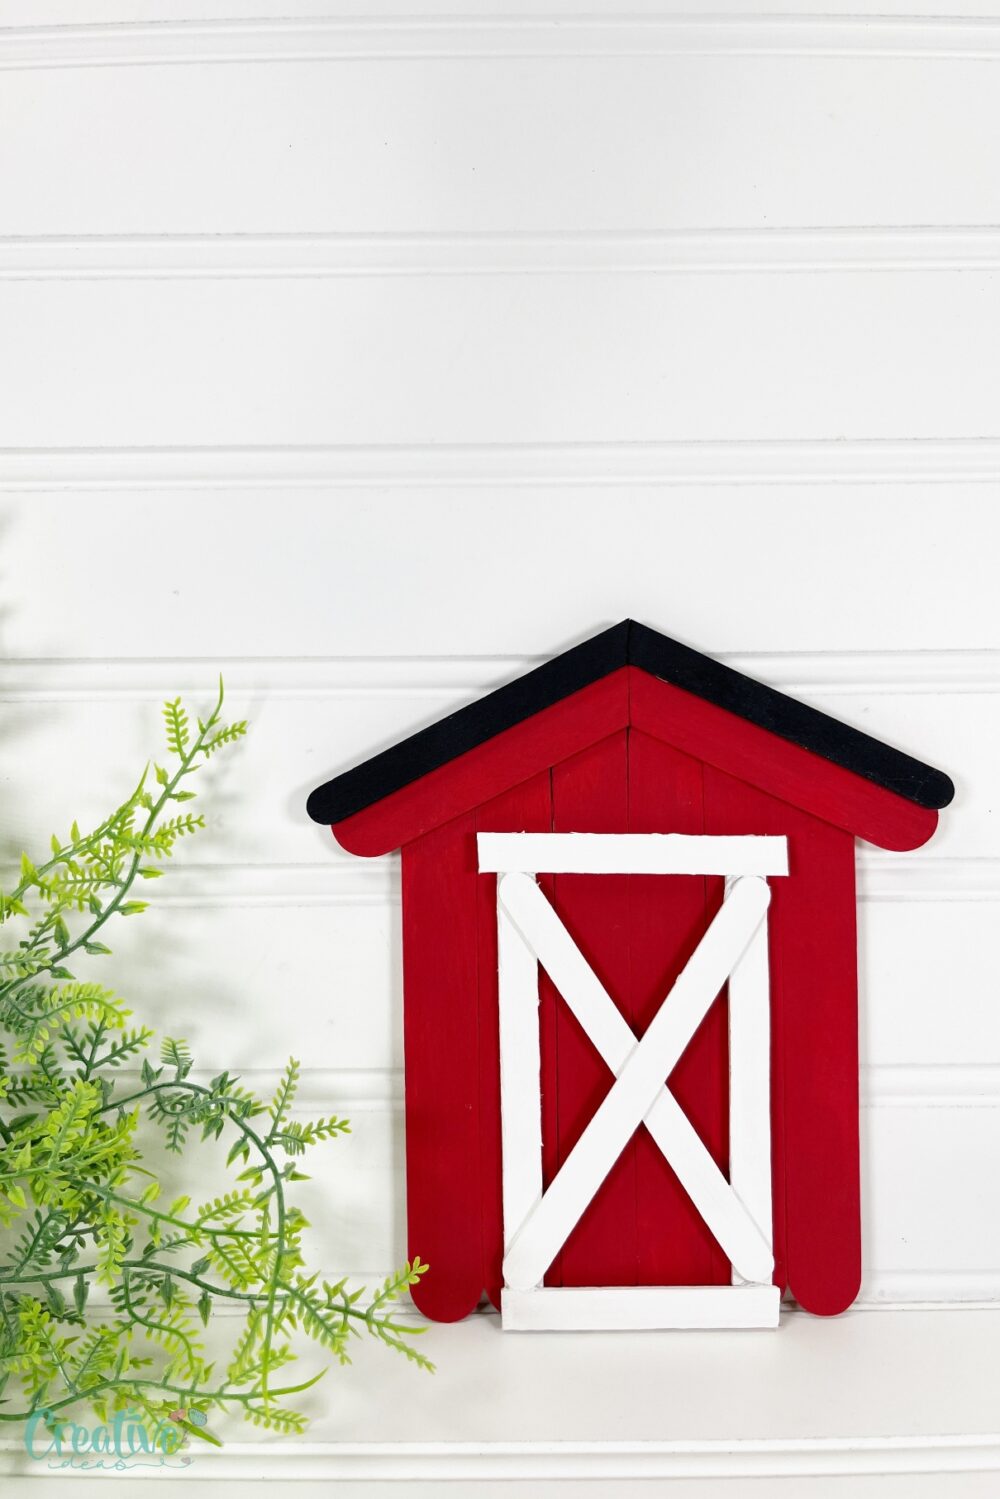
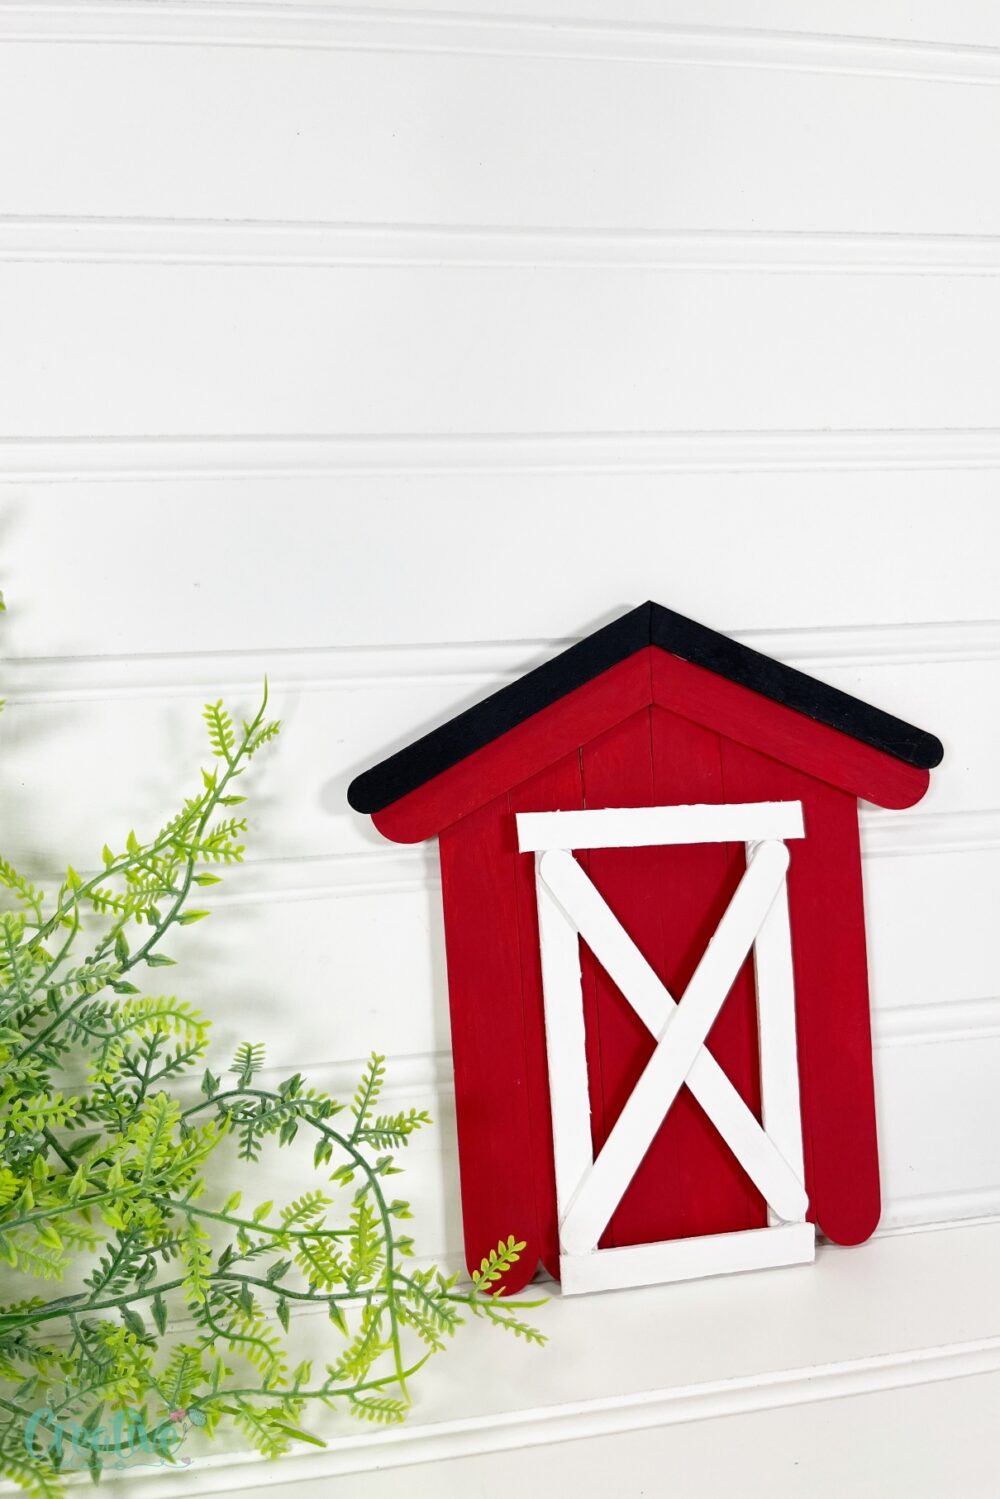
Cute barn craft with craft sticks
Let your creativity shine with this fun barn craft! Discover how to make a cute miniature barn with just basic materials and tools. Whether you’re a beginner or a seasoned craft enthusiast, this project is a perfect way to explore your artistic side and enjoy the process of crafting. Embark on a fun and rewarding creative journey with this charming craft idea!
Welcome to the wonderful world of barn craft, where your crafting dreams blend with rustic charm. Whether you’re looking for a cozy touch to your home décor or a special gift idea, creating a miniature barn is a fun project that calls out to you.
In this easy step-by-step guide I will walk you through the creation of your very own DIY miniature barn using easily accessible materials and equipment. Get ready to be swept away by the simplicity and beauty of this barn craft.
This cute craft blends my creativity with a love for the charming and peaceful. Making it adds a sense of calm and a hint of country joy to any space, making it a great project for craft enthusiasts and those who appreciate life’s simple joys. Using simple supplies from the Dollar Store, create a quick and easy craft stick barn with the kiddos in just about 30 minutes. Create this adorable barn to spark conversation and learning about farming or use it as a fun activity for a farm-themed birthday party.
How to make a barn craft
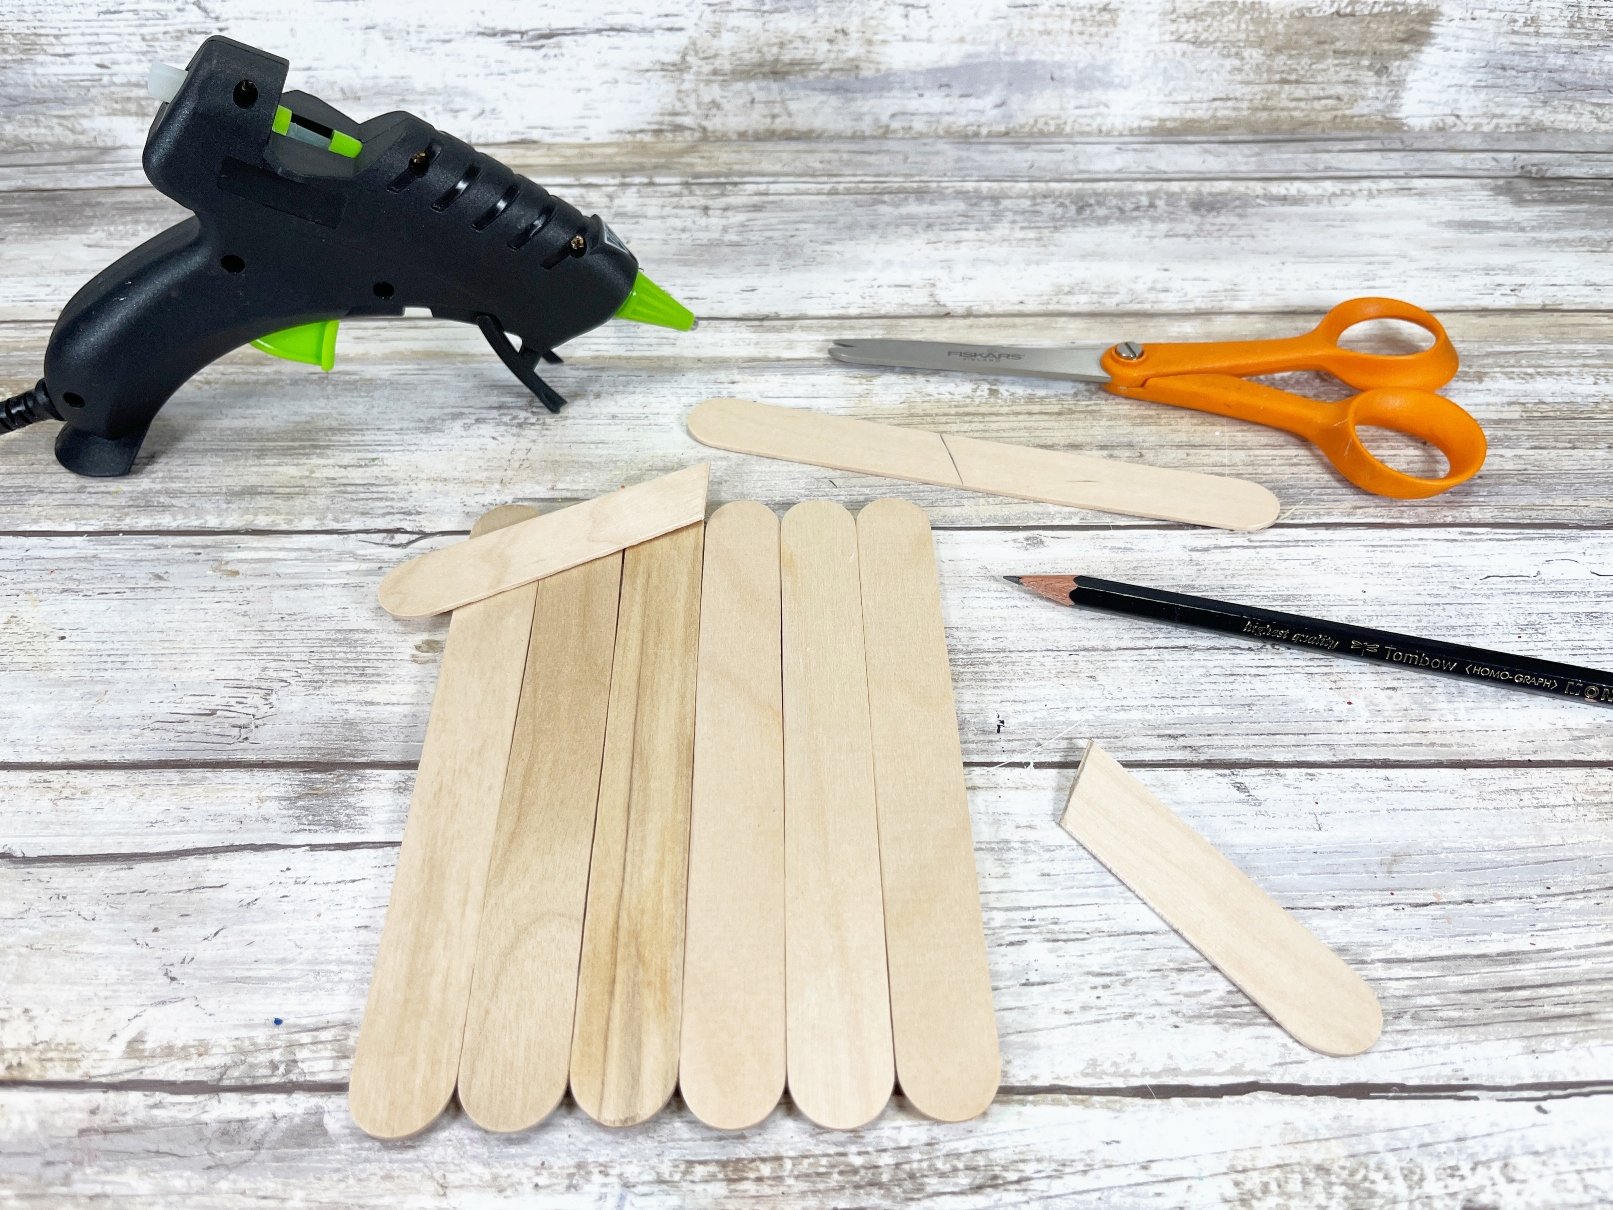
Materials
- Jumbo Craft Sticks: These can be easily found at any dollar store or online. These are used for the base of your miniature barn.
- Regular Craft Sticks: These sticks are perfect for constructing the barn door.
- Acrylic Craft Paint – in red, white, and black: These classic barn colors bring your barn craft to life with a vibrant hue and timeless appeal. The acrylic formula ensures a smooth application and a durable finish.
- Barn pattern: You can get mine or hand-draw one on a piece of paper.
Substitutes
If you’re missing some materials, don’t worry! Cardboard can substitute for craft sticks, and watercolors can replace acrylic paints. The essence of barn craft lies in improvisation and making the most of what you have.
Equipment
- Glue gun and glue sticks: For a sturdy and enduring build, a glue gun ensures that your craft sticks stay in place.
- Paintbrush: Essential for applying your paint smoothly and precisely to get that classic barn look.
- Scissors: For cutting craft sticks to the desired size, ensuring your barn has the perfect dimensions.
- Pencil: Ideal for drafting the outline of your barn on your working surface or craft sticks, guiding your construction process.
Step-by-step instructions
Preparations
- Gather all your materials and equipment.
- Sketch a rough outline of your barn on paper to serve as a blueprint.
- Cut your jumbo craft sticks to size.
Making
STEP ONE

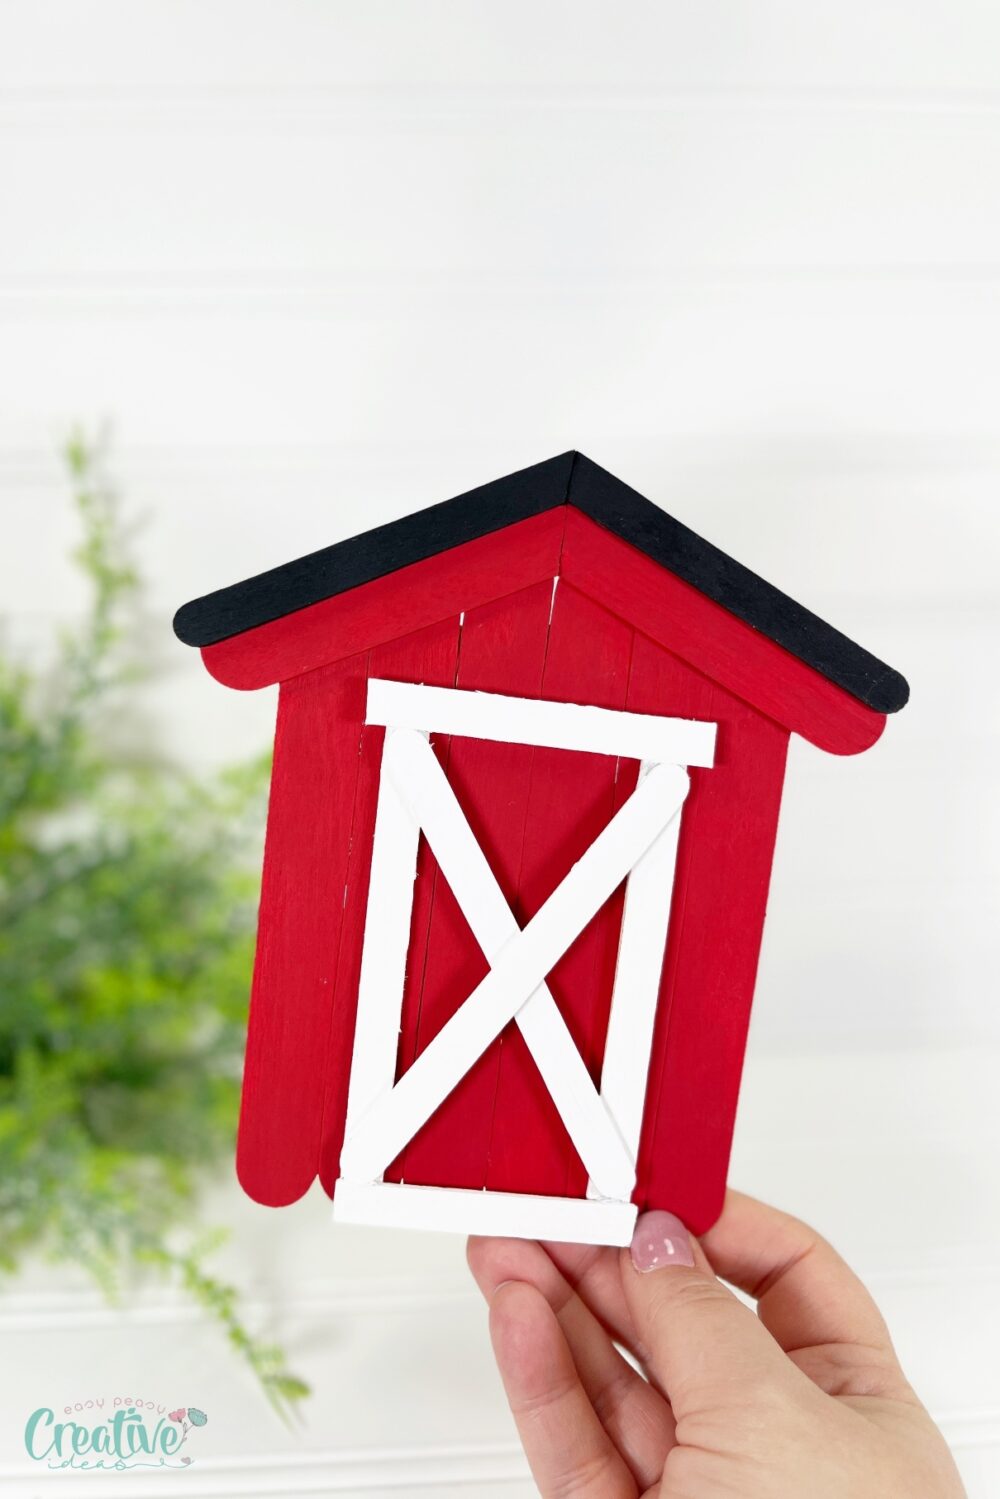
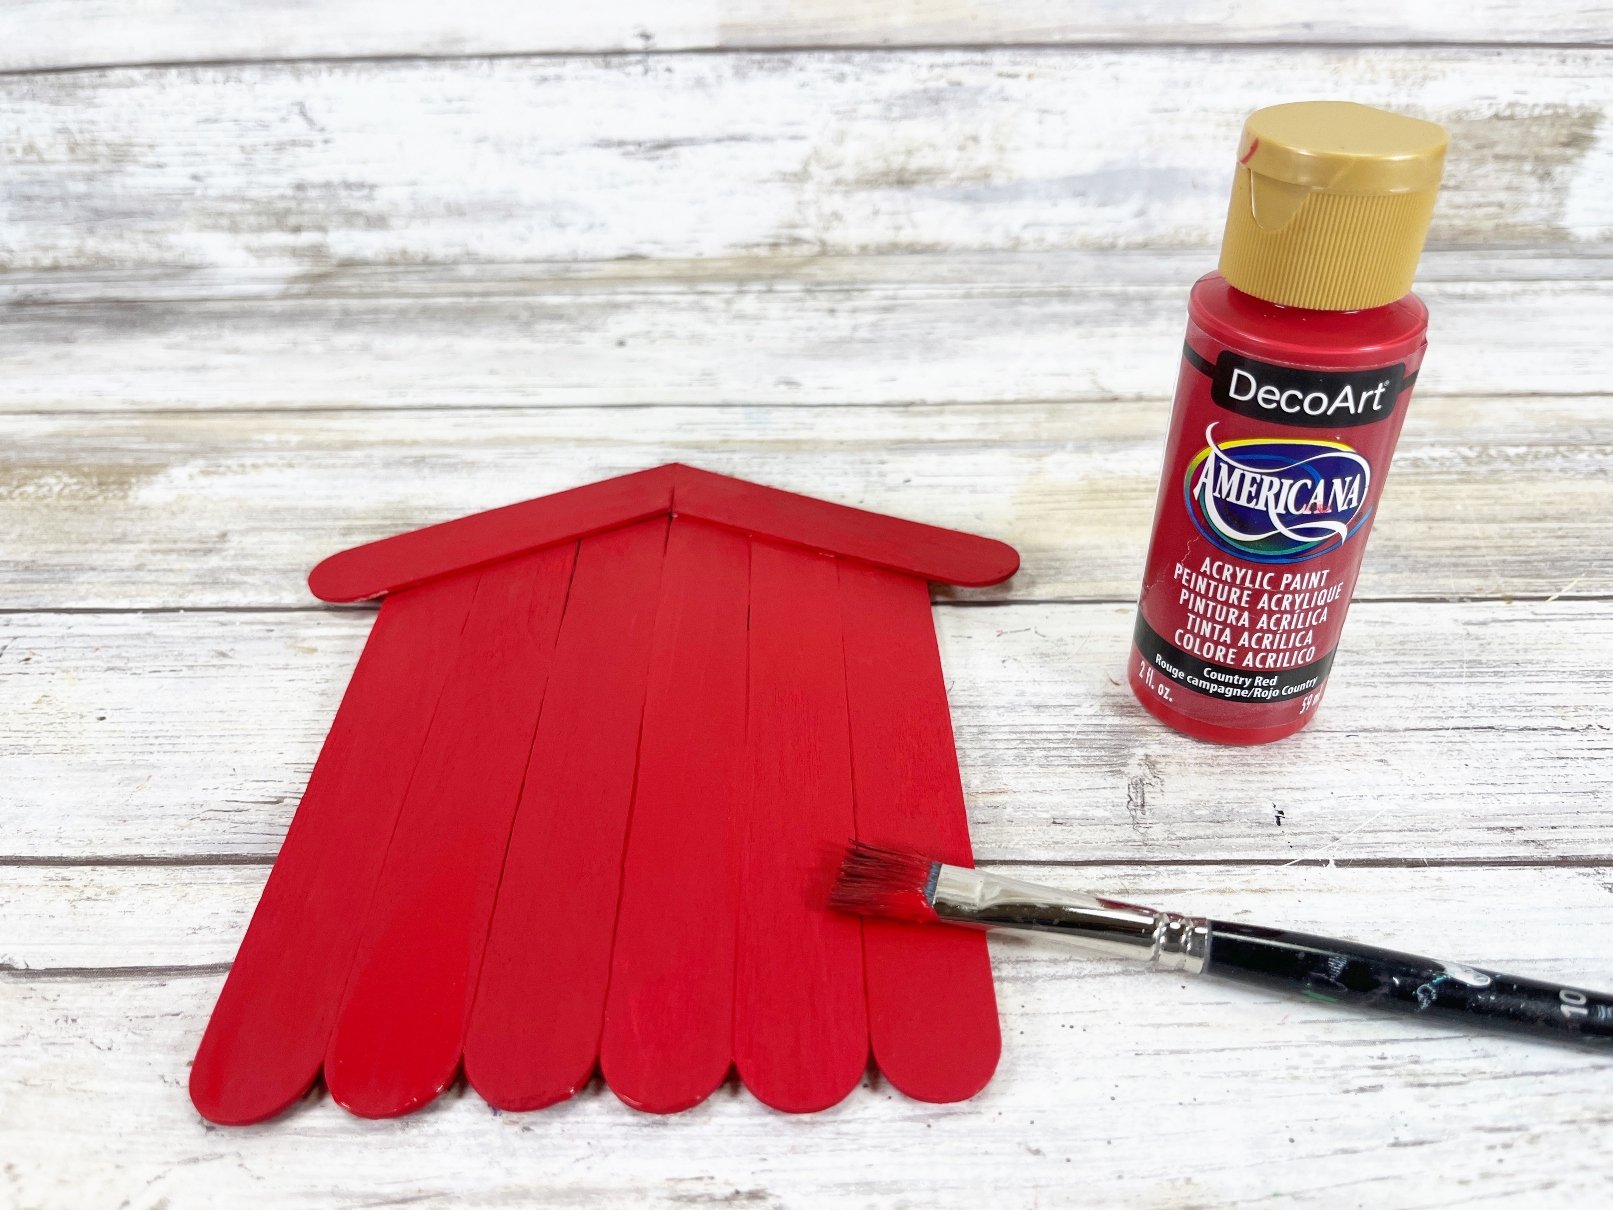
To create the barn, line up six jumbo craft sticks on your work surface. Using scissors, trim additional jumbo craft sticks to the width of the barn and attach with a glue gun and glue sticks.
STEP TWO
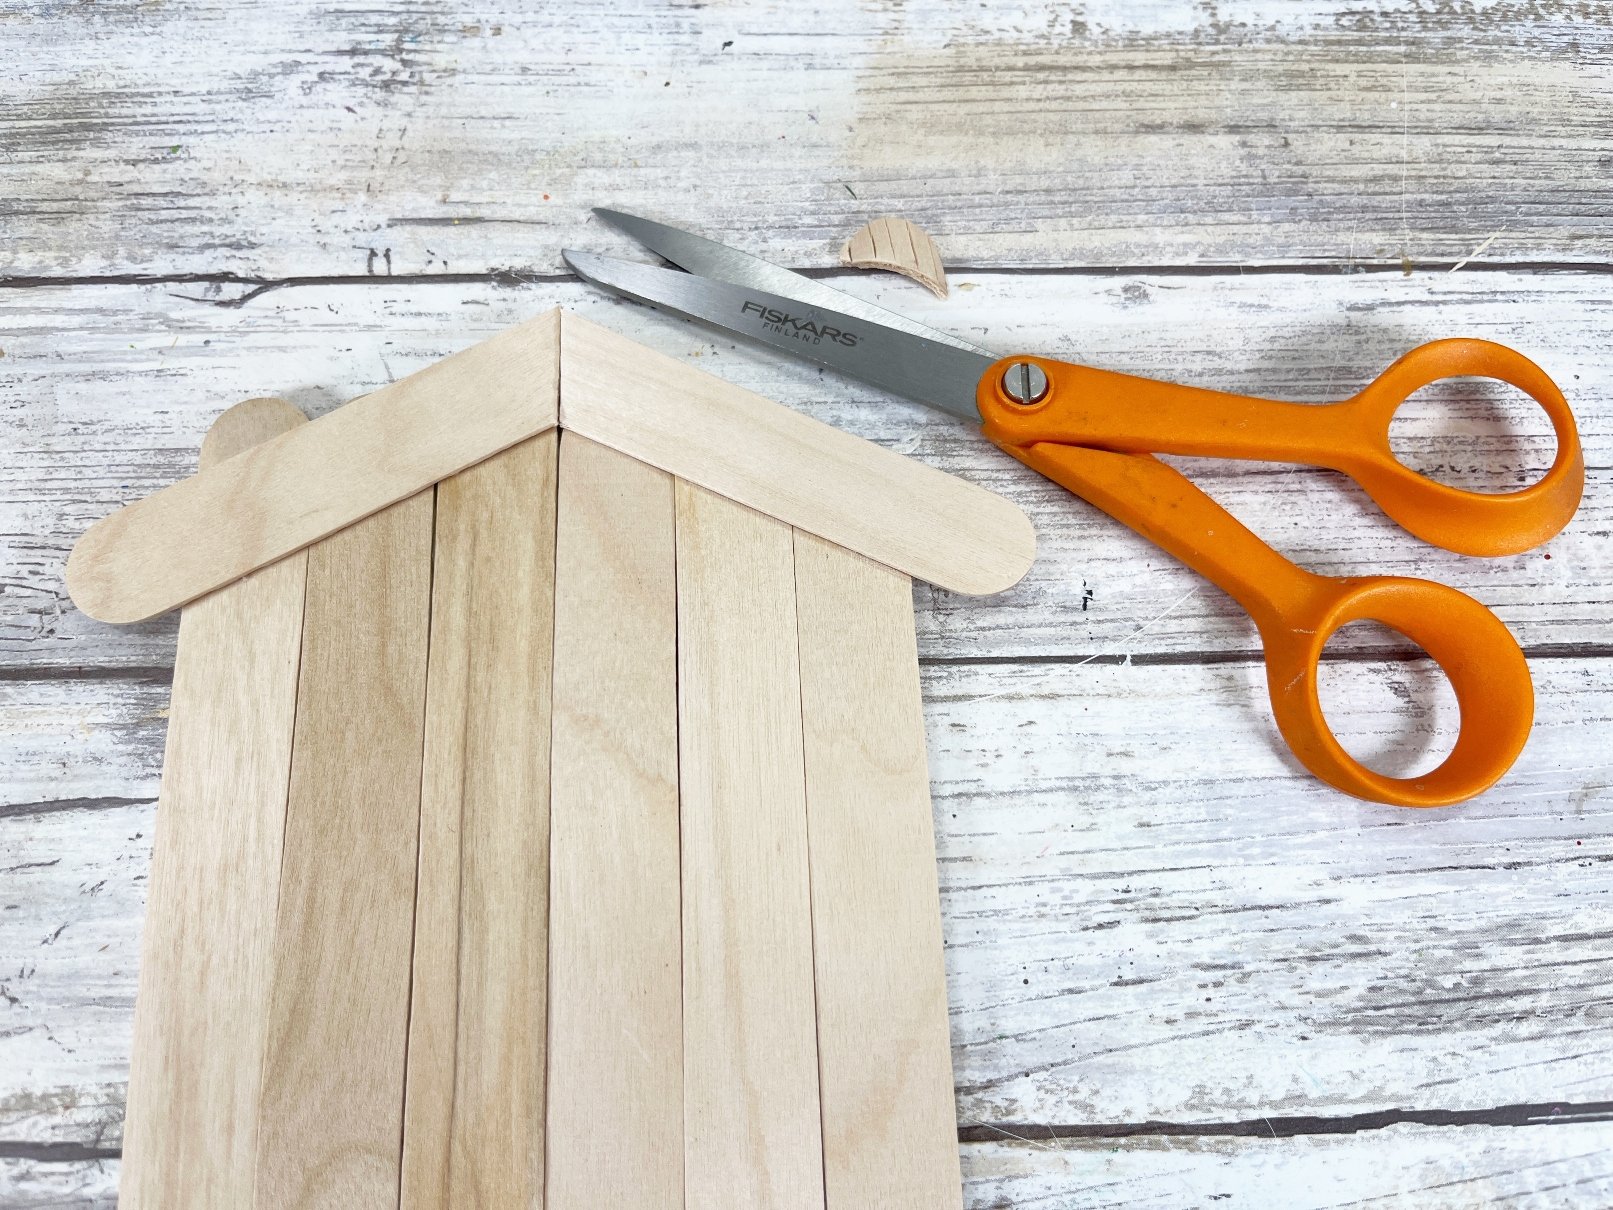
Lay a jumbo craft stick diagonally at the top of the barn, make a pencil mark at the center, and cut at an angle. Attach the left-hand roof piece to the barn. Repeat with the right-hand side of the barn roof.
STEP THREE
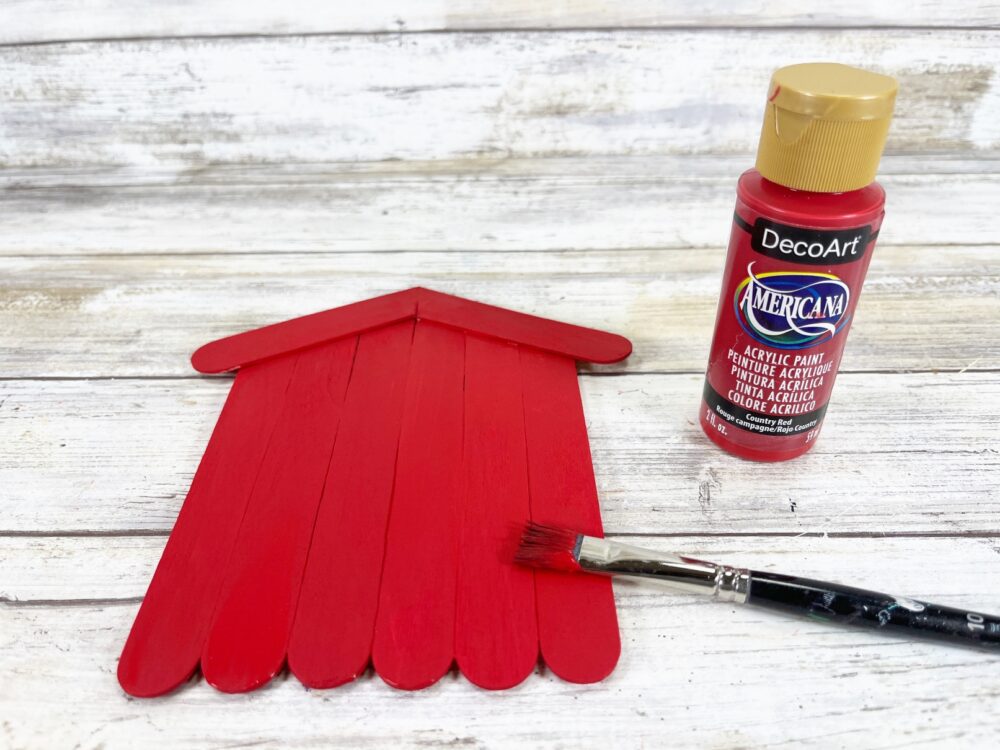
Paint the entire barn, and roof with red acrylic craft paint. Let dry, and apply a second coat, if necessary.
STEP FOUR
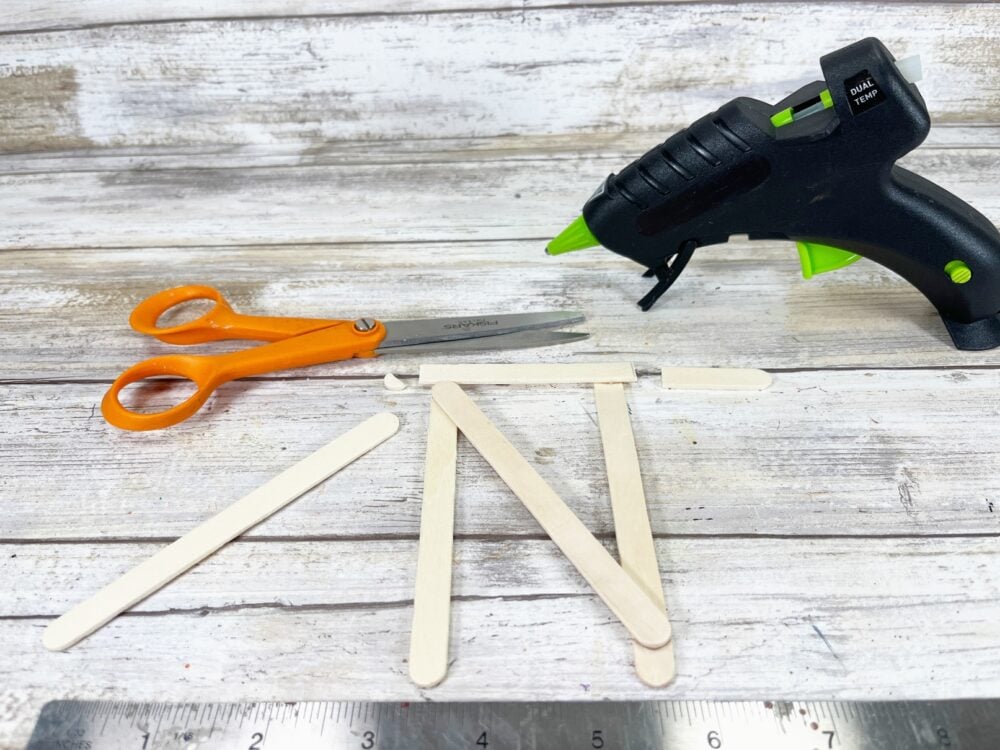
Print the barn template. Lay out and cut regular craft sticks to create a rectangle, using the barn door pattern as your guide. Attach two craft sticks, in an “X” pattern using a glue gun and glue sticks.
STEP FIVE

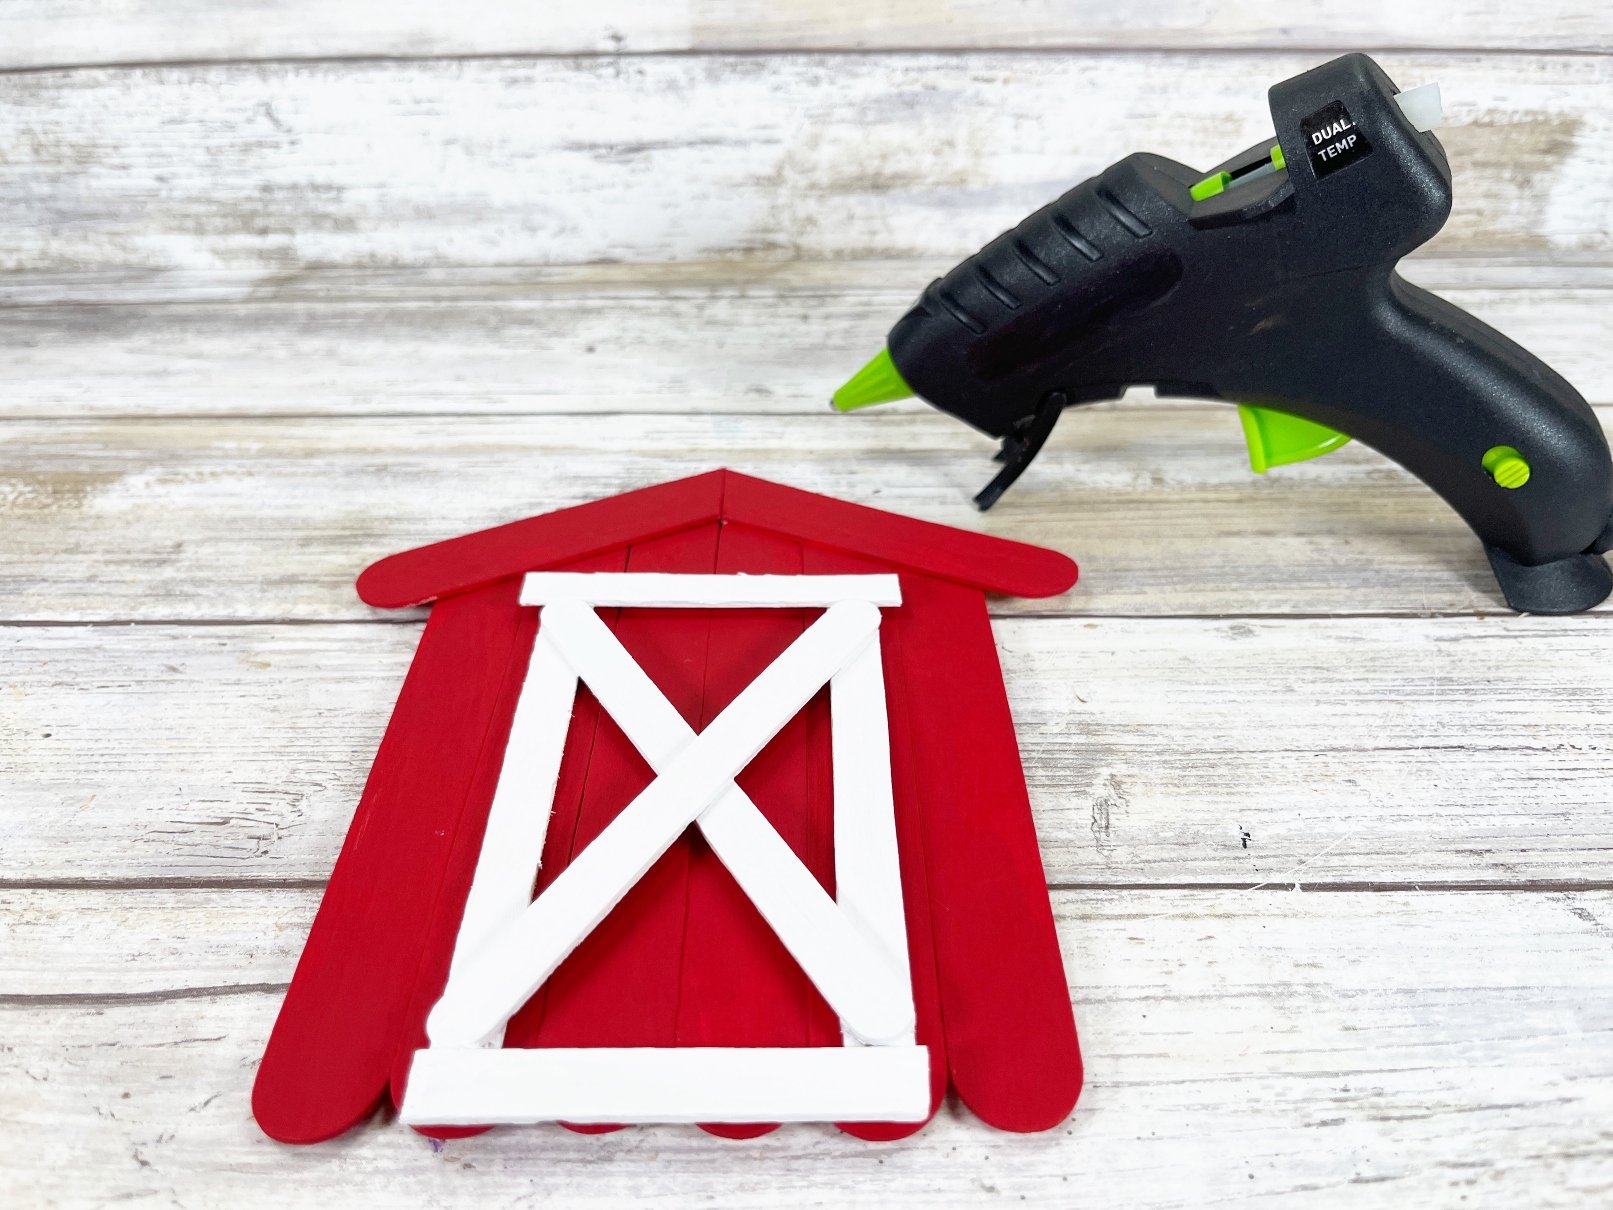
Paint the craft stick barn door with white acrylic craft paint. Let dry, and apply a second coat, if necessary. Attach it to the barn with the glue gun.
STEP SIX
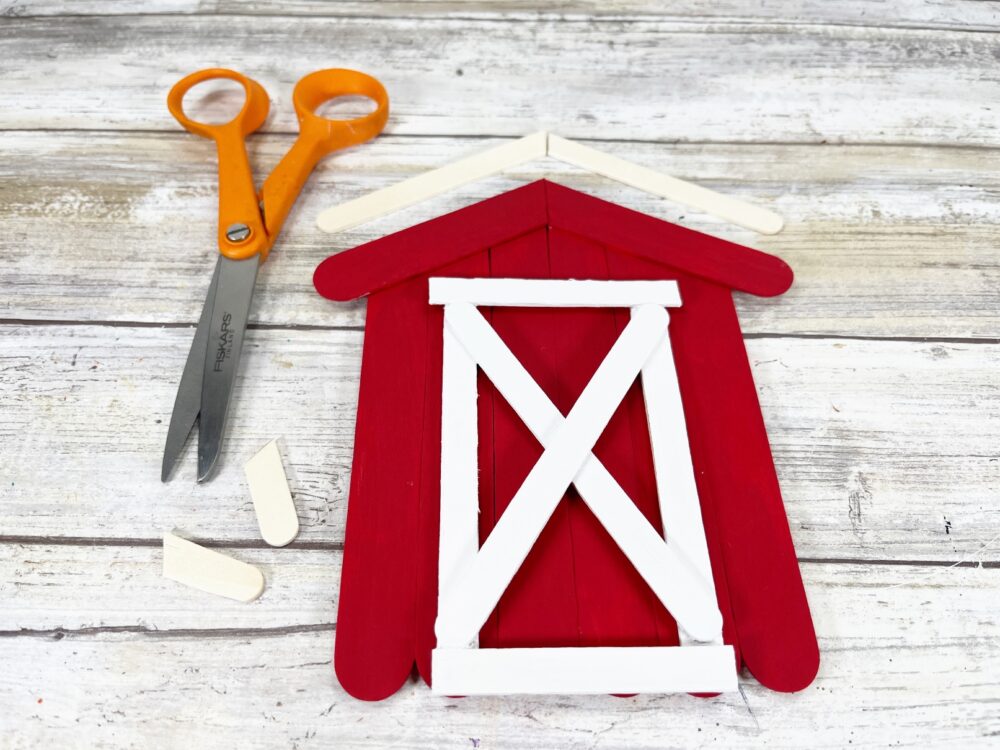
Using scissors, cut two regular craft sticks at angles, slightly longer than the jumbo craft stick roof. They will become the barn shingles.
STEP SEVEN
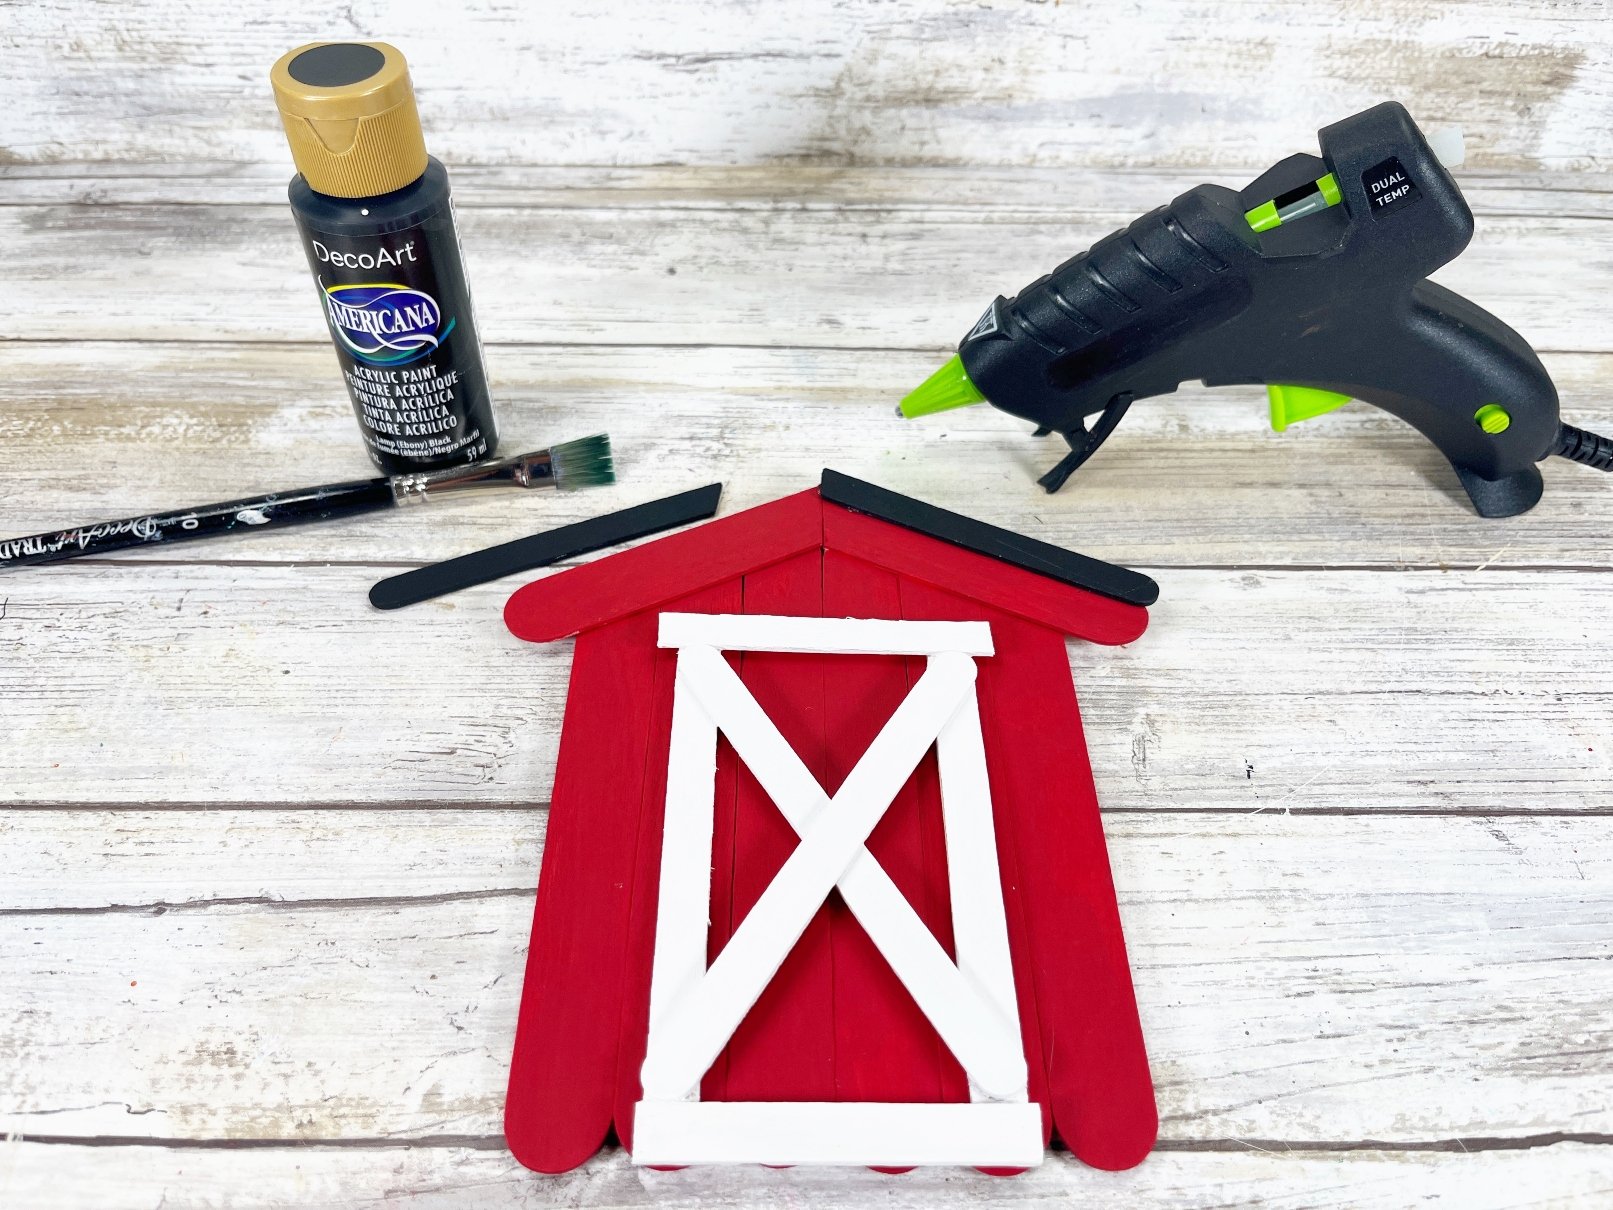
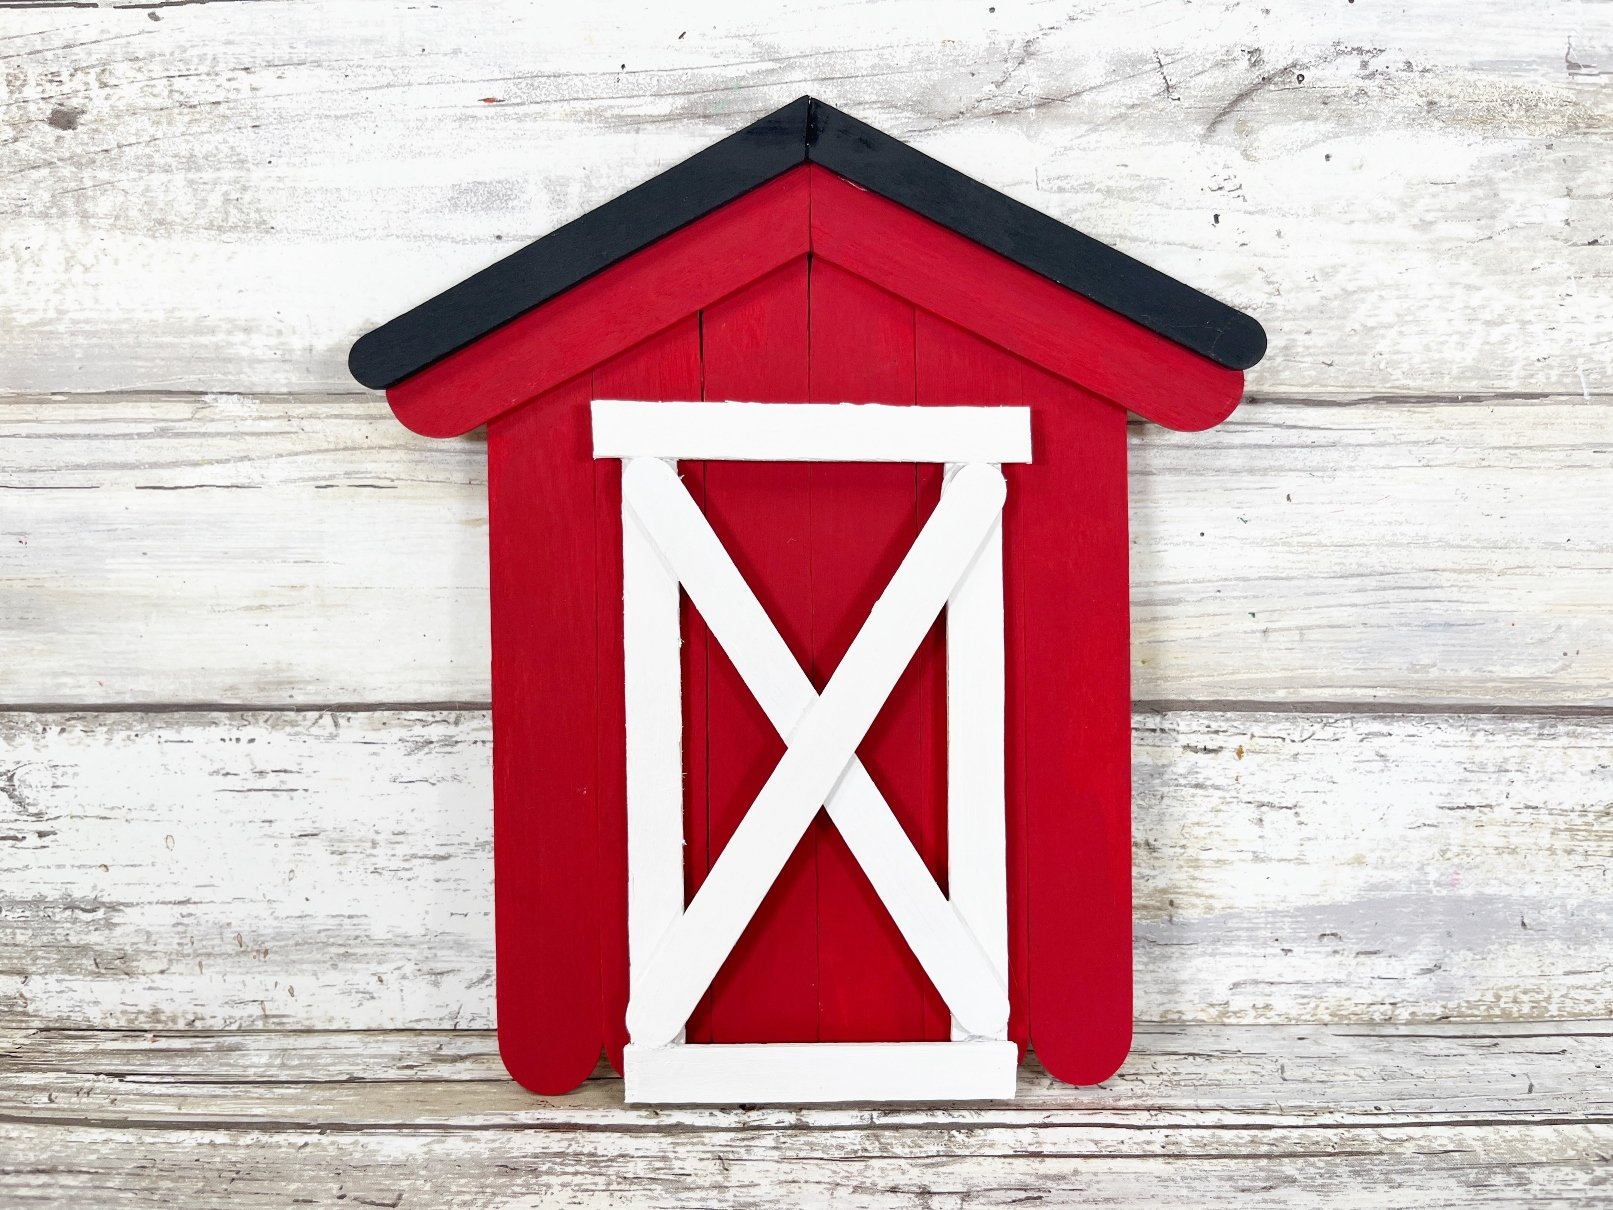
Basecoat the craft stick shingles with black acrylic craft paint. Let dry, and apply a second coat, if necessary. Attach to the left and right-hand side of the roof with a glue gun and glue sticks.
Tips
- Paint Before Assembly: For a neater appearance, paint your craft sticks before gluing them together. This strategy prevents messes and ensures a professional finish.
- Replace glue sticks: You can use liquid craft glue for this project, but you will have to wait for it to dry.
- Personalize: Make your barn craft truly yours by adding customizable elements such as mini animals, a craft stick silo, or even a tiny tractor for a lively farm scene.
Craft Variations
- Seasonal Barns: Customize your barn with seasonal decorations, like a snowy roof for winter or autumn leaves for fall. For Halloween, paint your barn black and add creepy accessories for a haunted effect.
- Educational Barns: Create an educational barn project by labeling parts of the barn and including farm animals. This can be a fun way for children to learn about farm life, animal names, and where food comes from.
How to use the craft
A miniature barn makes for an excellent gift or a charming addition to your home décor. It can also serve as a playful educational tool for children, introducing them to farm life and inspiring creative play.
Frequently Asked Questions
Can I use real wood instead of craft sticks?
Yes, but you’ll need more advanced tools and skills to cut and shape the wood.
Is this project suitable for children?
With adult supervision, especially for the use of the glue gun and scissors, this can be a fun and rewarding project for children.
More craft sticks ideas you’ll enjoy
- Butterfly craft with craft sticks
- Craft sticks bee
- DIY Spring wreath with craft sticks
- Mini shelves from craft sticks
- Craft sticks strawberries
Got inspired by this barn craft? Sign up for my newsletter for more fun projects, and don’t forget to share your thoughts on this craft in the comments below. Happy crafting!
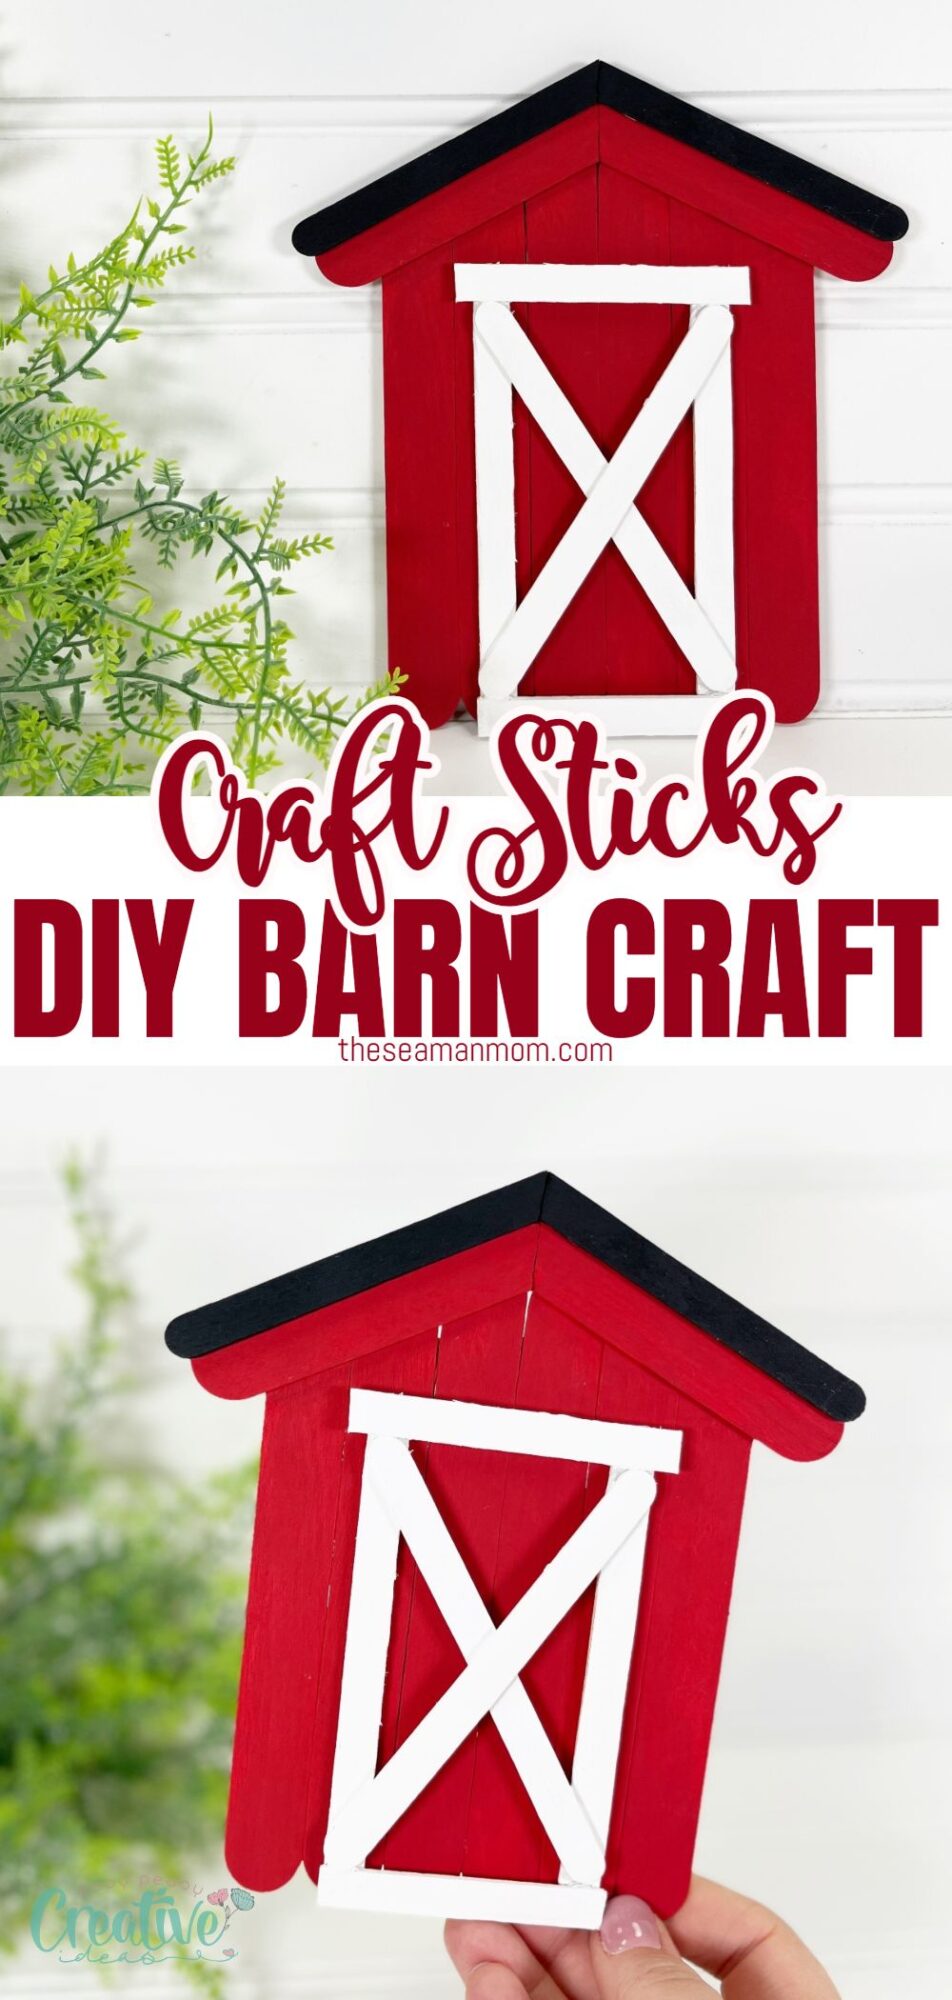

Barn craft with craft sticks
Materials
- Craft Sticks Jumbo
- Craft Sticks Regular
- Acrylic Craft Paint – Red White, Black
Tools
- glue gun
- scissors
- Pencil
Instructions
- Gather all supplies. To create the barn, line up six jumbo craft sticks on your work surface. Using scissors, trim additional jumbo craft sticks to the width of the barn and attach with a glue gun and glue sticks.

- Lay a jumbo craft stick diagonally at the top of the barn, make a pencil mark at the center, and cut at an angle. Attach the left-hand roof piece to the barn.
- Repeat with the right-hand side of the barn roof.
- Paint the entire barn, and roof with red acrylic craft paint. Let dry, and apply a second coat, if necessary.
- Print the barn pattern. Lay out and cut regular craft sticks to create a rectangle, using the barn door pattern as your guide. Attach two craft sticks, in an “X” pattern using a glue gun and glue sticks.
- Paint the craft stick barn door with white acrylic craft paint. Let dry, and apply a second coat, if necessary.
- Glue the door to the barn
- Using scissors, cut two regular craft sticks at angles, slightly longer than the jumbo craft stick roof. They will become the barn shingles. Basecoat the craft stick shingles with black acrylic craft paint. Let dry, and apply a second coat, if necessary.
- Attach to the left and right-hand side of the roof with a glue gun and glue sticks.


Video
Article may contain Amazon & affiliate links. As an Amazon Associate I earn from qualifying purchases at no additional cost to you.

Where is the pattern for a silo?
It’s listed in the materials section, Sheri. It’s not a pattern per se, it’s a diagram that shows you how to place the sticks.