

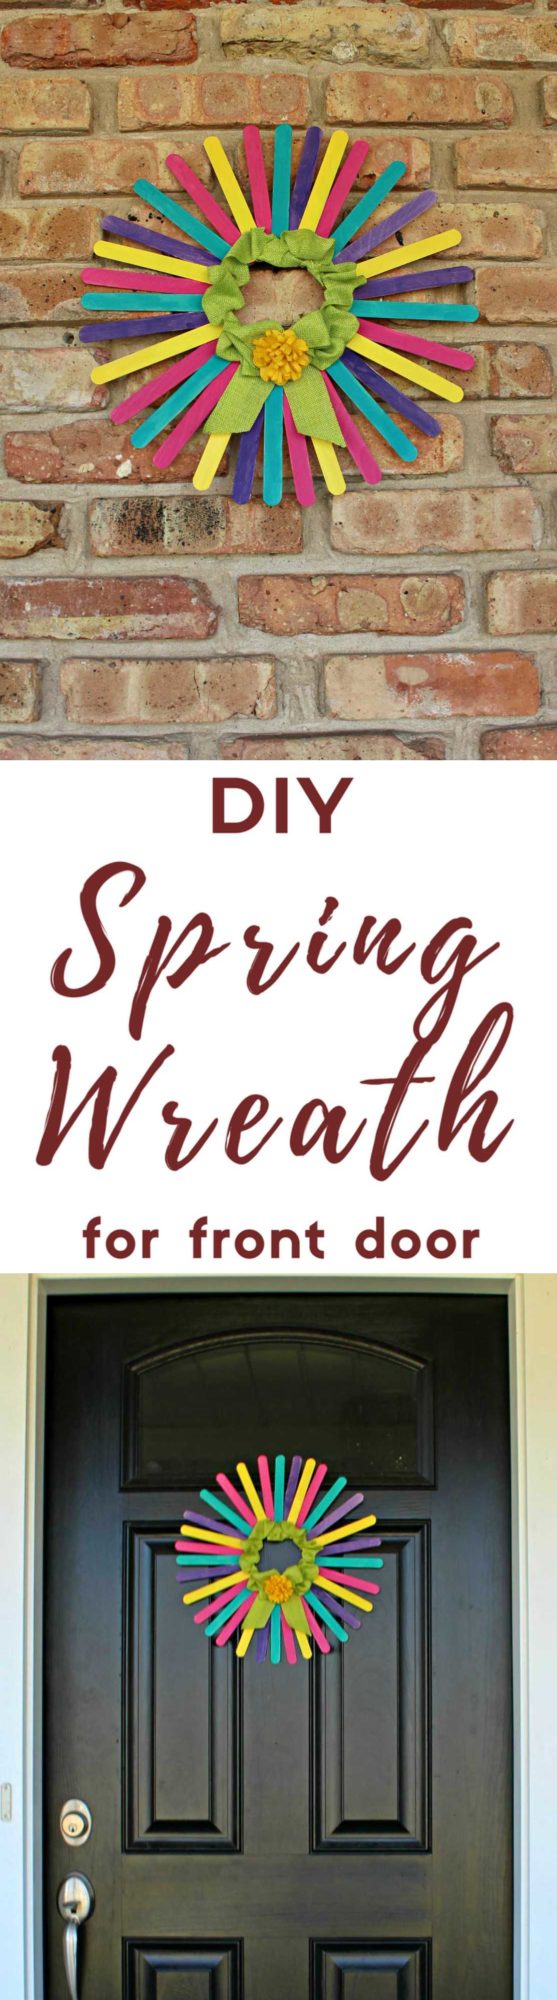
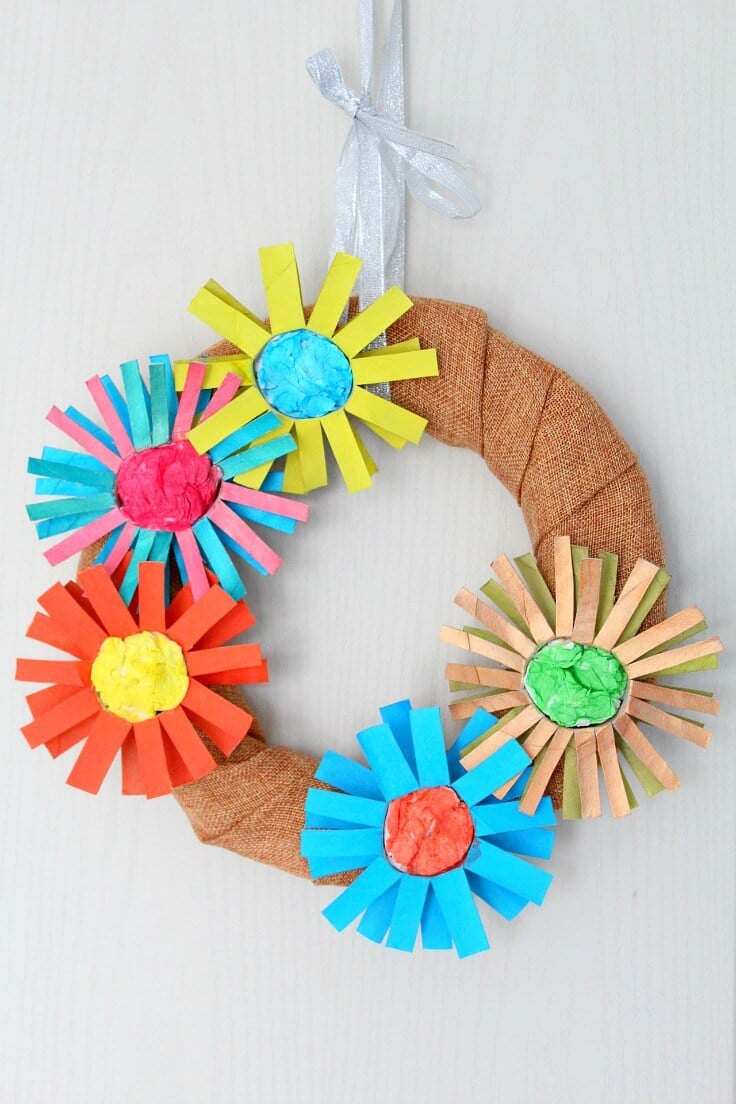
Colorful DIY Spring Wreath With Craft Sticks
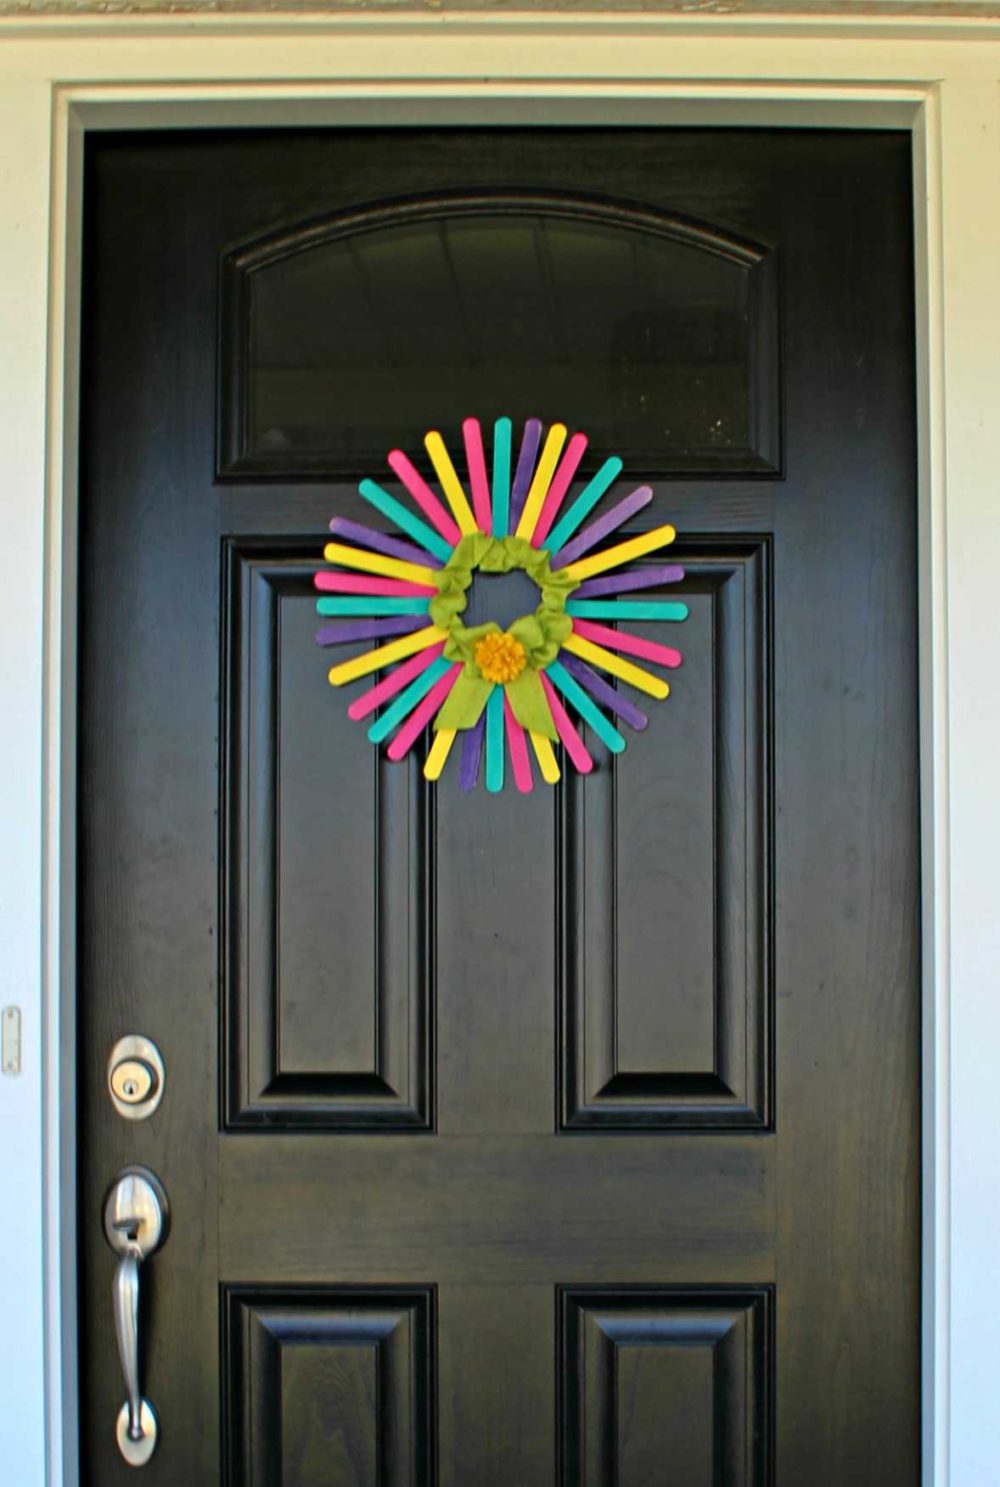
Are you on the lookout for a fun wreath idea to decorate your front door this spring? We’ve got an adorable DIY spring wreath that is not only happy and cheerful but easy peasy too and a great craft to make with the kiddos!
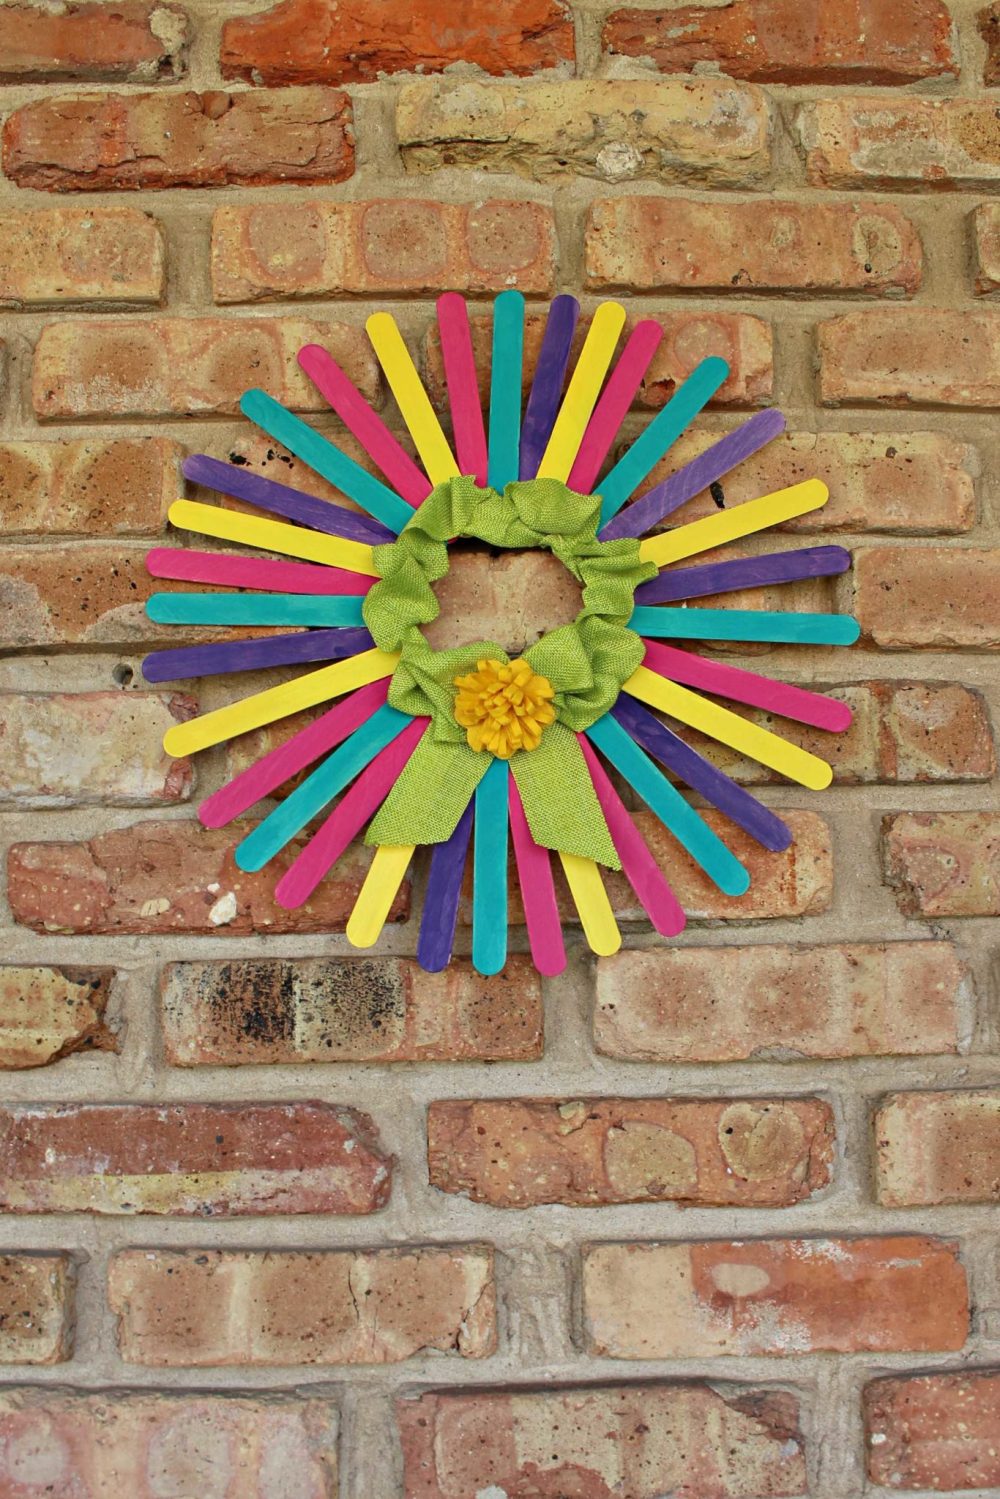
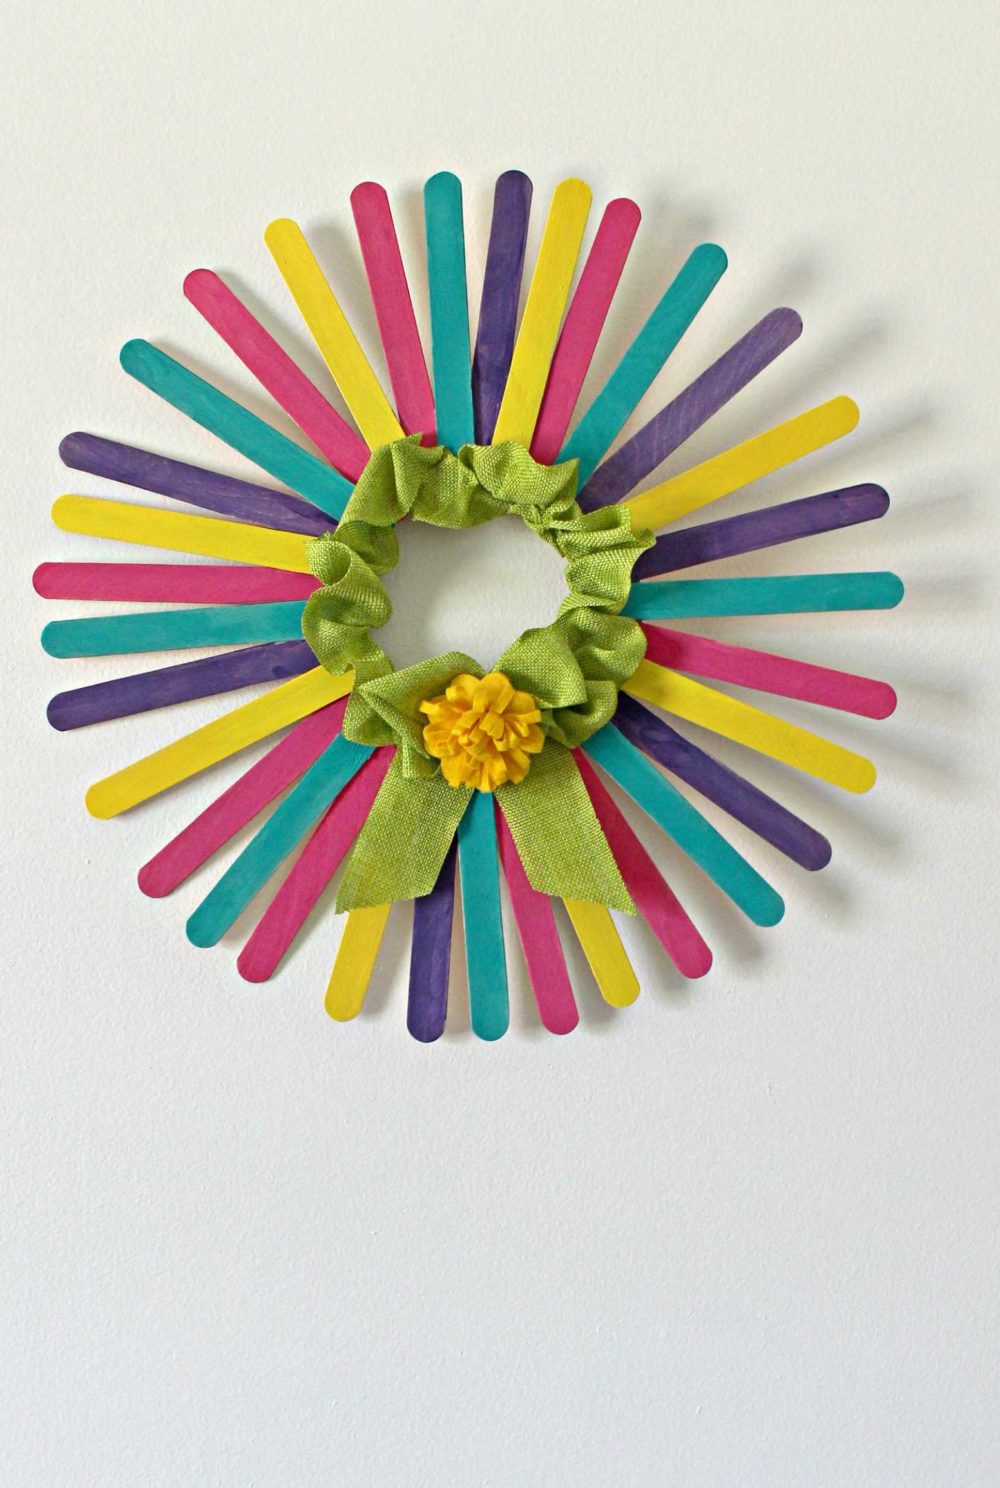
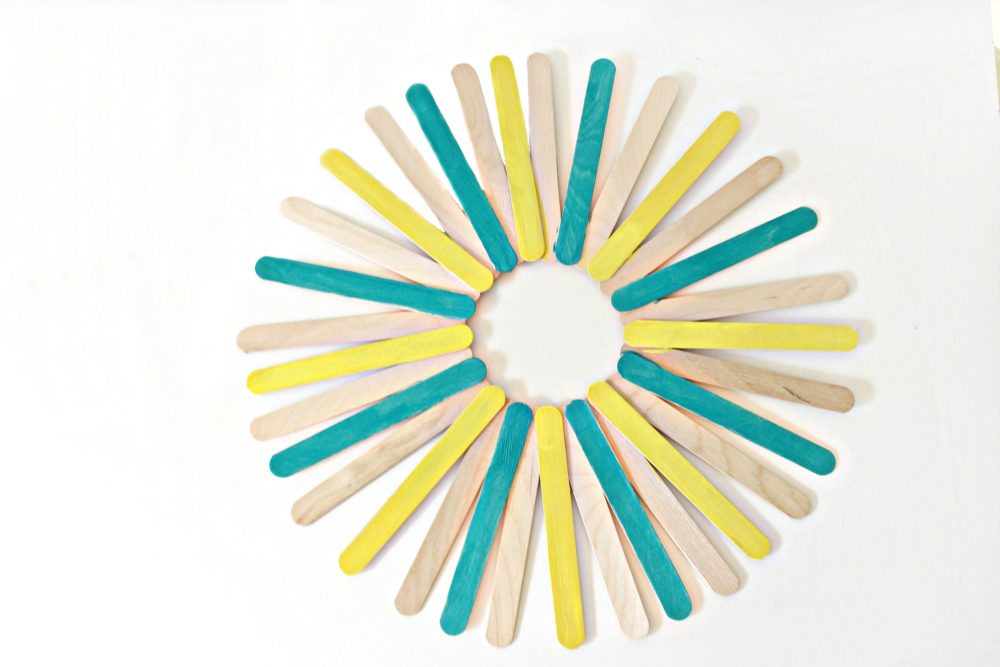
Got a bunch of craft sticks just laying around? Put them to a good use when you make this colorful DIY spring wreath! This lovely stick wreath is a great way to brighten up your front door and adds fun and color to your decor.
This spring wreath DIY is super easy to make, kids can help you put your DIY spring wreath together and it’s ready in no time! You can play with the colors and make this stick wreath in all kinds of colors or make it more traditional, to match your front door decor. I personally think nothing speaks spring better than a brightly colored wreath that will make your house the coolest on the block!
This adorable DIY spring wreath project requires simple, affordable supplies you most likely have on hand, or at least most of them. And it’s a great way to get your front door all festive without breaking the bank.
How to make a DIY Spring Wreath for front door
Materials:
- 32 wide craft sticks
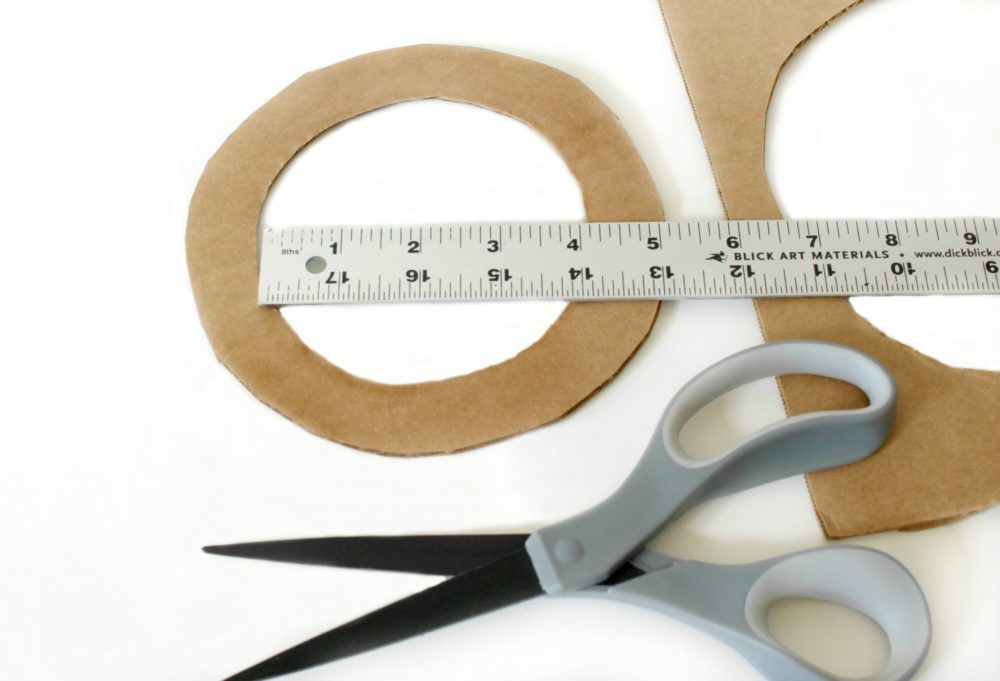
- 7” x 7” piece of heavyweight cardboard
- Ruler
- Pencil
- Scissors
- Glue gun
- Small paint brushes
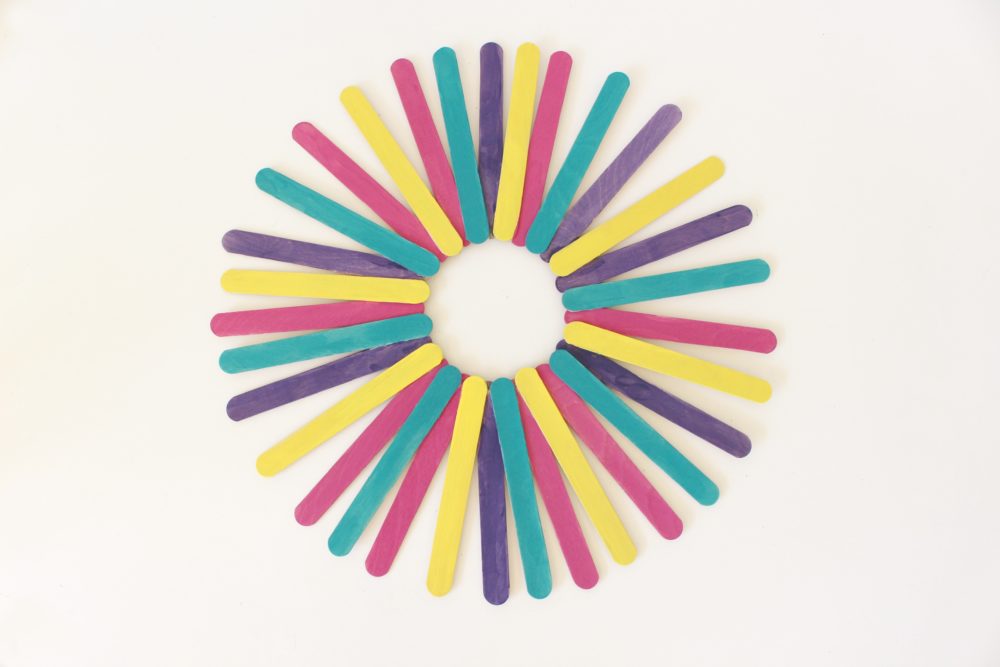
- Craft paint in the bright colors: pink, yellow, turquoise and purple.
- Roll of bright green ribbon about 2” wide
- Flower embellishment a little larger than 2”
Directions:
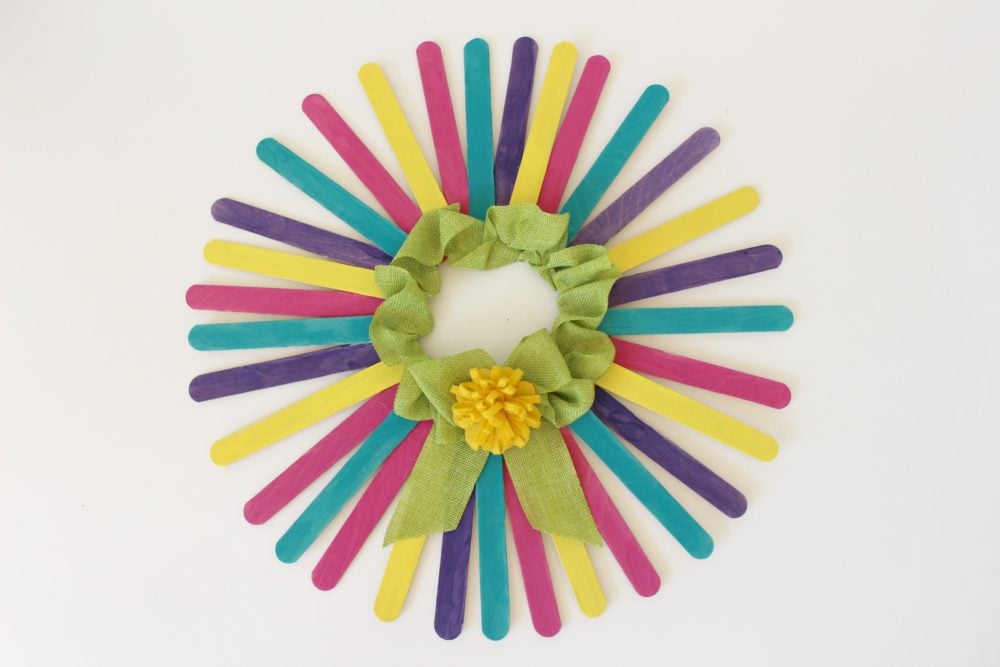
- Cut the cardboard into a ring that is 4” across on the inside, 1” wide, and 6” to each of the outside edges.
- Using the glue gun, begin to attach the craft sticks to the cardboard circle. You want the finished wreath to be uniform and even, so place two sticks opposite each other as you go.
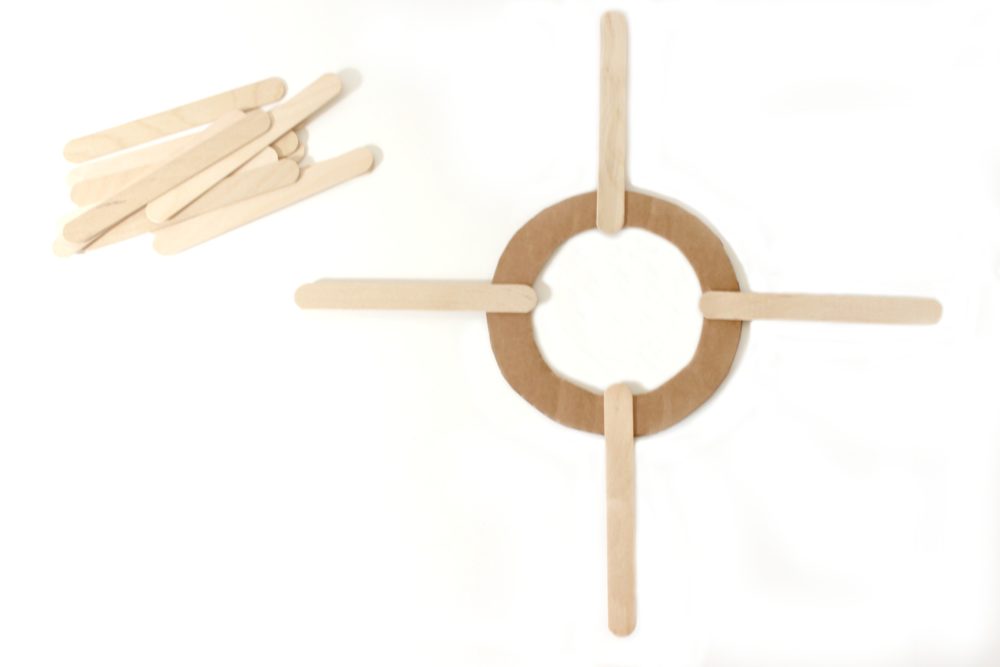
- Keep adding sticks until they go evenly all the way around the circle.
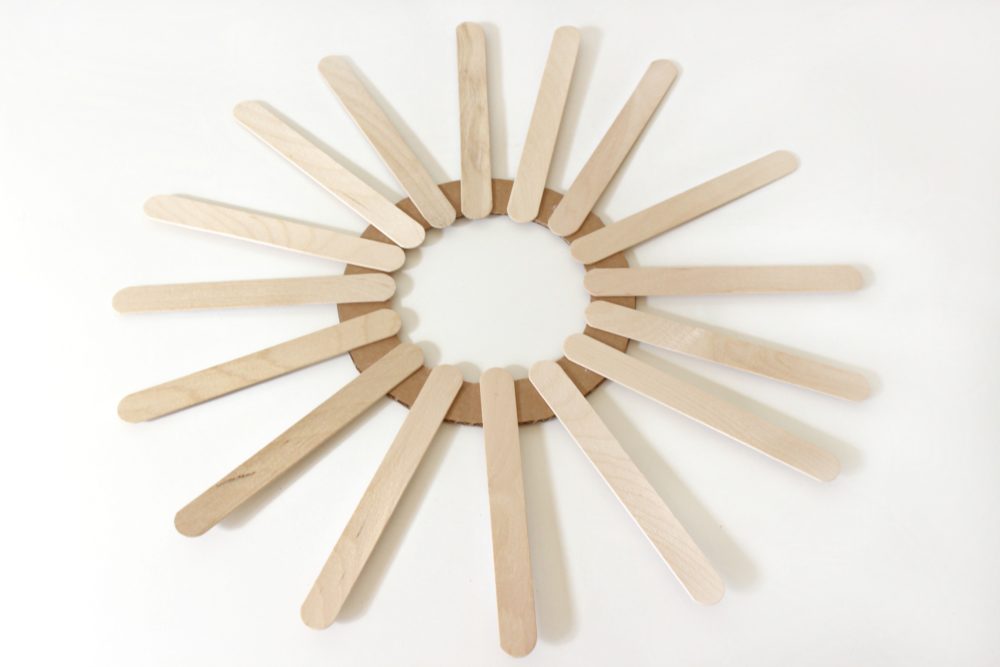
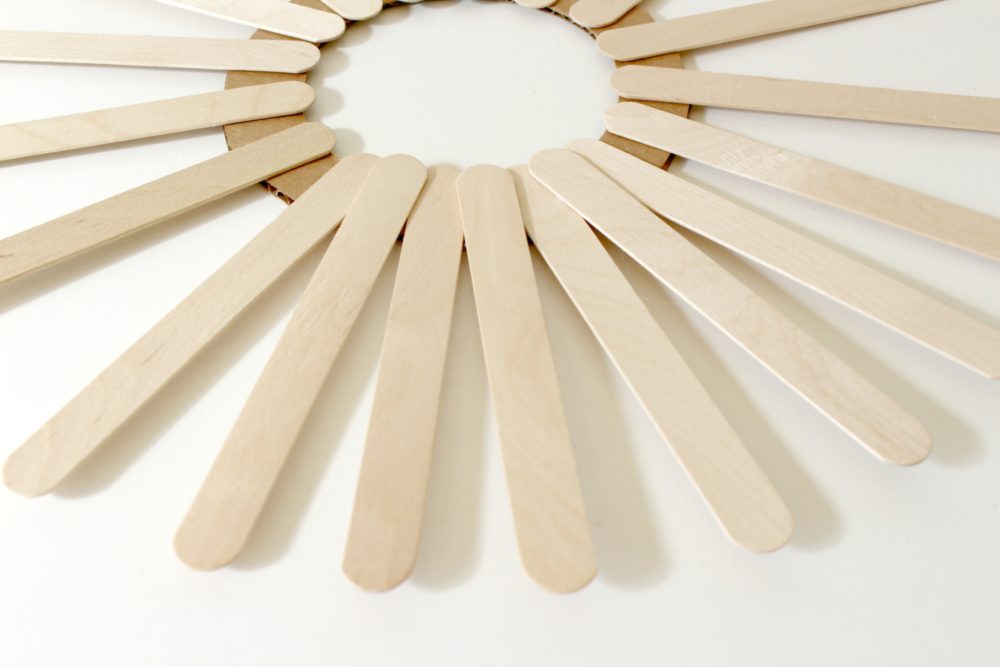
- Take more craft sticks and adhere them to the top of the craft sticks where they meet (as shown) and continue until all the spaces are covered.
- Once all the sticks are in place, paint every fourth stick turquoise.
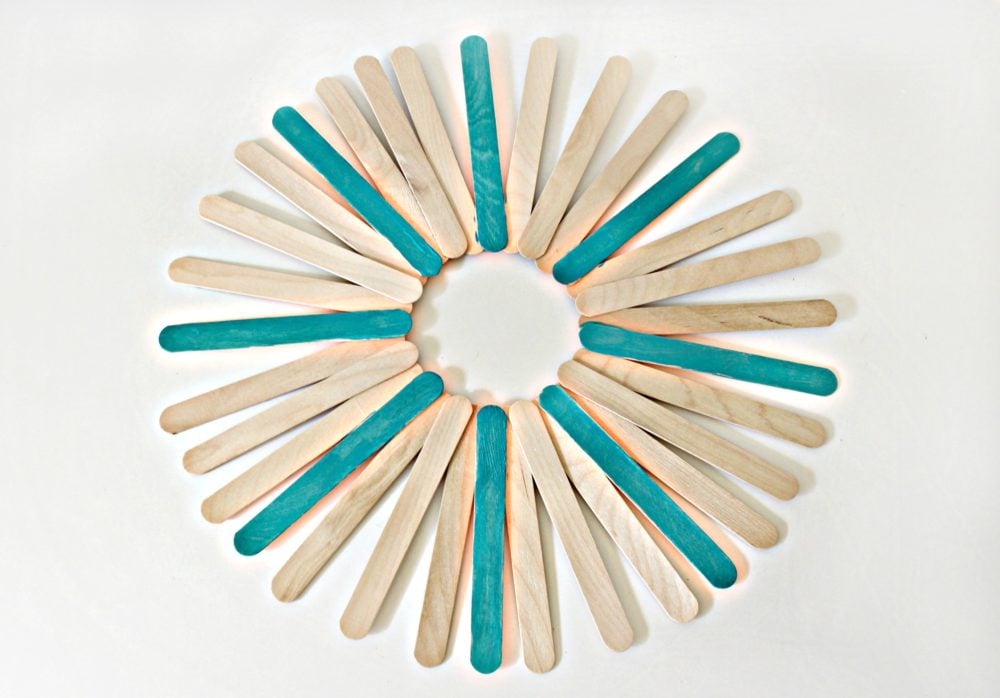
- Paint every middle stick yellow.
- Paint the remaining sticks pink and purple until all the sticks are painted.
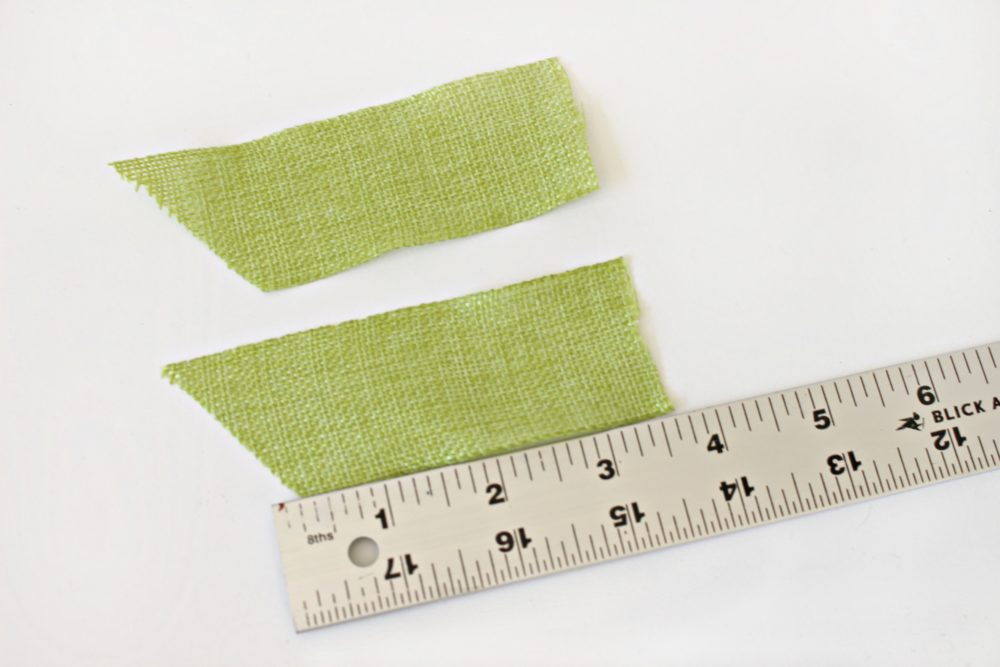
- Cut two pieces of green ribbon that are approximately 4 ½” long. Then, make diagonal cuts on one end of each piece.Glue these to the bottom of the inner circle of the wreath.
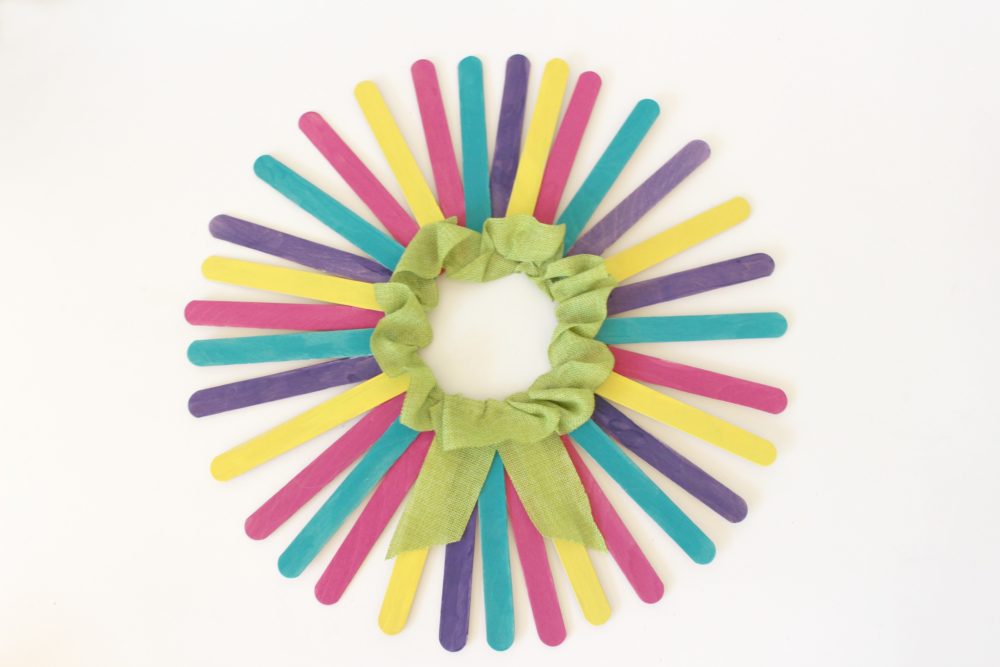
- Use the glue gun to secure the green ribbon to the inside of the wreath bunching it up as you go (as shown).
- Use a length of string approximately 10” – 12” long and create a bow shape. Use the glue gun to secure the pieces in the middle and glue it above the two straight pieces that are hanging down.
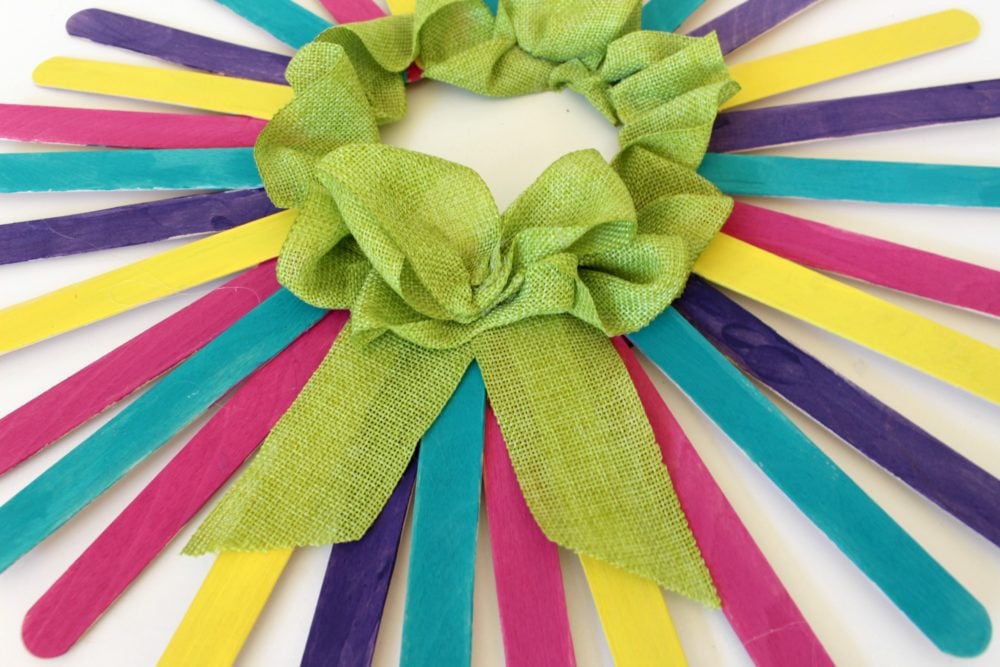
- Add the flower embellishment to the center of the bow using the glue gun.
- Hang your wreath!


Most popular craft

Article may contain Amazon & affiliate links. As an Amazon Associate I earn from qualifying purchases at no additional cost to you.
ABOUT PETRO
Hi, I’m Petro, author and founder of Easy Peasy Creative Ideas. Sewist, crafter, avid DIY-er, foodie, photographer, homemaker and mommy to one. I’m an expert at coming up with quick, clever sewing tips, recycling crafts and simple, easy recipes! You can find my ideas featured in reputable publications such as Country Living, Good House Keeping, Yahoo News, WikiHow, Shutterfly, Parade, Brit & Co and more. Thanks for stopping by and hope you’ll stay for a while, get to know me better and come back another time. Stick around for real fun projects! Read more…