

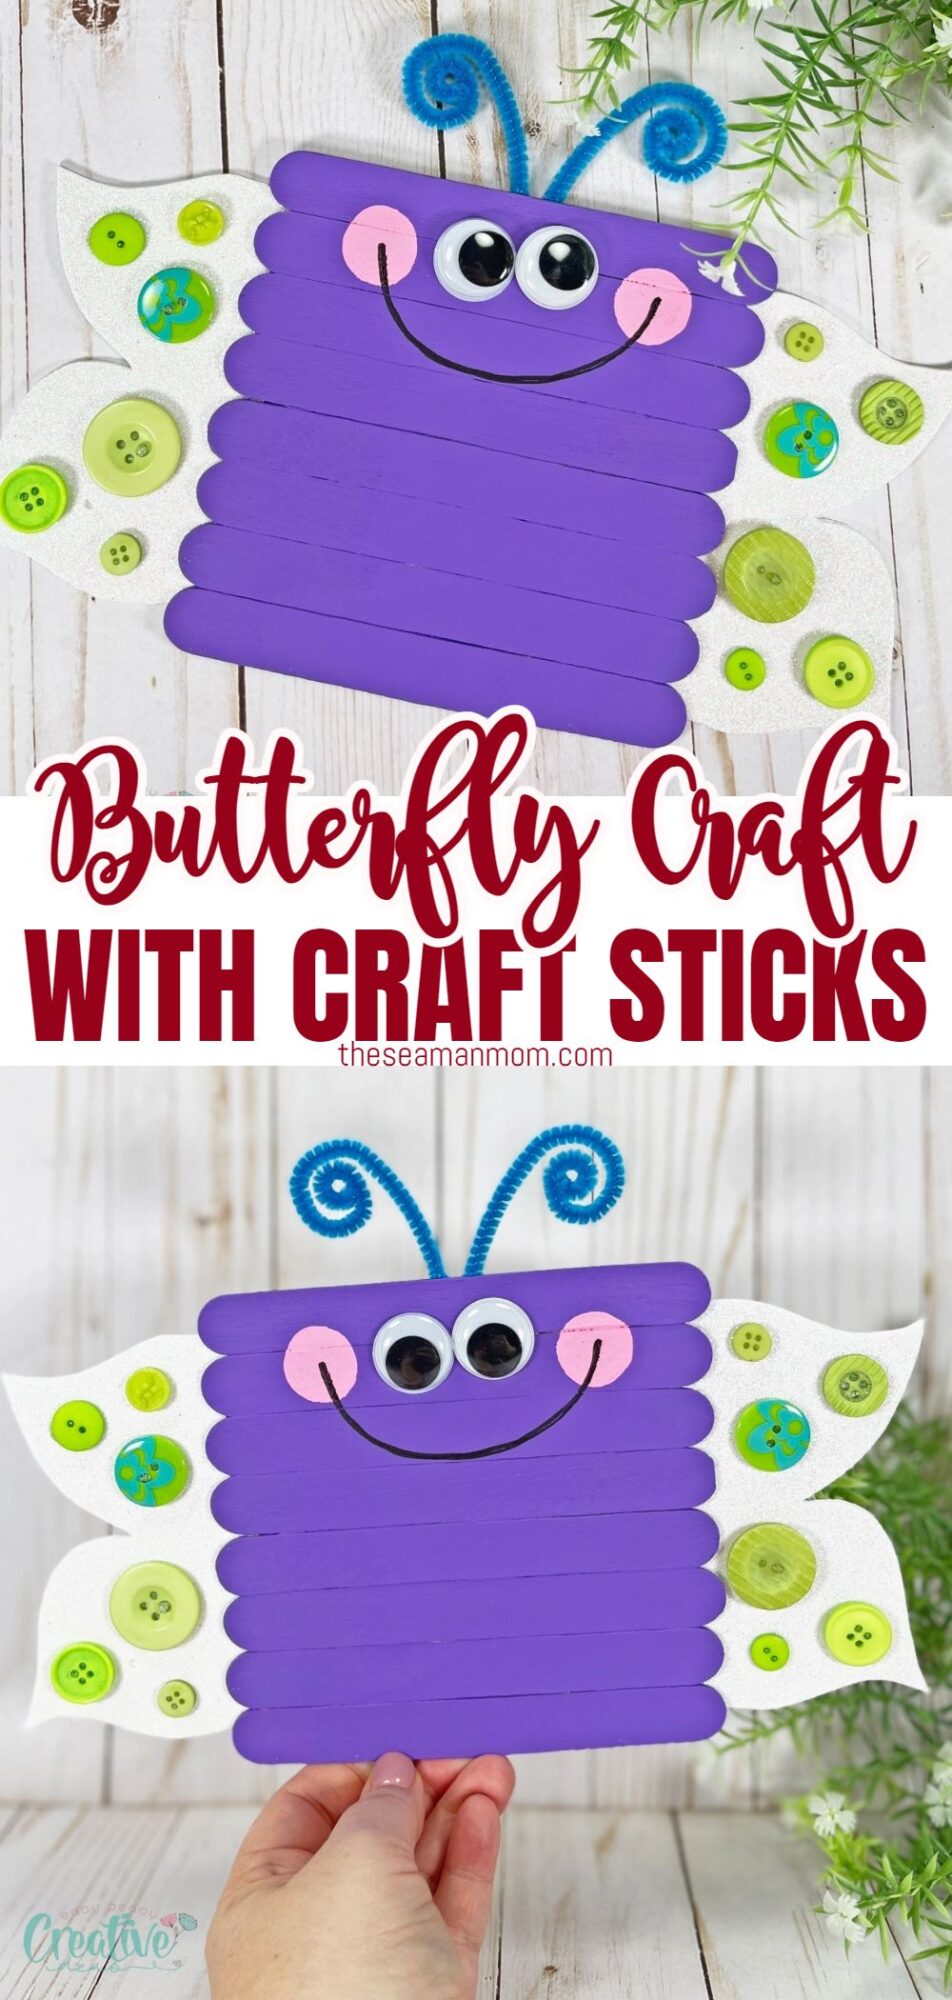
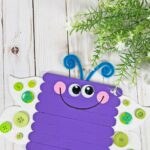
Butterfly craft with craft sticks
Let your creativity soar with this awesome butterfly craft project that will bring a burst of color and fun to your living space. Whether you’re a seasoned DIY enthusiast looking for a new challenge or someone just beginning to explore crafting, this easy and cute craft project made with jumbo craft sticks is a delightful opportunity to unleash your imagination and let it take flight!
This Spring, unleash the magic of creativity with this enchanting butterfly craft! This venture into the world of butterflies is perfect for those looking to add a splash of color and whimsy to their surroundings. Whether you’re a seasoned crafter or new to the DIY scene, this butterfly craft idea is a great way to spend quality time with loved ones, especially children. It’s also perfect for those looking for inexpensive and fun ways to decorate their living space.
As a lover of all things crafty, I find that this DIY butterfly project is not only fun but also therapeutic. The process of creating something beautiful with your own hands is truly rewarding and satisfying. Plus, this butterfly craft requires only a few key materials that can easily be found at your local dollar store.
How to make a butterfly craft
What you need
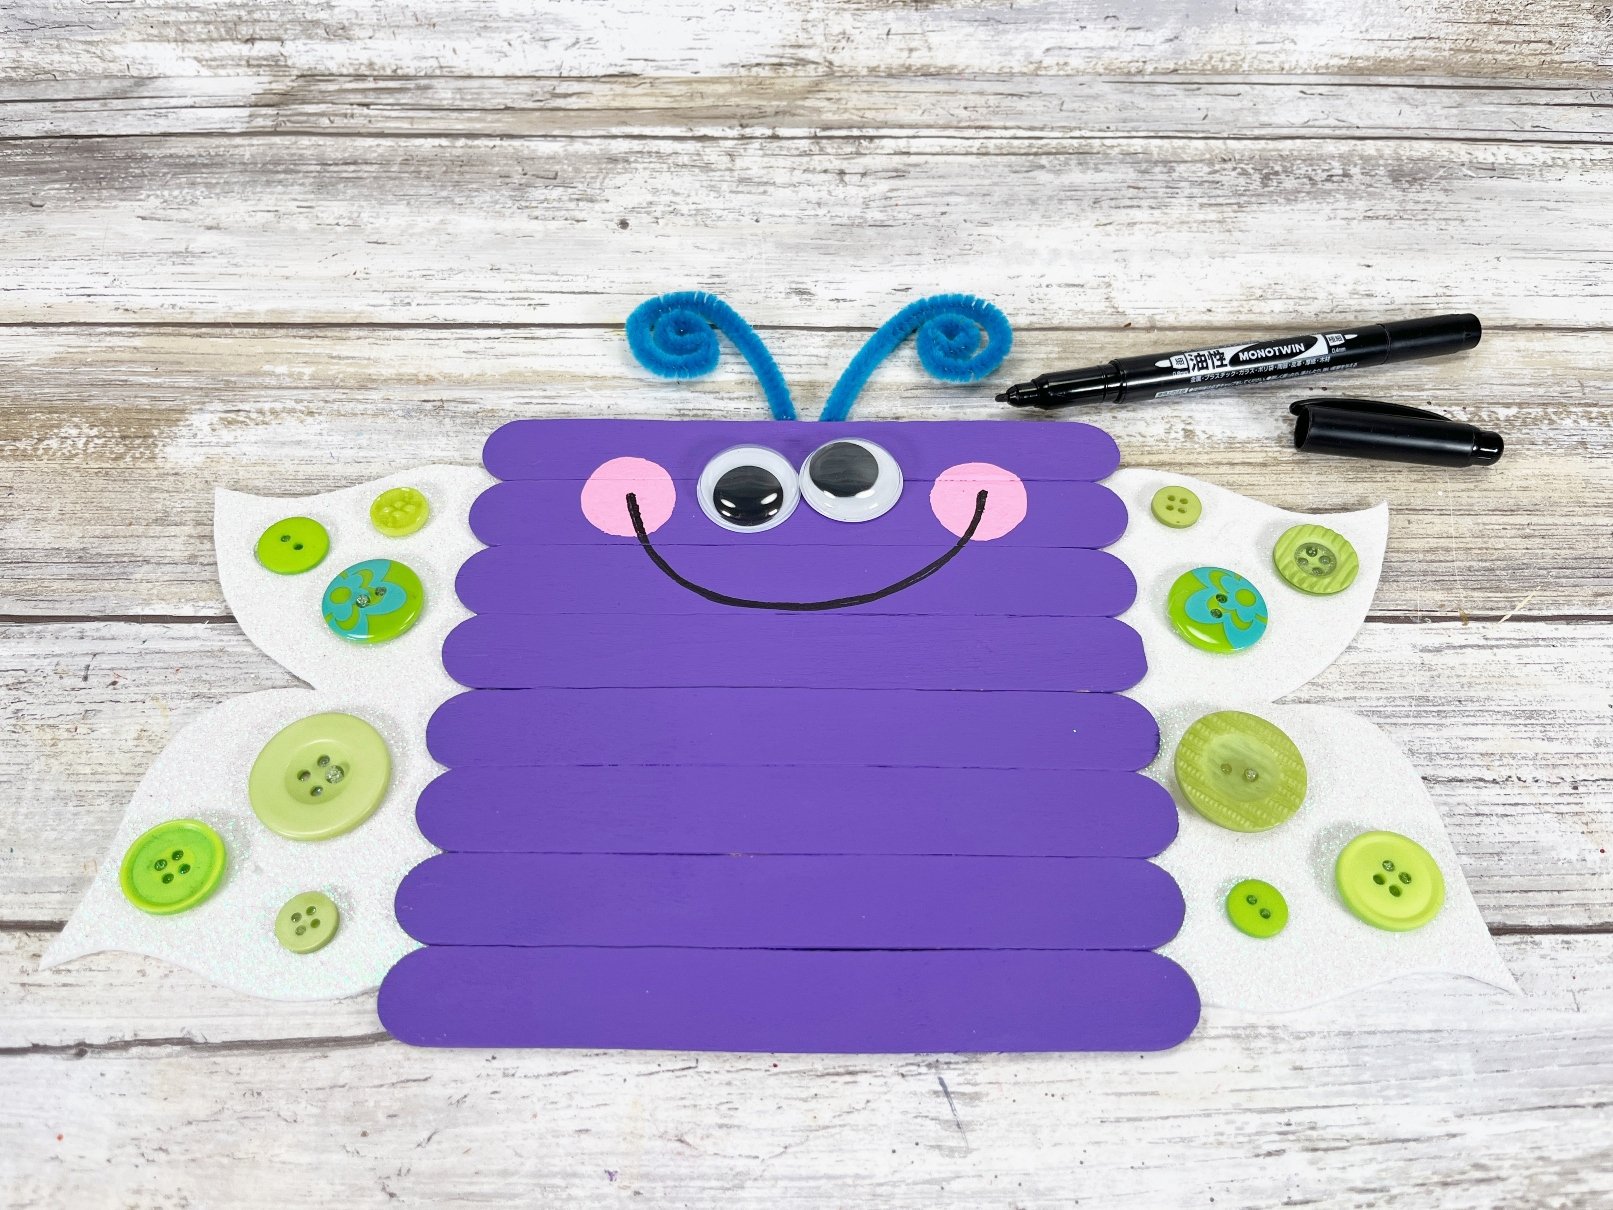
- Wooden Craft Sticks, Jumbo: The backbone of our butterfly, giving it structure and shape.
- Chenille Stems, Blue: Adds a playful touch as the butterfly’s antennae.
- Craft Paint – Purple, Pink: Brings our butterfly to life with vibrant colors.
- Craft Foam – White Glitter: Adds sparkle and magic to the wings.
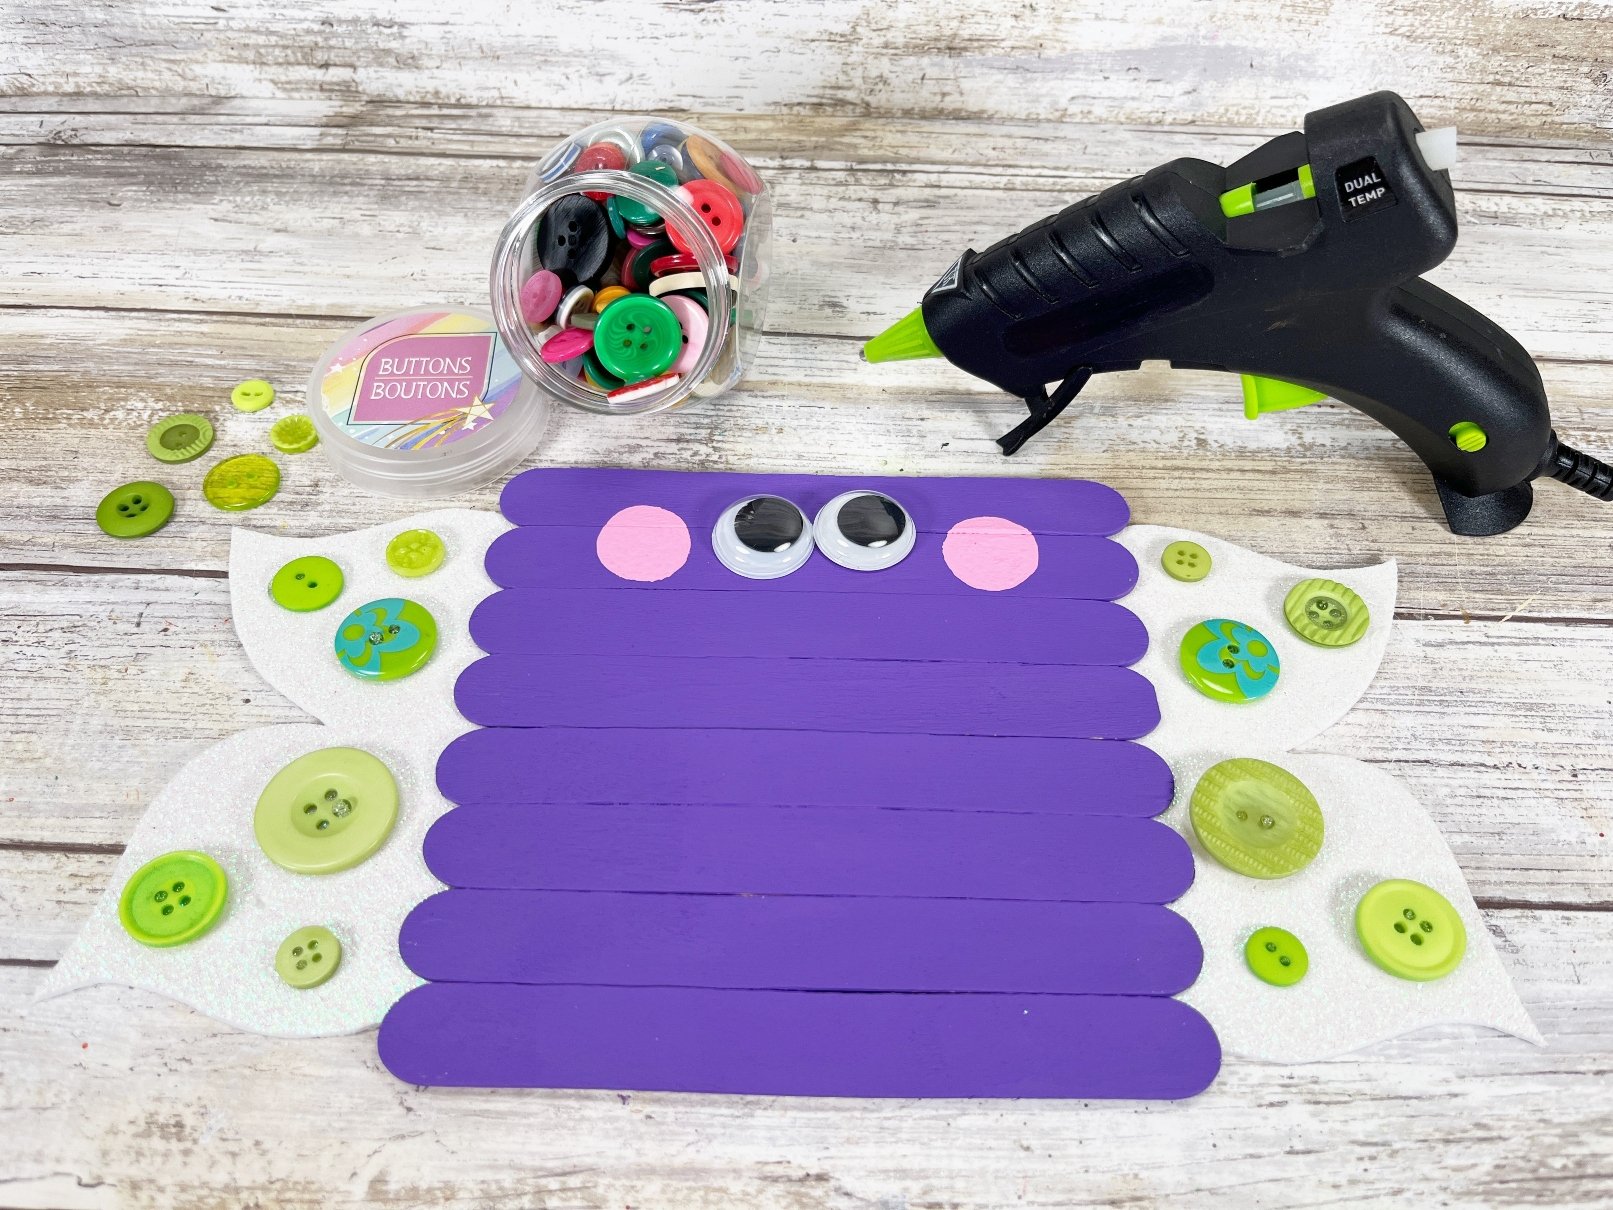
- Buttons, Green: Used for decorating the wings, providing texture and color variation.
- Wiggle eyes: Brings personality to our butterfly’s face.
- Glue Gun and Glue Sticks: For easy and quick attachment of materials.
- Sponge Dabber: Used for adding details like cheeks to the butterfly’s face.
- Paintbrush: For applying paint evenly onto the butterfly’s body.
- Scissors: Essential for cutting out patterns and shapes.
- Permanent Marker: For finishing touches on the butterfly’s face.
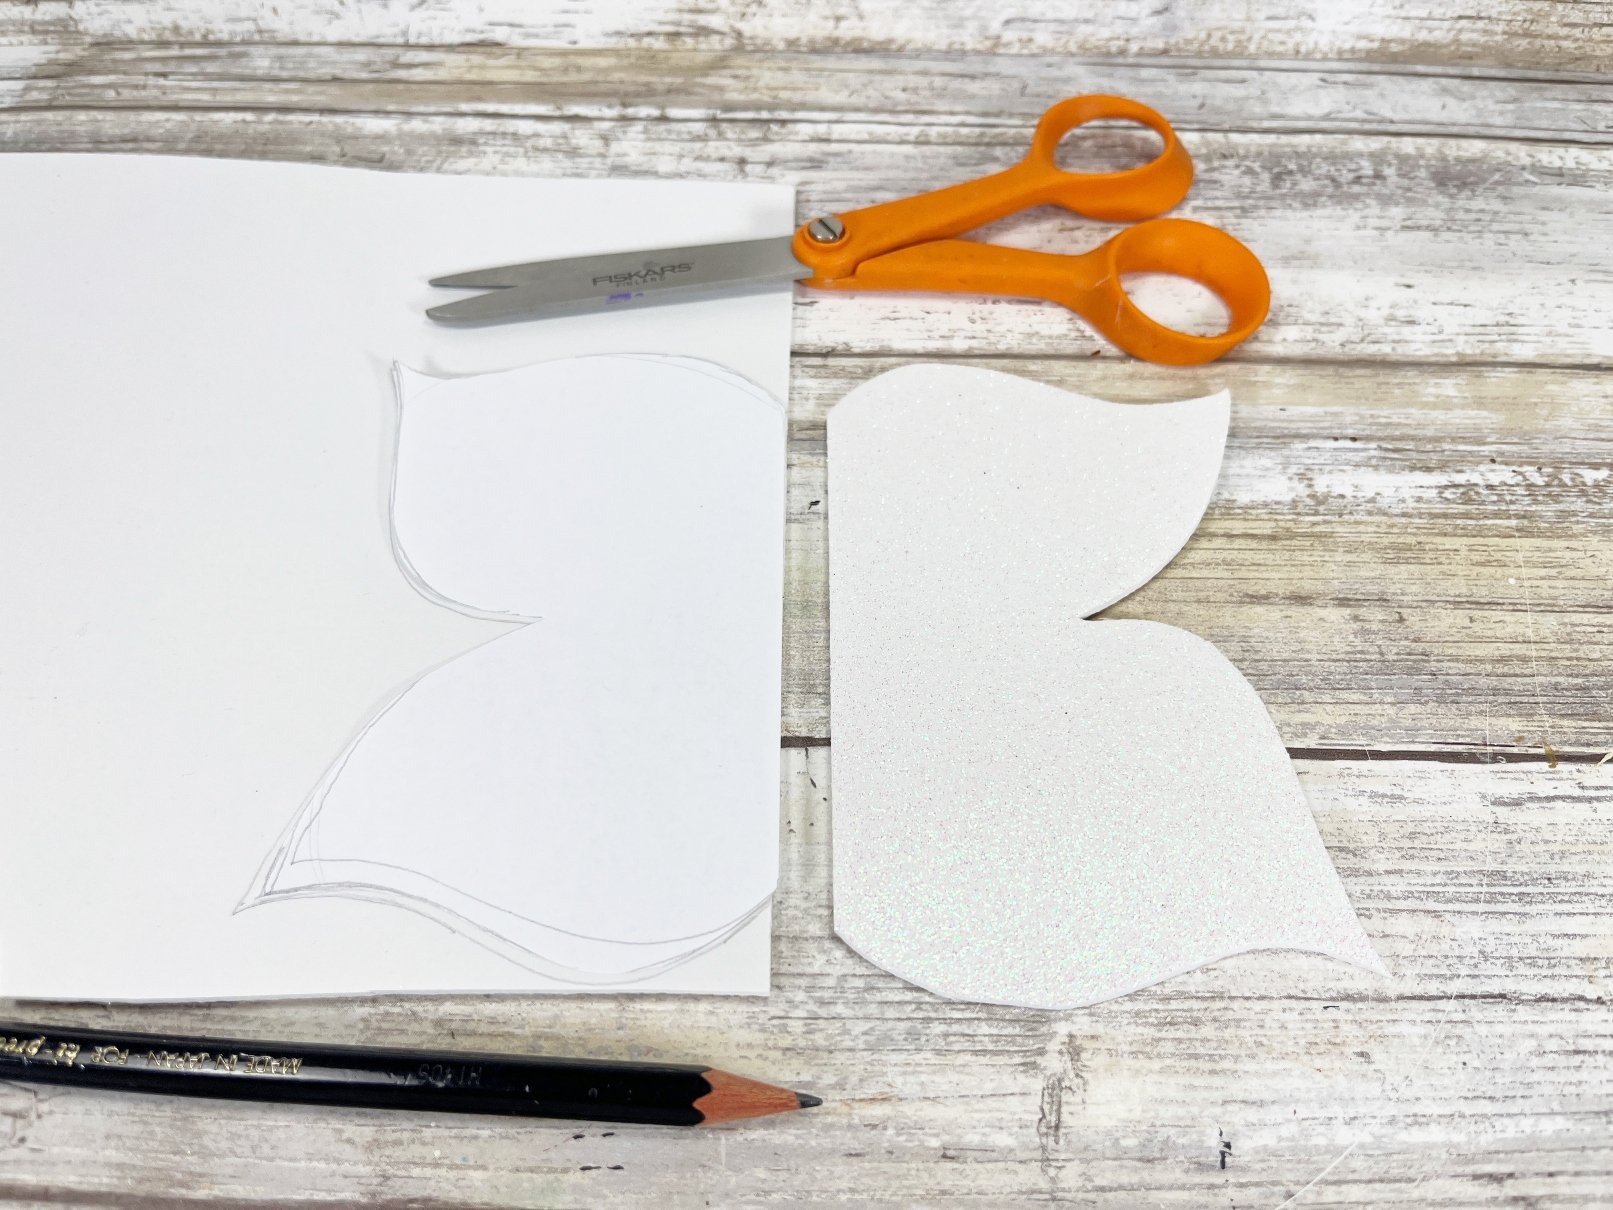
- Craft stick butterfly template: Grab and print this free pattern for a perfect butterfly shape every time.
Substitutes
If you don’t have craft foam, feel free to use colored cardstock or craft felt. Both alternatives provide different textures and can bring a unique touch to your butterfly craft.
Instructions to make a butterfly craft with craft sticks
Preparations
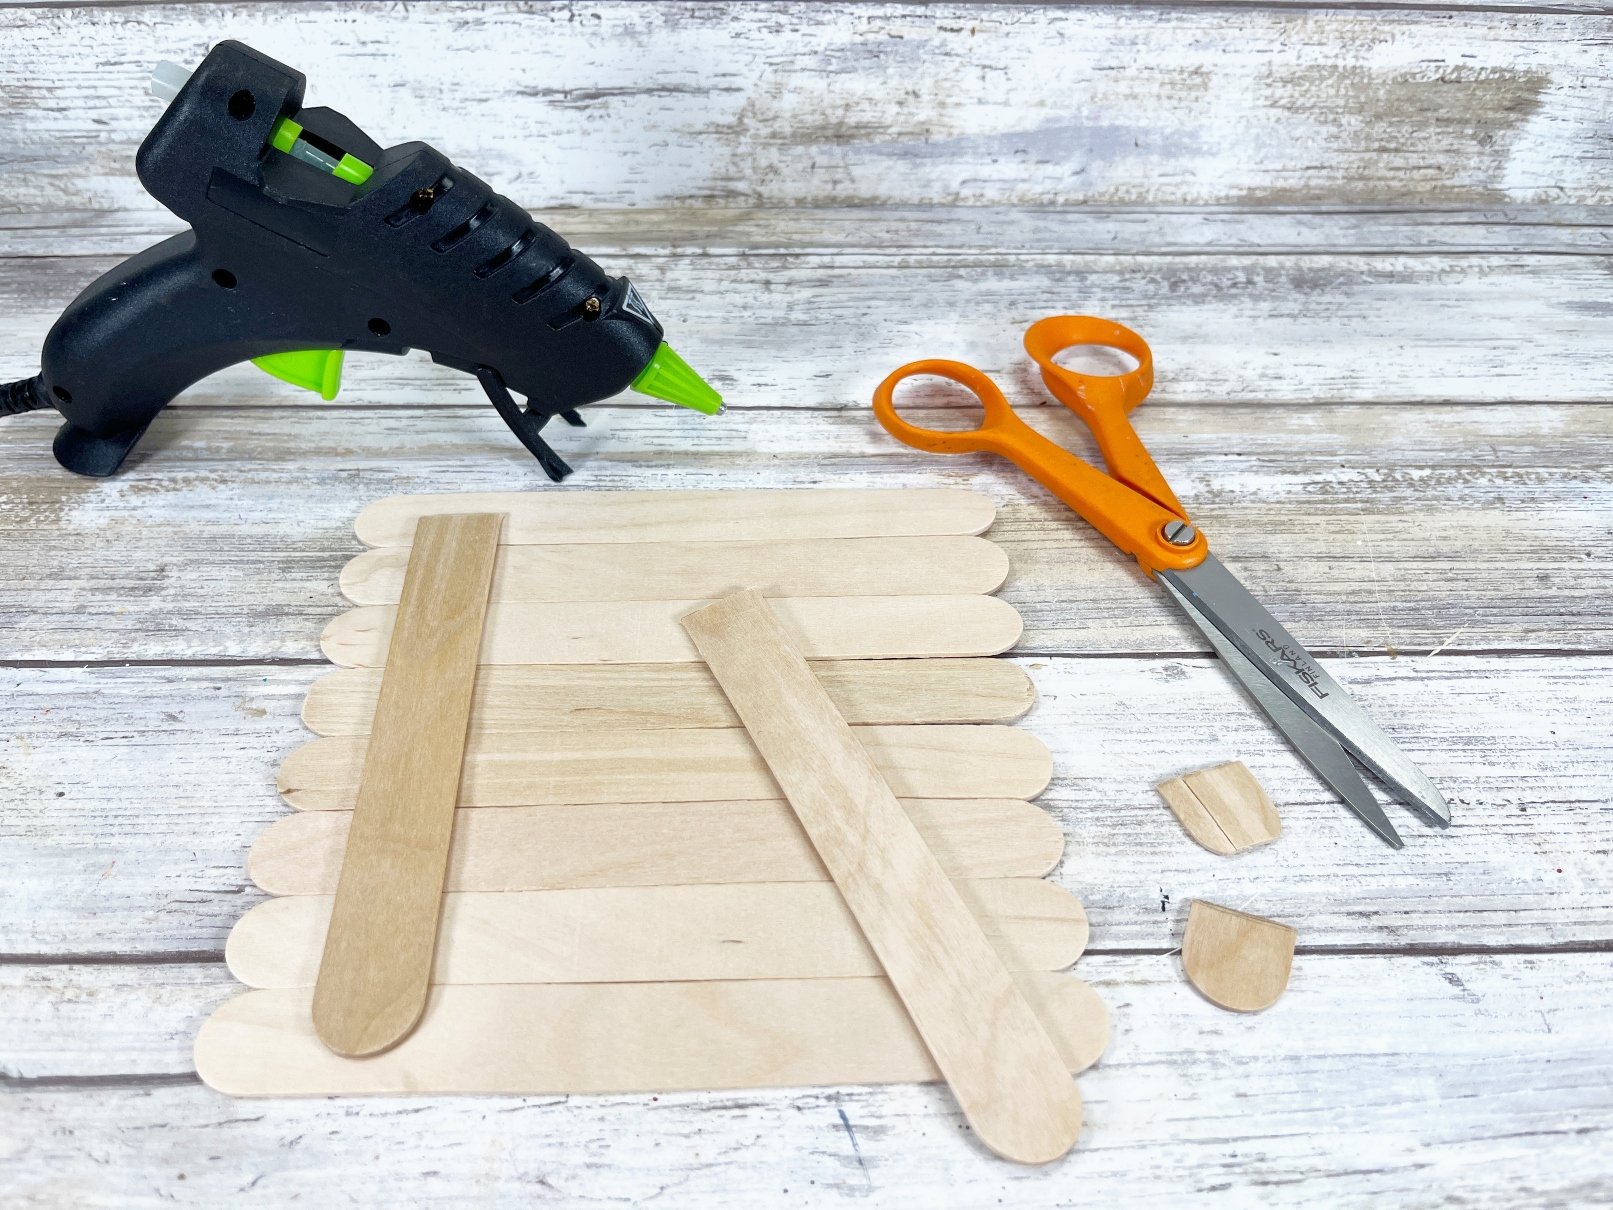
- Start by lining up eight jumbo craft sticks on your work surface.
- If the craft sticks need trimming to fit the width of your butterfly, use scissors to cut them to size.
Crafting
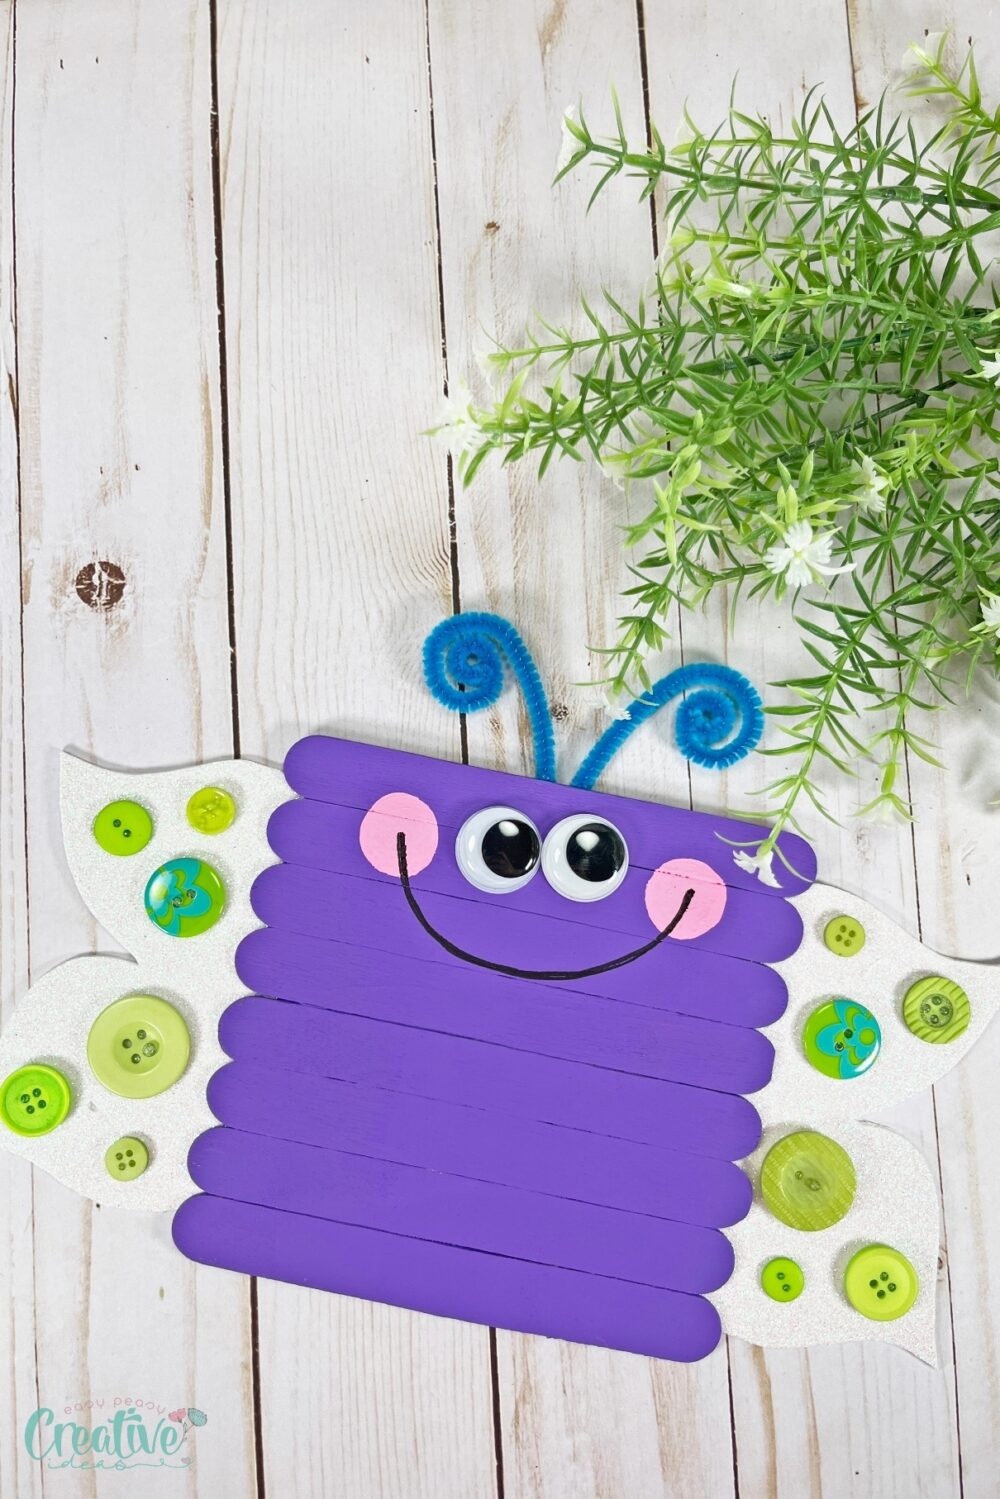
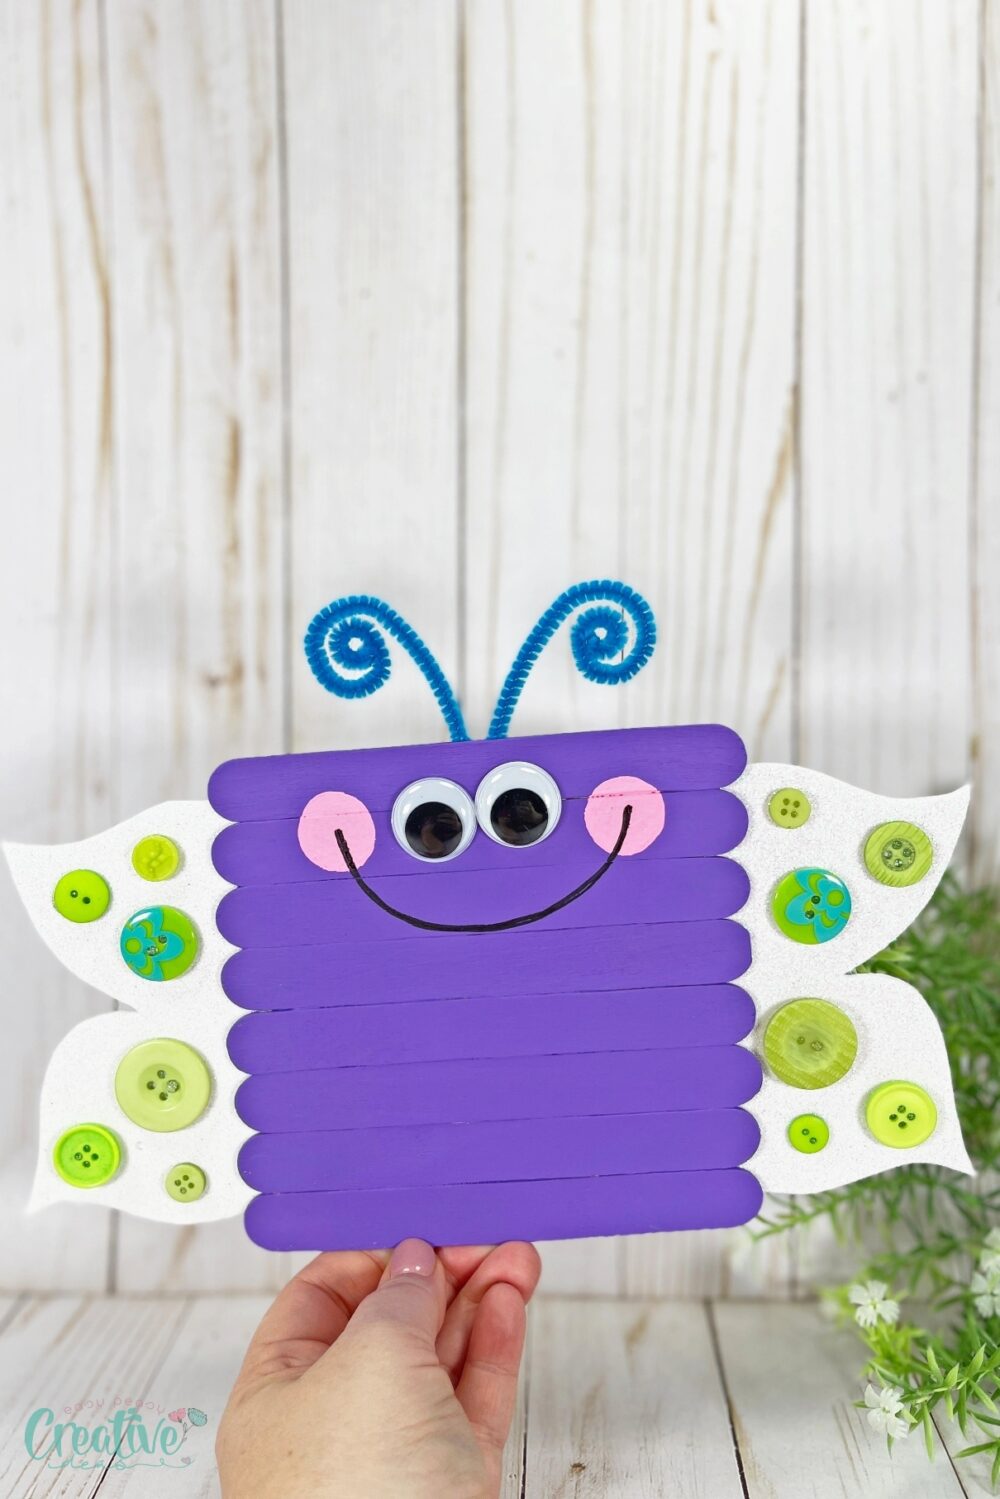
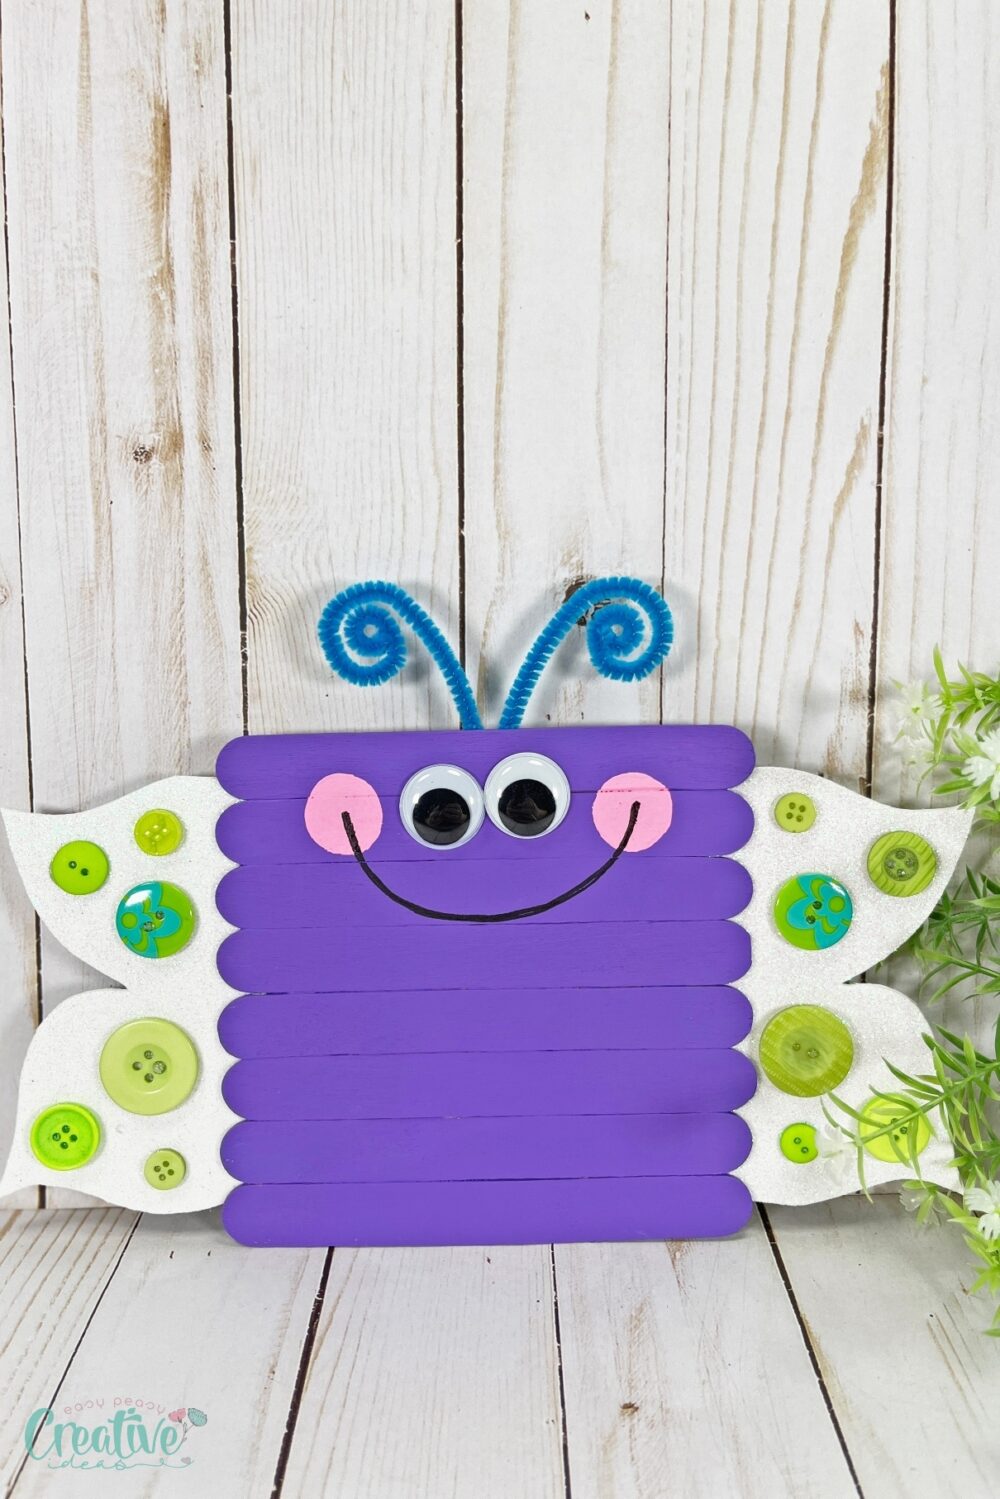
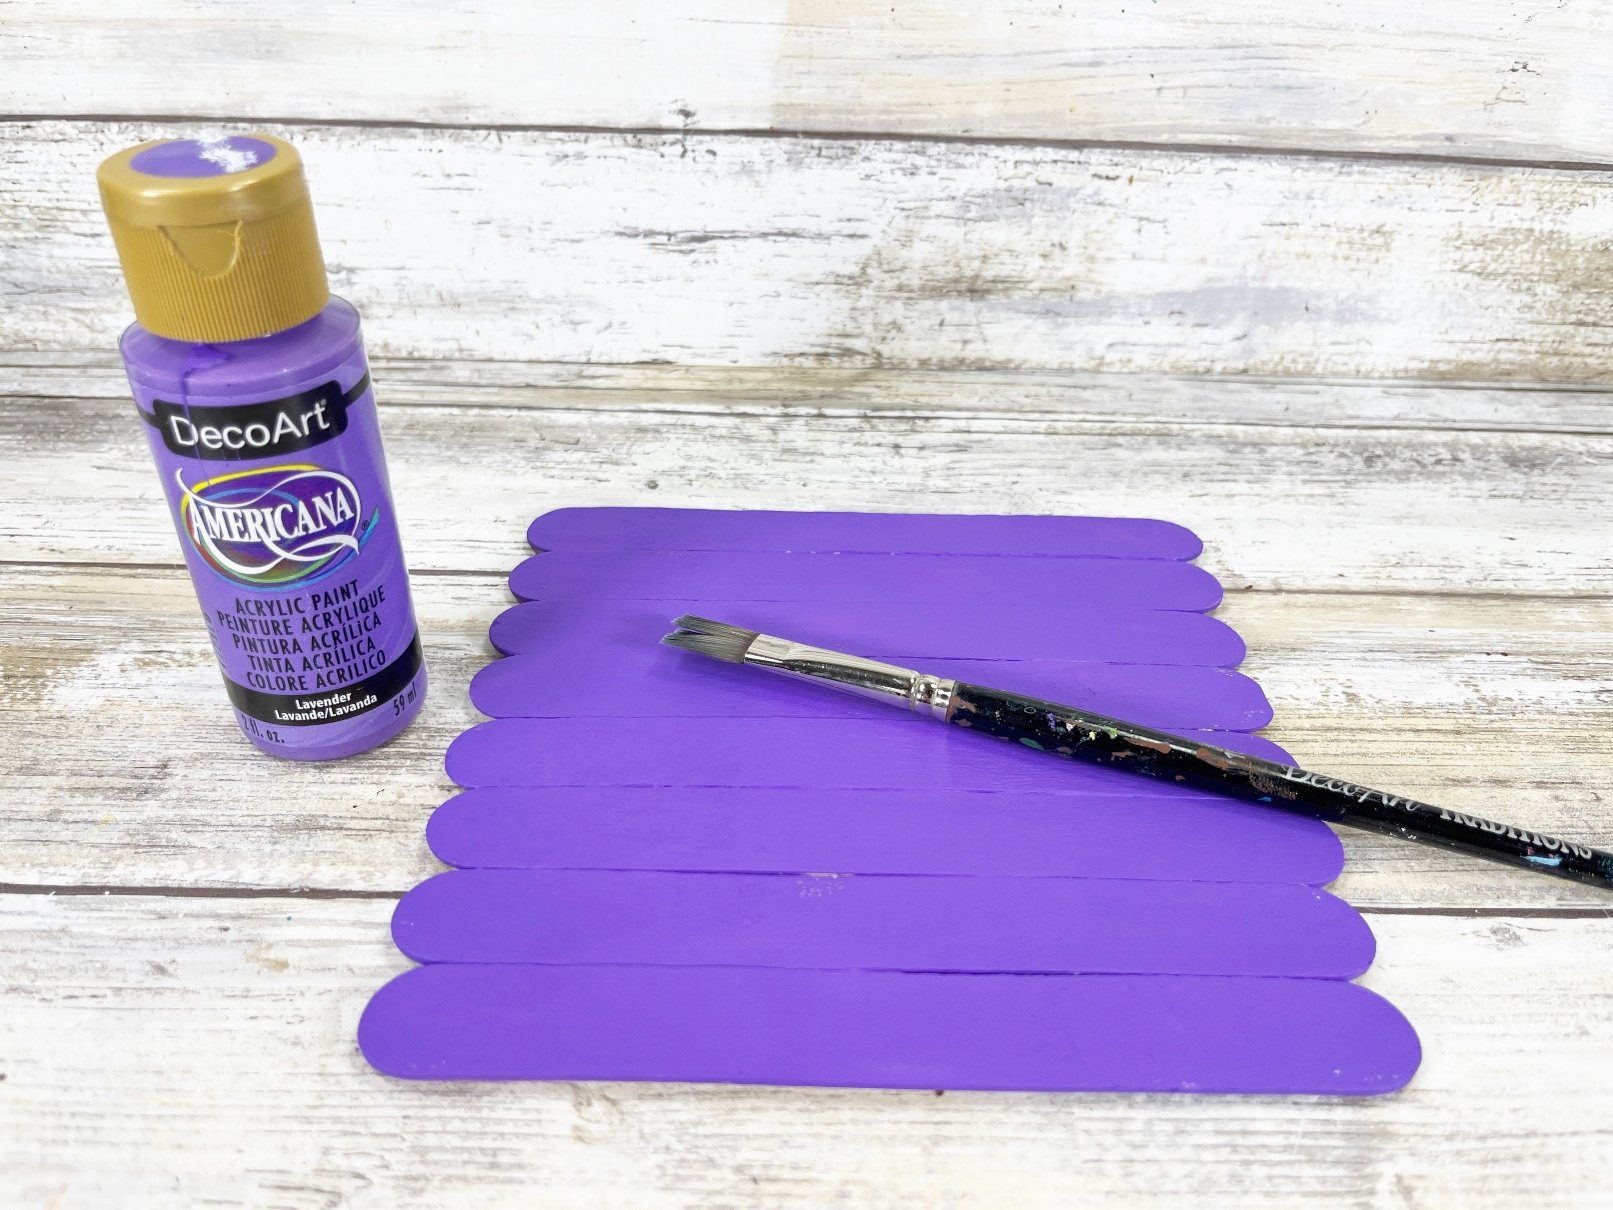
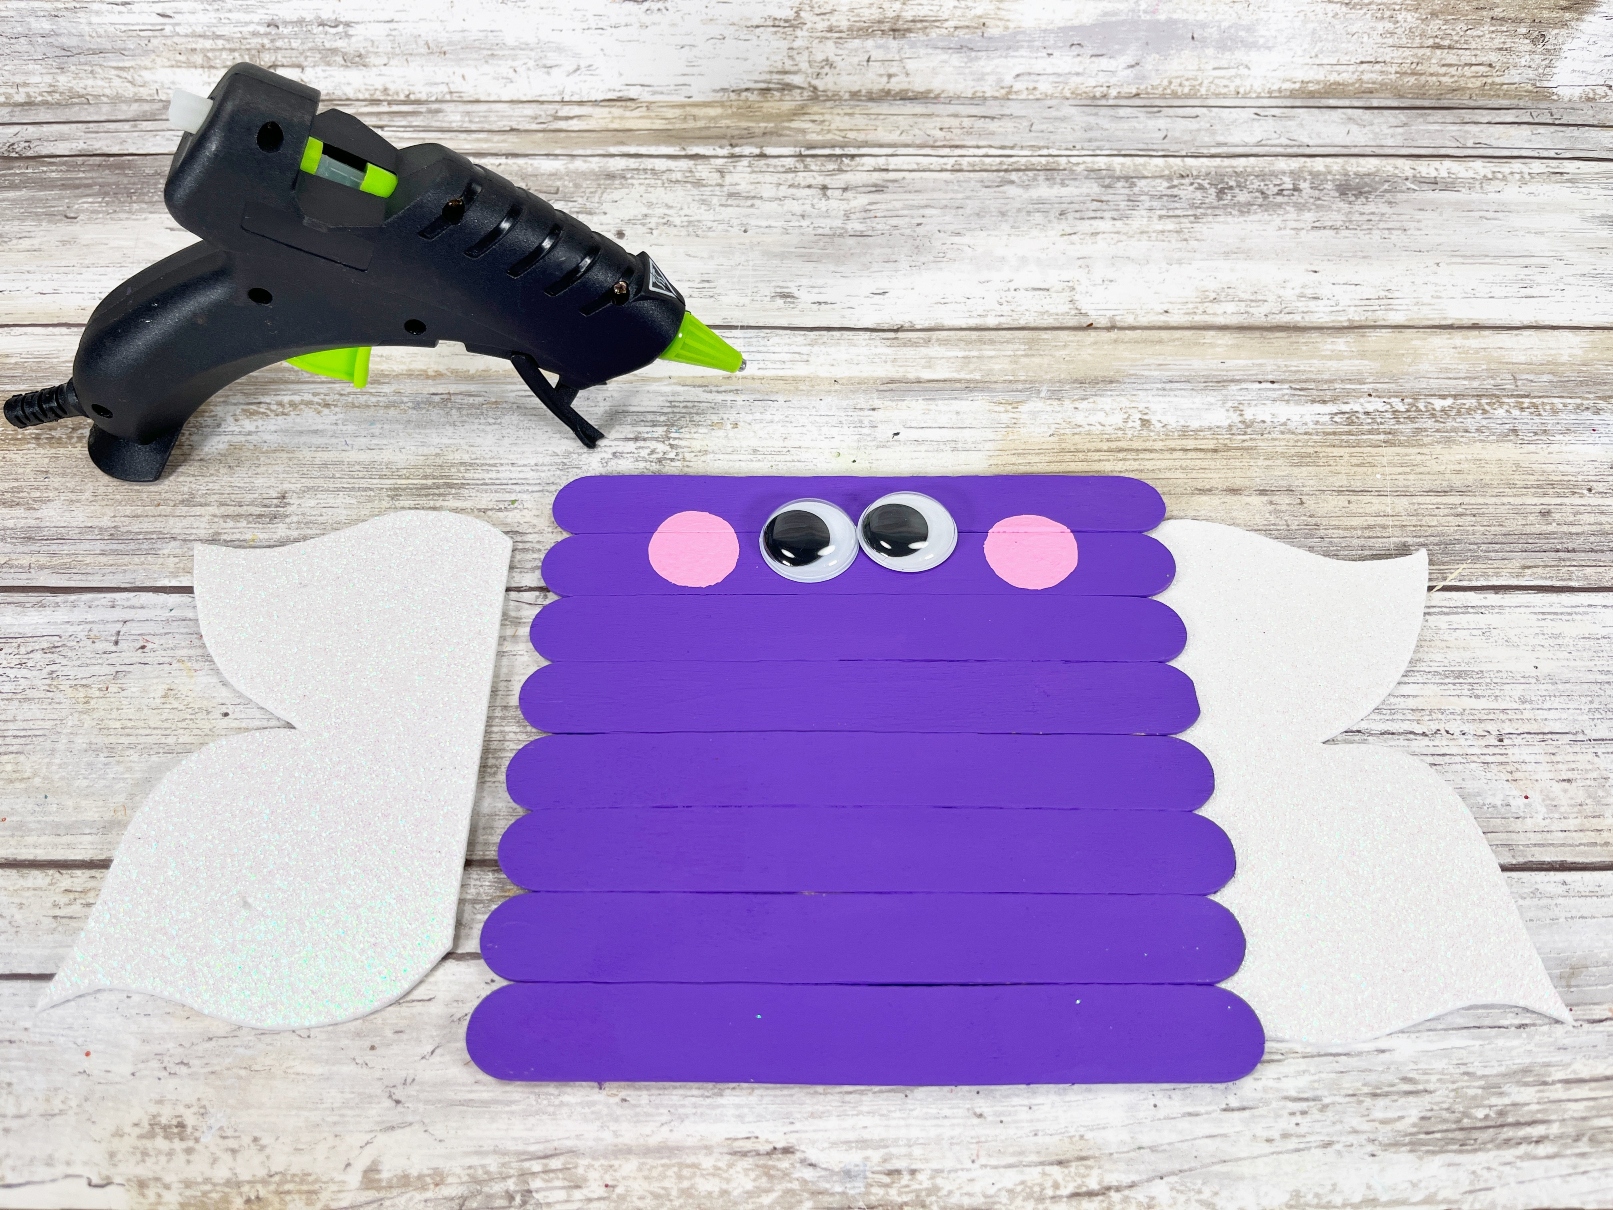
- Base Coat: Paint the front and sides of the butterfly with purple craft paint. Allow it to dry before applying a second coat if needed.
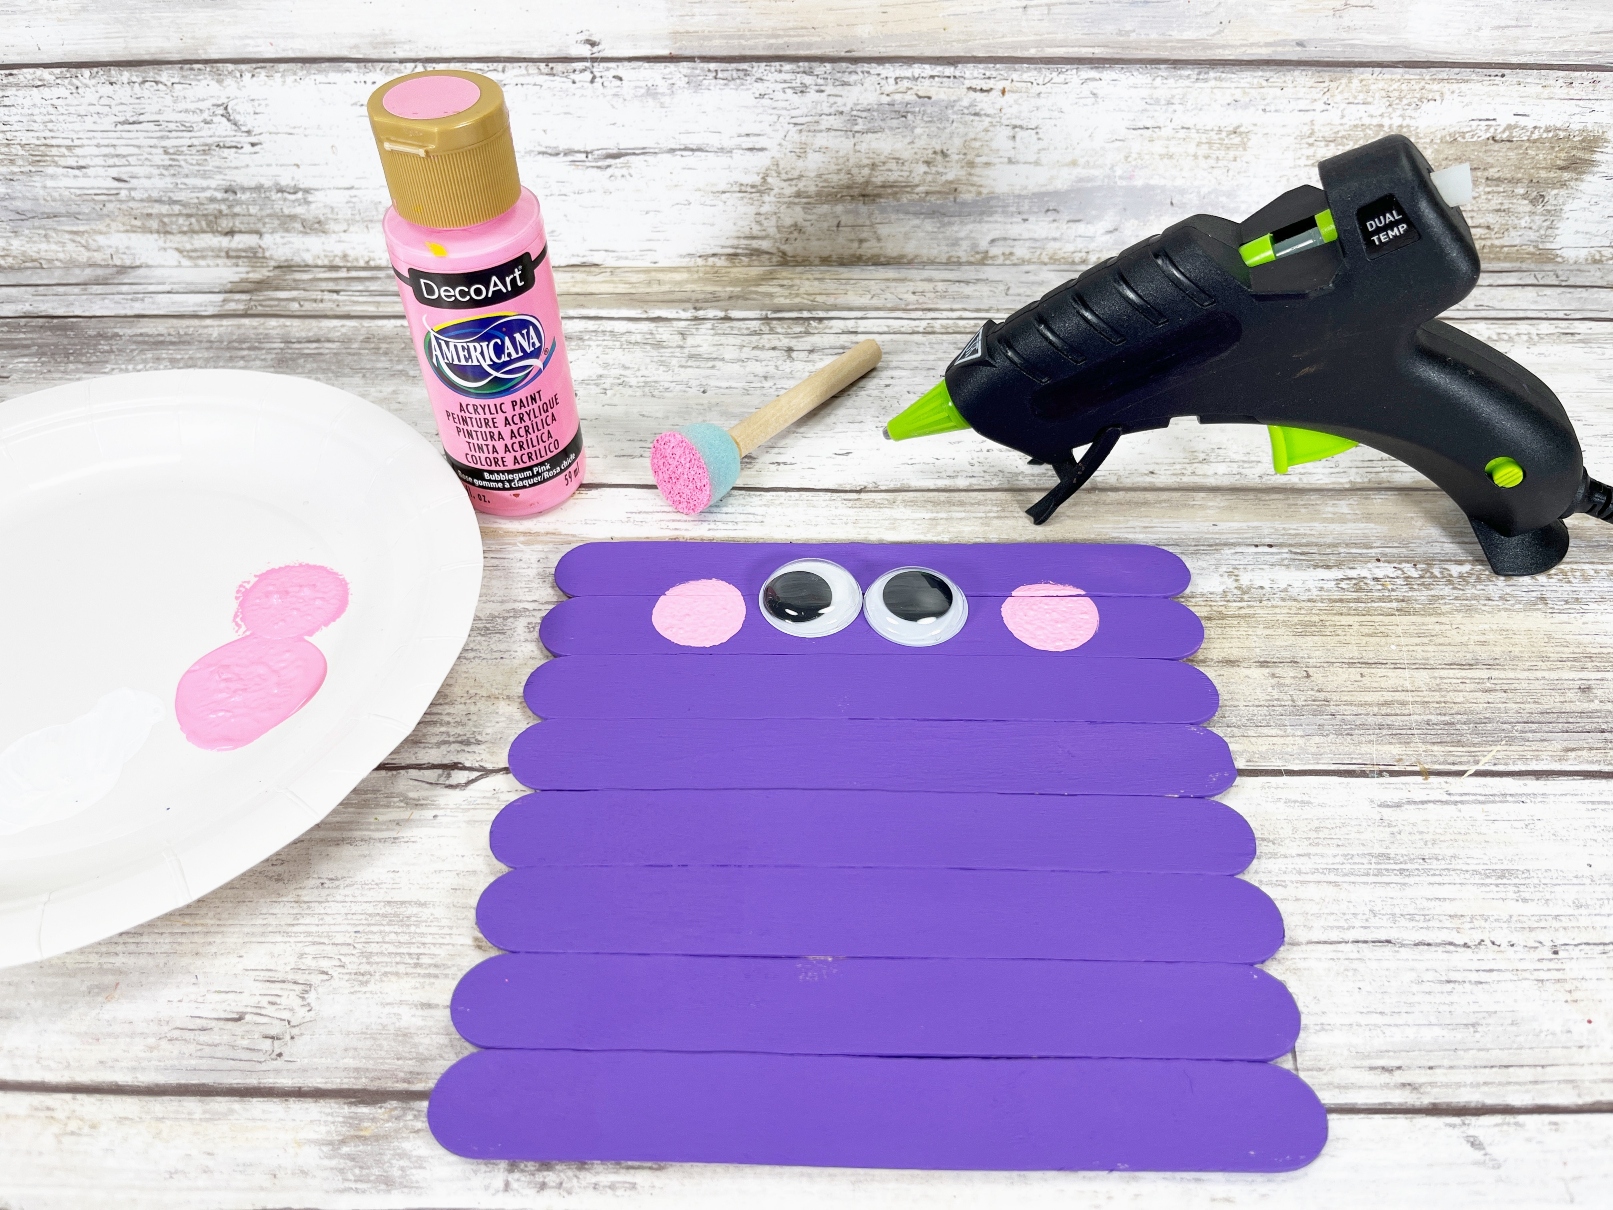
- Details: Attach wiggle eyes and create cheeks with pink paint. Use the sponge dabber for the cheeks to get a soft, rounded look.
- Wings: Trace and cut out the wings from white glitter craft foam. Attach them to either side of the butterfly’s back.
- Decorations: Embellish the wings with green buttons of various sizes and colors.
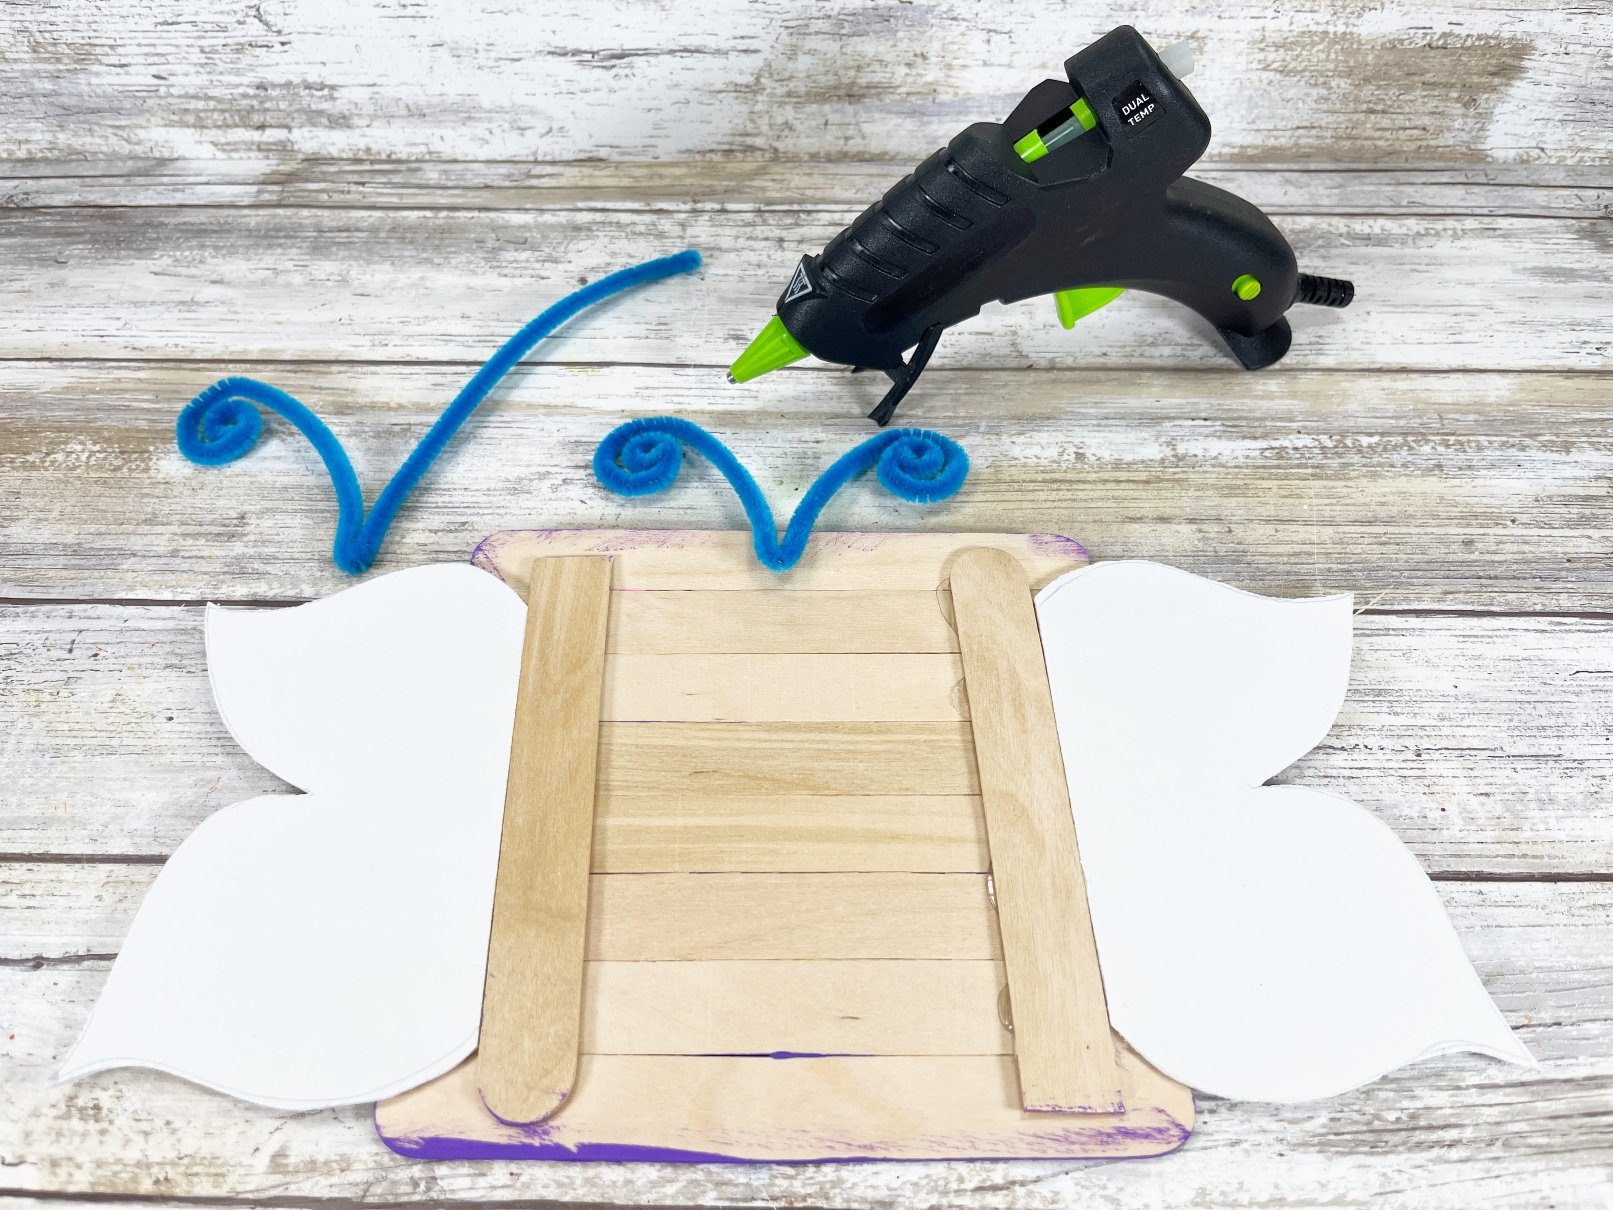
- Antennae: Bend a blue chenille stem in half and curl the ends to make antennae. Attach it to the top center of the butterfly’s back.
- To finish, draw a large smile from cheek to cheek to create the Butterfly’s mouth.
Tip
For a more durable butterfly, consider using liquid glue instead of a glue gun for attaching lighter elements like the buttons and antennae. However, keep in mind that you’ll need to allow time for the glue to dry completely.
Craft Variations
- Rainbow Butterfly: Use a multitude of paint colors to create a vibrant, rainbow-themed butterfly.
- Night Sky Butterfly: Paint the body and wings in dark blue or black, and sprinkle glitter for a celestial effect.
- Nature-Inspired Butterfly: Use real leaves and flower petals in place of or along with the craft foam for a more natural look.
How to use the butterfly craft
This easy idea makes a charming décor addition to any room, serving as a delightful wall hanging or a whimsical addition to planters and gardens.
It’s also a fantastic gift idea for friends and loved ones who appreciate handmade treasures.
Frequently Asked Questions
Can I use regular paper instead of craft foam?
Yes, though paper may not be as durable.
What’s the best age group for this craft?
This project is fantastic for crafters aged 5 and up, with appropriate supervision for the younger ones.
More craft stick ideas you’ll enjoy
- Craft stick shelves
- Colorful Spring wreath
- Fall pumpkin craft
- DIY bee with craft sticks
- Mini barn craft
- Craft sticks pineapple
I hope you enjoyed this project and that it sparks your creativity to craft even further. Don’t forget to sign up for more delightful craft ideas and share this butterfly craft on socials, and inspire others. Happy crafting!
Butterfly craft with craft sticks
Materials
- Wooden Craft Sticks Jumbo
- Wiggle Eyes
- Chenille Stems Blue
- Craft Paint Purple, Pink
- Craft Foam White Glitter
- Buttons Green
Tools
- glue gun
- scissors
- Permanent Marker
Instructions
- Gather all supplies. To create the Butterfly, line up eight jumbo craft sticks on your work surface. Using scissors, trim additional jumbo craft sticks to the width of the Butterfly and attach with a glue gun and glue sticks.

- Base coat the front and sides of the Butterfly with purple acrylic craft paint. Set aside to dry and apply a second coat, if necessary.
- Attach two wiggle eyes to the Butterfly’s face with a glue gun and glue sticks. Create cheeks by dipping a sponge dabber into pink acrylic craft paint and stamping on either side of the face.
- Download and print the Craft Stick Butterfly Patterns, then cut out with scissors. Trace the wings twice onto the back of white glitter craft foam. Cut out with scissors making sure to cut inside the traced lines for a clean, finished project.
- Attach the wings to the left and right-hand side of the back of the Butterfly with a glue gun and glue sticks.
- Attach a variety sizes and colors of green buttons to the Butterfly’s wings as an embellishment.
- Bend the blue chenille stem in half, then curl the ends into a swirl to create antennae. Attach to the back top center of the Butterfly with a glue gun and glue sticks.
- To finish, draw a large smile from cheek to cheek to create the Butterfly’s mouth.
Video
Article may contain Amazon & affiliate links. As an Amazon Associate I earn from qualifying purchases at no additional cost to you.
ABOUT PETRO
Hi, I’m Petro, author and founder of Easy Peasy Creative Ideas. Sewist, crafter, avid DIY-er, foodie, photographer, homemaker and mommy to one. I’m an expert at coming up with quick, clever sewing tips, recycling crafts and simple, easy recipes! You can find my ideas featured in reputable publications such as Country Living, Good House Keeping, Yahoo News, WikiHow, Shutterfly, Parade, Brit & Co and more. Thanks for stopping by and hope you’ll stay for a while, get to know me better and come back another time. Stick around for real fun projects! Read more…