

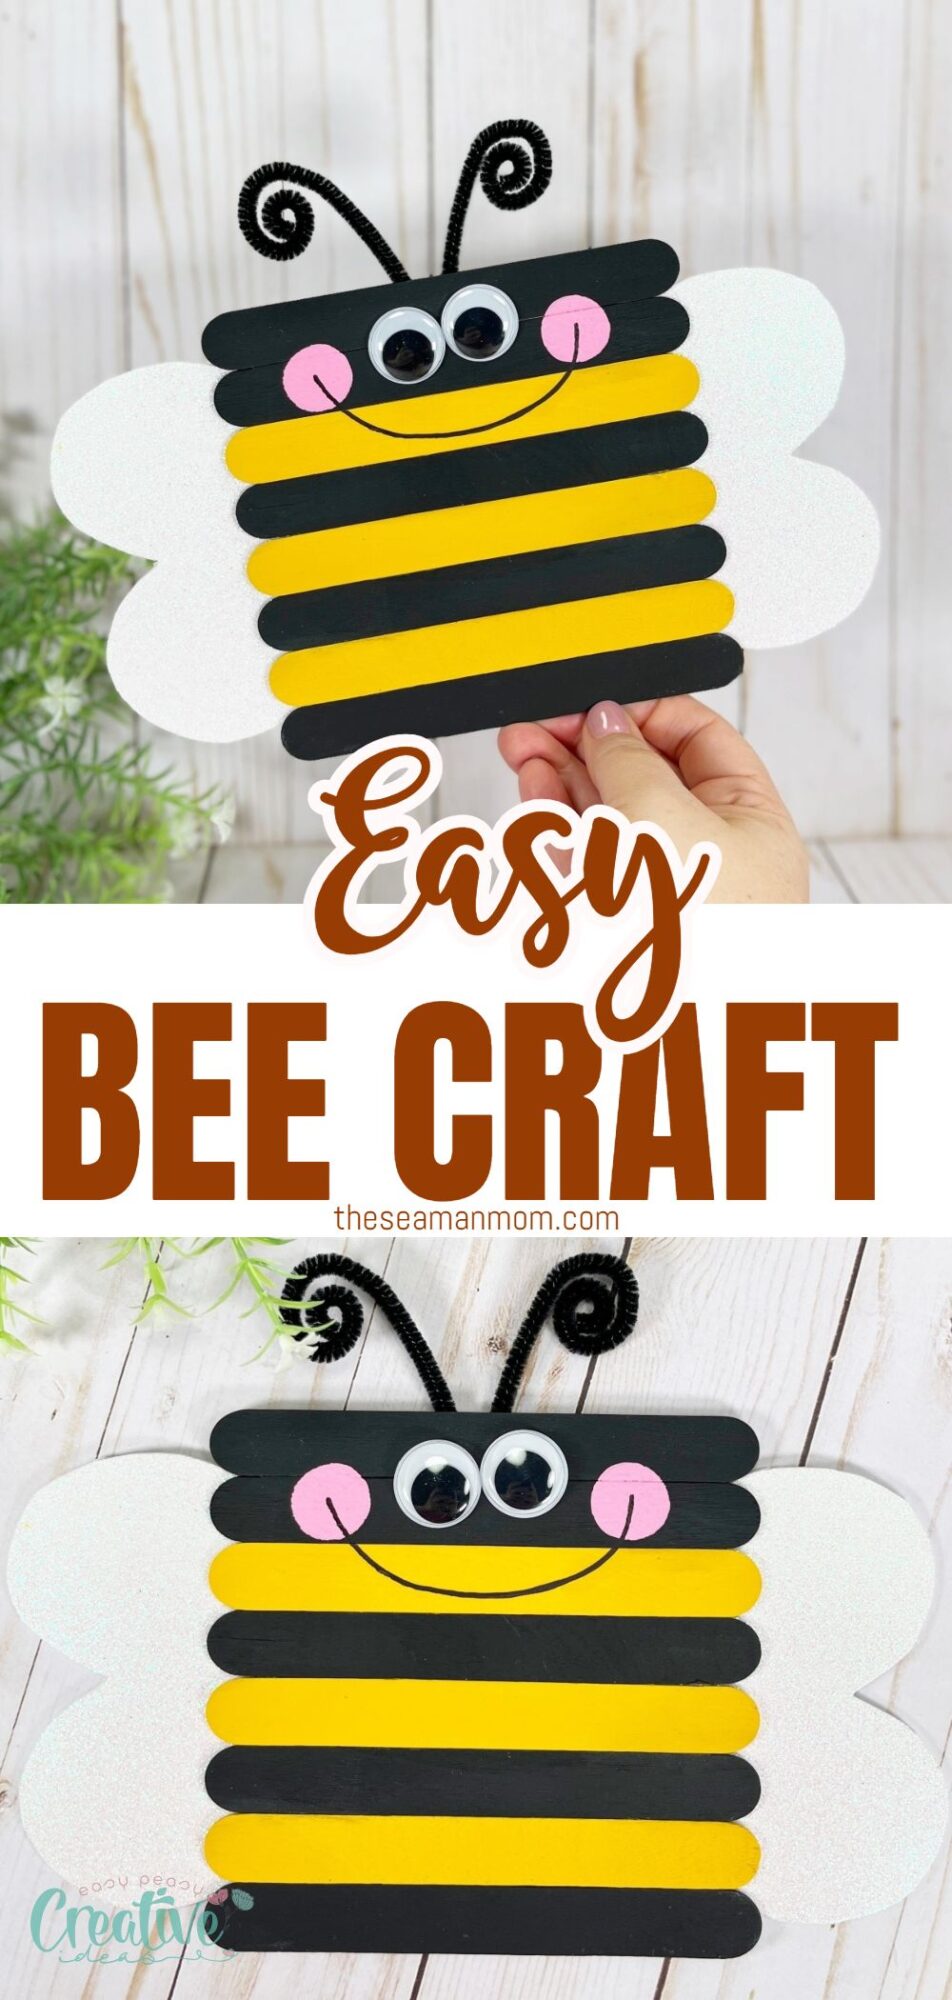
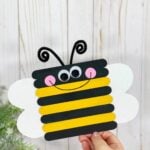
Bee craft with craft sticks
Unleash your creativity with an adorable bee craft! This delightful project is not only perfect for kids but also a fun activity for adults. The step-by-step tutorial will guide you through creating your very own bee decorations using simple materials and providing helpful tips for a successful crafting experience. Enjoy the process and let your imagination soar as you bring these charming bees to life!
Whether you’re a seasoned crafter looking for your next project or a beginner eager to dip your toes into the world of DIY, this bee craft is a delightful way to add a buzz of creativity to your day. Bee crafting is not only simple and fun, but it also results in adorable bees that can decorate your home, classroom, or serve as an excellent gift.
I’ve always been fascinated by the natural world, and this easy bee craft allows me to celebrate these tiny, hardworking creatures in a creative and colorful way. This craft is not only an excellent opportunity to engage in something hands-on and relaxing but also a way to create cheerful decorations that can brighten up any space or occasion.
How to make the bee craft
Materials
- Jumbo wooden craft sticks: These serve as the main frame for our bee crafts. Their larger size provides enough surface area to work on, making them perfect for little hands and adult crafters alike.
- Wiggle eyes: These small, movable eyes bring our bee crafts to life, adding personality and charm.
- Black chenille stems: These flexible stems are ideal for creating the bee’s antennae. Their fuzzy texture adds to the overall appeal of the craft.
- Craft paint in black, yellow, and pink: High-quality craft paint is essential for adding color and vibrancy to our bees. The yellow and black are traditional bee colors, while pink adds a fun, playful touch.
- Craft foam: Lightweight and easy to cut, craft foam will be used for the wings, giving our bee a delightful three-dimensional effect.
Substitutes
If you’re missing any of the above materials, don’t worry! Almost everything can be substituted with items you might have around the house. For example, popsicle sticks can replace the jumbo wooden craft sticks, and paper can be used instead of craft foam for the wings.
Equipment
- Glue gun and glue sticks: These will be used to securely attach all the components of our bee crafts. A glue gun ensures a strong hold, but adult supervision is recommended when used by children.
- Sponge dabber and paintbrush: Perfect for applying paint smoothly and creating texture on our bee crafts.
- Scissors: Needed for cutting the craft foam into wing shapes.
- Permanent marker: To add the finishing touches, such as smile features, to our bees.
- Bee templates: These printable patterns provide the wing templates our bees. Simply print them out on cardstock or paper, cut them out, and use them as stencils for cutting the craft foam.
Bee crafting step-by-step instructions
Preparations
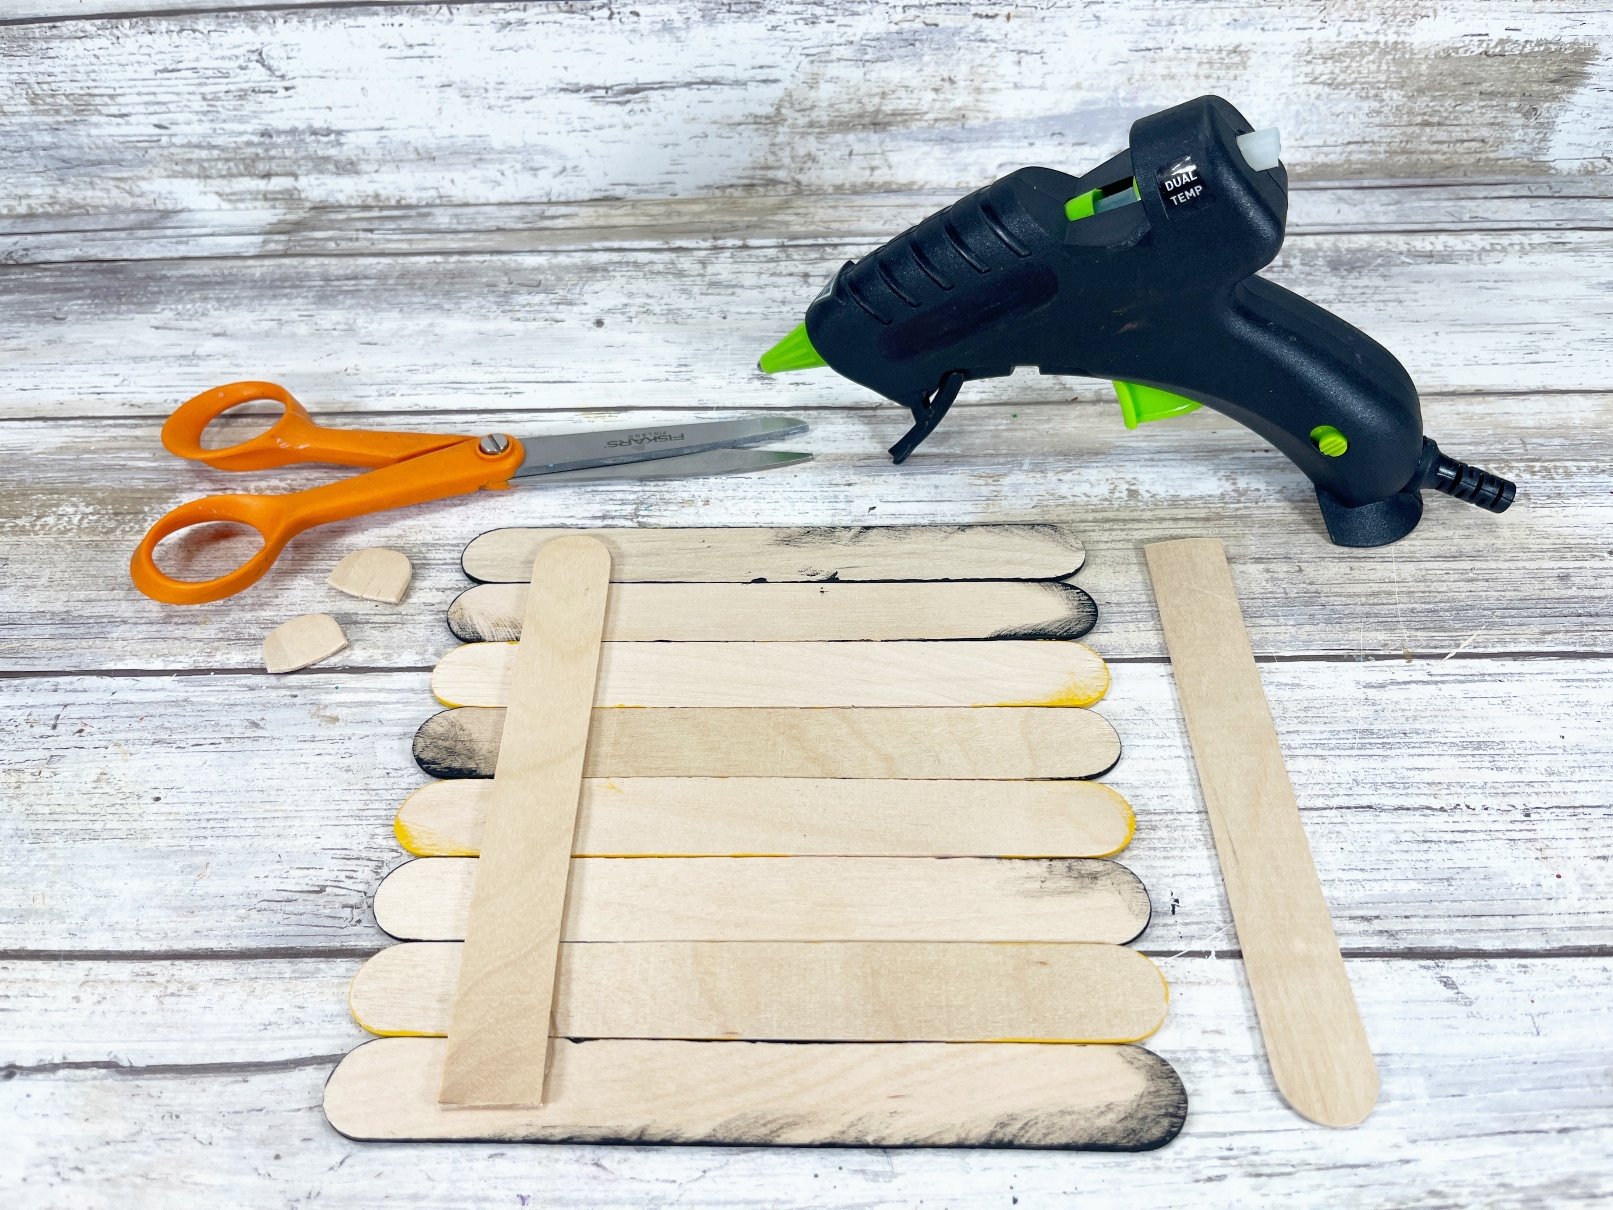
Gather all your materials and equipment, and set up a clean, flat workspace. If using a glue gun, plug it in to warm up. Print out the craft stick bee patterns, if desired.
Making the bee
STEP ONE
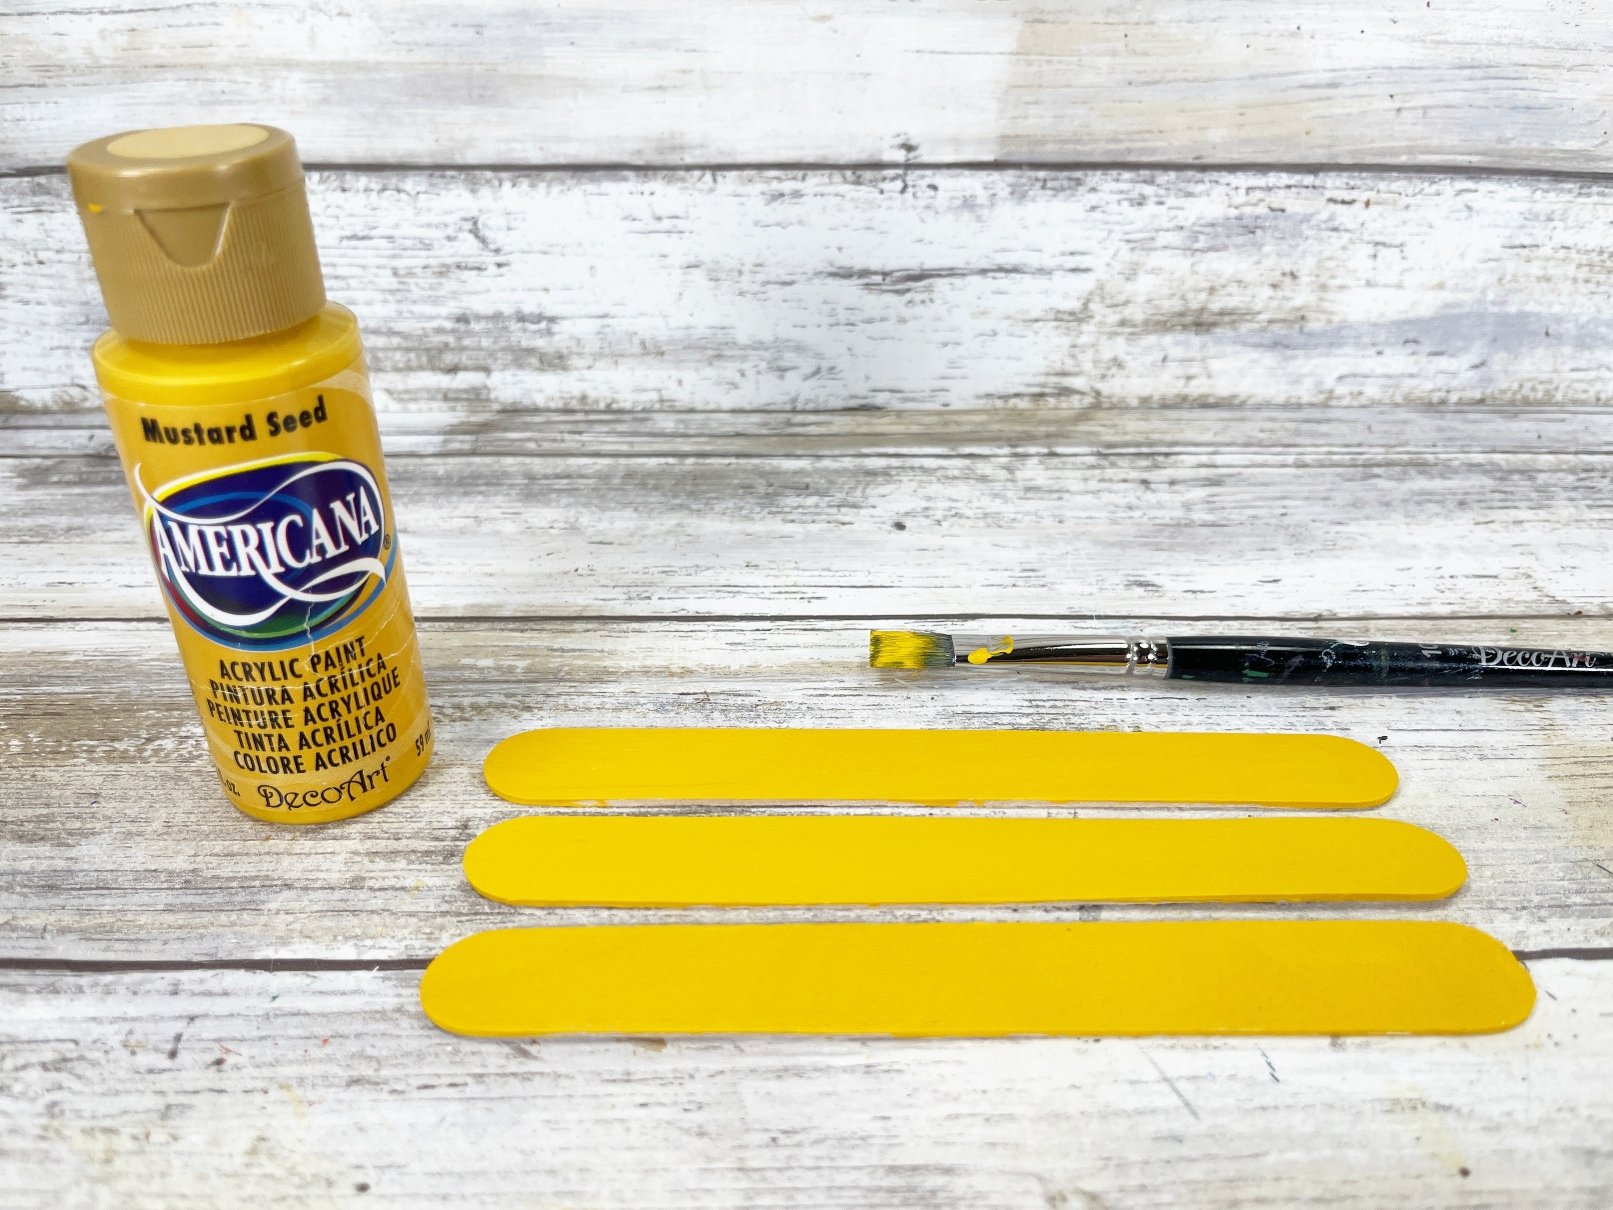
Gather all supplies. Base coat the front and sides of three jumbo craft sticks with yellow acrylic craft paint. Set aside to dry and apply a second coat, if necessary.
STEP TWO
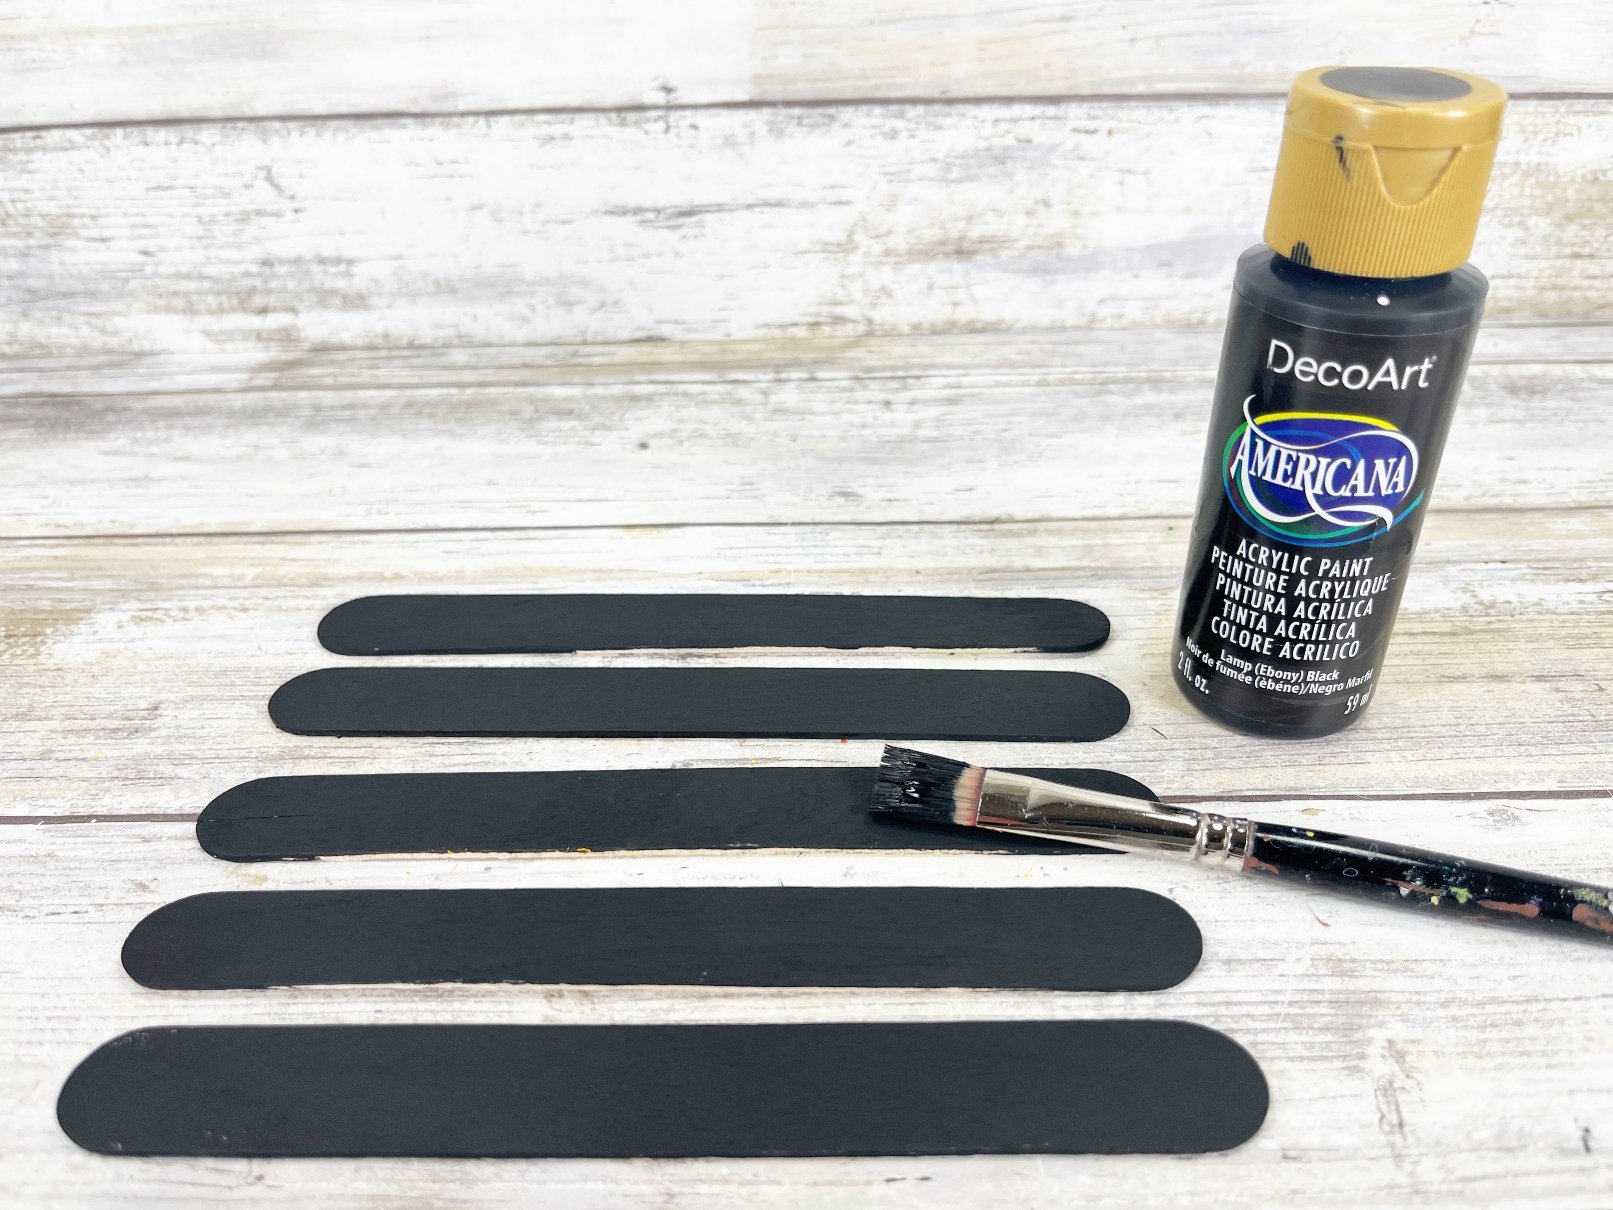
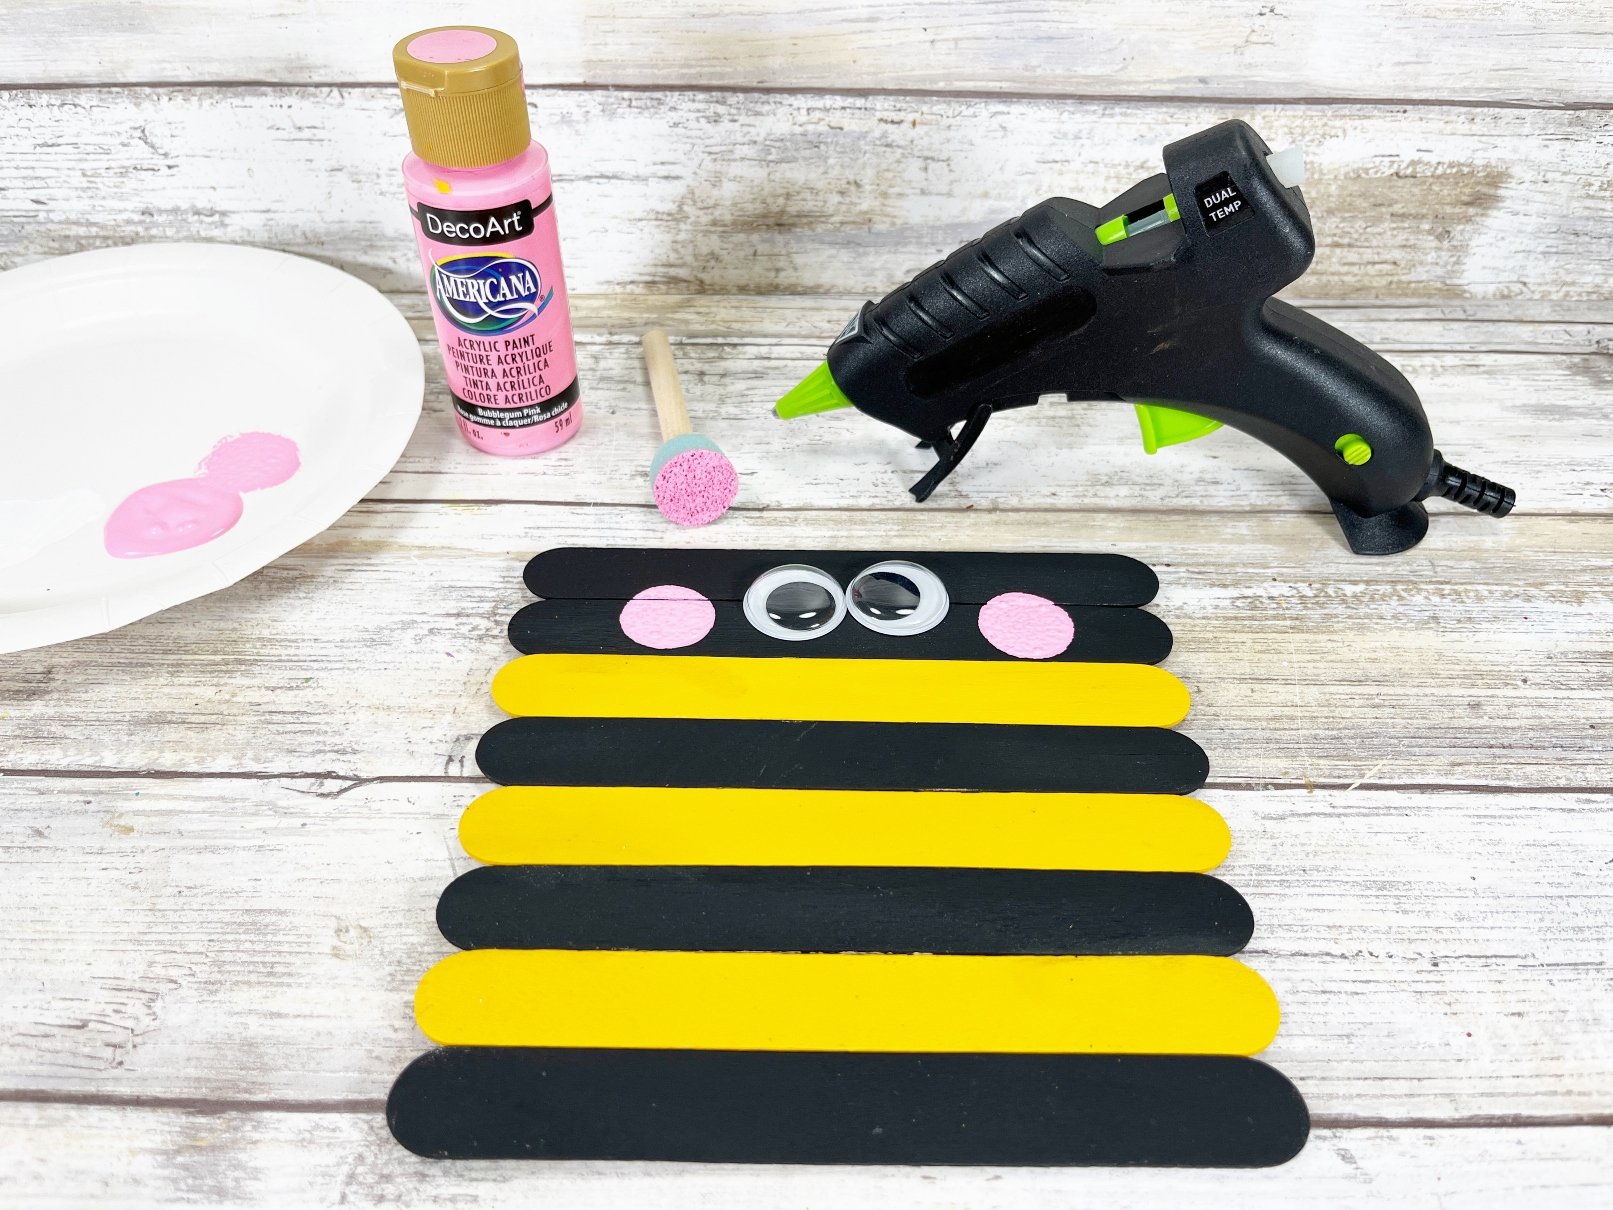
Base coat the front and sides of five jumbo craft sticks with black acrylic craft paint. Set aside to dry and apply a second coat, if necessary.
STEP THREE
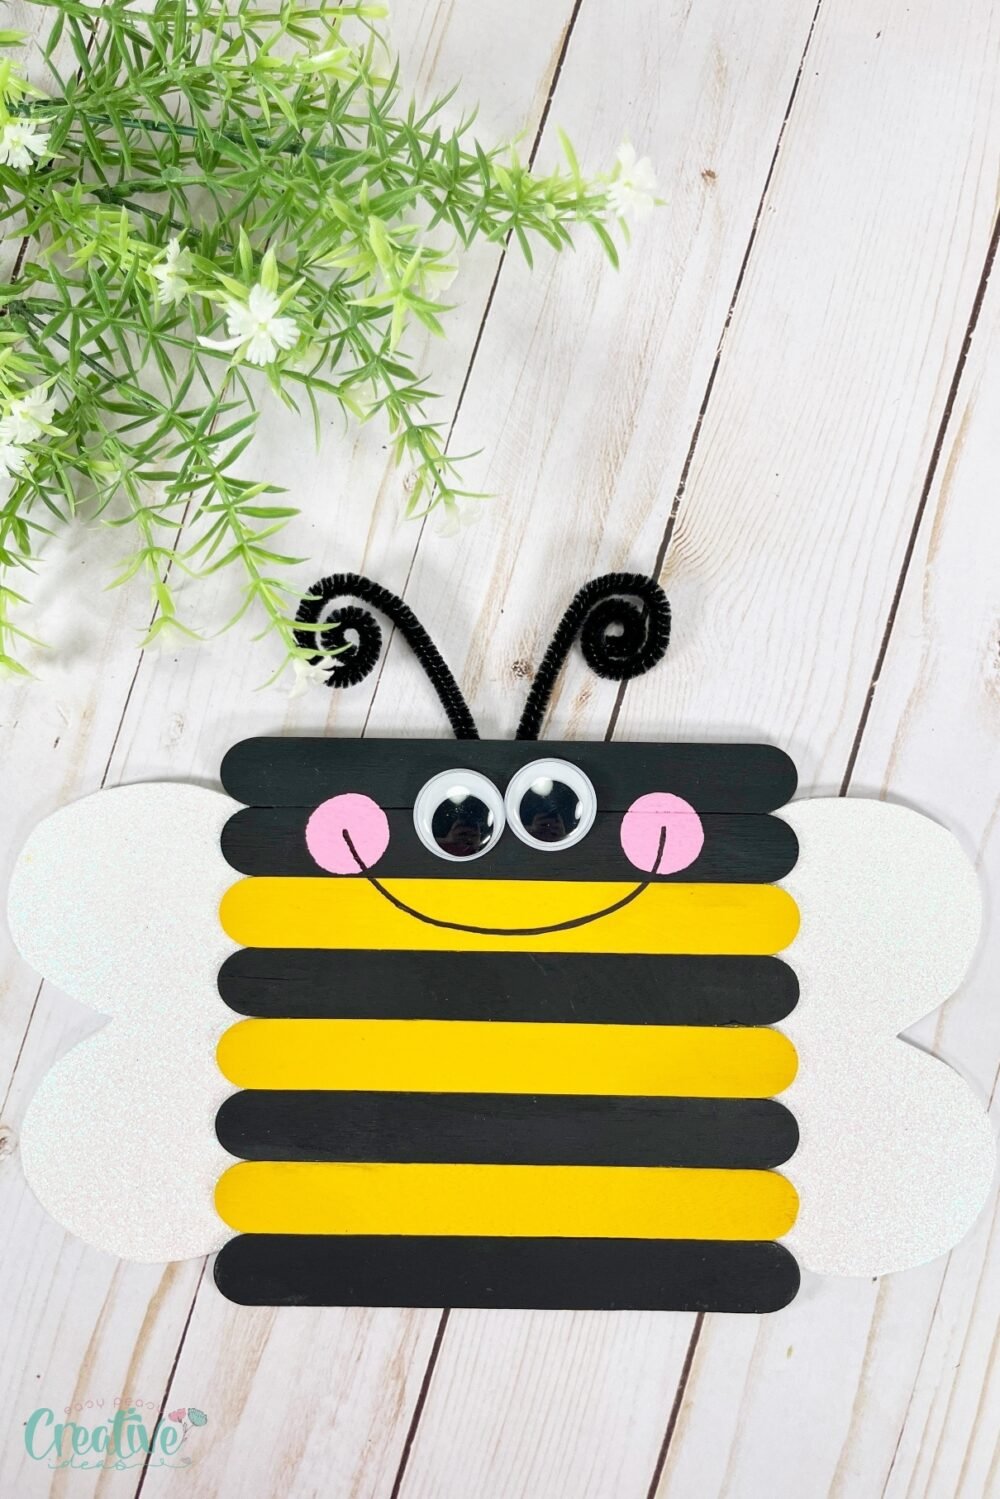
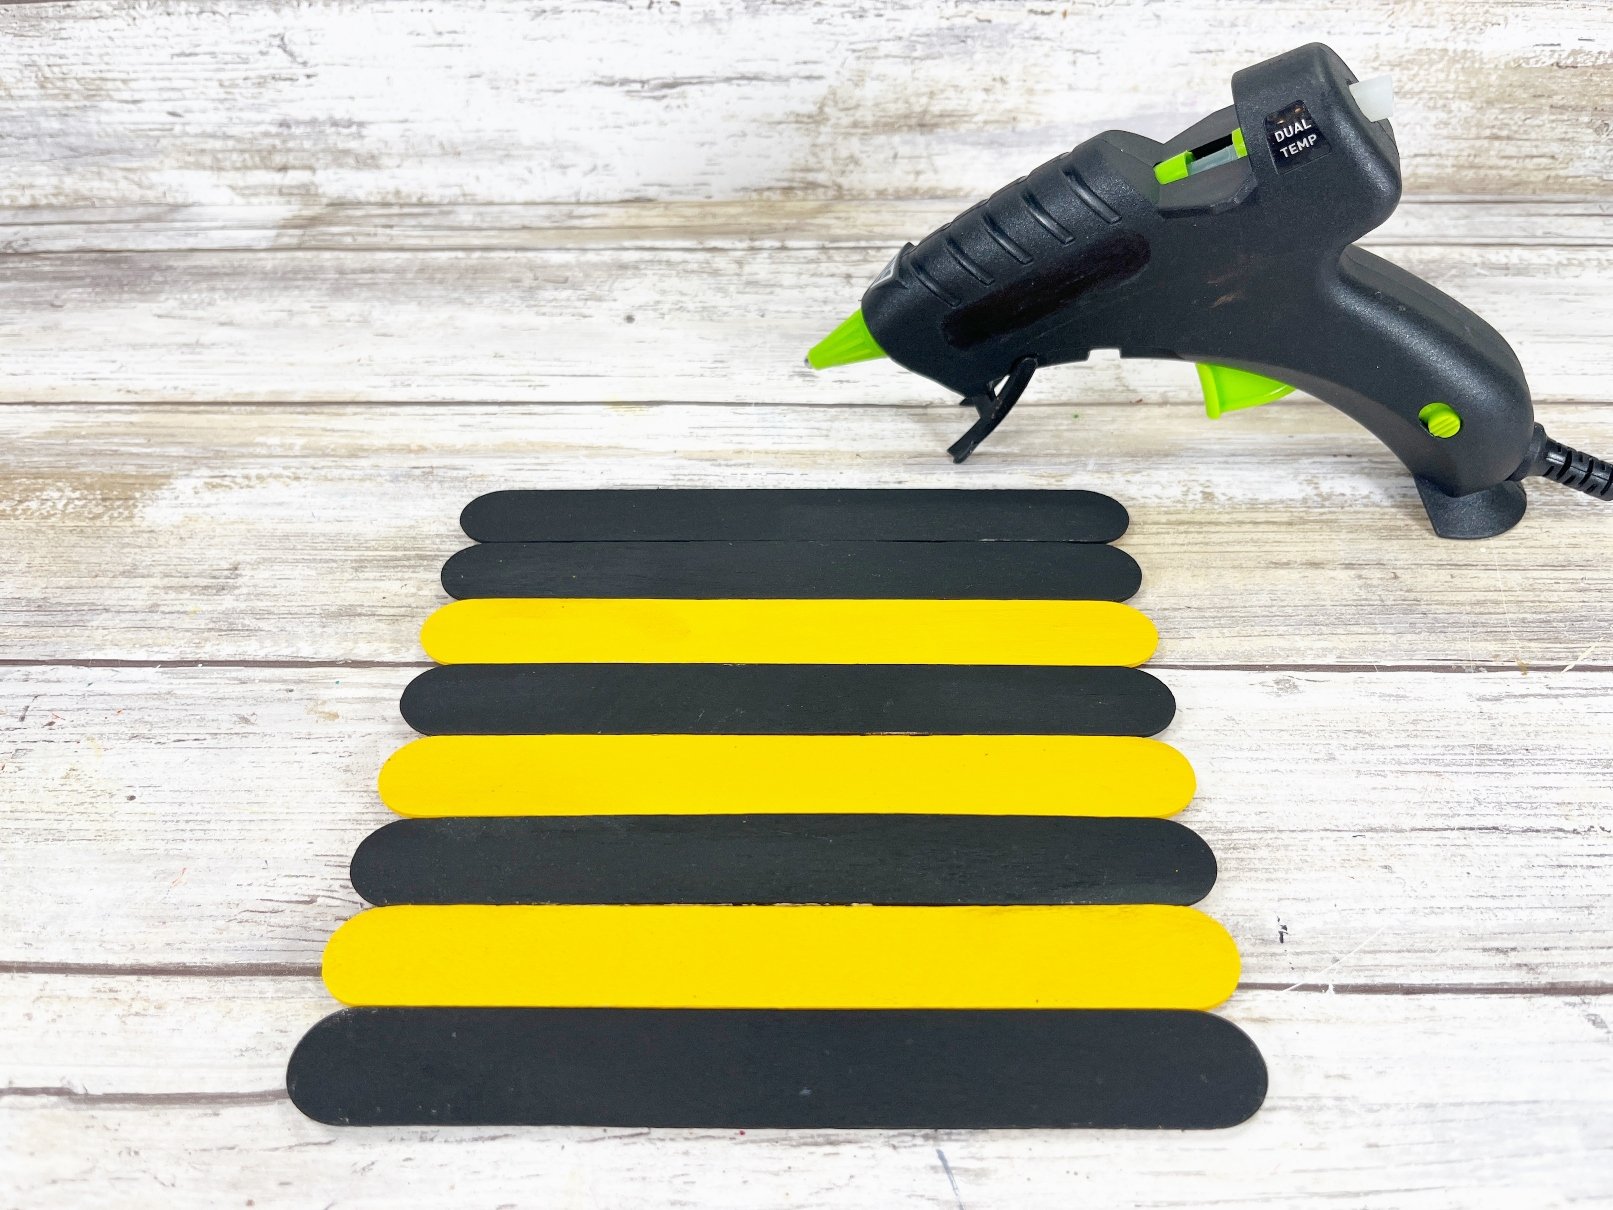
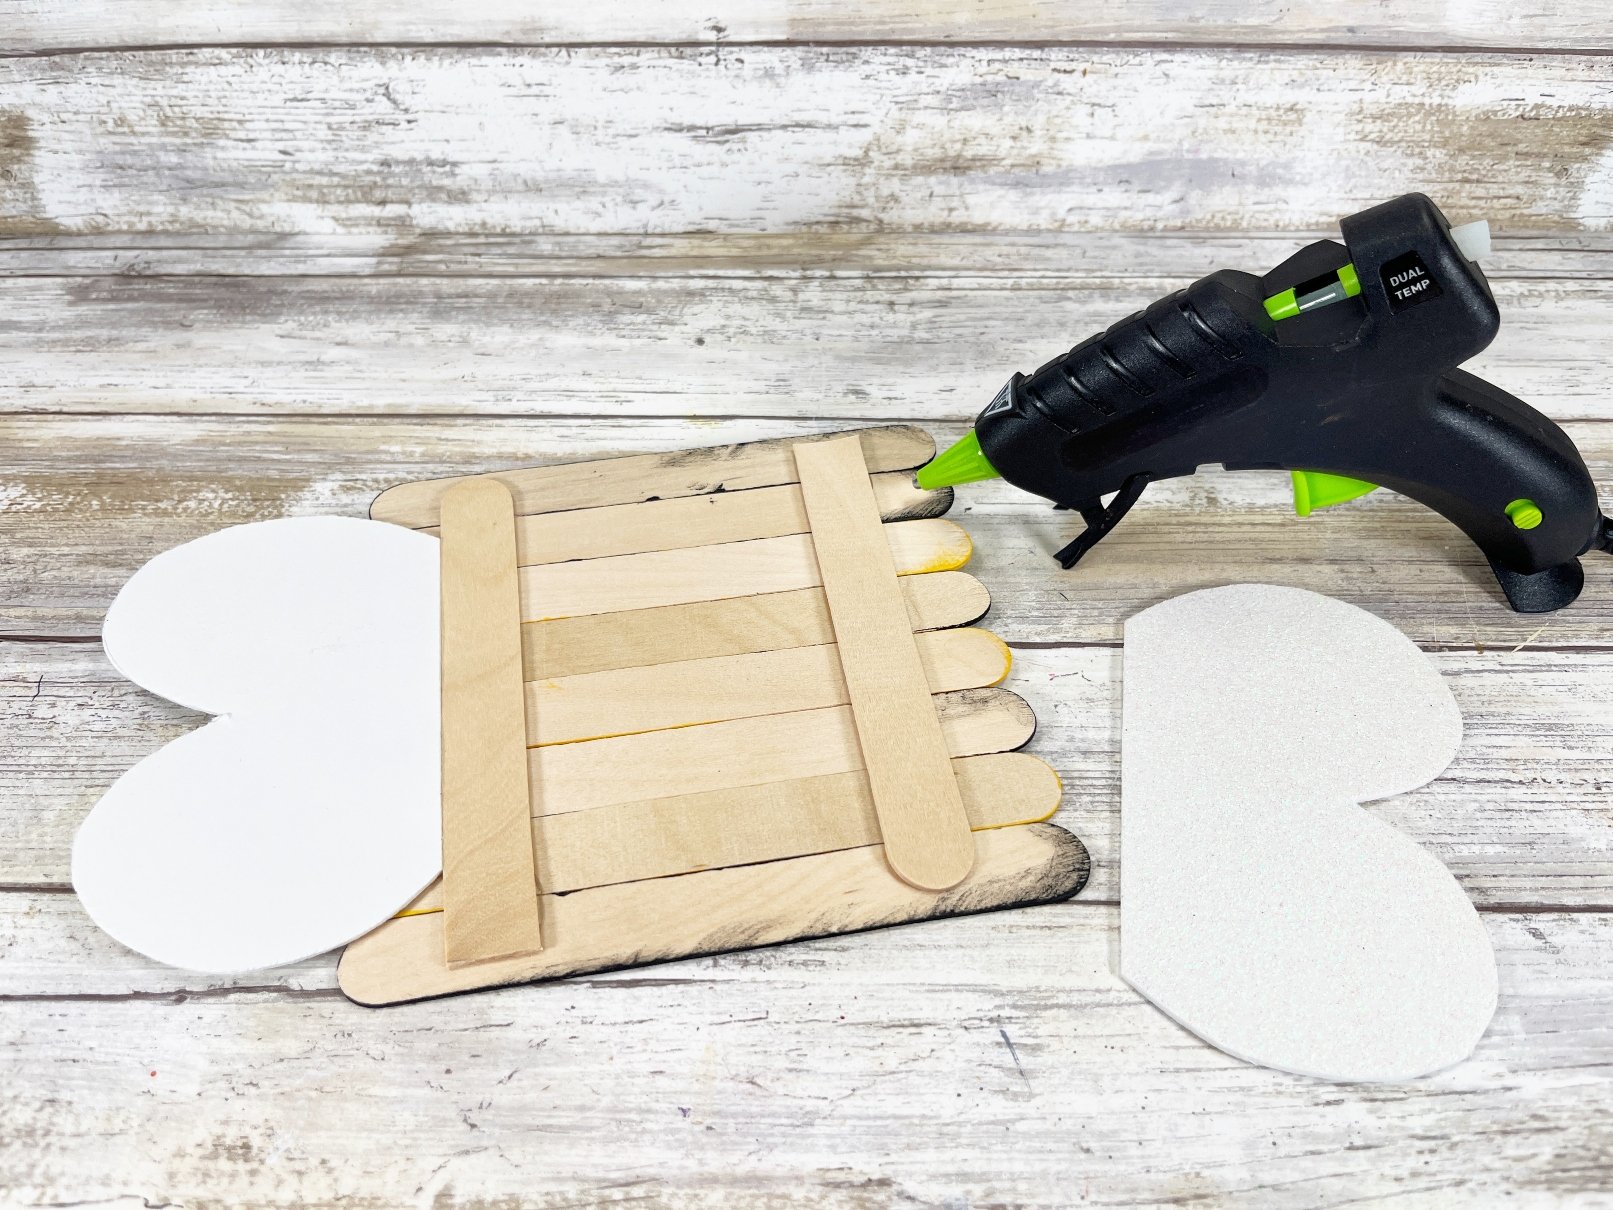
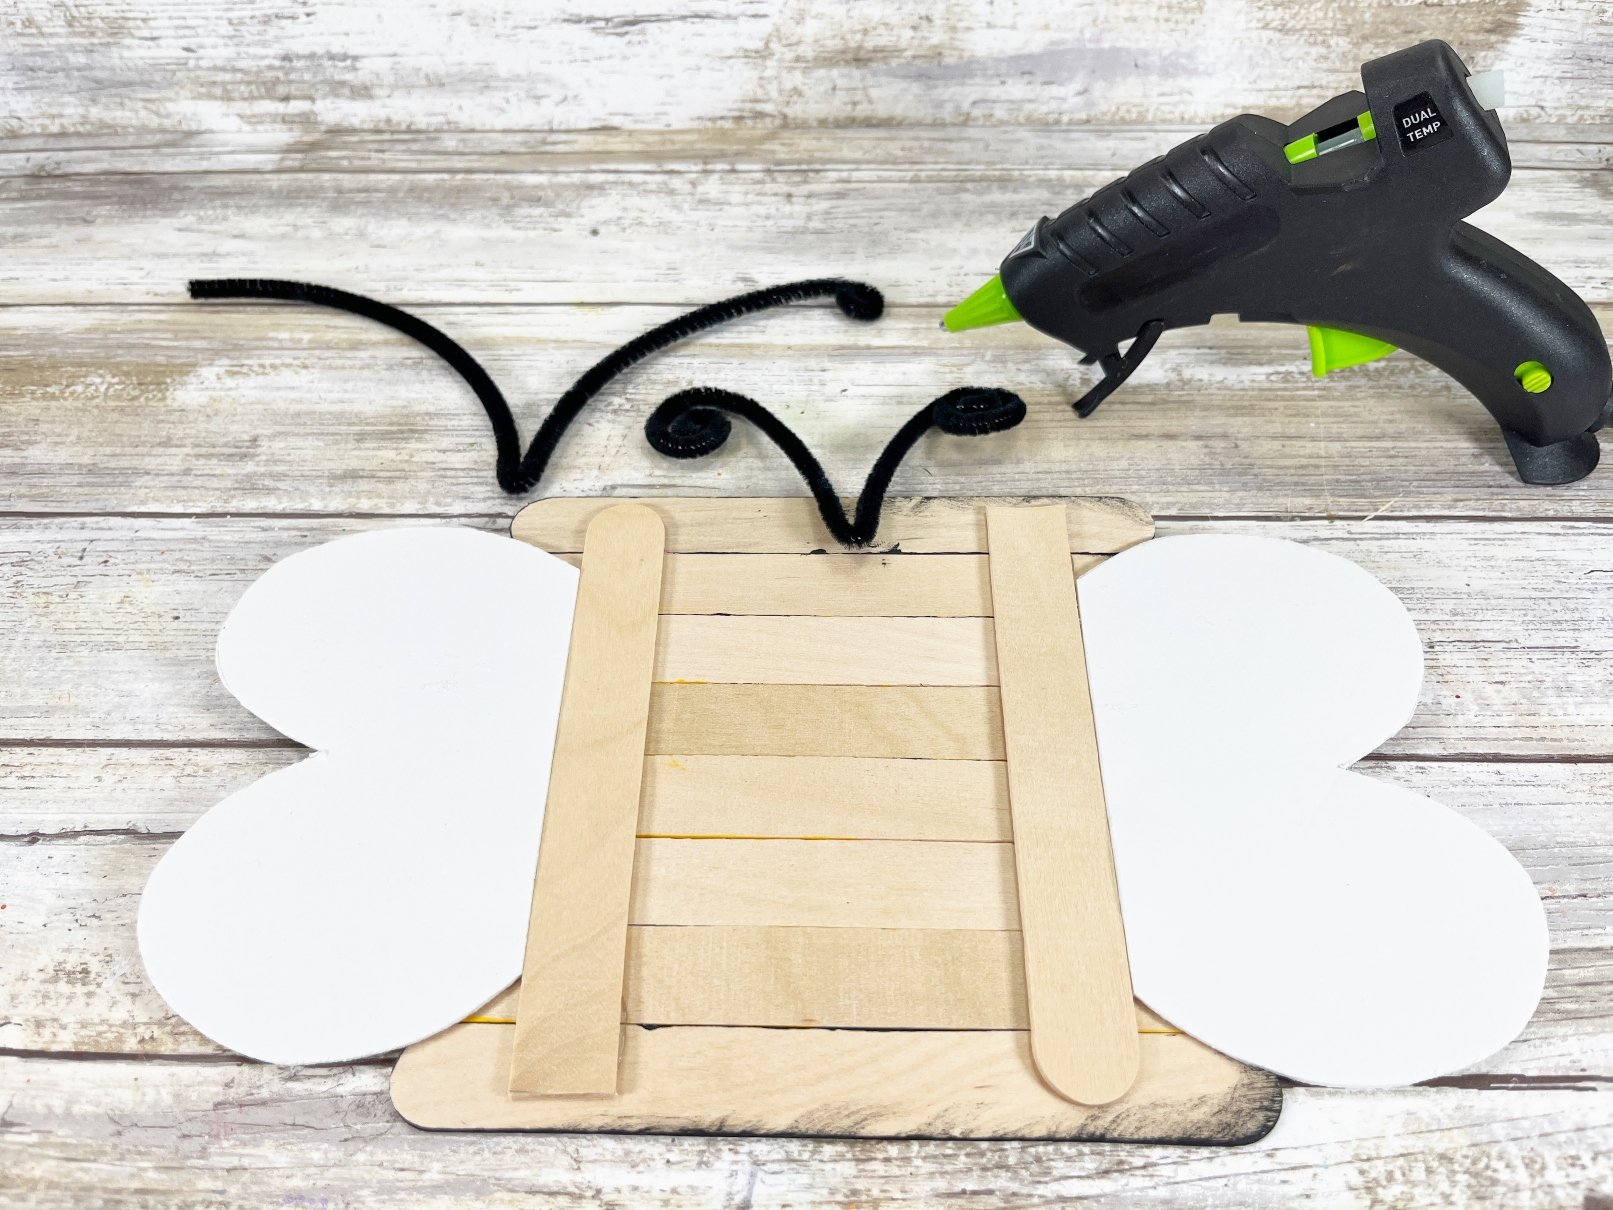
To create the Bee, line up two black, then alternate yellow and black jumbo craft sticks on your work surface. Using scissors, trim additional jumbo craft sticks to the width of the Bee and attach with a glue gun and glue sticks.
TIP: You can use liquid craft glue for this project, but you will have to wait for it to dry.
STEP FOUR
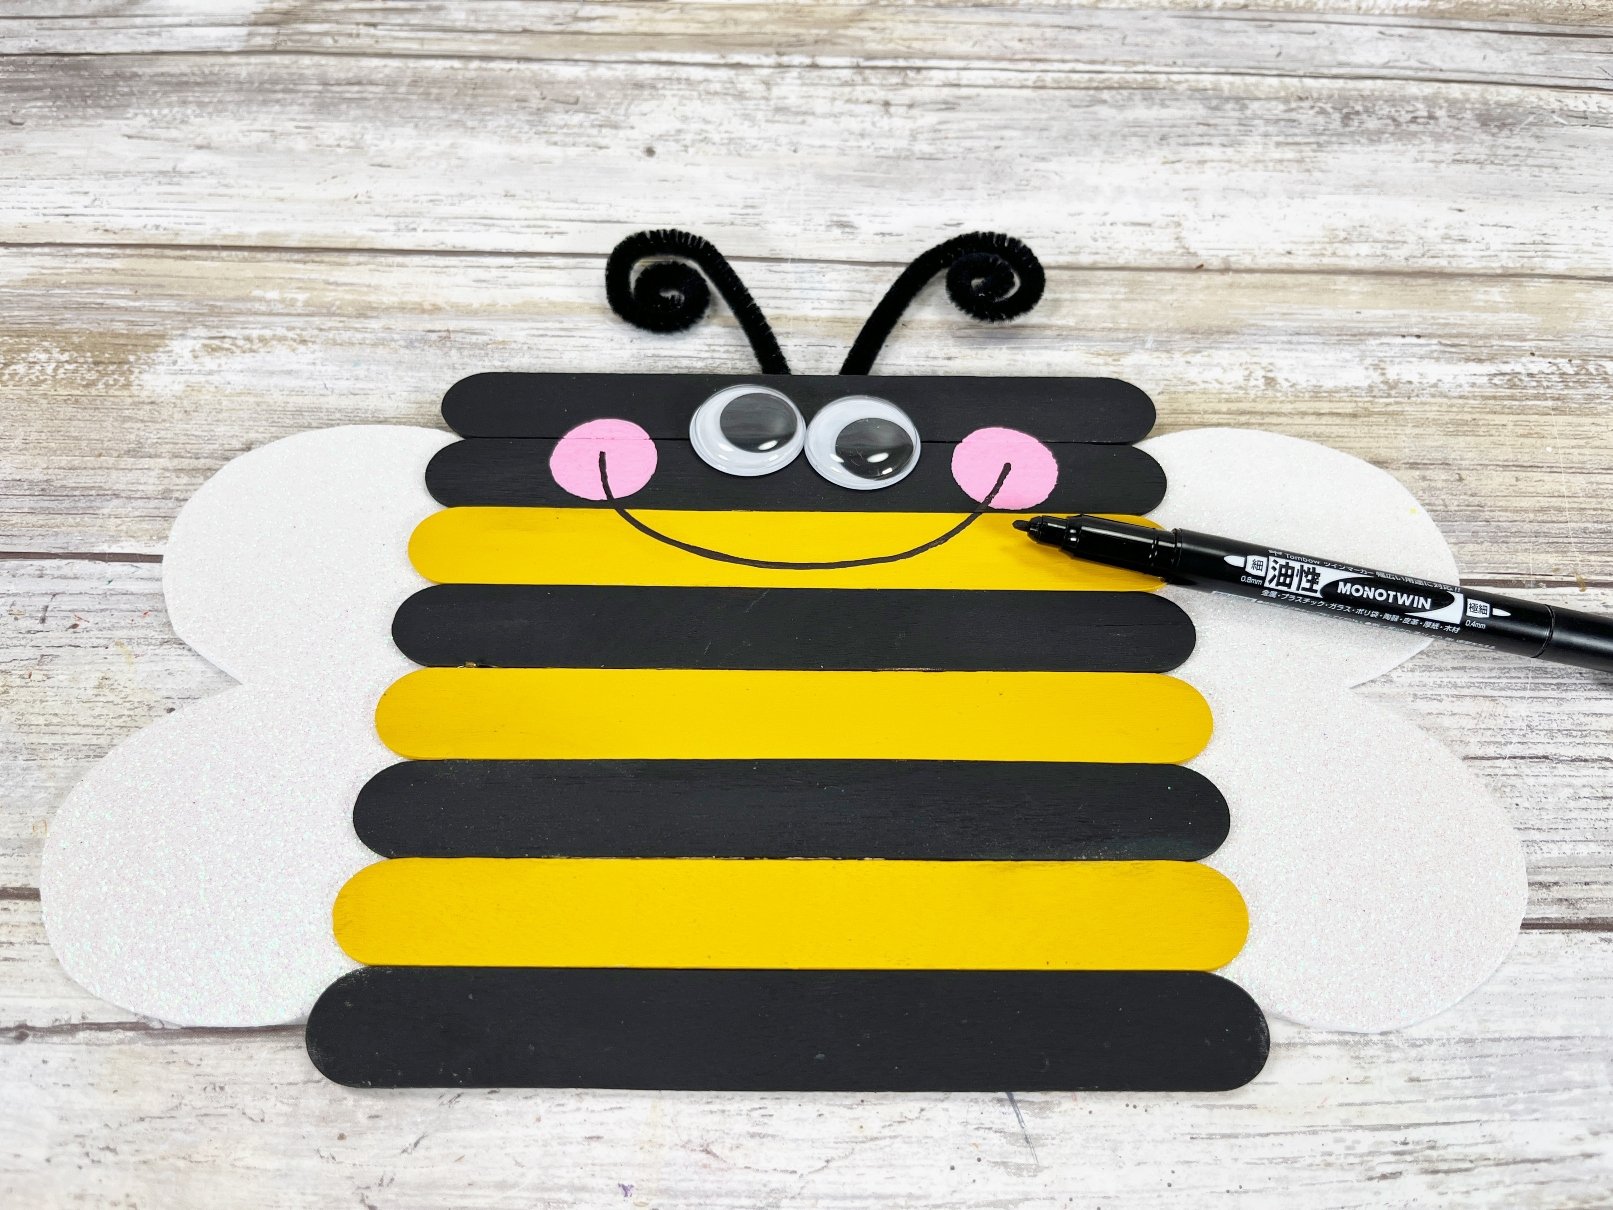
Attach two wiggle eyes to the Bee’s face with a glue gun and glue sticks. Create cheeks by dipping a sponge dabber into pink acrylic craft paint and stamping on either side of the face.
STEP FIVE
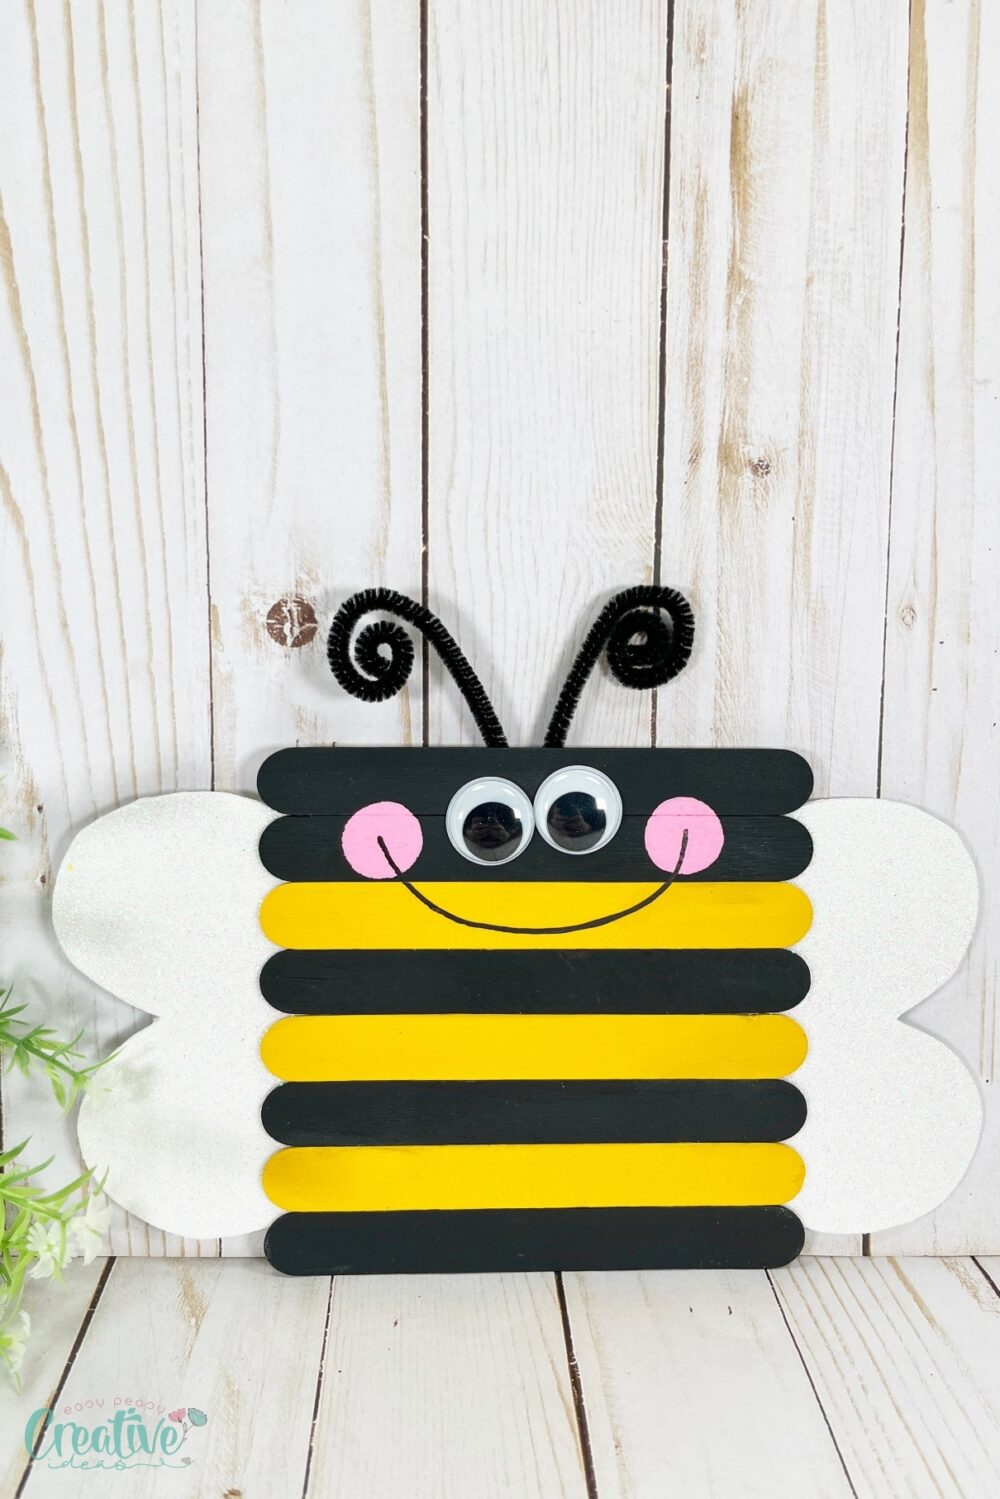
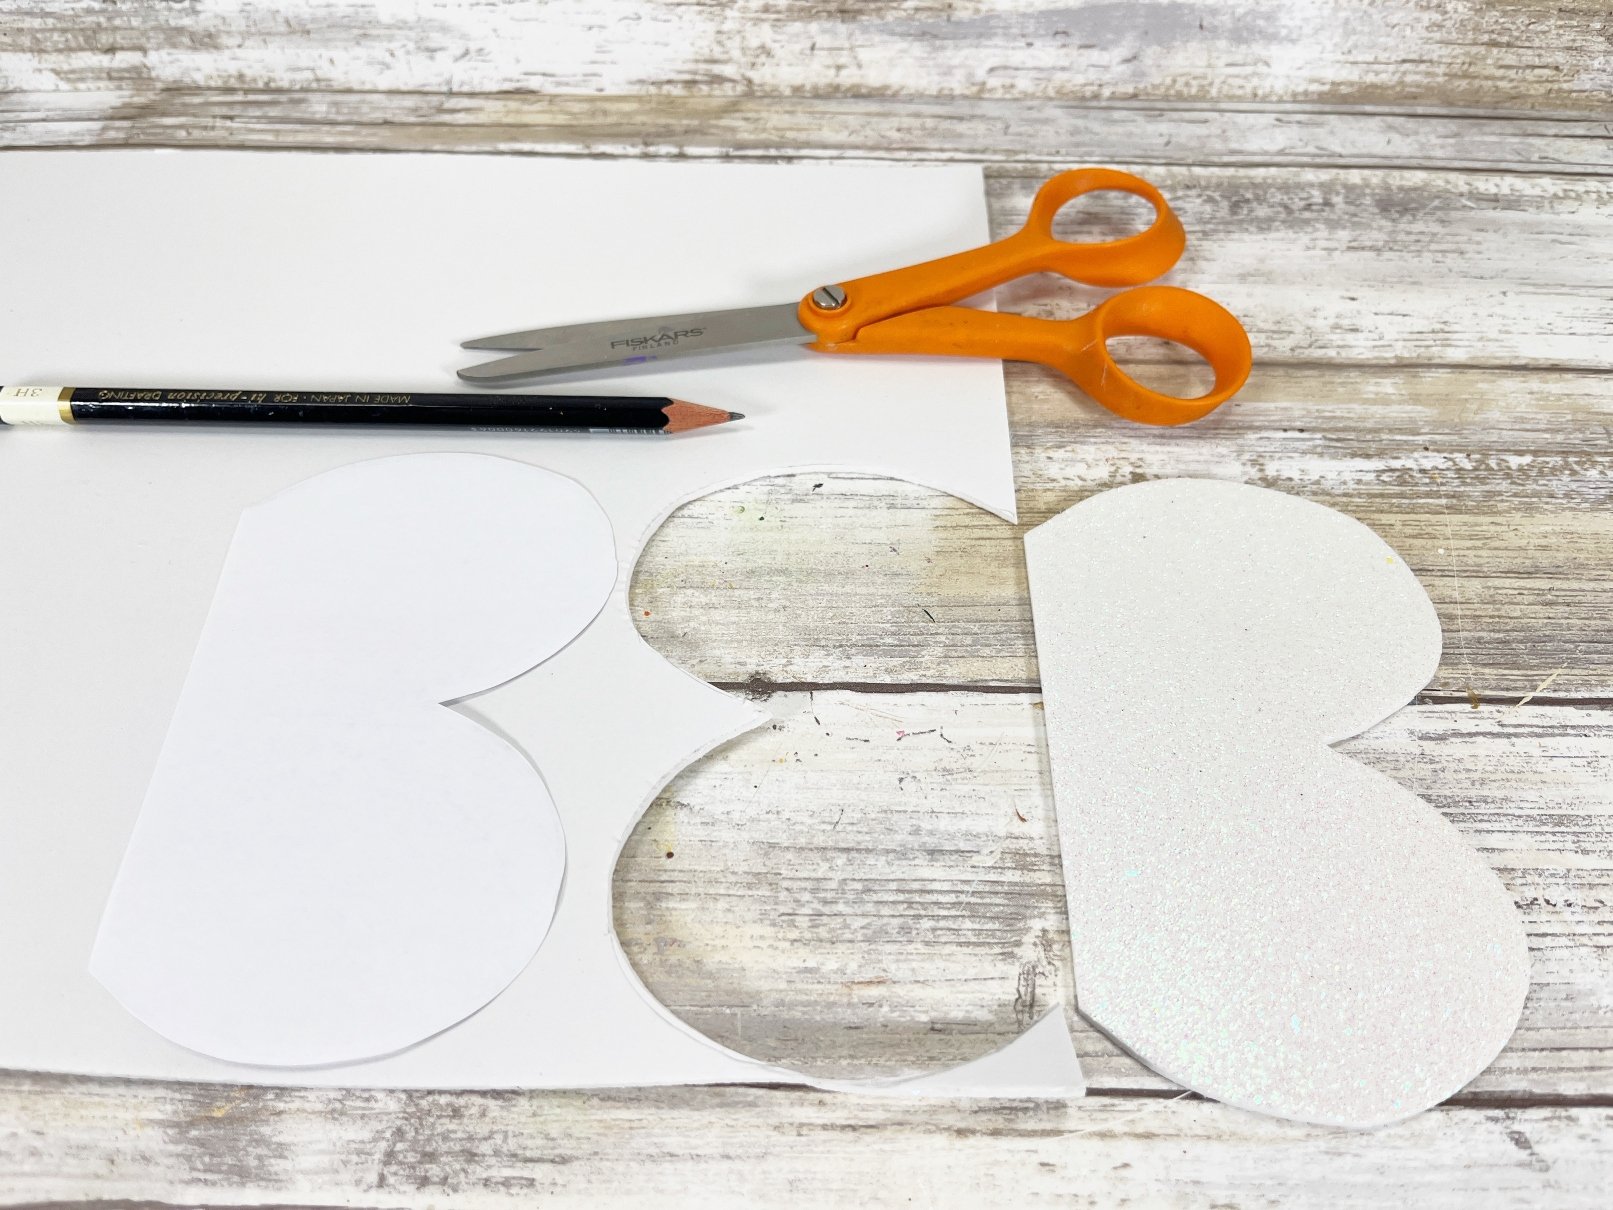
Download and print the Craft Stick Bee Patterns, then cut out with scissors. Trace the wings twice onto the back of white glitter craft foam. Cut out with scissors making sure to cut inside the traced lines for a clean, finished project.
You could also use colored cardstock or craft felt instead of foam for this project.
STEP SIX
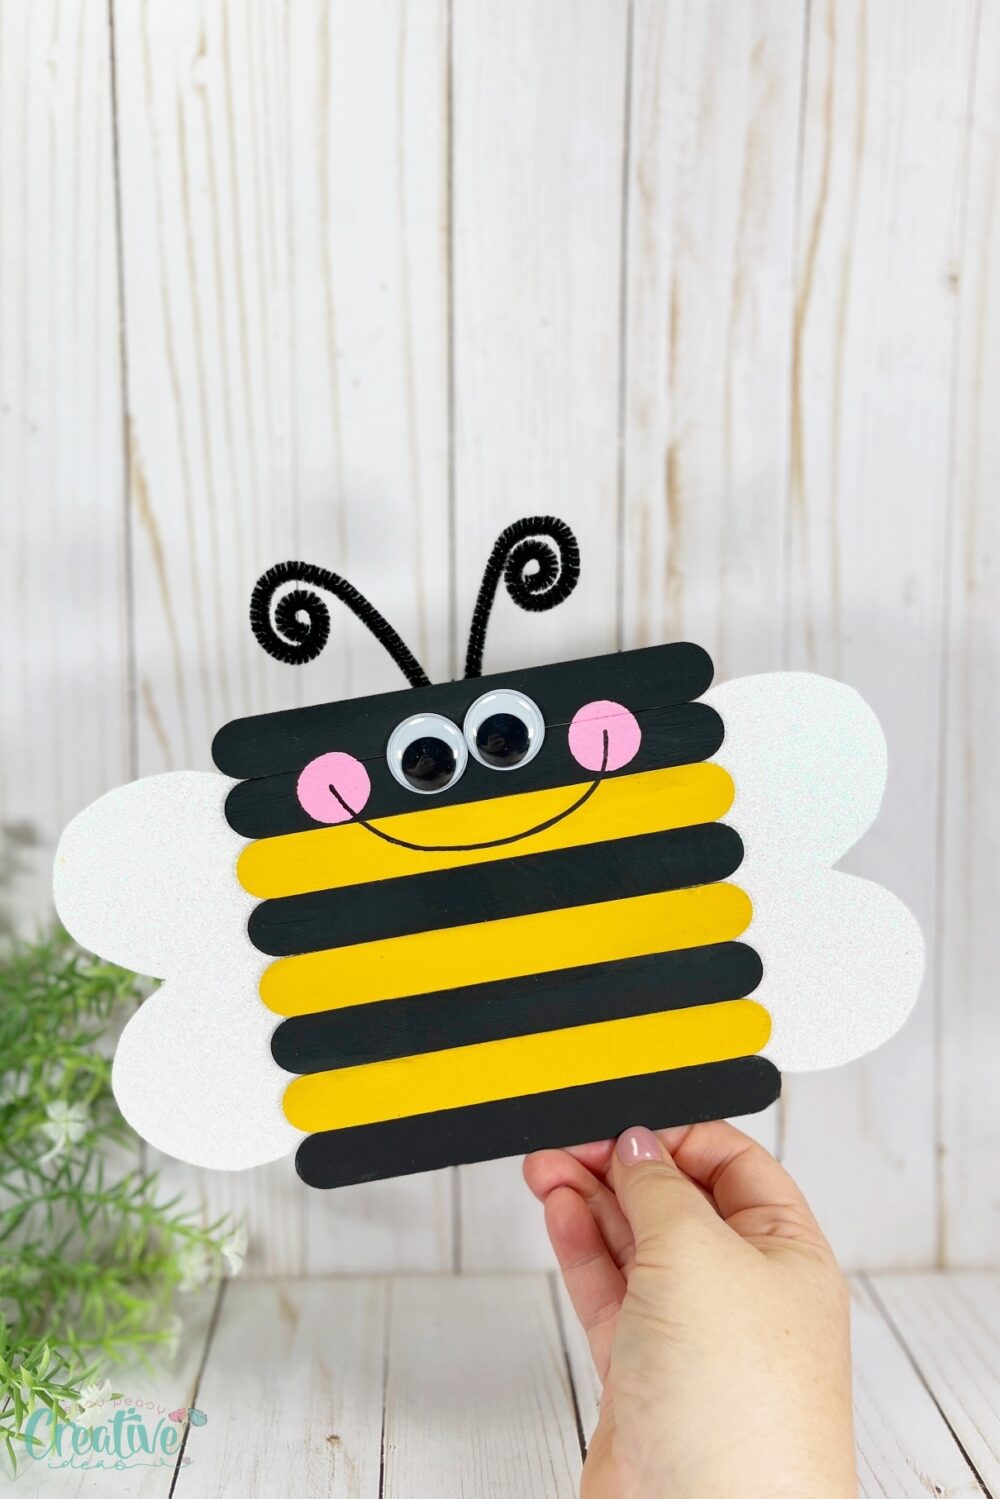
Attach the wings to the left and right-hand side of the back of the Bee with a glue gun and glue sticks.
STEP SEVEN
Bend the black chenille stem in half, then curl the ends into a swirl to create antennae. Attach to the back top center of the Bee with a glue gun and glue sticks.
STEP EIGHT
To finish, draw a smile with a permanent marker from cheek to cheek to create the Bee’s mouth.
Tips:
- For a smoother paint application, lightly sand the wooden craft sticks before painting.
- To add more dimension to your bee, layer two pieces of craft foam for the wings.
- If making this craft with young children, pre-painted craft sticks can be used to simplify the process.
Bee craft variations
- Glitter bees: Add sparkle to your bees by mixing glitter into the paint or applying glitter glue over the dried paint.
- Flying bees: Attach a small piece of fishing line to the top of your bee craft or to the back to hang it from the ceiling and give the appearance of flying.
- Fridge magnets: Glue a small magnet to the back of your finished bee craft to create a cute and functional fridge magnet.
- Garden markers: Use a waterproof sealant on your finished bees and attach them to a garden stick to use as whimsical garden markers.
What to do with the bee craft
Your finished bee crafts can adorn classrooms, serve as cheerful home décor, make unique gifts, or even act as fun, interactive learning tools for lessons on nature or insects.
Frequently Asked Questions
Can I use regular markers instead of paint?
Yes, markers can be used for a less messy alternative, though the colors might not be as vibrant.
How long does the glue from a glue gun take to dry?
It typically sets within a minute, but it’s best to allow it to fully cool and dry for about five minutes for a strong bond.
Can this craft be made with recycled popsicles?
Absolutely! You can use recycled popsicle sticks instead of purchasing new craft sticks. Just make sure they’re the jumbo type and they are properly cleaned.
Can I make different types of bees using this craft?
Definitely! Get creative and try making honeybees, bumblebees, or even a whole bee family with varying sizes and colors.
More crafts you’ll enjoy
- Homemade playdough
- DIY tissue paper flowers
- Minion bookmarks
- Craft sticks French fries
- Paper finger puppets
- Mini barn craft
- Craft sticks pineapple
- Craft sticks strawberries
This bee craft is such a fun activity to keep the kiddos busy with coloring, counting and motor skills. Make this super cute wooden craft stick bee in just about 30 minutes! Just remember to always supervise children during this project and have fun being creative with different variations and materials.
Don’t forget to share your thoughts on this craft in the comments below and sign up to my newsletter for more exciting craft ideas and tips! Happy crafting!
Bee craft with craft sticks
Materials
- Wooden Craft Sticks Jumbo
- Wiggle Eyes
- Chenille Stems Black
- Craft Paint – Black Yellow, Pink
Tools
- White Glitter Craft Foam
- glue gun
- scissors
- Permanent Marker
Instructions
- Base coat the front and sides of three jumbo craft sticks with yellow acrylic craft paint. Set aside to dry and apply a second coat, if necessary.

- Base coat the front and sides of five jumbo craft sticks with black acrylic craft paint. Set aside to dry and apply a second coat, if necessary.
- To create the Bee, line up two black, then alternate yellow and black jumbo craft sticks on your work surface.
- Using scissors, trim additional jumbo craft sticks to the width of the Bee and attach with a glue gun and glue sticks.
- Attach two wiggle eyes to the Bee’s face with a glue gun and glue sticks. Create cheeks by dipping a sponge dabber into pink acrylic craft paint and stamping on either side of the face.
- Print the Craft Stick Bee Patterns, then cut out with scissors. Trace the wings twice onto the back of white glitter craft foam. Cut out with scissors making sure to cut inside the traced lines for a clean, finished project.
- Attach the wings to the left and right-hand side of the back of the Bee with a glue gun and glue sticks.
- Bend the black chenille stem in half, then curl the ends into a swirl to create antennae. Attach to the back top center of the Bee with a glue gun and glue sticks.
- To finish, draw a smile with a permanent marker from cheek to cheek to create the Bee’s mouth.
Video
Article may contain Amazon & affiliate links. As an Amazon Associate I earn from qualifying purchases at no additional cost to you.
ABOUT PETRO
Hi, I’m Petro, author and founder of Easy Peasy Creative Ideas. Sewist, crafter, avid DIY-er, foodie, photographer, homemaker and mommy to one. I’m an expert at coming up with quick, clever sewing tips, recycling crafts and simple, easy recipes! You can find my ideas featured in reputable publications such as Country Living, Good House Keeping, Yahoo News, WikiHow, Shutterfly, Parade, Brit & Co and more. Thanks for stopping by and hope you’ll stay for a while, get to know me better and come back another time. Stick around for real fun projects! Read more…