

Upcycled DIY Cardboard Camera For Kids
Ignite your children’s imaginations with this exciting cardboard camera! Creating their own plaything is the perfect way to nurture and develop little minds. Not only that, but it’s a fun activity for you and your kids to enjoy together – creating something so simple yet incredibly rewarding can be incredibly satisfying. So what are you waiting for? Get crafting today!
Cardboard Camera craft for kids

If your child has an interest in photography but isn’t quite ready for the real thing yet, why not create a fun cardboard camera together? It’s easy and will only take around 20 minutes to make. Your little one is sure to be thrilled with this project, and they may even want to get involved or do it all on their own!
This creative DIY cardboard camera project is the perfect way to show kids how upcycling day-to-day materials, such as toilet paper tubes and cereal boxes, can lead to amazing results! Not only will they have a blast building it together, but they’ll also enjoy hours of fun after completion.
Create a unique, customized cardboard camera for your children to explore their creativity! With just a few simple household materials, your kids can express themselves as photographers with limitless potential. Spark curiosity and immerse them in hands-on learning as they design and build this cost-effective project of their own! Jumpstart imagination by harnessing the power of DIY crafts!
Similar posts you might like:
- DIY toy car bridge
- Snowflake winter craft for kids
- Paper finger puppets
- Heart cuffs with paper tubes
- DIY Minion bookmarks
What materials are needed to make a DIY cardboard camera?
To create a DIY cardboard camera, you will need two toilet paper tubes, one cereal box, scissors, tape or glue and craft supplies such as markers or paint.
How long does it take to make a DIY cardboard camera?
The entire process should take around 20 minutes.
What are the benefits of making a DIY cardboard camera?
Making a DIY cardboard camera provides numerous advantages such as teaching kids about upcycling and creative expression, enhancing their problem-solving skills, and giving them an engaging activity to enjoy with you or independently. Plus, it’s affordable and can provide hours of fun.
Is a DIY cardboard camera safe for kids?
Yes, a DIY cardboard camera is perfectly safe for children as long as adult supervision is provided and all sharp objects are kept away. With the help of an adult, children can create and use their own cardboard cameras without any worry.
What can kids do with a DIY cardboard camera?
After completing their DIY cardboard camera, children can explore photography by “taking pictures” of their surroundings and experimenting with different angles.
To get the most out of your DIY cardboard camera, it’s important to use it in a way that allows for creative exploration. Don’t limit your child to “taking pictures” from one spot; encourage them to move around, experiment with angles and perspectives, and observe the world through their own eyes.
Use this cardboard camera to help your kids explore the world around them in an entirely new way – through their own lens. Encourage your child to ask questions about what they see, experiment with angles and perspectives, and “capture” those special moments that mean the most to them.
And don’t forget to share their creations with friends and family, too! With this cardboard camera in your hands, the possibilities for fun and creativity are endless. So grab some supplies and get crafting today – it’s time to ignite imaginations everywhere!
It’s also important to remember that mistakes can be part of the learning process. Don’t be too hard on your child if their “camera” doesn’t turn out exactly as they envisioned – instead, use it as an opportunity to talk about problem-solving and how to adjust next time.
Above all else, let them have fun, explore, and create! That’s what this project is all about. So get building and have a blast!
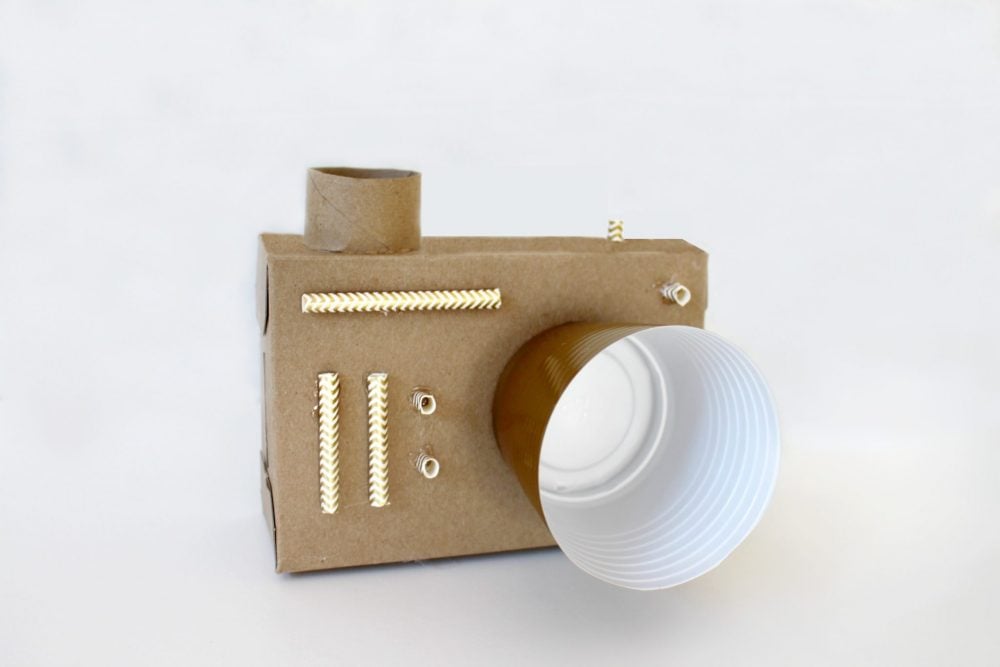
DIY Cardboard Camera
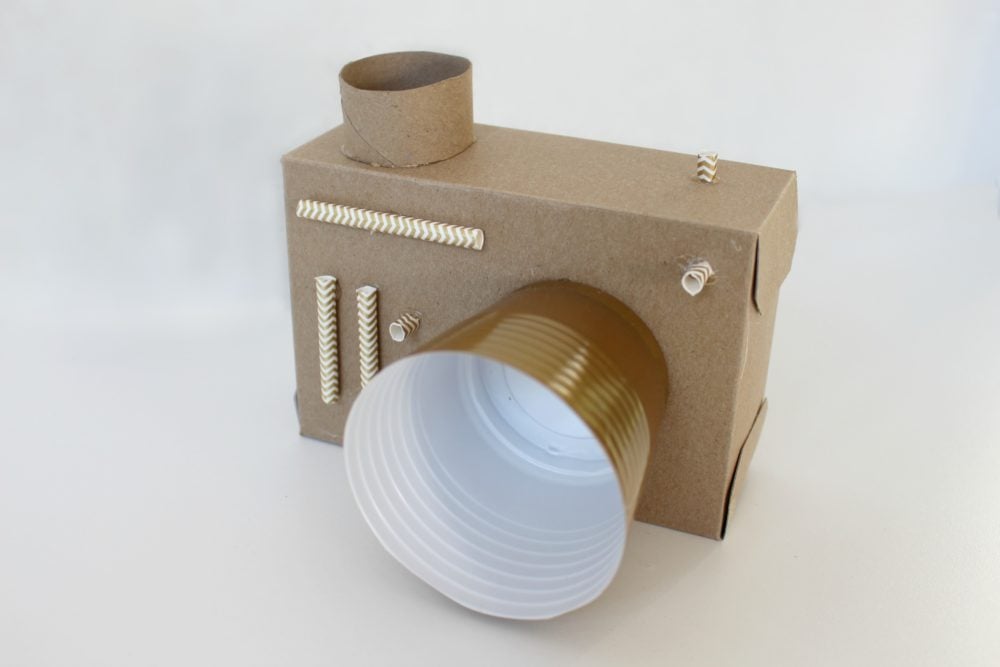
Materials:
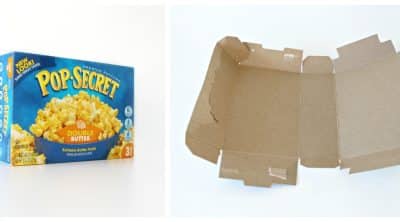
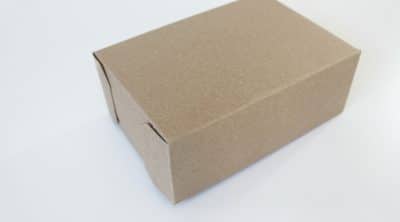
- 1 small microwave popcorn box (or any box approx 4” x 6” x 2 ½”)
- 1 disposable plastic drinking cup
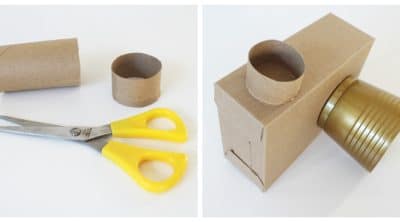
- 1 toilet paper roll
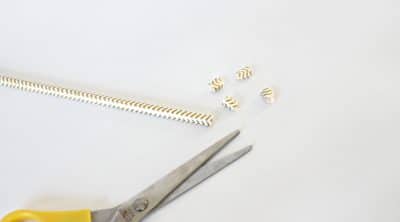
- 1 paper straw
- Scissors
- Hot glue gun
- Knife
How to make a cardboard camera
- Step 1: Use a knife to loosen the glue along the seams of the box so that you can disassemble it and lay it out flat.
- Step 2: Use the glue gun to reassemble the box inside out.
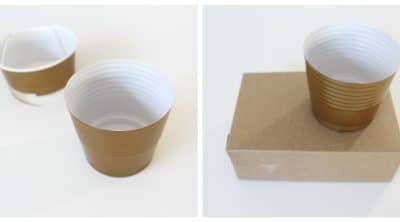
- Step 3: Cut the cup in half and glue the bottom of the cup to the front, right side of the front of the box.
- Step 4: Cut a 1” section off of the toilet paper tube and glue it to the top, left side of the box.
- Step 5: Cut a few small pieces from the straw and cut the rest of the straw into sections.
- Step 6: Glue one small piece of straw to the top right side of the box.
- Step 7: Glue pieces of straw to the front of the box to add character.
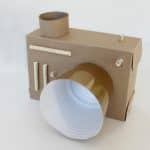
DIY cardboard camera kids craft
Materials
- 1 small microwave popcorn box or any box approx 4” x 6” x 2 ½”
- 1 disposable plastic drinking cup
- 1 toilet paper roll
- 1 paper straw
Tools
- scissors
- Knife
Instructions
- Use a knife to loosen the glue along the seams of the box so that you can disassemble it and lay it out flat.

- Use the glue gun to reassemble the box inside out.
- Cut the cup in half and glue the bottom of the cup to the front, right side of the front of the box.
- Cut a 1” section off of the toilet paper tube and glue it to the top, left side of the box.
- Cut a few small pieces from the straw and cut the rest of the straw into sections.
- Glue one small piece of straw to the top right side of the box. Glue pieces of straw to the front of the box to add character.
Article may contain Amazon & affiliate links. As an Amazon Associate I earn from qualifying purchases at no additional cost to you.
ABOUT PETRO
Hi, I’m Petro, author and founder of Easy Peasy Creative Ideas. Sewist, crafter, avid DIY-er, foodie, photographer, homemaker and mommy to one. I’m an expert at coming up with quick, clever sewing tips, recycling crafts and simple, easy recipes! You can find my ideas featured in reputable publications such as Country Living, Good House Keeping, Yahoo News, WikiHow, Shutterfly, Parade, Brit & Co and more. Thanks for stopping by and hope you’ll stay for a while, get to know me better and come back another time. Stick around for real fun projects! Read more…