

How to sew a drawstring laundry bag
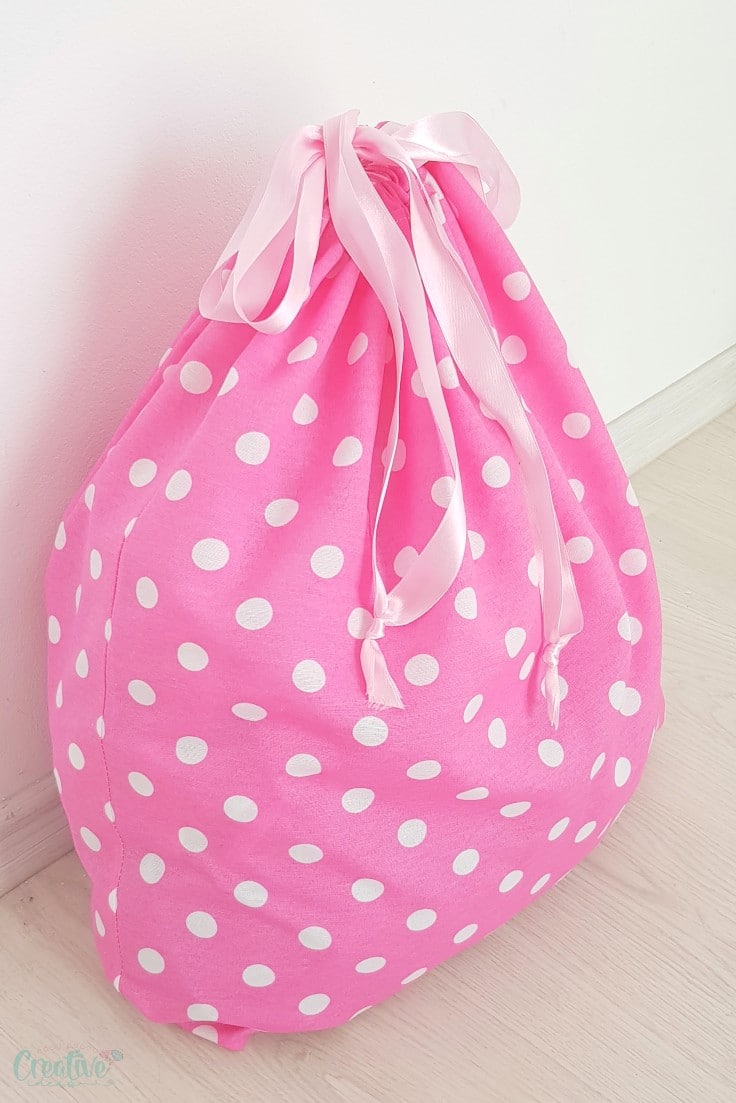
If you’re looking for a quick and easy way to store your dirty laundry, this simple tutorial shows you how to make a drawstring laundry bag using nothing more than a pillowcase. It’s a practical, convenient solution, spacious enough to hold your clothes, and other essentials, making transport hassle-free if you do your laundry in a shared facility.
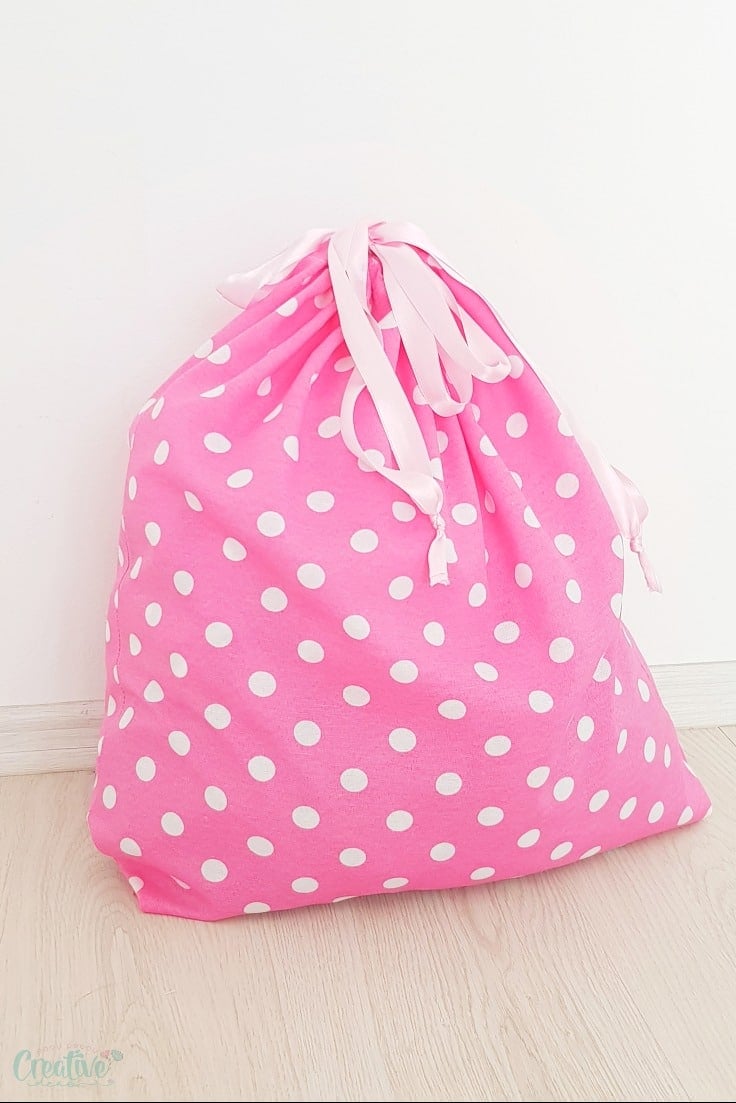
This quick and easy drawstring laundry bag takes just 20 minutes to make, or even less if you’re good with a sewing machine. Using a pillowcase as the base means most of the work is already done. Simply sew a casing for the drawstring, add a ribbon for a finishing touch, and your DIY laundry bag is ready! It’s a great way to repurpose old or mismatched pillowcases.
You can turn unused pillowcases into drawstring laundry bags and donate them to your local hospital. These handmade bags are a thoughtful gift that healthcare workers will surely appreciate. Choose medium or large pillowcases so the bags can fit scrubs, caps, masks, headbands, or scrunchies.
How to sew a drawstring laundry bag
Materials:
- Medium to Large Pillowcase or Fabric – You can use a pre-made pillowcase or purchase fabric to make one from scratch. Check out this fabric selection for inspiration.
- Scissors – A good pair of fabric scissors will make cutting your material easier and more precise. Consider these high-quality scissors for the job.
- Pins – Pins are crucial for holding your fabric pieces in place as you sew. Regular sewing pins will work perfectly.
- Ribbon – Add a decorative touch or functional ties with a ribbon of your choice. Opt for a color or pattern that matches your fabric.
- Matching Thread – Choose a thread that complements the color of your fabric for seamless stitching. This small detail can make a big difference in the final look.
- Sewing Machine – A sewing machine is essential for creating clean, sturdy seams. If you don’t have one, take a look at these options.
- Serger (Optional) – For a professional finish, consider using a serger to prevent fabric from fraying. This is an optional, but highly recommended, tool.
- Pressing Iron – An iron is key for pressing your seams and fabric to keep your project neat and wrinkle-free. Check out this selection of irons.
- Safety Pins – Safety pins are a great tool for threading ribbon or elastic through fabric channels with ease.
- Seam Gauge – A seam gauge helps measure hems and seam allowances accurately. This affordable option makes adjustments simple and precise.
- Embroidery Pattern or Iron-On Applique Pattern (Optional) Add personality to your pillowcase with a decorative touch.
Instructions:
- Start by cutting the top of your pillowcase (where the envelope forms) so that you’re left with a simple bag with an open top.
- Cut out the front panel of this trimmed top.
- Cut two strips of 3″ wide from this panel.
- Fold the ends of the strips inside, about 1/4″. Press and sew.
- Fold the strips in half, wrong sides together.
- Pin one strip to one side of the pillowcase, right sides together and the other strip to the other side of the pillowcase, also right sides together.
- Sew with 1/2″ allowance then serge the raw edges or use a zig zag stitch.
- Press the casing up so the seam is now pressed down inside the bag.
- Press the seam and top stitch.
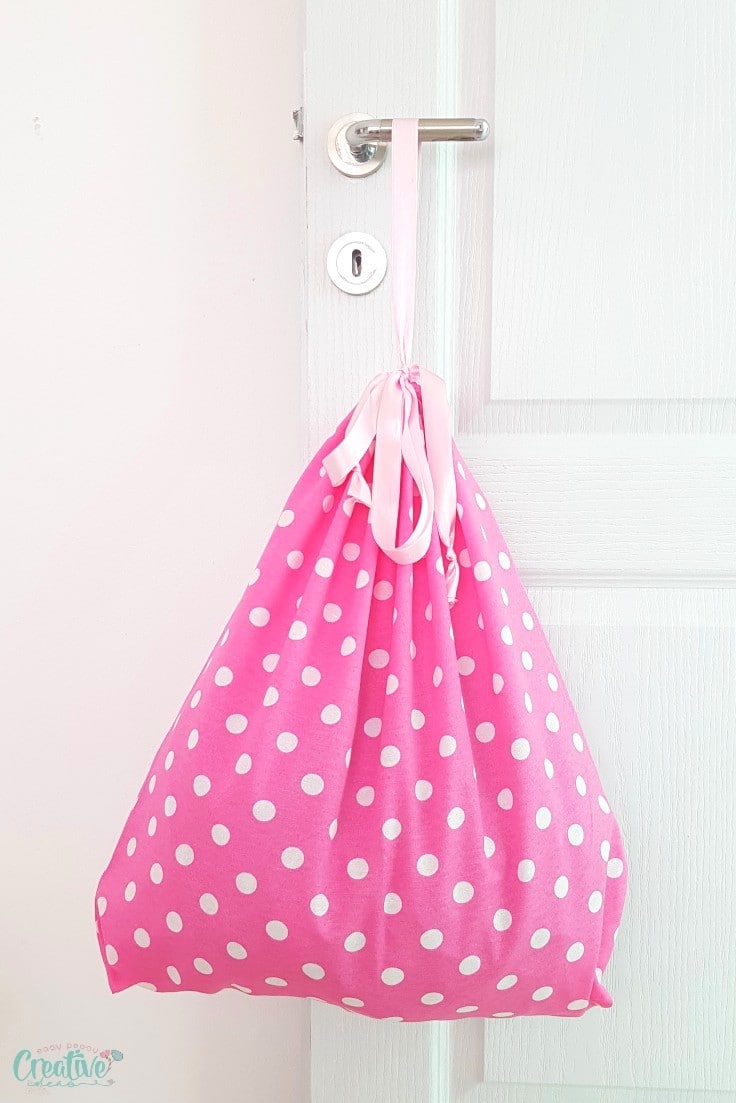
- Using a safety pin, thread some ribbon through the casing, starting on one end and going around the entire casing until you are back where you started.
- Grab another piece of ribbon and start threading it through the casing, starting on the opposite end and thread again through the entire casing until you’re back where you started.
- Tie the ribbons together into a knot, at each end of the casing.
- Use these knots to pull the ribbon to close the bag in one go.
- To open the bag, simply grab the opening with both hands and pull.
And that’s it! Easy peasy 20 minutes (or less) project! You can have a ton of these done in no time!
Tips
- Use a safety pin or a bodkin to make threading the ribbon through the casing much easier.
- If you want a sturdier bag, consider using fabric with thicker material or adding a second layer for extra durability.
- Don’t forget to press the fabric with an iron before sewing for a clean and professional finish.
- These bags make great reusable gift wraps, travel pouches, or even small storage solutions around the house.
Drawstring laundry bag variations
There are a few ways you can add a personal touch to the wash bags you sew:
- You can embroider names if you are making them as gifts for friends or family.
- Add a fun patch or fabric appliqué to personalize the bag.
- Use different colored drawstrings to easily identify which bag belongs to whom in a shared laundry space.
- If you want to make your laundry bags more versatile, you can add an outer pocket for storing laundry detergent pods or dryer sheets.
- Instead of using a single color of fabric for the entire bag, try mixing and matching various patterns and colors for a unique and eye-catching design.
More easy sewing projects you will enjoy:
- Waterproof pleated face mask with filter pocket
- No elastic face mask with filter pocket
- Headband with buttons for nurses
- Reversible scrub cap pattern
Frequently asked questions
Are there other options to make this pillowcase laundry bag?
With extra fabric, you can easily make a bag from scratch. The process is simple and works for smaller grocery bags too. Just measure, cut, and sew the sides and bottom—adding only about 10 minutes to your project. If you don’t have a spare pillowcase to repurpose, starting from scratch is easy. That said, using a pillowcase is super convenient—just add a drawstring to finish!
Can I use any fabric for this DIY laundry bag?
Yes, you can use any type of fabric as long as it is sturdy enough to hold your laundry. Cotton or canvas fabrics are commonly used for their durability.
Do I need to have sewing experience to make this DIY laundry bag?
This DIY project is fairly simple and doesn’t require much sewing experience. Basic sewing skills such as threading a needle and making basic stitches are all that’s needed.
Sewing your own drawstring laundry bags is not only a fun and creative way to customize your storage solutions, but it’s also an excellent opportunity to reduce waste by reusing materials and creating long-lasting items. So why not give this project a try and let me know how it goes in the comments below? Happy sewing!
Drawstring laundry bag
Materials
- medium to large pillowcase or fabric to make one yourself
- ribbon
- matching thread
- embroidery pattern or iron-on applique pattern optional
Tools
- scissors
- safety pins
- serger (optional)
- pressing iron
Instructions
- Start by cutting the top of your pillowcase (where the envelope forms) so that you're left with a simple bag with an open top.
- Cut out the front panel of this trimmed top.
- Cut two strips of 3" wide from this panel.
- Fold the ends of the strips inside, about 1/4". Press and sew.
- Fold the strips in half, wrong sides together.
- Pin one strip to one side of the pillowcase, right sides together and the other strip to the other side of the pillowcase, also right sides together.
- Sew with 1/2" allowance then serge the raw edges or use a zig zag stitch.
- Press the casing up so the seam is now pressed down inside the bag.
- Press the seam and top stitch.
- Using a safety pin, thread some ribbon through the casing, starting on one end and going around the entire casing until you are back where you started.
- Grab another piece of ribbon and start threading it through the casing, starting on the opposite end and thread again through the entire casing until you're back where you started.
- Tie the ribbons together into a knot, at each end of the casing.
- Use these knots to pull the ribbon to close the bag in one go.
- To open the bag, simply grab the opening with both hands and pull.
Article may contain Amazon & affiliate links. As an Amazon Associate I earn from qualifying purchases at no additional cost to you.

I make laundry bags out of old pillowcases. I put two button holes about an inch above the bottom of the cuffed top and opposite side and cut open the button holes. Then I fold the cuff in half to the inside of the pillowcase and sew it where the cuff meets the single layer of fabric. Then I “top stitch” the folded cuff above the buttonhole to form a casing and thread in the drawstrings. I also cut an 8″ piece of 3/4″ to 1″ grosgrain ribbon or webbing and sew a hanging loop centered on the top of the bag (between the buttonholes), sewing the 2 ends about 3″ apart.
I made 2 dozen of these for a mobile laundry/shower truck for unsheltered folks. We also keep one in each of our suitcases for traveling.
Can I buy this bag ? Lol