

Free reversible scrub cap pattern
If you’re looking for ways to help the medical community, this scrub cap pattern is a great project to sew! Together with a fun face mask and a headband with buttons this scrub cap would make a thoughtful gift set for the medical staff!
Scrub cap pattern
Today’s project will be a textile reversible scrub cap pattern, which is a great alternative that can be washed, disinfected and reused, just like textile masks. You can make some for you and your family if you work in the medical field, or for donating to your local hospital to help fight the current situation.
Surgical scrub caps are used in all medical facilities to avoid contamination, as even clean hair is home to many bacteria that can harm vulnerable patients. Hair can also host and spread the dangerous viruses, so it must be safely tied and covered.
Unfortunately, medical disposable caps are hard to find and shipping times can be very long (we’re talking weeks, not days). Before the crisis, most masks, caps and gowns came from China and Taiwan, but as the borders are closed and stocks are scarce, medical workers need something to protect them from the virus. These caps are also called nurse caps, medical caps, surgery hats, scrub hats…..and many more. It’s just about their functionality.
Similar projects you will love:
- No elastic face mask with filter pocket
- Headband with buttons
- Simple waterproof face mask with filter pocket
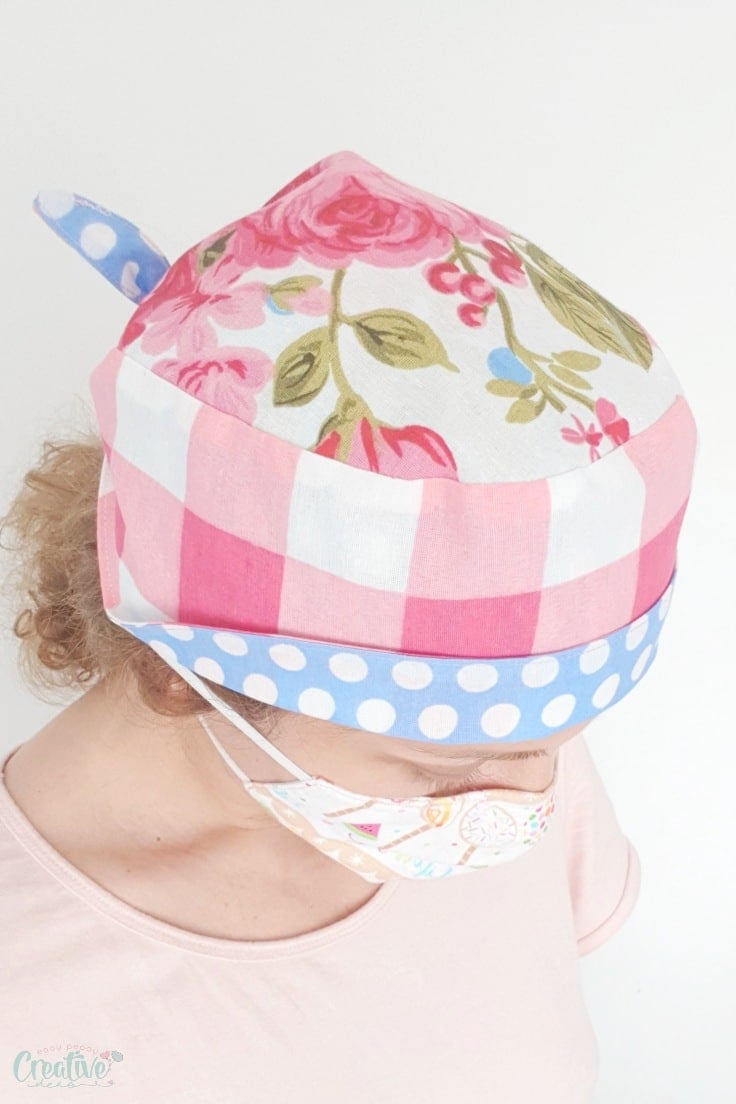
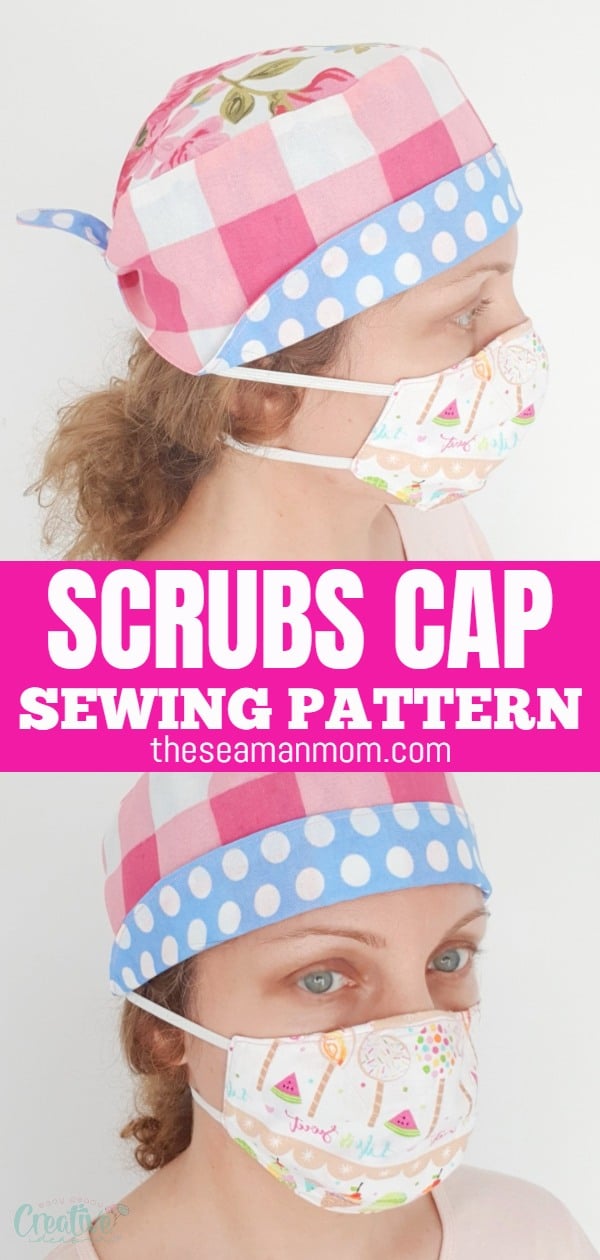
This simple scrub cap pattern will take little fabric that is likely already in your stash, and you can make it reversible, so that you can change your look from time to time if you get bored. It will also give you a more human look than those boring blue caps everyone wears. This surgical cap sewing pattern is so easy to make and sew and takes very little time (20 to 30 minutes), that even beginners can try their hand with it. Even children can be involved in this if they are old enough to safely handle a sewing machine. Bonus – it is free, compared to the expensive ones found online, and it’s a lot less wasteful, as you don’t need to throw away disposables.
It is best to use medium weight cotton or other dense fabric that can be washed in very hot water and can stand steam ironing. This way, you are sure you managed to kill all the germs and viruses in the cap before wearing it again.
Even if you are not in the healthcare system, you may want something to cover your hair while grocery shopping, as hair can catch lots of bacteria from the environment. Although not a 100% shield, it is a lot better than not wearing anything, but it is still advised that you should wash thoroughly after getting home, or taking a full shower.
The scrub cap is great not only for doctors or nurses, but also for chemo patients or those who underwent a craniotomy, as well as kitchen workers or everyone who needs to cover their heads for sanitary or aesthetic reasons.
Here are some small tips that will make a great difference to the wearer:
- To ease the pressure that elastic-tied masks put on the wearers’ ears, you can add buttons to the cap so that they can connect the mask to it;
- For long hair, leave some extra fabric at the back so that the wearer can tuck it in, or add a small ponytail pouch;
- Those with large, curly hair or larger head circumference may like looser caps, similar to the fluffy-looking chef caps.
Either if you are a healthcare worker yourself, making it for your partner or making several to donate them to your local healthcare workers, this scrub cap pattern is a great project to try while in the lockdown. Keep in mind that it has to be easily cleaned and sanitized, so no fancy rhinestones!
I would love to see your thoughts on this cap in the comments section, or your ideas of making it look even more interesting and functional.
This is a very simple and quite quick sew, about 30 minutes for the entire cap, main and lining. The scrub cap sewing pattern is available here, in sizes L, M and S.
Here’s how to make a scrub cap!
Surgical cap pattern
Materials:
- scrub cap pattern
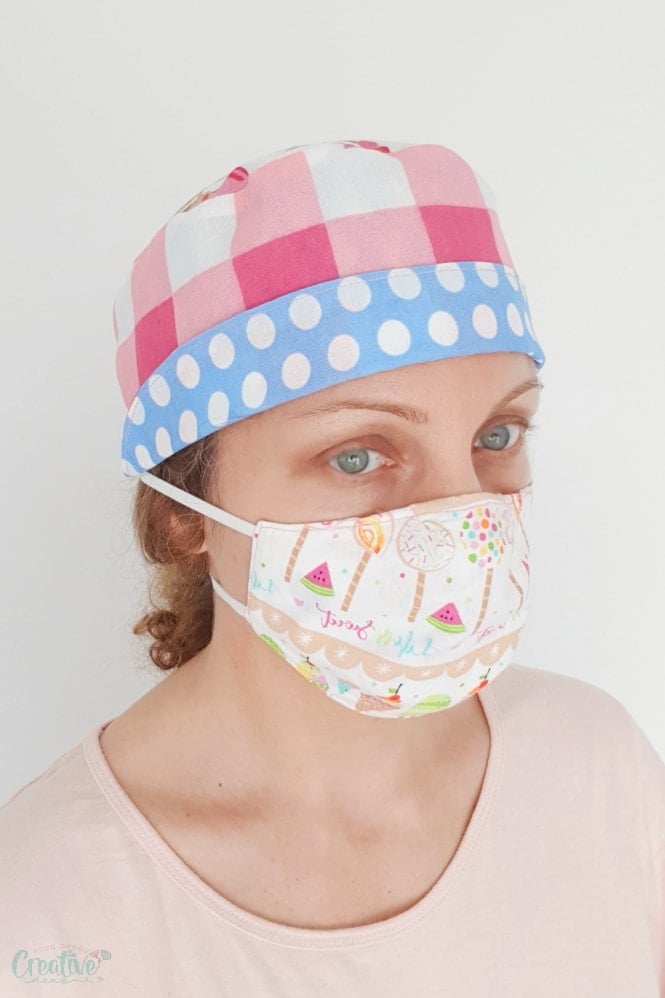
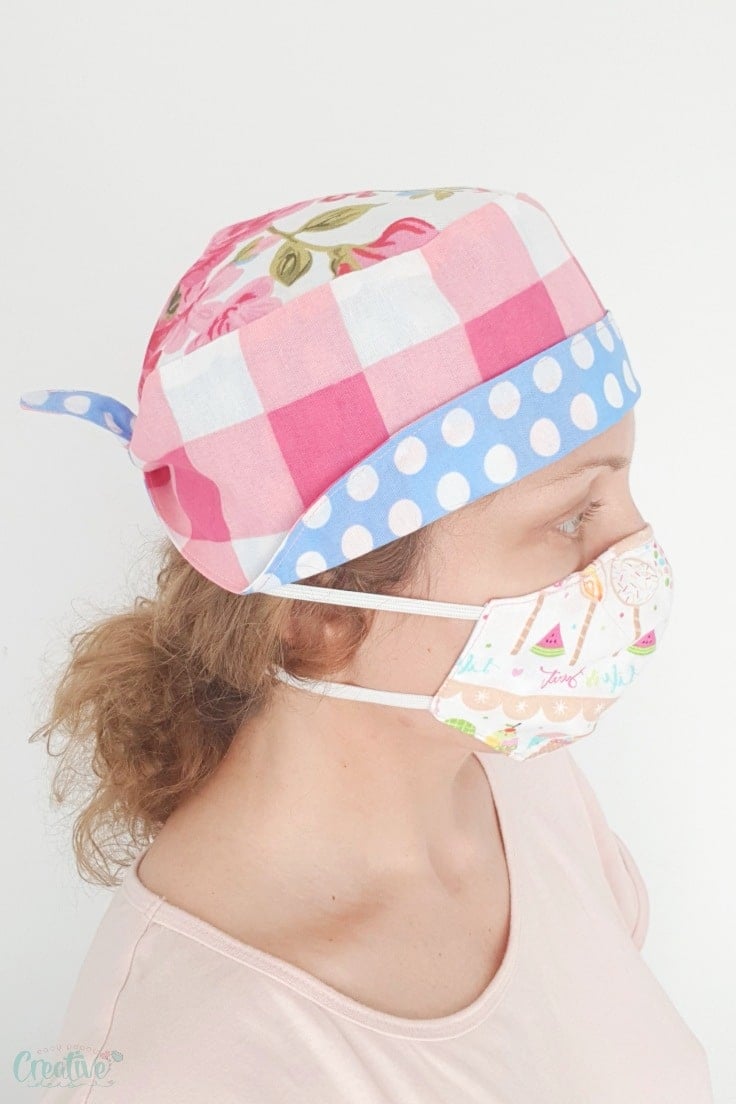
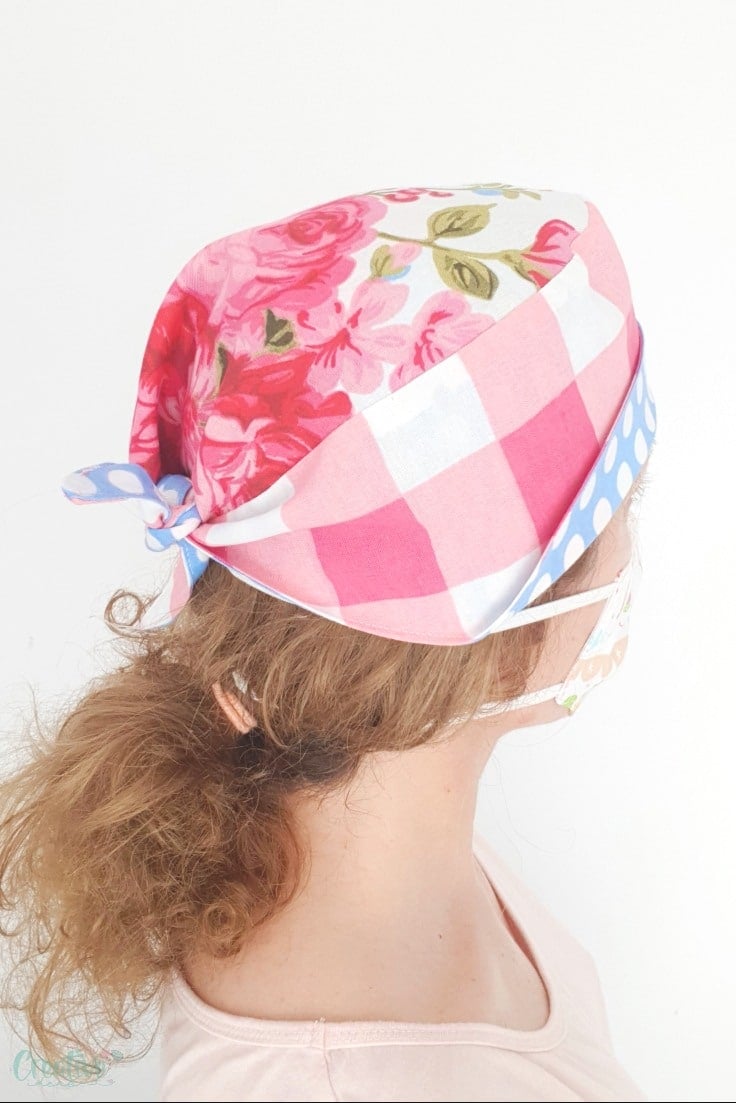
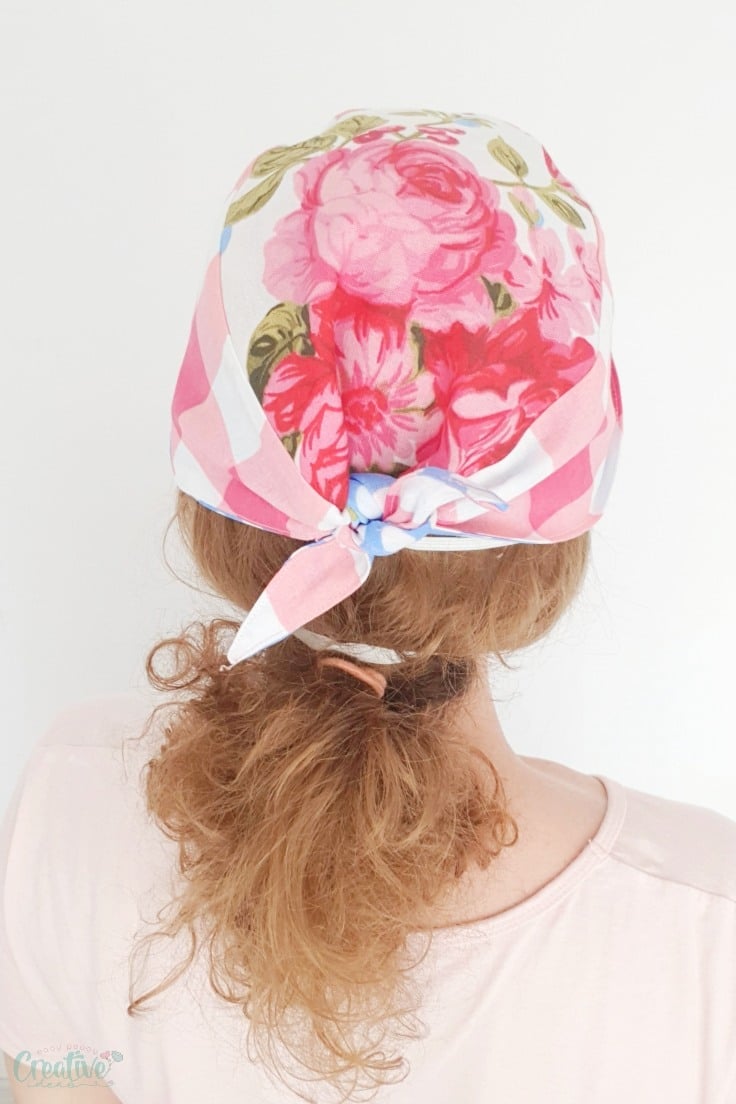
- 100% cotton, about 1/2 yard for a reversible cap (main and lining). I used different fabrics for the top and band as well as different fabrics for the main and lining cap.
- scissors
- pins
- matching thread
- sewing machine
- pressing iron
Directions:
Choose the cap option
- Print the pattern and attach the pieces at the pink colored circles/semi circles. You’ll have to end up with 2 pieces of fabric for the top of the cap and two strips for the band with ties.
- You have 2 options to construct your scrub cap using my pattern:
- You can attach the band to the top cap on either side. If you like the version you see in the pictures above, with the band folded, you’ll have to sew the straight edge of the band to the top. When choosing this option, please use the dart option #1.
- If you like more coverage in the forehead and ears area, as well as more space to fit your hair under the cap for longer hair worn into buns or ponytails, you’ll have to attach the curved edge of the band to the top of the cap. For this version you won’t fold the band when wearing the cap, as in the images above. In this version you’ll have to use the dart option #2.
- In this tutorial I’ll describe the steps used to attach the straight edge of the band to the top of the cap. The process is exactly the same for the curved edge.
Construct the caps
- Place one of the top fabrics right side up.
- Top with the band, wrong side up, straight edge matching the edges of the top. For this step, my tutorial on attaching concave and convex curves would be a great help so if you’re new to sewing, I suggest you read this tutorial first.
- Pin the raw edges and sew with about 1/2″ allowance.
- Place this cap aside and construct the lining cap the exact same way as the main cap.
- Press the seams to a side, towards the band on both caps.
- Clip the corners and cut notches in all curves, without snipping through the seams.
Sew caps together
- Place the main cap right side up and fill with the lining cap, wrong side up.
- Adjust both caps until all raw edges align.
- Pin and sew all around the band and the bottom of the top cap, with 1/2″ allowance.
- Leave an opening of 2-3 inches so you can turn the caps right side out.
- Turn the caps right side out through the opening.
Finish the cap
- Smooth out the seams and press well.
- Top stitch with 1/8″ allowance and you’re done!
- Fold the front of the band up when wearing the cap and enjoy!
Pin to save for later
Article may contain Amazon & affiliate links. As an Amazon Associate I earn from qualifying purchases at no additional cost to you.

Hi there, can’t wait to try this pattern out. Do I print this out as ‘actual size” or ” fit to page”? Thank you for helping us with this beautiful pattern 💓 Have a great day!
HiDanica! Thanks for your lovely comment! The pattern should be printed actual size. Happy sewing!
Thanks I made one but I think I cut it out wrong the ties were opposite. Great directions I am going to try again.
Hi Heddie! I’m sorry you had troubles with this pattern. I’m sure you’ll nail it next time! :)
Are the darts necessary? No darts were shown on the demonstration video.
Hi Marilyn. The darts were added after the video for a better fit. You can skip the darts but the cap will have a looser fit.
I don’t understand the ‘dart’ in this pattern….I am a beginner so I would like to know when you sew the dart….would that be before pinning the band to the cap?
Hi, Jo! Yes, the dart is sewn first.