

How to sew pinwheel hot pads
Create some beautiful kitchen accessories with this easy pinwheel hot pads tutorial! These lovely hot pads are not only simple to make but also add a touch of charm to your kitchen décor. Whether you’re a beginner or an experienced sewist, this project is perfect for any skill level. Follow the detailed steps to sew unique and functional hot pads that will impress your family and friends!
If you’ve been looking for ways to add a pop of color to your kitchen space with something functional yet aesthetically pleasing, pinwheel hot pads might just be the DIY project you’re looking for! These vibrant hot pads not only protect your surfaces but also bring a delightful charm to your kitchen.
Making pinwheel hot pads has been a fun and fulfilling experience, mixing practicality with creativity. This project lets you customize endlessly, making it a great way to show off different fabric designs and colors. Plus, these hot pads are awesome gifts for friends and family, showing a personal touch and thoughtfulness.
How to sew pinwheel hot pads
Materials
- 1 square of quilting fabric for the backing, 9″ by 9″
- 4 squares of quilting fabric for the pinwheels, 9″ by 9″
- 1 square of batting, 9″ by 9″
Equipment
- Scissors or rotary cutter
- Quilting ruler
- Cutting mat
- Wonder clips
- Sewing machine
- Point turning tool
- Pressing iron
Instructions to Sew the Pinwheel Hot Pads
Detailed step by step images and video are available in the craft card below.
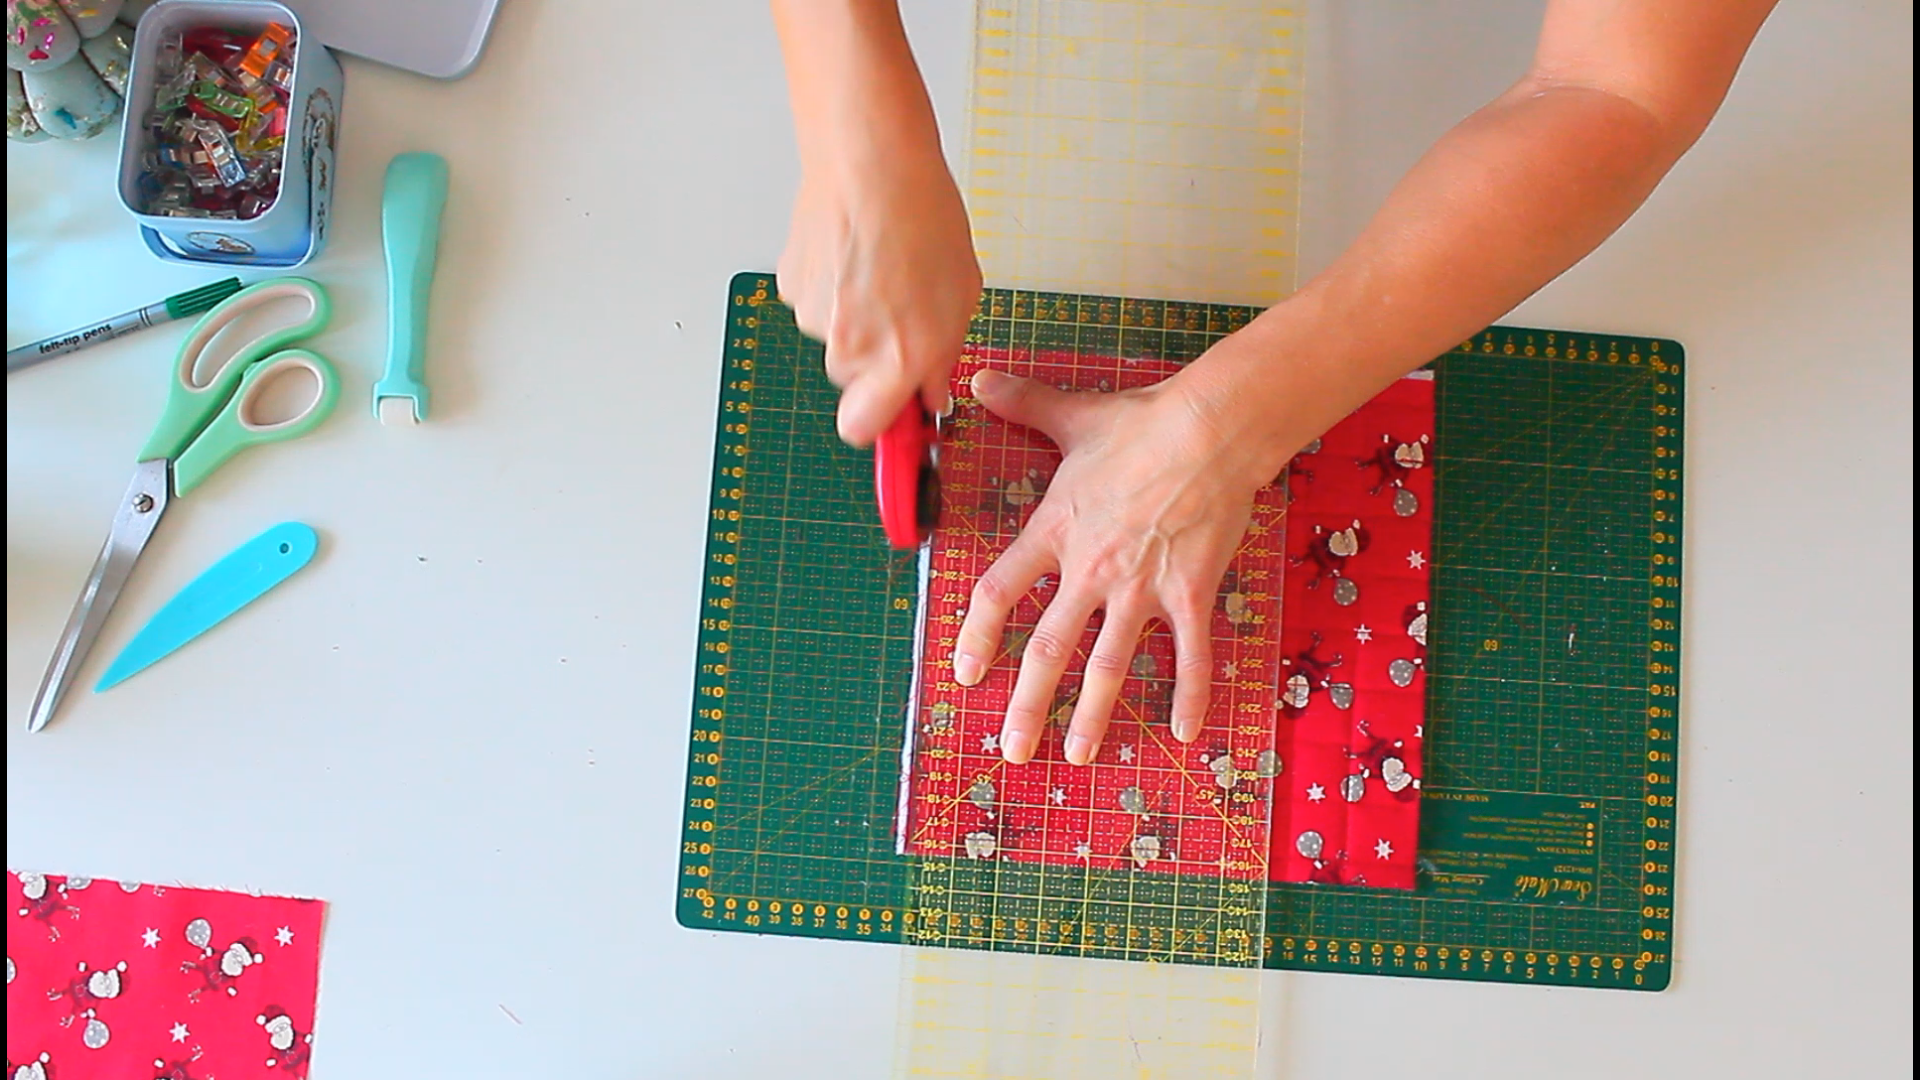
- Cut 5 fabric squares, each measuring 9″ by 9″, 1 for the backing and the other 4 for the pinwheels.
- Cut one piece of batting the same size, doubling it up if needed for extra thickness.
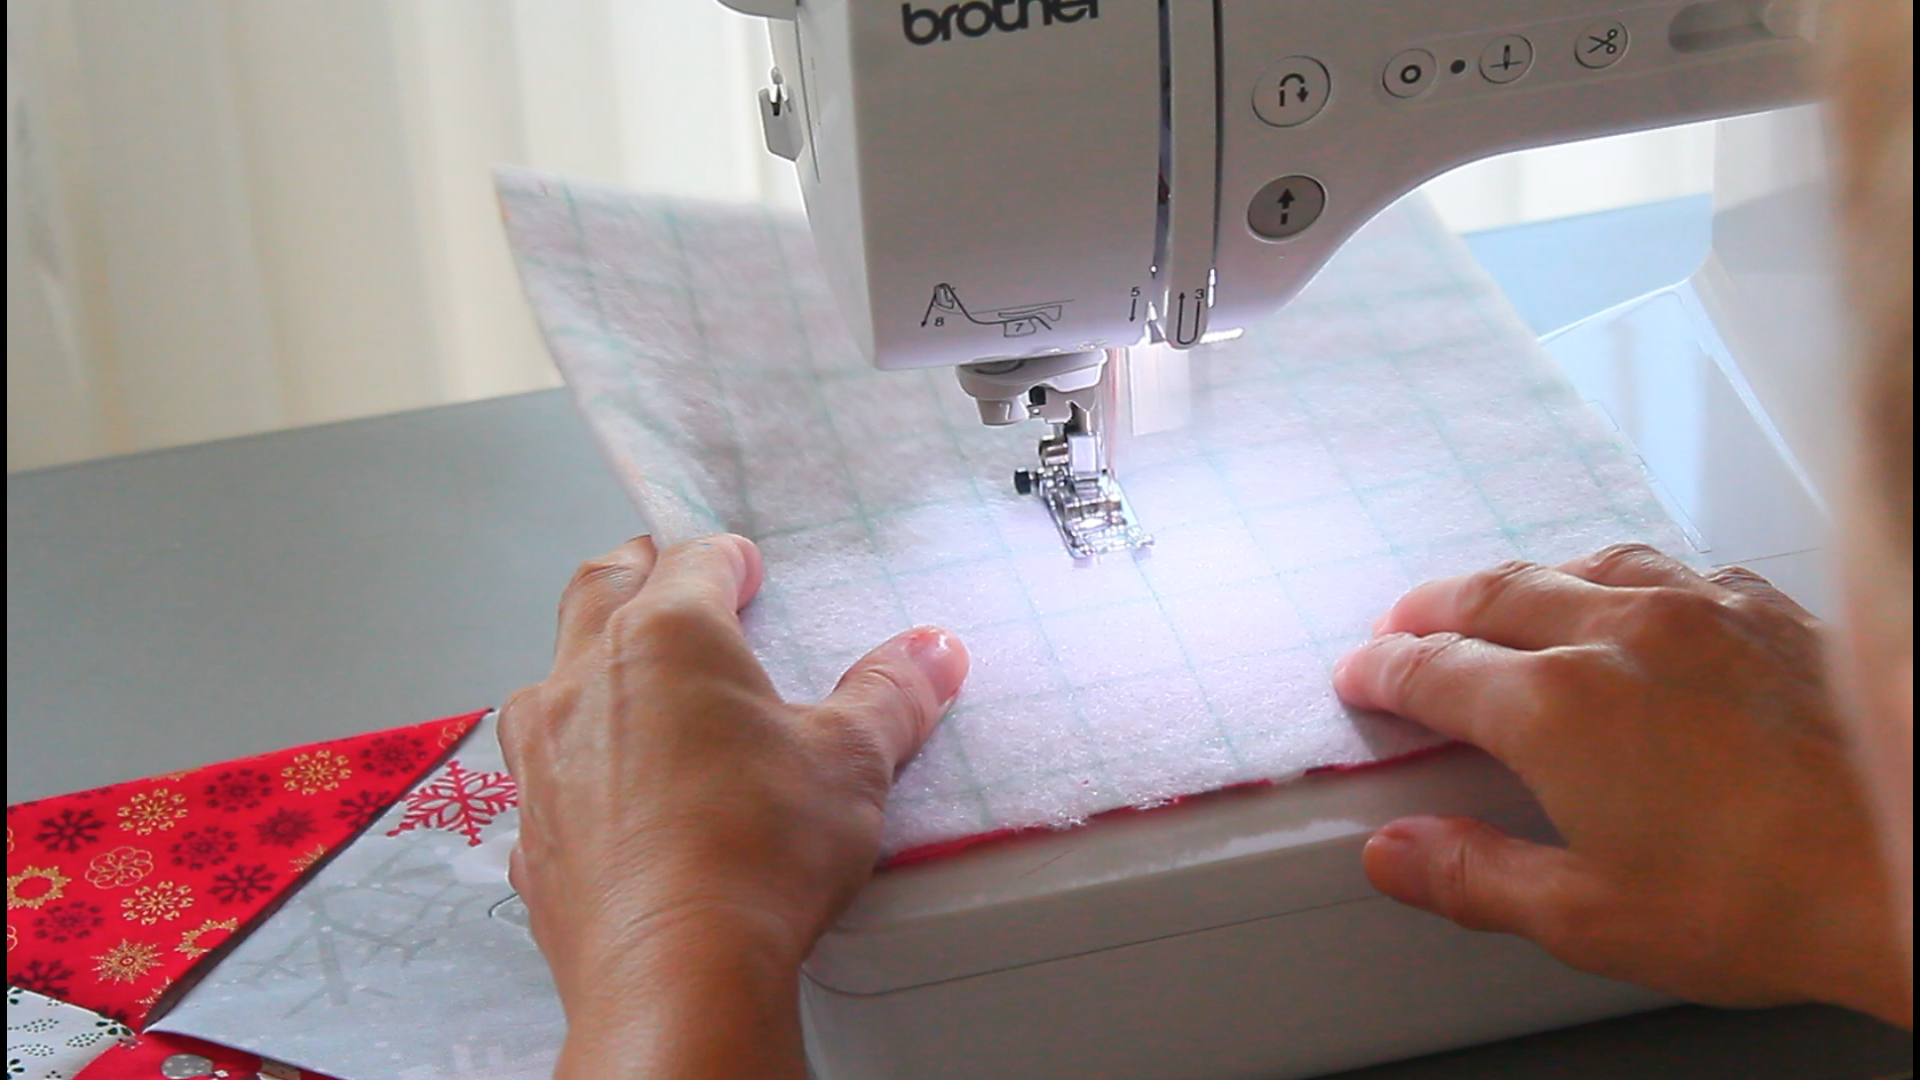
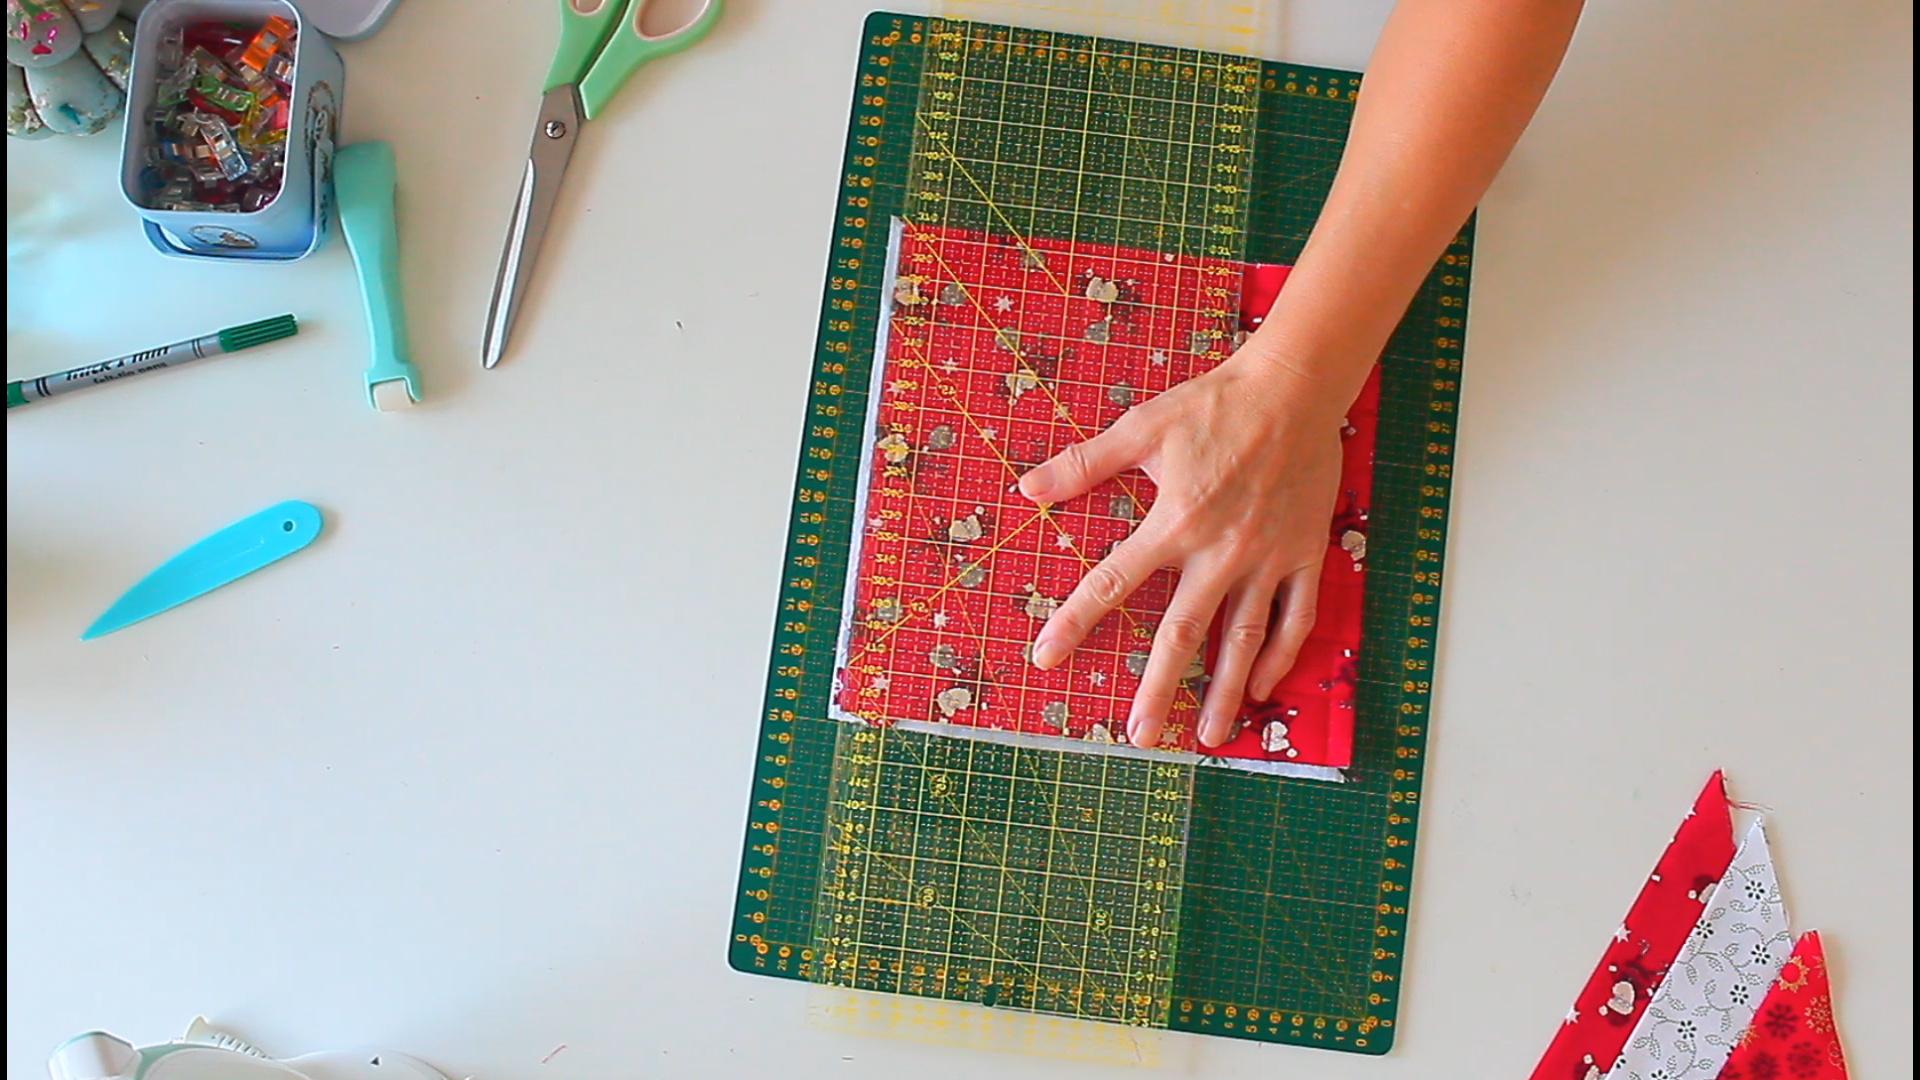
- Quilt the backing square and batting together. Use hem tape to attach them before quilting from the center to avoid shifting. Trim the quilted panel if necessary.
- To make the loop, fold the fabric strip in half lengthwise and press. Fold again in half and press, then edge stitch along the open edge before pressing to form a loop.
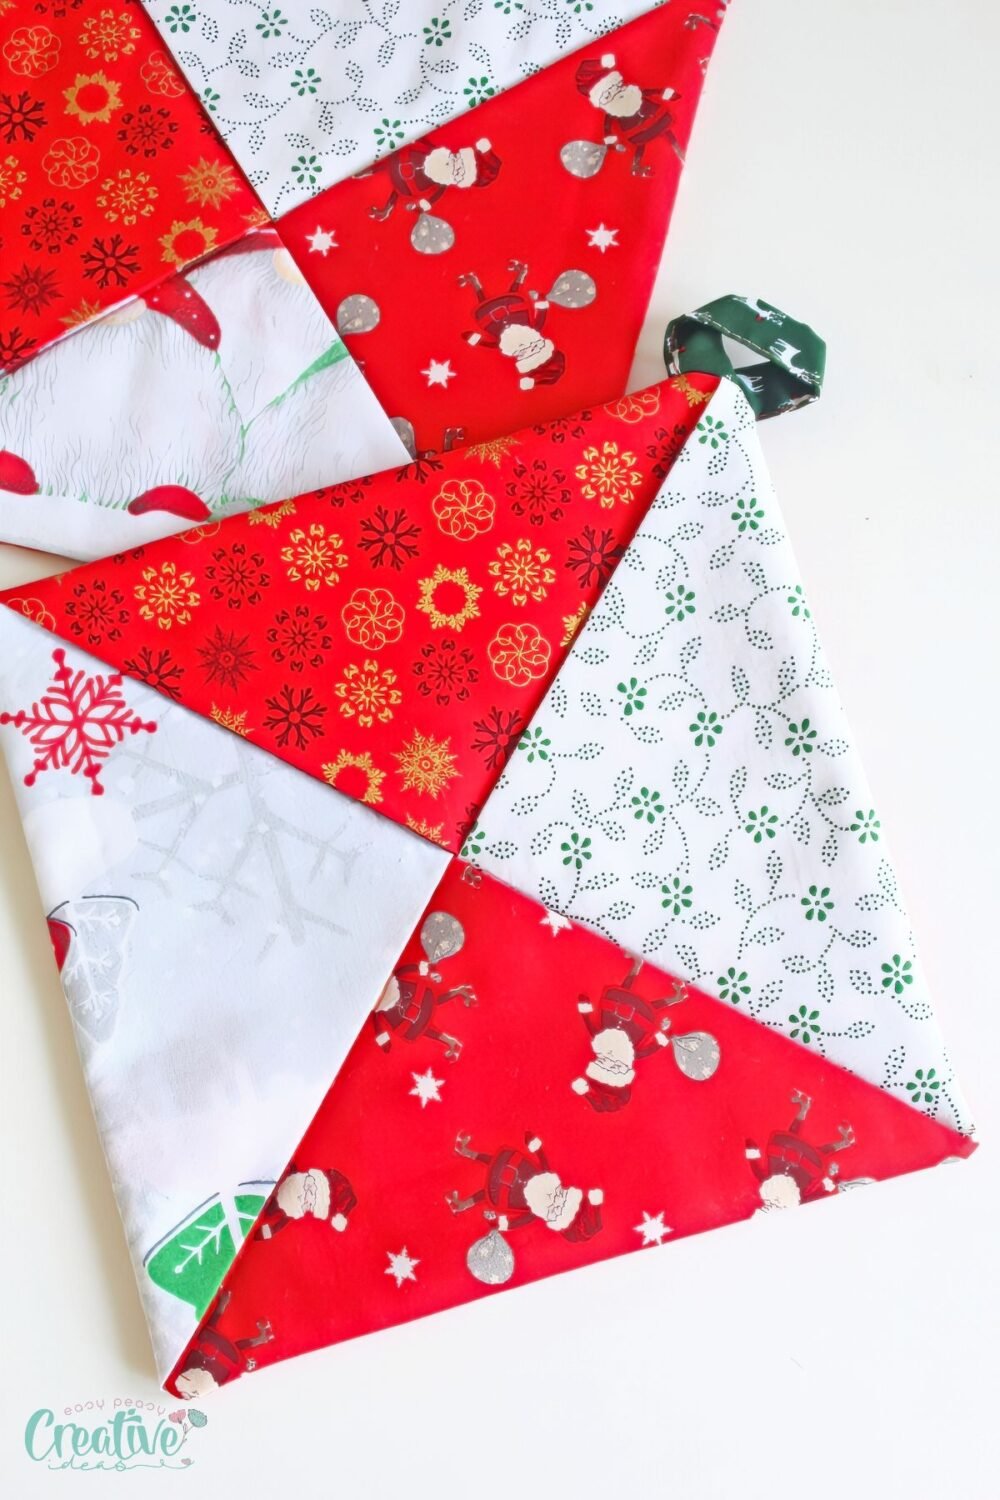
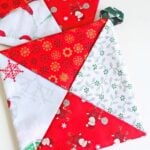
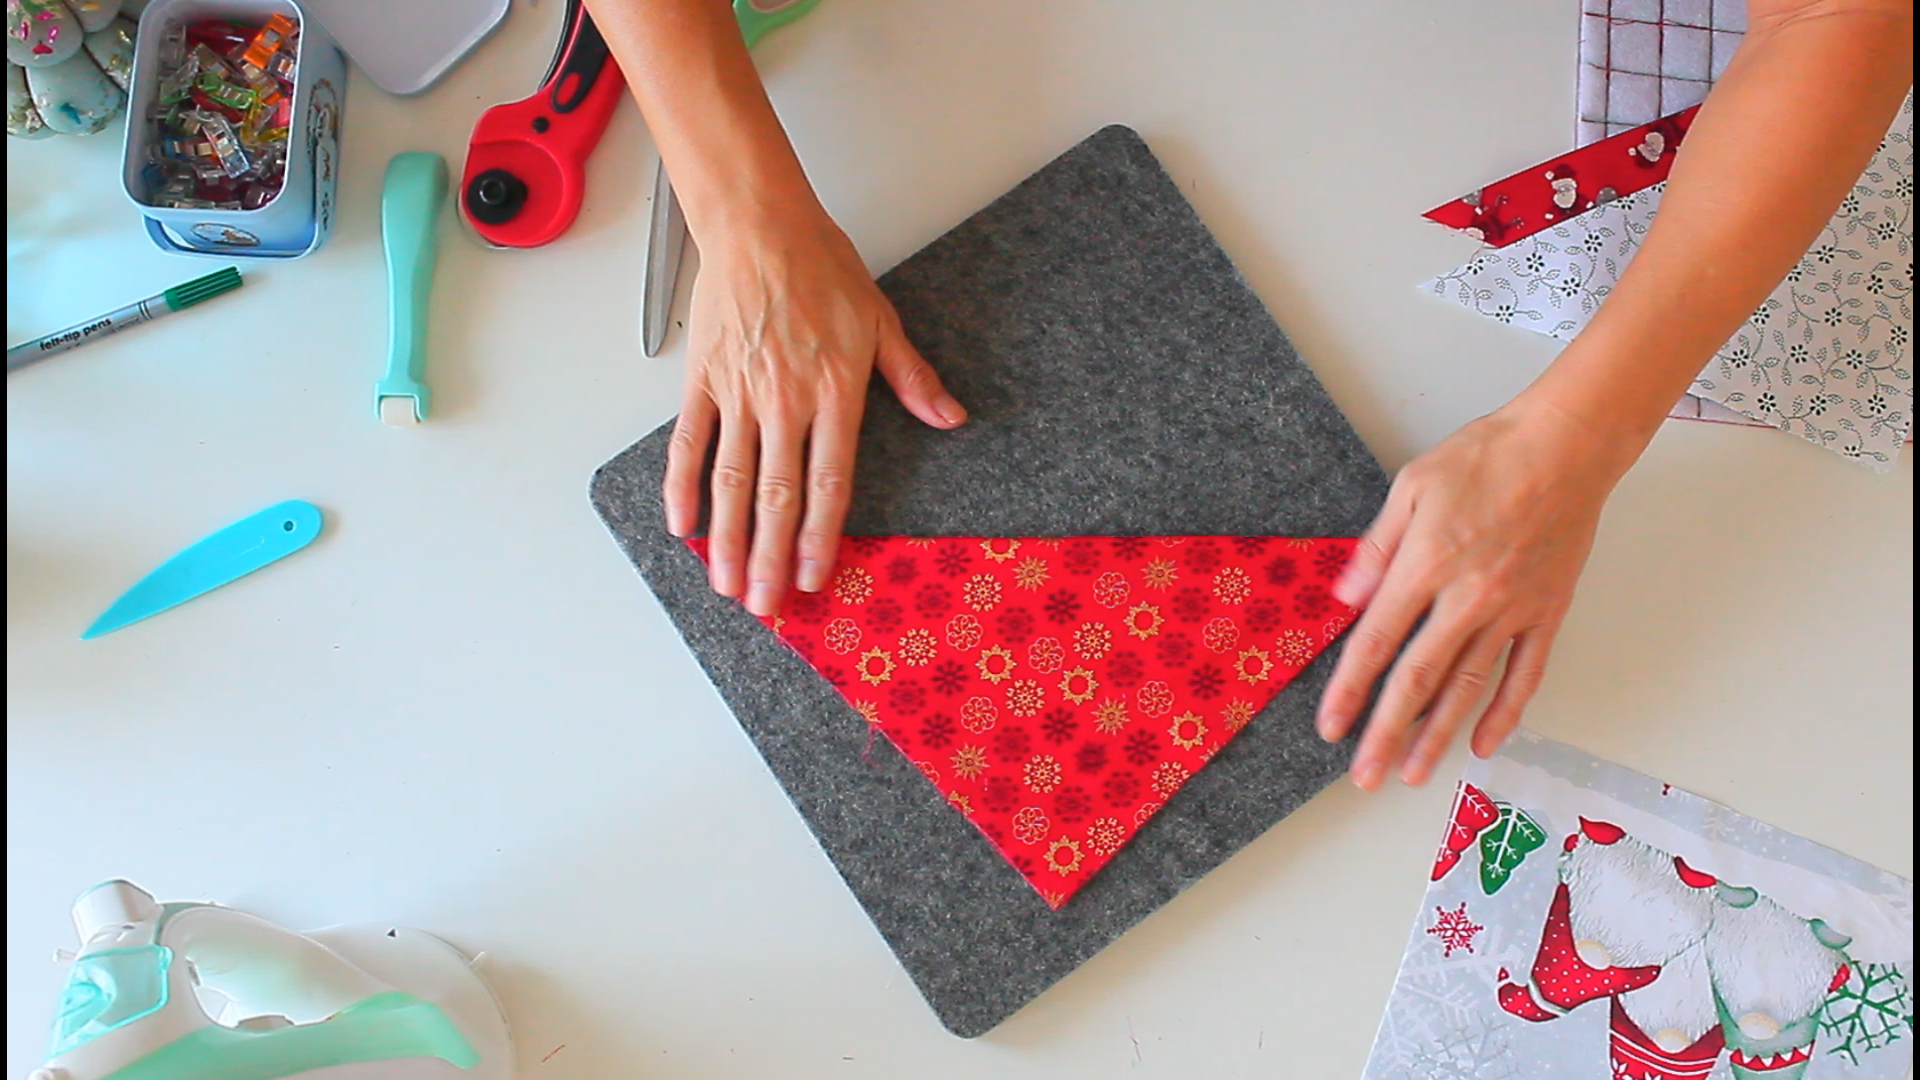
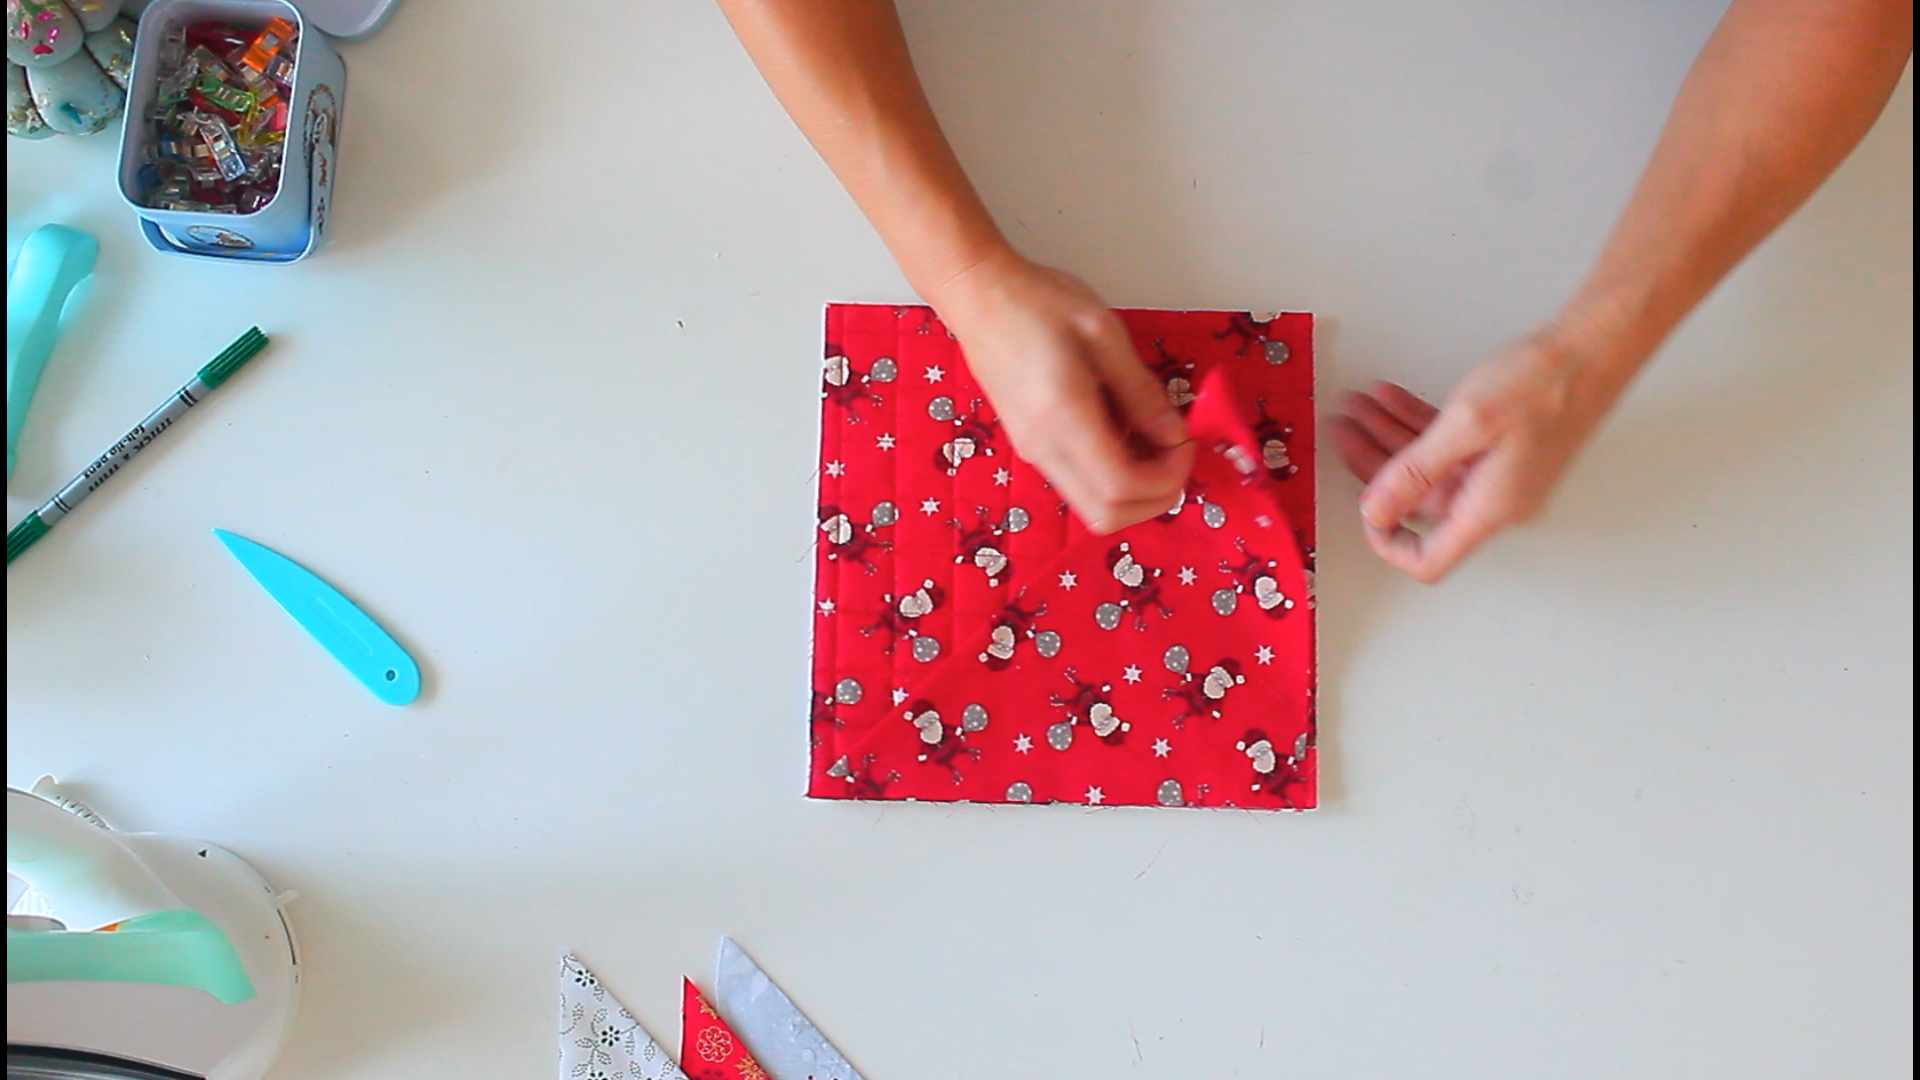
- Fold the 4 squares in half diagonally and press. Trim these triangles if they exceed the quilted panel’s size.
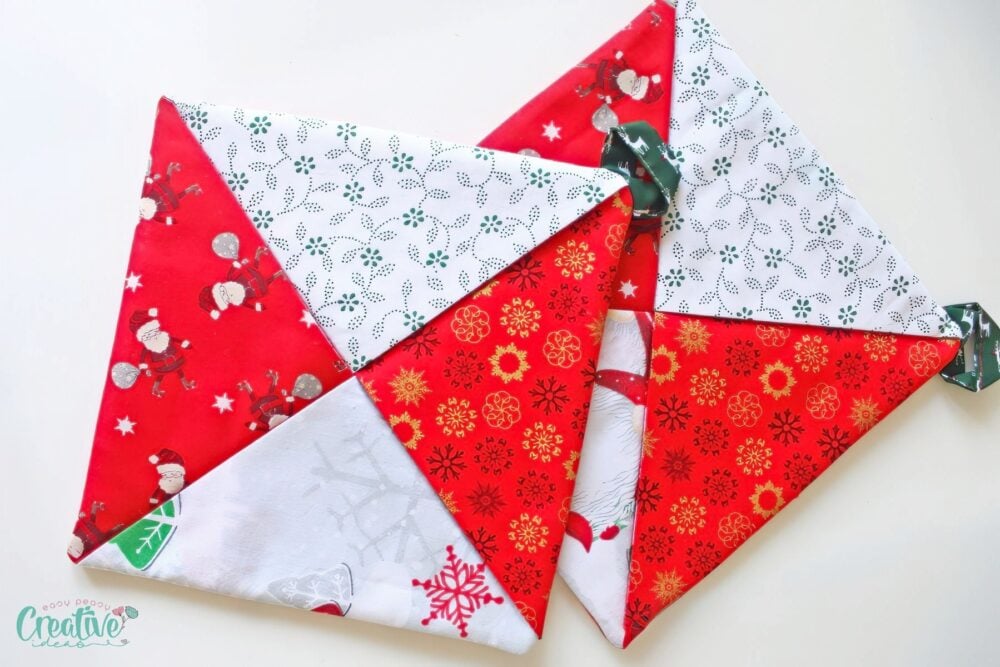
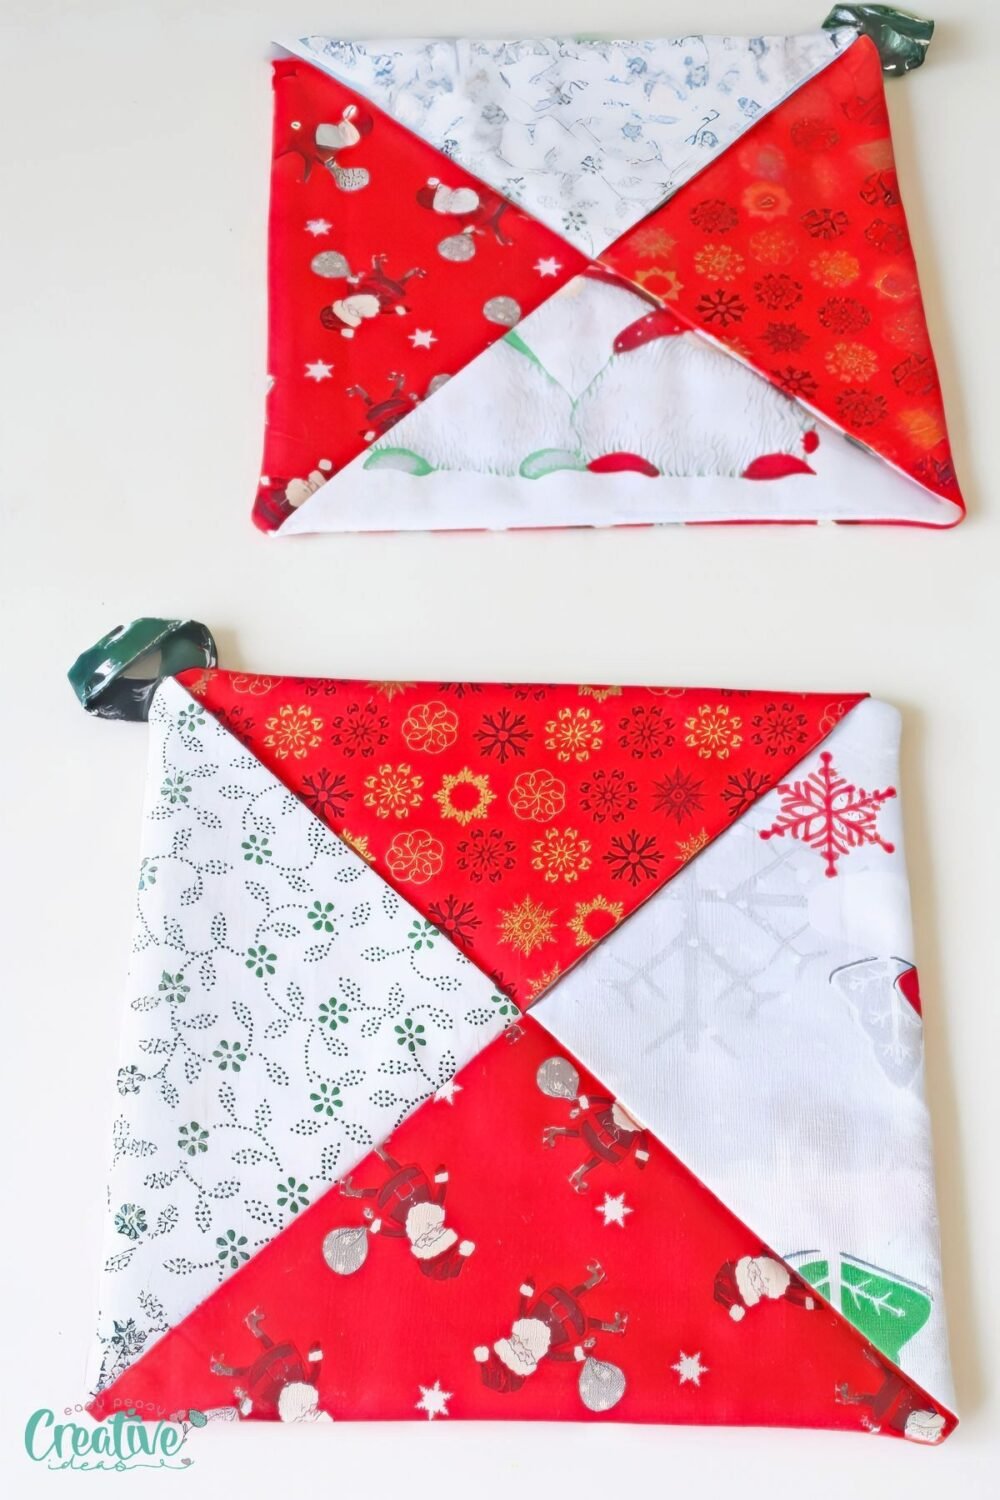
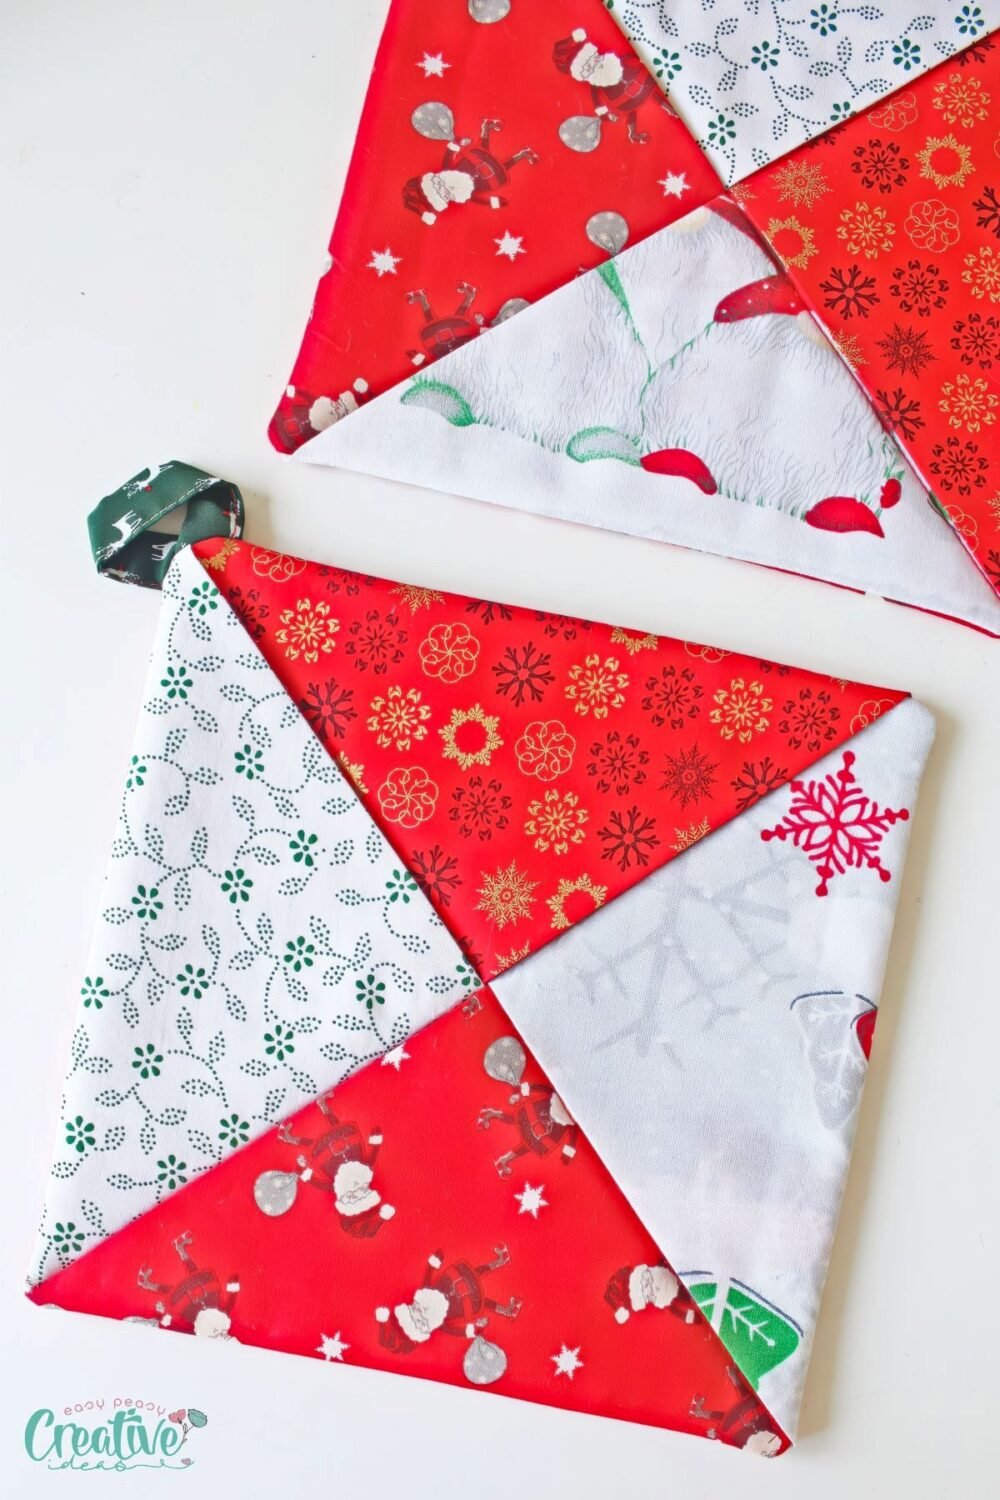
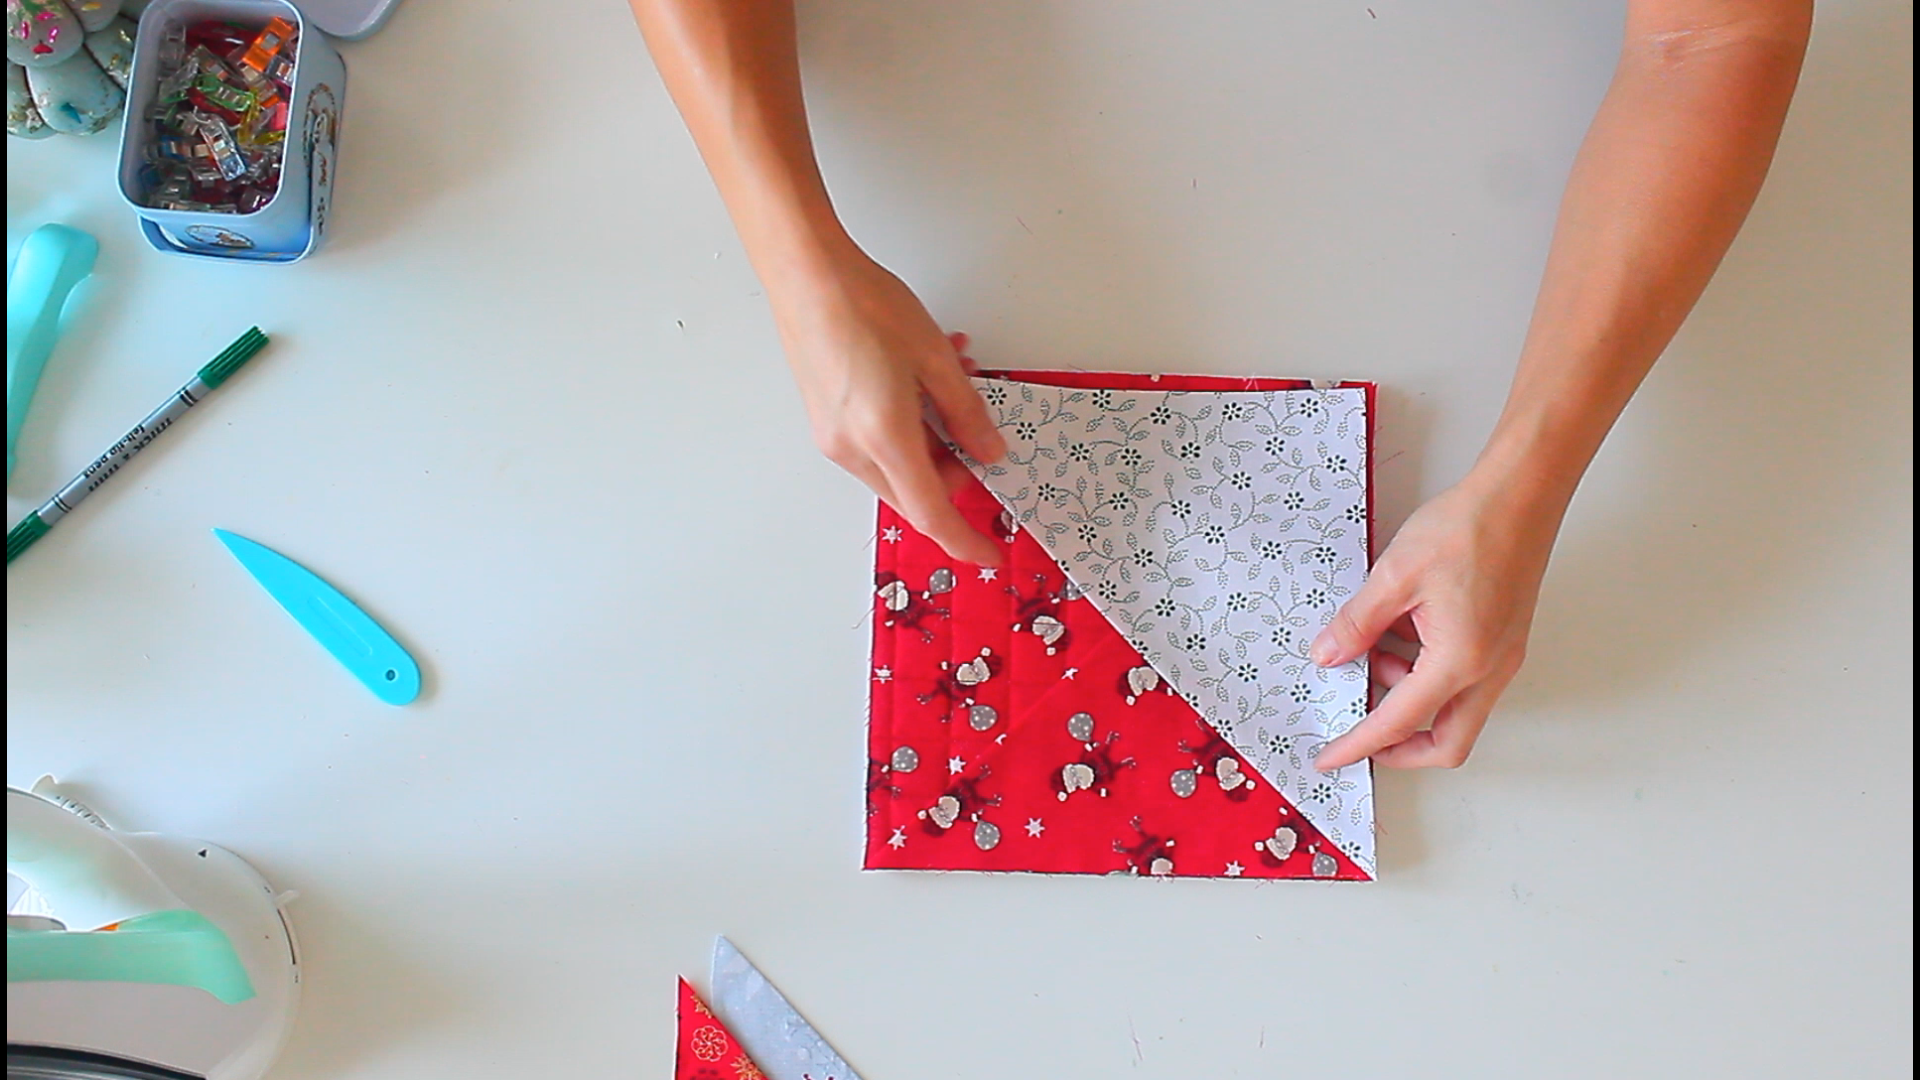
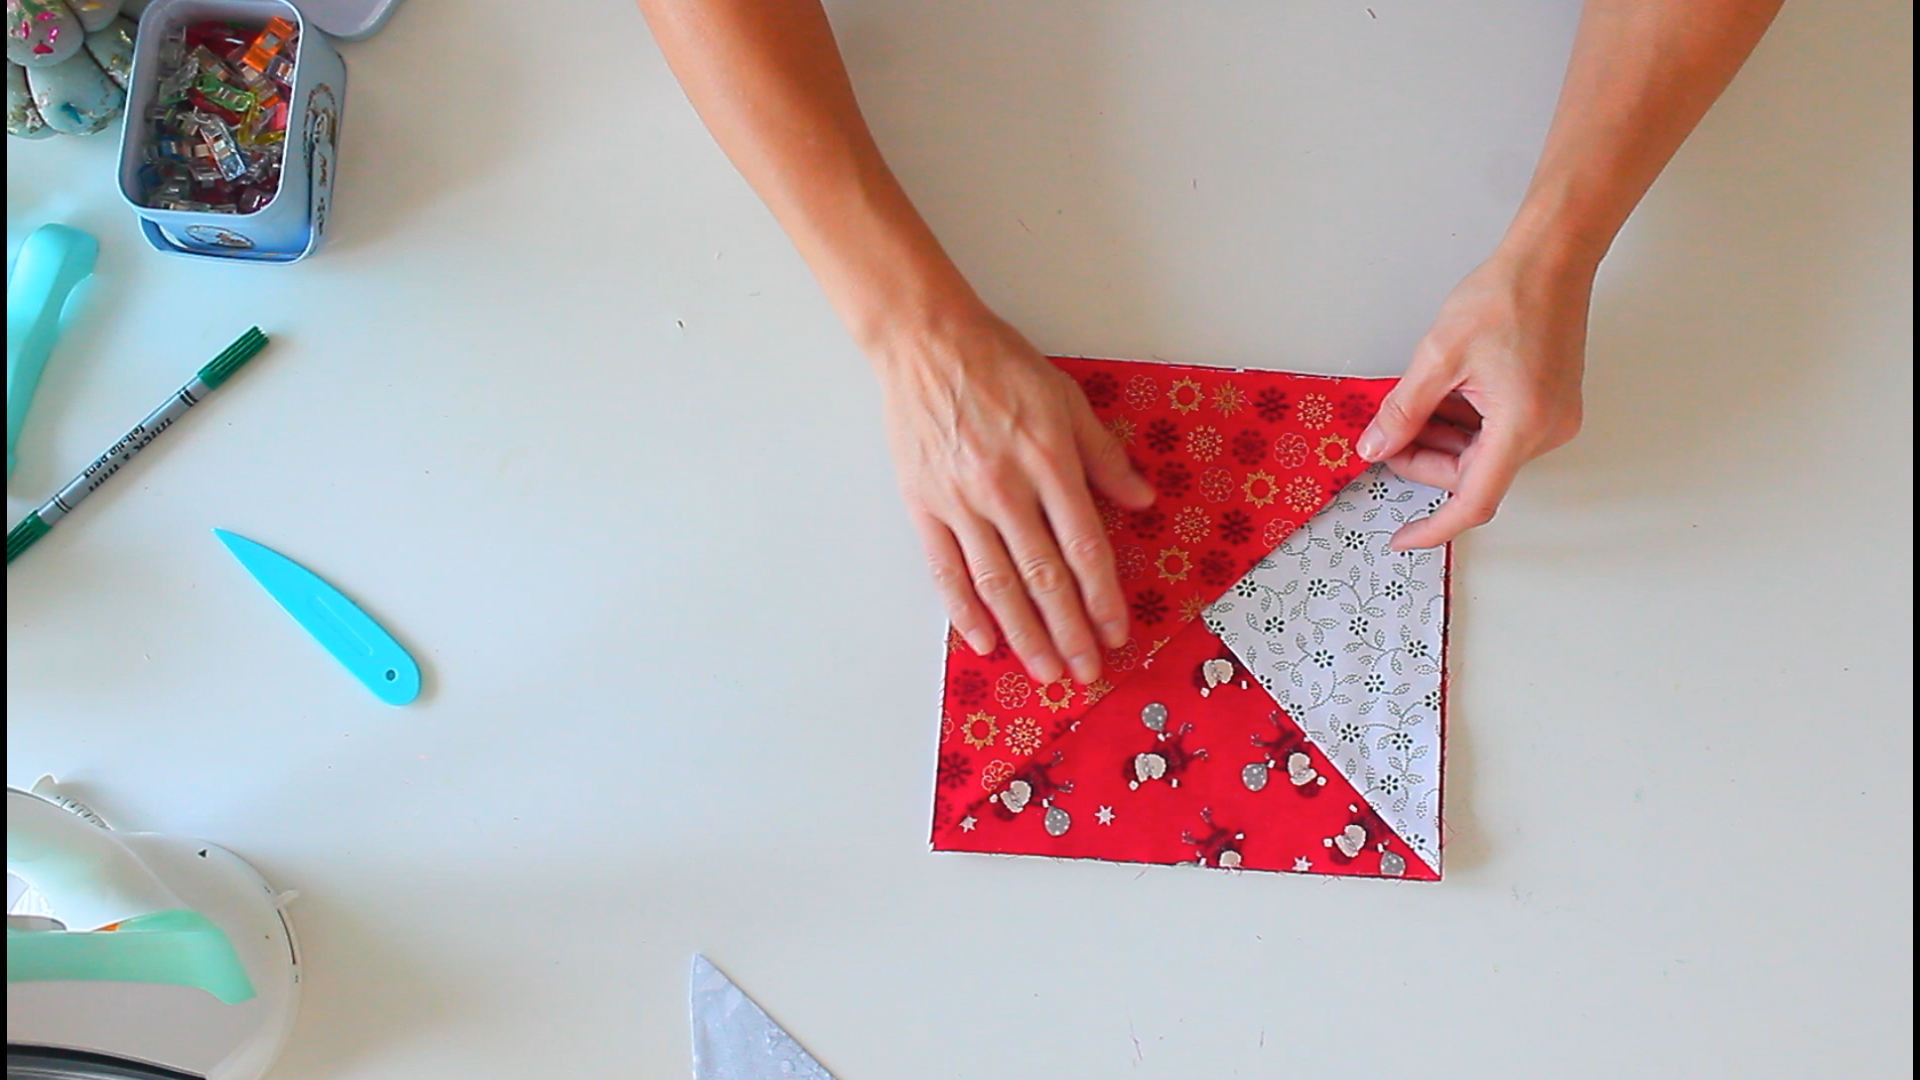
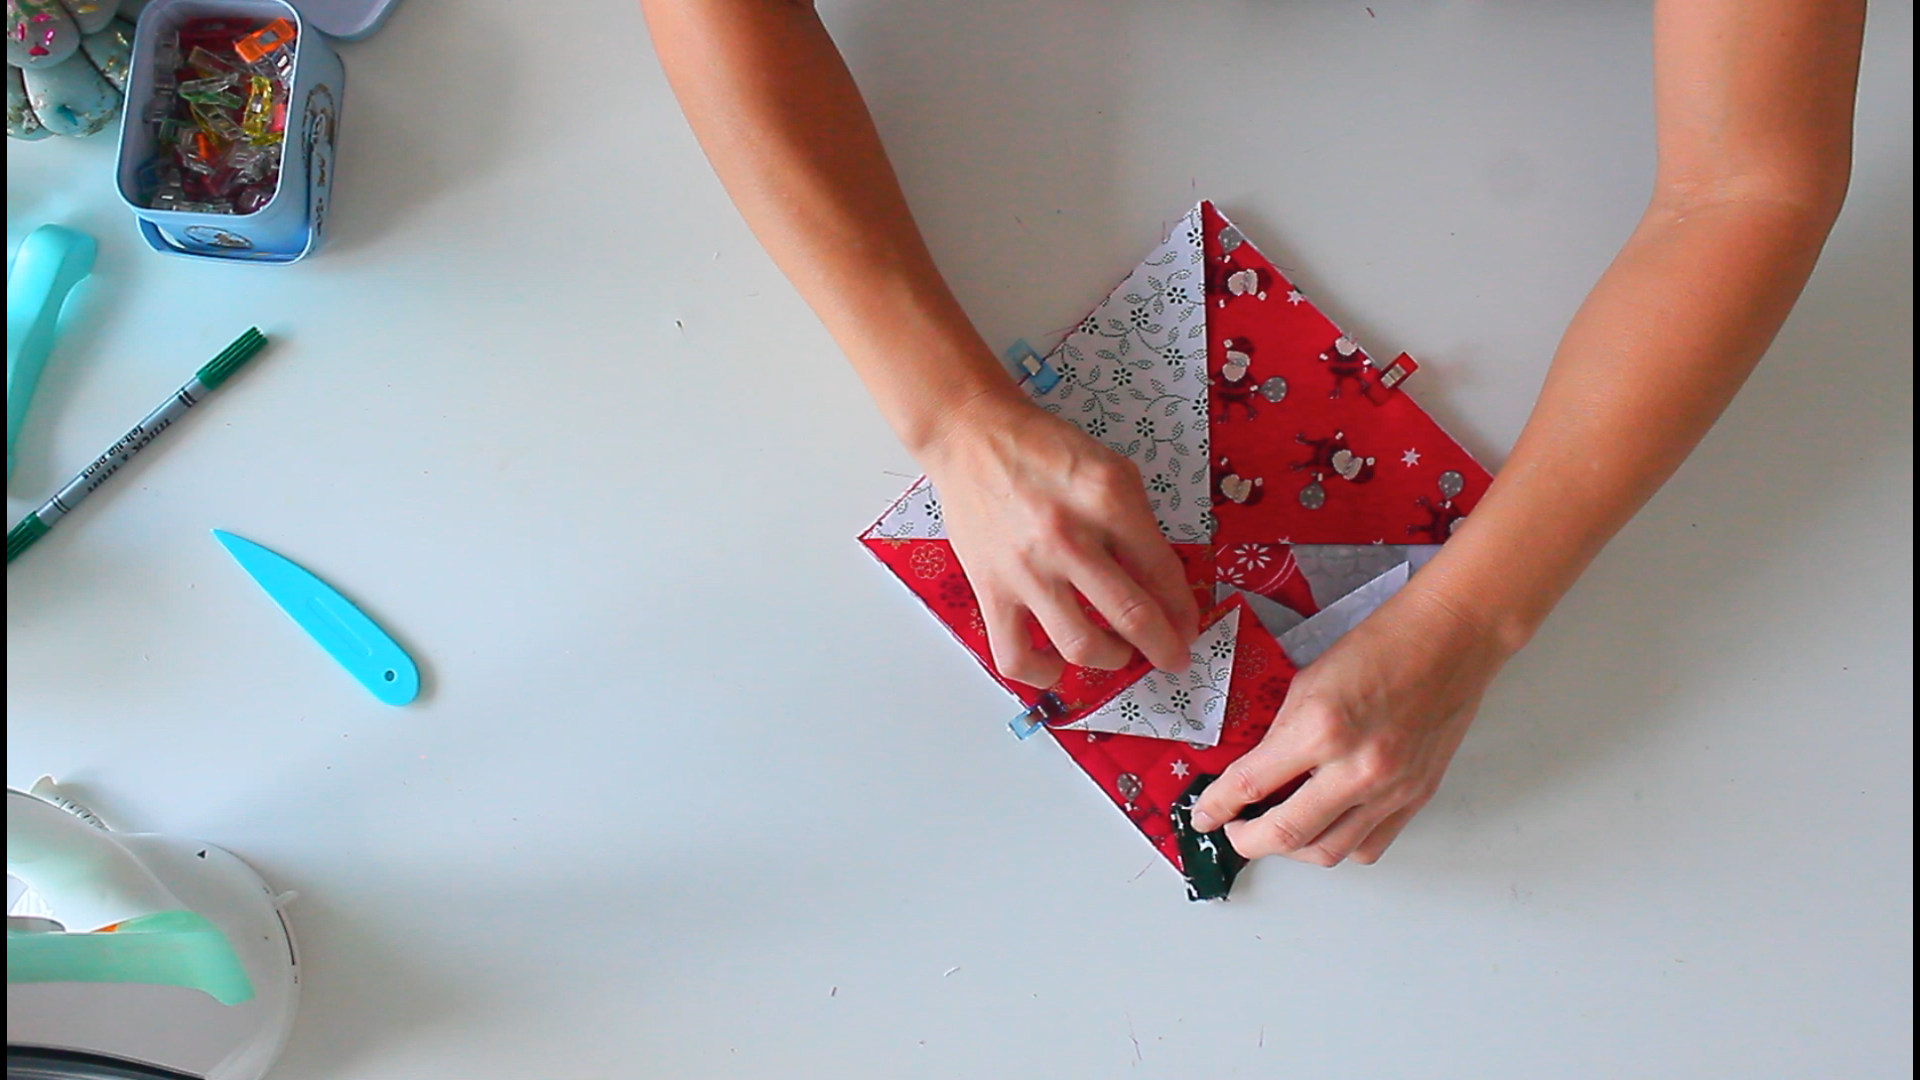
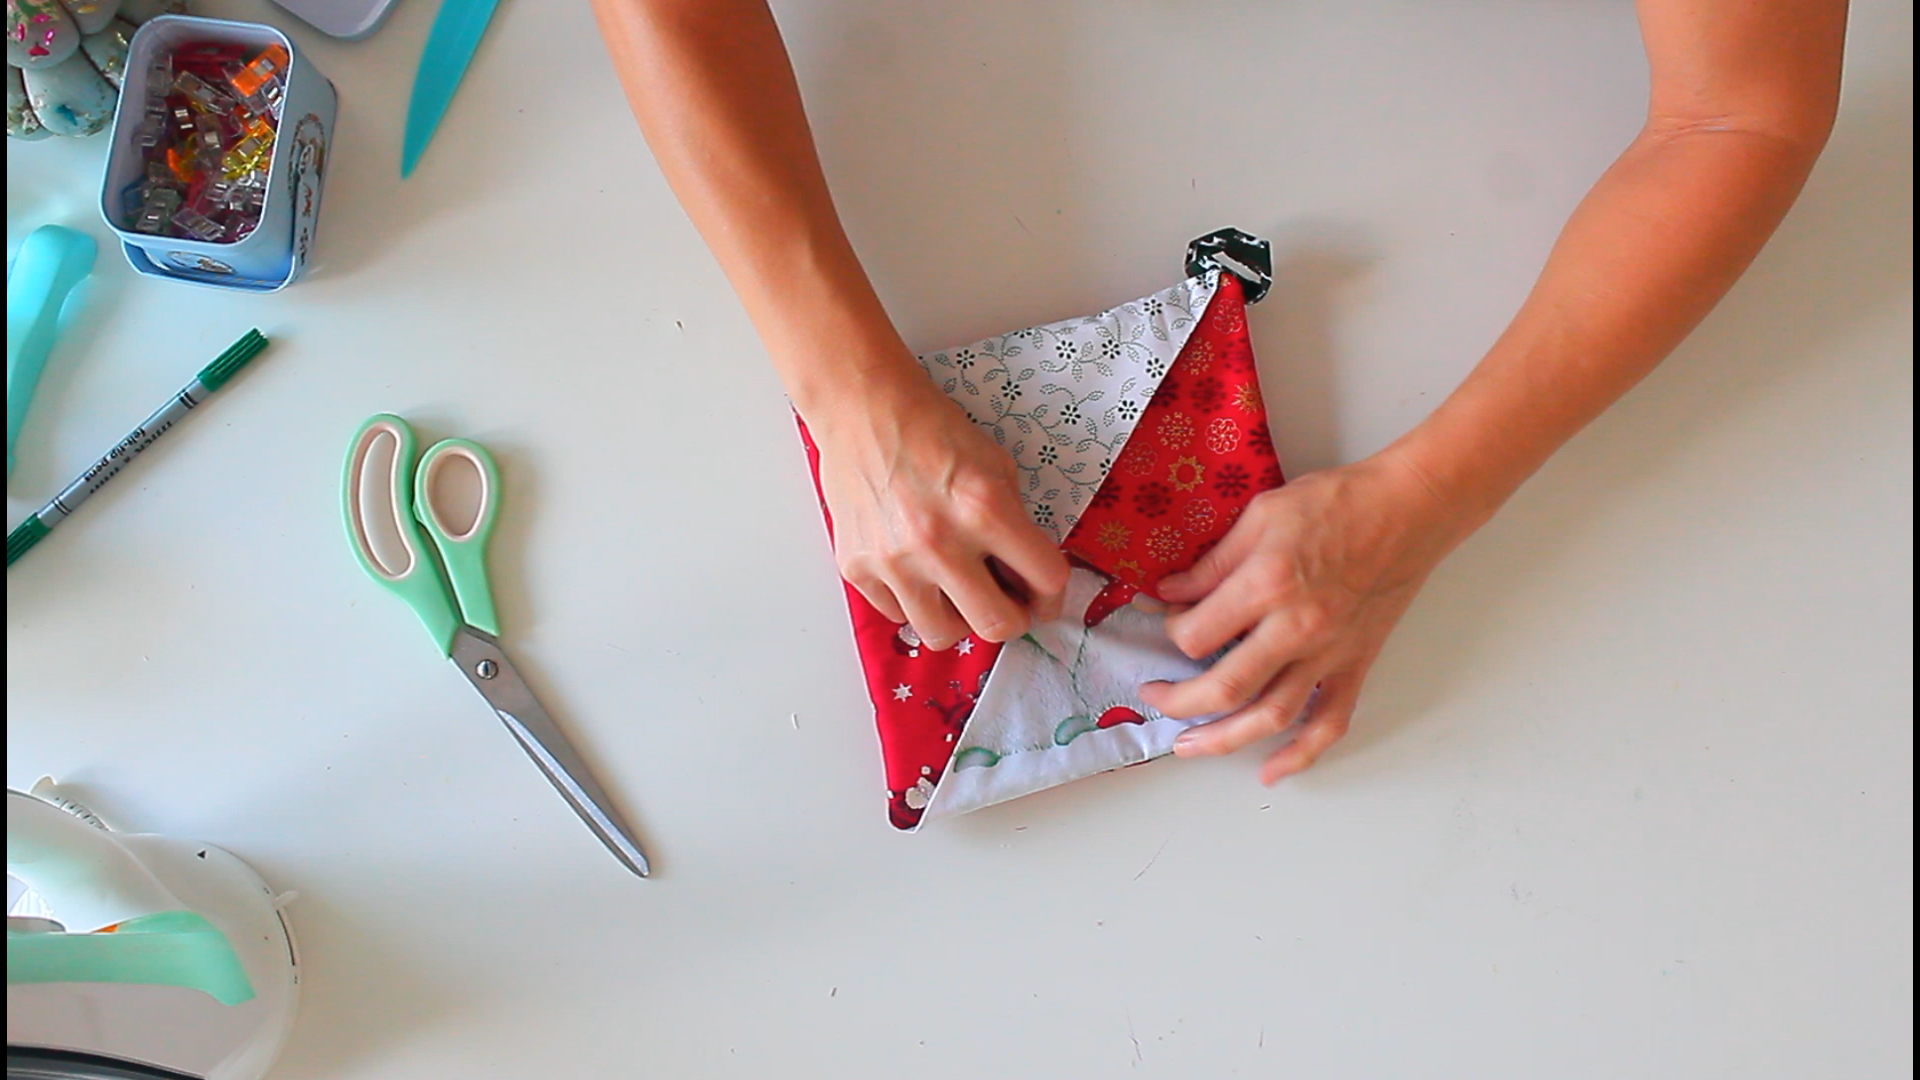
- Arrange the pinwheel triangles along the edges of the quilted panel, aligning raw edges. Insert the fourth triangle’s corner into the first to form the pinwheel.
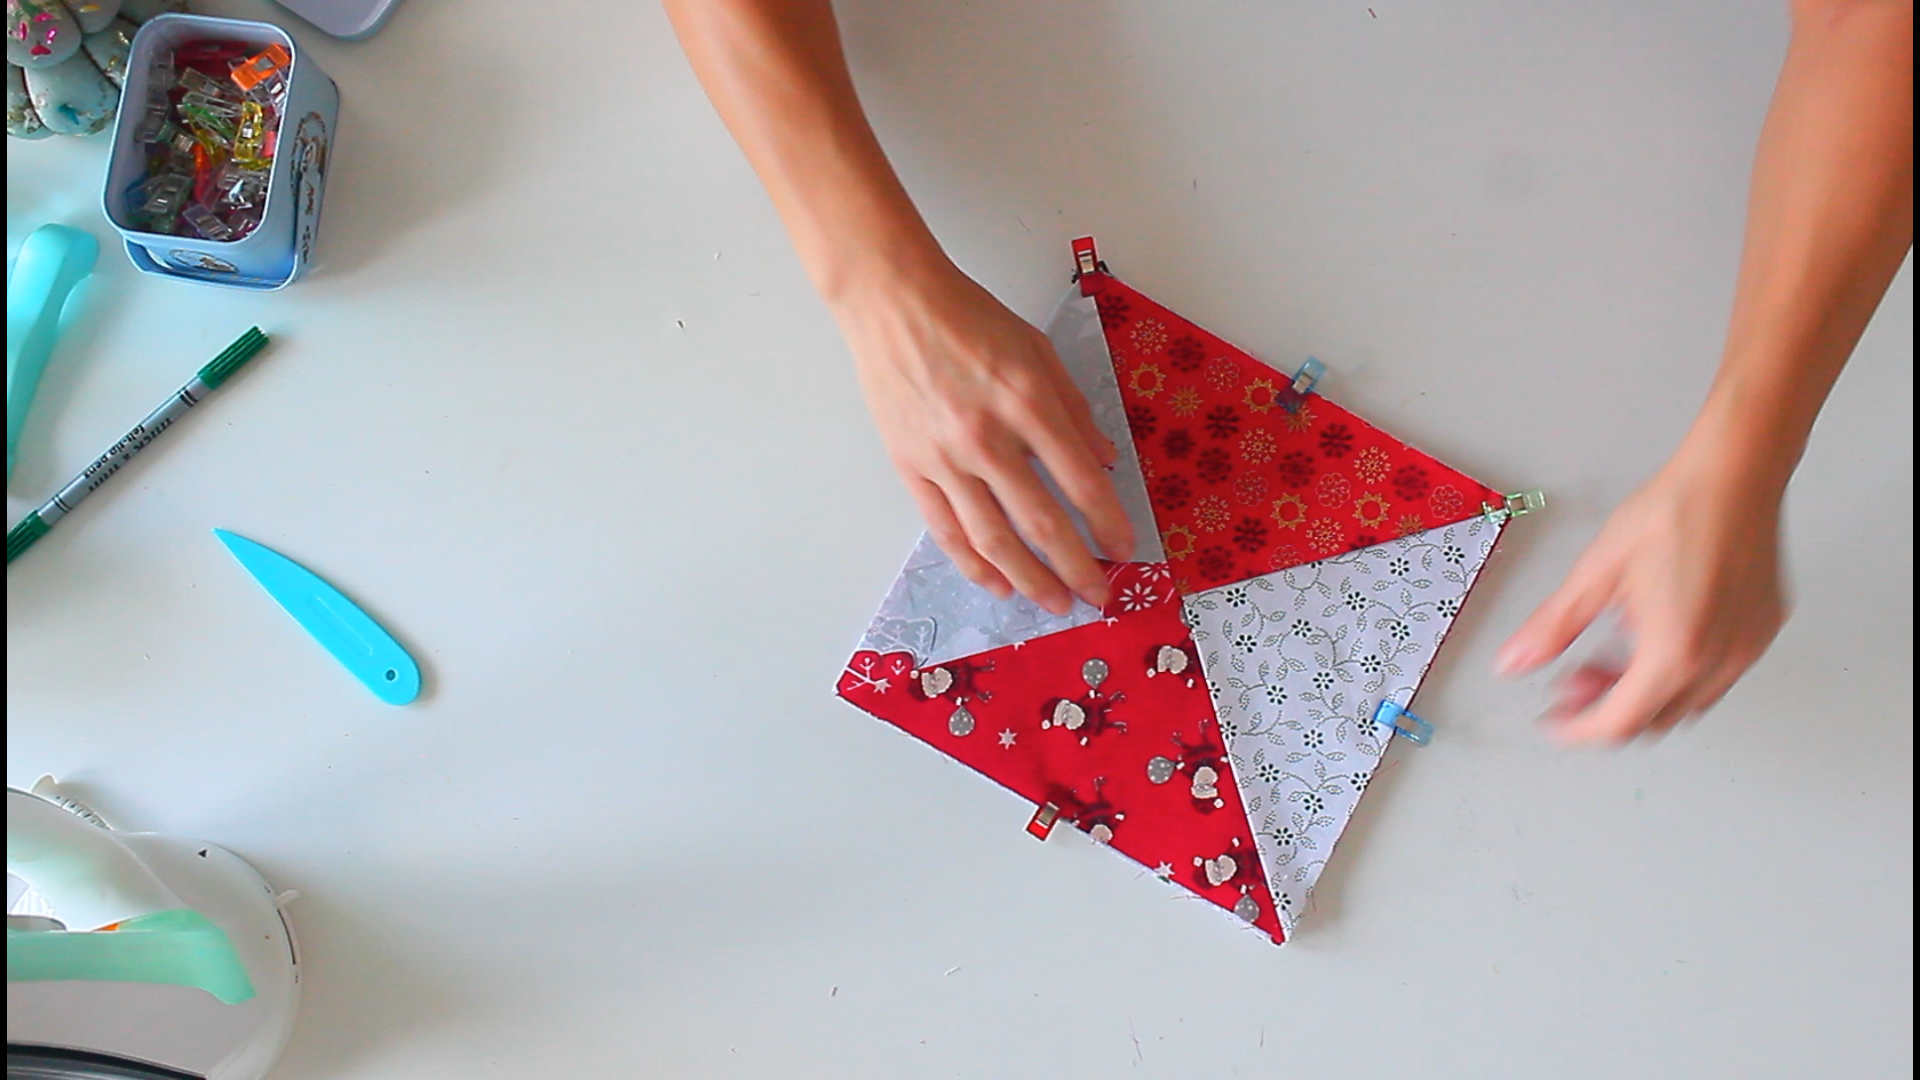
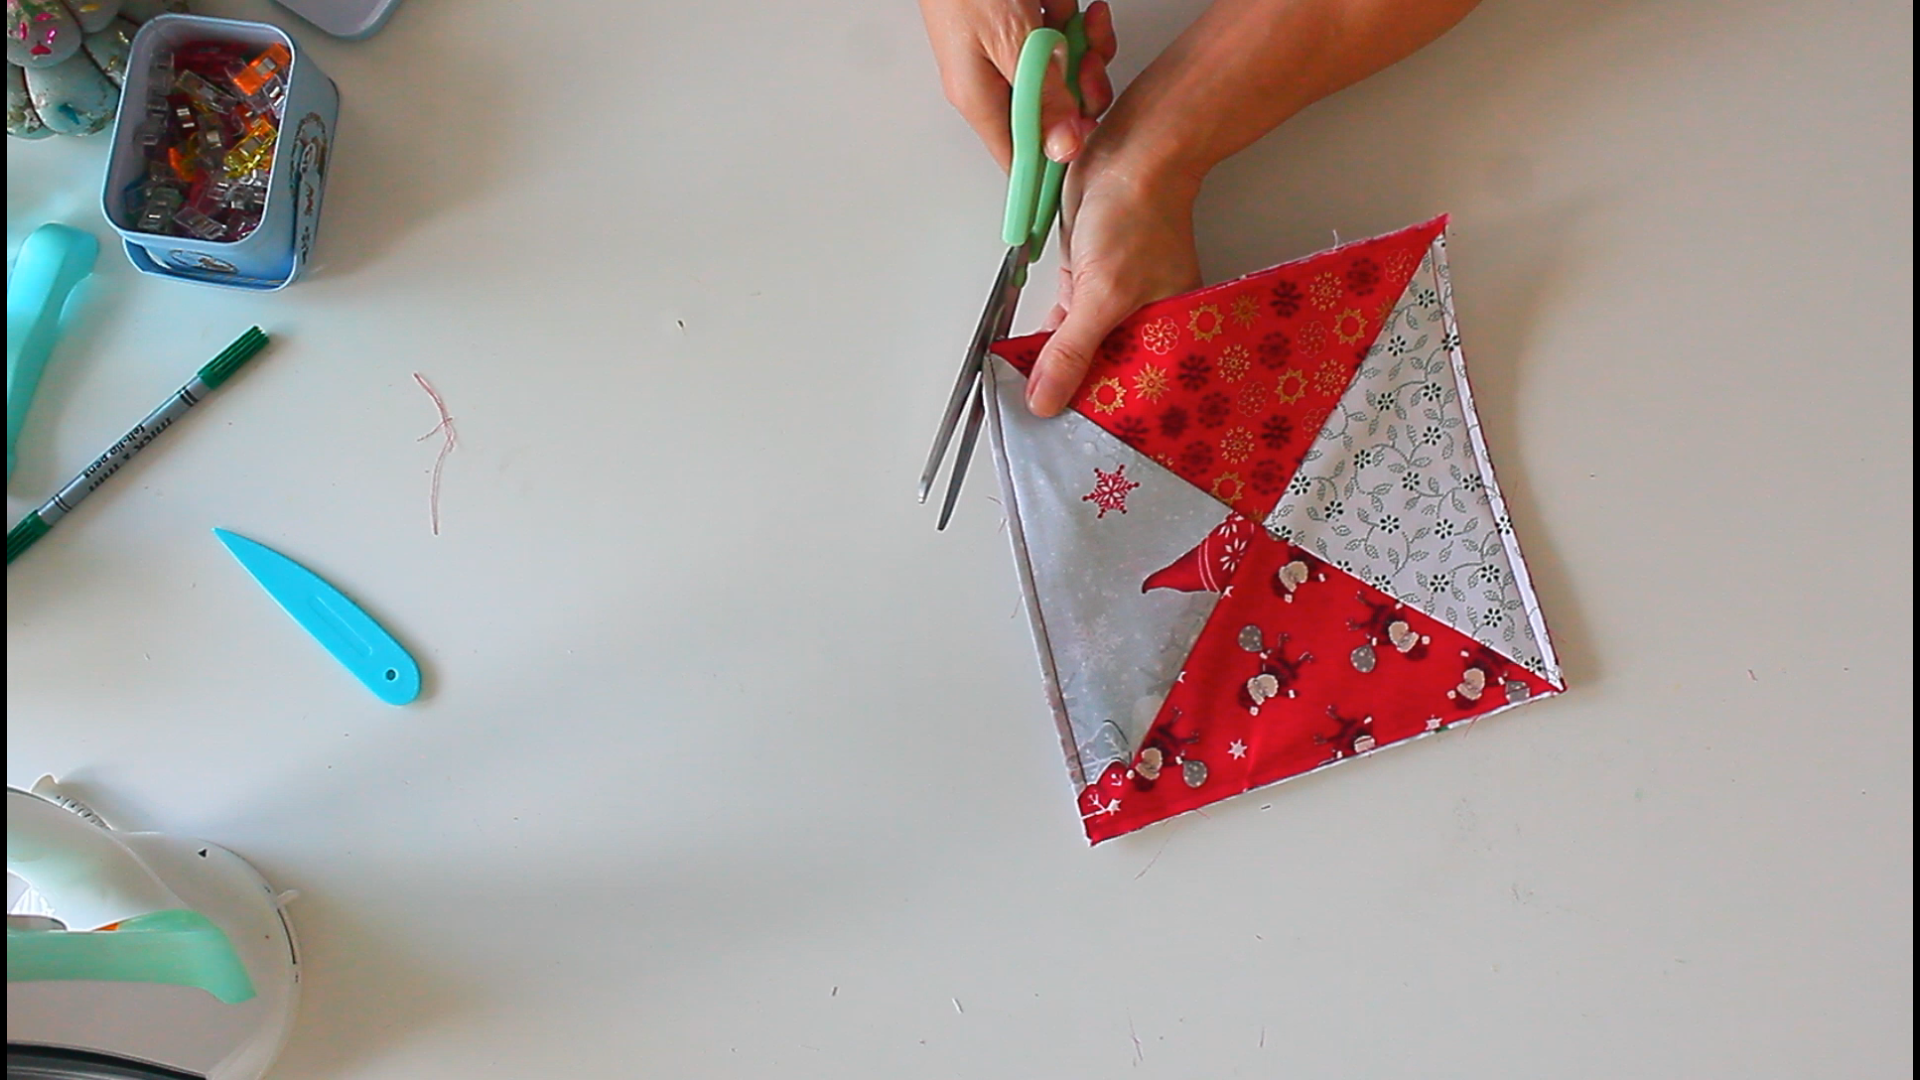
- Place the loop as desired between the quilted panel and pinwheels, with raw ends up. Clip the hot pad layers with wonder clips and sew with a 1/4″ seam allowance. Clip corners and turn the pad right side out through the center gap in the pinwheels.
- Use a point turner to push out corners, smooth seams, and press well with the iron on steam. Optionally, stitch in the ditch at the center to keep the pad flat during washes.
Tips
- When selecting fabrics, consider using heat-resistant materials or adding a layer of insulated batting for additional protection.
- Measure twice cut once: double-check all measurements and pieces before cutting to ensure accuracy and avoid fabric waste.
- Use a piece of ribbon or twine instead of fabric for the loop to add a different texture and some rustic look to your hot pad.
- Experiment with different sizes for the pinwheels to create unique designs.
Project Variations
- For a reversible hot pad, start by sandwiching the batting between 2 pieces of fabric, quilt and add 4 pinwheels to both sides of the hot pad.
- Add decorative stitches or embroidery for extra flair.
- Use seasonal or holiday-themed fabrics to match your kitchen décor throughout the year.
Frequently Asked Questions
Can I use different shapes instead of triangles for the pinwheel design?
Yes! Experiment with squares or even circles to create unique variations.
How can I make my hot pads more durable?
Consider using thicker batting or making it reversible. Also you can edge stitch the hot pads once finished sewing.
Can I personalize my hot pads as gifts?
Absolutely! Try embroidering initials or names on the backing fabric for a personalized touch.
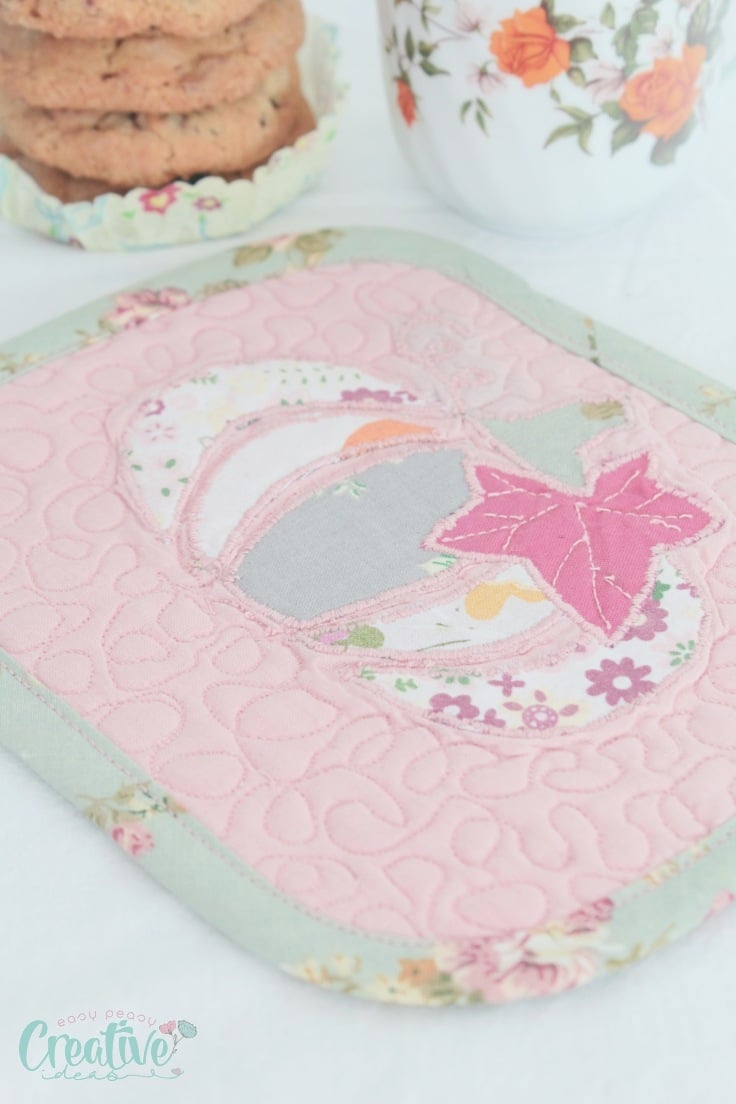
More Sewing Ideas You’ll Enjoy
- Pumpkin applique mug rug
- Reverse applique pumpkin coasters
- Oval pocket pot holders
- No binding hot pads
- Large patchwork pot holders
Creating pinwheel hot pads is a simple yet enjoyable project that allows for endless customization and personalization. I hope you’ve enjoyed this tutorial and are excited to start sewing your own hot pads. Let me know how you found this project in the comments section below!
Happy sewing!
Pinwheel hot pads sewing tutorial
Materials
- 1 square of fabric for the backing 9" by 9"
- 4 squares of fabric for the pinwheels 9" by 9"
- 1 squares of batting 9" by 9"
Tools
- scissors or rotary cutter
- pressing iron
Instructions
- Cut 5 fabric squares, each measuring 9" by 9", 1 for the backing and the other 4 for the pinwheels.
- Cut one piece of batting the same size, doubling it up if needed for extra thickness.
- Use hem tape to attach baking fabric to batting before quilting from the center to avoid shifting. Trim the quilted panel if necessary.

- Quilt the backing square and batting together.
- Trim the panel if shifting has occurred
- To make the loop, fold the fabric strip in half lengthwise and press. Fold again in half and press, then edge stitch along the open edge before pressing to form a loop.
- Fold the 4 squares in half diagonally and press.
- Trim these triangles if they exceed the quilted panel's size.
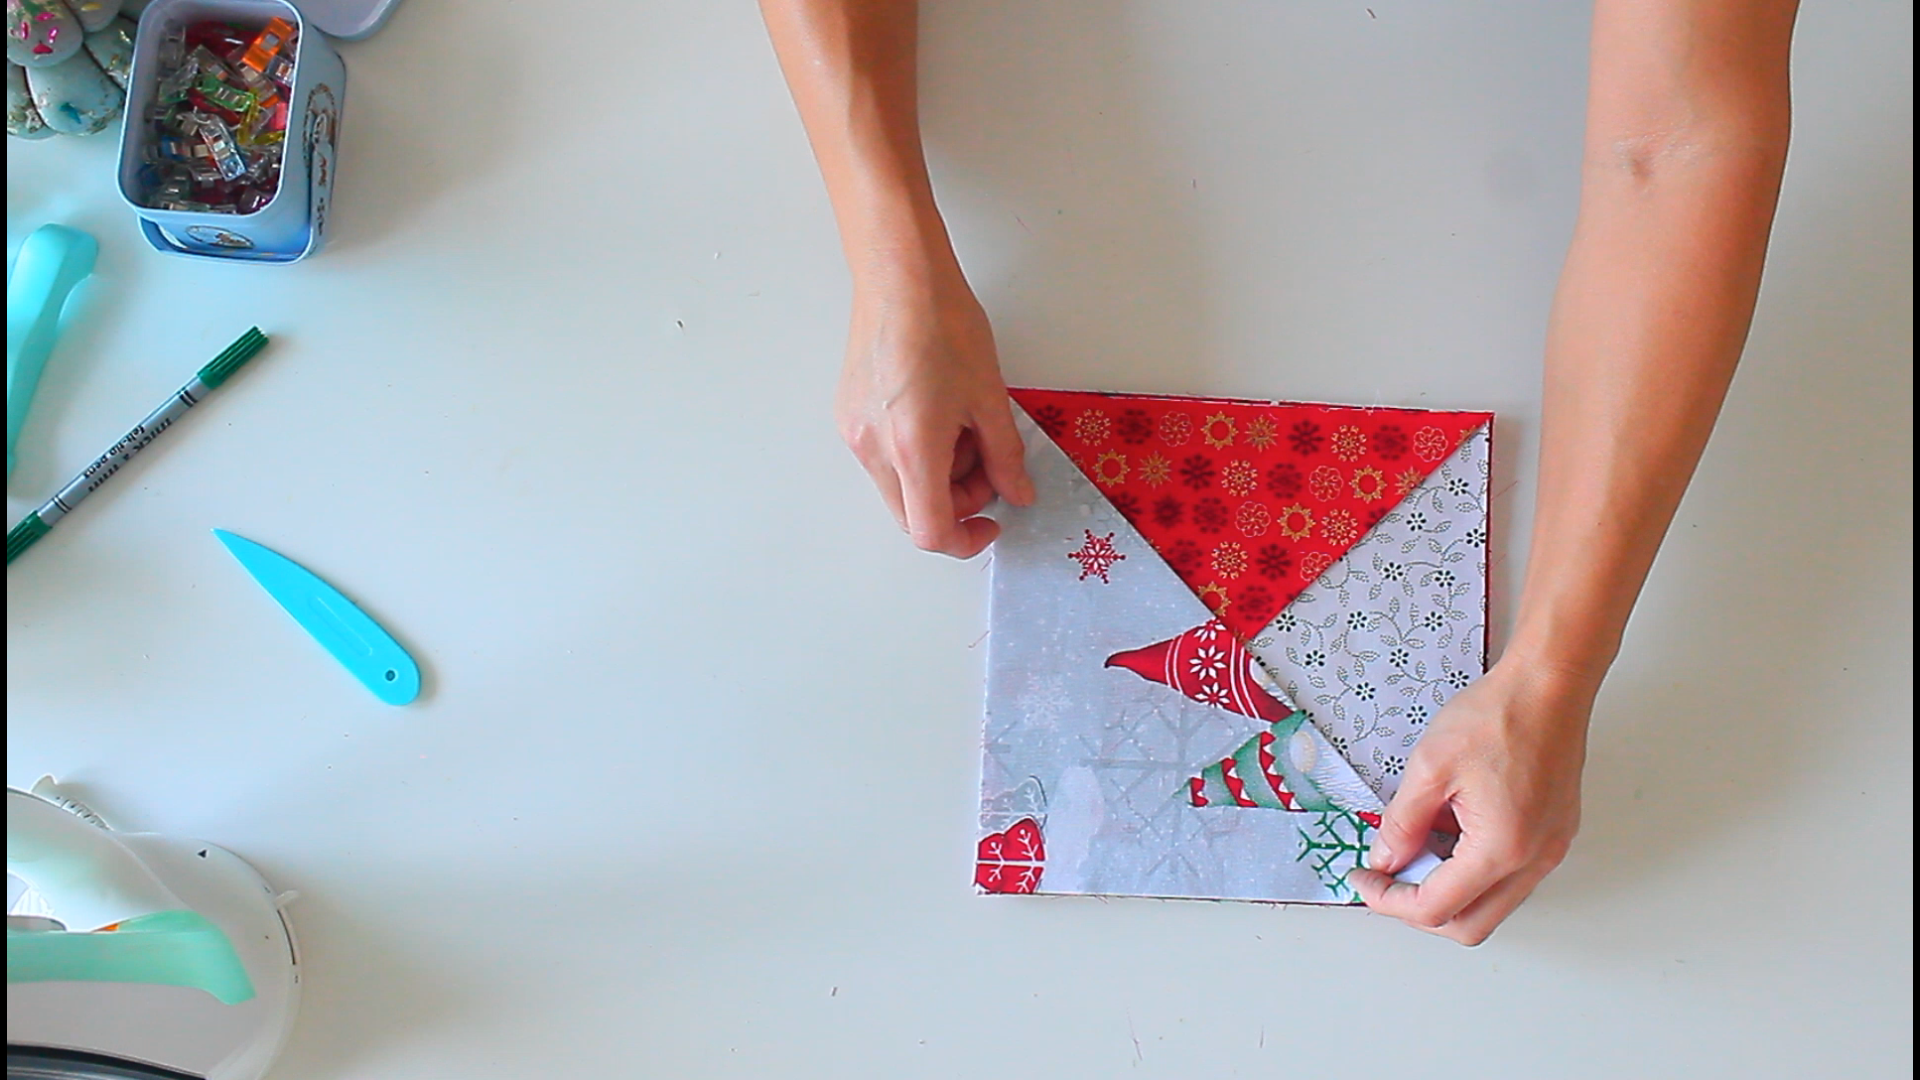
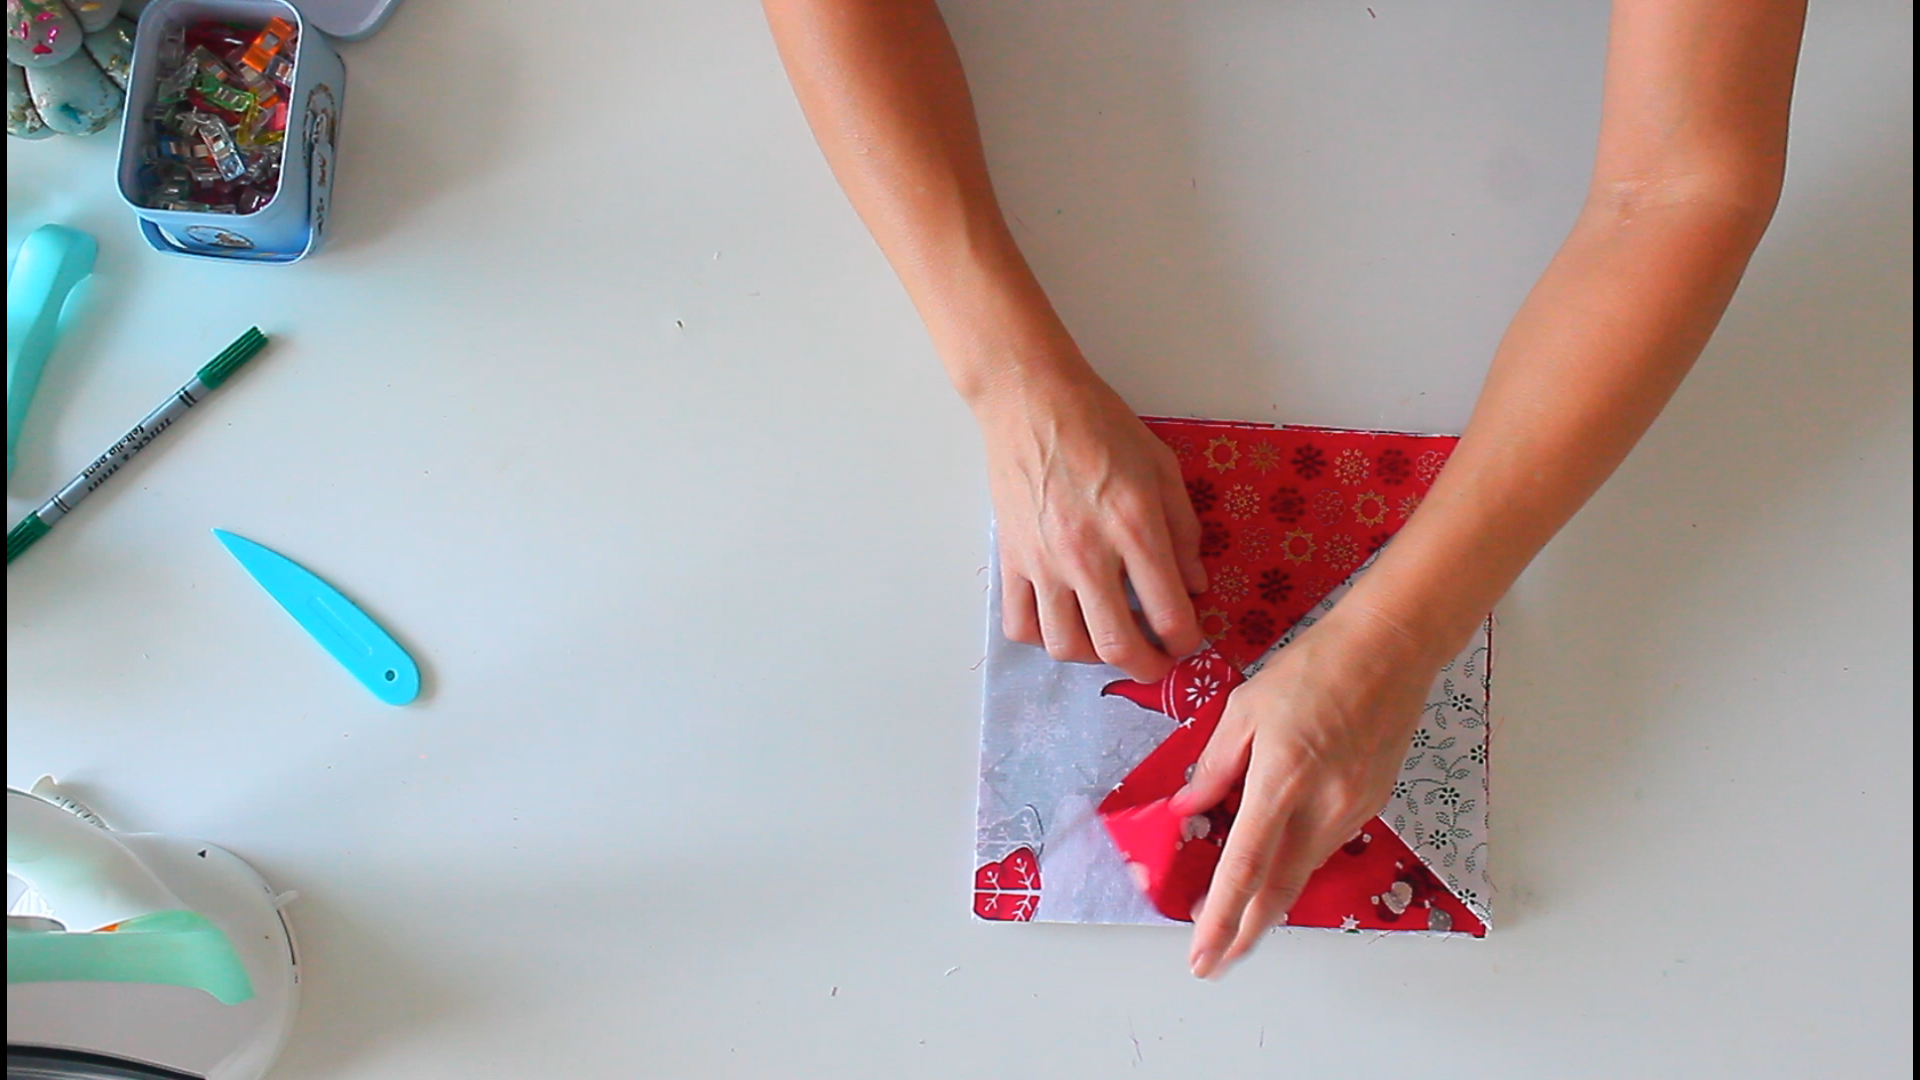
- Arrange the pinwheel triangles along the edges of the quilted panel, aligning raw edges. Start with the first triangle like so
- Add the second triangle to the next raw edge of the quilted panel
- Continue with the third triangle to the next edge
- Add the fourth triangle to the next raw edge.
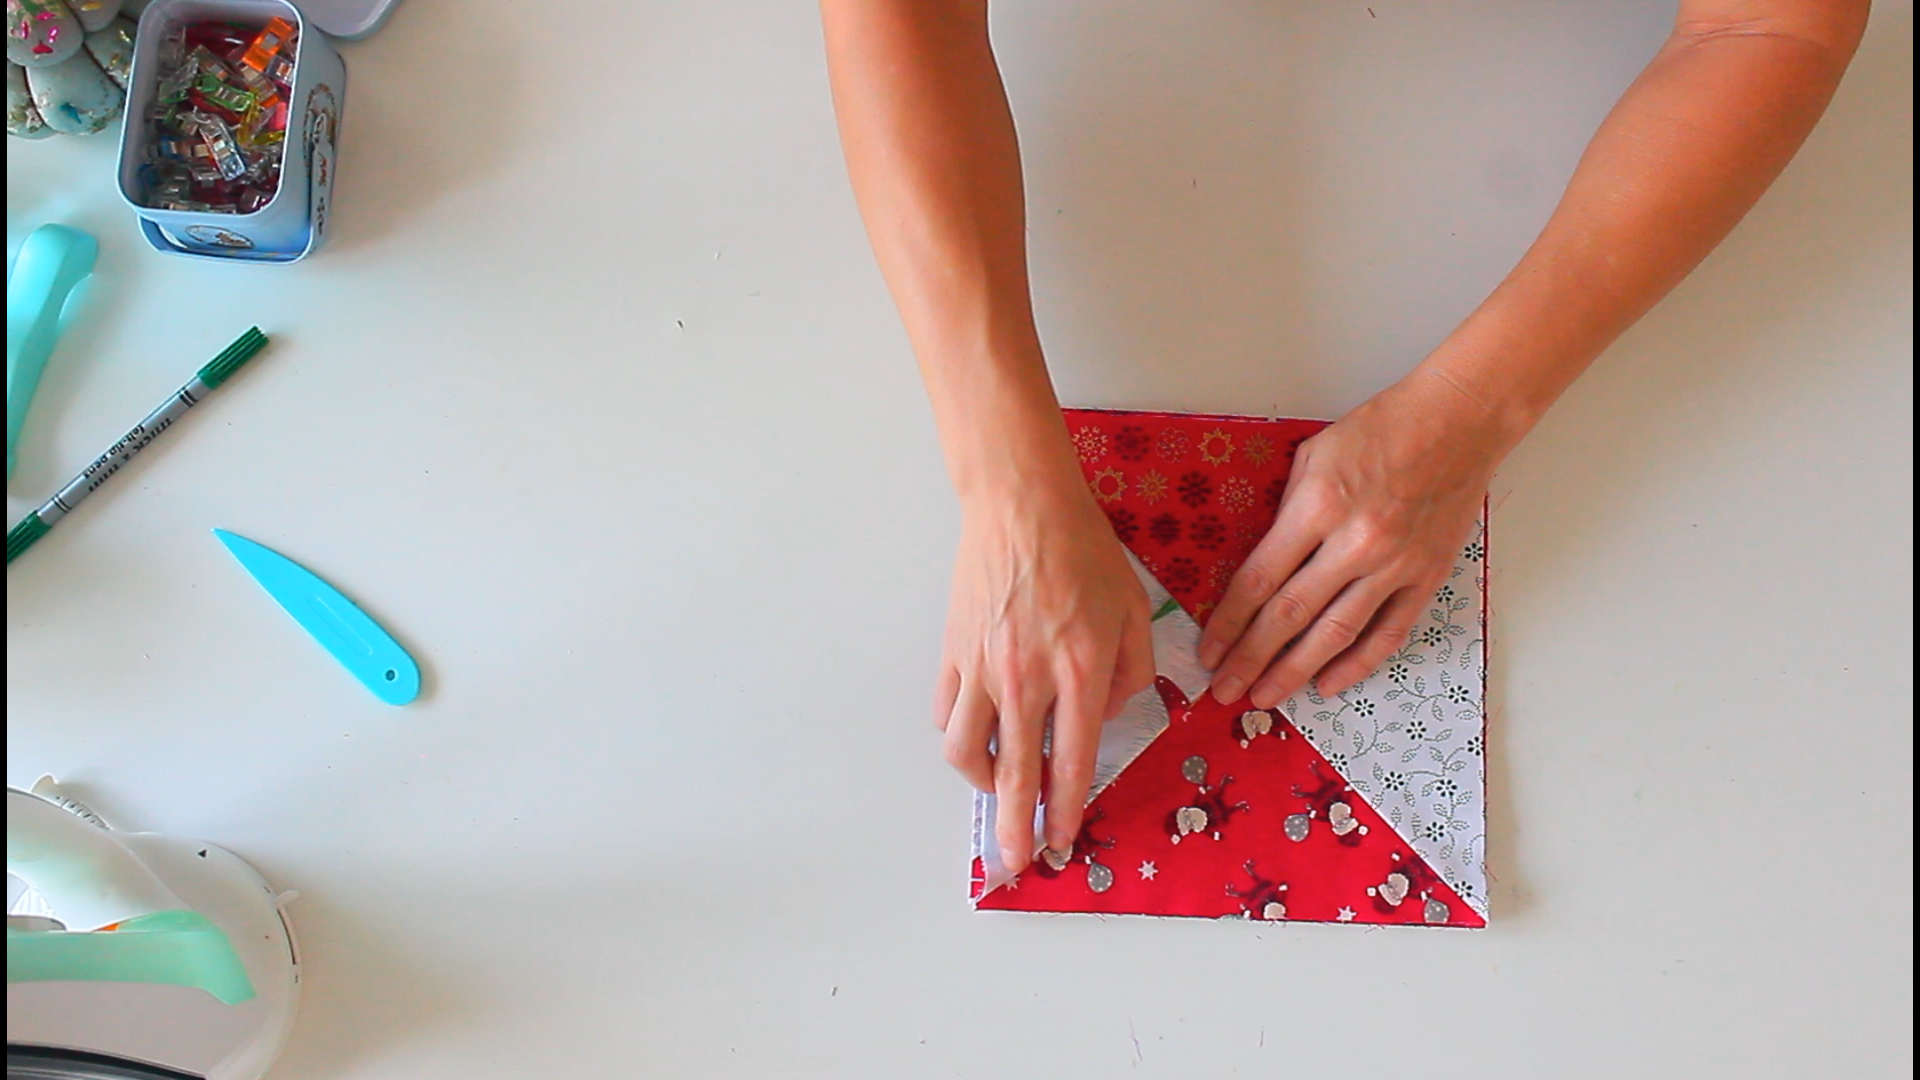
- Then flip the half that is on top of the first triangle.
- Flip half of the first triangle to a side
- Fold the fourth triangle back
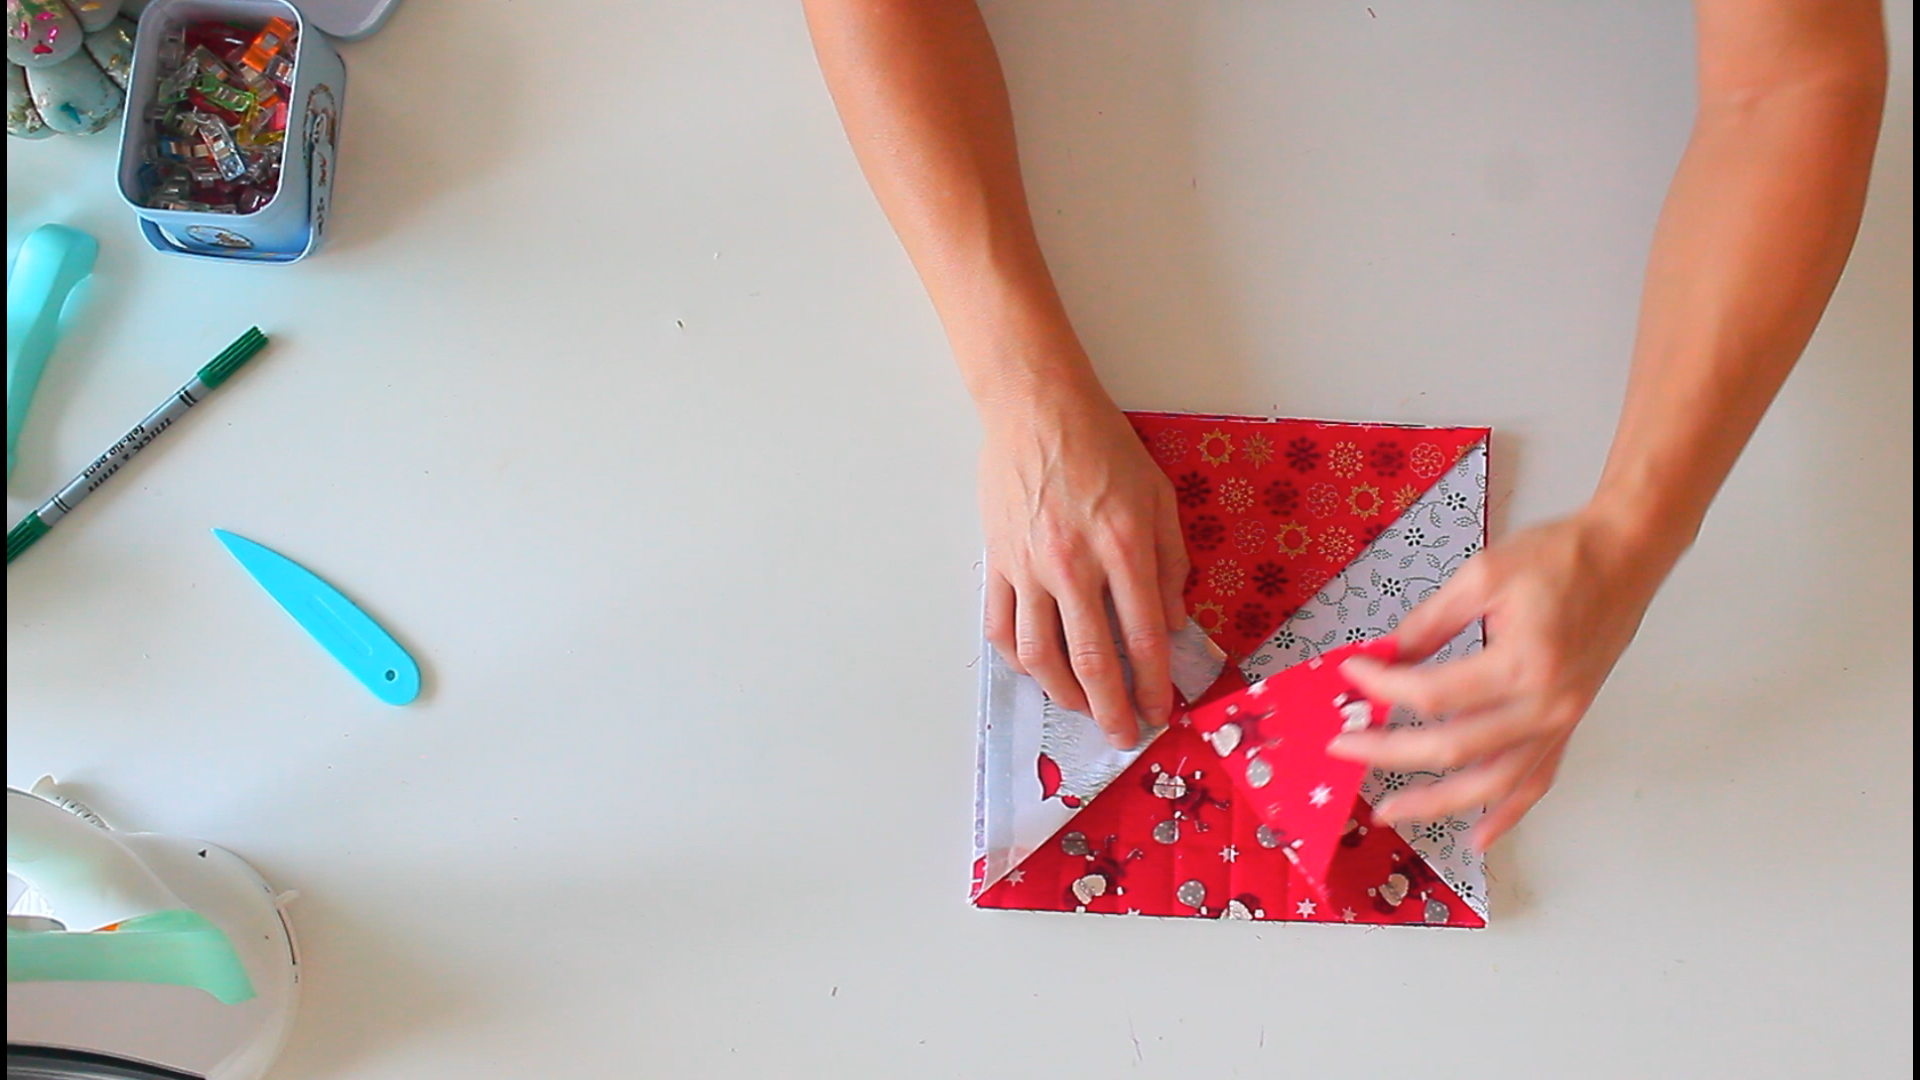
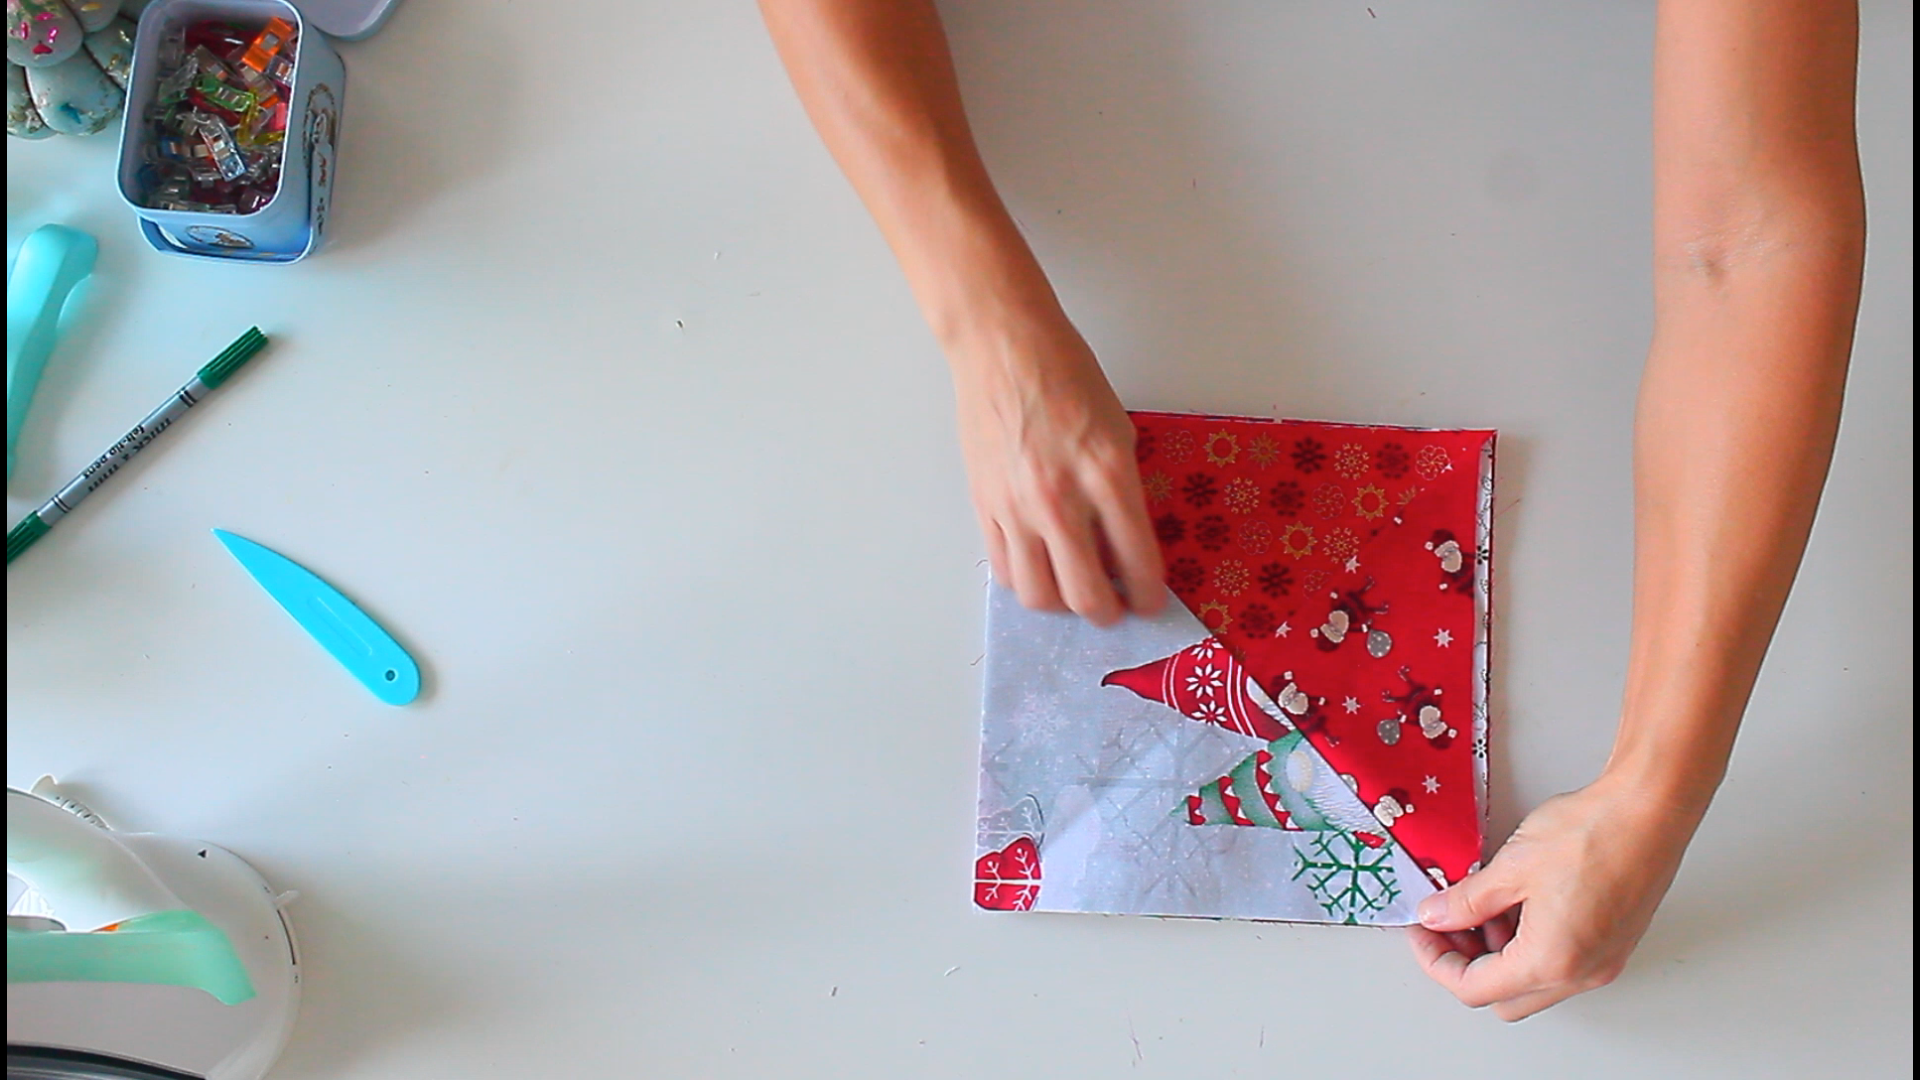
- Fold the first triangle back over the fourth triangle. At this point all triangles should face the backing panel with half of their size.
- Place the loop as desired between the quilted panel and pinwheels, with raw ends up
- Clip the hot pad layers and sew with a 1/4" seam allowance.
- Clip corners
- Turn the pad right side out through the center gap. Use a point turner to push out corners, smooth seams, and press.
- Optionally, stitch in the ditch at the center to keep the pad flat during washes.


Video
Article may contain Amazon & affiliate links. As an Amazon Associate I earn from qualifying purchases at no additional cost to you.

Thank you for sharing this recipe