

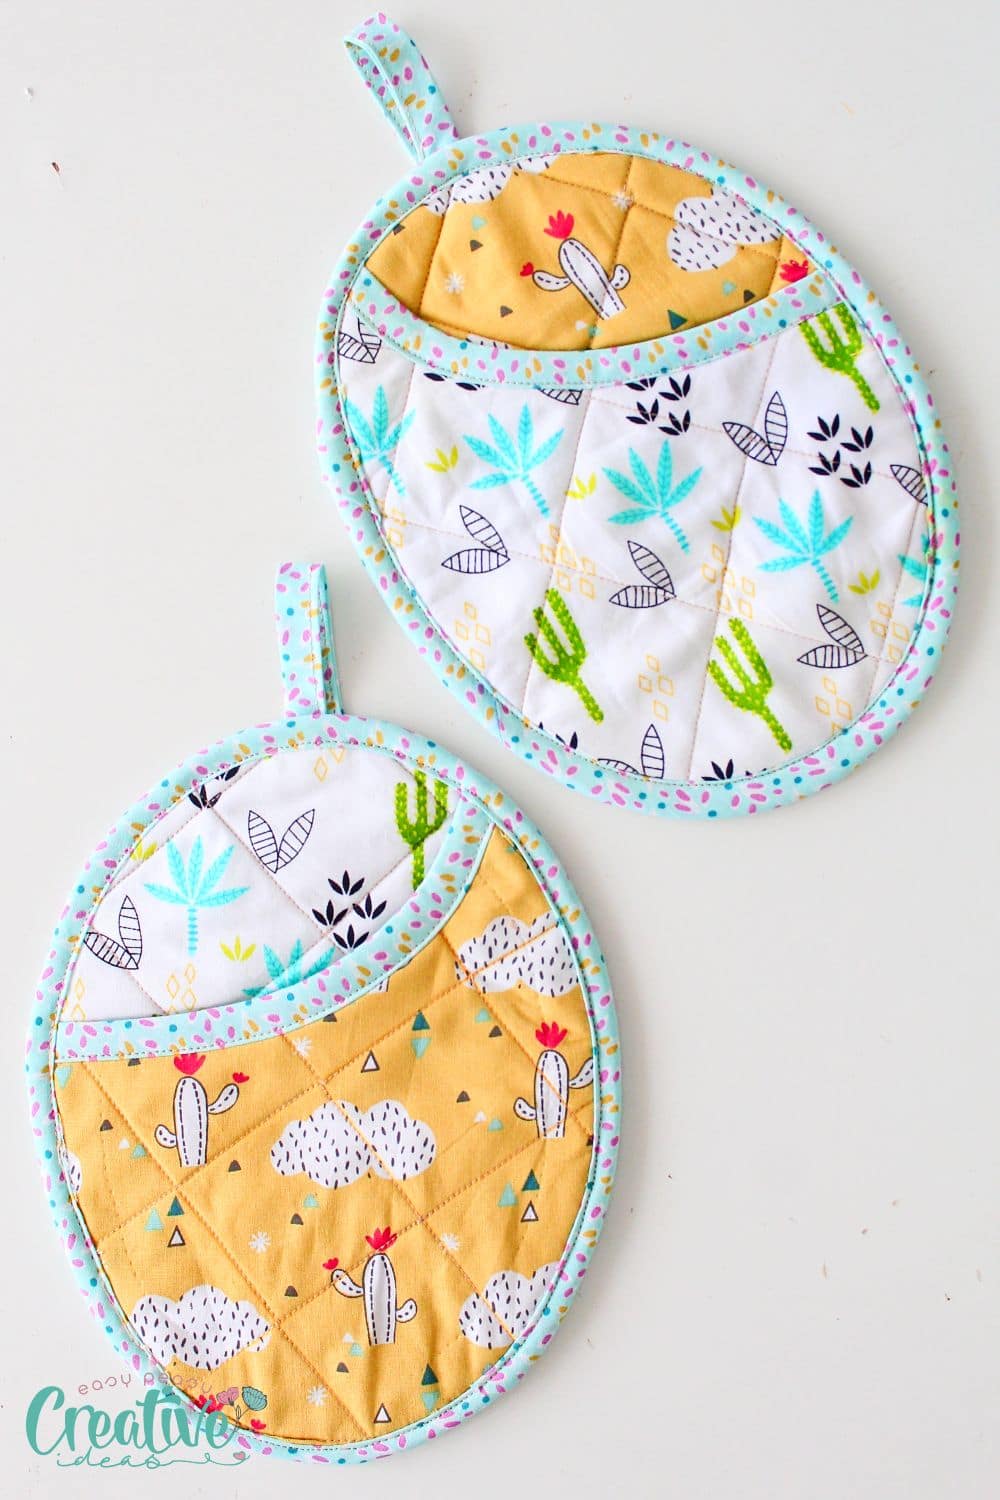
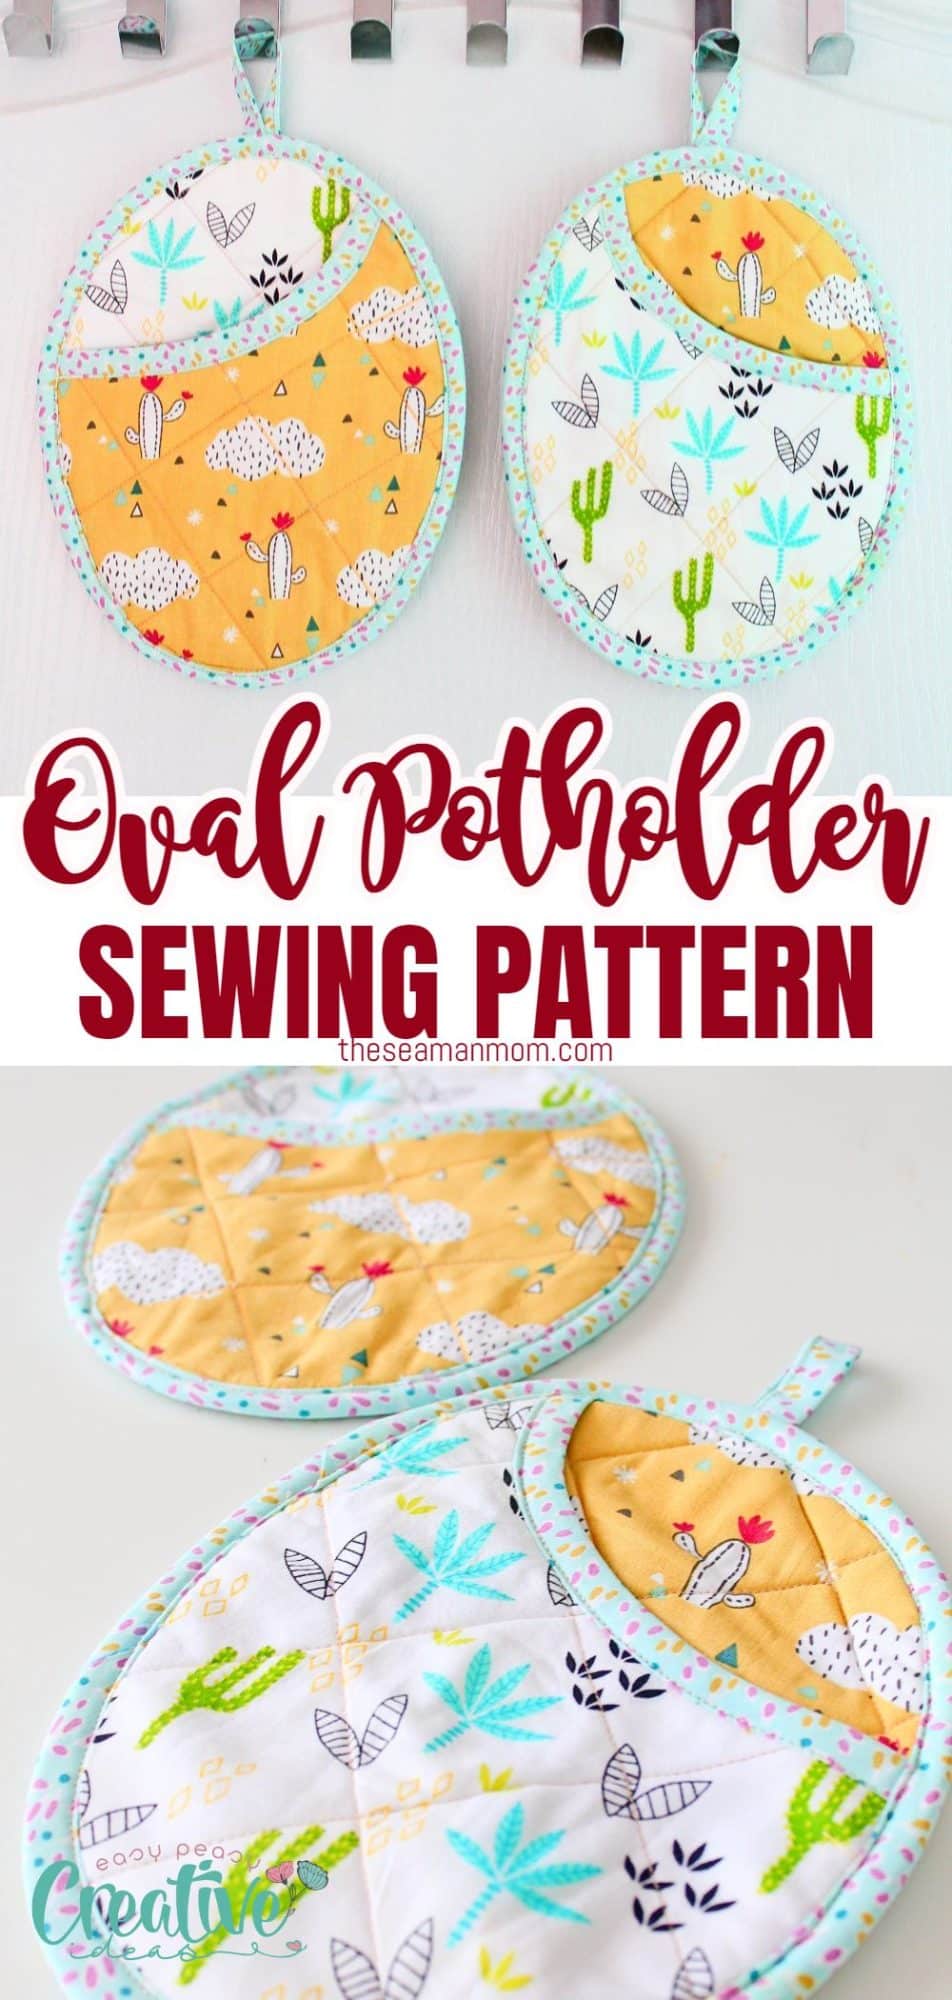
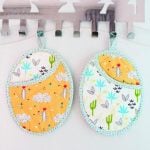
Oval pocket pot holders sewing pattern
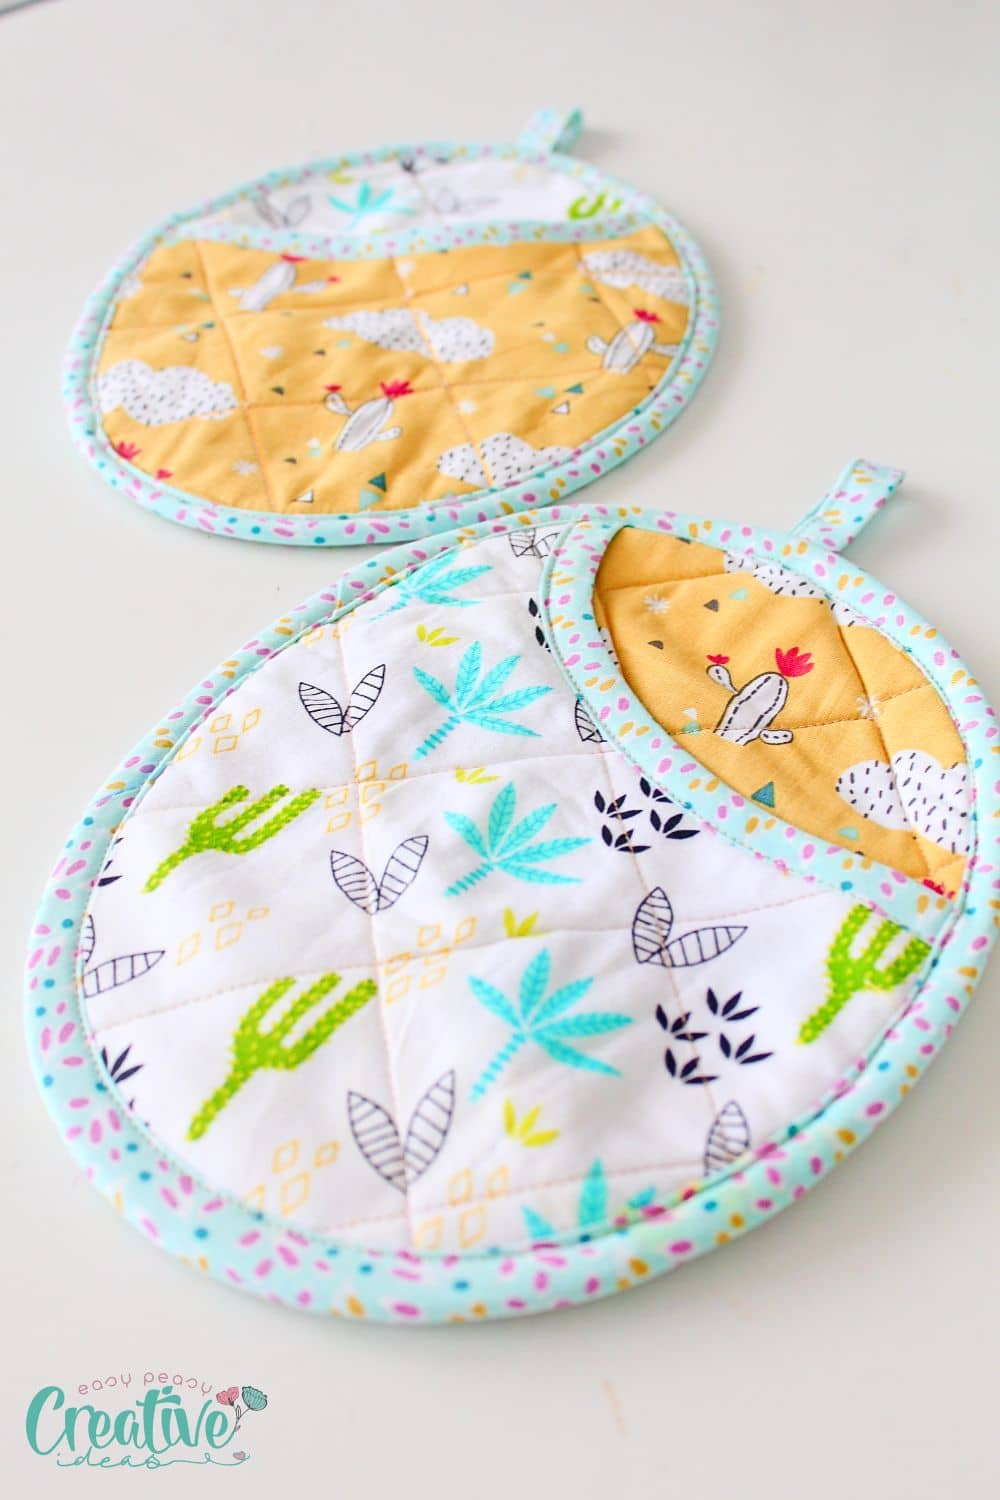
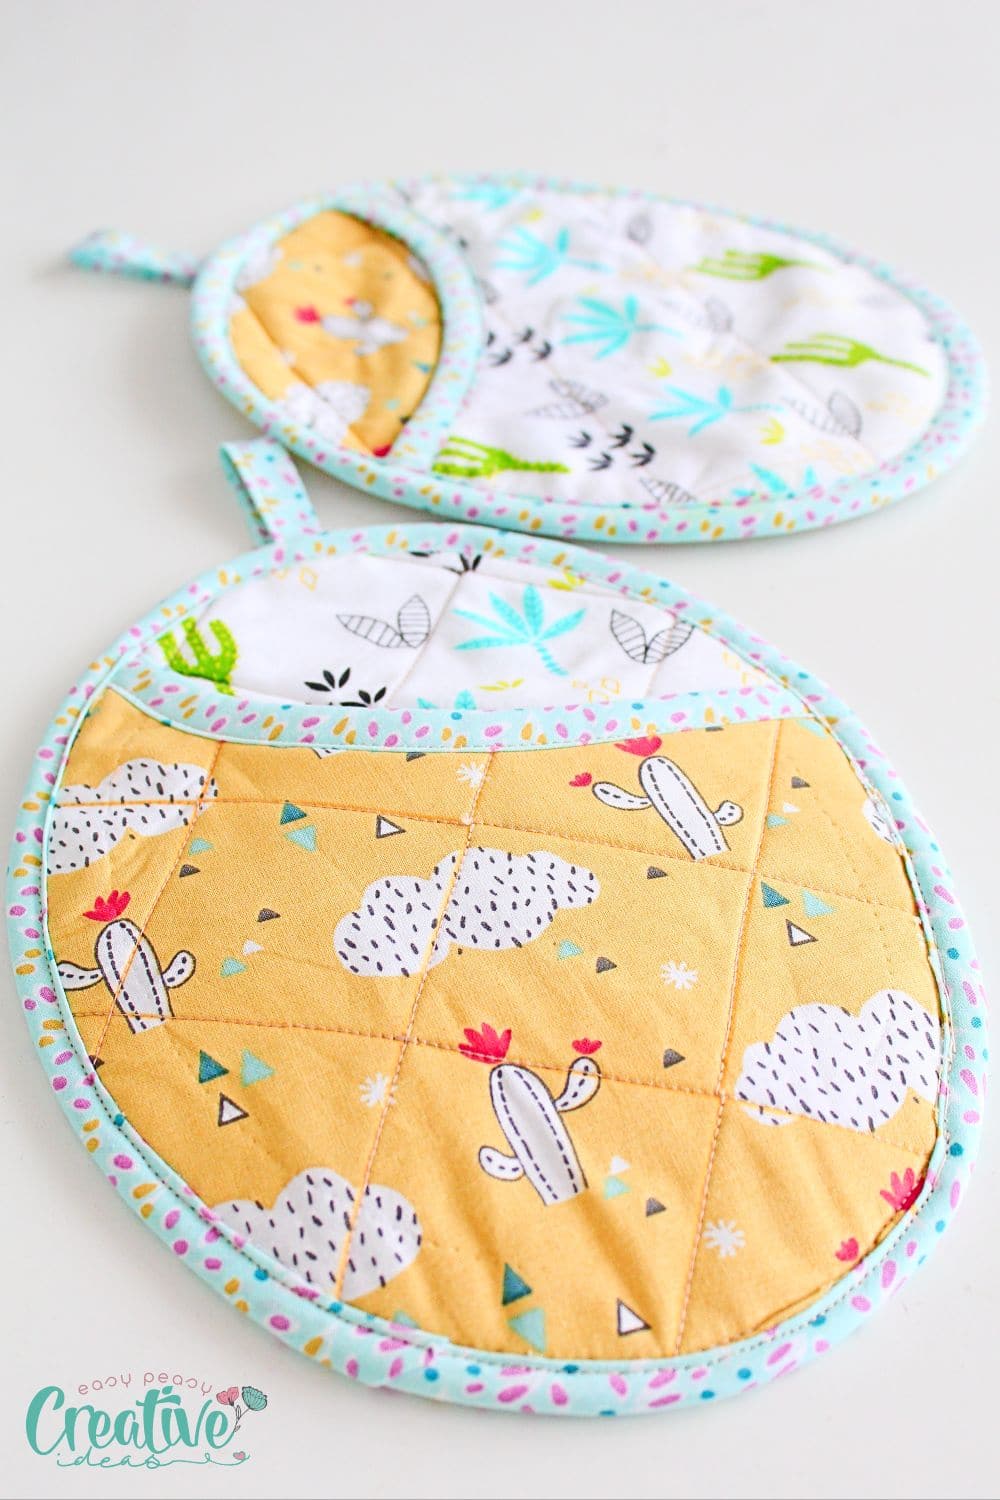
It’s time to make some beautiful, durable pocket pot holders! These oval shaped pot holders are perfect for your cooking needs! They’re perfect for bringing along to picnics, BBQs, or just keeping in your kitchen. Plus, they’re so easy to make – just follow my simple tutorial.

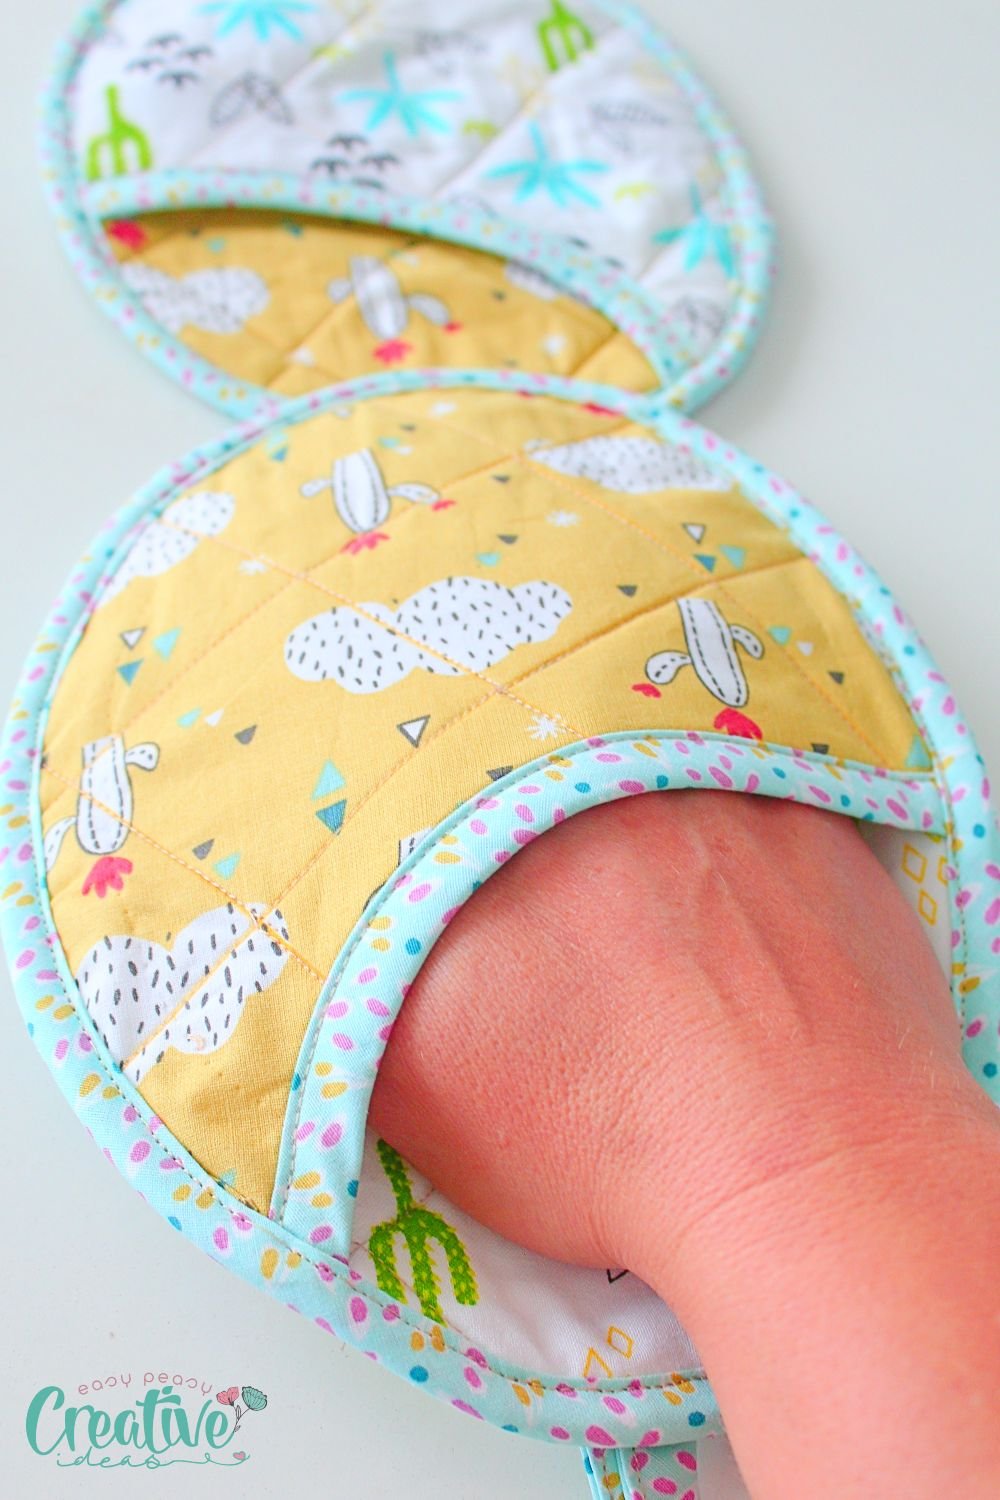
End your search for the perfect pot holder because these pocket pot holders are ideal for all of your cooking needs! With a handy pocket for safe handling of hot pots and pans, these potholders are sure to become your new favorite kitchen accessory. So grab your sewing supplies and get started on your very own set today!
Sewing potholders is a great way to use up fabric scraps and show off your creative side. And with this pattern for pocket pot holders, you can do both! These potholders are perfect for anyone who loves to cook or bake. So whether you’re looking for a new addition to your kitchen or a unique gift for a friend, these oval pot holders are sure to please.
How to make pocket pot holders
Materials needed
Depending on the type of potholder you make, you’ll need different materials. For my quilted oval pot holders with pockets, you’ll need the following materials, in addition to the sewing pattern, available here:
For the potholder body:
- 1 strip of 100% cotton fabric, of 16″ by 10″
- 1 strip of batting, of 16″ by 10″
- approx. 25″ of bias binding to sew all around the potholder
For the pocket pot holder:
- 1 strip of fabric (different than the body), of 16″ by 10″
- 1 strip of batting, of 8″ by 10″
- approx. 7″ of bias binding for the top of the pocket
Other materials needed:
- pattern for oval pot holders with pockets
- 5″ bias binding to form the hanging loop (used for hanging the potholder)
- matching thread
- sewing machine
- walking foot (useful if you’re quilting through thick layers of fabric if your sewing machine is not equipped/designed to sustain sewing through such thickness)
- embroidery scissors or seam ripper
- scissors
- quilting ruler or yardstick
- fabric markers or chalk
- quilting clips
- pins
- pressing iron with steam setting
Instructions to sew a potholder with pockets
Sewing these pocket pot holders could not be easier and if you’re an advanced sewist/quilter you’ve already figured out how to do it by now. Here are the easy steps:
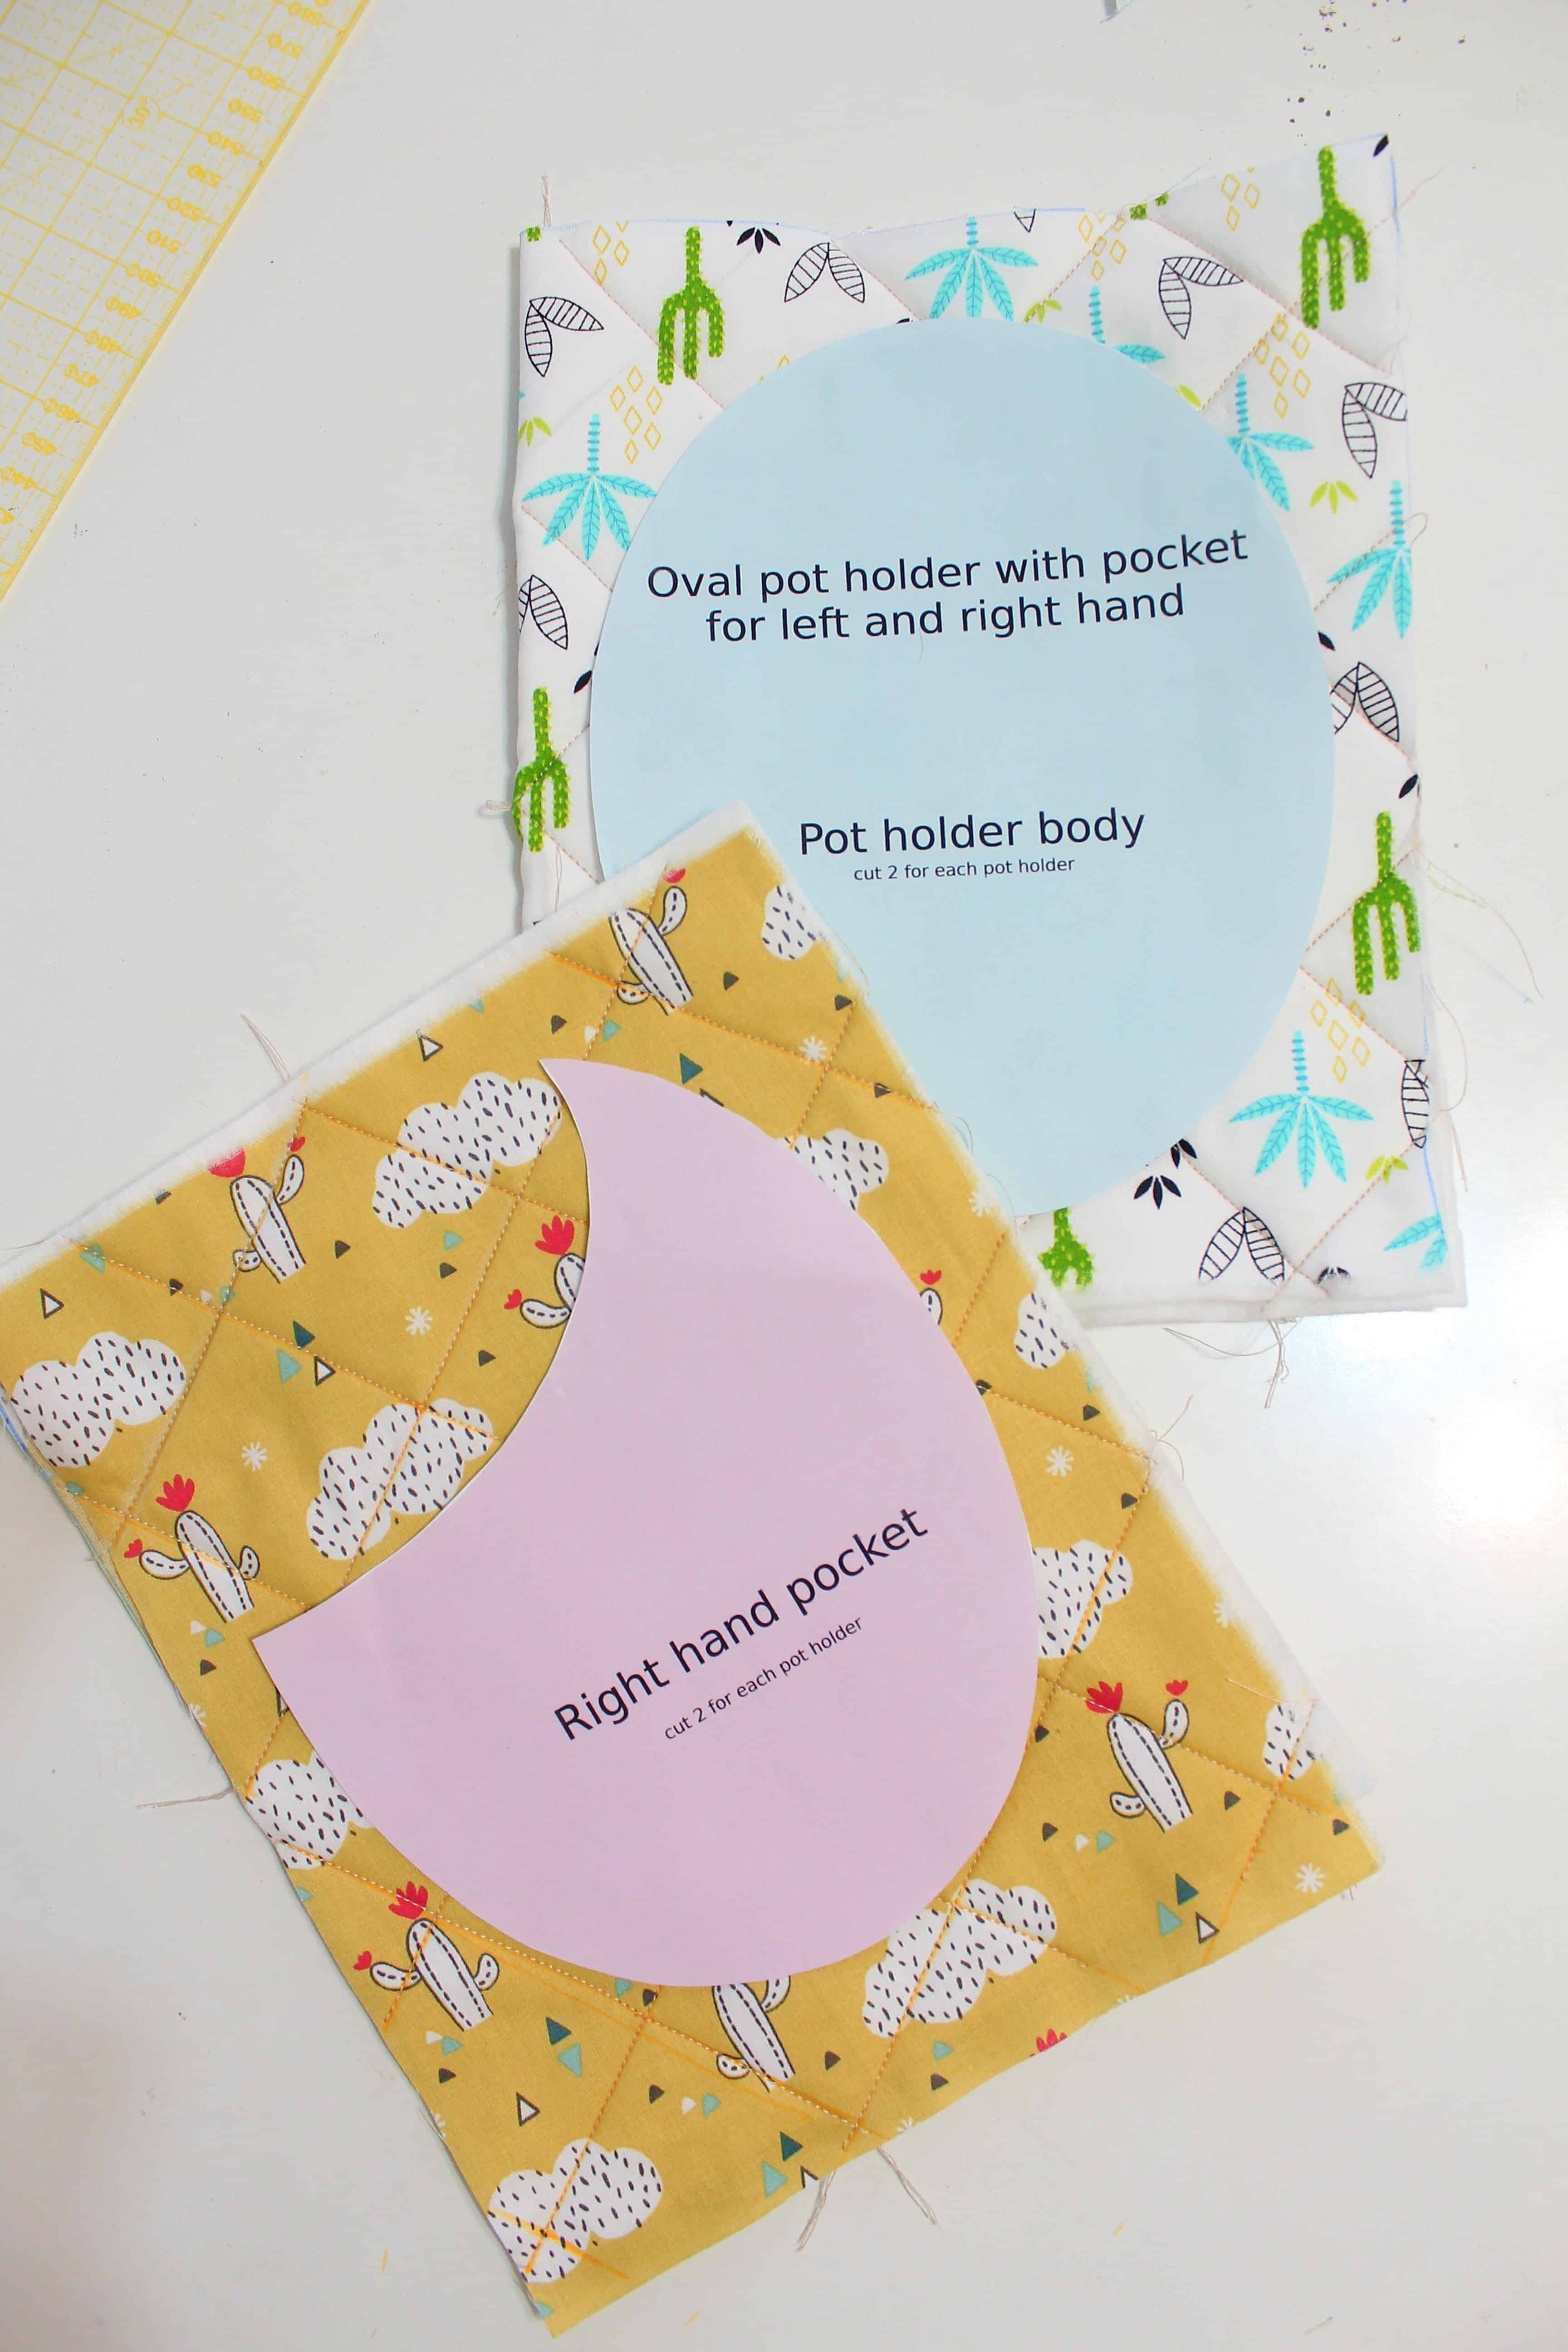
- Grab my pattern for oval potholders with pockets and print out the version you like (for right hand or left hand). If you want to make a pair, you don’t need to print the pocket pattern for both the right and left hand. Print one and just flip it when creating the opposite potholder.
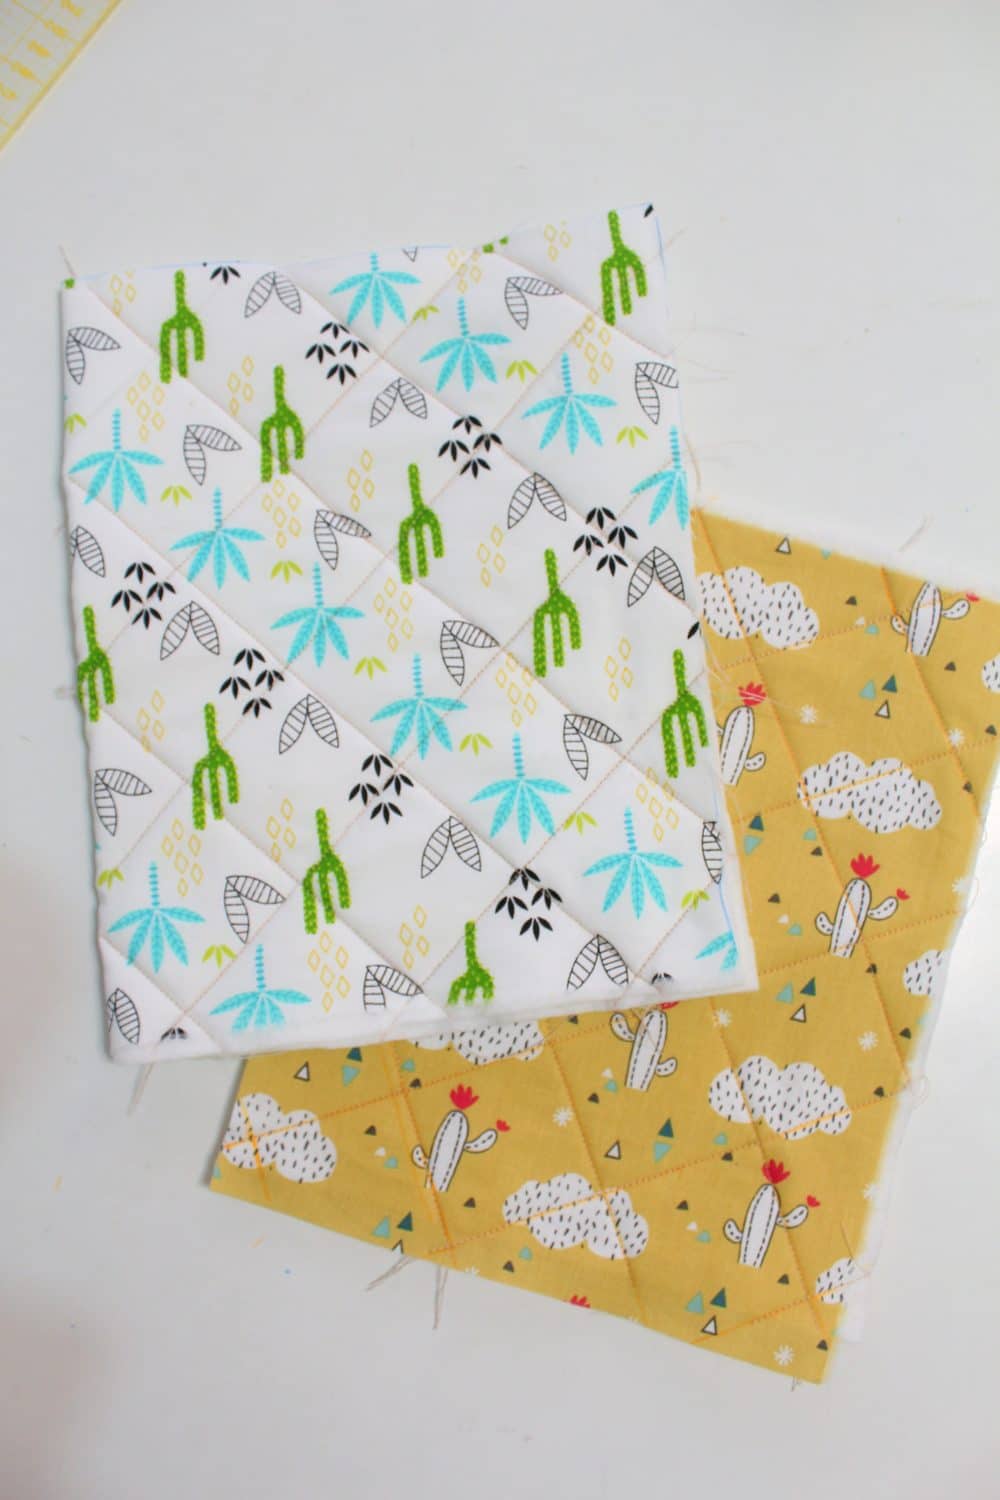
Quilt the fabrics:
- Get the fabric and batting for the body and place the batting onto the wrong side of the fabric. If you’re having troubles keeping the fabric and batting together, a quilting spray adhesive will help baste them temporarily.
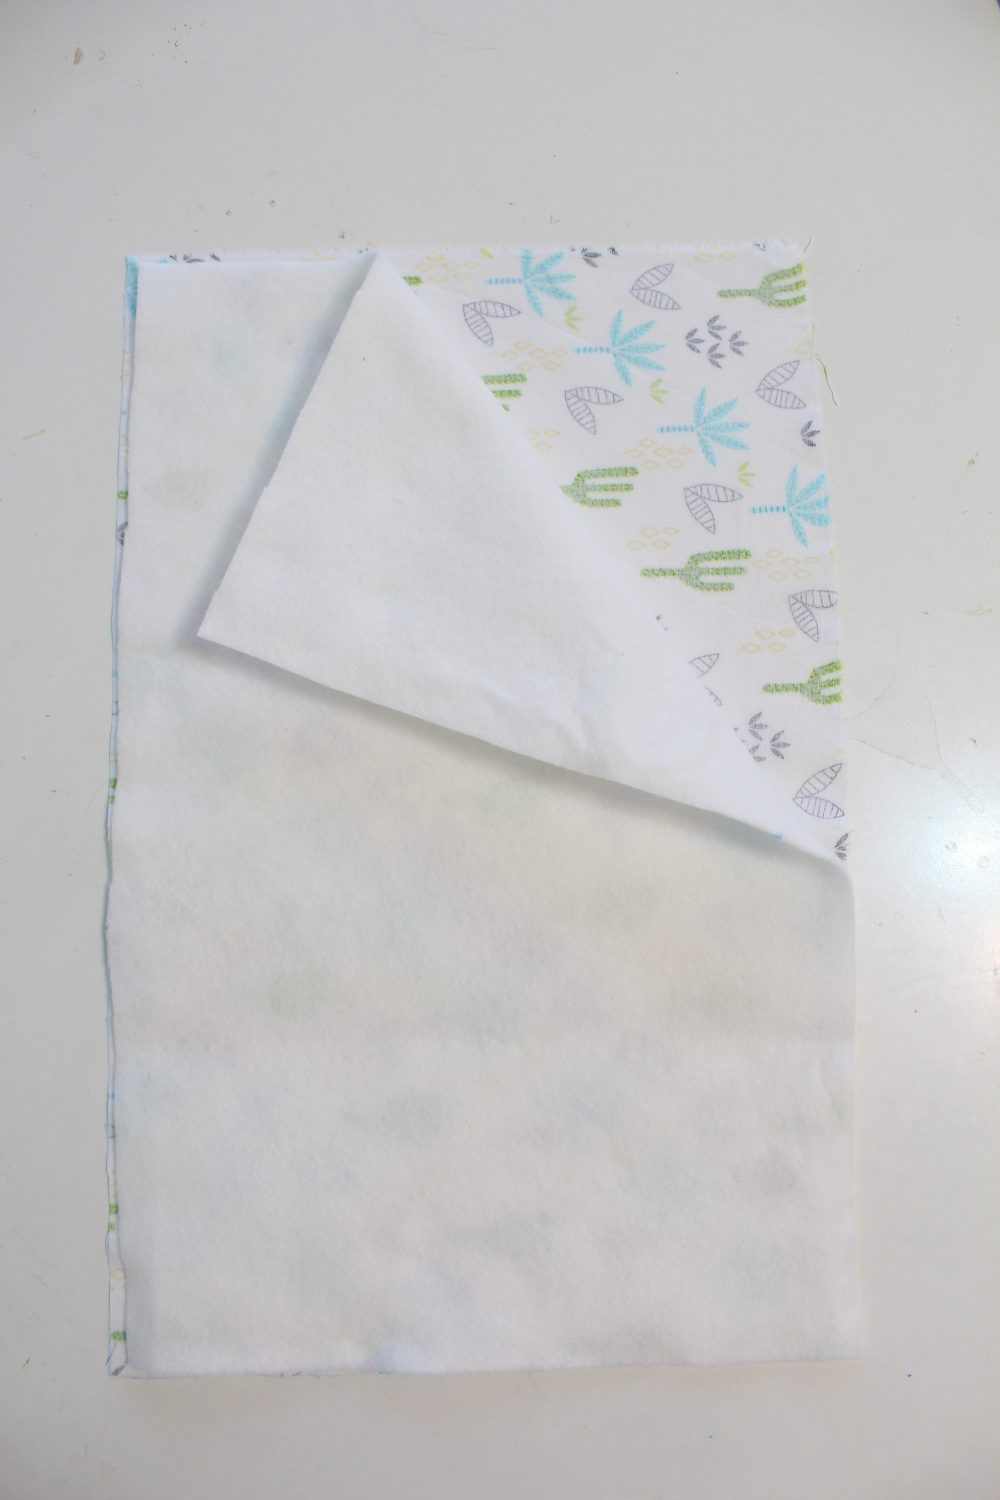
- Then fold the fabrics in half, with the wrong side inside.
- Using your quilting ruler or yardstick and the fabric marker, trace diagonal lines across the fabric, about 2″ apart.
- Pin through all layers or clip the edges with quilting clips to help all layers stay put. If you spray-basted them, this step shouldn’t be necessary.
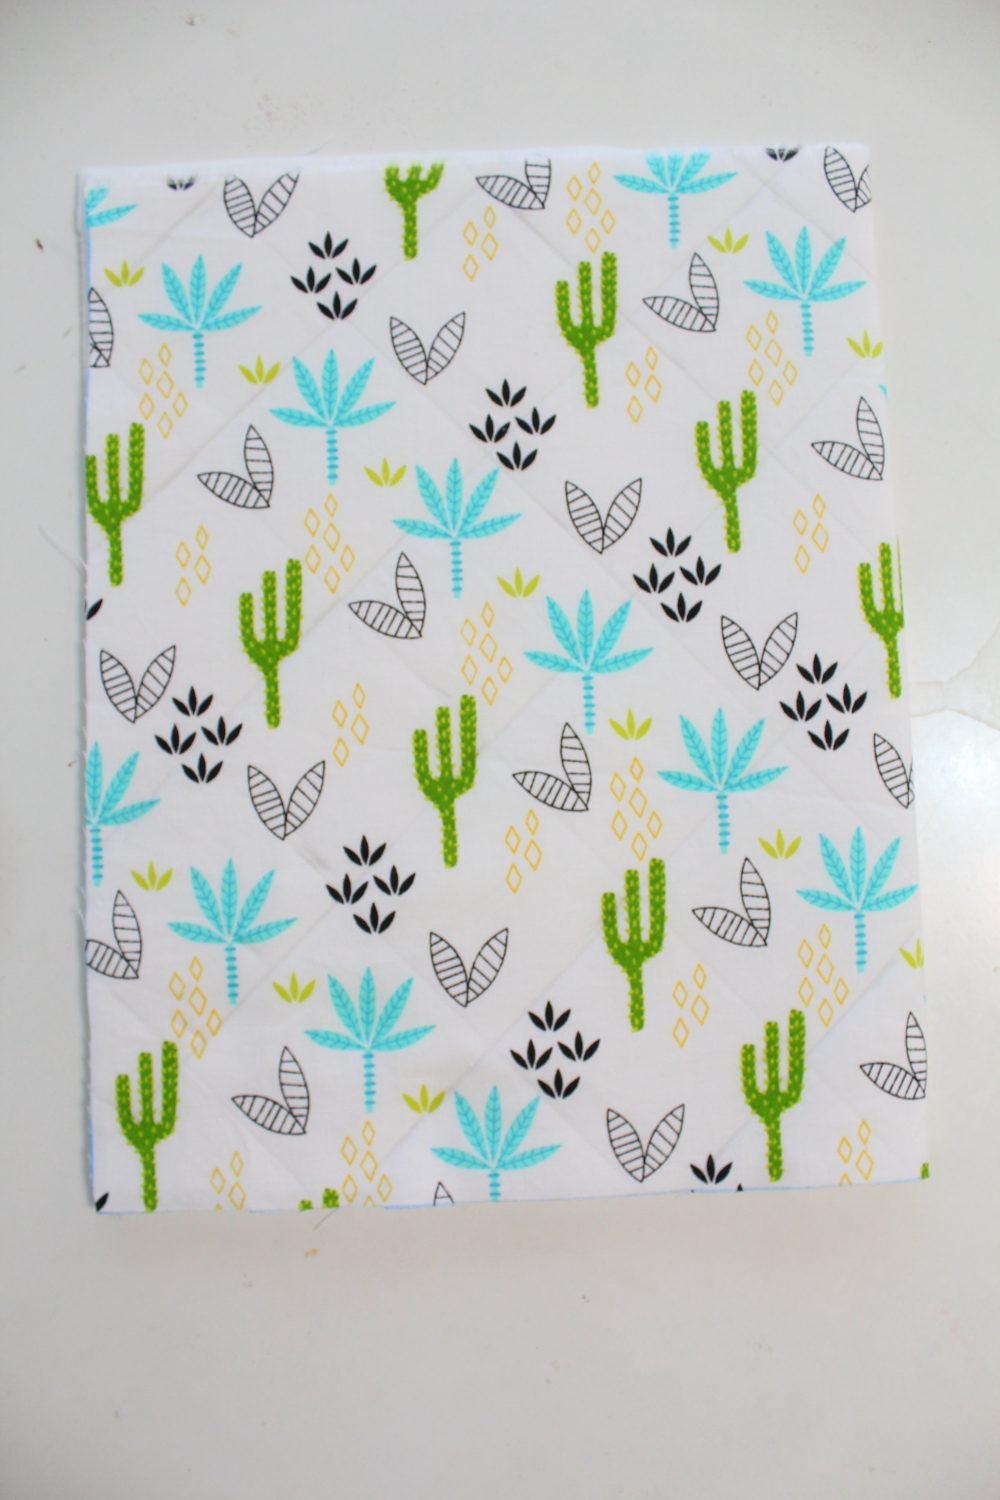
- Start quilting the fabrics by sewing all those traced lines. I like to start from the center out to prevent the fabrics from slipping. Again, if you used the adhesive spray, this shouldn’t be necessary so just sew as normal.
- Repeat the process for the pocket.
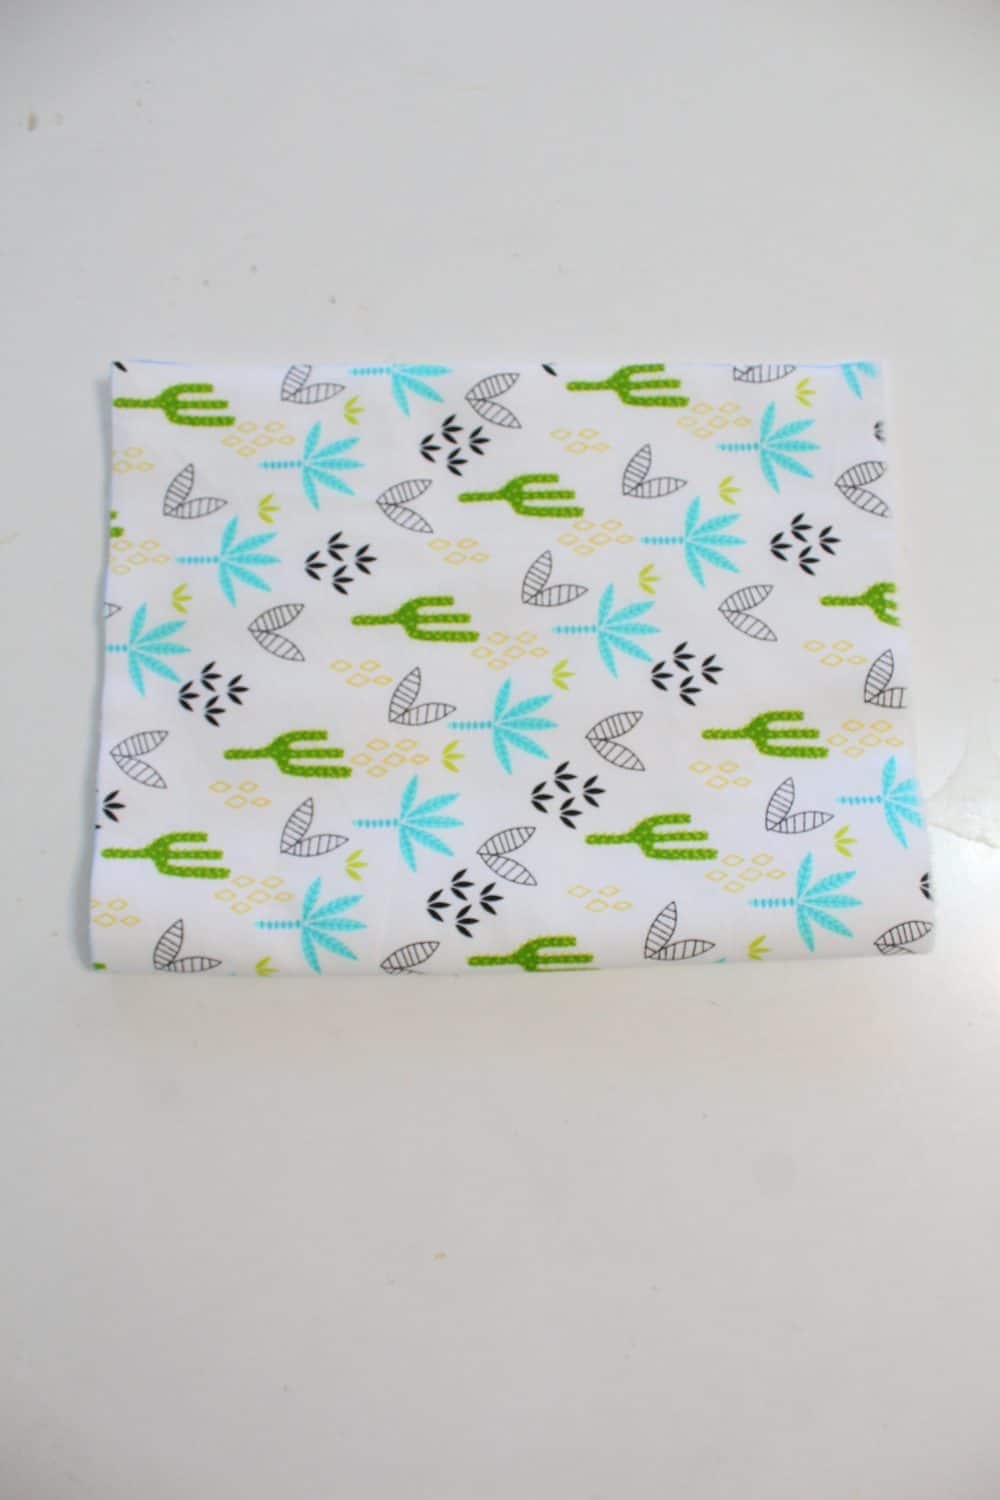
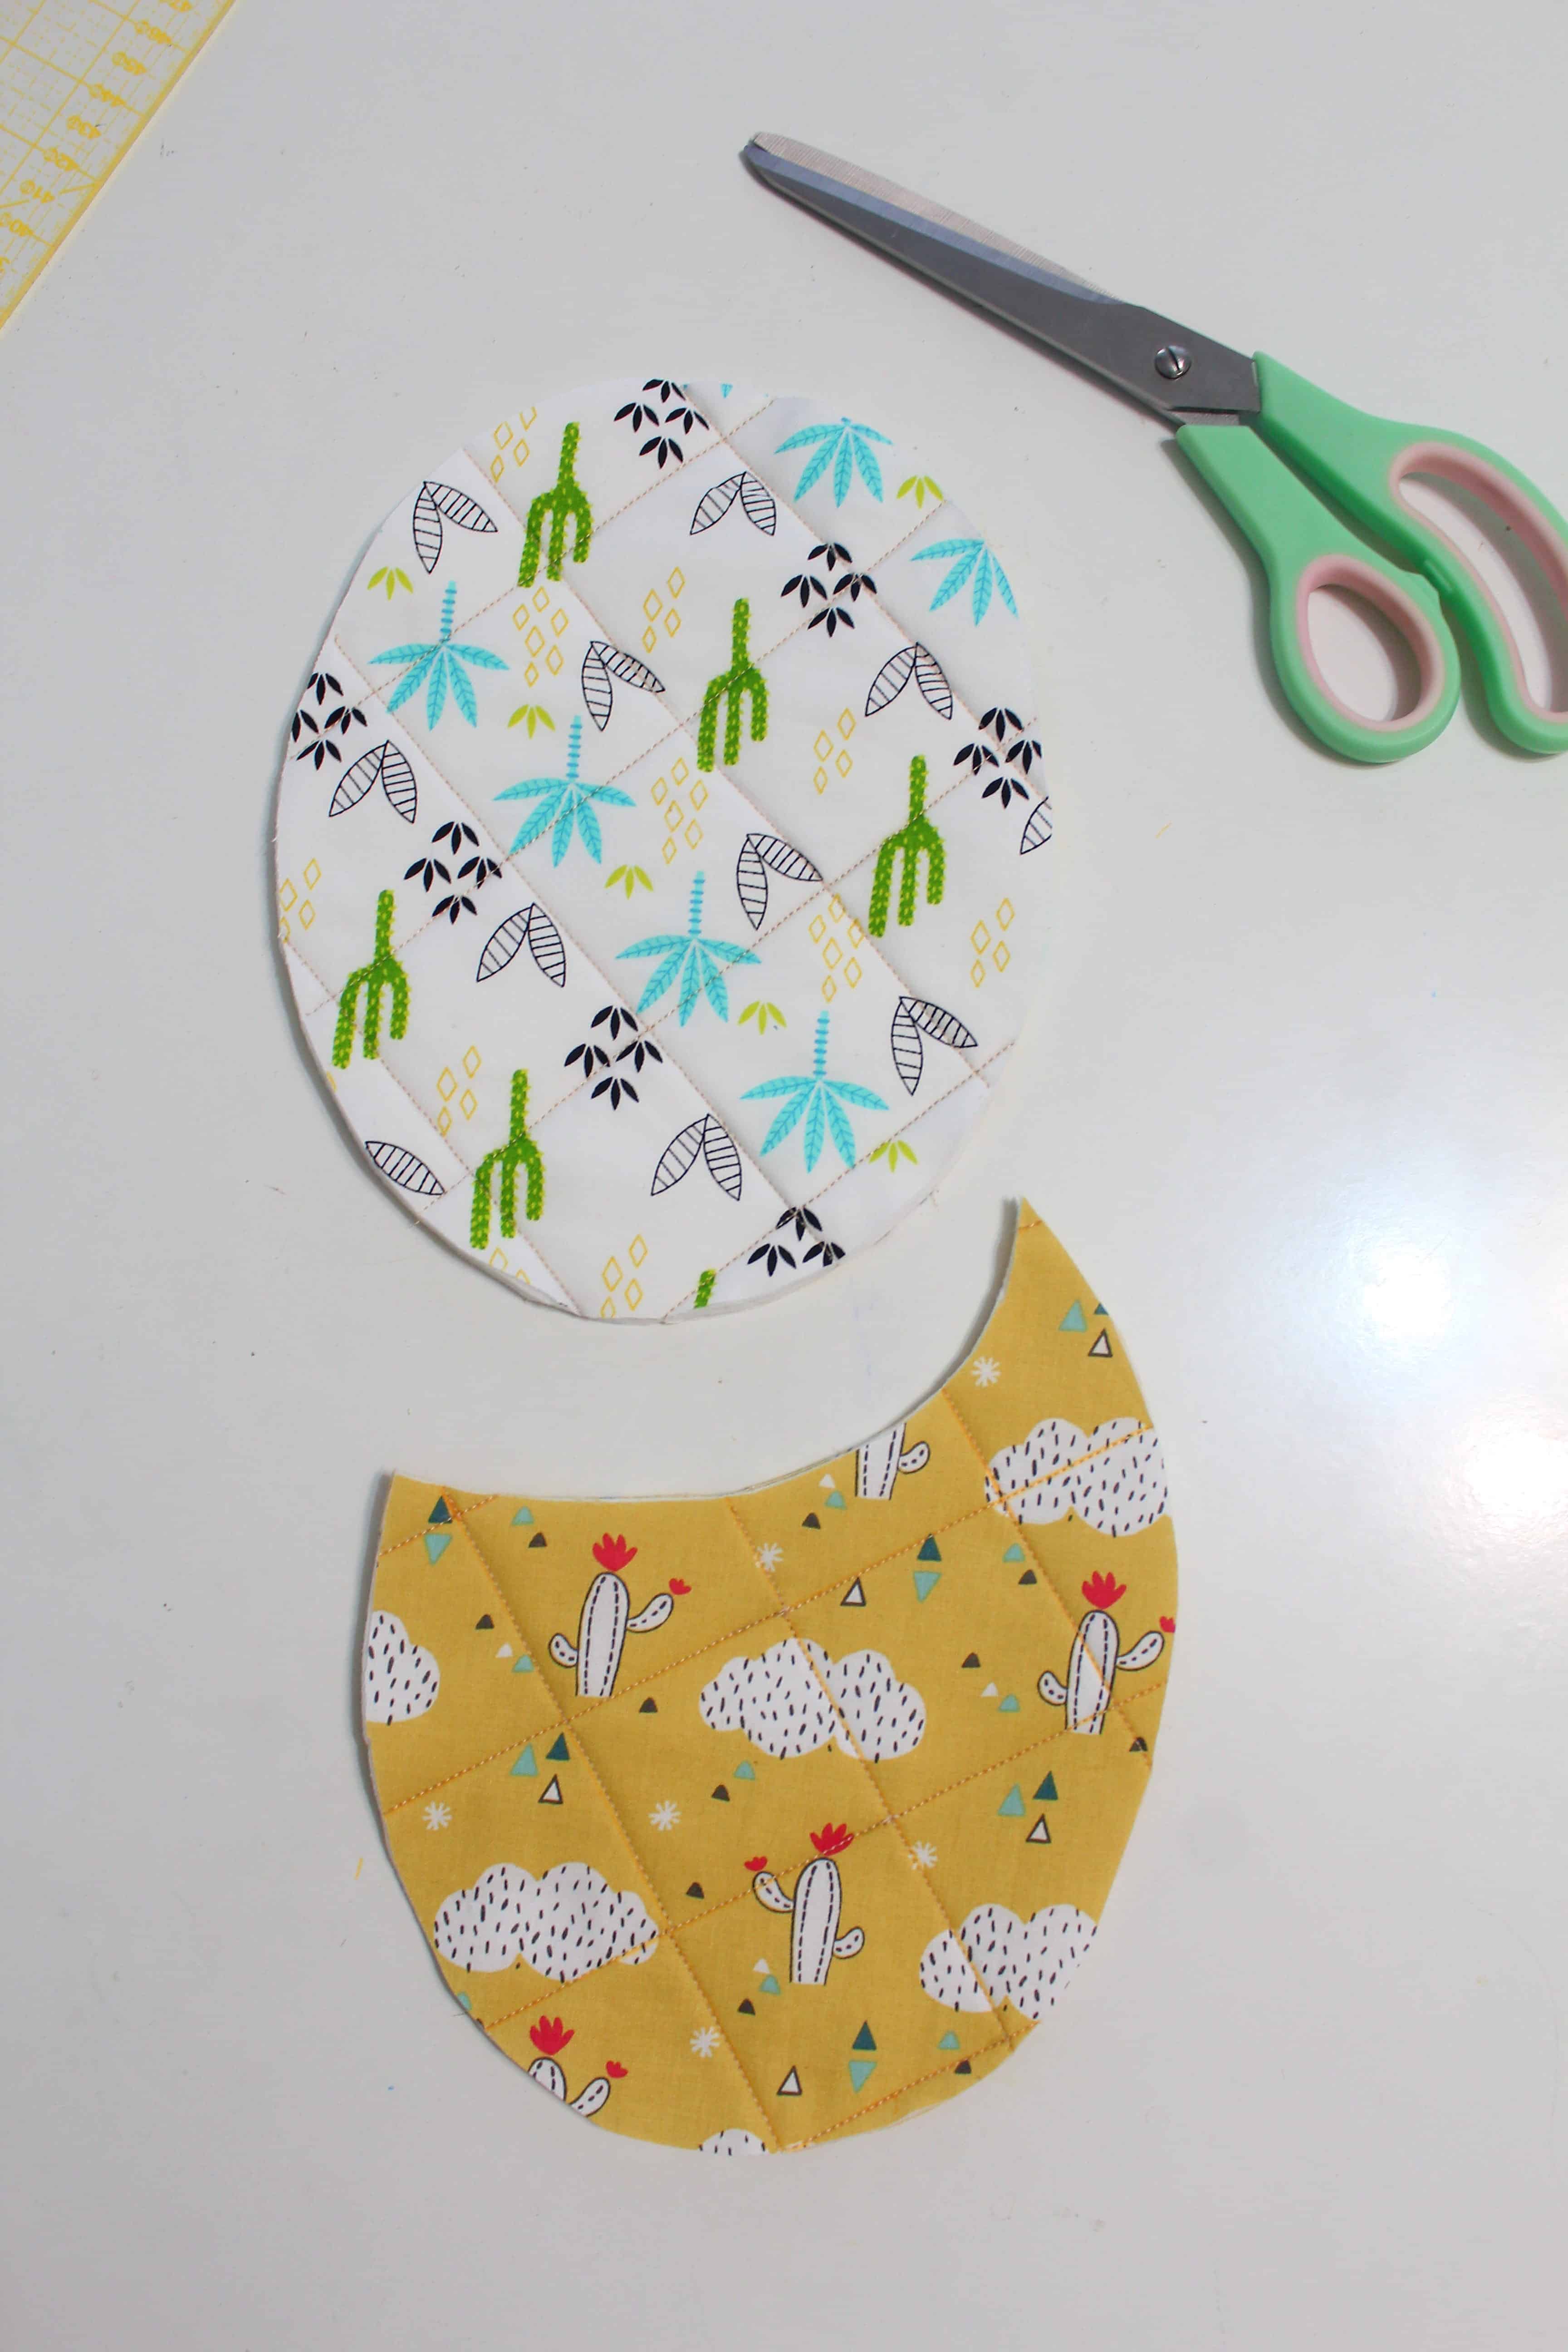
- Then trace the patterns for the potholder and pocket onto their respective fabrics and cut them out.
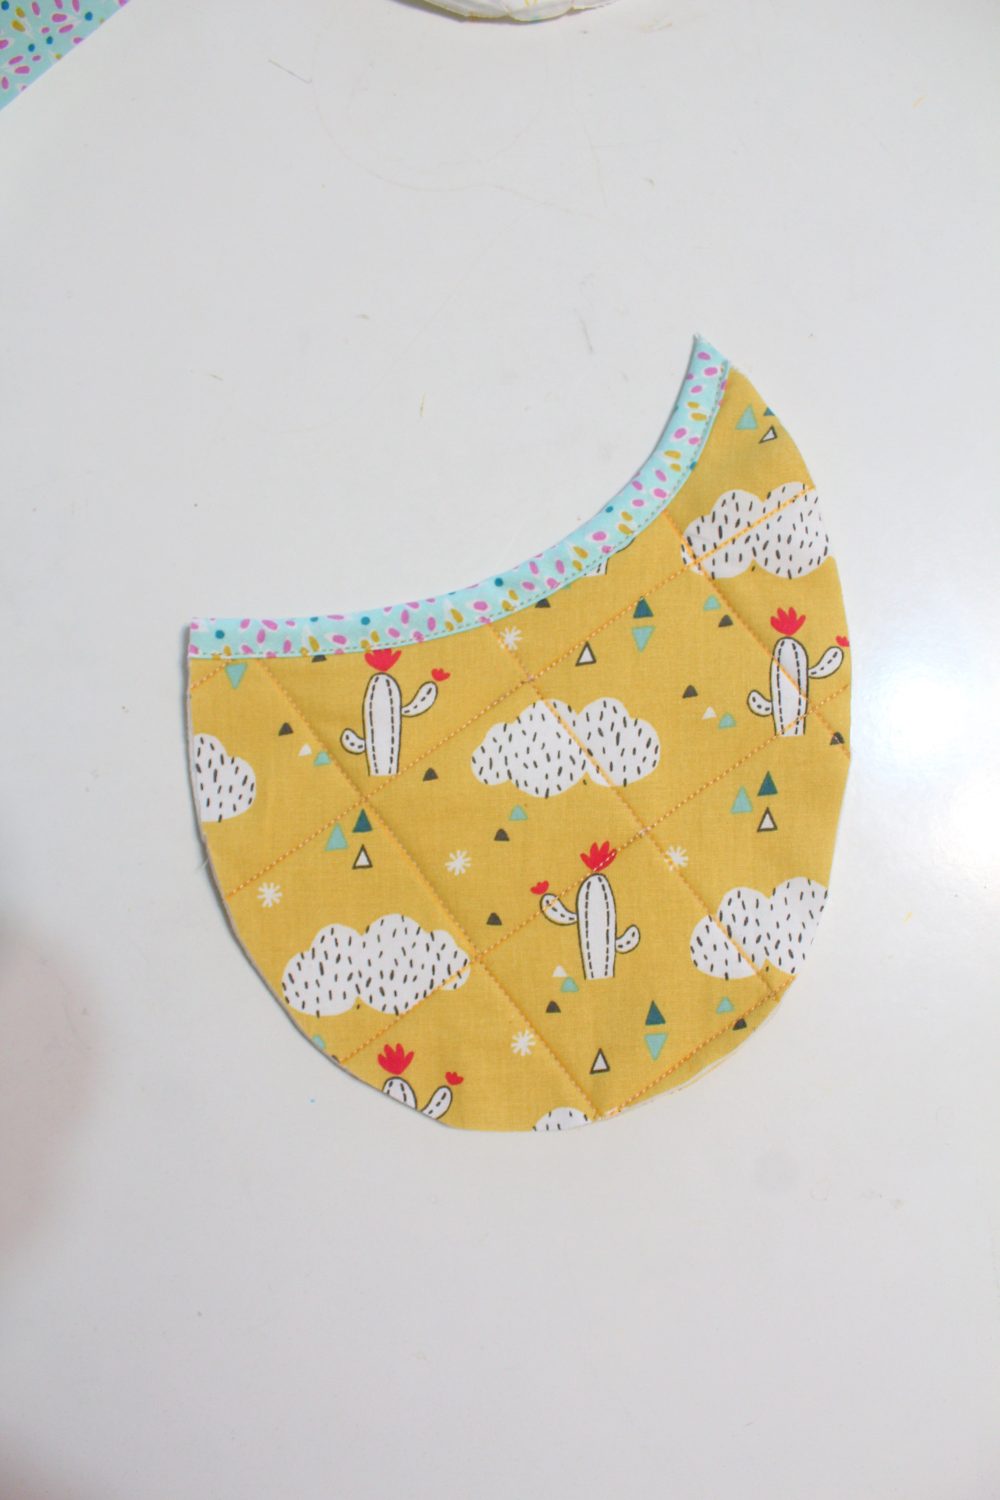
Make the pocket:
- Grab the bias binding for the pocket and clip it to the top of the pocket. Most quilters start attaching the bias binding at the front side, flip it to the back, and then do a stitch-in-the-ditch. As I’m not as handy, I find that this method doesn’t give me satisfactory results. So I start by attaching the bias binding to the back of the pocket.
- Sew the bias binding with 1/4″ allowance.
- Flip the bias to the opposite side of the pocket and press the seam well (you can use the iron on steam to smooth it out). Clip in place.
- Stitch-in-the-ditch or top stitch the bias binding if you’re using my method.
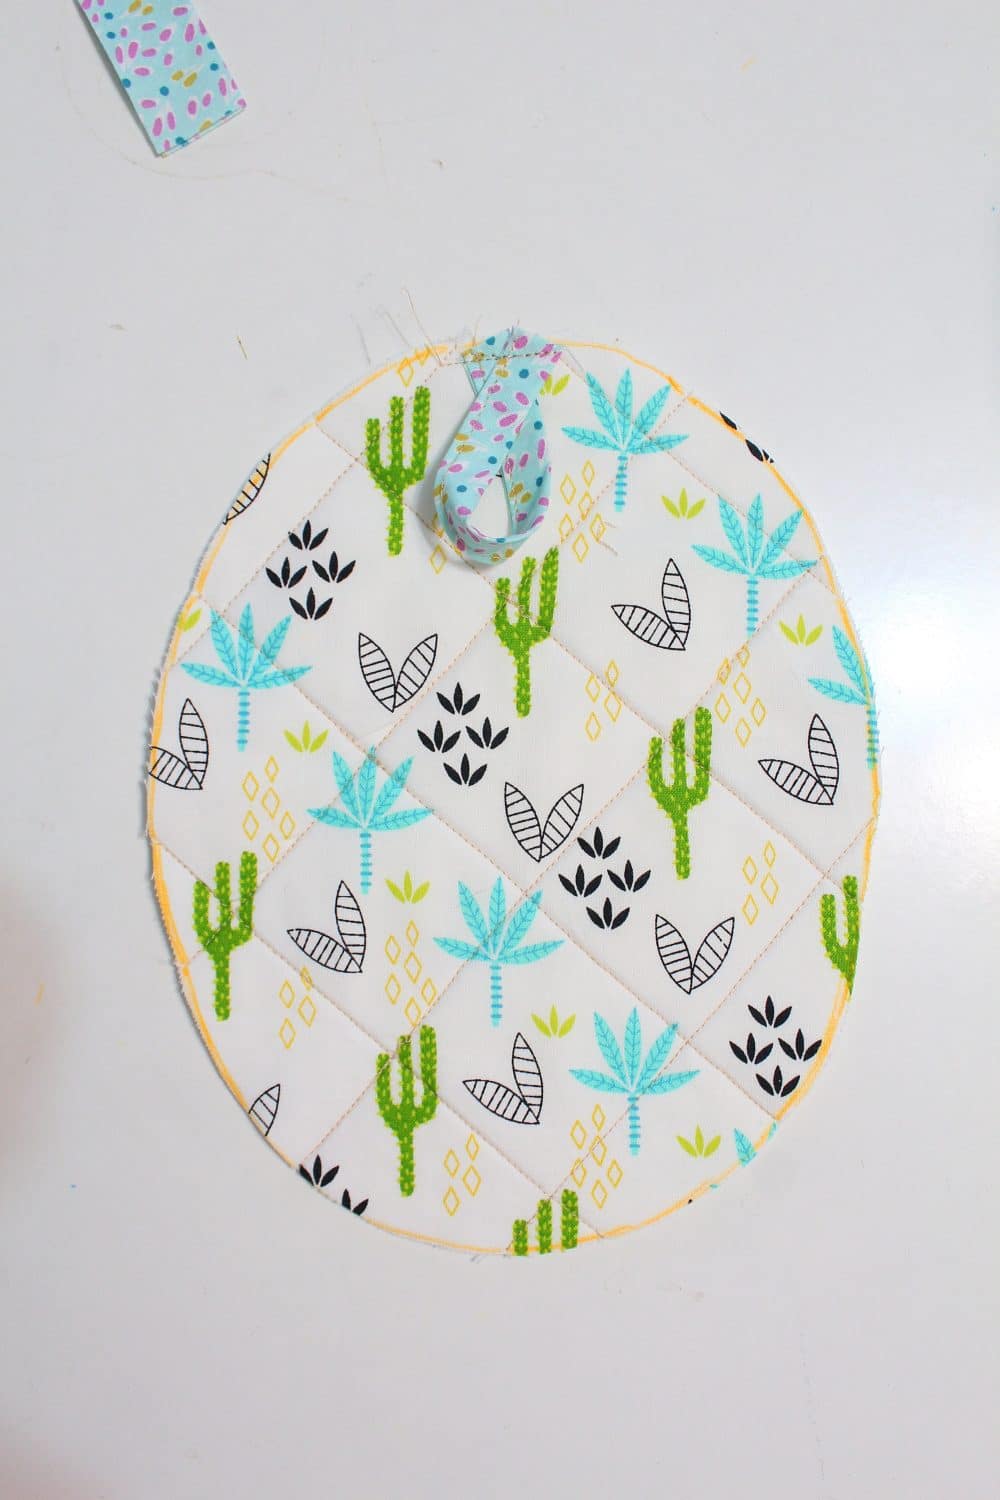
Make the body:
- Grab the bias binding for the loop and open it.
- Fold the edges in towards the middle and press.
- Close the strip again and press.
- Top stitch the open edge to form the loop strip.
- Fold the loop in half and clip it to the top of the potholder body, with the raw edges out.
- Sew the loop to the body using a 1/8″ allowance.
Finish the potholder:
- Place the pocket piece over the front side of the body (the one without the loop), with the loop end at the top.
- Make sure the edges in both pieces match perfectly. If there is some small discrepancy, cut out the areas that don’t match perfectly, making sure to keep the oval shape smooth.
- Clip the pieces together with quilting clips.
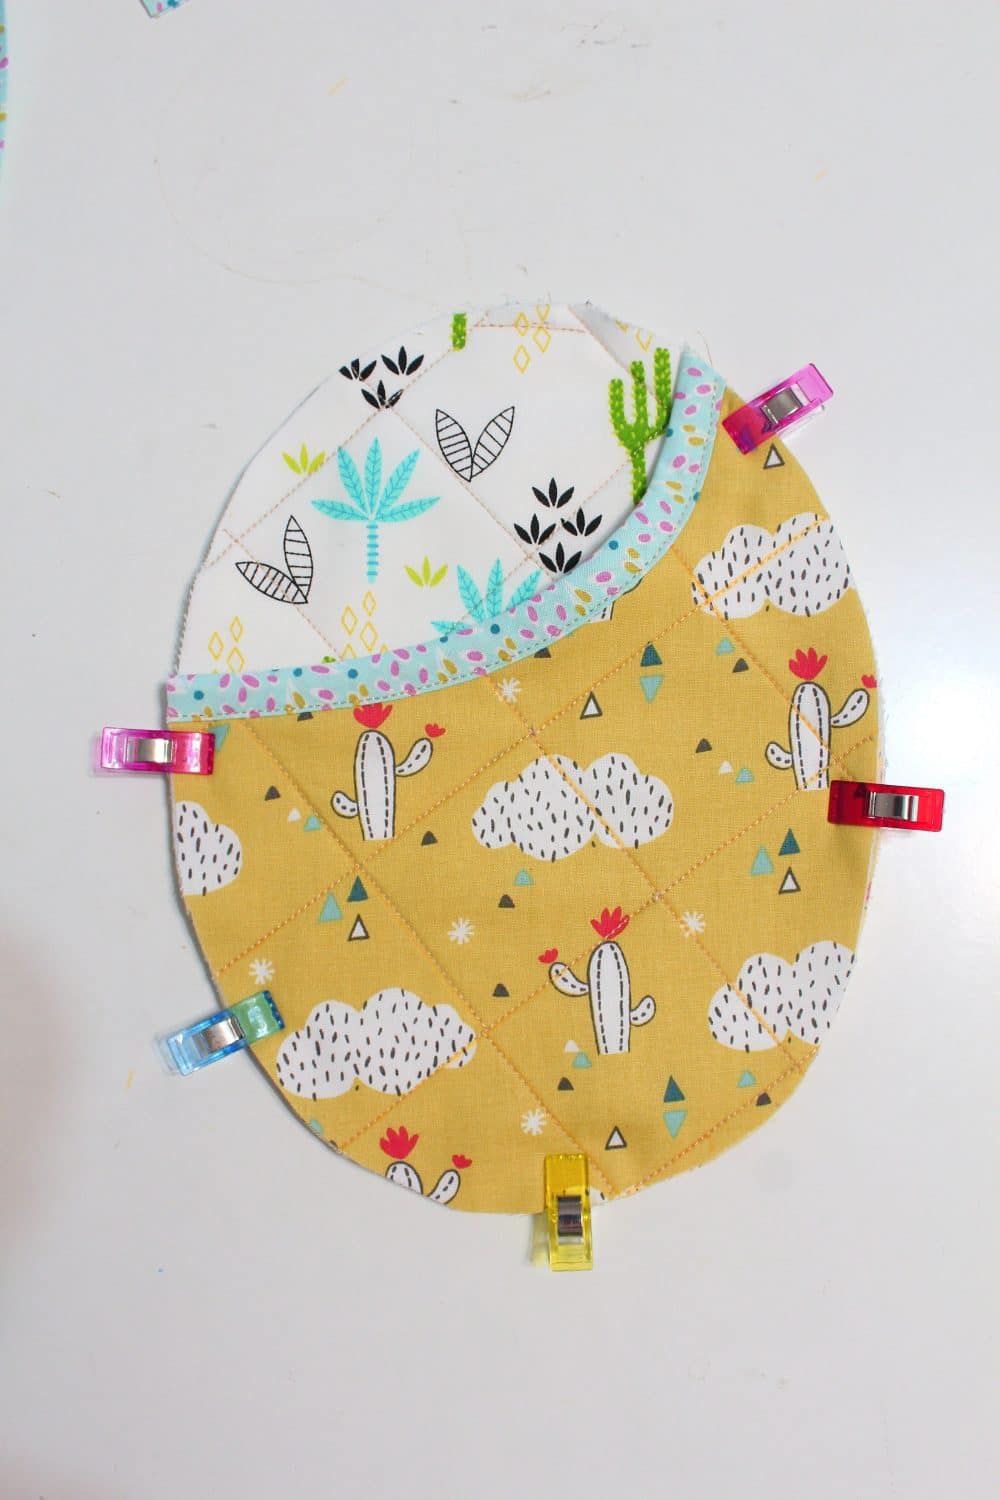
- Run 2 lines of basting stitches on the sides. These are temporary stitches that will keep the pieces together while sewing the bias binding. If you are an experienced quilter this step is not needed.
- Add bias binding to the raw edges in the same manner as for the pocket.
- Flip the loop up before finalizing sewing the binding. This would be done in the second step of the process.
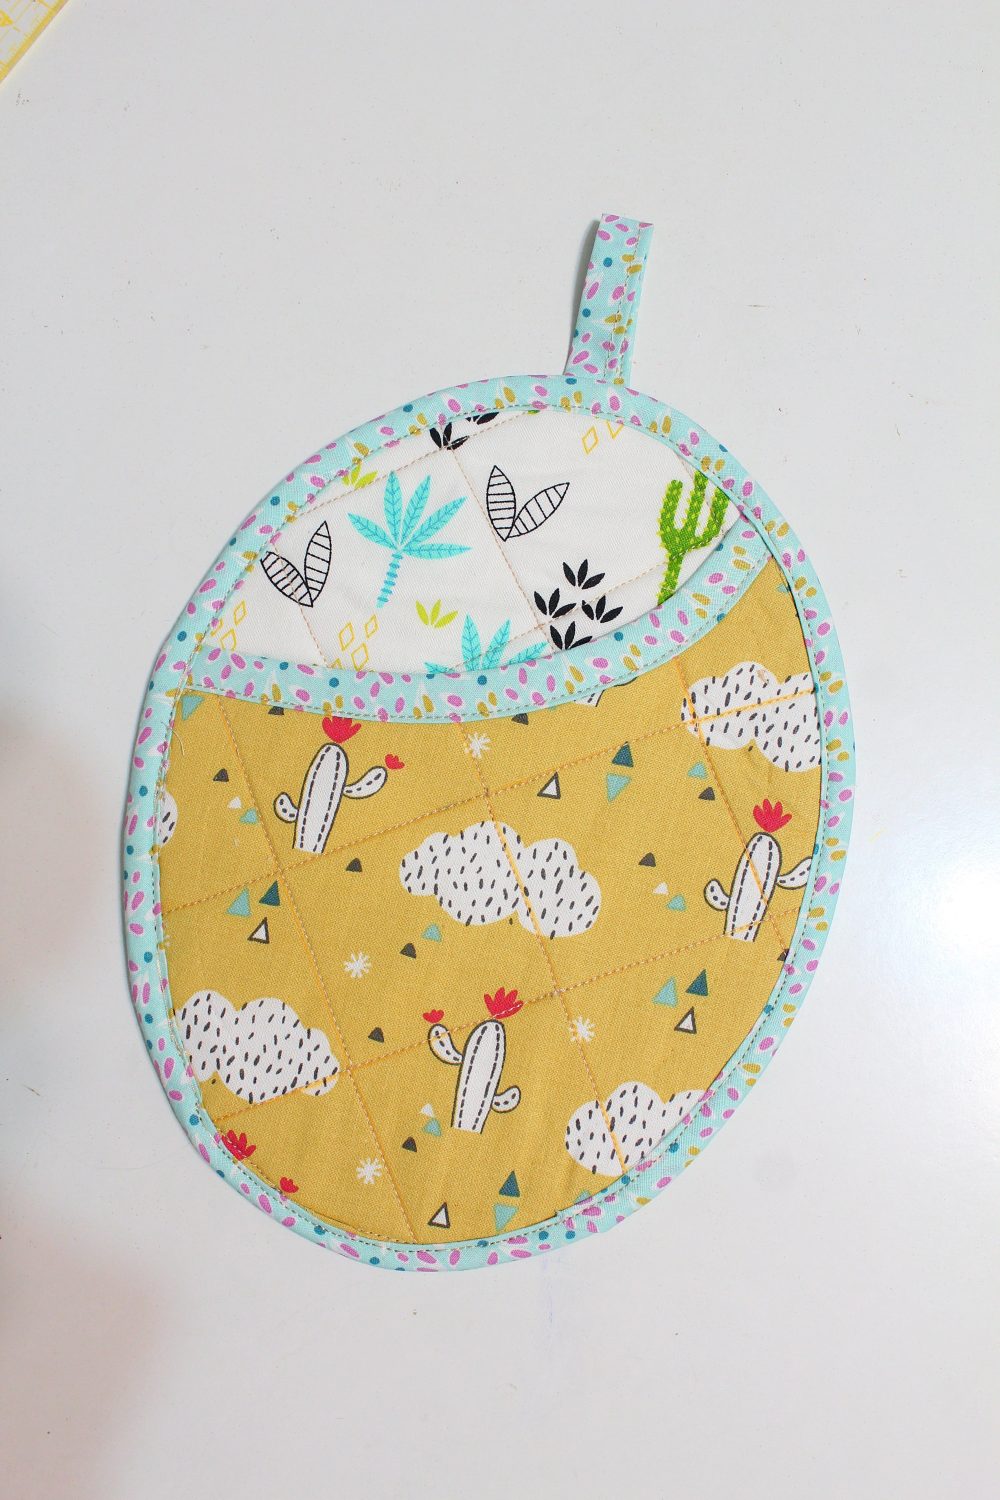
- Remove the basting stitches using the seam ripper or embroidery scissors.
- Press potholders with steam.
Frequently asked questions
What should I look for in a potholder?
When you’re choosing a potholder, there are a few things you’ll want to keep in mind. First, think about what material you want your potholder to be made out of. Cotton or quilting fabric is the most common type of material, but there are also silicone options available. Each type of material has its own set of pros and cons, so it’s important to choose the one that’s right for you.
Next, consider the size of the potholder. Potholders come in all different shapes and sizes, so you’ll want to make sure you choose one that’s big enough to cover your hand completely. You don’t want any part of your hand to be exposed to the heat, so make sure the potholder you choose is large enough to provide complete coverage.
Finally, take a look at the design of the potholder. Some have fun prints or patterns, while others are more simple and understated. There are even some that come with pockets, which can be handy for holding onto hot pans or pots or be of additional help for extra hot pots and pans. It’s really up to you what kind of design you choose, so pick something that you think you’ll enjoy using. Better yet, pick this pattern for pocket pot holders and just make your own in the color you like.
What are the pockets on the pot holders for?
The pocket on the pot holder is there to help you safely grip hot pots and pans while protecting your hand. By holding onto the pot or pan through the pocket, you can be sure that your hand will not come into contact with any heat. This is especially helpful when you’re cooking with large or heavy pots and pans, as it can be difficult to grip them without a pocket.
The pockets are also handy as an extra layer of protection. If the pot or pan you’re using is especially hot, the pocket can help to insulate your hand and prevent any burns.
What can I use instead of a pot holder?
There are a few different options you can use instead of a pot holder. One is to use an oven mitt. Oven mitts are usually larger and more insulated than pot holders, so they can provide extra protection from heat when handling hot cookware. They also tend to have loops or ties, so you can easily hang them up when you’re finished using them.
Another option is to use a towel. A thick kitchen towel can be wrapped around a hot pot or pan to provide some protection from the heat. However, it’s important to be careful when using a towel, as it can easily slip or come undone.
Are pot holders and oven mitts the same?
Oven mitts and pot holders are both kitchen items that are used to protect your hands from heat. However, they are not the same thing. Oven mitts are usually larger and more insulated than pot holders, so they can provide extra protection from heat. They are shaped like a mitten and are designed to fit over your hand which gives them easier gripping power.
Pot holders, on the other hand, are smaller and less insulated than oven mitts. They are usually made out of cloth or another heat-resistant material and come in a variety of shapes, designs, and sizes. They are not shaped like a mitten and are not designed to go over your hand unless you add a pocket as I did for this pattern for pot holders.

Are pot holders and hot pads the same?
Pot holders and hot pads are both kitchen items. However, they are not the same thing. Pot holders are usually designed to protect your hands while handling and moving hot pots and pans away from the cooking surfaces. Hot pads are designed to protect the surface of your counter or table from hot pots and pans. They are not meant to be used as a grip the way pot holders are although many cooks resort to hot pads when they’re in proximity.
Do I need both pot holders and oven mitts?
You might need both pot holders and oven mitts, depending on what you’re cooking and how hot the pots and pans are. Using both might be overkill for some tasks, but if you’re handling very hot pots and pans, it’s better to be safe than sorry. Having both pot holders and oven mitts gives you the most protection in the kitchen.
What is the best material for potholders?
The best material for pot holders is a heat-resistant material that can withstand high temperatures. Some pot holders are made out of cloth, while others are made out of silicone or other heat-resistant materials. Cloth pot holders can be more comfortable to use and easier to grip, but they might not provide as much protection from heat as silicone. However, using high-quality cotton fabric to make pot holders with pockets is just fine because you are adding an extra layer of protection with the pocket.
How do you make a heatproof potholder?
A heatproof pot holder is made out of a heat-resistant material that can withstand high temperatures. Some pot holders are made out of cloth, while others are made out of silicone or other heat-resistant materials. Cloth pot holders can be more comfortable to use and easier to grip, but they might not provide as much protection from heat as silicone.
The best way for a sewist/quilter to make a heatproof pot holder is by adding a layer of Insul-Bright.
Do I have to use Insul-Bright in potholders?
You don’t have to use Insul-Bright in pot holders, but it can help to insulate your hand from heat. If you’re using a pot holder that doesn’t have a pocket, you might want to consider adding a layer of Insul-Bright. This will help to protect your hand from the heat of the pot or pan.
What is the difference between double-thick and quilted pot holders?
Double-thick pot holders are made out of two layers of fabric, while quilted pot holders are made out of three layers of fabric. Quilting helps to add strength and durability to the pot holder. It also helps to prevent the padding from shifting around inside the pot holder. Double-thick pot holders are less common than quilted pot holders and less effective at providing protection from heat.
Do I need a pattern to make potholders?
You don’t need a pattern to make pot holders, but it can be helpful. Having a pattern can help you to make sure that your pot holders are the same size and shape. It can also help you to add embellishments or pockets to your pot holders. If you want to make a potholder with a different design this pocket pot holders sewing pattern and tutorial will show you how in just a few easy steps.
What is the best way to clean potholders?
Usually traditional pot holders made from fabric are machine washable. But the best way to clean pot holders is to wash them in warm water with mild detergent. You can also machine wash them on a gentle cycle. If your pot holder is very dirty or stained, you can use a stain remover before washing.
Can I put potholders in the dryer?
You can put pot holders in the dryer, but you should use a low heat setting. You might also want to air dry them or lay them flat to dry. This will help to prevent them from shrinking.
Can I iron potholders?
You can iron pot holders, but you should use a heat setting that matches the type of fabric used to make the potholders. You might also want to test the fabric beforehand to make sure that it won’t melt. I find that iron on steam setting does a great job at pressing almost any item.
What is the best way to store potholders?
The best way to store pot holders is to stack them up and place them in a drawer or cabinet. You might also want to hang them up on a hook or peg.
How often should I replace my potholders?
You should replace your pot holders every few years or whenever they start to show signs of wear and tear. If you use them often, you might need to replace them more frequently. I find myself in need of new potholders almost every year, that’s why I like to change the design, shape, and size of my potholders in the rotation process.
When should I use pot holders?
You should use pot holders when you’re cooking with hot pots and pans. You might also want to use them when you’re handling hot food items out of the oven or microwave.
Where to keep pot holders in the kitchen?
There are a few different places where you can hang pot holders in the kitchen. You can hang them on a hook near the stove, on a pegboard, or a cabinet door. I usually keep mine in a very handy place, on the countertop next to the oven or in a drawer, also located nearby the oven, together with other potholders, oven mitts, and kitchen towels.
Similar ideas you will love:
- Round quilted potholders
- Square kitchen potholders
- No binding hot pads
- Crazy easy cutlery holders
- Pumpkin mug rug pattern
- Large quilted potholders
- Fabric trivets from fabric twine
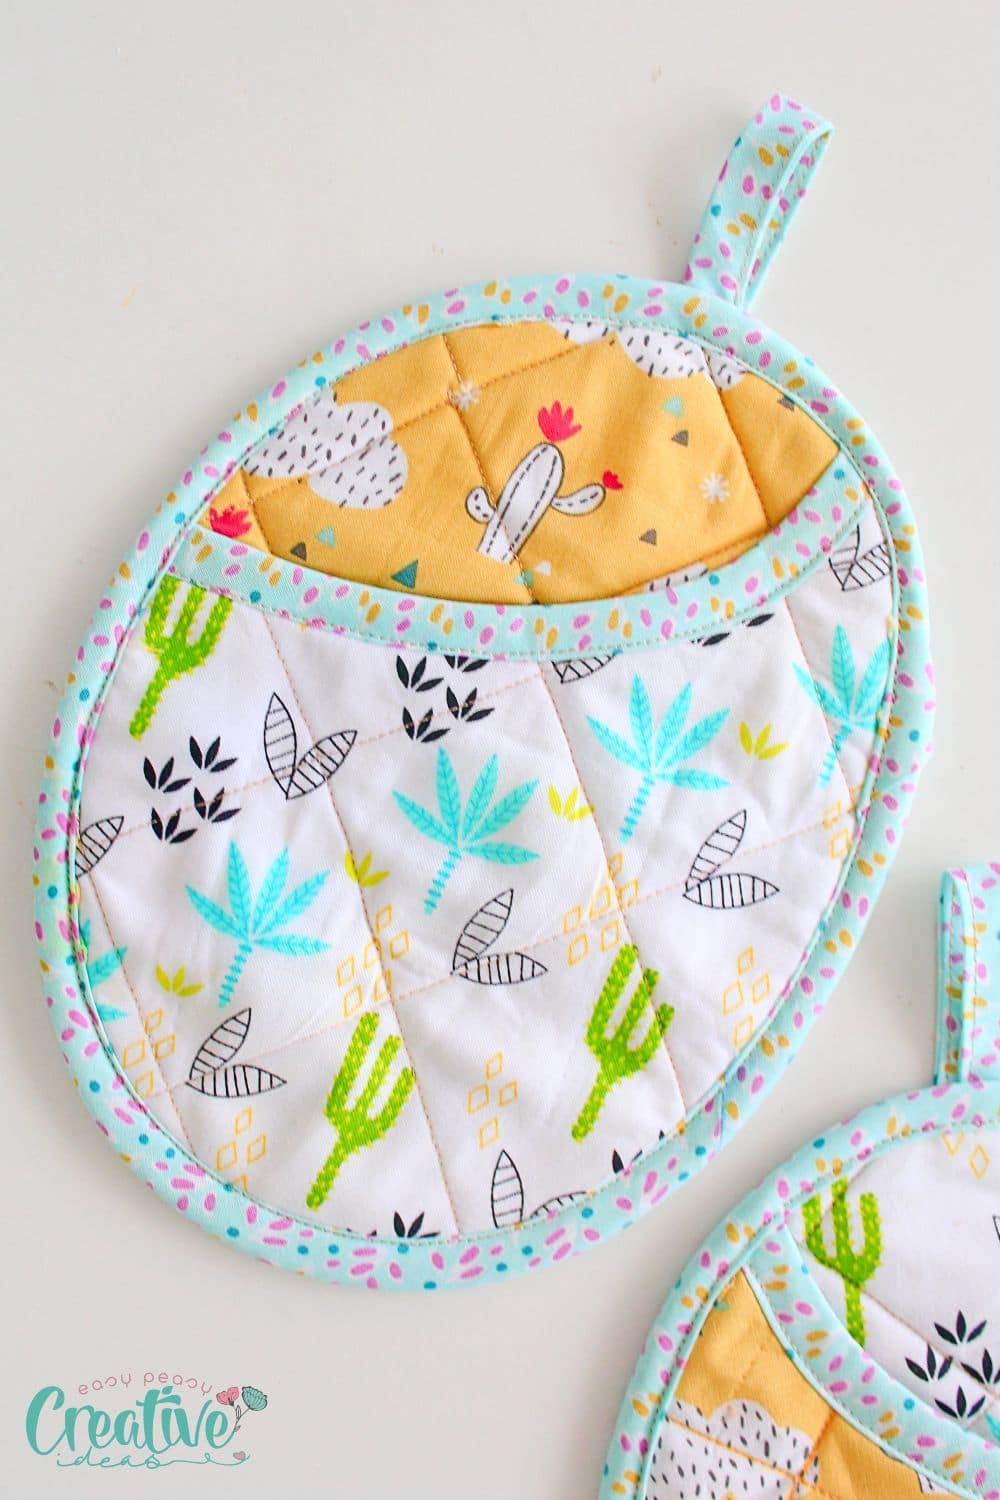
These pocket pot holders are not only easy to make, but they’re also quite useful. If you’re a beginner sewist, this is a great pattern to start with. And if you’re an experienced quilter, you can easily whip up a pair of these in no time. So grab your fabric and batting and get started on your own set of pocket pot holders today!
Pocket pot holders sewing tutorial
Materials
For the pot holder
- 1 strip of 100% cotton fabric of 16" by 10"
- 1 strip of batting of 16" by 10"
- 25 inches of bias binding to sew all around the potholder
For the pocket
- 1 strip of fabric different than the body, of 16" by 10"
- 1 strip of batting of 8" by 10"
- 7 inches of bias binding for the top of the pocket
- 5 inches of bias binding to form the hanging loop used for hanging the potholder
- matching thread
Tools
- walking foot useful if you're quilting through thick layers of fabric
- embroidery scissors or seam ripper
- scissors
- quilting ruler or yardstick
- fabric markers or chalk
- pressing iron with steam setting
Instructions
- Print out the pattern version you like (for right hand or left hand). If you want to make a pair, you don't need to print the pocket pattern for both the right and left hand. Print one and just flip it when creating the opposite potholder.
- Get the fabric and batting for the body and place the batting onto the wrong side of the fabric. If you're having troubles keeping the fabric and batting together, a quilting spray adhesive will help baste them temporarily.
- Then fold the fabrics in half, with the wrong side inside.
- Using your quilting ruler or yardstick and the fabric marker, trace diagonal lines across the fabric, about 2" apart.
- Pin through all layers or clip the edges with quilting clips to help all layers stay put. If you spray-basted them, this step shouldn't be necessary.
- Start quilting the fabrics by sewing all those traced lines. I like to start from the center out to prevent the fabrics from slipping. Again, if you used the adhesive spray, this shouldn't be necessary so just sew as normal.
- Repeat the process for the pocket.
- Then trace the patterns for the potholder and pocket onto their respective fabrics and cut them out.
- Grab the bias binding for the pocket and clip it to the top of the pocket. Most quilters start attaching the bias binding at the front side, flip it to the back, and then do a stitch-in-the-ditch. As I'm not as handy, I find that this method doesn't give me satisfactory results. So I start by attaching the bias binding to the back of the pocket.
- Sew the bias binding with 1/4" allowance.
- Flip the bias to the opposite side of the pocket and press the seam well (you can use the iron on steam to smooth it out). Clip in place.
- Stitch-in-the-ditch or top stitch the bias binding if you're using my method.
- Grab the bias binding for the loop and open it.
- Fold the edges in towards the middle and press.
- Close the strip again and press.
- Top stitch the open edge to form the loop strip.
- Fold the loop in half and clip it to the top of the potholder body, with the raw edges out.
- Sew the loop to the body using a 1/8" allowance.
- Place the pocket piece over the front side of the body (the one without the loop), with the loop end at the top.
- Make sure the edges in both pieces match perfectly. If there is some small discrepancy, cut out the areas that don't match perfectly, making sure to keep the oval shape smooth.
- Clip the pieces together with quilting clips.
- Run 2 lines of basting stitches on the sides. These are temporary stitches that will keep the pieces together while sewing the bias binding. If you are an experienced quilter this step is not needed.
- Add bias binding to the raw edges in the same manner as for the pocket.
- Flip the loop up before finalizing sewing the binding. This would be done in the second step of the process.
- Remove the basting stitches using the seam ripper or embroidery scissors.
- Press potholders with steam.
Video
Most popular sewing projects:


Article may contain Amazon & affiliate links. As an Amazon Associate I earn from qualifying purchases at no additional cost to you.
ABOUT PETRO
Hi, I’m Petro, author and founder of Easy Peasy Creative Ideas. Sewist, crafter, avid DIY-er, foodie, photographer, homemaker and mommy to one. I’m an expert at coming up with quick, clever sewing tips, recycling crafts and simple, easy recipes! You can find my ideas featured in reputable publications such as Country Living, Good House Keeping, Yahoo News, WikiHow, Shutterfly, Parade, Brit & Co and more. Thanks for stopping by and hope you’ll stay for a while, get to know me better and come back another time. Stick around for real fun projects! Read more…