

Sewing Concave & Convex Curves: Tips & Tricks
Master the basics of sewing curves with these simple tips & tricks! Learn how to sew convex and concave curves together with ease using the right supplies, tips and techniques and get the perfect curved seams every time!
Sewing curves
When I first started using a sewing machine, the idea of sewing curves used to scare the soul out of me! It took me a while to get the courage to tart sewing curves and a lot more to sew different types of curves together!
In sewing there’s a lot of squares and rectangles, especially in home décor sewing and quilting. But curves add beauty and interest to any project! So at one point in your life, you will want to learn sewing curved seams if you want to step up your sewing skills and make project that are not only prettier but look professional too!
Other brilliant sewing tips you will love:
- Easy method for removing serger stitches
- How to sew mitered corners with bias tape
- Genius bobbin storage ideas
- How to do a lettuce hem
- DIY serged rolled hem
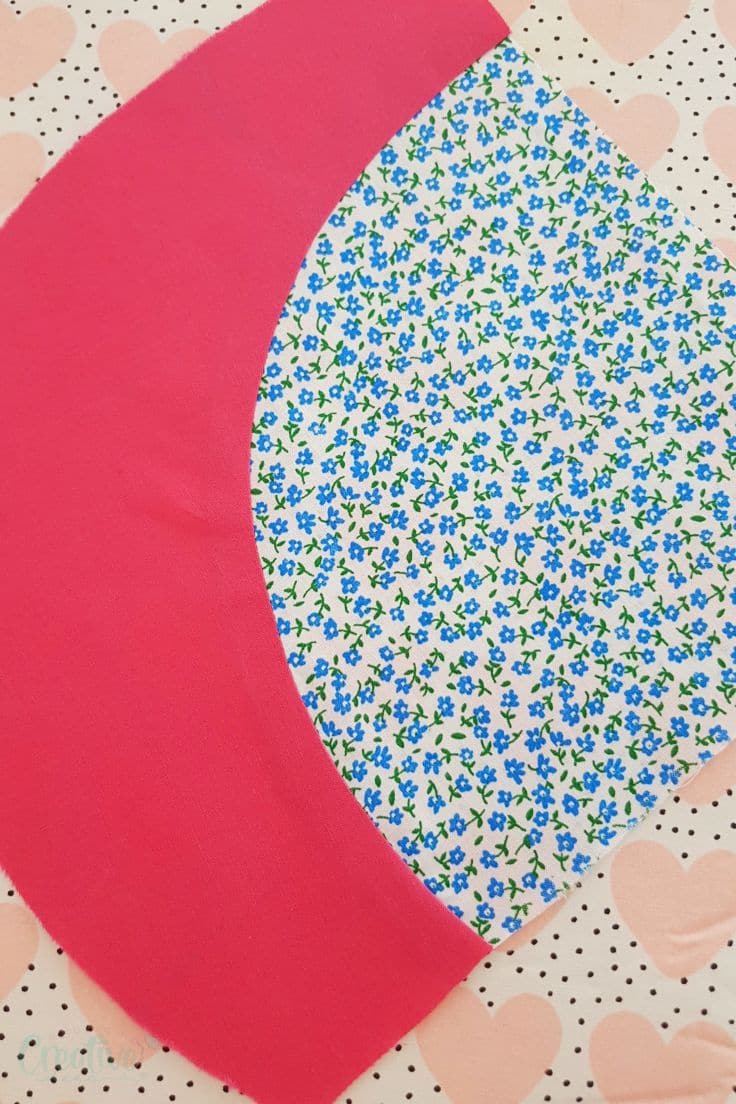
If you’re fairly new to sewing or simply never had the interest to learn about sewing curves, there are two kind of curves you need know about: convex and concave. A convex curve shapes outward, much like a football while a concave curve shapes inwards.
In your sewing journey you will encounter a few opportunities where you’ll need to attach two curves of the same type together (two concave curves to each other or two convex curves to each other. This situation might not be as easy as sewing a straight seam but with a little patience you will manage to tackle the task in a pinch.
But there will also be some opportunities where you’ll have to join concave curves to convex curves. A lot of beautiful quilting patterns and templates are created using this technique and at one point in your life you’ll probably be tempted to give them a try. And this is where you might find yourself a little puzzled because stitching an outward curve to an inward curve looks pretty difficult at first! No need to panic though as I’ve got you covered for this kind of situations right here in this tutorial.

Before getting into the nitty gritty of sewing concave and convex curves together, let’s get through some tips and secrets that will make sewing different kind of curves together a breeze, with complete accuracy! It all boils down to using correct seam allowance, tension and machine needle, adjusting stitch length, pinning and pressing. Once you get the grip of this otherwise easy technique you’ll be hooked and want to apply it to many of your projects, including garments.
Tips for sewing curves together
- Use a small seam allowance. Anything above 1/4″ will make it difficult for you to get a smooth curved seam line.
- Mark your seam allowances before sewing. Take the time to mark the entire seam and clearly mark your seam line.
- Adjust the stitch length to a shorter one. I normally decrease the length to a 2.0. A shorter stitch length helps you shape the curves easier than longer ones as you are more in control.
- Use the correct tension and machine needle for your fabric type.
- Use lots and lots of pins! I like to pin about every 1/4″. This offers me more control and helps with handling creasing a lot better.
- Sew slow! If you have a digital machine set it to the slowest speed so you can take your time when sewing those curves. This is particularly useful for small curves that are very tight. The smaller the curve, the tighter it gets and harder to sew.
- Lift the foot and smooth out the fabric whenever you encounter creasing. Make sure no crease is caught in the needle. But if this happen, don’t panic! Grab your seam ripper, unpick the seam and start over.
- On tight curves it helps to stop and pivot every once in a while, whenever shifting the fabric won’t work. Stop the machine, keep the needle down, lift the presser foot up and shift the fabric as needed. The lower the foot and continue sewing.
- Clip and notch seam allowances when needed. On tight curves this is a really necessary step while wider curves might not need this step as the seam has plenty of room to fit. This is particularly true if you’re using a very narrow seam allowance.
- Press well but use the right motion. The curves will stretch because of the cut on the bias so pushing the iron in an back and forth motion will stretch the fabric around the seam. To avoid that, use an up and down motion and work in small sections.
What seam size is best for curves?
When it comes to sewing curves, the size of your seam allowance is important. Generally, you should use a smaller seam allowance for convex curves and a wider seam allowance for concave curves. This allows you to better control the shape of the curve when stitching. For most projects, a 5/8-inch (1.6 cm) seam allowance works well for convex curves, while a ¼-inch (0.6 cm) seam allowance is better for concave curves. Personally I’m a big fan of the 1/4″ allowance and I use it in the majority of my projects.
How do I ensure the curve is even?
When sewing curved seams, you want to make sure that your fabric doesn’t get stretched out of shape as you sew it together. To keep things even, it’s a good idea to use pins to hold the fabric in place while you stitch. Place the pins perpendicular to the curve and make sure that none of them are too close together or too far apart, otherwise you could end up with an uneven seam.
What is the best presser foot for sewing curves?
I recommend using a presser foot that allows you to see the stitching line and the seam. This will make it easier to follow the curve as you sew.
Can you sew curves with a walking foot?
Yes, you can use a walking foot to sew curves. The walking foot helps to keep the fabric layers from shifting while sewing. However, because the walking foot is quite wide, it may be harder to stitch curves that are more complicated or intricate.
What type of fabrics can I use for sewing curves together?
Cotton fabrics are the easiest to work with. I would suggest avoiding heavyweight or slippery fabrics. Also stretchy fabrics can make it difficult to sew curves as they tend to stretch out of shape.
Also sewing two different types of fabrics together might be tricky so make sure to test out a few samples before starting your project.
Additionally, it can be helpful to use fusible web tape on the backside of the seam allowance. This will help hold the two fabric pieces together and prevent any bunching or bulging when stitching.
How to finish a curved seam?
After you have sewn a curved seam, it’s important to neaten the edge. You can do this by using an overcast stitch or a zigzag stitch on both sides of the seam. This will help prevent your fabric from fraying and make it look neater. Alternatively, you could use bias binding tape to cover up any raw edges.
How do you sew perfect curves?
Materials:
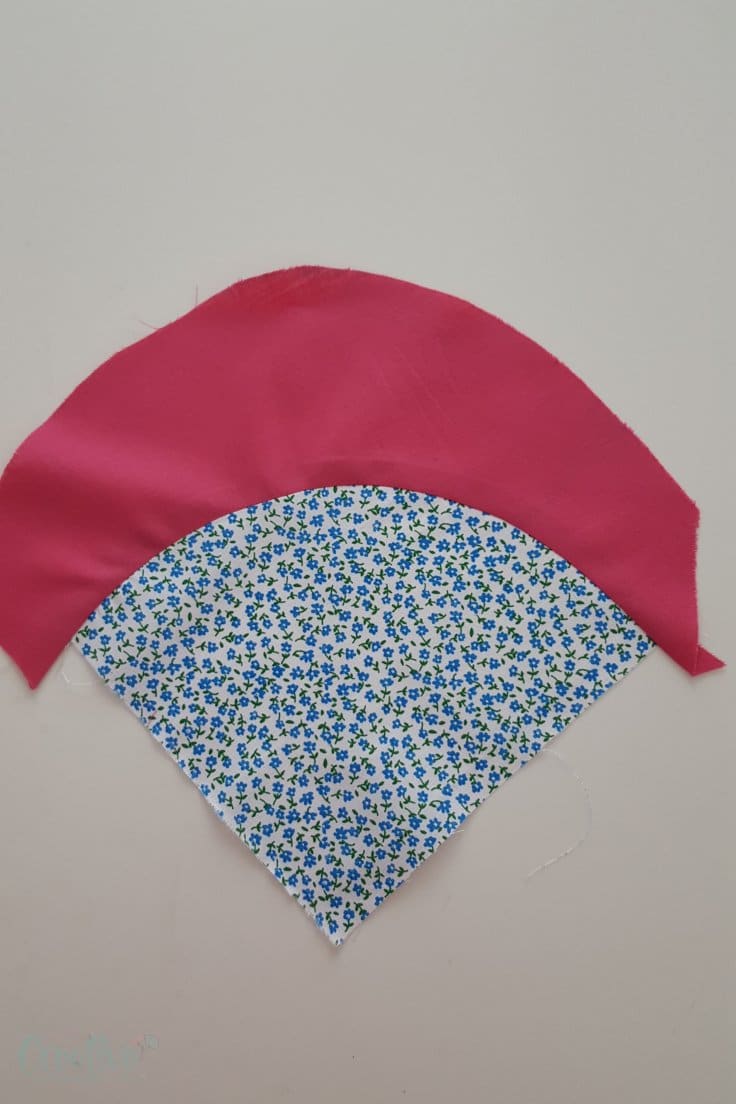
- two fabric pieces, one with a concave curve and the other with a convex curve.
- fabric marker
- seam gauge
- pins
- sewing machine
- matching thread
- pressing iron
Directions:
Prepare the fabrics
1. Start by washing, drying and pressing your fabrics well.
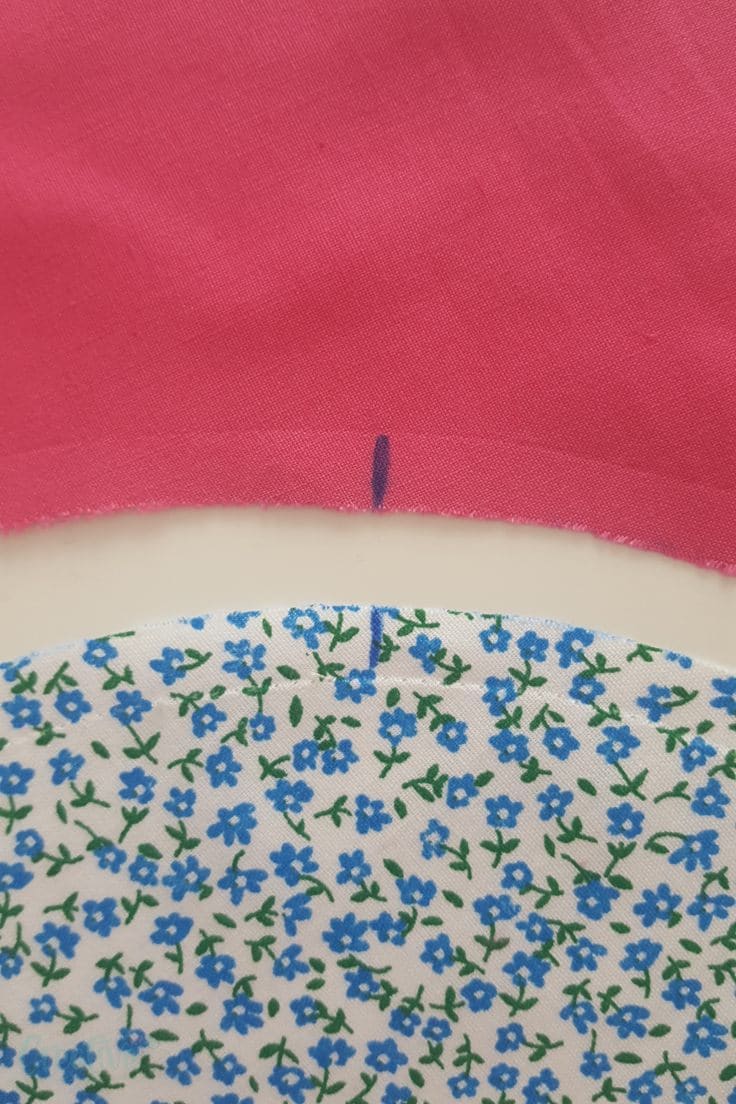
2. Using your seam gauge and the fabric marker, trace 1/4″ seam allowance. Take your time to measure and mark as accurately as possible. If you’re experienced and have a sewing machine with guides on the plate, you can skip this step.
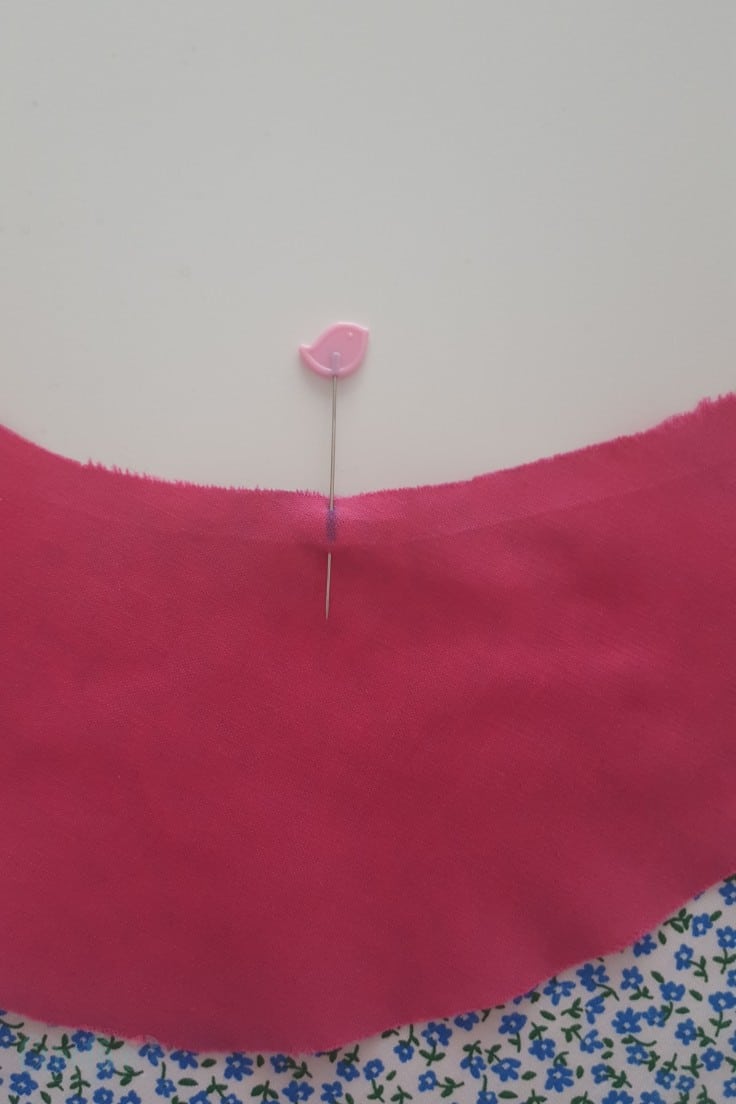
3. Fold each fabric piece in half, finger press the middle and mark with fabric marker.
Attach fabrics together
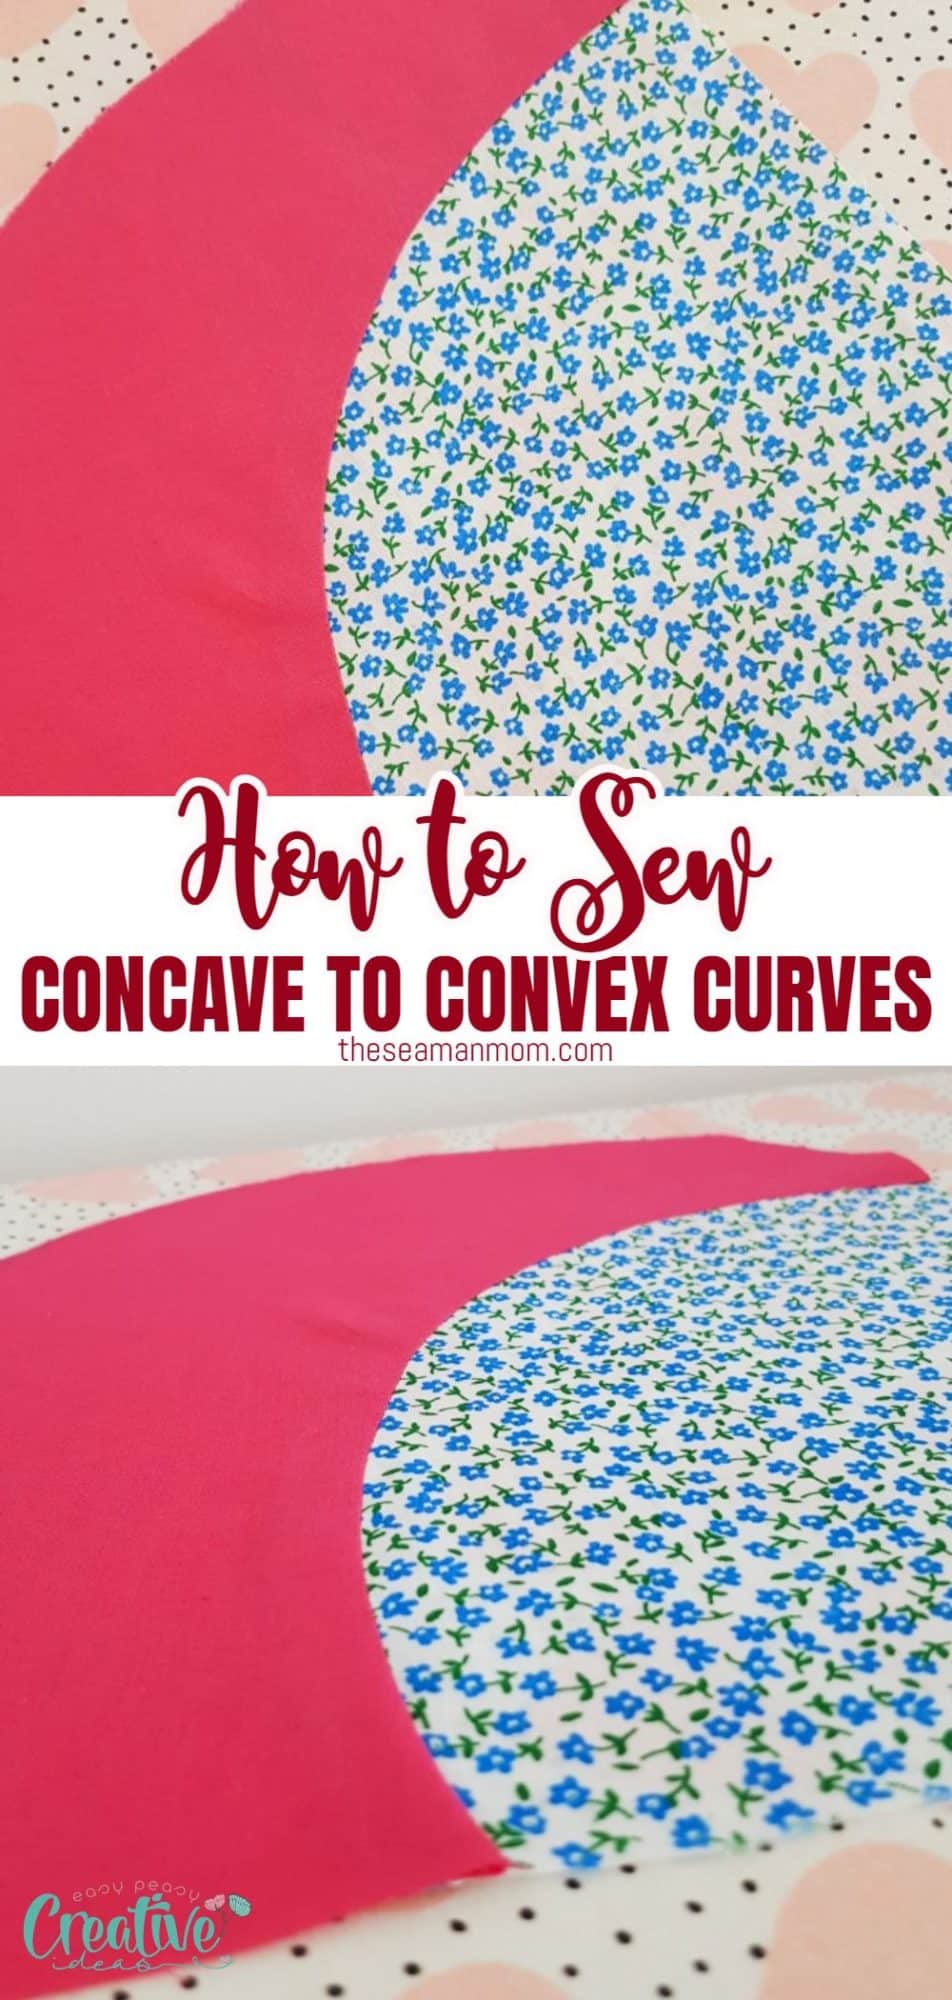
4. Place the convex curve fabric right side up and top with the concave curve fabric wrong side up, matching at the traced you made in the previous step. Pin at the mark.
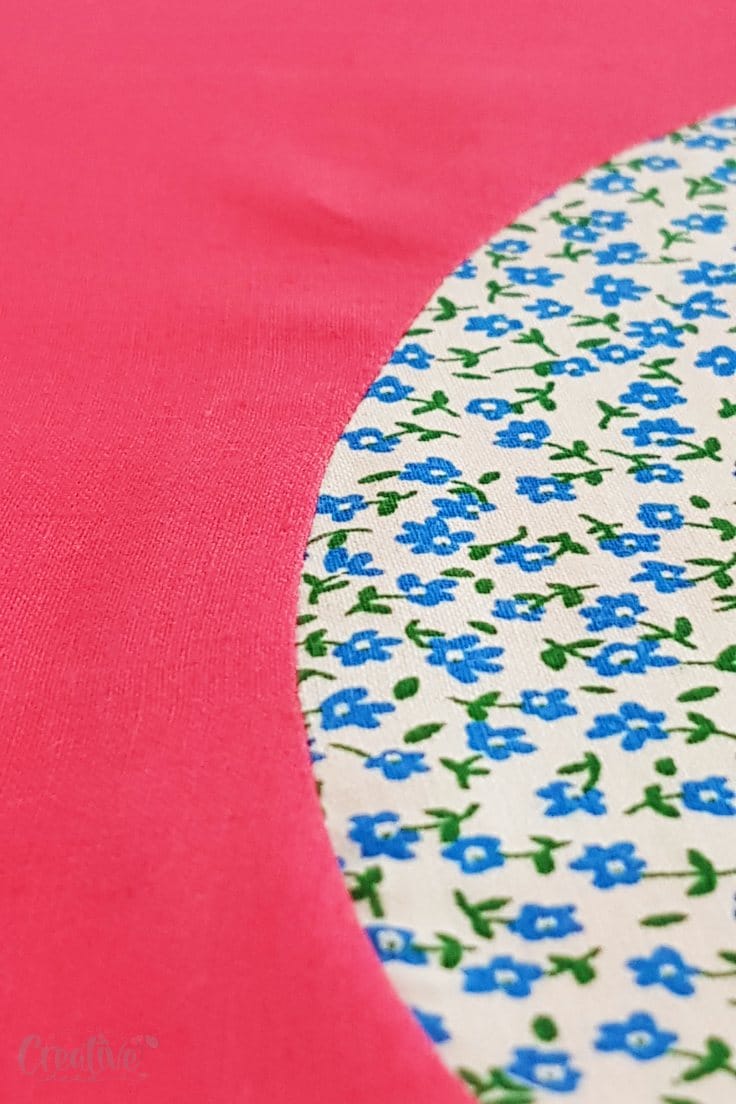
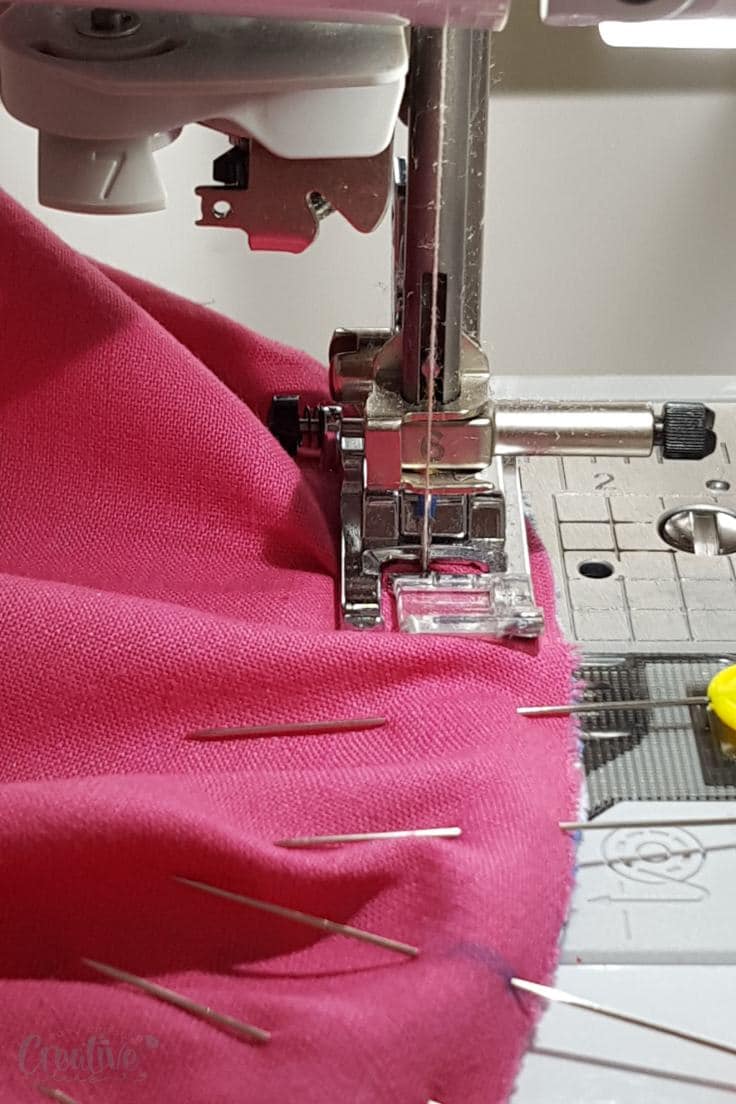
5. From this center pin start moving to your left and pin the fabrics together every 1/4″. I like to use thin long pins. You will notice creasing is forming in the convex fabric as you pin towards the edge. This is normal so don’t panic!
6. Repeat for the right side of the center pin.

Sew the curves
7. Take the fabrics to the sewing machine and start sewing right on the seam allowance mark, sewing slow and taking care not to catch the creases in the seam. If that happens, don’t worry! Just rip out the seam in that spot, smooth out the seam and start over.
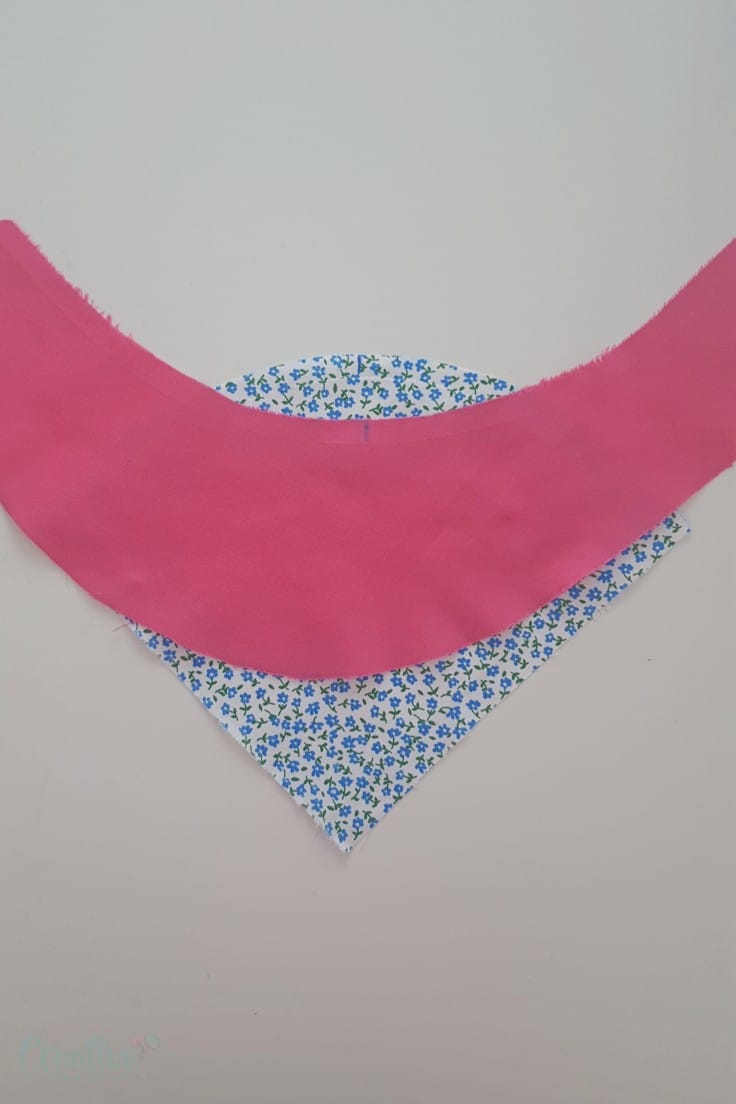
Press the curve
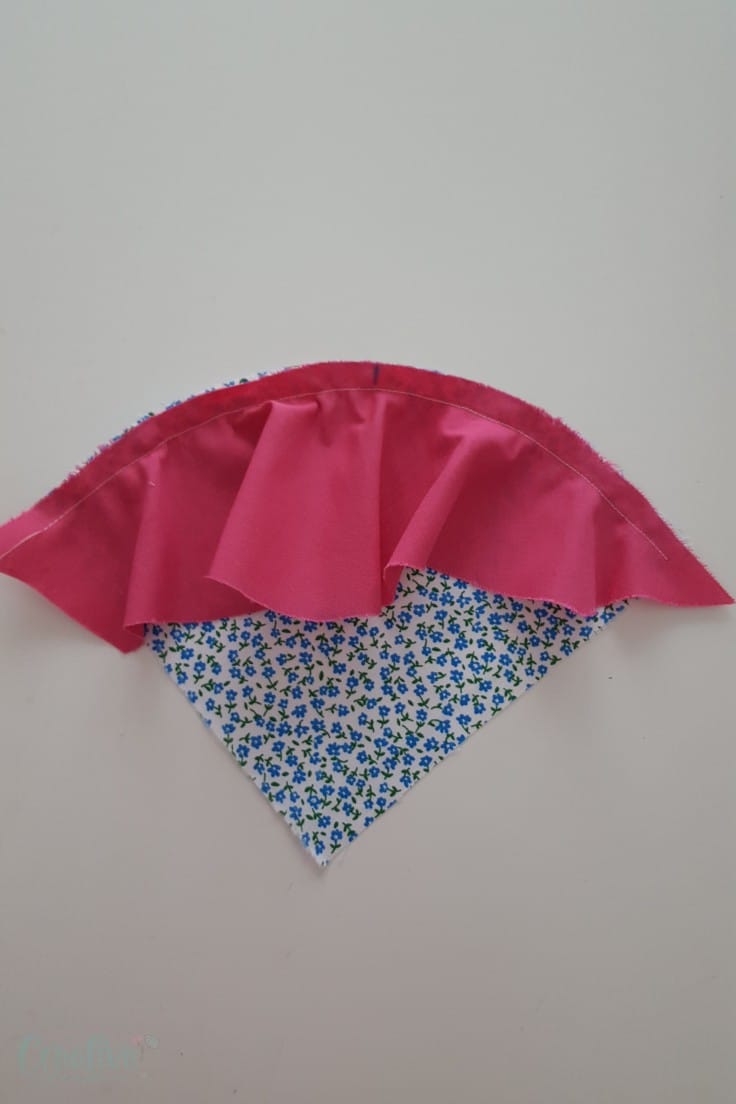
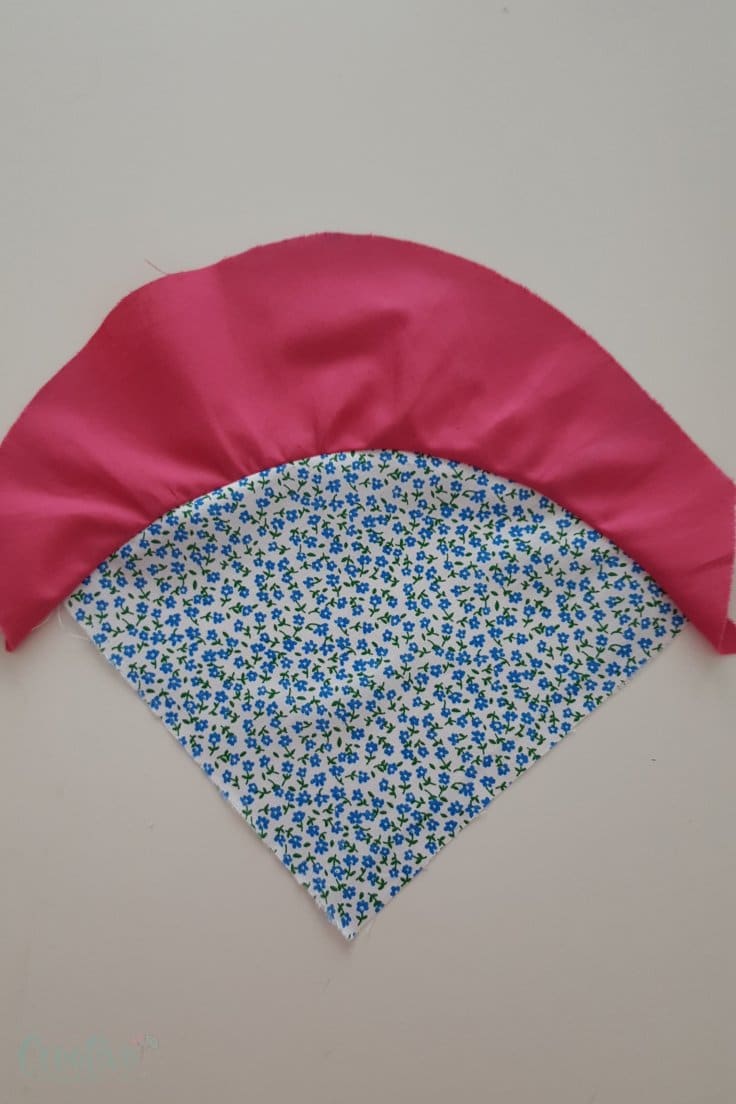
8. Fold the concave fabric up, finger press the seam and then press with your iron on steam. Take note of the tip I shared above when pressing.
If you’re sewing a narrow curve, or your project requires a wider seam allowance you will need to do some clipping and cut notches in your seam allowance. On a wider curve you might not need to do this. Not sure if you need to skip this step or not? Simply push the fabric up and see if the seam is accommodated comfortably. If you get a bunched up seam or the seam doesn’t align properly because it can’t stretch enough, you will need to clip and cut notches in the seam allowance.
And that’s it! I hope I managed to convince you that sewing curves, even opposite ones, is simple and easy to manage! Please let me know your thoughts in the comment section below and don’t forget to rate this tutorial! Thanks!
Pin to save for later
Most popular sewing projects:
- Tips for sewing a round hem
- Corded bag handles
- Flutter sleeve dress pattern
- How to laminate cotton fabric


Article may contain Amazon & affiliate links. As an Amazon Associate I earn from qualifying purchases at no additional cost to you.

Thank you for the information and pictures. It’s been a long time since I sewed clothing. Now I quilt. I am attempting a curved seam, forming the letter ‘P’. Your explanations and pictures shook my brain and helped remind me how to do a curved seam. I really appreciated your tips and tricks. Thank you! I hope I’m successful.
Hi Petro, I just found your website and a really good good tutorial on sewing curves. I did two samples to see if I could sew a curve, and, both came out excellent. I am planning these two curves for a quilt. Again, thanks
Aww, thanks so much for your lovely comment, Steve! I’m happy I was able to help through my tutorial.
I also am attempting to create a small library and the copy and paste process is rather annoying- not annoying enough for me to skip your wonderful information. So I would also very much appreciate a PDF that can be printed. Thanking you in advance
I would love a way to easily print out your posts! In order to save paper, I have to copy everything to a Word doc and then edit out the extra spaces and the ads, etc. and scale everything to a normal size. I really love the tips, as I am teaching myself to sew. THANK YOU for sharing your knowledge!!!
Hi Em. Thanks for your comment! We’re currently working on making our most popular posts in a ready to print PDF format. If those are well received we will expand the offer to all articles.