

How to make paper hyacinth flowers
Struggling to find that perfect present? Look no further – these magnificent swirly paper hyacinth flowers are both effortless and enjoyable to craft! Each flower is one of a kind and is sure to leave an everlasting impression on the recipient.
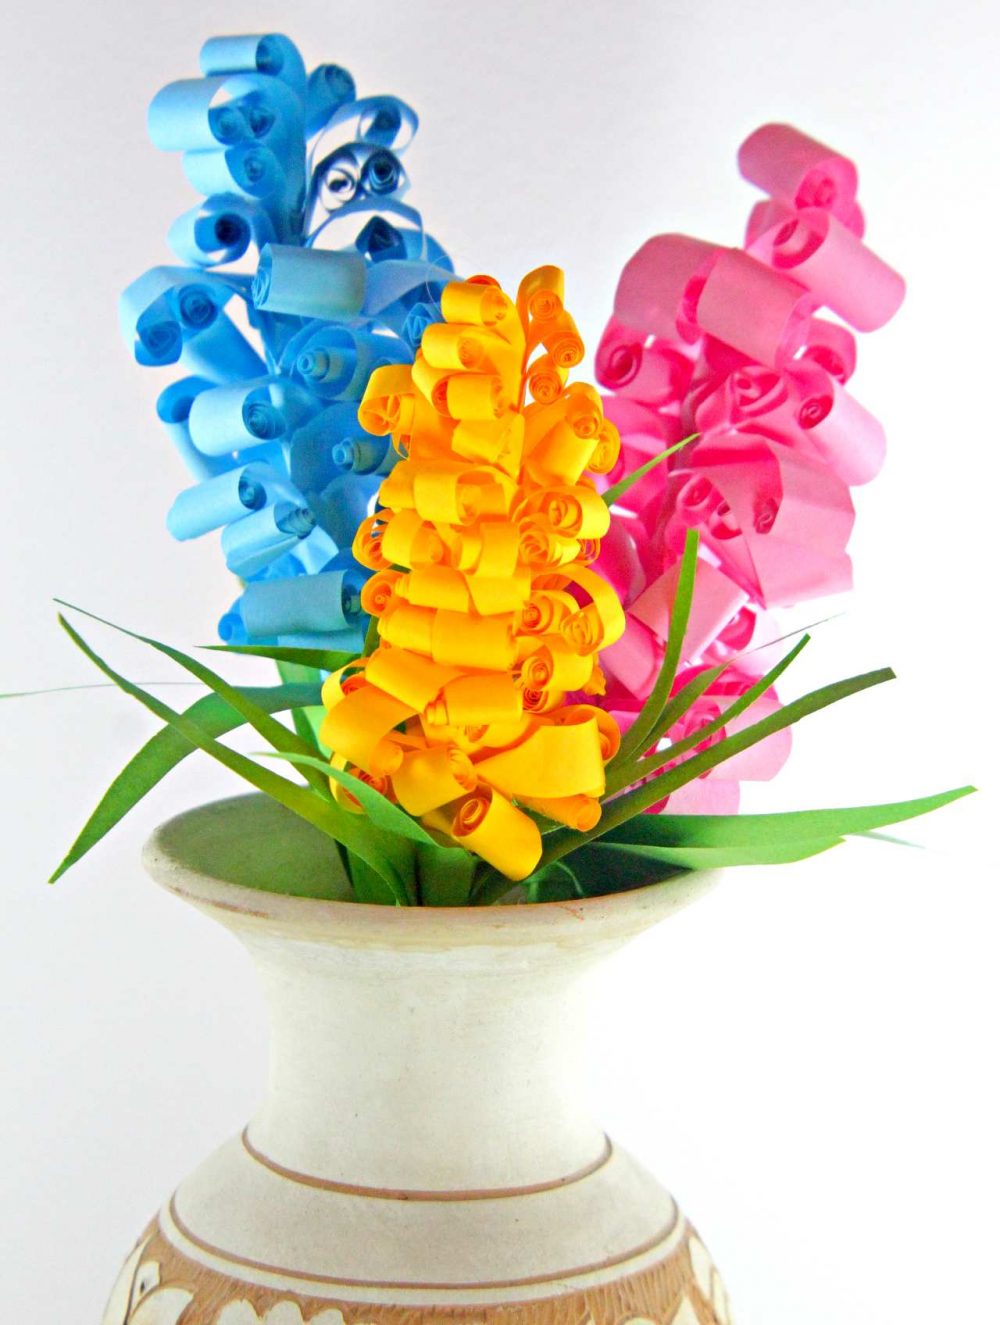
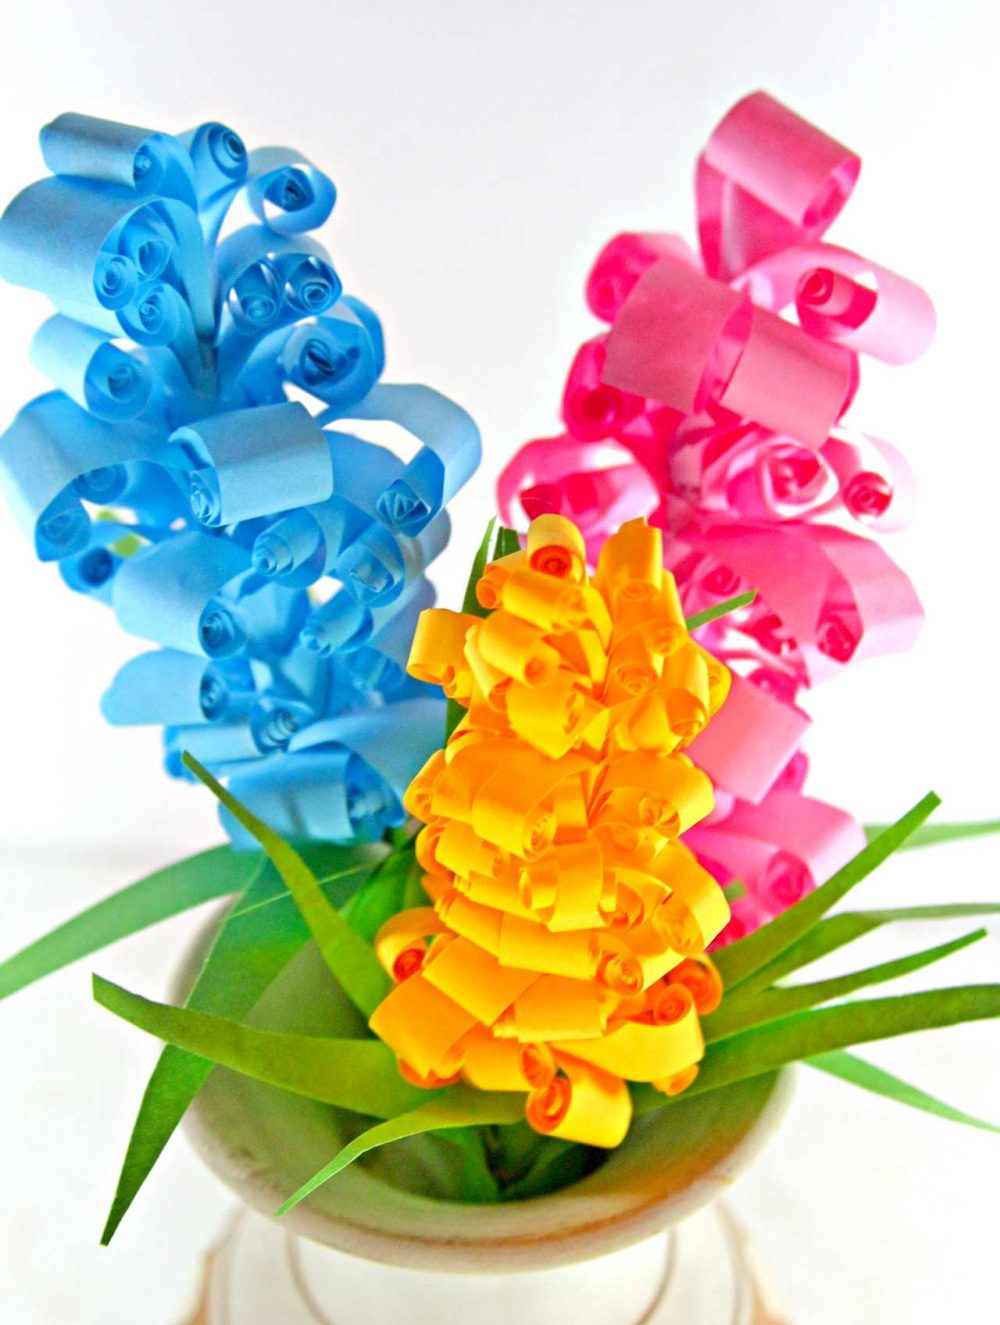
Paper Hyacinth Flowers
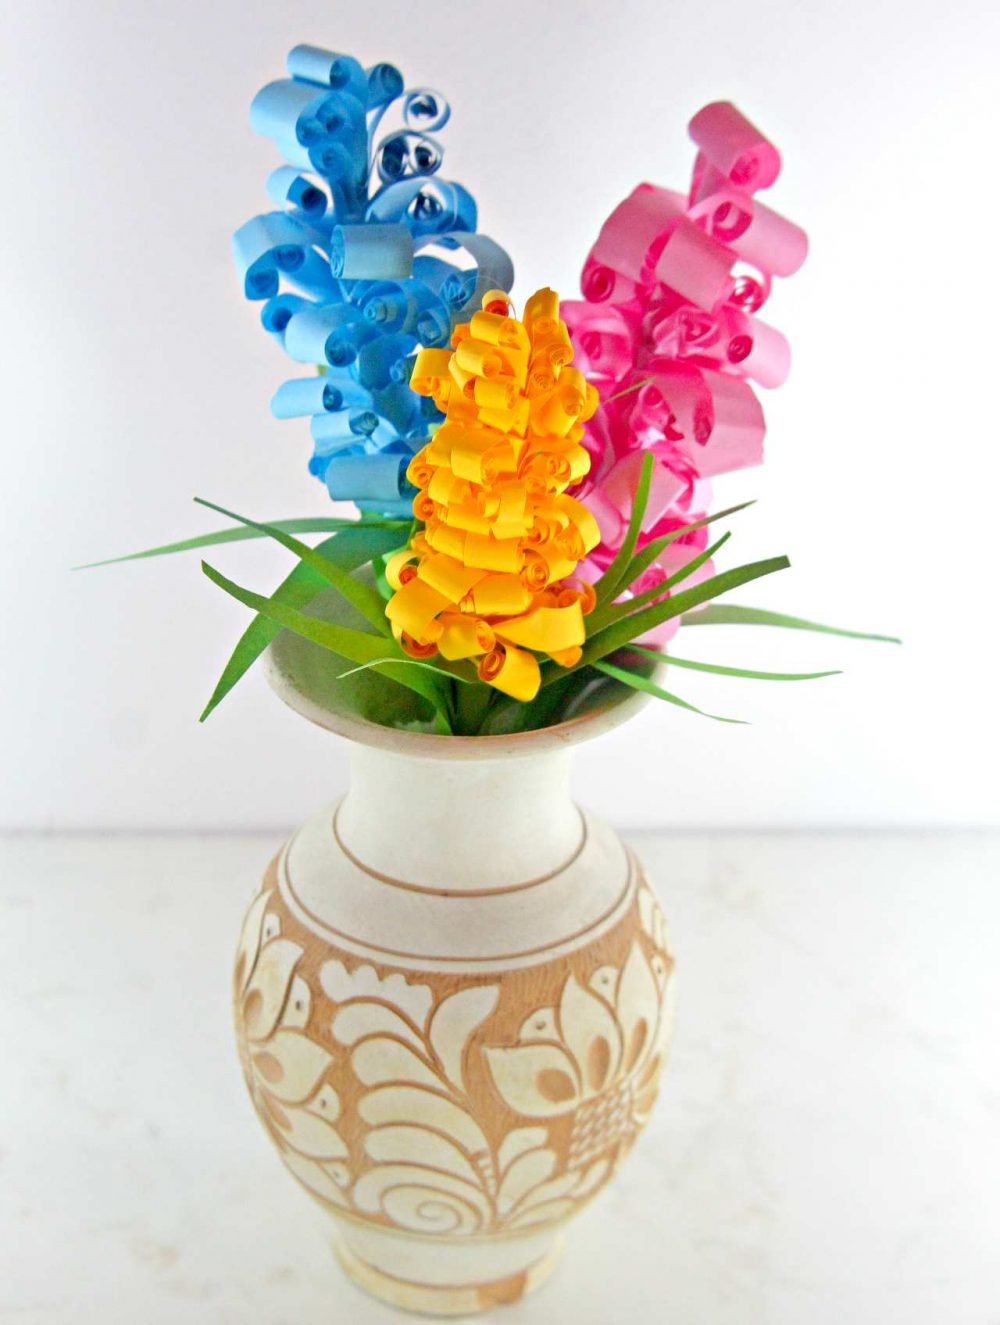
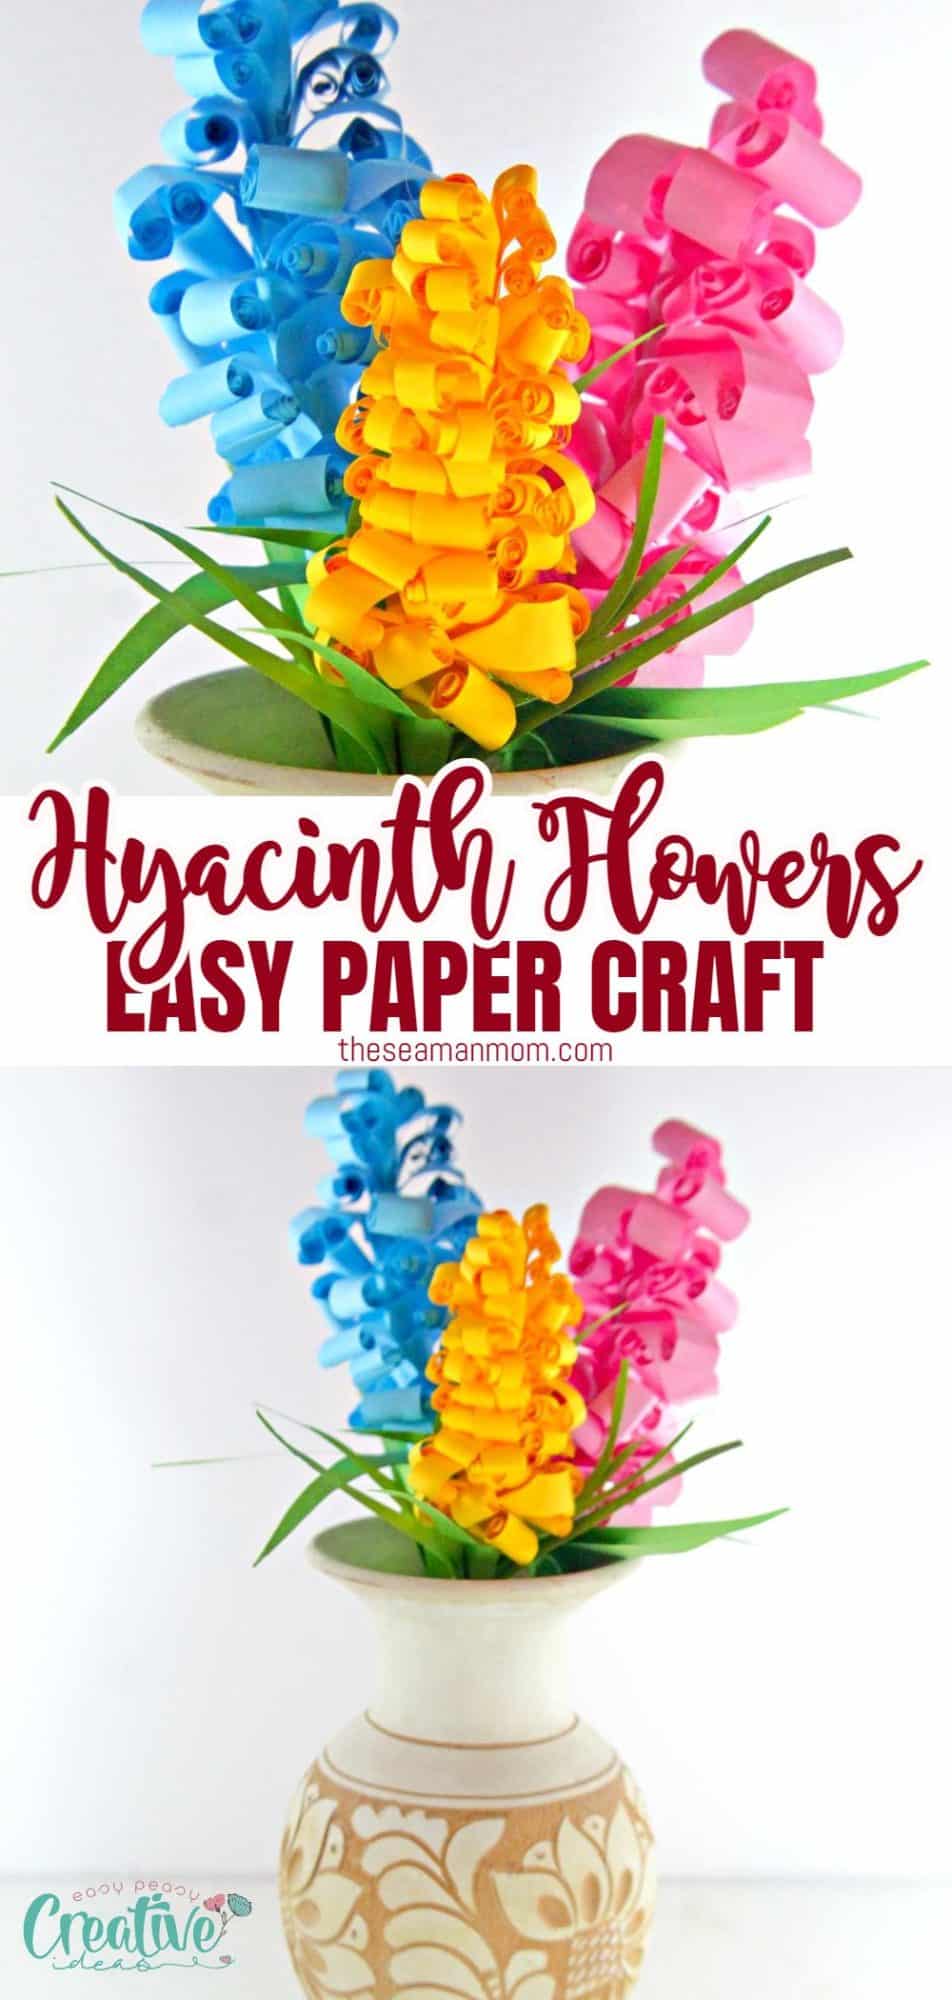
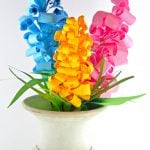
Do you ever miss the flowers in cold season? I do! I love flowers and plants, I think I have over fifty in my house right now. But they’re all leaves only, no flowers and I truly miss that wonderful, happy vibe that bright colored flowers give to my house. And that’s why I decided to brighten it up with a bunch of swirly paper hyacinth flowers!
These adorable curly paper flowers are called hyacinth. And real hyacinth smell absolutely amazing! While these swirly paper flowers are just a replica and won’t obviously smell at all, they still do a pretty awesome job at making a house feel like a home, cheerful, friendly and warm.
More paper flowers you will love:
What is the flower of hyacinth?
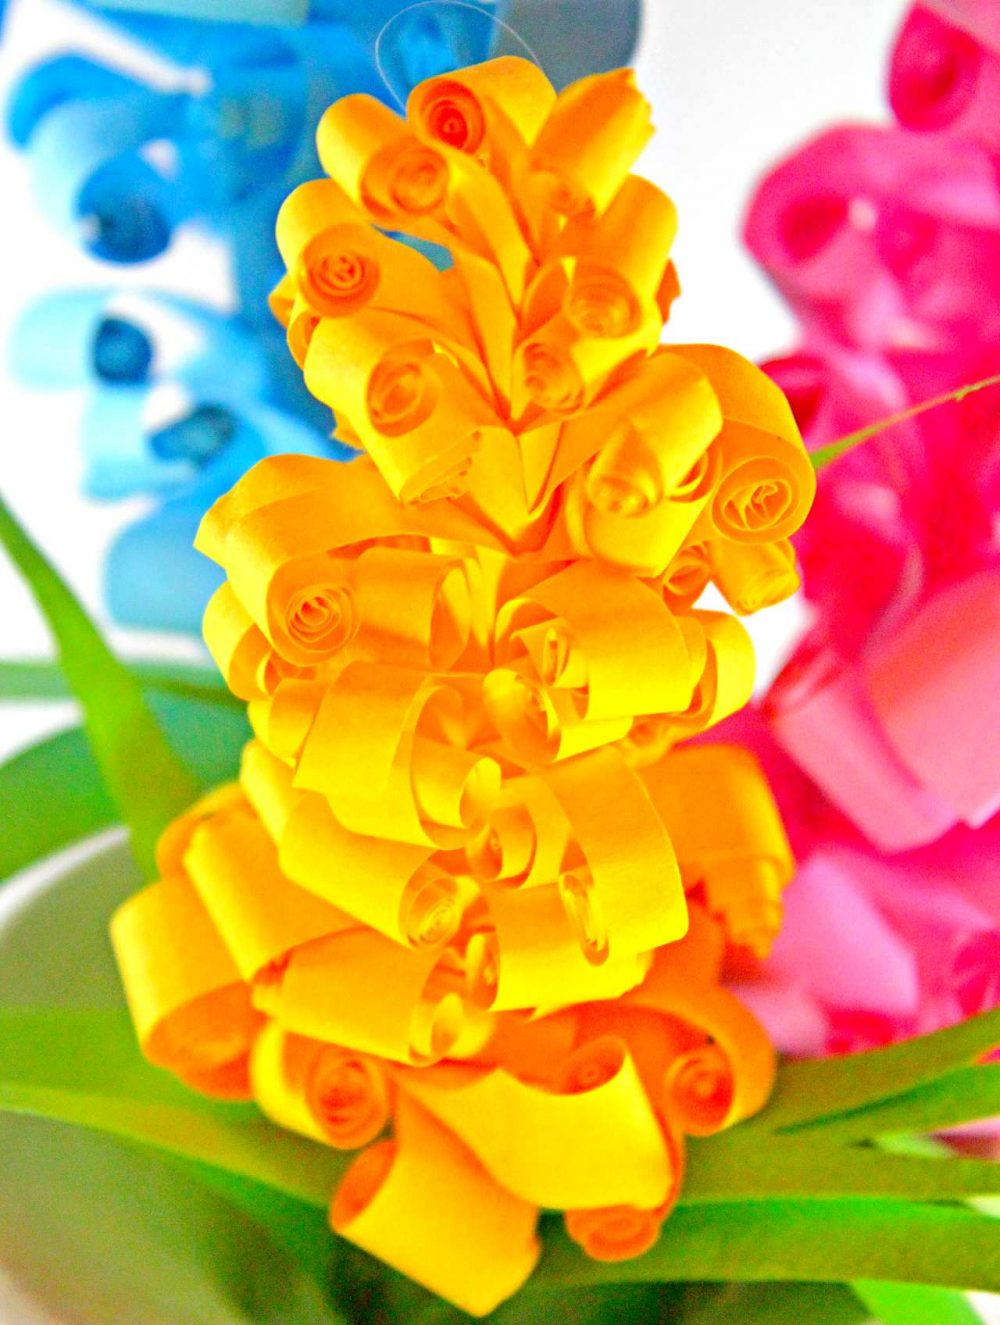
Hyacinths are one of the most beautiful flowers in the world. They come in many vibrant colors and have a stunning shape. The petals of hyacinth paper flowers curl inward, making them an ideal choice for those who want to make unique paper flower decorations.
The great thing about these paper flowers is that you can make them in any color you want! You can even mix and match the petals to create more intricate designs.
These paper hyacinth flowers also make a fabulous gift idea this season, especially for someone who’s a big flower fan! They’re also perfect for parties, baby showers, or even weddings. And they’re so insanely easy to make even though they might look a bit complicated on the first look. You don’t need special skills or tools to make these swirly paper flowers! Just your bare hands, paper, a glue gun and a glue stick.
When making these paper hyacinth flowers, the hardest part for me was curling the flowers. But this only happened to the first few curls, as soon as I got the hang of it it was all going at the speed of light. And I think my swirly paper flowers look so pretty and real, they’re totally worth the effort!
The size of your flowers will depend on the size of the paper you use. I opted for regular A4 paper size and my paper hyacinth are pretty close in size to the real flowers.
What paper is best for paper flowers?
I like to use regular colored printing paper when making these paper hyacinth flowers, as it’s affordable and easy to work with. However, if you want your swirly flowers to look more premium and sophisticated, you can opt for a thinner paper such as tissue paper, crepe paper, cardstock or craft papers.
What can I use as a stem for paper flowers?
For the stems you can opt for a wire stem. You can buy these at craft stores or online. Alternatively, you can use a thin wooden dowel rod, or even a pipe cleaner!
For my hyacinth paper flowers, I used a stem made out of paper; I’ll include the steps in the tutorial below.
So, grab your paper and glue gun, and let’s make some paper hyacinth flowers! It will be so much fun and the end result looks amazing, a stunning splash of colour in your home decor! And the best part is you don’t need a complicated pdf template to create these beauties!
Give this fun spring craft a try and share your gorgeous spring bouquet creations with me on Instagram!
DIY Paper Flowers
Materials for one flower:
- 1 sheet A4 size paper in color of choice
- 2 sheets A4 green paper (green craft paper or green construction paper)
- glue stick
- glue gun
- hot glue stick
- scissors
How to make hyacinth paper flowers
Pin to save for later
Print the craft card
Paper hyacinth flowers craft
Materials
- 1 sheet A4 size paper in color of choice
- 2 sheets A4 green paper green craft paper or green construction paper
- glue stick
- hot glue stick
Tools
- glue gun
- scissors
Instructions
- First, let's make the stem. Start at one corner of the green paper and roll tight towards the other corner.
- Apply glue stick to the opposite end and glue them together.
- For the flower: take the other colored paper and fold it in half, lengthwise then cut in half.
- Cut fringes out of each paper strip, leaving about 1/2" untouched, along one edge of the paper.
- Using your fingers, start creating the swirly patterns by curling up each piece of fringe, one by one. Make the rolls as tight as possible but don't press to flatten.
- Grab the stem and apply a dab of hot glue to the top end. Glue one strip of curls with the rolls up, at a slight angle. Continue to roll the curls around the stem, gluing it with hot glue occasionally. Repeat the steps with the second strip of curls.
- Grab the second piece of green paper and fold then cut it into 4. Grab one piece of paper and fold it like an accordion. Cut lengthwise into a “V” on both sides. Unfold the accordion then fold the leaves around the bottom of the flower, gluing it occasionally to the stem.
- Repeat with the remaining 3 pieces of paper, spacing them out evenly around the stem.
Video
Article may contain Amazon & affiliate links. As an Amazon Associate I earn from qualifying purchases at no additional cost to you.
ABOUT PETRO
Hi, I’m Petro, author and founder of Easy Peasy Creative Ideas. Sewist, crafter, avid DIY-er, foodie, photographer, homemaker and mommy to one. I’m an expert at coming up with quick, clever sewing tips, recycling crafts and simple, easy recipes! You can find my ideas featured in reputable publications such as Country Living, Good House Keeping, Yahoo News, WikiHow, Shutterfly, Parade, Brit & Co and more. Thanks for stopping by and hope you’ll stay for a while, get to know me better and come back another time. Stick around for real fun projects! Read more…