

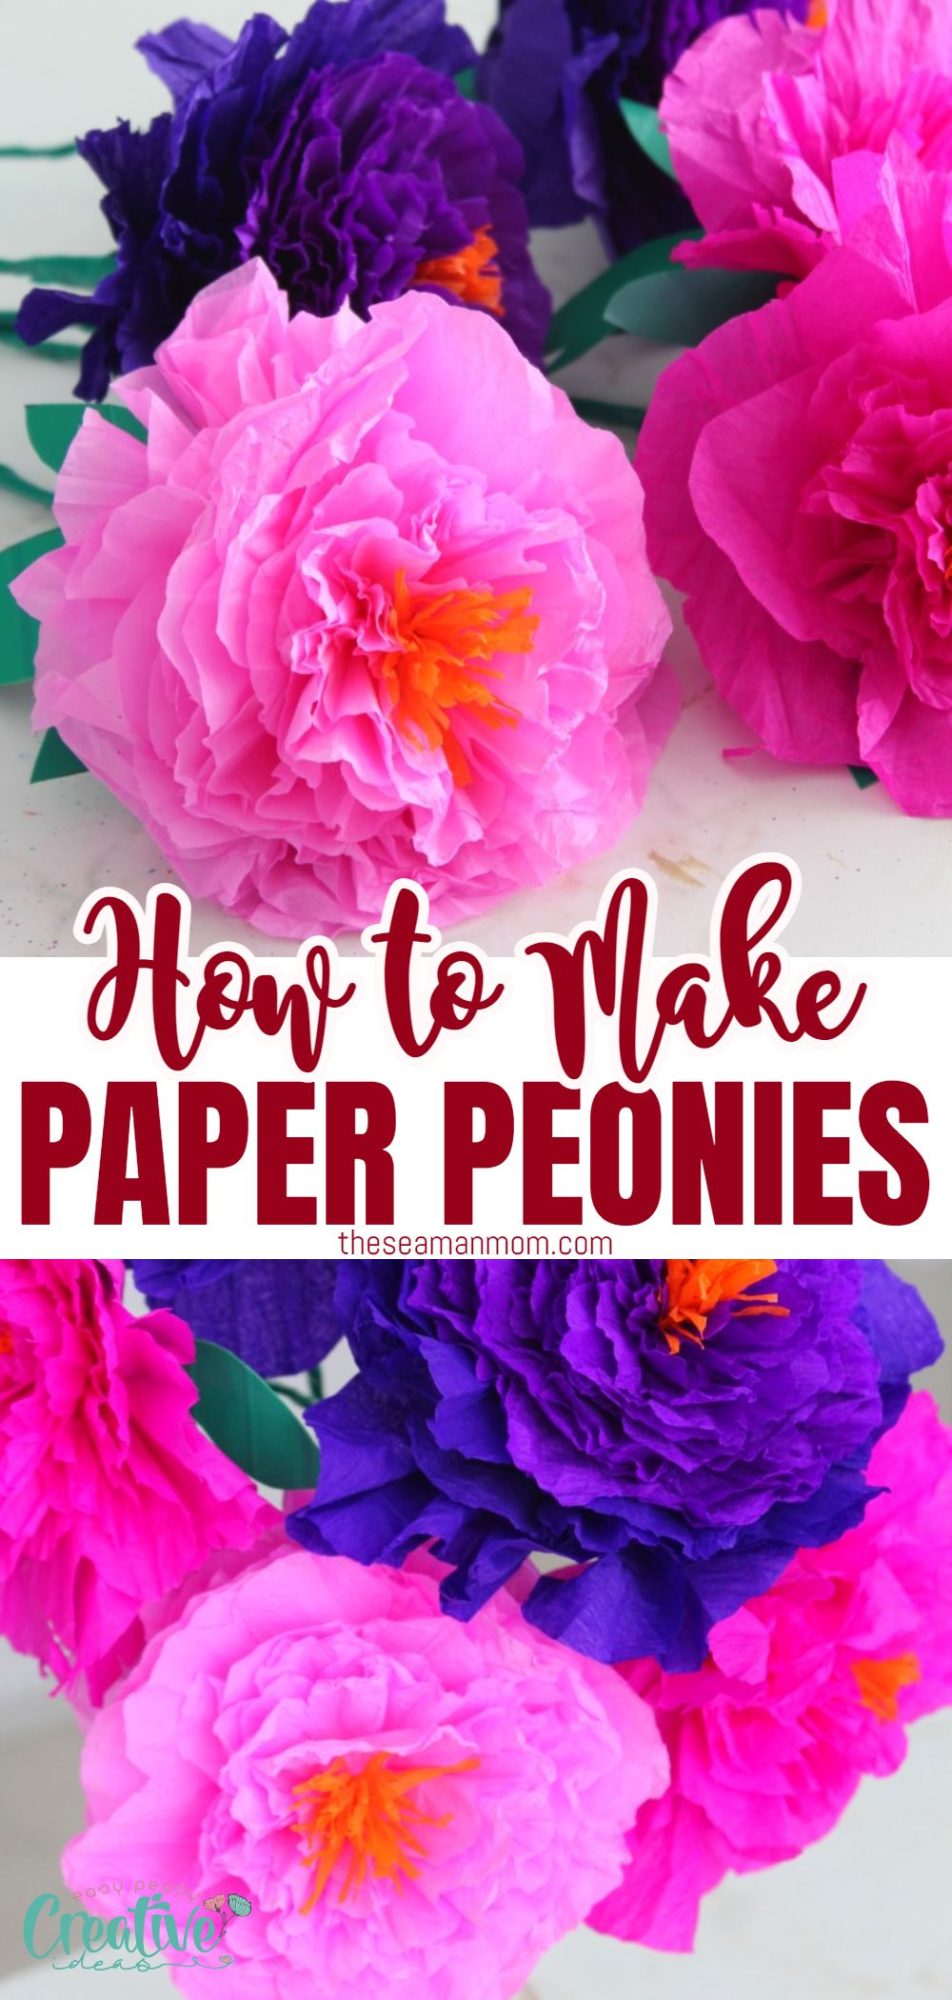
How to make Paper Peonies that will last forever!
Bring Spring earlier into your home when you make your own faux peonies, following this easy peasy DIY paper peonies tutorial! These crepe paper peonies are not only super adorable but will last for a long time!
Paper Peonies
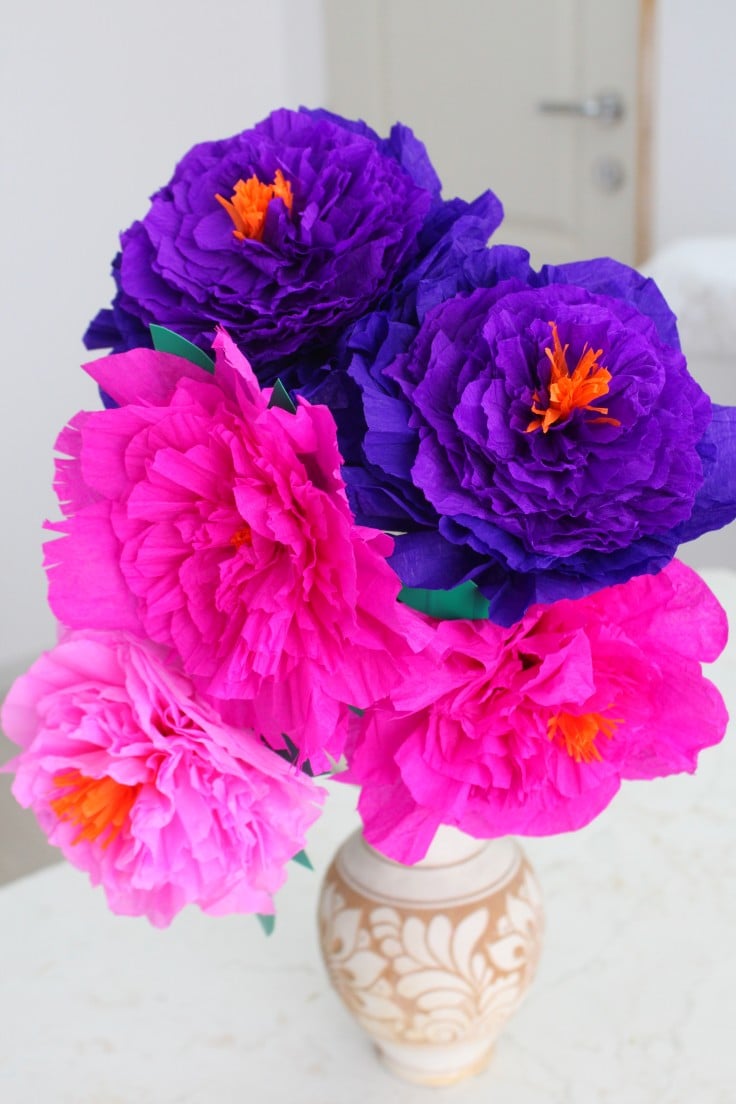
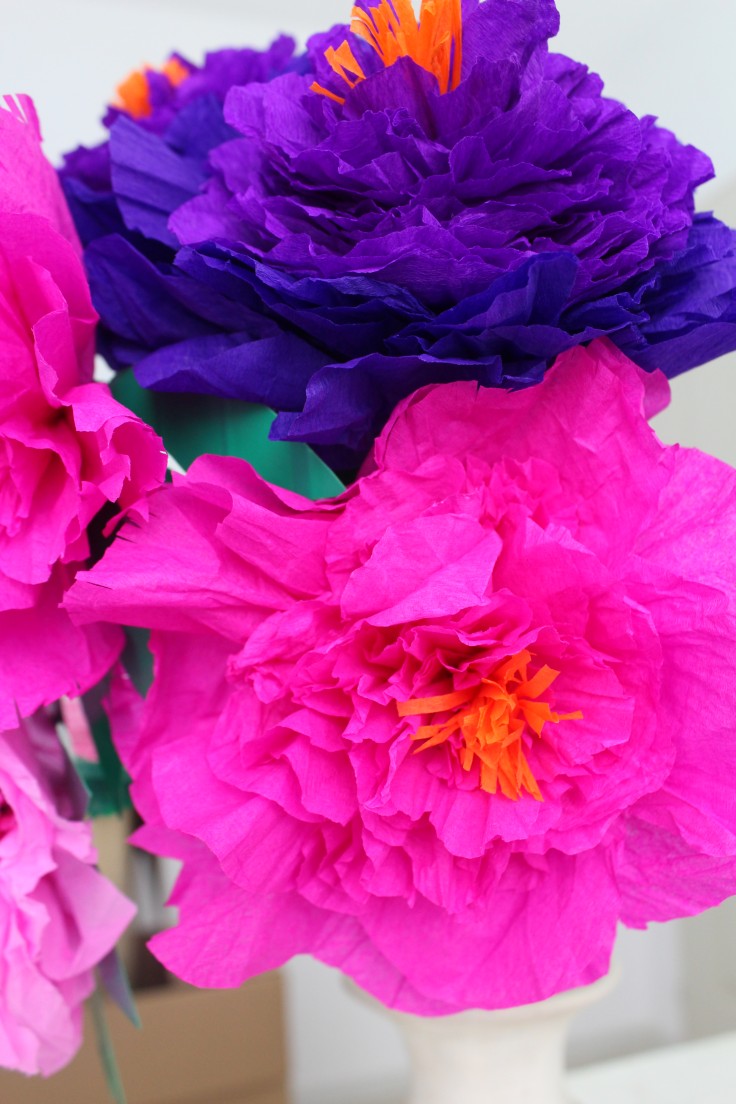
Do you love flowers? I’m sure you do, and so do I! This DIY mommy is passionate about creating beautiful paper peonies that will bring a smile to your face. My tutorial show you how to make these gorgeous blooms at home with just a few simple supplies. And the best part is that they last forever! You can enjoy them for years to come in your home as modern glam centerpieces, as a gift for moms or use as floral arrangements for a wedding or birthday party!
I bet you thought these artificial peonies are the real thing! Just kidding! I am completely aware my paper peony flowers are far from perfect but I absolutely love them! My little peony arrangement looks so bright and cheerful and makes me feel like Spring is here already!
Paper peonies are a cute and quick way to add a pop of color to your home. These peonies can be moved around easily, and their springy nature makes them a fun party favor for whenever you’re having a celebration.
I love making fake flowers but I lack the patience! I can’t spend hours cutting hundreds of petals and gluing them one by one, I need something real quick, a faster and better method! And that’s how I came up with these DIY paper peonies with a video tutorial included.
More DIY flowers you might like:
- DIY pine cone flowers
- Painted coffee filter flowers
- Hyacinth paper flowers
- Crepe paper flowers kids activity
- Toilet paper roll flowers
- DIY paper flower backdrop
What kind of paper do I need for paper peonies?
My easy peony flowers are made out of crepe paper. Other good options are: tissue paper, kite paper or wrapping paper. You can also use two or more different types of paper to make your peonies look even better!
Make sure the paper you choose is sturdy but not too thick. The lighter and flimsier, the better it looks when you’re done folding your flowers.
How much crepe paper do I need to make paper peonies?
It depends on how large you want your flowers, how big the blossoms will be in the end as well as the number of blossoms. It’s best to get a full roll or crepe paper for each color you plan on using.
How do you construct a peony flower with these templates?
Instead of constructing the flowers from individual peony petals, I believe I made things easier and faster. I created flower templates that are then scrunched and twisted to shape into a peony flower.
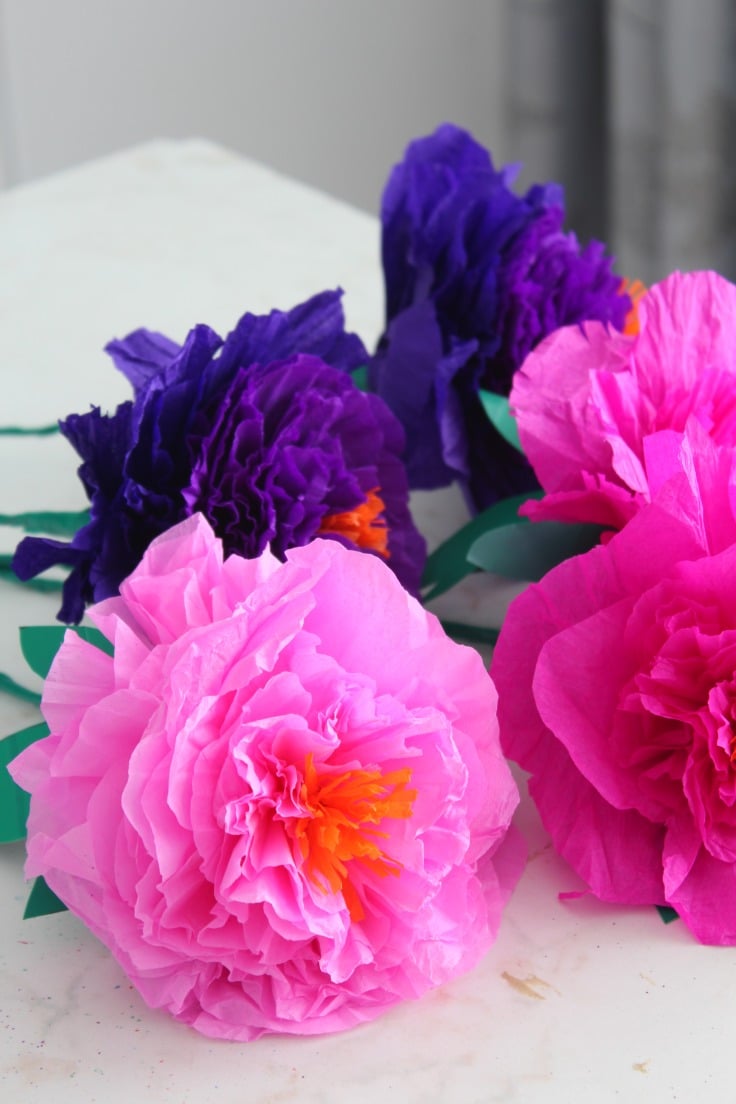
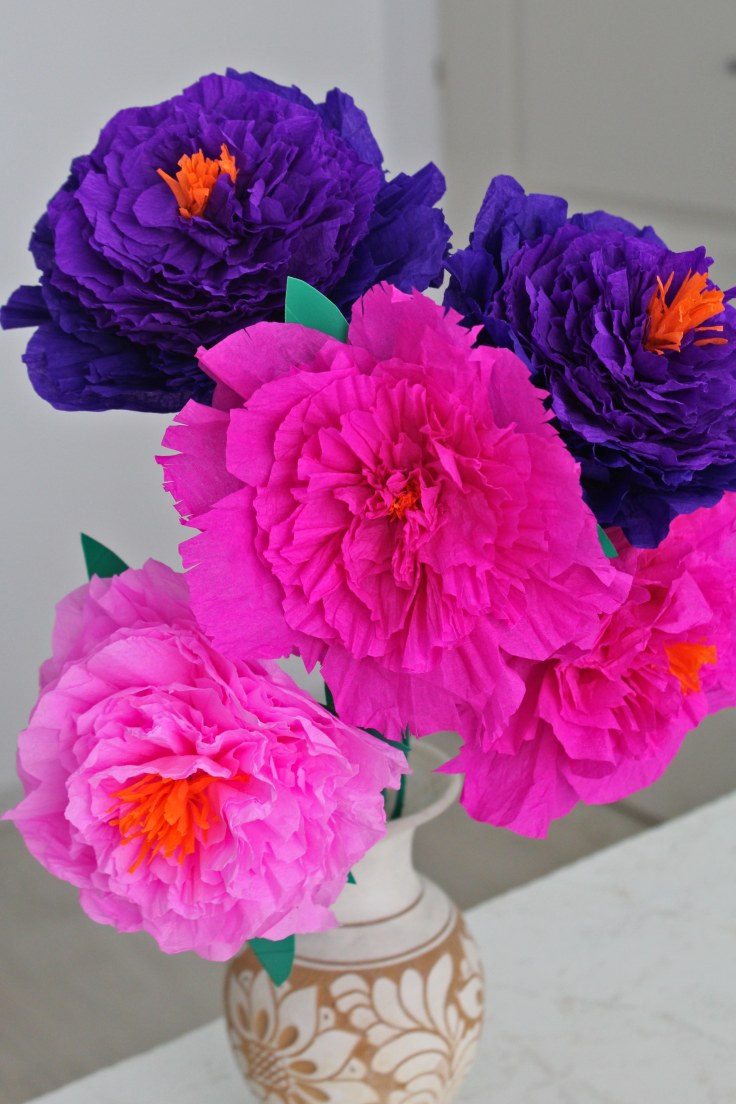
I made three templates and got to work with all of them but I think the large template works best for these crepe paper peonies. And the more layers you use, the better your peony will look. Unfortunately I didn’t have a lot of crepe paper in the colors I loved so I had to be “stingy” to make my supply shape into five beautiful, eye catching DIY paper peonies!
How many layers do I need for each paper peony?
It’s up to you, the more layers the better. In my project here’s what I used:
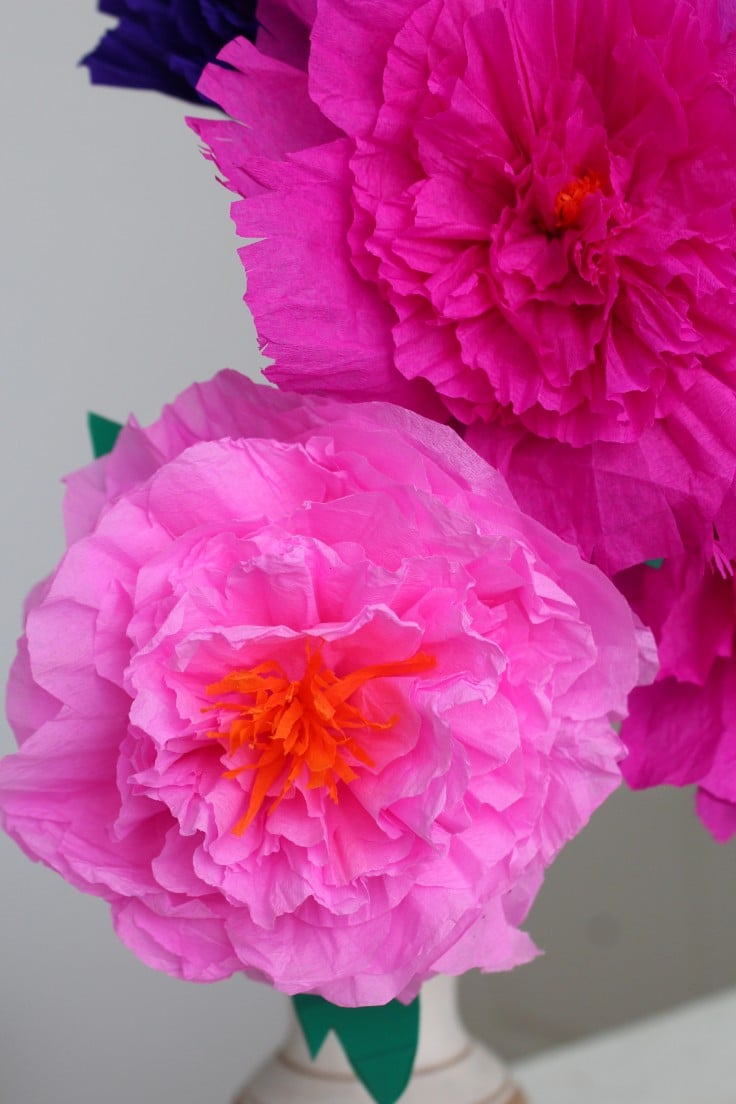
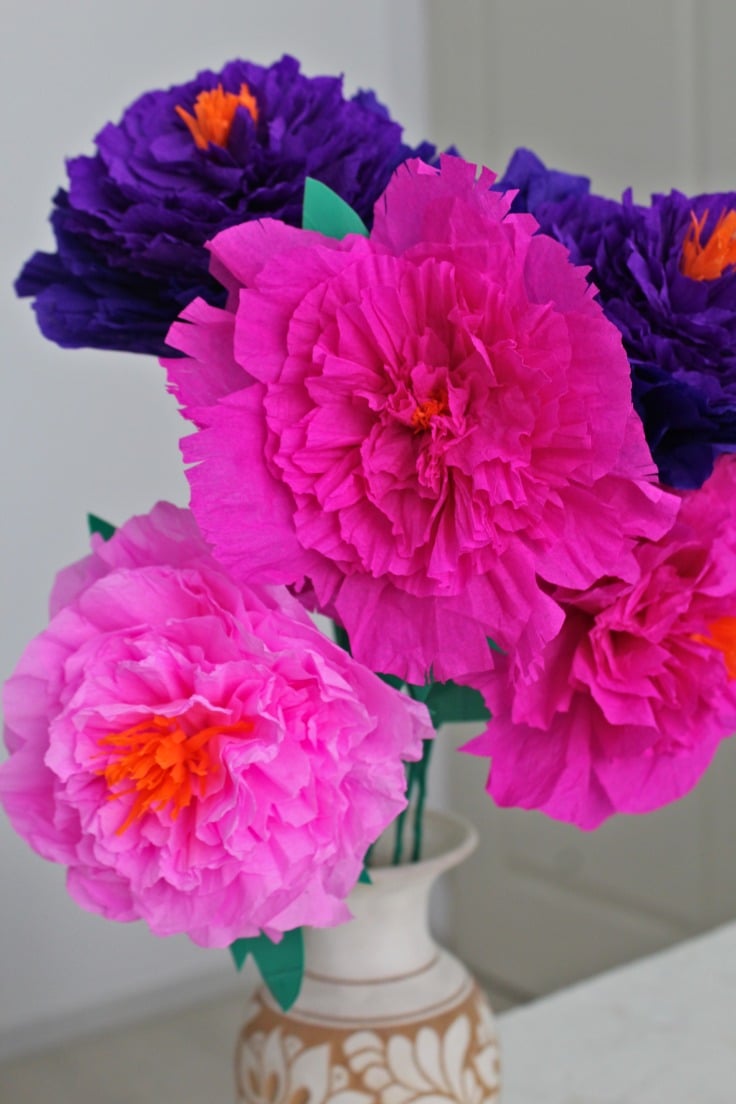
- On the light pink peony I used 16 layers (8 large, 4 medium and 4 small).
- For the fuchsia pink peonies I used 12 layers (4 large, 4 medium & 4 small).
- On the purple peonies I used 20 layers (4 large, 8 medium & 8 small.
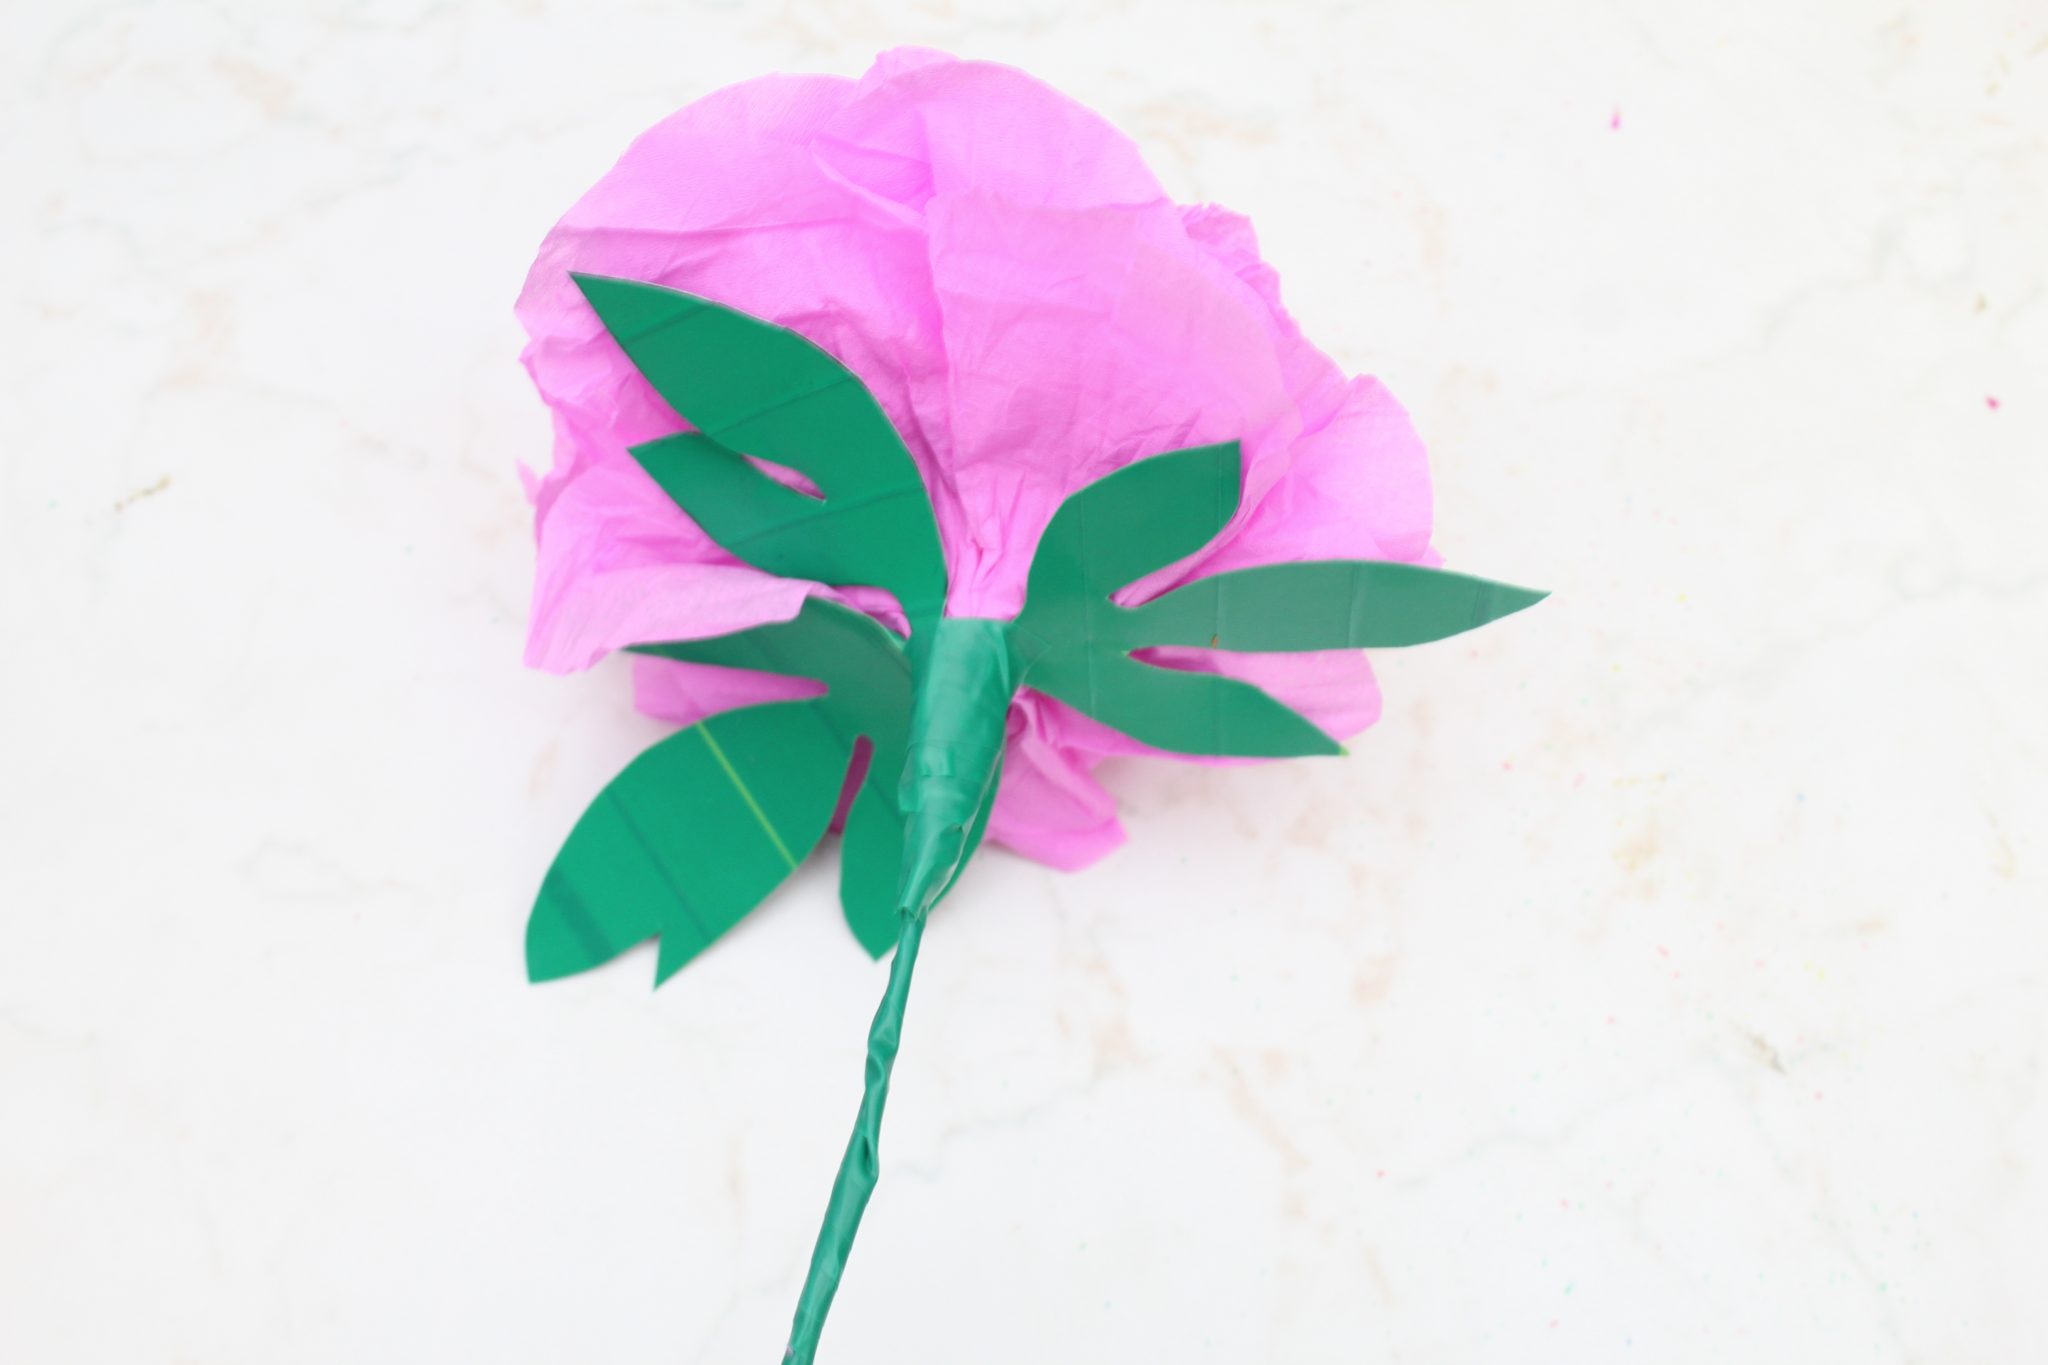
Each of the peonies have a fringed middle in orange crepe paper and a few of them also have leaves (I made a template for these too).
What’s the best material to use for leaves?
It’s up to you! If you want to make your peony more realistic, use craft leaves.
I didn’t have craft leaves or cardboard paper in the same color of the tape that I used to wrap around the stems of my paper peonies. So I decided to get creative! I used the same tape to cover a piece of cardstock, drew the leaves patterns on and cut out so now the leaves are in the exact same color as the stem. Plus they were sturdier and easier to shape!

Tips and tricks for the best paper peonies!
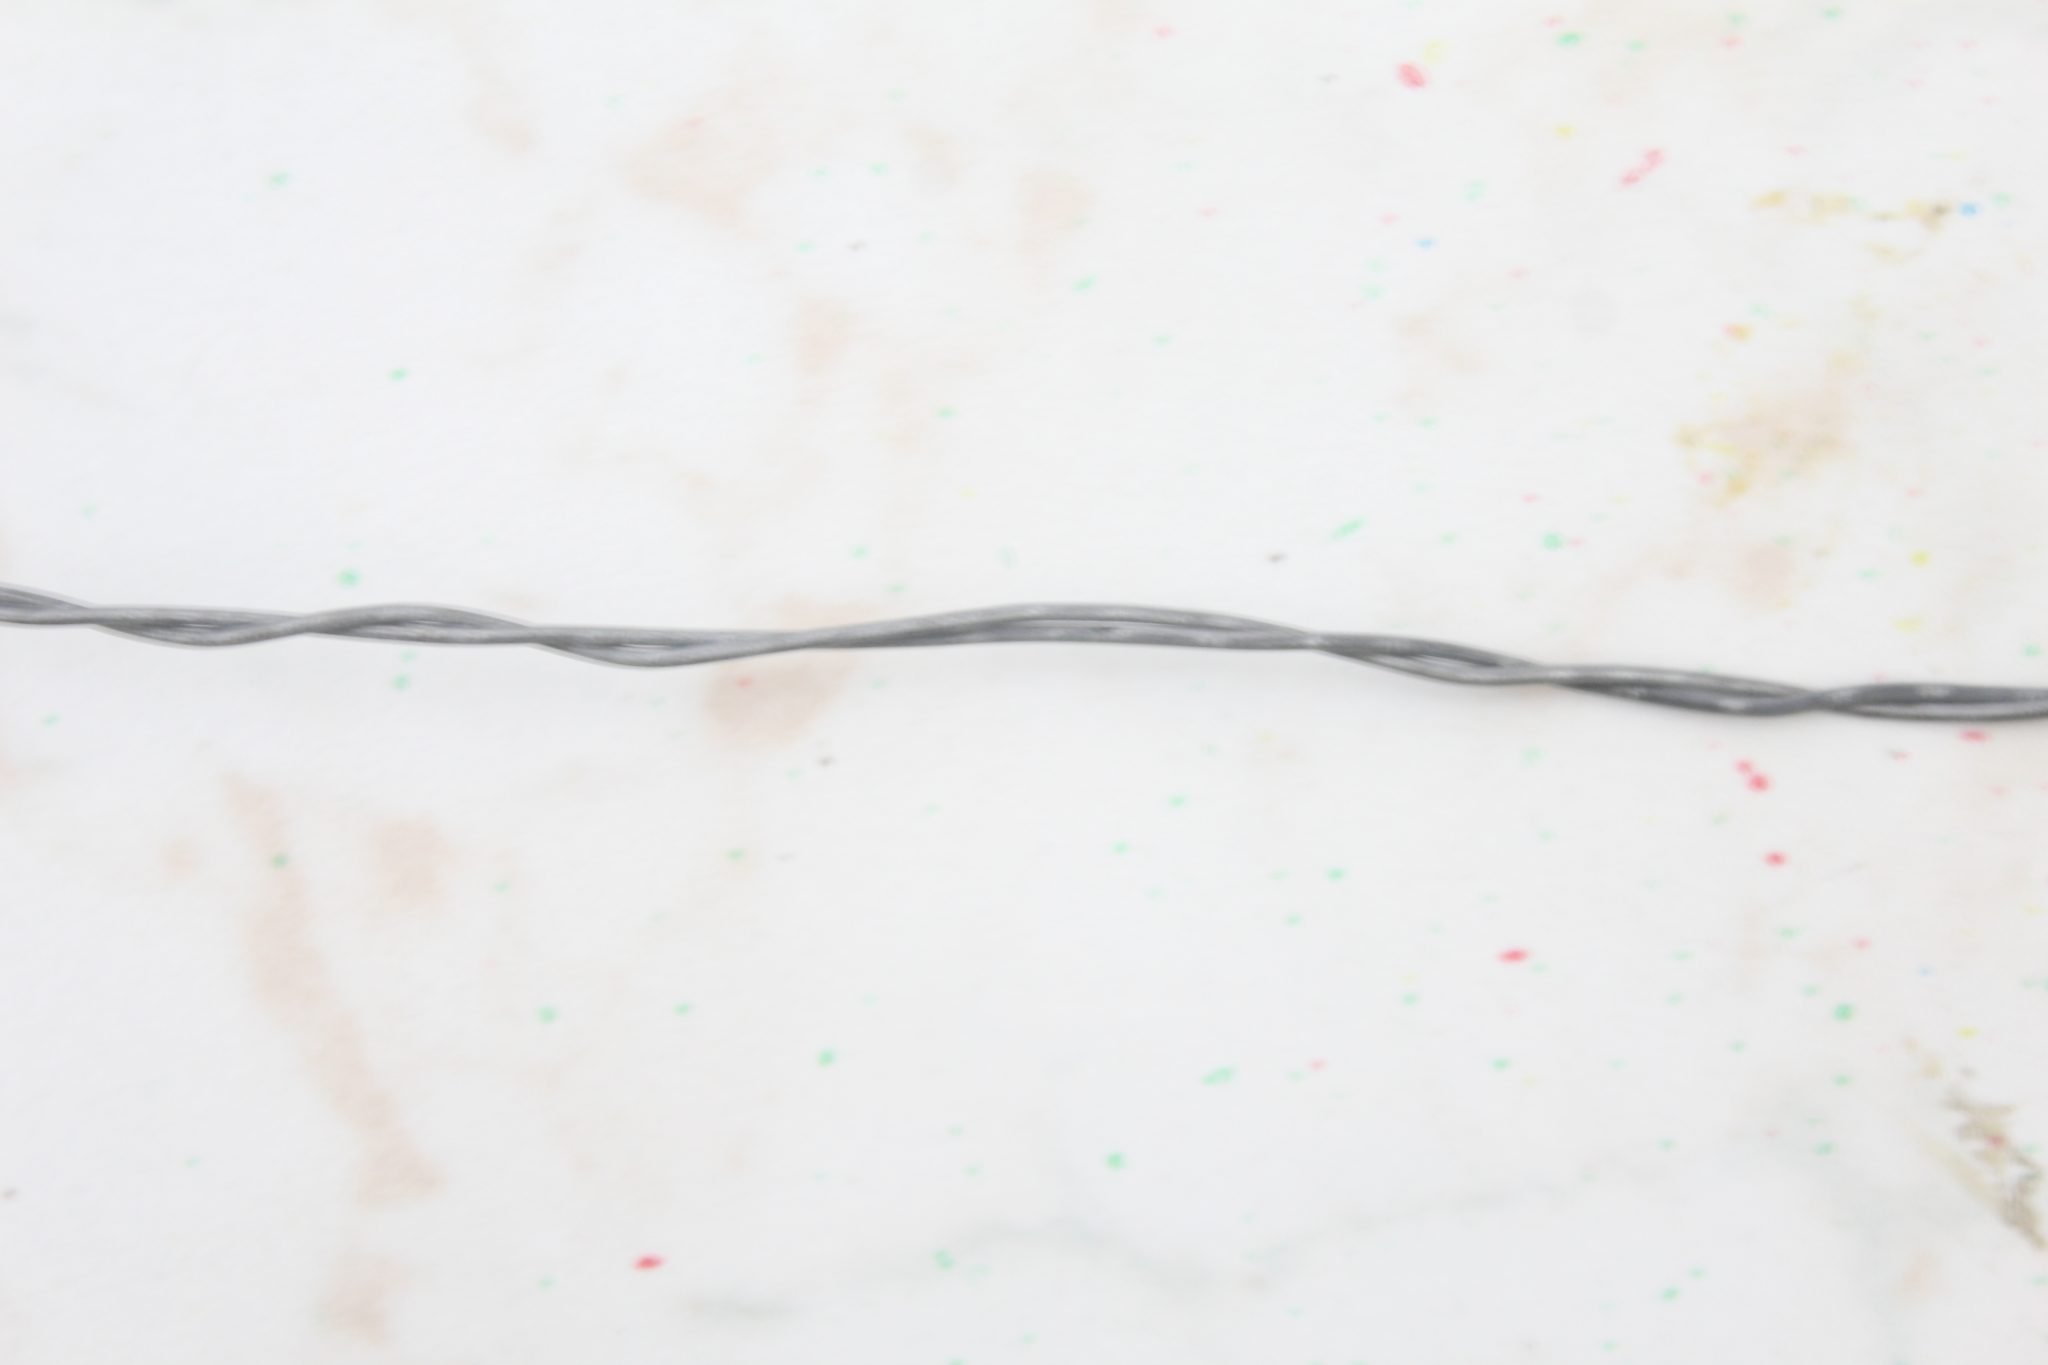
- Use thin wire or floral wire to shape your flowers, they will hold their shape much better than you can ever imagine. Plus it’s also easier to bend in the shapes you want.
- Crepe paper tears really easily so be extra careful when working with it!
- Plan in advance and prepare a lot of paper flowers before you start constructing the flowers.
- Once finished, crepe paper peonies should be kept away from direct sun. Colored crepe paper might fade when exposed to sun for extended periods of time.
- Another tip I would suggest now, learning from my mistakes, is to separate the petals on the outermost layers and fold them towards the inside. I think this would help your DIY paper peonies look less artificial and more like the real thing.
What tools do I need?
You won’t need a lot of tools and if you are a crafter, chances are you already ave these in your craft supply box.
- craft scissors
- wire cutting pliers
- pins
- pen
- glue gun if you decide to glue the flowers instead of using tape as I did
How long does it take to make a peony flower?
This will all depend on your level of patience, the time it takes for you to cut the paper properly and attach individual layers.
If you are in a hurry, this project might not be right for you. If you are an experienced paper crafter, I guess this can be done within an hour or so!
You can always extend this project over a few days, dedicating 20-30 minutes at a time or until you lose patience.
How do I attach my peony layers together?
I used electrical tape . You can also use washi tape, masking tape or floral tape. You can also use hot glue or double sided tape if you prefer, but make sure it’s the thin type!
The possibilities are endless when it comes to making paper peonies – there are many different colors, sizes, and styles of petals you can choose. You can even use my tutorial as inspiration for creating your own unique flower designs from scratch! So get out those craft supplies and let’s get started on this fun project together today. And if you are a video person, I also have a step by step video tutorial for these beautiful peonies.
The PDF files for these peonies together with the SVG can be purchased HERE.
DIY paper peonies
Materials:
- peonies and leaves templates
- lots and lots of crepe paper in the desired color (peonies come in such a large variety of colors!)
- galvanized wire
- cutting pliers
- green electrical tape
- craft scissors
- pins
- cardstock
- pen
How to make paper peonies?
Prepare the parts
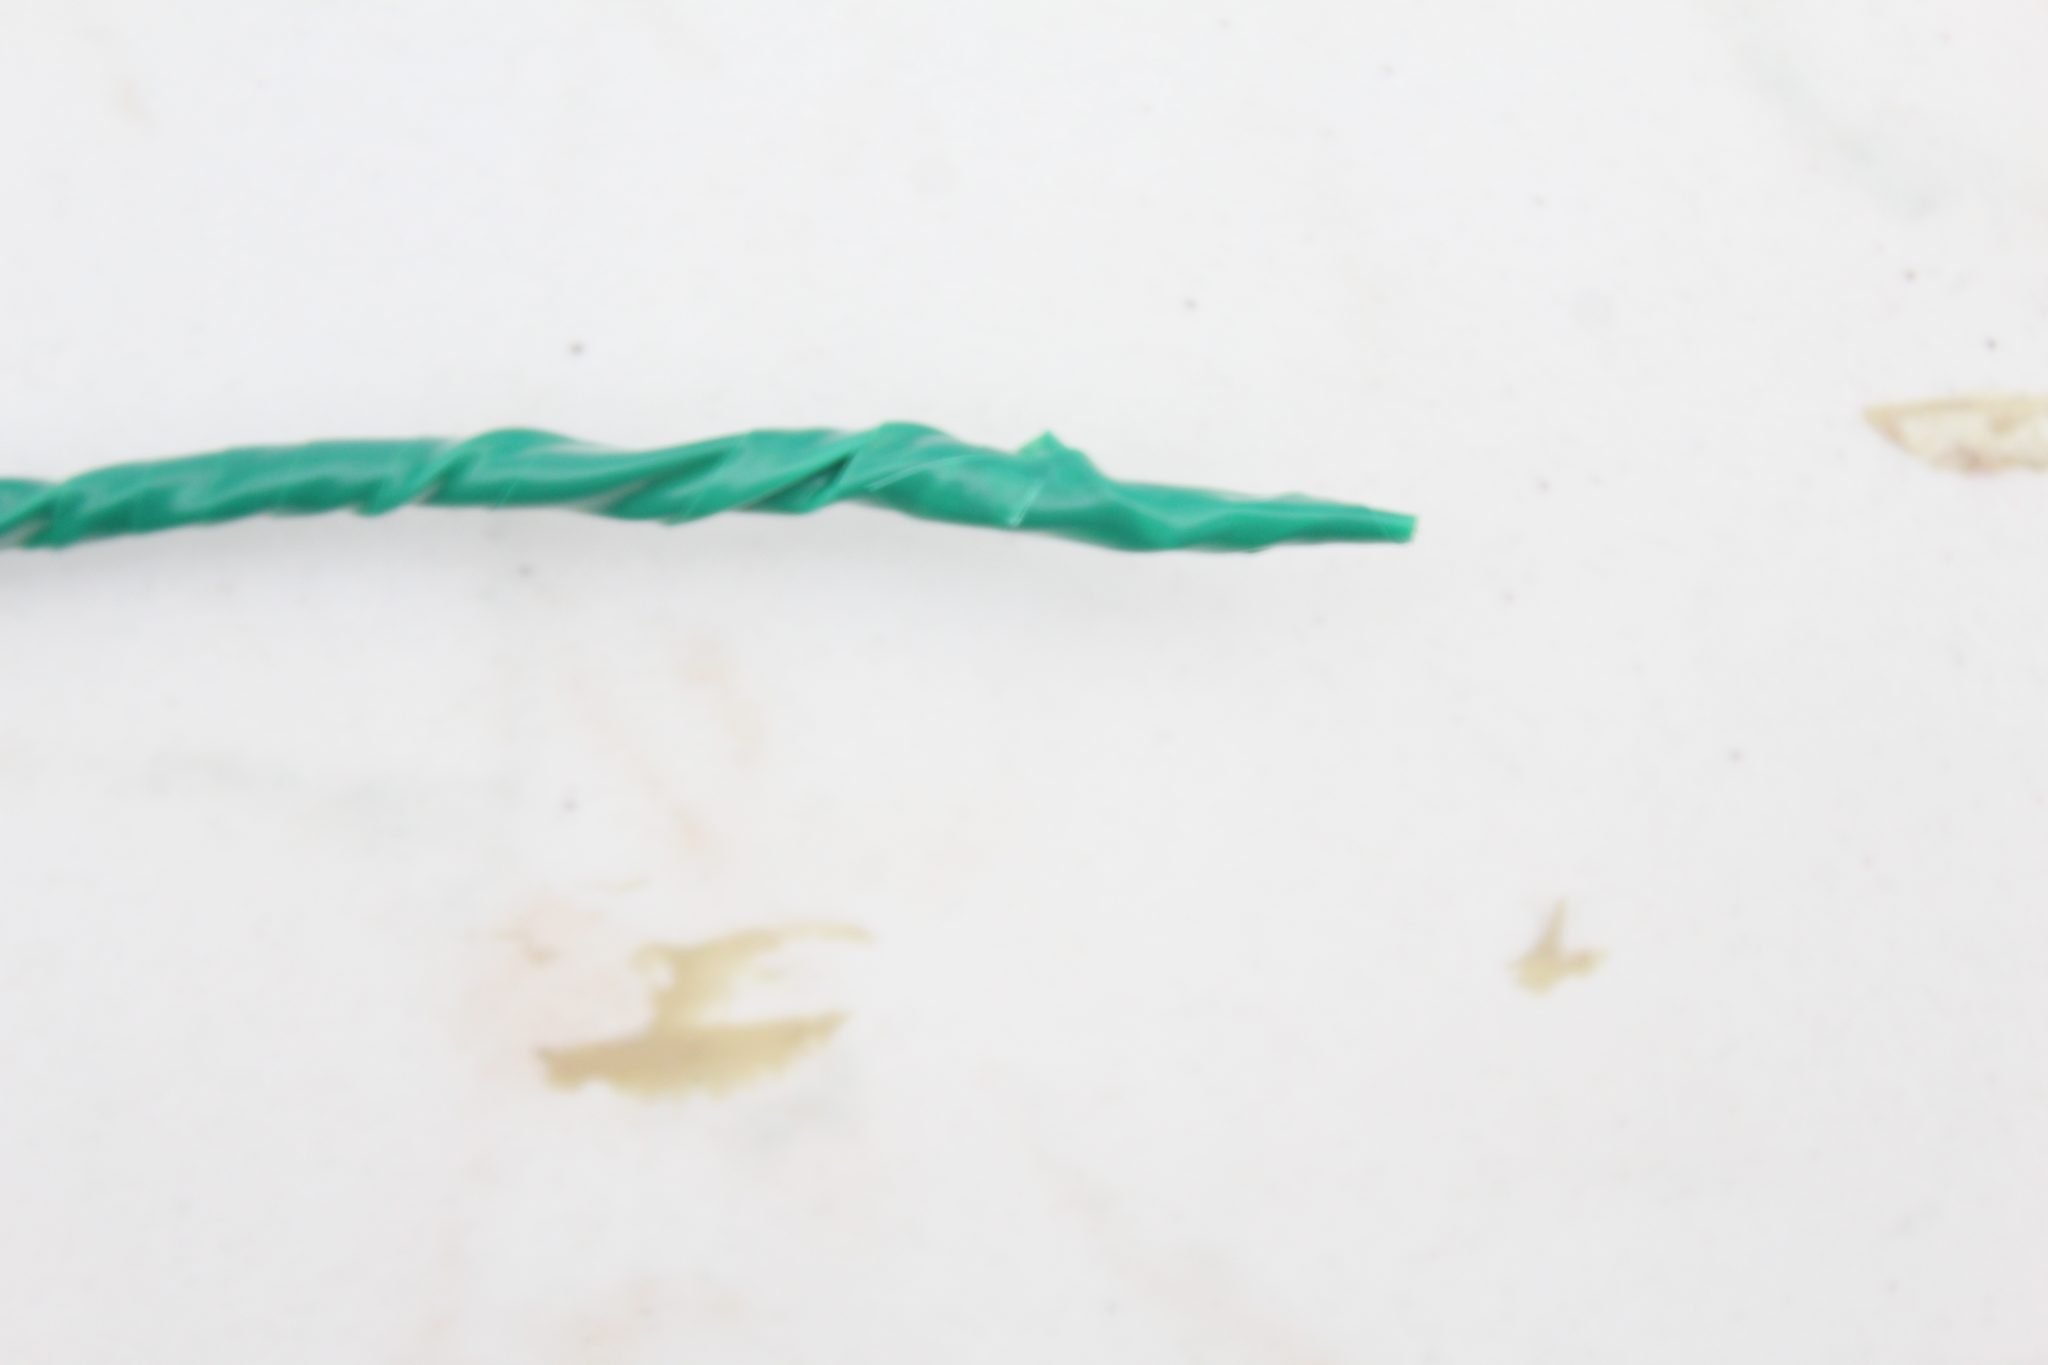
- You’ll use the wire to make the stems so grab your cutting pliers and cut as many wires as needed for the amount of peonies you plan to make and then double the number.
- Take two at a time and wrap the wires around each other.
- Get the green electrical tape and wrap it around the twisted wires leaving one end exposed and covering the opposite end.
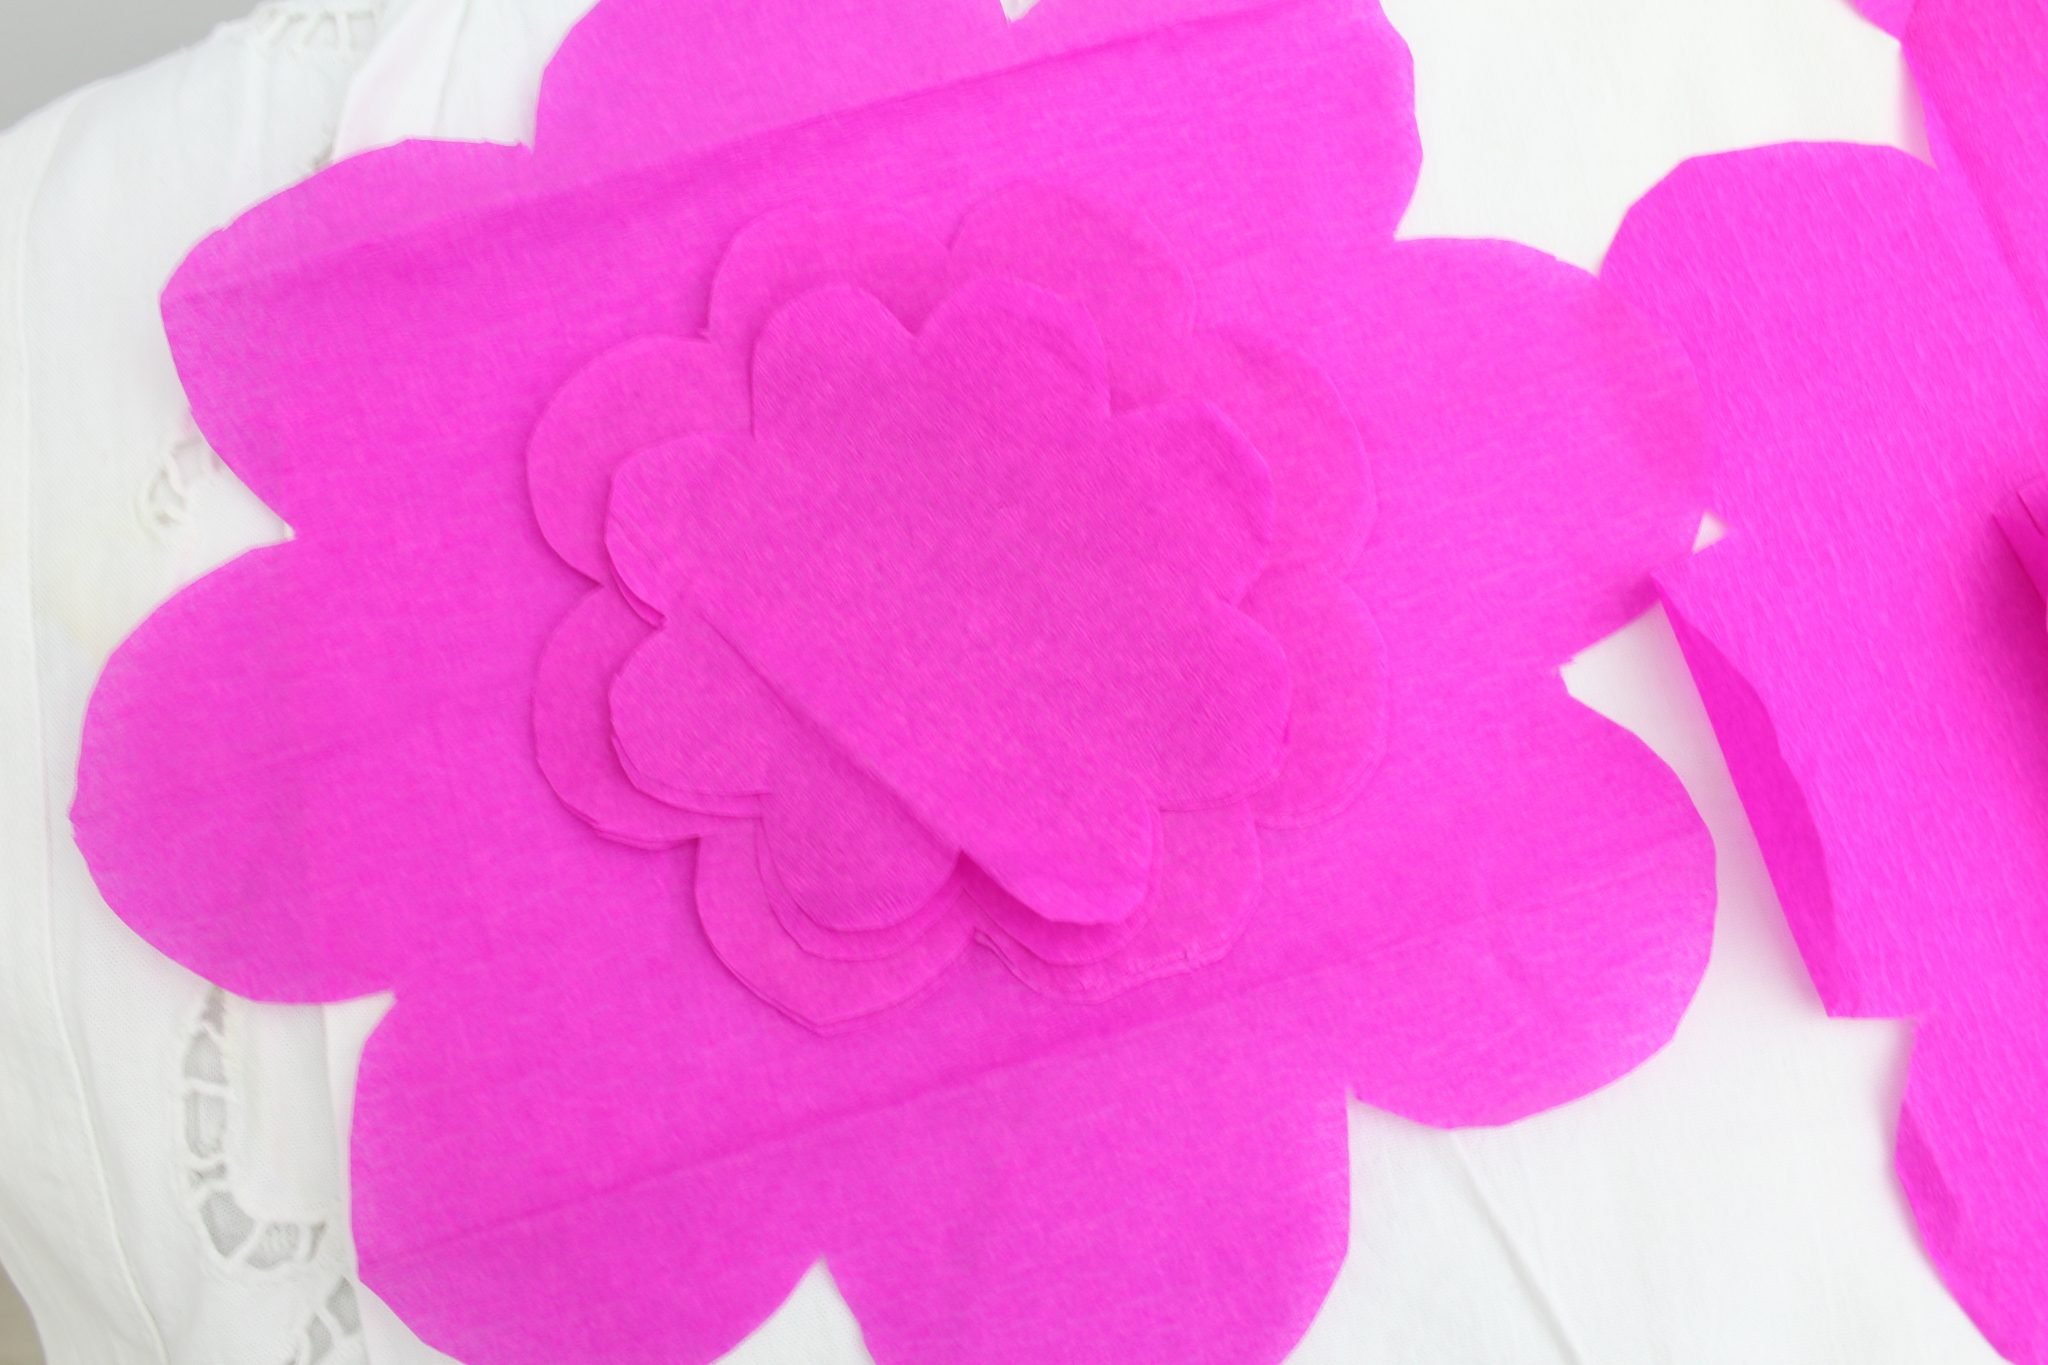
- Stack up a few layers of crepe paper and place the peony templates on the crepe paper.
- Pin the template to the paper so it won’t slip and start cutting out.
- Make as many layers as you like, in the size you love best. Adding a bunch of small petal ones in the center of your flower makes it look better so you might wanna try those too. Then use the larger petal flowers for the outer layers.
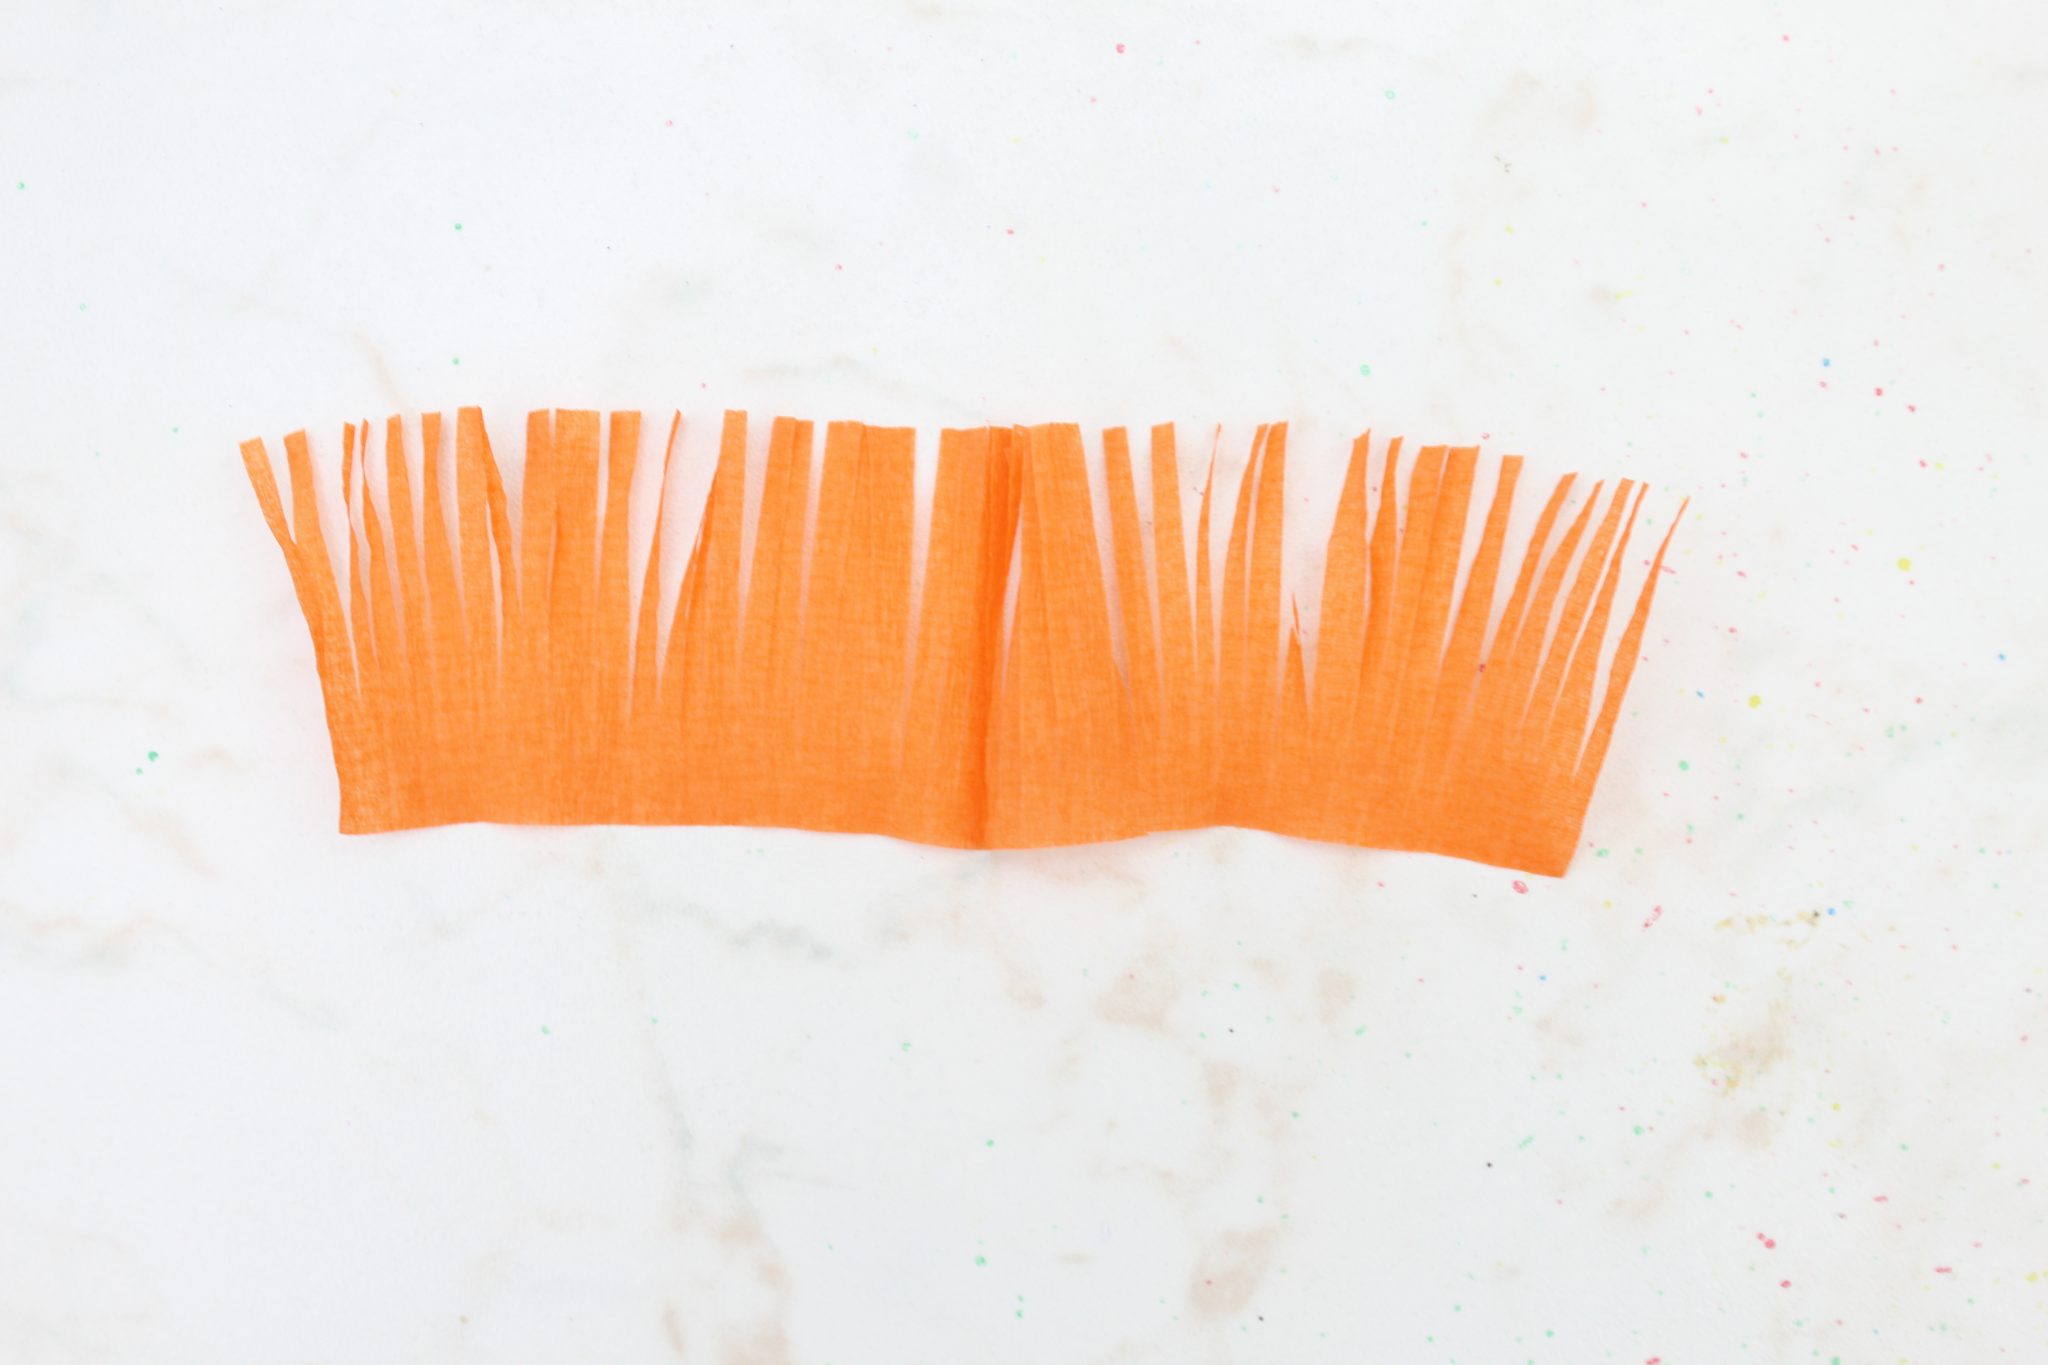
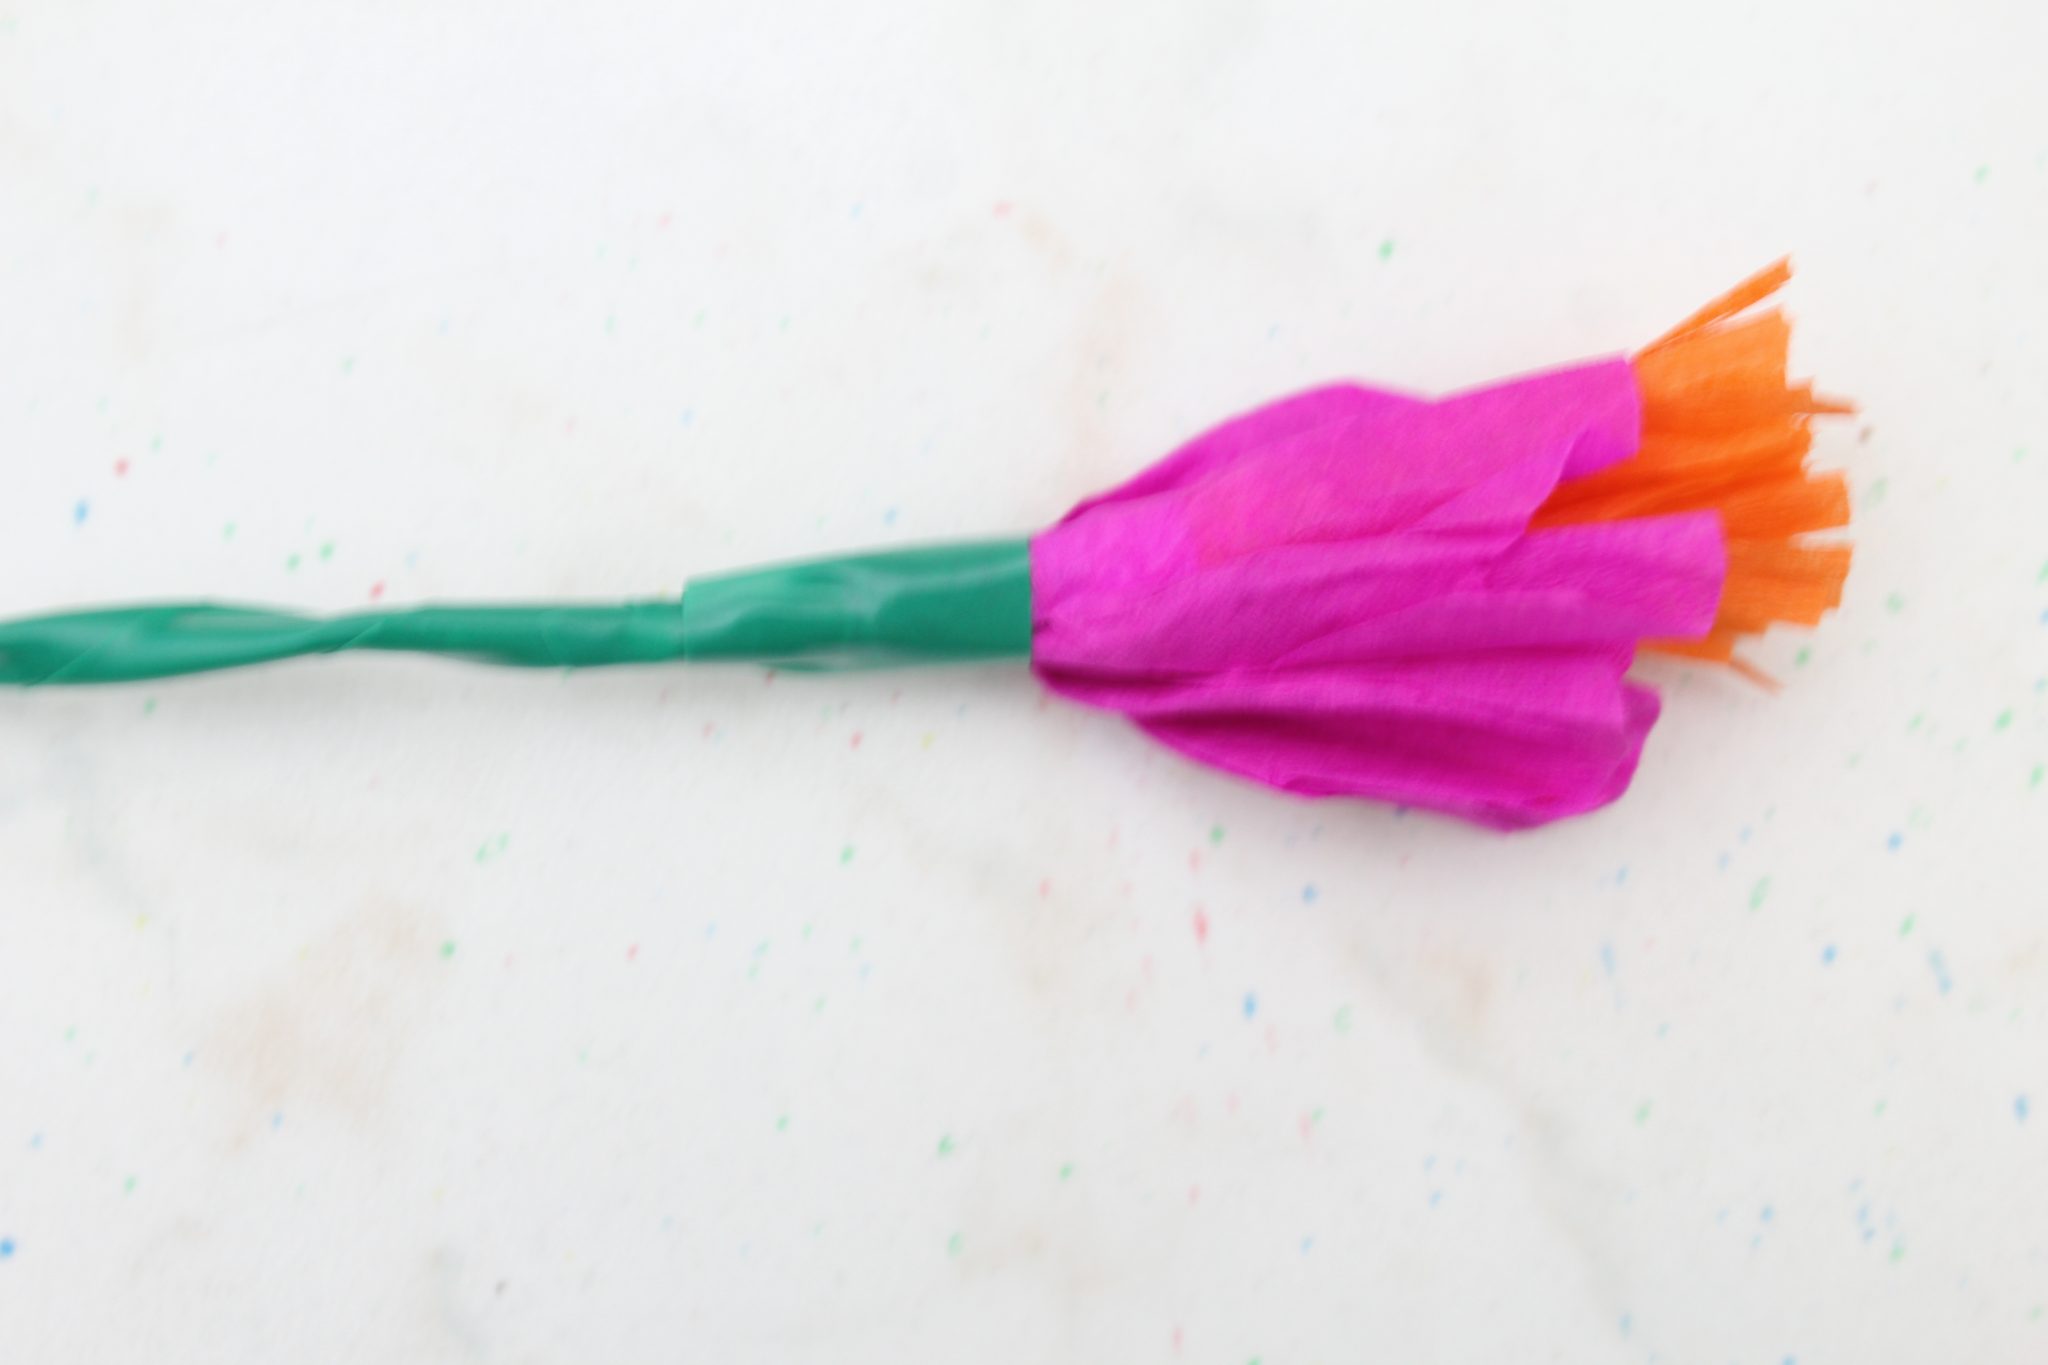
- Grab some orange crepe paper, cut a few squares of about 2″ x 4″ and fringe along one of the long sides.
Construct the flower
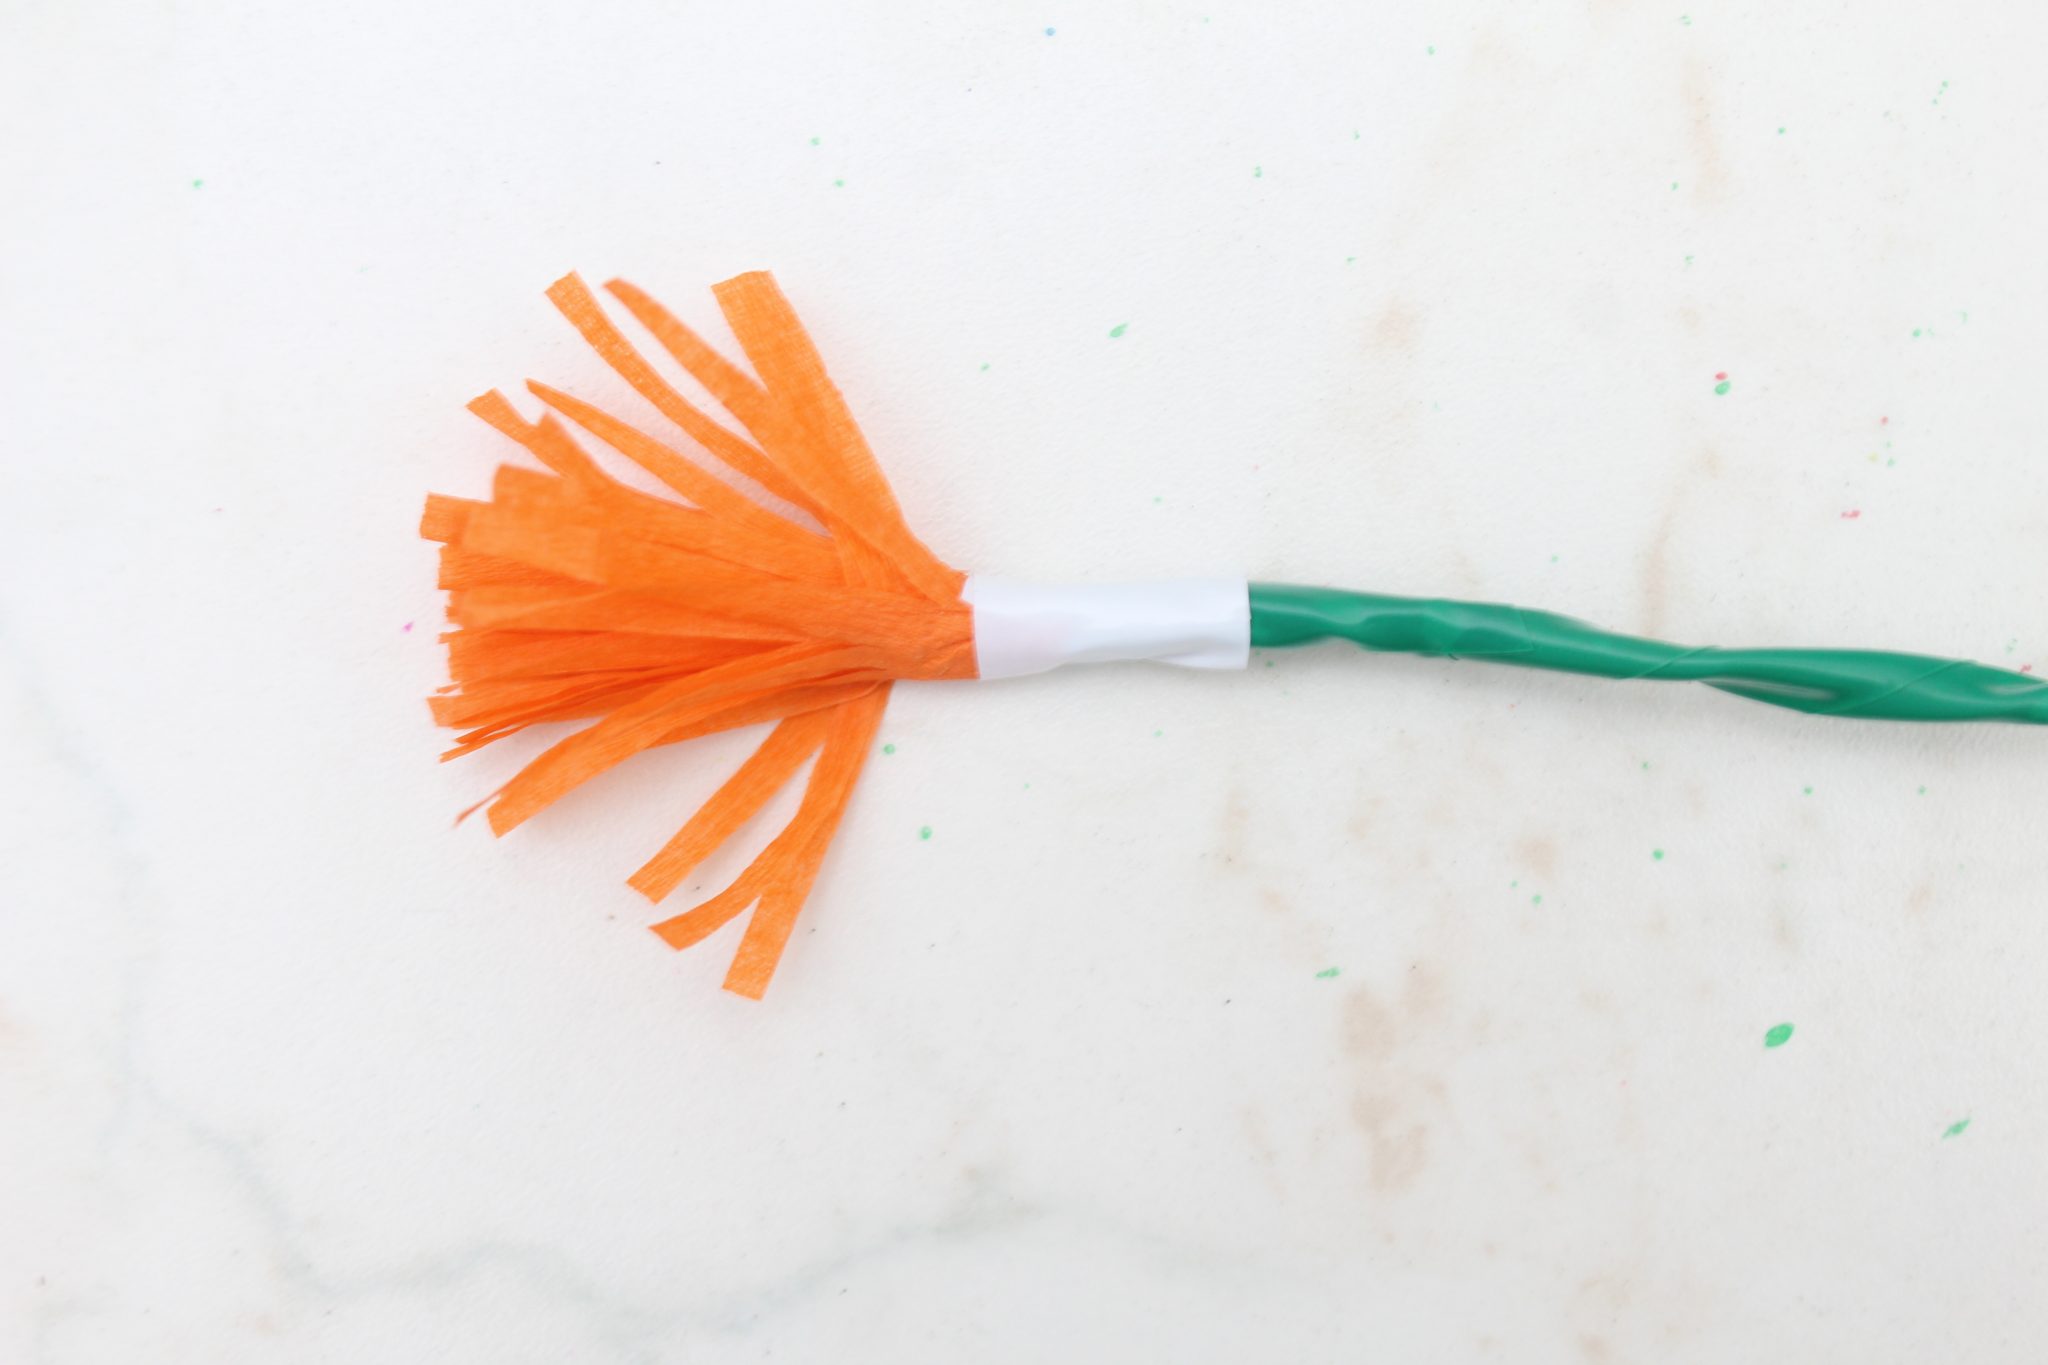
- Start making your first flower. Get one of the fringes and wrap around the taped end of the stem until all fringe is finished. Tape onto the stem using green electrical tape (I find this is very stretchable and bendable and a lot easier to work with than other kind of tape).
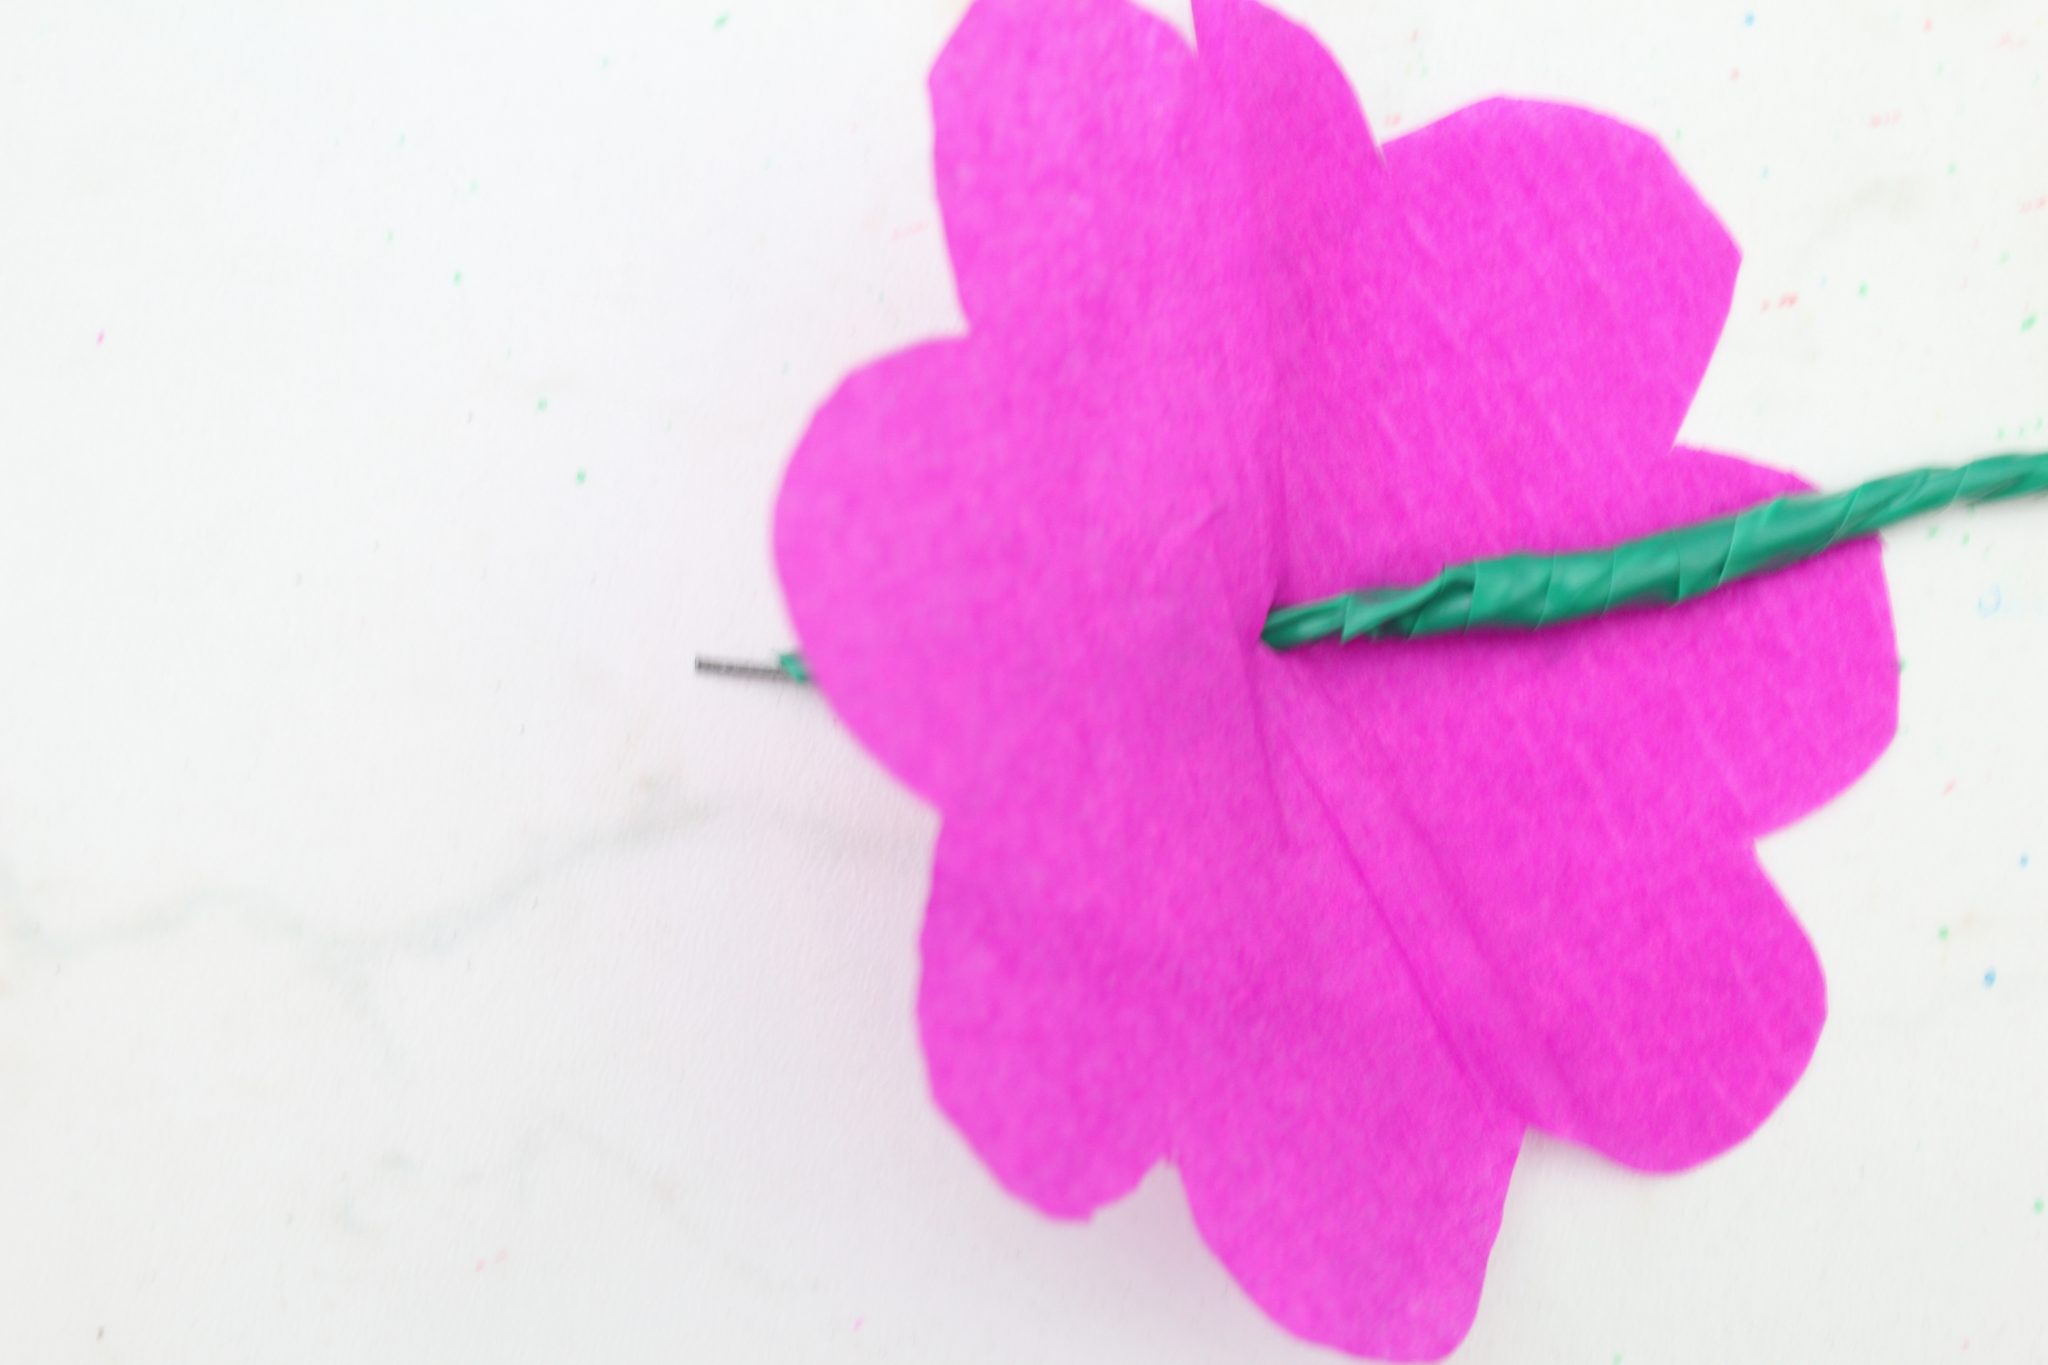
- Take a small flower and using the other end of the stem, pierce the middle of the flower.
- Push the flower to the top until it meets the wrapped and taped fringe.
- Scrunch and twist the flower then tape the base of the flower as you did with the fringe.
- Continue like this until all layers are attached to the stem. Start with a few small ones for the center flower, then a few medium ones and finish with the large petal flowers,
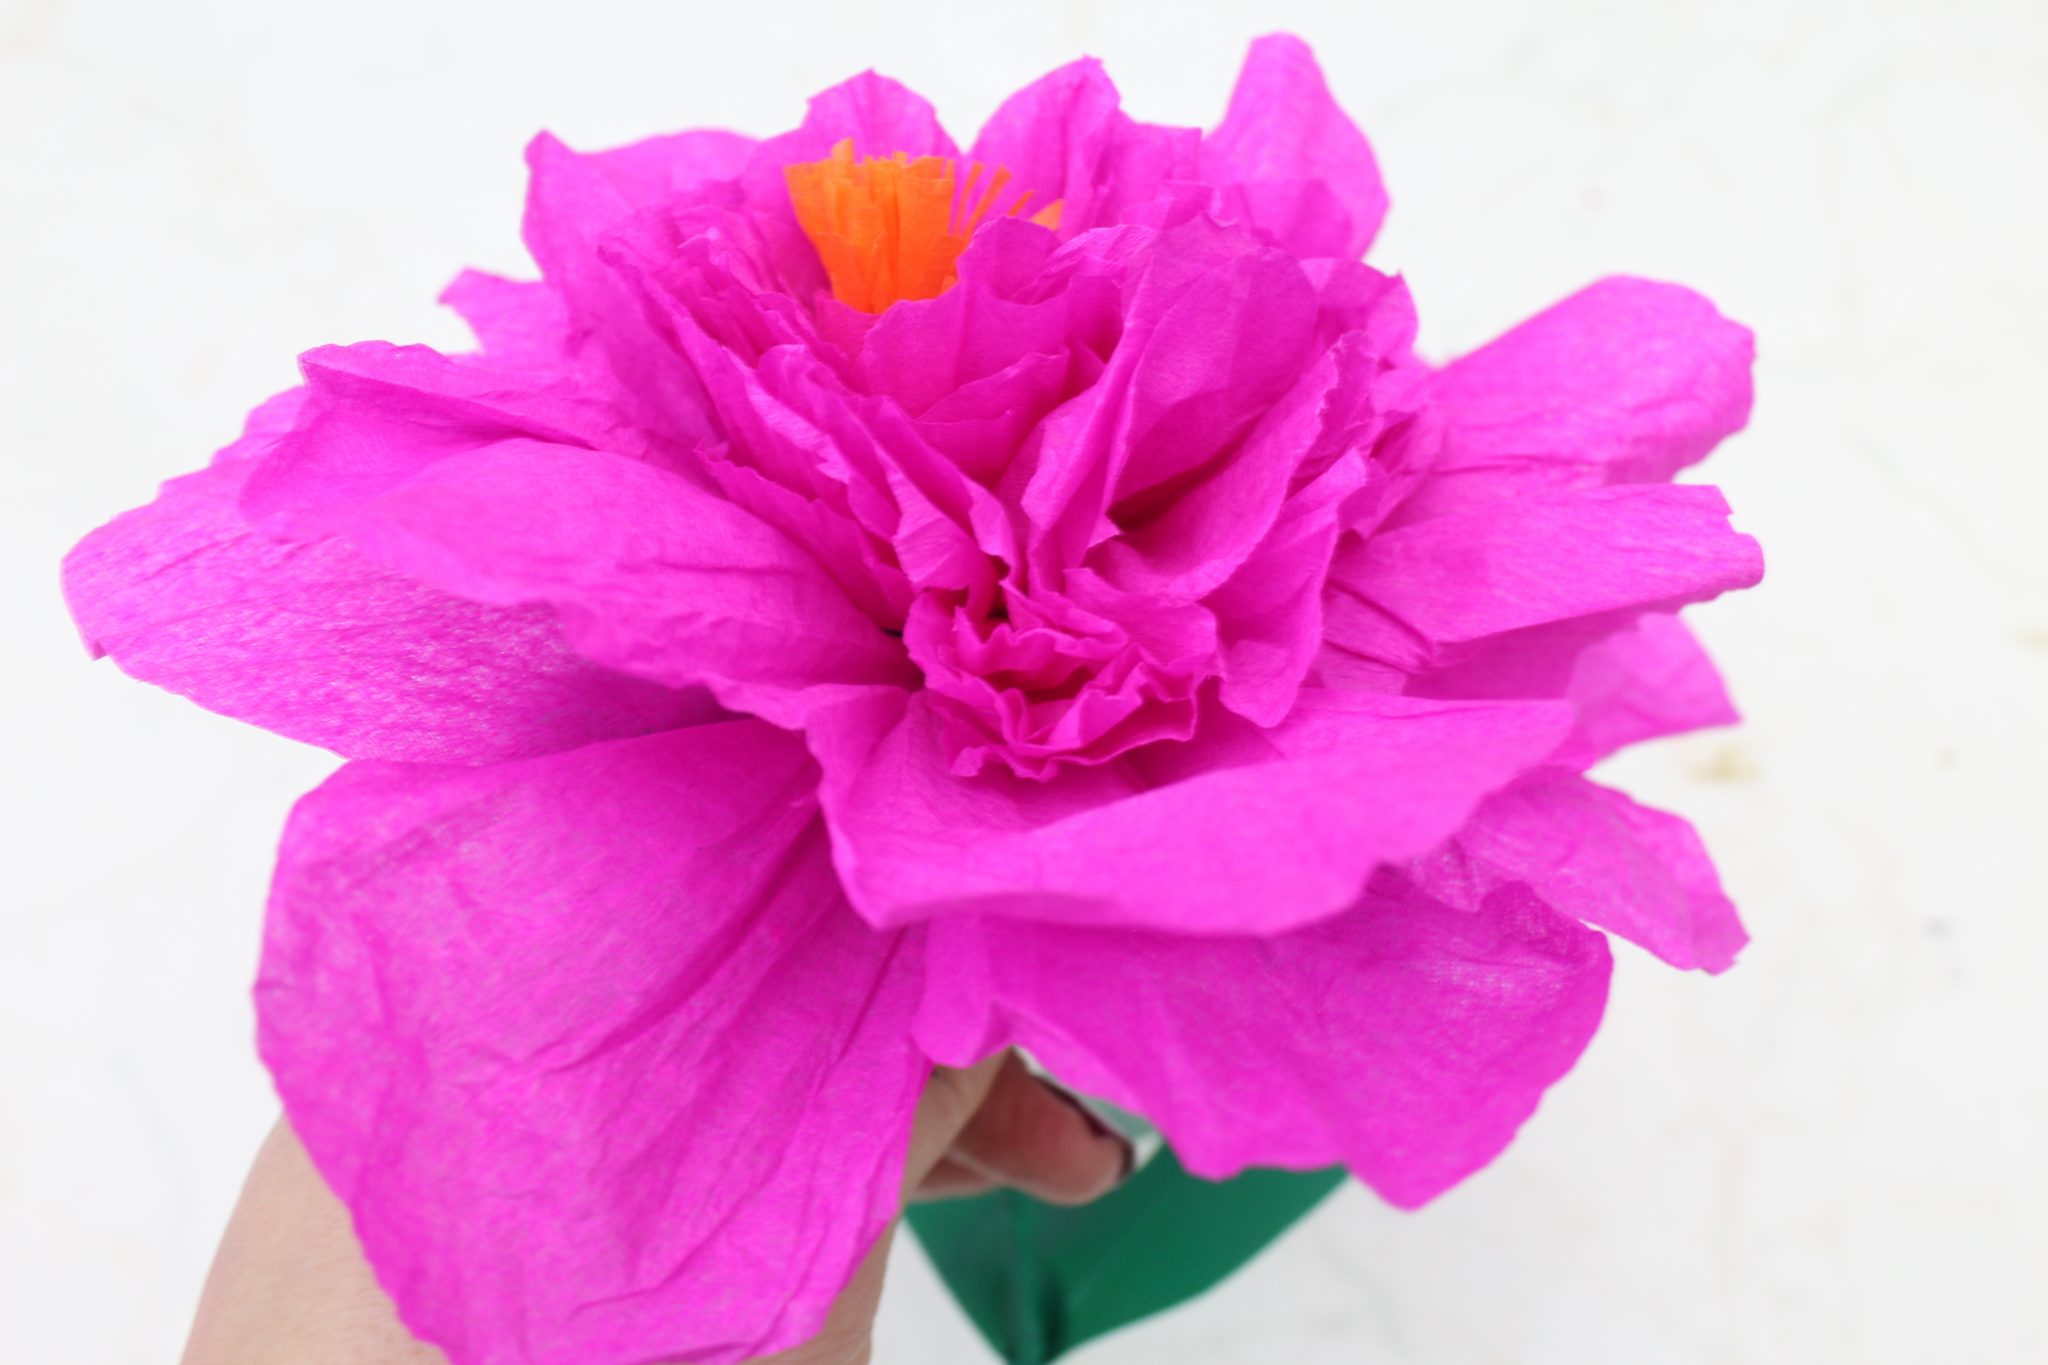
- Open the peony and start pushing the layers of petals outward until your flower looks like you want it.
- You may even want to fringe the outermost layer as I did (notice in the photos above, before the tutorial)
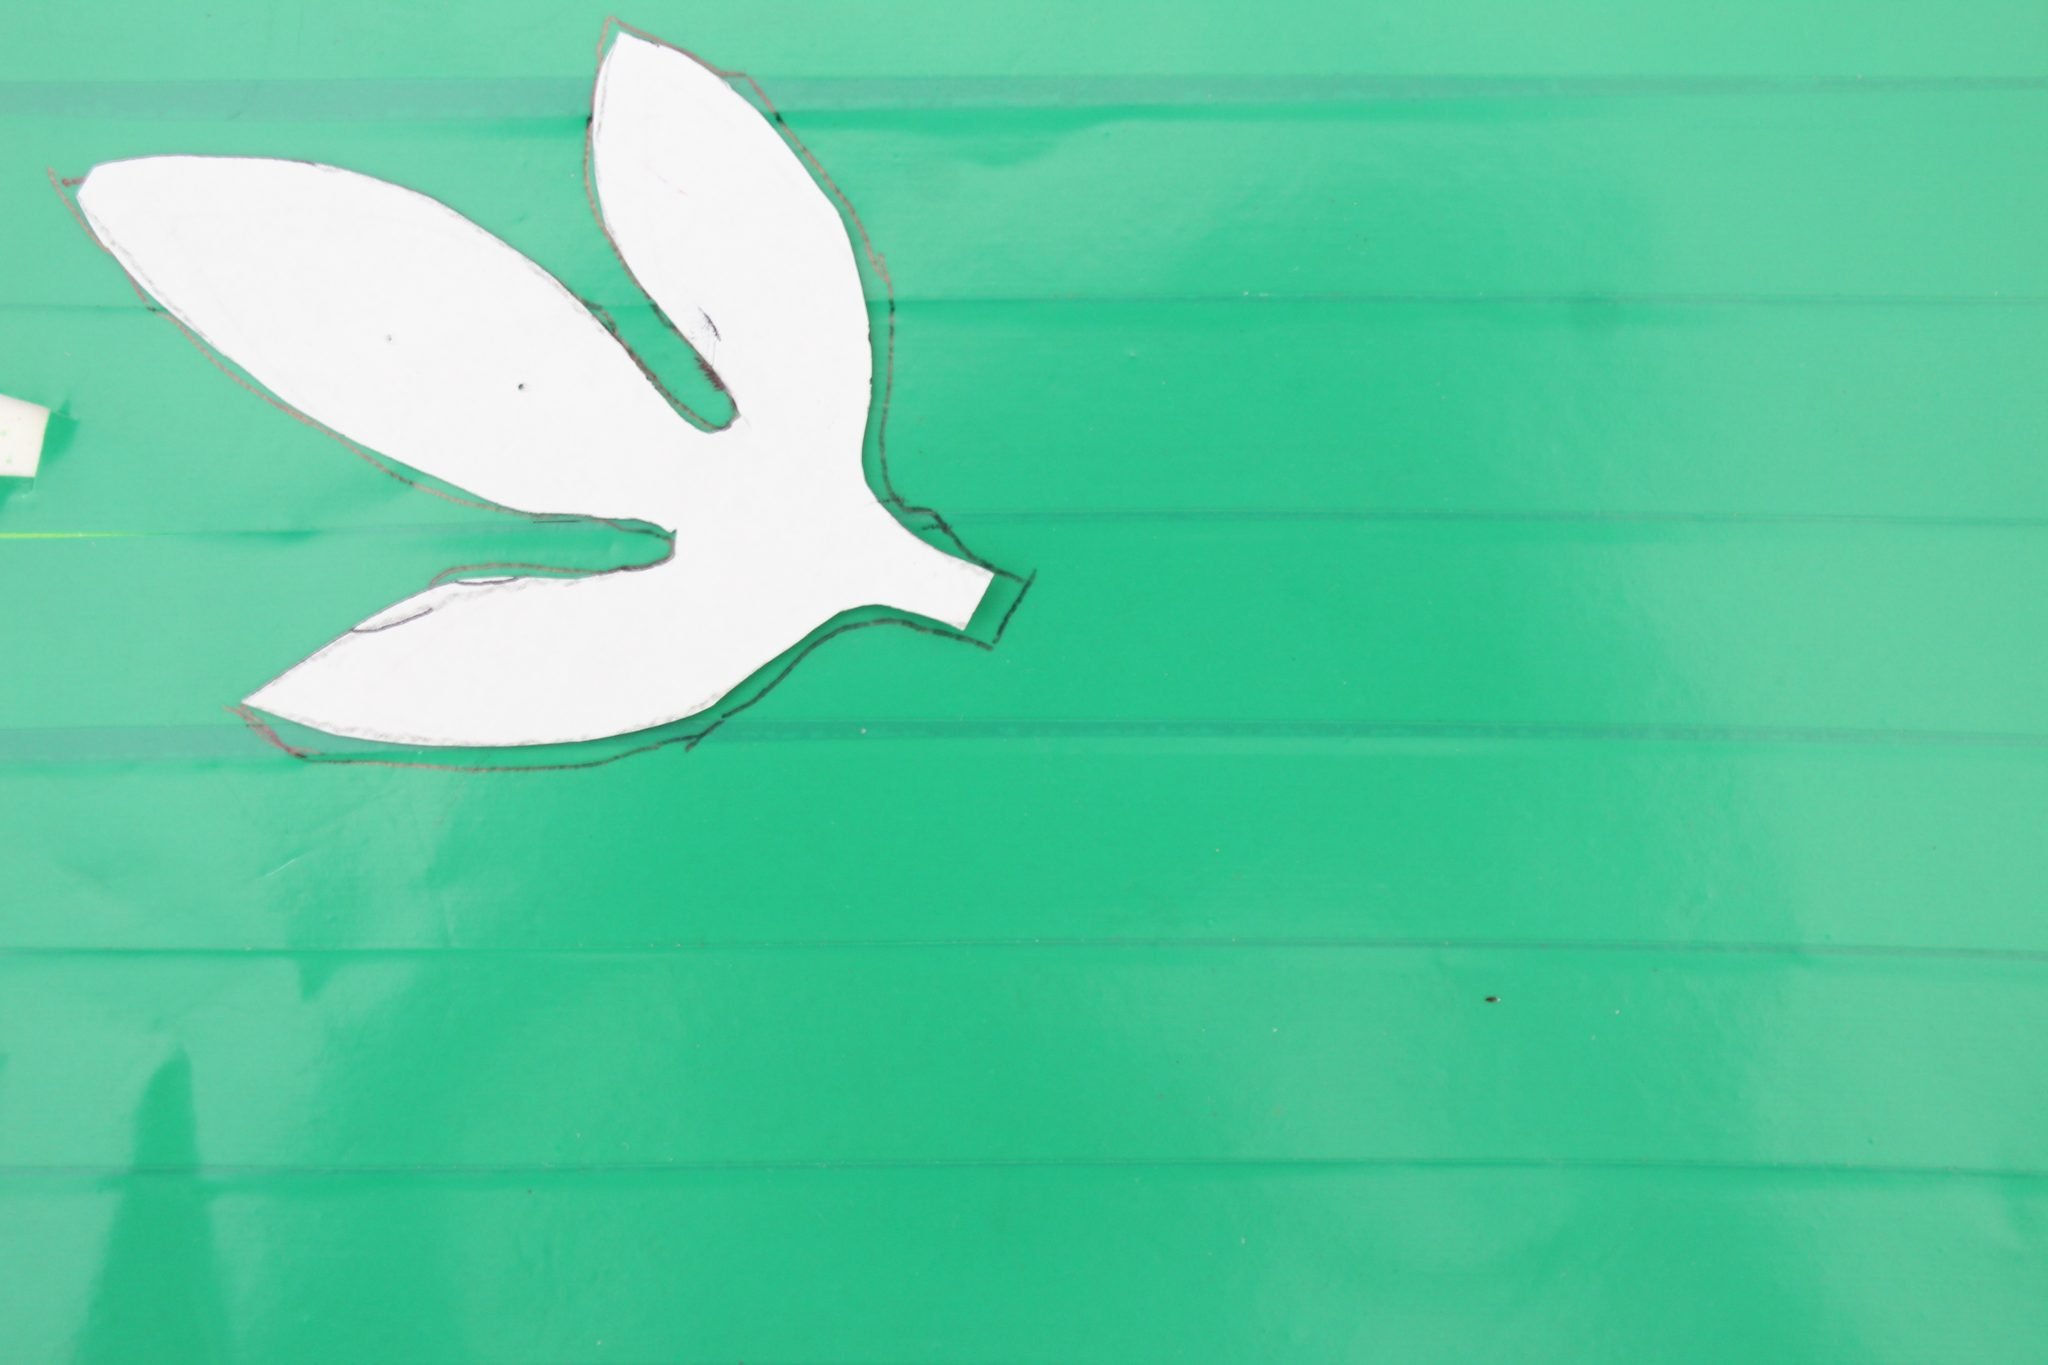
Make the leaves
- Cover a piece of cardstock in green tape, use a pen to draw the petals on then cut them out.
- Attach leaves to the base of the flower and the stem.
- Repeat the above steps until all flowers are done. Then display them in a vase as a simple floral arrangement that looks stunning in any room!
Peonies are beautiful flowers, but they can be expensive to buy. Wouldn’t it be great if you could save money and have beautiful florals in your home all year long? You can! With this easy tutorial for making paper peonies at home, you’ll be able to create a stunning bouquet of flowers for just a few dollars. These faux peonies are perfect for any occasion, and they last forever!
If you have any questions or just want to show off your creations, feel free to leave a comment below. Thanks for reading this tutorial and have fun making your paper peonies! Good luck and happy crafting!
Pin to save for later
Print the craft card

How to make Paper peonies
Materials
- peonies and leaves templates
- galvanized wire
- crepe paper in the desired color
- green electrical tape
- cardstock
Tools
- pen
Instructions
- You'll use the wire to make the stems so grab your cutting pliers and cut as many wires as needed for the amount of peonies you plan to make and then double the number. Take two at a time and wrap the wires around each other.

- Get the green electrical tape and wrap it around the twisted wires leaving one end exposed and covering the opposite end.
- Stack up a few layers of crepe paper and place the peony templates on the crepe paper. Pin the template to the paper so it won't slip and start cutting out. Make as many layers as you like, in the size you love best. Adding a bunch of small petal ones in the center of your flower makes it look better so you might wanna try those too. Then use the larger petal flowers for the outer layers.
- Grab some orange crepe paper, cut a few squares of about 2" x 4" and fringe along one of the long sides.
- Start making your first flower. Get one of the fringes and wrap around the taped end of the stem until all fringe is finished. Tape onto the stem using green electrical tape (I find this is very stretchable and bendable and a lot easier to work with than other kind of tape).
- Take a small flower and using the other end of the stem, pierce the middle of the flower. Push the flower to the top until it meets the fringe.
- Scrunch and twist the flower then tape the base of the flower as you did with the fringe.
- Continue like this until all layers are attached to the stem. Start with a few small ones for the center flower, then a few medium ones and finish with the large petal flowers. Open the peony and start pushing the layers of petals outward until your flower looks like you want it. You may even want to fringe the outermost layer.
- Make the leaves. Tape some green tape over a piece of cardstock, use a pen to draw the petals on then cut them out.
- Attach leaves to the base of the flower and the stem.
- Repeat the above steps until all flowers are done. Then display them in a vase as a simple floral arrangement that looks stunning in any room!

Video
Article may contain Amazon & affiliate links. As an Amazon Associate I earn from qualifying purchases at no additional cost to you.

These look so fun, funky and pretty all at once. The hardest part will be finding crepe paper. I plan to make them this weekend.
Thanks, Judith! They were super fun to make & look so pretty in a vase! Hope you find the paper soon!
These look absolutely lovely. I cant wait to get some tissue paper and start the process