

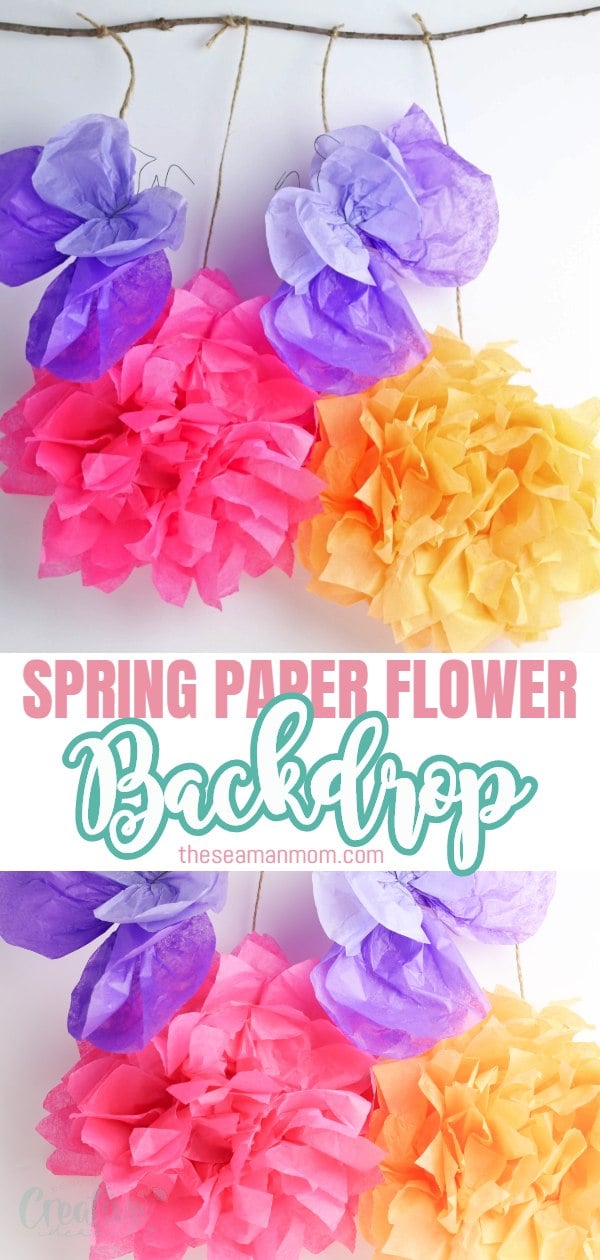
DIY paper flower backdrop
Spring is a season filled with beautiful outdoor colors and rich colored florals! For a fun spring party, create this DIY paper flower backdrop with tissue paper. This paper flower backdrop is adorable and versatile and can be used not only for a party but as wall decor around the house as well for an extra pop of color!
DIY paper flower backdrop
Flowers are one of my favorite ways to decorate during the spring. While using fresh flowers in your home decor is a great way to add a pop of color and a nice scent to the room, those fresh flowers don’t last long. This year, instead of adding fresh flowers to my home, I decided to make my own. This easy DIY paper flower backdrop is one of the best ways to decorate! It looks great as a floral display or on a spring backdrop.
More paper crafts you will love:
- DIY paper peonies
- Tissue flowers kids craft
- Easy hyacinth flowers
- Honeycomb pom poms
- Gold & silver tissue paper tassels
- Paper chain decorations
Where to use a paper flower wall backdrop
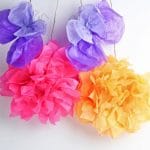
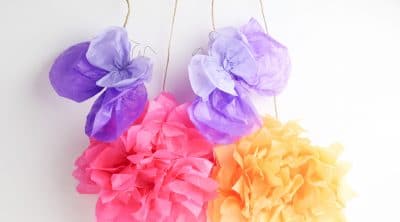
You’re going to love making these simple paper flowers and butterflies! So much that you’re going to want to hang them everywhere! If you’re looking for an excuse to hang your DIY paper flower backdrop somewhere, why not try one of these fun ideas?
- Hang in on your mantel. Give your living room a dose of spring cheer by hanging this spring backdrop on your mantel. It would make a great backdrop for the rest of your spring display and add a nice pop of color to the room.
- Decorate a party. Whether you’re hosting a bridal shower or just an Easter get-together, this fun spring backdrop would make a great party accent.
- Make a photo backdrop. These paper flowers and butterflies would look amazing in your photos! Hang the branch on a wall or a plain white background to instantly create a pretty spring background for your photos.
Tissue paper flower backdrop Variations
This simple spring backdrop is great for a variety of uses, but you could also change it up a little bit to make it fit your needs. Here are few easy variations to make this cute spring backdrop:
- Make the flowers and butterflies smaller. For a more subtle look, try making your paper flowers and butterflies smaller and adding more to the branch. This simple adjustment is great for photo backdrops because it creates a pretty background without distracting from the subjects of the photos.
- Add more branches. If you really want to make a statement with your spring backdrop, keep the flowers and butterflies the same size and add more branches to the background. You could easily fill an entire wall with branches and flowers to really create a statement with your paper flower design.
- Hang Easter eggs. To make your spring backdrop more holiday-friendly, add a few pastel Easter eggs to the branch. The eggs will add a little more visual appeal and make the design a great accent for your Easter display.
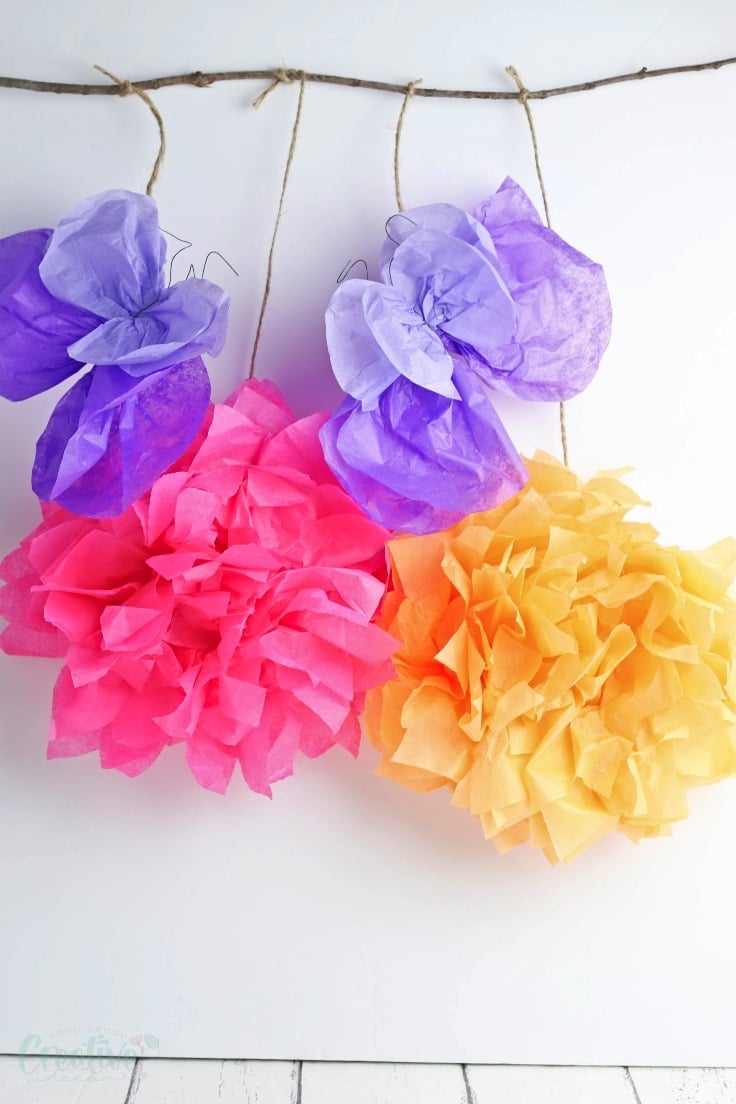
DIY flower backdrop
Supplies:
- 2 sheets of pink tissue paper
- 2 sheets of orange tissue paper
- two sheets of dark purple tissue paper
- 2 sheets of light purple tissue paper
- Floral wire
- 1 thin branch
- Jute twine
Instructions:
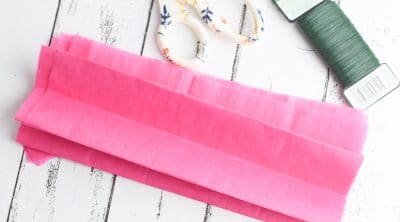
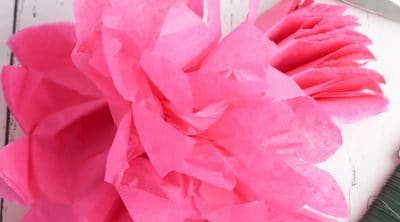
1. To make the flower, layer two sheets of pink tissue paper on top of each other and cut them into quarters. Stack all the sheets on top of each other and fold them accordion style.
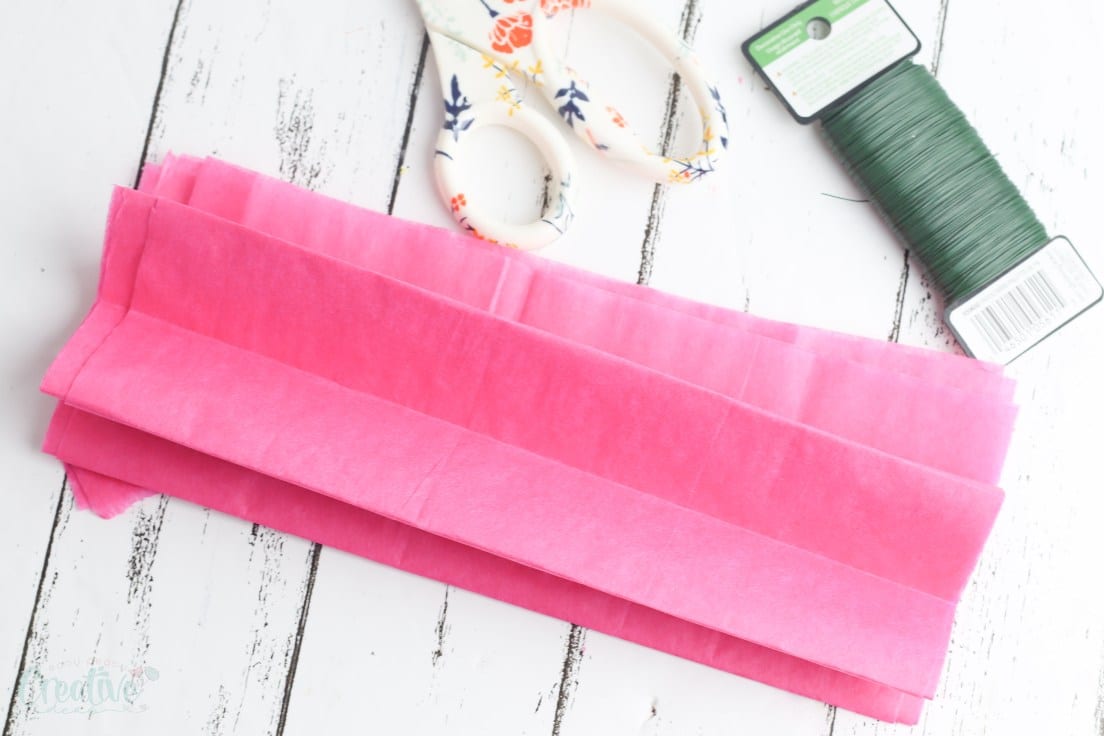
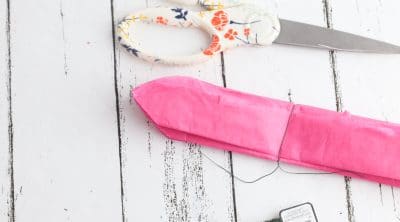
2. Cut a rounded triangle on each end of the folded paper. Secure it in the center with a piece of floral wire.
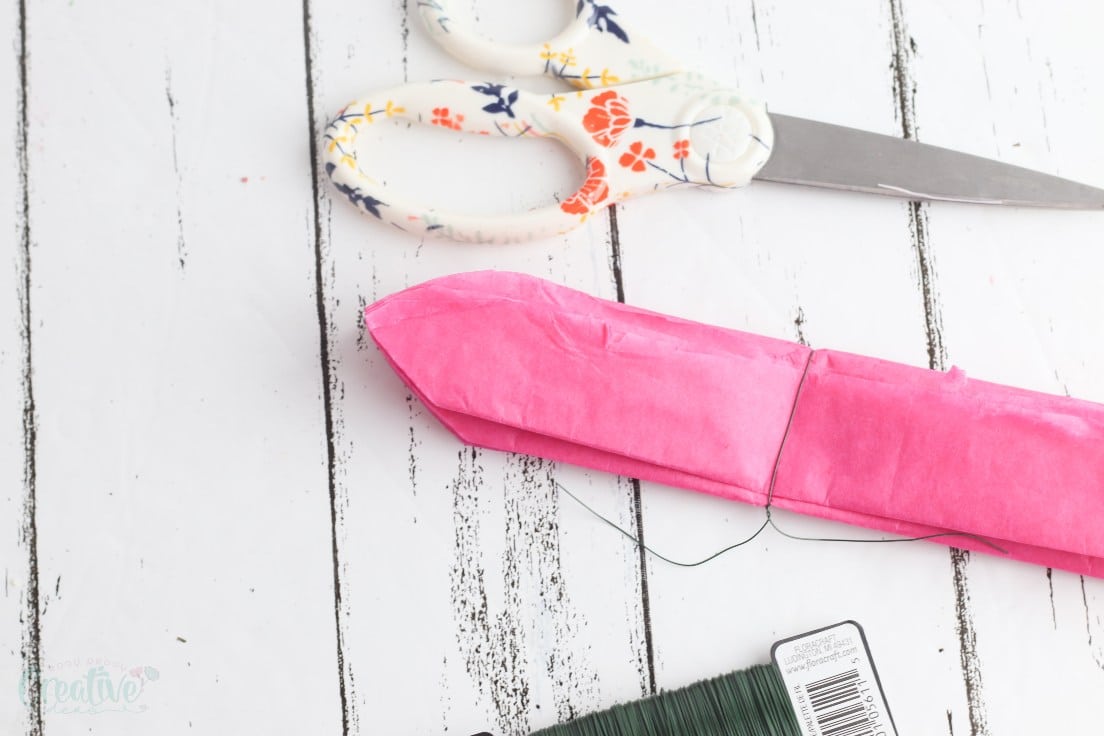
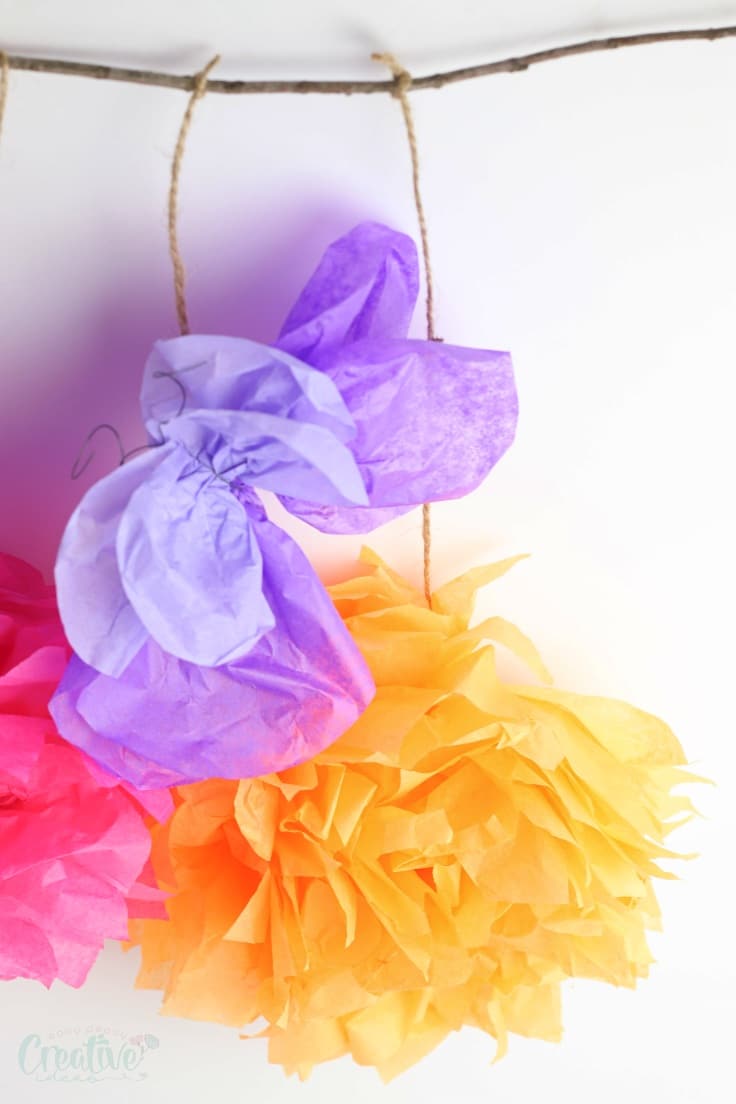
3. Carefully pull each piece of paper toward the floral wire in the center to form a flower.
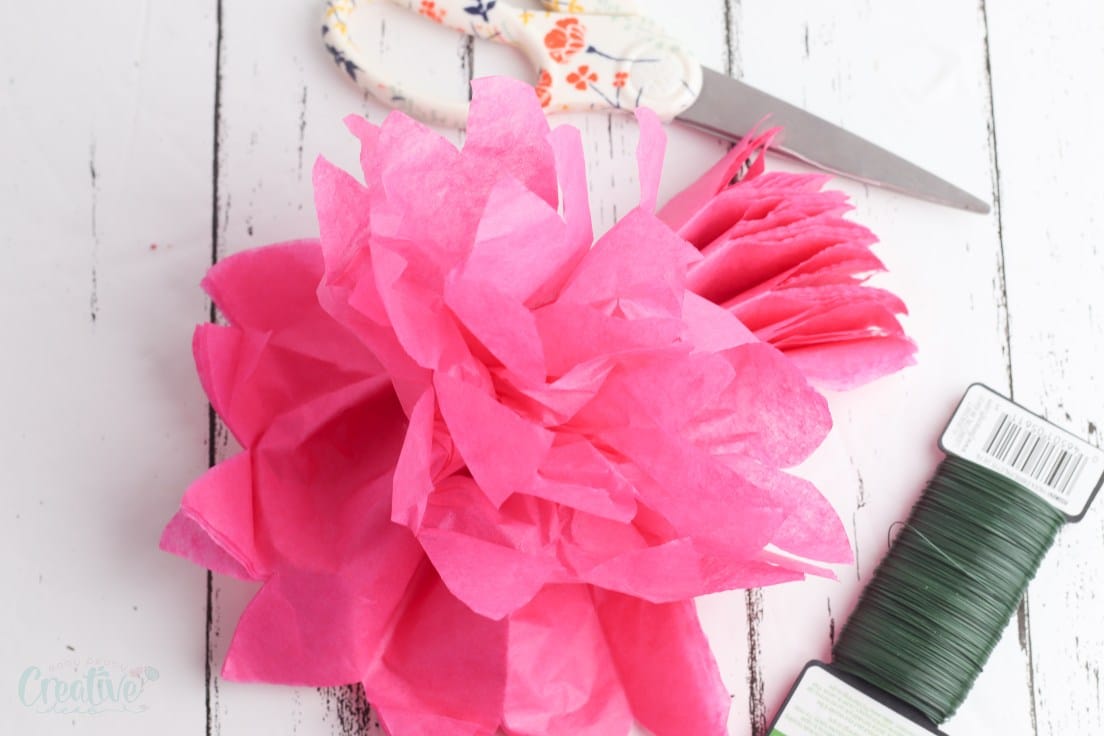
4. Repeat steps with the orange tissue paper.
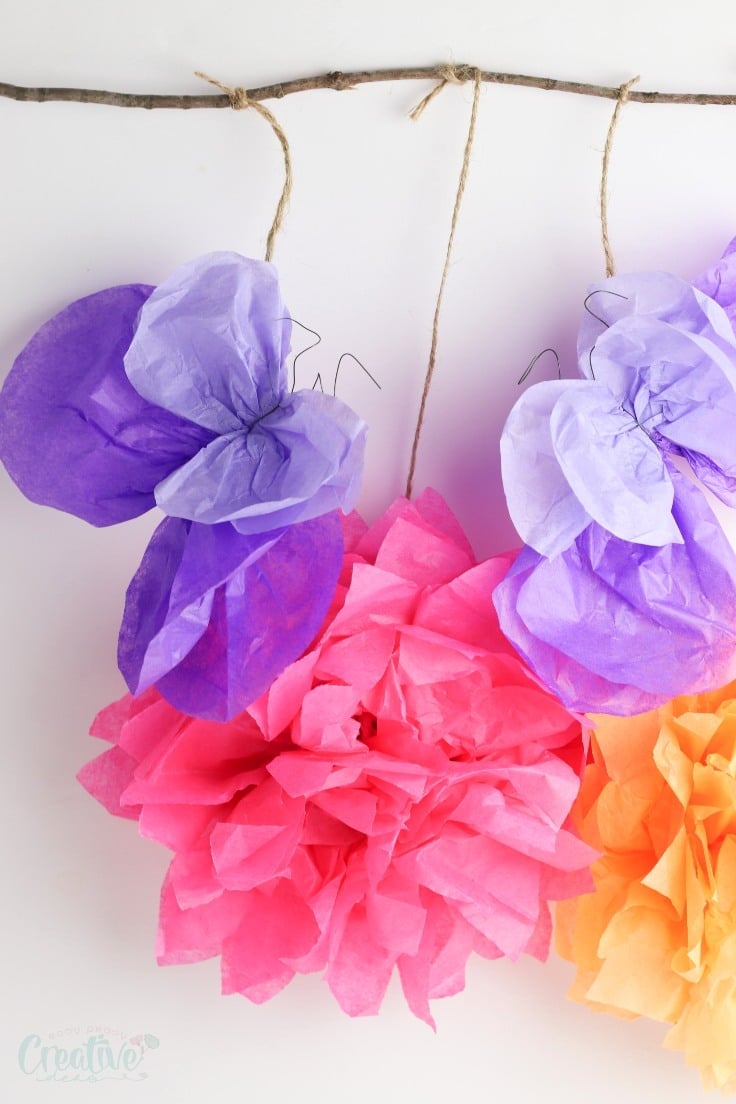
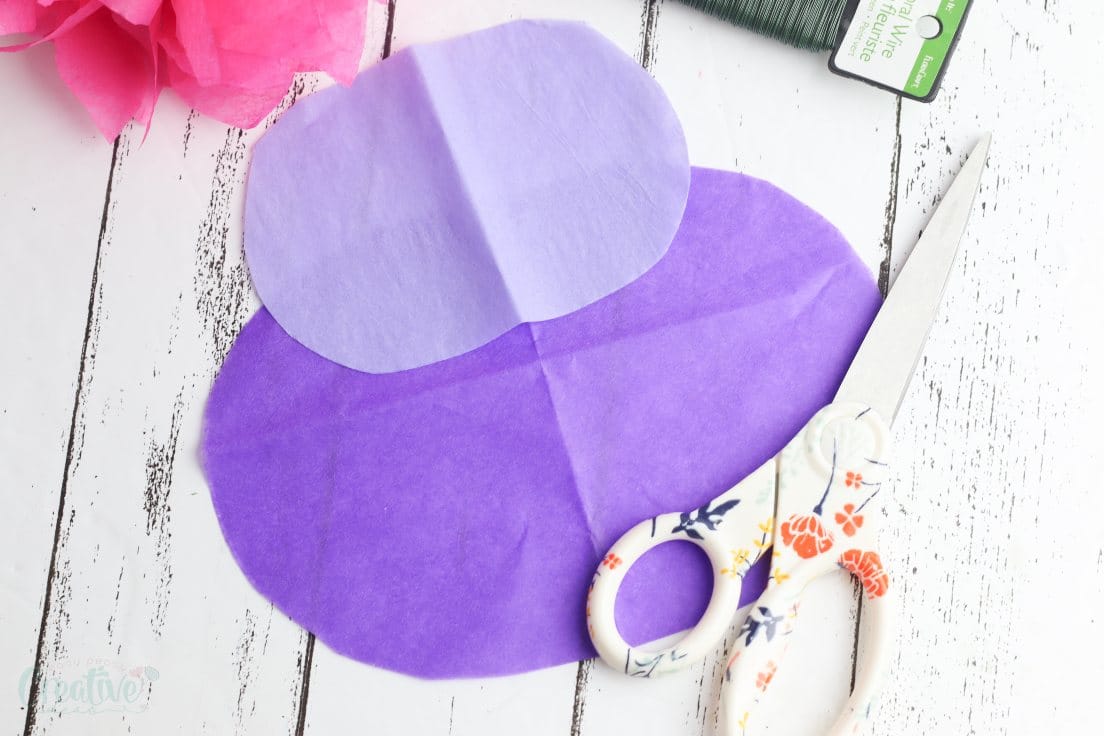
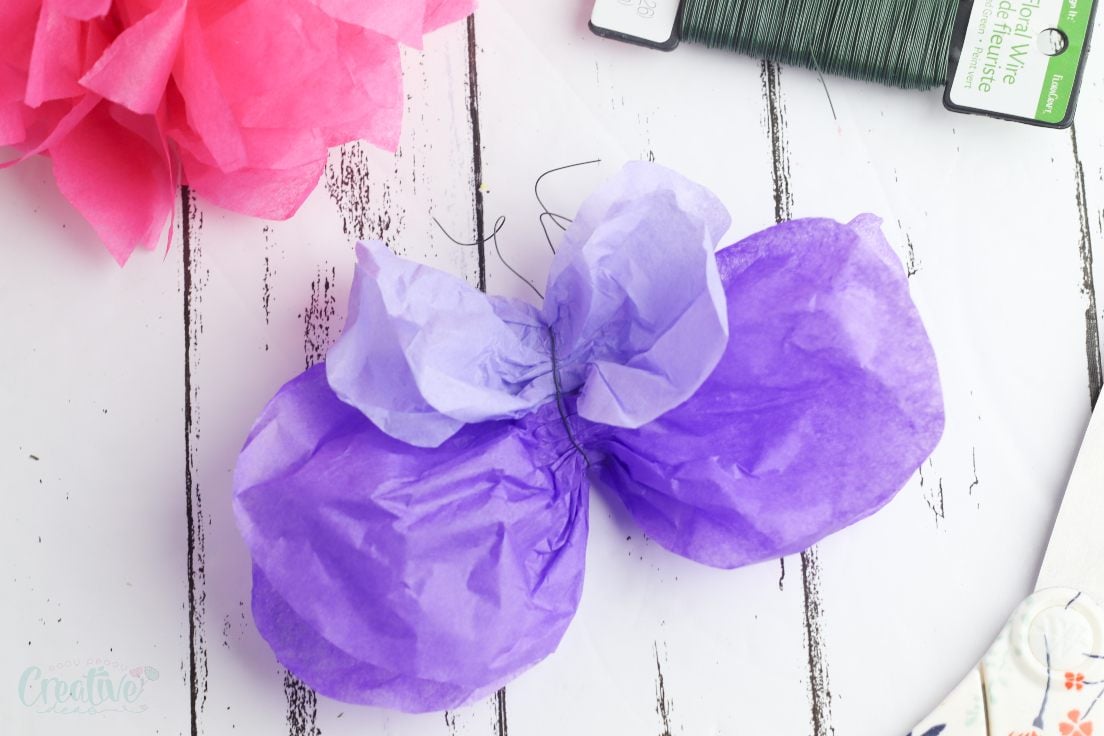
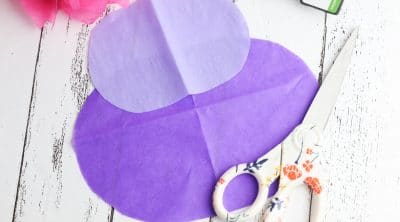
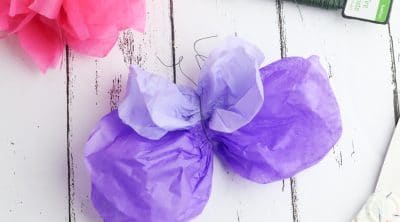
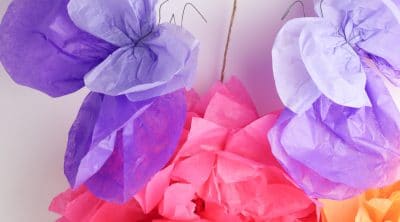
5. To make the butterfly, layer the two pieces of dark purple tissue paper on top of each other and cut out a large oval in the paper. Layer the two pieces of light purple tissue paper on top of each other and cut out a smaller oval in the paper. Place the smaller oval on top of the larger oval.
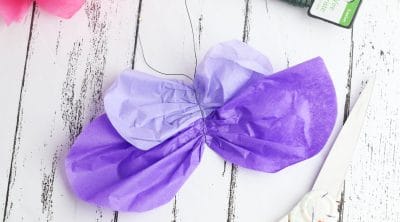
6. Secure in the center with a piece of floral wire. Leave extra length on the end of the wire.
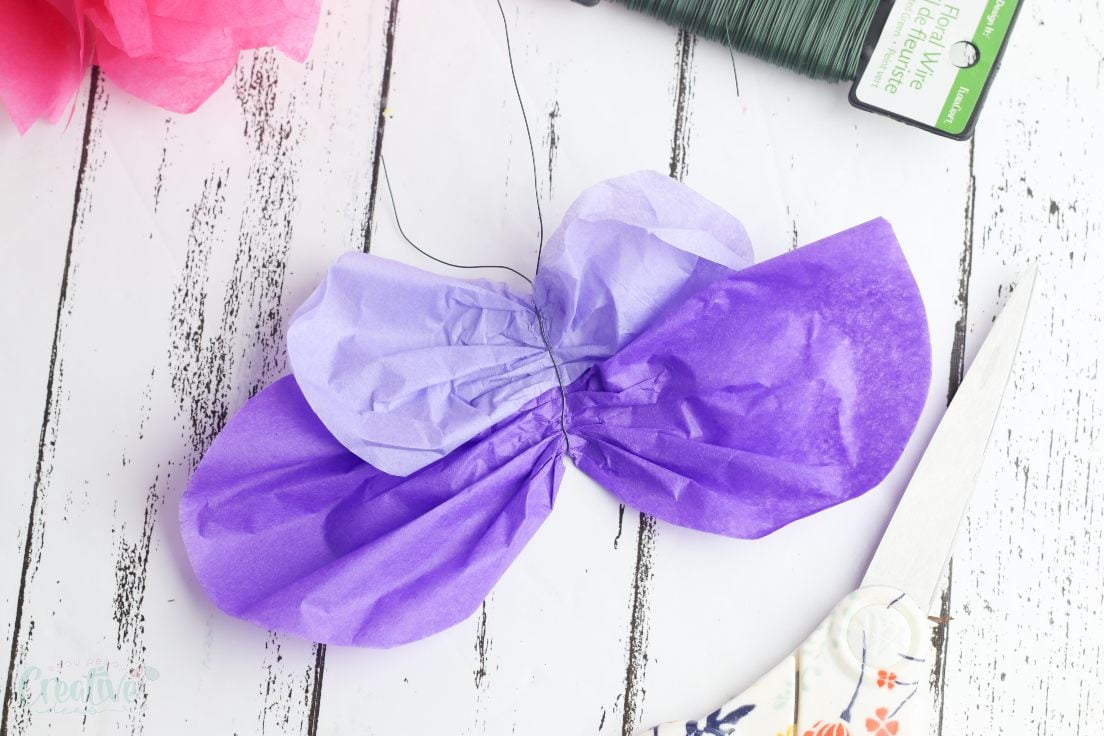
7. Create antennae by wrapping the end of the wire around your finger to make a spiral.
8. Attach the flowers and butterflies to the branch by tying one end of the jute twine to the floral wire on the back of the flowers and butterflies. Tie the other end of the twine to the branch.
Print the card
DIY paper flower backdrop
Materials
- 2 sheets of pink tissue paper
- 2 sheets of orange tissue paper
- 2 sheets of dark purple tissue paper
- 2 sheets of light purple tissue paper
- Floral wire
- 1 thin branch
- Jute twine
Tools
Instructions
- To make the flower, layer to two sheets of pink tissue paper on top of each other and cut them into quarters. Stack all the sheets on top of each other and fold them accordion style.

- Cut a rounded triangle on each end of the folded paper and secure it in the center with a piece of floral wire.
- Carefully pull each piece of paper toward the floral wire in the center to form a flower.
- Repeat step one with the orange tissue paper.
- To make the butterfly, layer the two pieces of dark purple tissue paper on top of each other and cut out a large oval in the paper. Layer the two pieces of light purple tissue paper on top of each other and cut out a smaller oval in the paper. Place the smaller oval on top of the larger oval.
- Secure in the center with a piece of floral wire.
- Leave extra length on the end of the wire and create antennae by wrapping the end of the wire around your finger to make a spiral.
- Attach the flowers and butterflies to the branch by tying one end of the jute twine to the floral wire on the back of the flowers and butterflies. Tie the other end of the twi
Pin to save for later
Article may contain Amazon & affiliate links. As an Amazon Associate I earn from qualifying purchases at no additional cost to you.
ABOUT PETRO
Hi, I’m Petro, author and founder of Easy Peasy Creative Ideas. Sewist, crafter, avid DIY-er, foodie, photographer, homemaker and mommy to one. I’m an expert at coming up with quick, clever sewing tips, recycling crafts and simple, easy recipes! You can find my ideas featured in reputable publications such as Country Living, Good House Keeping, Yahoo News, WikiHow, Shutterfly, Parade, Brit & Co and more. Thanks for stopping by and hope you’ll stay for a while, get to know me better and come back another time. Stick around for real fun projects! Read more…