

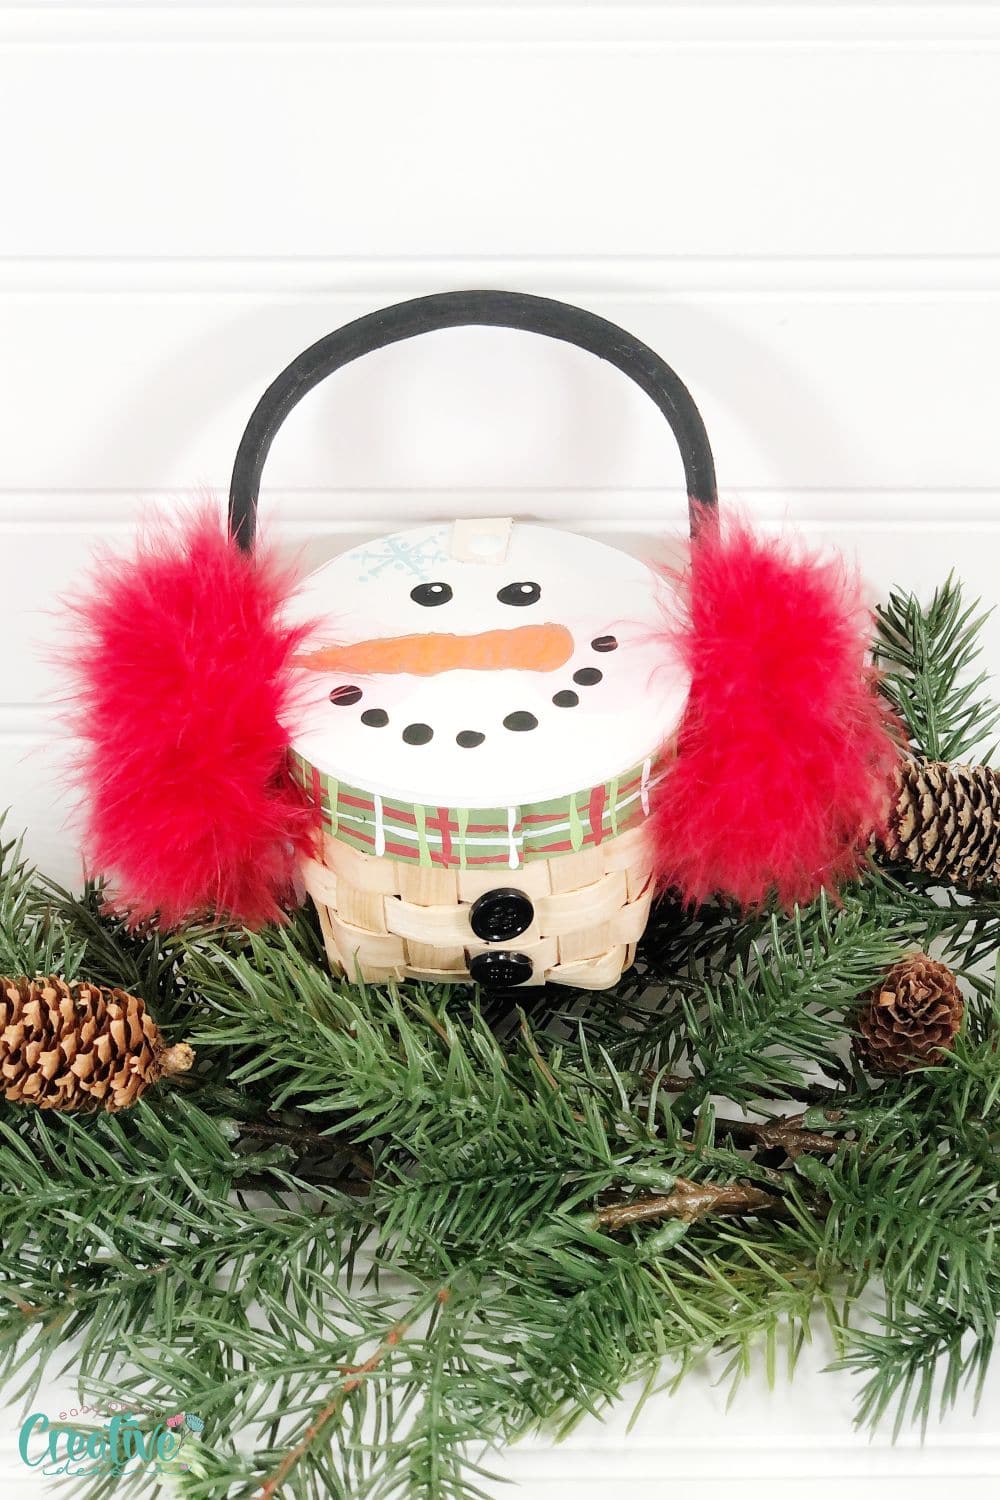
Fun and festive Snowman craft from a mini basket
Want to make a memorable winter craft with the kids? Build a snowman craft! Not only is it fun, but it’s easy too. This DIY snowman project is perfect for both young and old, and is a great way to get into the festive spirit.
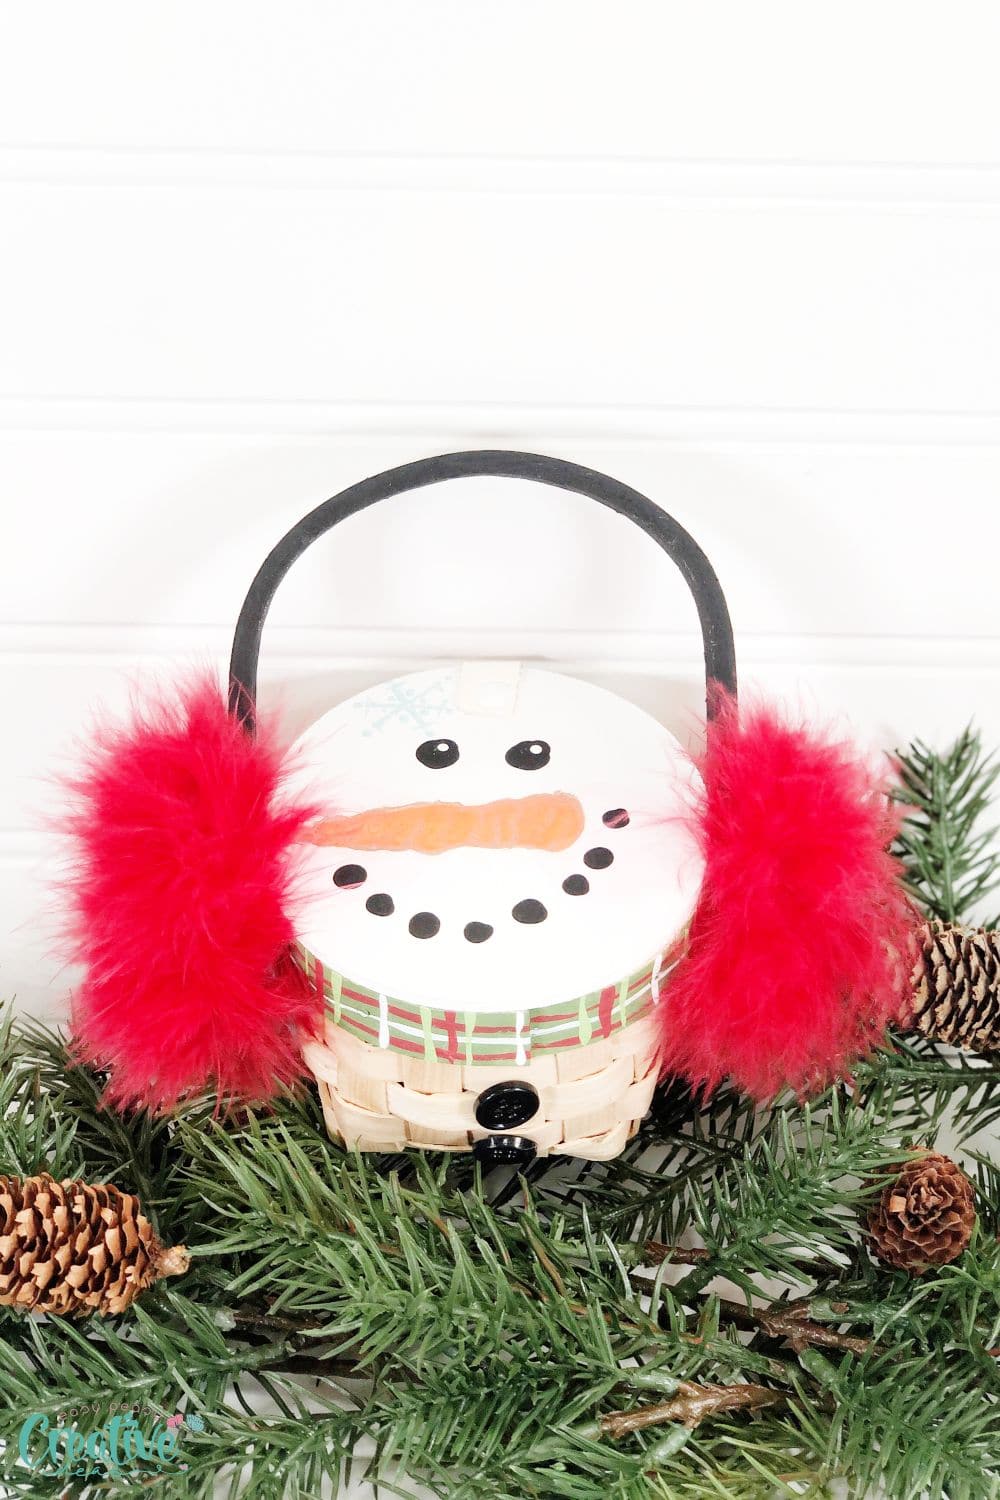
Snowman craft from a basket
This easy peasy and fun snowman craft is a great way to get into the holiday spirit, whether you’re looking for something simple to do with the kids or looking to create a stunning piece of art that you can display all season long.
With just a few basic supplies you can easily create your very own DIY snowman in no time. Whether you prefer simple shapes like circles and triangles for your snowman’s body and accessories, or want to go all out with detailed designs and patterns, there are endless ways to customize your snowman project to match your personal style.
This cute snowman craft ensures fun and festive winter memories for the whole family. So get creative and give it a try – your toddlers or preschoolers will sure love it! Older kids can get involved in the crafting process as well, helping you to cut and assemble all of the pieces needed for your snowman craft. So get ready to have some fun this holiday season with a snowman craft that is sure to become a family favorite.
What are some other winter/Christmas crafts I can make?
Looking for other fun winter crafts? Try making some of these:
- Clothespin ballerina ornaments
- Clothespin star ornaments
- Cheap and cute Christmas wreath tutorial
- Fabric covered plywood Christmas tree
Tips for decorating your snowman craft
Decorating your adorable snowmen baskets with colorful twinkling lights, festive ribbons and bows, or even some small holiday decorations like mini pine cones and sprigs of holly can really take your snowman craft to the next level.
Drawing fun shapes with markers or colored pencils are also easy ways to make your snowman craft stand out and look extra festive.
Some other fun ideas for decorating your snowman project include adding a scarf or toque, using glittery craft paper to create snowflake embellishments on your snowman’s body and accessories, or even painting your snowman in bright colors.
Whether you prefer traditional white and black shades or want to go bold with reds, pinks, blues, greens, and purples, there are endless ways to make your snowman craft truly unique. Just have fun with it and let your creativity shine!
How can I make my snowman craft unique?
To make your adorable snowman craft truly unique, try experimenting with different materials and decorations.
Consider using nontraditional shapes for your snowman body and accessories, such as squares and rectangles instead of circles and triangles. You can also get creative with the colors you use to paint or decorate your snowman – from bright neon hues to soft pastels and everything in between.
And don’t be afraid to think outside the box when it comes to embellishing your snowman – from glittery pom-poms to quirky but adorable accessories like mini top hats for your snowmans head, or buttons, flowers, snowflakes, mini socks and more for the body!
With a little bit of imagination and creativity, the sky’s the limit when it comes to making an awesome snowman craft that will put a smile on everyone’s face this winter season.
Tips for taking care of your snowman craft
Since your snowman is made out of materials that are typically found around the home, taking good care of him won’t be much trouble at all.
To keep your snowman looking fresh and vibrant, make sure to dust or vacuum regularly as needed, and try not to place it in direct sunlight for long periods of time.
You may also want to consider mounting or displaying your snowman so he can stand safely without being disturbed by curious kids or pets.
When the holidays are over and the weather begins to warm up, you can remove your snowman basket and store it away for next year. To do this, simply pack it away in a safe and dry location until you’re ready to bring out your winter craft again.
With a little bit of care and attention, your snowman craft is sure to last you for many seasons to come. So start crafting today, and enjoy beautifully festive winter memories with your family!
What can I put inside the snowman basket?
Some ideas for things you can place inside your snowman craft basket include holiday decorations such as mini pine cones, sprigs of holly, and small gifts.
You can also add toys like small dolls or figurines, small winter-themed trinkets, or even small treats like candy canes and chocolates.
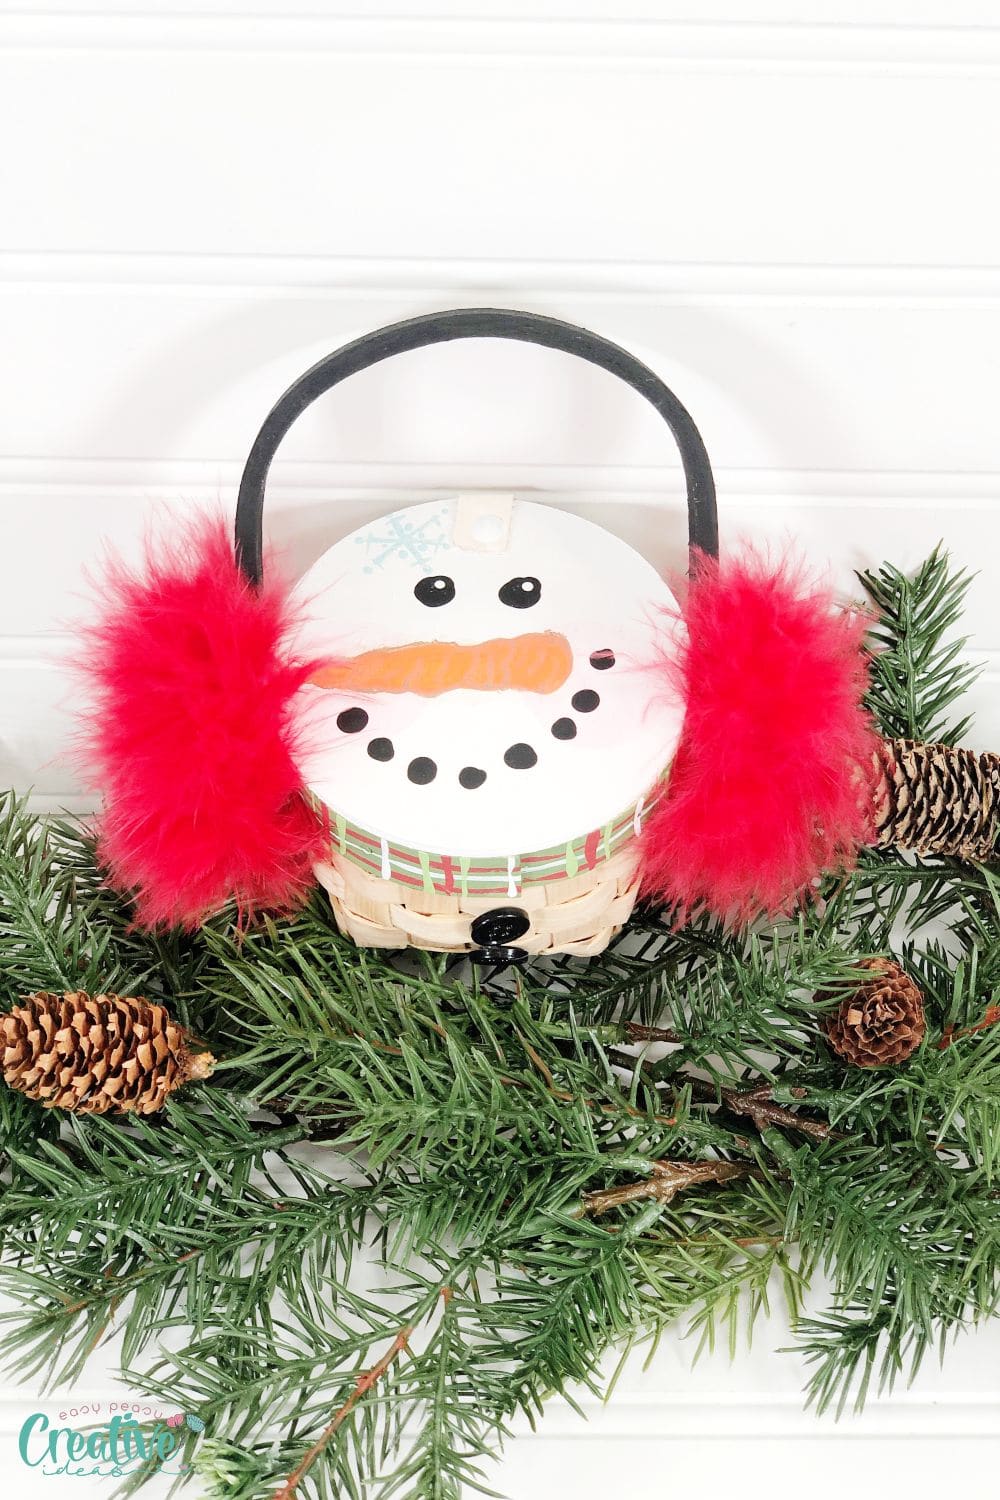
You may also choose to use this craft as a centerpiece or display it as a snowman ornament for your Christmas tree. Just imagine these cute little snowmen sprinkled among your decorations for an extra touch of holiday cheer!
It’s up to you to decide what you want to include in your little snowman basket – just have fun with it and let your creativity shine! Whatever you choose to put inside the snowman basket, the most important thing is that it reflects your personal style and makes the craft even more fun! So get creative and have fun crafting your own unique snowman today.
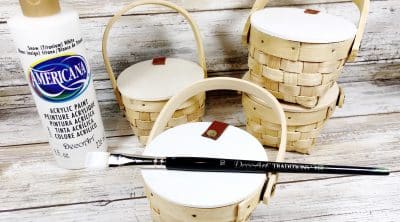
What materials do I need to make a snowman basket?
Some simple supplies from the craft store and a few easy instructions you can make a fun snowman container for teens and tweens to craft on a budget. The perfect hostess, teacher, or neighbor gift for this holiday season.
- Mini Baskets – found in the dollar bins at Michael’s
- Feather Boa – Red and Green
- Buttons – Black, Two
- Acrylic Craft Paint – White, Orange, Black, Pink, Light Blue, Dark Green, Light Green, Red
- Paintbrushes – Small Flat Brush and Skinny Round Brush
- Felt – Scraps of Red and Green – you can use construction paper instead
- Glitter Glue – Iridescent
- Glue Gun and Glue Sticks
- Scissors
How to build a snowman craft?
STEP ONE
Gather all supplies. Paint the wooden lid of the mini basket with white acrylic craft paint. Paint the wooden handle of the mini basket with black acrylic craft paint. Apply second coats of paint, if necessary, and then set aside to dry.
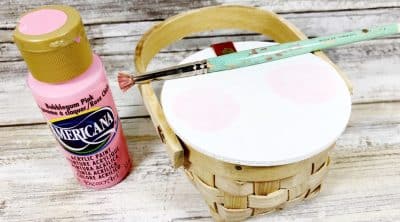
STEP TWO
Apply rosy cheeks to the snowman with light pink acrylic craft paint diluted with a bit of water.
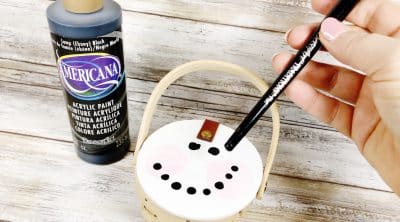
Dip the end of the paintbrush in black acrylic craft paint and dot on the snowman’s eyes and mouth. Using the same technique, add white highlights to the eyes.
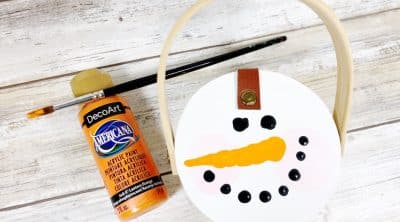
Paint an irregular triangle for the snowman’s carrot nose with orange acrylic craft paint. Add an outline around the carrot nose with black craft paint diluted with a bit of water and the skinny round brush.
STEP THREE
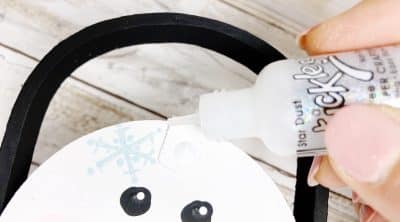
Paint a small snowflake with light blue acrylic craft paint and the skinny round paintbrush. Or download a free printable template from the internet and glue the snowflakes onto the basket.
Once the paint is dry, outline with iridescent glitter glue. Set aside to allow glitter glue to dry.
STEP FOUR
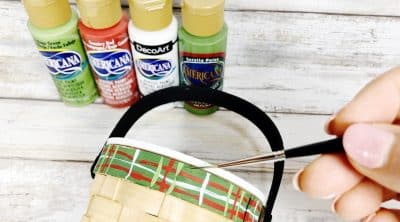
Basecoat band at top of basket with dark green acrylic craft paint. Apply a second coat of paint, if necessary, and then set aside to dry. Using the skinny round brush create a plaid pattern with white, red, and light green acrylic craft paint. Allow each color to dry before adding the next color.
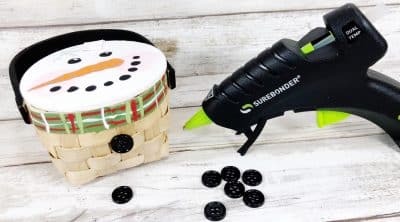
Attach two black buttons to the front of the basket with a glue gun and glue sticks.
STEP FIVE
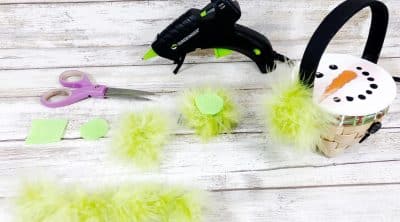
To create the earmuffs cut two one-inch circles from craft felt. Measure and cut two eight-inch lengths of feather boa trim and glue them to the felt in a spiral fashion making sure to secure the ends with a glue gun and glue sticks. TIP: Use the tip of your scissors to hold the feather boa trim down until the hot glue cools. To finish, glue the earmuffs to either end of the basket handle.
This easy DIY snowman craft is perfect for teens and tweens and allows you to customize your creation with whatever materials you like. Whether you want to use it as a centerpiece, gift container, or simply enjoy it yourself, the possibilities are endless with this fun and creative snowman craft. So get crafting today and have fun creating your own unique snowman!
Pin to save for later

Print the craft card
Mini basket snowman craft
Materials
- Mini Baskets – found in the dollar bins at Michael’s
- Feather Boa – Red and Green
- Buttons - Black Two
- Acrylic Craft Paint – White Orange, Black, Pink, Light Blue, Dark Green, Light Green, Red
Tools
- Felt – Scraps of Red and Green
- Glitter Glue - Iridescent
- Glue Gun and Glue Sticks
- scissors
Instructions
- Gather all supplies. Paint the wooden lid of the mini basket with white acrylic craft paint. Paint the wooden handle of the mini basket with black acrylic craft paint. Apply second coats of paint, if necessary and then set aside to dry.

- Apply rosy cheeks to snowman with light pink acrylic craft paint diluted with a bit of water.
- Dip end of paintbrush in black acrylic craft paint and dot on snowman eyes and mouth. Using the same technique, add white highlights to eyes.
- Paint an irregular triangle for the snowman’s carrot nose with orange acrylic craft paint. Add an outline around the carrot nose with black craft paint diluted with a bit of water and the skinny round brush.
- Paint a small snowflake with light blue acrylic craft paint and the skinny round paintbrush. Once paint is dry, outline with iridescent glitter glue. Set aside to allow glitter glue to dry.
- Basecoat band at top of basket with dark green acrylic craft paint. Apply a second coat of paint, if necessary and then set aside to dry. Using the skinny round brush create a plaid pattern with white, red, and light green acrylic craft paint. Allow each color to dry before adding the next color.
- Attach two black buttons to the front of the basket with a glue gun and glue sticks.
- To create the earmuffs cut two one-inch circles from craft felt. Measure and cut two eight-inch lengths of feather boa trim and glue to the felt in a spiral fashion making sure to secure the ends with a glue gun and glue sticks. TIP: Use the tip of your scissors to hold the feather boa trim down until the hot glue cools. To finish, glue the earmuffs to either end of the basket handle.
Article may contain Amazon & affiliate links. As an Amazon Associate I earn from qualifying purchases at no additional cost to you.
ABOUT PETRO
Hi, I’m Petro, author and founder of Easy Peasy Creative Ideas. Sewist, crafter, avid DIY-er, foodie, photographer, homemaker and mommy to one. I’m an expert at coming up with quick, clever sewing tips, recycling crafts and simple, easy recipes! You can find my ideas featured in reputable publications such as Country Living, Good House Keeping, Yahoo News, WikiHow, Shutterfly, Parade, Brit & Co and more. Thanks for stopping by and hope you’ll stay for a while, get to know me better and come back another time. Stick around for real fun projects! Read more…